_GOTOBOTTOM
Early Aviation
Discuss World War I and the early years of aviation thru 1934.
KotS GB 2012 Ford Flivver - Guy
mtnflyer
_VISITCOMMUNITY
Alberta, Canada
Joined: March 08, 2009
KitMaker: 394 posts
AeroScale: 360 posts
Posted: Wednesday, February 01, 2012 - 07:30 AM UTC


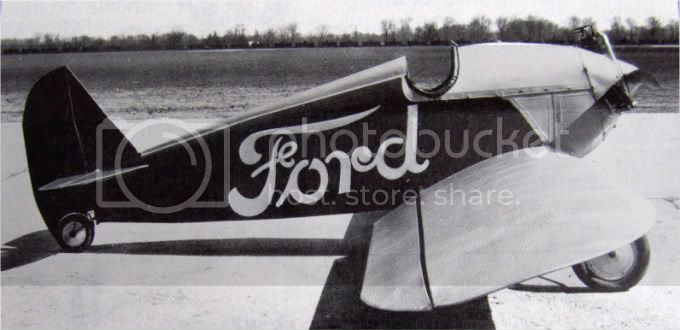
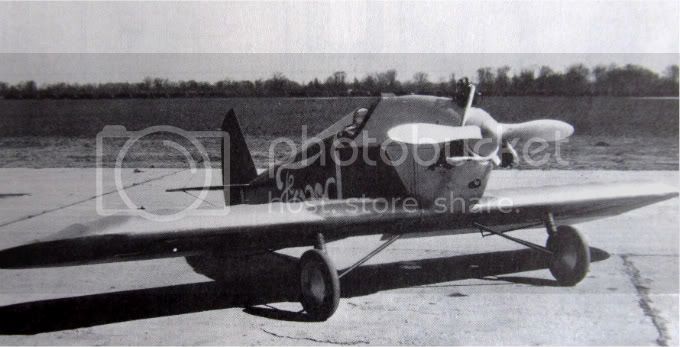
In the mid 1920's, the industrialist Henry Ford contemplated the mass production of a light aircraft intended for personal flying use. Ford was envisioning the flying "Model T", an aircraft to be supplied to and made attainable by populations.


I suppose that in a business sense, the idea of the masses purchasing and flying their own little airplanes made perfect sense. However, I'm fairly happy the project was cancelled after three prototypes. The sky's just not big enough for millions of little zippers flashing back and forth. Can you imagine the regulatory infringements that would beset us if such a plan were fulfilled.

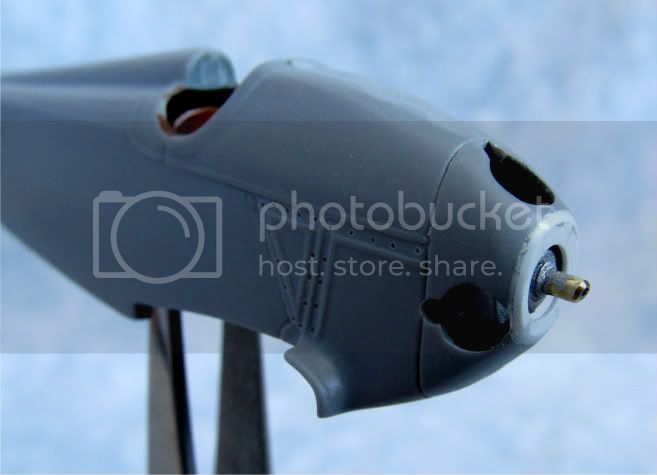
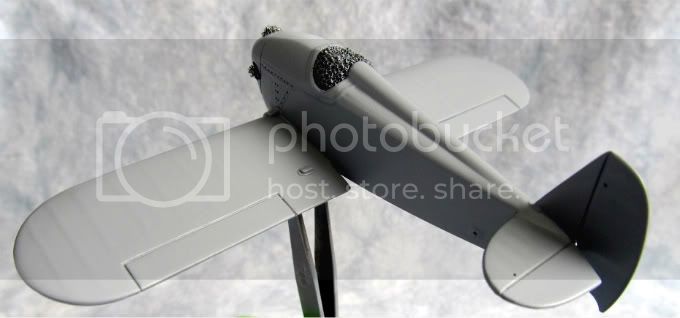
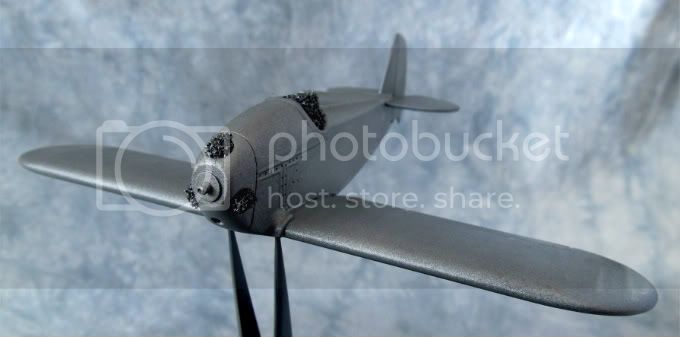
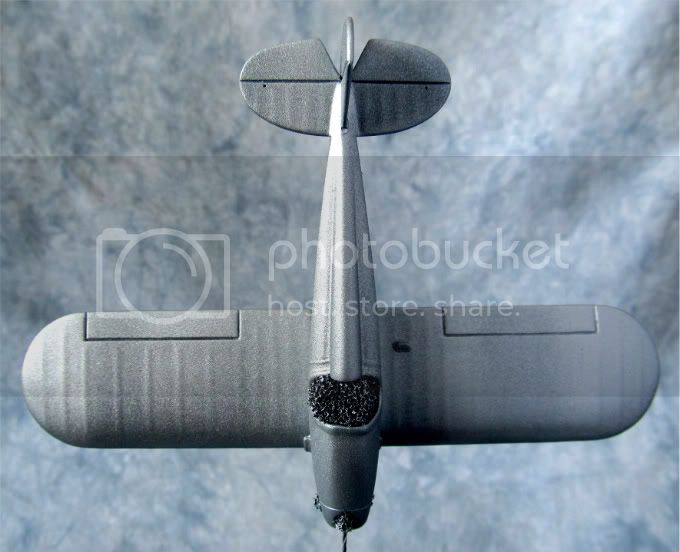
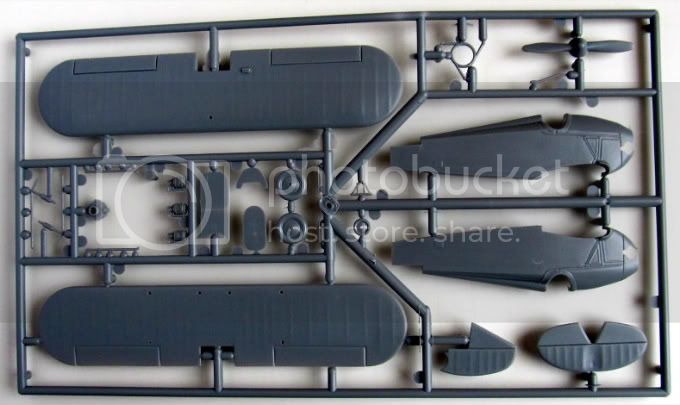
Annyway, I plan to build one from the 1/48 Williams Brothers kit. Here are some photos of what's in the box:

Only a Single Sprue of Parts


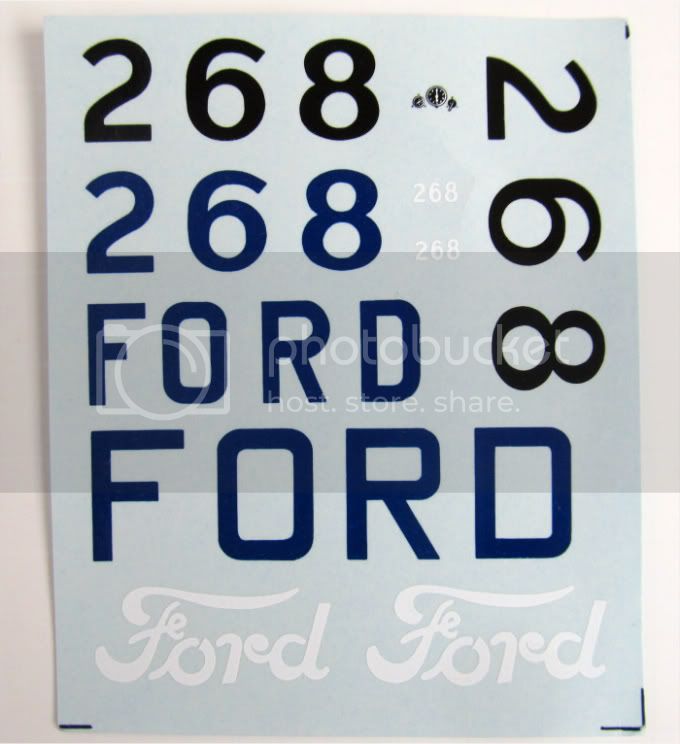
A decal sheet that appears to be quite good. It allows to build three options. The original prototype with logos and no numbers, 268 as it appeared in 1927, and 268 as it appears today following restoration:


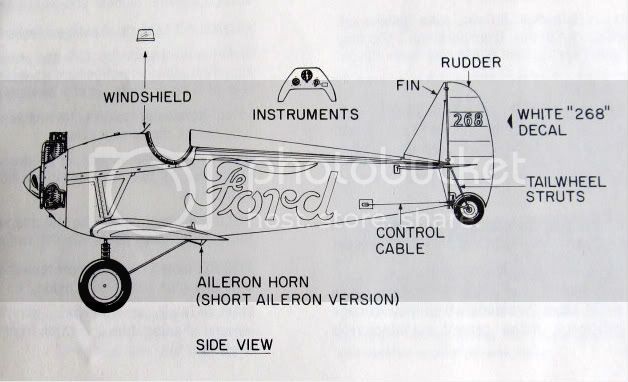
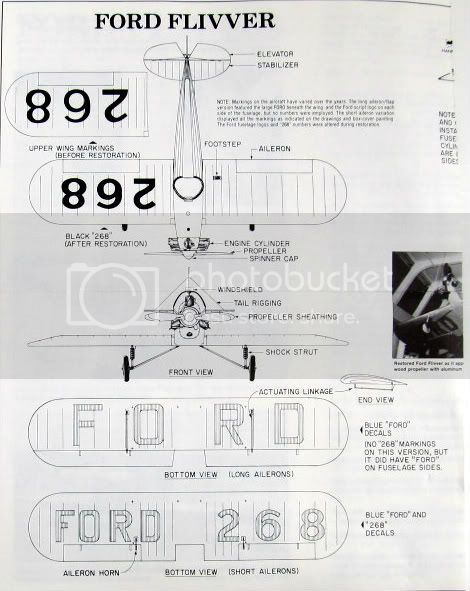
There are also instructions with good written information, a simplistic construction diagram, and a fine three-view:


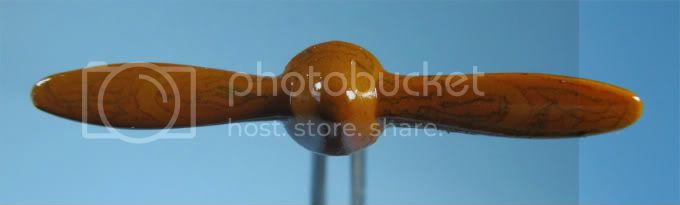
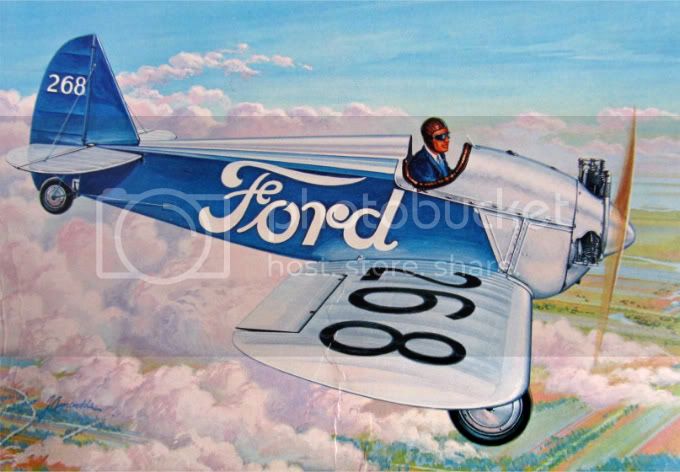
I'm going to target the Ford Flivver as it appeared originally in 1927. That means a wood grain prop with copper cladding, original 268 numbers, and the short span ailerons. This is also the most well known version, thanks to the replica builders of the world.
amegan
#243
_VISITCOMMUNITY
England - North East, United Kingdom
Joined: March 21, 2008
KitMaker: 996 posts
AeroScale: 915 posts
Posted: Wednesday, February 01, 2012 - 09:22 AM UTC
What a nice little kit. I read up on the Flivver after you mentioned it, prototype 2 was significantly different from the one you are building. I can see why, the lack of dihedral and the low wing would make it unstable and difficult to land, as well as tricky on take off. The control system was quite unconventional as well, as it used full length flaperons along the wing trailing edges. This isn't a fault as such, but flaperons can introduce some interesting handling characteristics. I doubt if Henry really thought this aircraft was the answer to the aerial car problem, designers like Taylor and de Havilland understood the requirements better. It is an attractive aircraft though.
Mgunns
_VISITCOMMUNITY
Arizona, United States
Joined: December 12, 2008
KitMaker: 1,423 posts
AeroScale: 1,319 posts
Posted: Wednesday, February 01, 2012 - 01:41 PM UTC
Hello Guy:

I have seen this kit and have always wondered how it would look built up. I have built a few of the Williams brothers kits and they build up quite nice without a minimum of effort. I am looking forward to your build.

Best

Mark
lcarroll
_VISITCOMMUNITY
Alberta, Canada
Joined: July 26, 2010
KitMaker: 1,032 posts
AeroScale: 1,025 posts
Posted: Wednesday, February 01, 2012 - 02:19 PM UTC
Guy,
Something completely different and really appropriate; you and several others are truly establishing the "1919 to 1934" element of our little niche in aviation history!
Looking forward to more.

Cheers,
Lance
gajouette
_VISITCOMMUNITY
Texas, United States
Joined: February 01, 2007
KitMaker: 365 posts
AeroScale: 356 posts
Posted: Wednesday, February 01, 2012 - 05:54 PM UTC
Guy,
Now that's certainly something different. Great choice my friend.
Highest Regards,
Gregory Jouette
mtnflyer
_VISITCOMMUNITY
Alberta, Canada
Joined: March 08, 2009
KitMaker: 394 posts
AeroScale: 360 posts
Posted: Thursday, February 09, 2012 - 08:53 AM UTC
After a little parts clean-up, I taped the fuse and wings together. This gives me an idea of any problems that may arise. Obviously, the front end around the cylinders is going to be a small issue.


Once the cylinder block is in (without cylinders), I plan on facing it with .010 sheet and filler. Hopefully, this will doctor it up.

I'm also doing a few small things to try and improve detail in an otherwise simple model. One is to add a little cockpit tube framing. I know the real one was tube framed. My tubeing is glued in just following Williams Bros. simplistic interior detail as a guide. The glue blobs and injection pins will not be seen on the final product.


Then, I made a new milliput blob seat cushion, and replaced the soft plastic prop shaft with something a little more substantial:


Just about ready for some paint. All the major parts are cleaned-up, and my next post should show some color.

Bye-the-way, thankyou for the supportive comments all.
lcarroll
_VISITCOMMUNITY
Alberta, Canada
Joined: July 26, 2010
KitMaker: 1,032 posts
AeroScale: 1,025 posts
Posted: Thursday, February 09, 2012 - 11:14 AM UTC
Guy,
Neat looking little devil! I like your start on the interior and am looking forward to some more Pics!
How many were built?

Cheers,
Lance
mtnflyer
_VISITCOMMUNITY
Alberta, Canada
Joined: March 08, 2009
KitMaker: 394 posts
AeroScale: 360 posts
Posted: Thursday, February 09, 2012 - 11:20 AM UTC

Quoted Text

How many were built?


Three prototypes as far as I know, Lance. The third one was a racing machine, though, and bore little resemblance to the one I'm building. It was sleeker and just kinda looking like the Flivver.
mtnflyer
_VISITCOMMUNITY
Alberta, Canada
Joined: March 08, 2009
KitMaker: 394 posts
AeroScale: 360 posts
Posted: Saturday, February 11, 2012 - 12:36 PM UTC
I have absolutely no idea what a Ford Flivver's cockpit might have looked like, so I based my work on total artistic license, using the kit instructions as a basic guide. Even though I don't reckon there was wood in the cockpit, I'm trying to model wood. I suspect the real one would have used more aluminum, though.

I'll show my inventive instrument panel in the construction stages. Here is what I accomplished today:

First, I tried to make the console look like wood. Primed it with Tamiya XF-59 Desert yellow, then dusted it with rusty red powder. Put a sheet of paper over the powder and pencilled in the marks. Then brushed off the excess powder. I sealed it all in with Future:


I put on some instrument decal. Three 1/48 AirScale and one Mike Grant in the middle:


Using the wrap copper wire around a drill bit technique, I was able to make some shiny new instrument bezels. I don't yet have any fancy store bought ones.


To round out the available daylight hours, I painted some cylinder heads and began work on the seat and prop:


Tonight or tomorrow, I plan on finishing the pilots seat. It will be wood representation, a harness, and the milliput seat pad I made. Hope it all makes sense.

JackFlash
_VISITCOMMUNITY
Colorado, United States
Joined: January 25, 2004
KitMaker: 11,669 posts
AeroScale: 11,011 posts
Posted: Saturday, February 11, 2012 - 01:31 PM UTC
Nice wood work & instruments.
lcarroll
_VISITCOMMUNITY
Alberta, Canada
Joined: July 26, 2010
KitMaker: 1,032 posts
AeroScale: 1,025 posts
Posted: Saturday, February 11, 2012 - 02:30 PM UTC
Guy,
Beautiful job on the bezels, the panel looks really great! What is the woodgrain pattern on the prop? Looks almost like an exotic hardwood effect.
This little gem is really different, glad you stepped in with it and looking forward to the end result.

Cheers,
Lance
mtnflyer
_VISITCOMMUNITY
Alberta, Canada
Joined: March 08, 2009
KitMaker: 394 posts
AeroScale: 360 posts
Posted: Saturday, February 11, 2012 - 02:54 PM UTC

Quoted Text

What is the woodgrain pattern on the prop? Looks almost like an exotic hardwood effect.


Hardy!Har!Har!

Lance, that,s just my scribbly, old mans hands trying to negotiate an HB pencil over Future coated, painted plastic. Nothing exotic about it. Thanks for the compliment anyway.
Guy
amegan
#243
_VISITCOMMUNITY
England - North East, United Kingdom
Joined: March 21, 2008
KitMaker: 996 posts
AeroScale: 915 posts
Posted: Friday, February 17, 2012 - 10:51 PM UTC
Nice, simple build, well executed, the prop looks good but I would have thought the spinner would be aluminium, painted. The fuselage is almost egg plane proportions
Grumpyoldman
Staff Member_ADVISOR
KITMAKER NETWORK
_VISITCOMMUNITY
Florida, United States
Joined: October 17, 2003
KitMaker: 15,338 posts
AeroScale: 836 posts
Posted: Saturday, February 18, 2012 - 12:17 AM UTC
Looks great so far.
(one of my favorite Williams Brothers Kits)
Mgunns
_VISITCOMMUNITY
Arizona, United States
Joined: December 12, 2008
KitMaker: 1,423 posts
AeroScale: 1,319 posts
Posted: Saturday, February 18, 2012 - 02:48 PM UTC
Great job on the instruments. Great technique on the bezels. This is a neat little kit, and will be watching this come together.

Best

Mark
thegirl
_VISITCOMMUNITY
Alberta, Canada
Joined: January 19, 2008
KitMaker: 6,743 posts
AeroScale: 6,151 posts
Posted: Saturday, February 25, 2012 - 11:25 AM UTC
Now that is a neat little kit !


Terri
mtnflyer
_VISITCOMMUNITY
Alberta, Canada
Joined: March 08, 2009
KitMaker: 394 posts
AeroScale: 360 posts
Posted: Sunday, February 26, 2012 - 11:55 AM UTC
I was able to do some on the Flivver today.

The seat got finished using masking tape for the harness along with some PE bits I had laying around for an indication of hardware. Its hardly the way it was in reality though.

This build is simply an effort to gain some experience and have some fun to conquer my modeling lag.


And, I closed-up the fuselage. The wings are only on temporarily, so I could play a little. They'll come off for the filling and sanding I have to do on the fuse.


Just waiting for it to dry from a wash, before I apply the filler and get to sanding.
mike_espo
_VISITCOMMUNITY
Illinois, United States
Joined: September 26, 2011
KitMaker: 125 posts
AeroScale: 115 posts
Posted: Monday, February 27, 2012 - 05:39 AM UTC
Interesting subject. Look forward to your progress.

OEFFAG_153
_VISITCOMMUNITY
Västra Götaland, Sweden
Joined: February 19, 2010
KitMaker: 1,473 posts
AeroScale: 1,450 posts
Posted: Monday, February 27, 2012 - 08:16 PM UTC
Guy – very interesting subject – and a very nice build!

Best Regards

Mikael
eseperic
_VISITCOMMUNITY
Croatia Hrvatska
Joined: November 06, 2009
KitMaker: 624 posts
AeroScale: 609 posts
Posted: Monday, February 27, 2012 - 09:55 PM UTC
Guy,

At last I have some time to see the other builds... if I only knew what I was missing!!! I heard of the flivver before, but I never saw the kit before. This is really a neat small aircraft, and the build is rather well executed and mastered! I will follow with great interest!

All the best,
Entoni
mtnflyer
_VISITCOMMUNITY
Alberta, Canada
Joined: March 08, 2009
KitMaker: 394 posts
AeroScale: 360 posts
Posted: Wednesday, February 29, 2012 - 11:03 AM UTC
Thanks to everyone for your comments.

I've been slowly, but steadily doing a little more. First, I had to deal with the nose issue. My solution, right or wrong, was to employ .15 plasti-card:


And sand it down to shape:


It was primed when everything seemed smooth:


Could use a little more work on the wing roots. This is where it stands now.
Kornbeef
_VISITCOMMUNITY
England - South East, United Kingdom
Joined: November 06, 2005
KitMaker: 1,667 posts
AeroScale: 1,551 posts
Posted: Wednesday, February 29, 2012 - 07:36 PM UTC
She has moved along nicely. Good fix on the cowl, thats pretty much exactly what I would have done.

Keith
mtnflyer
_VISITCOMMUNITY
Alberta, Canada
Joined: March 08, 2009
KitMaker: 394 posts
AeroScale: 360 posts
Posted: Thursday, March 01, 2012 - 12:01 PM UTC
After priming the Flivver, I applied a coating of Tamiya XF-16 Aluminum. This was followed by a brushing of the real Future. I wanted to seal in the paint for when I mask the Ford blue; can't have it lifting. I feel it turned out OK.


I'm actually quite happy with the nose-cone repair:

lcarroll
_VISITCOMMUNITY
Alberta, Canada
Joined: July 26, 2010
KitMaker: 1,032 posts
AeroScale: 1,025 posts
Posted: Thursday, March 01, 2012 - 12:23 PM UTC
Looking real good Guy; the blue should really compliment the aluminum and I think she'll be a real little gem once completed. BTW, nice fix on the nose.
Cheers,
Lance
mtnflyer
_VISITCOMMUNITY
Alberta, Canada
Joined: March 08, 2009
KitMaker: 394 posts
AeroScale: 360 posts
Posted: Tuesday, March 13, 2012 - 04:49 AM UTC
A couple of photos while paint dries. Even though this is a simple build, I found masking fairly difficult. Wondering if I should have applied the blue first and masked for the aluminum. Oh well, it got done.

I did have to touch-up with the brush. Also, I have thoughts as to if the blue is slightly dark. It does match the Ford emblem on my truck.


When its dry, I'll brush on a coat of 'Future', And give it a little wash. I'll also mask the ribs with thin strips, and then spray dust it; probably with Tamiya Smoke. Hoping to highlight the ribs. I saw someone on this very forum do it using this technique.

 _GOTOTOP