_GOTOBOTTOM
World War II: Germany
Aircraft of Germany in WWII.
Hosted by Rowan Baylis
Focke-Wulf Ta 152 C and H from Dragon in 1/72
magnusf
_VISITCOMMUNITY
Stockholm, Sweden
Joined: May 02, 2006
KitMaker: 1,953 posts
AeroScale: 1,902 posts
Posted: Thursday, February 09, 2012 - 09:51 AM UTC
The start of a long story: the Ta 152C-0 from Dragon is a model I have wanted to build during the last two decades. There was one on the shelf at a hobby shop in Stockholm when I moved here in 1991, when I finally took the decision to go back and buy it it had of course been sold .

Fast forward a bit more than fifteen years and my friend Rickard was cleaning out the last few 1/72 kits from his stash, I got this one as a gift from him so now I finally had the kit! A few months later, I picked up a bagged long-wing Ta 152H from the same company so now I had two!

A quick google (probably caused by a subconscious wonder why I have never seen one of these built) turns up a few reviews, the consensus among them seems to be that this is a difficult build. Well, the one who lives will see!

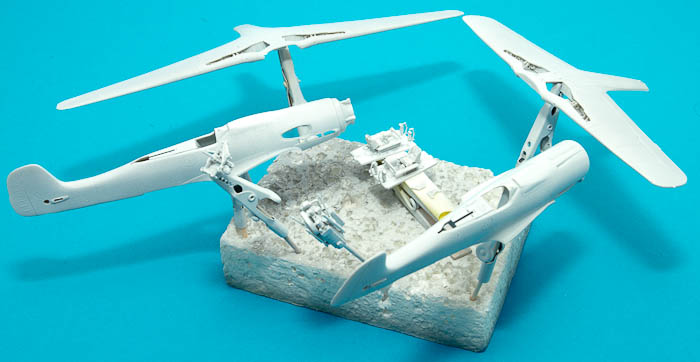
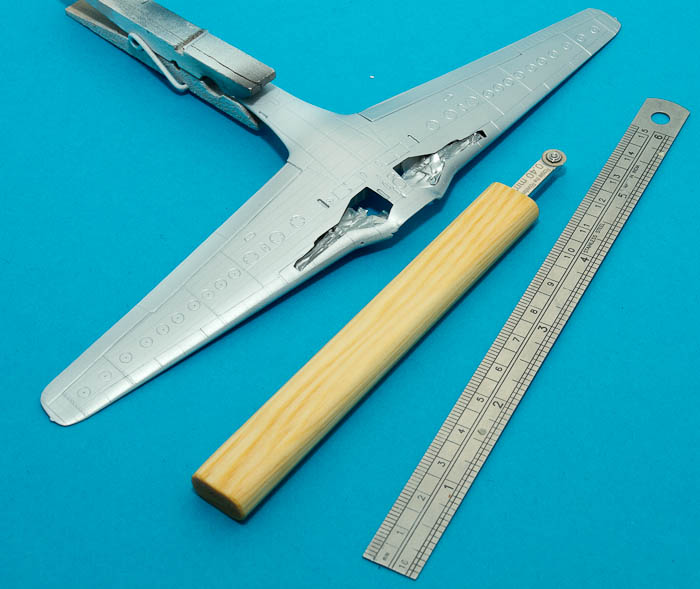
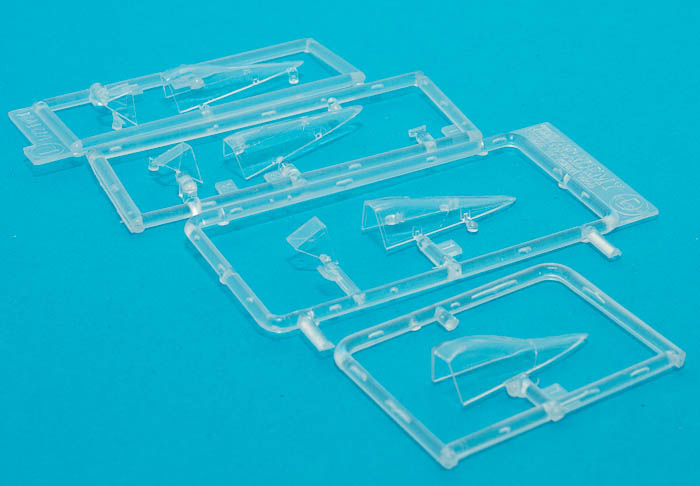
My usual blog start, all the bits and pieces:


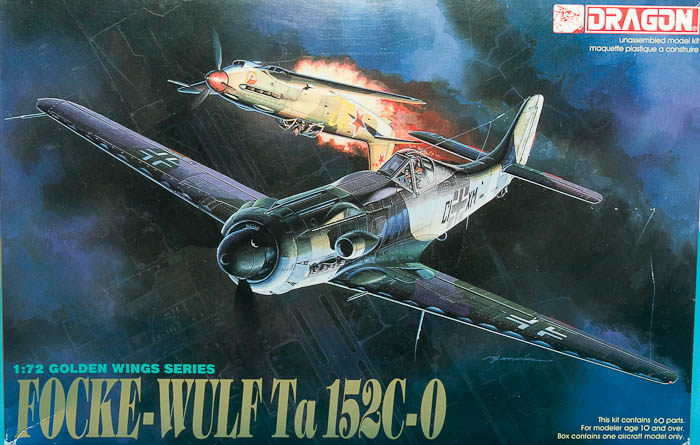
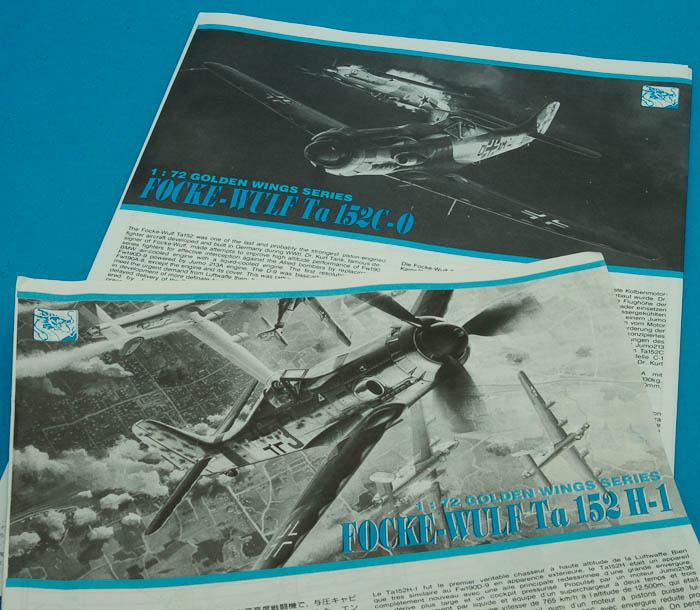
Box art. Maybe a bit violent for my taste (after all I have small children who tend to stroll into the sty every now and then )...


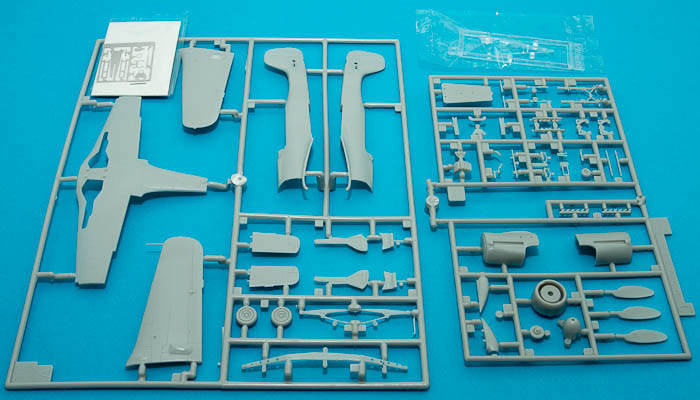
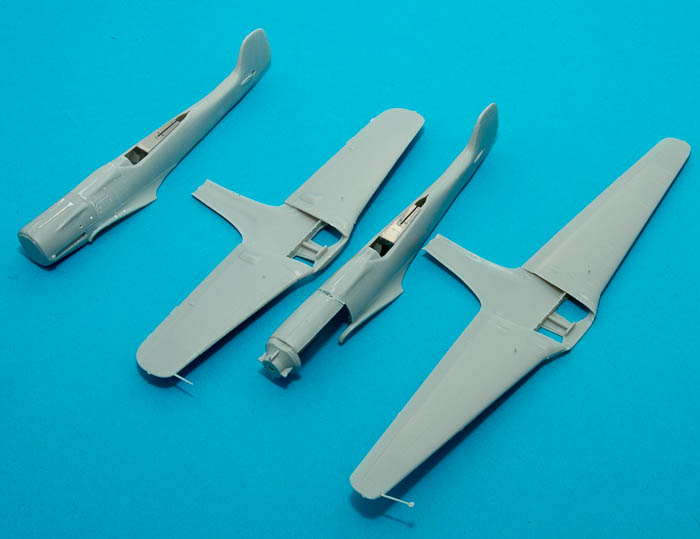
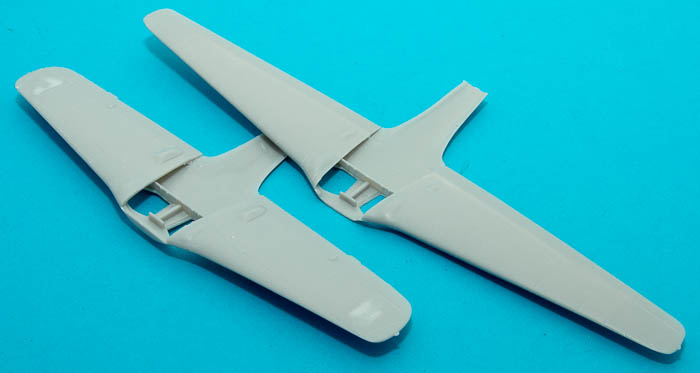
The plastic! This is the short-winged C-version, the H-version has more parts and even comes with an engine. None of that in the C kit!


Instructions...


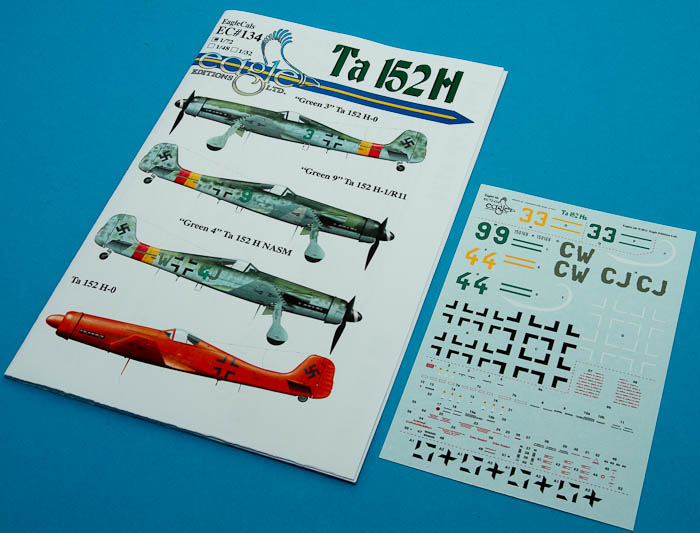
A sheet of aftermarket decals that I really felt I needed !


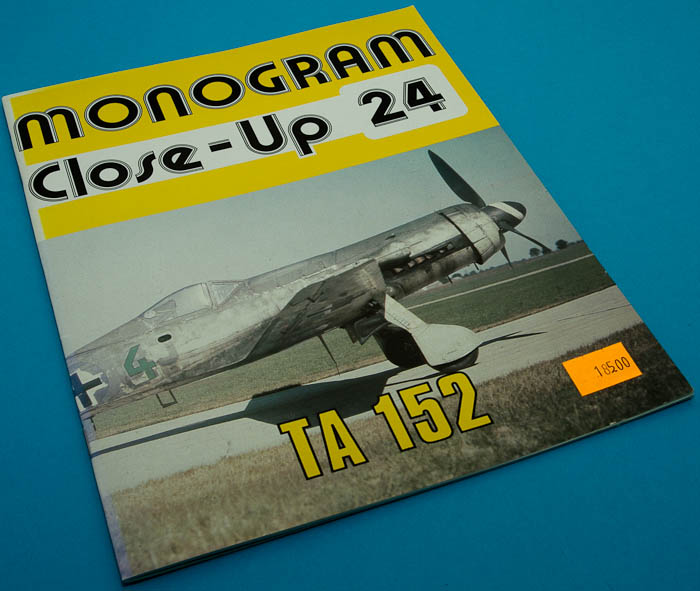
References... This is one of very few Monogram Close-Ups I own. It looks rather thin but it is well packed with high quality photos!


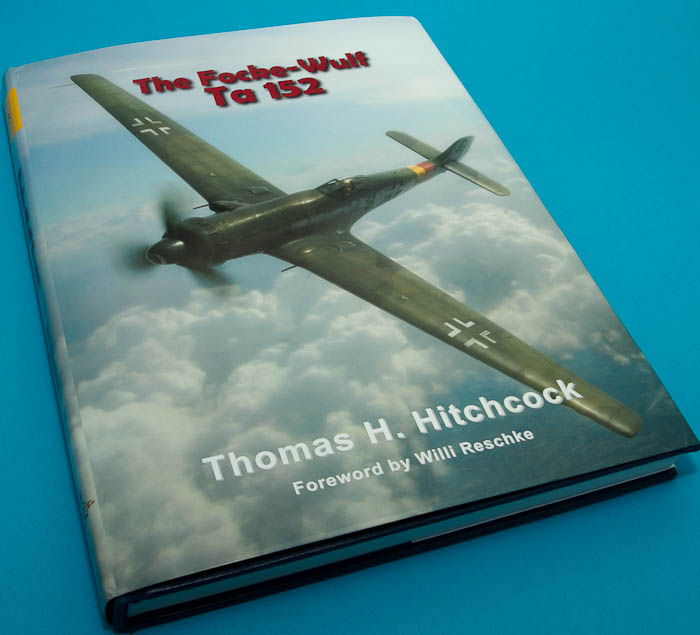
This book was probably not really necessary (and it came at a cost more than thirty times what I paid for the kits (which wasn't much since one was free and one was cheap but anyway 
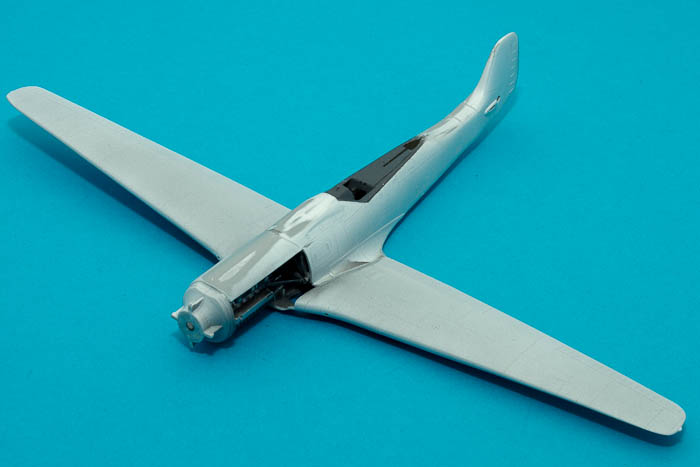
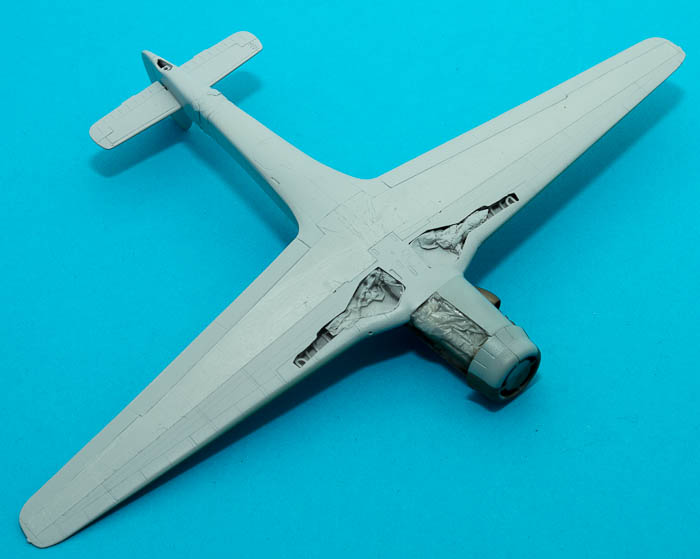
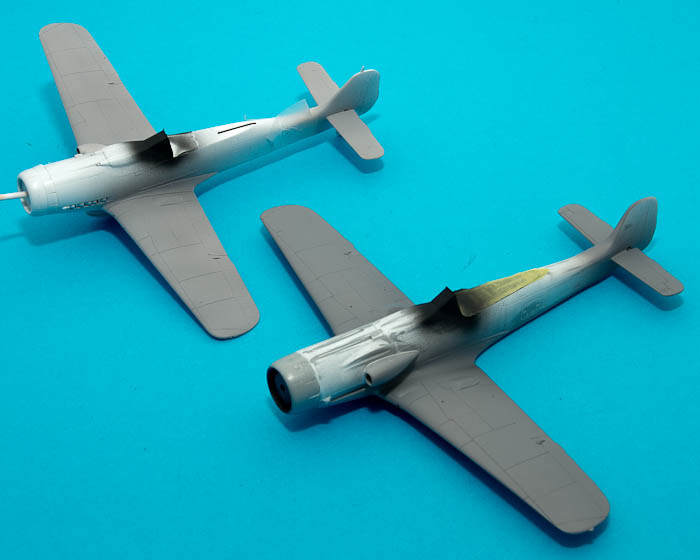
)) but I am admittedly a book lover and this one was simply to tasty to avoid!

And another one of my blog classics, since I can't leave the plastic alone this one has been slightly started last night...


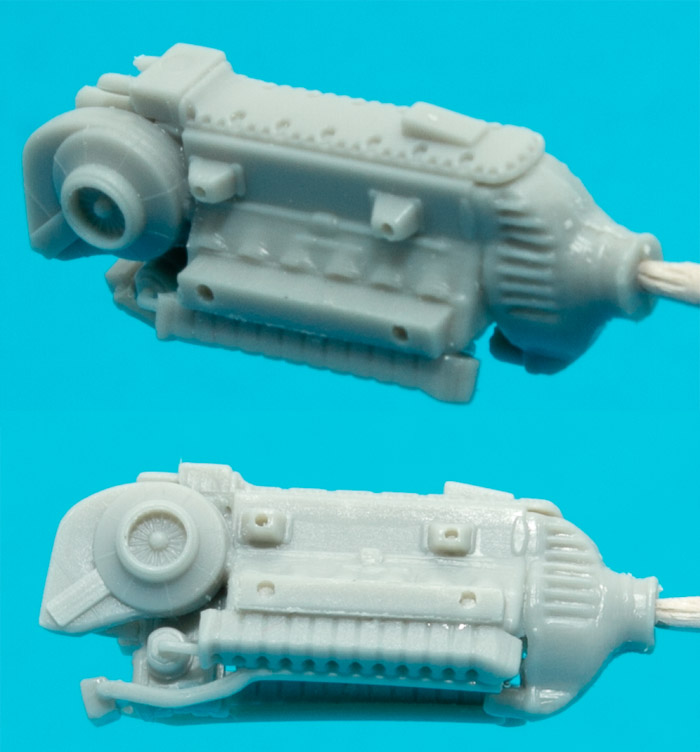
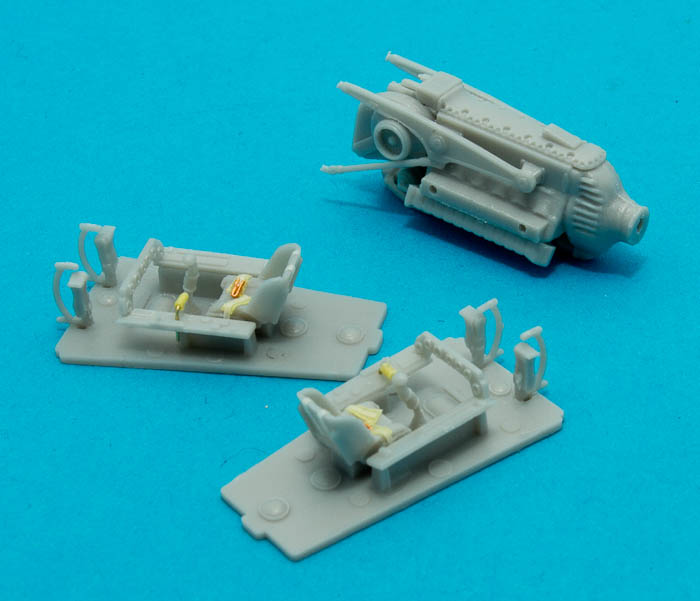
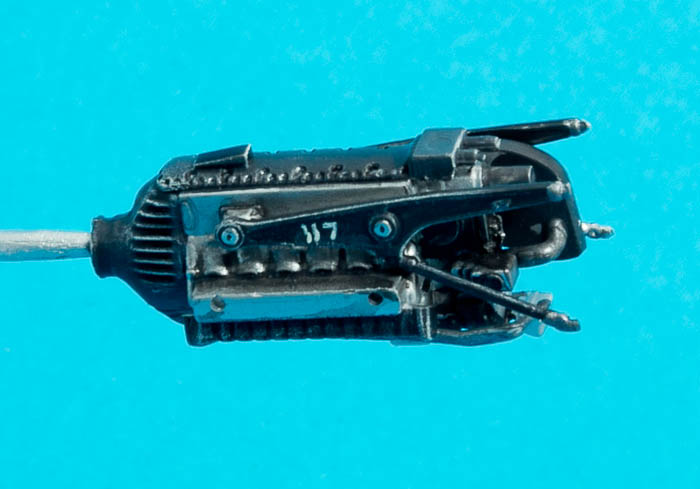
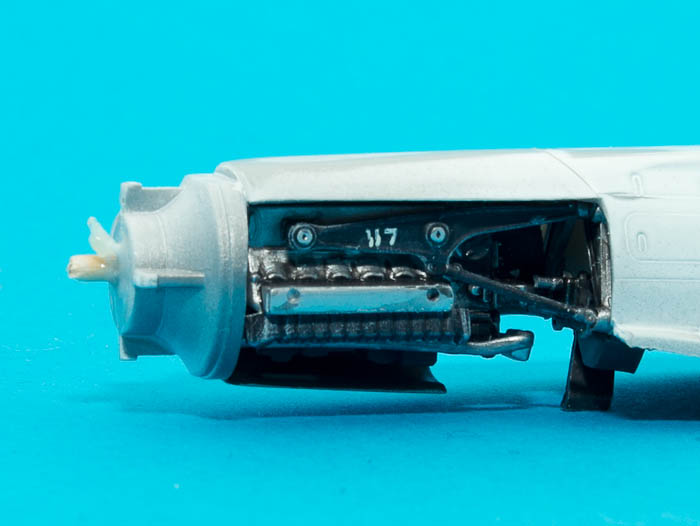
A Jumo engine. Consisting of many parts!


And an MK-108 mounted in the fuselage frame.

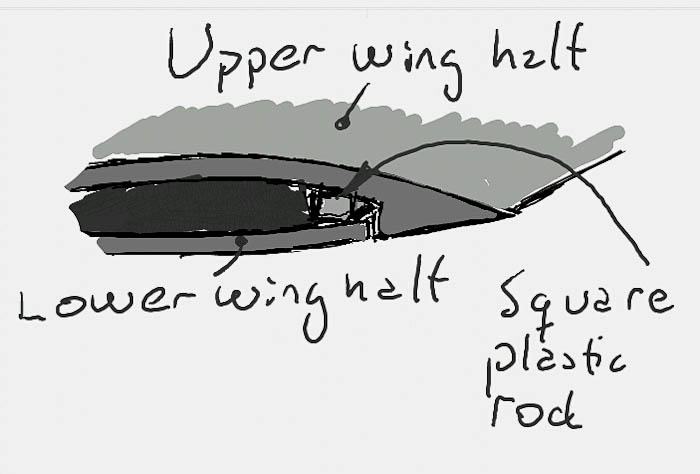
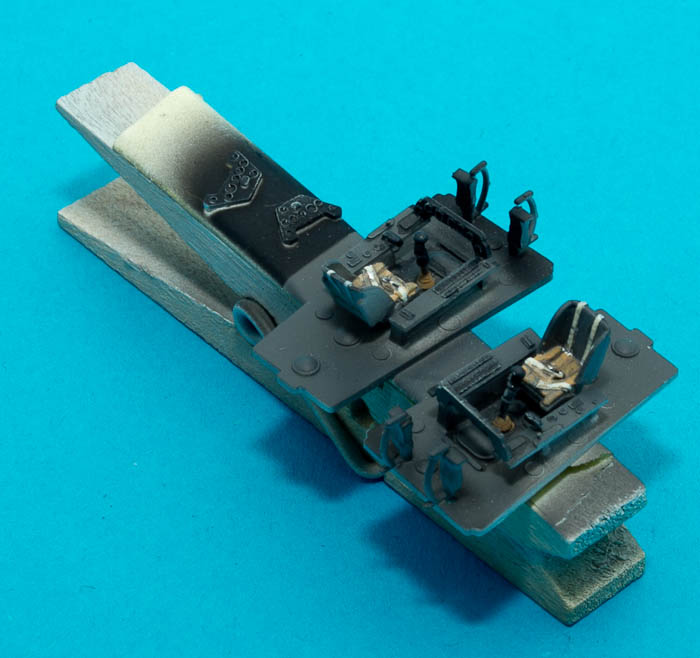
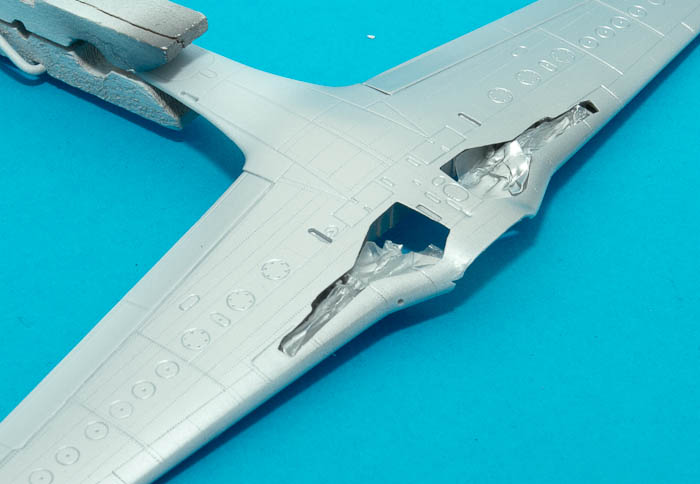
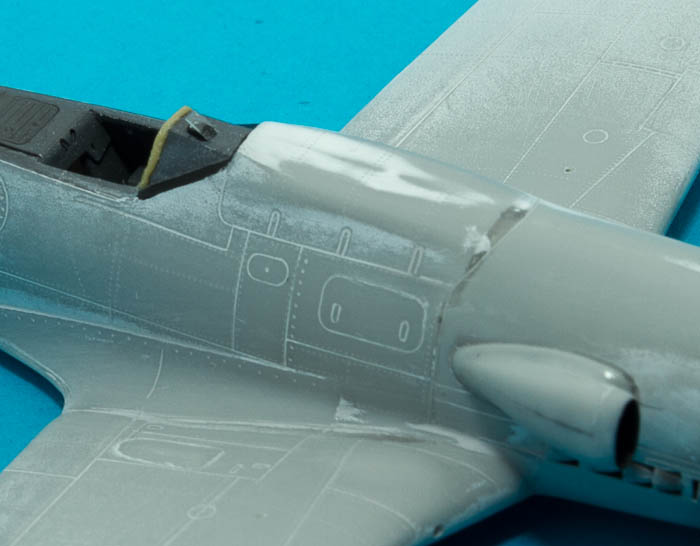
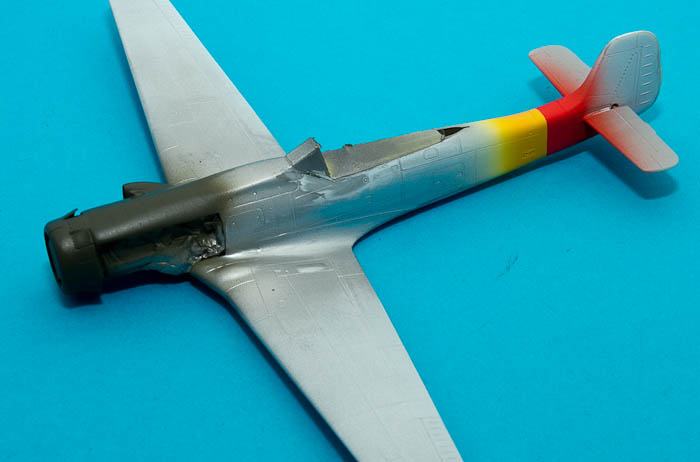
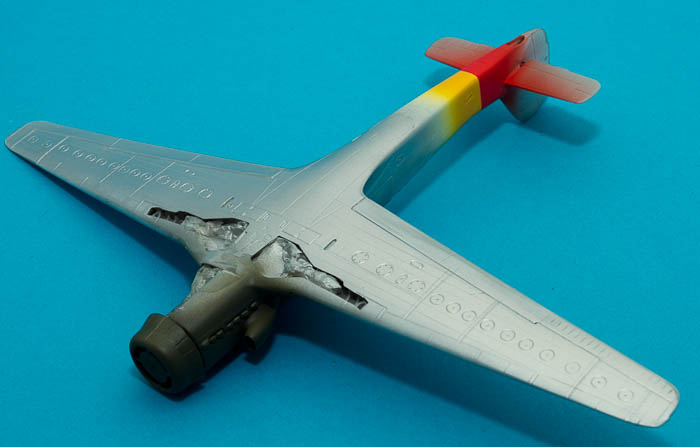
I have already gotten a taste of what I can expect. The fit is quite OK (at least up until now...) but the instructions are horrible! The main problem is that many of the parts simply aren't drawn the way they look, in several cases they are so different that it is very hard to figure out how they are expected to fit together and which side is up or down! The references (and modelling experience!) help a bit at least...

Since I have never been a marching band fan, finding the right music for that Luftwaffe feeling was a bit tricky. After some hesitation I went for the Bert Kaempfert orchestra, which is more like 1960s big band schlager... Try it, you might like it !


Magnus
Siderius
_VISITCOMMUNITY
Tennessee, United States
Joined: September 20, 2005
KitMaker: 1,747 posts
AeroScale: 1,673 posts
Posted: Thursday, February 09, 2012 - 10:39 AM UTC
Looking forward to seeing your build Magnus! I have the DML H model of the TA-152. I need to break it out and get building! ha ha Russell
magnusf
_VISITCOMMUNITY
Stockholm, Sweden
Joined: May 02, 2006
KitMaker: 1,953 posts
AeroScale: 1,902 posts
Posted: Sunday, February 12, 2012 - 09:01 AM UTC
Russell! If I am not wrongly informed, the DML kit has its fair share of fit issues as well.

Talking about fit issues: mine certainly have them! Interiors fit well (or rather, there are few places where the parts can collide) while the engine was awful. This is not your average "bad fit", this is simply a case where things probably never were intended to fit! The engine bearers are obstructed by various objects mounted on the engine, some can be cut and filed back for fit while the engine bearer itself has to be filed to fit the contour of the blower.


I added tape seat belts to the seats and I also made an attempt at the belt locking device. Photo etch is easier and looks better...


Magnus
Mecenas
Joined: December 23, 2007
KitMaker: 1,596 posts
AeroScale: 1,275 posts
Posted: Sunday, February 12, 2012 - 10:23 PM UTC
Magnus, take a closer look at the rudder pedals. In my oppinion they are located too much to the front. I think these should be shortly after the instrument panel. I'm also affraid you have glued those "bow" parts in the wrong direction - should be turned 90degrees.
magnusf
_VISITCOMMUNITY
Stockholm, Sweden
Joined: May 02, 2006
KitMaker: 1,953 posts
AeroScale: 1,902 posts
Posted: Sunday, February 12, 2012 - 10:54 PM UTC
Michal! Your'e right, I sat staring at them the other night and just thought they looked huge. Turned 90 degrees they'll make more sense ! And I can't blame the instructions for this, they are probably correct when it comes to this point.

I'll fix it tonight! Thanks!


Magnus
magnusf
_VISITCOMMUNITY
Stockholm, Sweden
Joined: May 02, 2006
KitMaker: 1,953 posts
AeroScale: 1,902 posts
Posted: Monday, February 20, 2012 - 09:02 AM UTC
Those builds are really interesting! Mixing extremely well detailed parts with bad fit and poor engineering. Those are not for the beginner!


Production line in full swing!


A typical annoying feature: there is no support for glueing the wing halves together along the trailing edge. Easily fixed with a few bits of scrap plastic but I still wonder why it was done this way in the kit!

Regarding the pedals: no matter which way I turn them they won't be seen from the outside so I'll leave them the way they are!


Magnus
magnusf
_VISITCOMMUNITY
Stockholm, Sweden
Joined: May 02, 2006
KitMaker: 1,953 posts
AeroScale: 1,902 posts
Posted: Friday, February 24, 2012 - 08:43 AM UTC
Tonight's update!


A pair of wings seen from one side...


...and the other. A few sink marks to fill in. I filled the cannon holes with CA glue in order to be able to drill them perfectly round. I have also removed the pitots and drilled holes so that I can use thin tubing instead.


One of my classic primer-photos!


Magnus
Snorri23
_VISITCOMMUNITY
Ontario, Canada
Joined: March 25, 2010
KitMaker: 514 posts
AeroScale: 244 posts
Posted: Friday, February 24, 2012 - 04:36 PM UTC
I have built many DML 190s and all of them needed to have the fuselage widened to fit the wings. Otherwise there is a huge gap. I found that placing the spreader at the rear of the cockpit opening works best. I did build the 152H in 1/48 and had the usual dml faults. Otherwise it went together well. Also you need to rake the struts forward so that the bottom of the wheel well covers run parallel to the ground. To get the proper stance. Currently building a 190C using bits from previous builds. Hope you do not find many faults that can not be over come. I do have photos which can be of assistance if needed.
MikeMx
_VISITCOMMUNITY
England - North East, United Kingdom
Joined: May 22, 2008
KitMaker: 649 posts
AeroScale: 434 posts
Posted: Friday, February 24, 2012 - 10:57 PM UTC
These kits are horrors to build. I abandoned mine part way through as I was fed up of the ill fitting. I might try to finish it at some point. I hope Hobby Boss scale down their Ta152C from 1/48 to 1/72 as that was a very nice build!

thanks
Mike
kenner
_VISITCOMMUNITY
Ontario, Canada
Joined: October 14, 2007
KitMaker: 122 posts
AeroScale: 119 posts
Posted: Saturday, February 25, 2012 - 11:28 AM UTC
I was just thinking there weren't going to be any forest pictures with this build... glad to see I was wrong
magnusf
_VISITCOMMUNITY
Stockholm, Sweden
Joined: May 02, 2006
KitMaker: 1,953 posts
AeroScale: 1,902 posts
Posted: Sunday, February 26, 2012 - 08:18 AM UTC
Trevor and Michael! I think I have put the worst part behind me now. Fuselage and wings are complete, now I just need to mate them together...

Kenneth! As always!


Magnus
kenner
_VISITCOMMUNITY
Ontario, Canada
Joined: October 14, 2007
KitMaker: 122 posts
AeroScale: 119 posts
Posted: Monday, February 27, 2012 - 11:29 AM UTC
For once I can actually say I built both these kits (even if it was almost 20 years ago)!

As you already observed, beautiful detail but a challenge to build. In general, I think the Ta152H is a nicer kit (more detailed anyway).

I had a lot of fun building the engine for the H but I was really torn between showing it off and breaking the graceful lines of the aircraft.

Just to make it more challenging, the wings of my H were warped. However, after adding some strips of plastic to support the trailing edge, as you have done, I clamped the wings to a "straight edge" (I think I used a file!) and they came out all right.

Although the photo-etch adds detail I found it rather fiddly to work with and not all that convincing. I don't know how many times I bent the underwing antenna... or how many time I broke the pitot tube... and the undercarriage...

Oh, and one of the areas I had the greatest difficulty with was the wing to fuselage join on the underside near the engine cowl of the Ta152C. Thank goodness for CA (I keep waiting for it to pop).

Oddly enough, in spite of all the challenges, I really enjoyed building these kits (especially the Ta152H).

magnusf
_VISITCOMMUNITY
Stockholm, Sweden
Joined: May 02, 2006
KitMaker: 1,953 posts
AeroScale: 1,902 posts
Posted: Tuesday, February 28, 2012 - 06:11 AM UTC
Kenneth! I thought that it was only my model that had a set of warped wings... Mine were dunked in hot water and pushed against the kitchen sink while they cooled. They are acceptably straight now!

I have already removed the pitots and fashioned new ones from metal tubing, I will still have to deal with the photo-etch under-fuselage antenna though.

When it comes to differences between the kits, I have arrived at the same conclusions as you: the C-specific parts lack a certain amount of TLC I think. They are a lot coarser than the H parts!

Regarding wing-to-fuselage fit it looks quite ok when dry-fitting but it ain't over until it's over as usual...


Magnus
magnusf
_VISITCOMMUNITY
Stockholm, Sweden
Joined: May 02, 2006
KitMaker: 1,953 posts
AeroScale: 1,902 posts
Posted: Friday, March 02, 2012 - 09:45 PM UTC
Cockpits and engine finished.


Sharply cast parts that are a joy to paint! And pedals are still mounted the wrong way, I'll let them stay that way since they won't be seen when hidden in the fuselage.


The engine! There were a lot of photos in one of my references making it a bit easier to paint it. The aluminium coloured block is quite unusual, most German engines seems to have been black all-over. Another common custom was the number stencilled on the engine bearer, I picked "117" as an ideal mix between what was easy to paint (111) and something slightly more believable but still paintable...


Magnus
Emeritus
_VISITCOMMUNITY
Uusimaa, Finland
Joined: March 30, 2004
KitMaker: 2,845 posts
AeroScale: 1,564 posts
Posted: Saturday, March 03, 2012 - 12:50 AM UTC
Looks really nice. keep up the great work!
I totally agree with Michael, those indeed aren't the easiest of kits to put together.
The Ta-152 H-1 gets the honorable mention of being the only kit so far that I have ever ended up binning. Ant that't not just putting the kit back in the box to wait for a surge of inspiration, but actually getting rid of and feeling relieved of a burden.
Of course, I saved every part I deemed usable: cockpit components, engine & it's associated gizmos, clear parts, decals.

magnusf
_VISITCOMMUNITY
Stockholm, Sweden
Joined: May 02, 2006
KitMaker: 1,953 posts
AeroScale: 1,902 posts
Posted: Wednesday, March 07, 2012 - 07:42 AM UTC
Eetu! I once scrapped an almost finished Spitfire Mk 1 from AZ. And I didn't keep any of the parts (which with hindsight was rather stupid, they could have gone into an Airfix build for instance!)... I think these will survive though, at least if I can get the wings to fit!


Stealing ideas shamelessly from Chukw... The slightly complex rear end of the engine cover would have been a pain to scribe without a template...


...I made this one by attaching a length of tape to the fuselage, then drawing the panel line curve with a pencil. The tape was then transferred to a thin sheet of plasticard where the contour was cut out and sanded smooth. The template was then attached to the fuselage and the panel line scribed using a needle in a pin vise.


I have also managed to squeeze in the fuselage bulkhead and the engine. After a slightly violent operation that broke off the leading edge fillet the engine finally was secured inside!


Have a look at the blower impeller, it won't be seen when the intake is glued in place! And no, even if there was a severe metal shortage in Germany at this stage in WWII, they didn't come with wooden prop shafts... It is a toothpick that I have used to fix the engine in place, the bearers looked a bit on the thin side. It will be cut and sanded flush with the plastic!


And finally, turning forty in less than a month, I realised it was time to try something new! Rivets... I've had the tool for a few years but it hasn't gotten further than a few test runs on my poor old Tempest...


I did the lower wing first with the bright idea that if I didn't like the effect I wouldn't have to continue with the rest of the model. Under a coat of Mithril Silver (the centre part of the lower wing was left unpainted on the machine I am planning to do) it looks just terrific so I'll go on with the rest of the parts. My only worry is how it will look under a coat of camo paint. I'll have to keep the coats thin...


Magnus
magnusf
_VISITCOMMUNITY
Stockholm, Sweden
Joined: May 02, 2006
KitMaker: 1,953 posts
AeroScale: 1,902 posts
Posted: Wednesday, March 14, 2012 - 04:18 AM UTC
A week ago already since last update! I haven't been idle though, I've been fixing a lot of smaller things that don't make any interesting photos !


Wings don't fit either... I've been busy working the wing root seam today and I am finally arriving at something that can be accepted...

I will probably let the C machine lag a bit behind this one so that I can see what the rivets look like after painting. If I don't like the effect (or even worse, if it is invisible!) there is no point in spending that amount of work on the other kit...


Magnus
magnusf
_VISITCOMMUNITY
Stockholm, Sweden
Joined: May 02, 2006
KitMaker: 1,953 posts
AeroScale: 1,902 posts
Posted: Thursday, March 22, 2012 - 09:14 AM UTC

I've added some leather upholstery around the cockpit coaming and also a sight glass for the EZ 42 gunsight. Almost at the paint stage now...


Magnus
magnusf
_VISITCOMMUNITY
Stockholm, Sweden
Joined: May 02, 2006
KitMaker: 1,953 posts
AeroScale: 1,902 posts
Posted: Friday, April 13, 2012 - 08:53 AM UTC
It's been a while since last post. I've been mostly "fixing things", that means all those things that don't fit... The worst yet is the windscreen. Anyway, most things on the long-wing H-machine are fixed building-wise and I've finally arrived at the paint stage!


Rear fuselage JG301-bands done using Xtracrylics...


...and the lower surfaces painted natural metal (about half the width of the wing was left unpainted).


The C-machine is lagging behind a bit...


...it does however fit a lot better than the H-kit. Probably mainly because of a lower parts count!


Magnus
magnusf
_VISITCOMMUNITY
Stockholm, Sweden
Joined: May 02, 2006
KitMaker: 1,953 posts
AeroScale: 1,902 posts
Posted: Saturday, April 14, 2012 - 09:04 PM UTC
Finally the fun starts but there are a few more things to complain about before we get to it...


Someone decided that it was a good idea to cast some kind of plastic lump on the inside of the canopy. Where it can be seen from the outside... I have fixed it on one of the canopies (scraping, sanding, polishing, polishing and polishing, one evening worth of boring work...) and was thinking about how I could avoid this on the other one...

Do you remember Rickard, the guy who gave me the Ta-152C? I got a partially built Hasegawa D-9 at the same time. Guess what was in that box?

...just pick your choice :-) ! I'll use the bulged canopy (and the windscreen, I don't want to talk about it but the original Dragon item had an accident...) for the Ta-152C and will use the other one to do a slightly unusual flat canopy D-9. The D-9 will probably sneak into this thread quite soon...


Finally painting time! I've masked the natural metal wing centre section using parafilm and painted the rest of the lower surfaces and the fuselage sides RLM76 (Gunze 417, out-of-the-bottle).


Wing and stabiliser top surfaces got a coat of RLM83 Light Green mixed from my favourite 1994 Me-262-recipe (35% H6 + 65% H58 from the Gunze range)...


...and tonight the fun continues with the top of the fuselage and the dark green areas. I will also do the "wrap-around" portions along the wing leading edge.

The "power-egg" is painted in RLM81 "Braunviolett". They were delivered as a complete unit to the assembly lines and often the paintwork didn't match the rest of the aircraft. I first did it in Gunze H421 but found it a bit dark (you can see the difference from my previous post) and repainted it using a mix of 35% H52 + 65 % H80 + 20% H11.


Magnus
magnusf
_VISITCOMMUNITY
Stockholm, Sweden
Joined: May 02, 2006
KitMaker: 1,953 posts
AeroScale: 1,902 posts
Posted: Thursday, April 19, 2012 - 06:16 AM UTC
I've spent the last two evenings painting...


Wing camo was painted using a copy of the planview in Monogram Close-Up as a mask. I love when they do the 3-views in 1/72 :-) ! The dark green is a mix of Gunze H6 with a few drops of H58 added to lighten it a bit.


I haven't decided if I like the mottling yet. I'll push this one to the back burner while I spend some quality time with the Ta 152C


The wrap-around at the leading edges was done freehand.


This one will soon be sneaking its way into this thread. It's not a Ta 152 but I am the one who is the boss around here so I have decided it is allowed :-) ! It won't be eligible for any campaigns though since it was started (or rather almost finished) beforehand! And not even by me...


Magnus
Siderius
_VISITCOMMUNITY
Tennessee, United States
Joined: September 20, 2005
KitMaker: 1,747 posts
AeroScale: 1,673 posts
Posted: Thursday, April 19, 2012 - 01:48 PM UTC
Very good paint job Magnus! Your freehand work is great. Thanks for sharing, looking forward to seeing more when you get a chance. Russell
pbaudru
_VISITCOMMUNITY
Belgium
Joined: April 12, 2012
KitMaker: 31 posts
AeroScale: 31 posts
Posted: Thursday, April 19, 2012 - 09:19 PM UTC
Nice builds !

I stopped mine years ago because of the big gaps between the fuselage and wing parts.....but I will re-start it in the future.

Cheers, Pierre.
magnusf
_VISITCOMMUNITY
Stockholm, Sweden
Joined: May 02, 2006
KitMaker: 1,953 posts
AeroScale: 1,902 posts
Posted: Thursday, May 03, 2012 - 08:06 AM UTC
Updates has been a bit slow once again... Partially due to the gaps that Pierre is referring to :-) !


I couldn't resist peeling off the masking just to see what it would look like!


Lower surfaces...


This is what I have been working on lately: the C and the D-9. Last night I finally got to the painting stage on these! Wings are painted RLM75, I aimed for different shades so that they don't look too identical when finished!


A bunch of prop parts... By a divine stroke of luck only one of them had a spiral on the spinner. Thank you very much dear plastic model gods :-) !


Magnus
magnusf
_VISITCOMMUNITY
Stockholm, Sweden
Joined: May 02, 2006
KitMaker: 1,953 posts
AeroScale: 1,902 posts
Posted: Friday, May 04, 2012 - 08:40 AM UTC

A bit of green... I could use the same masks for both, another reason to build batches of similar models :-) !


Magnus
 _GOTOTOP