_GOTOBOTTOM
Early Aviation
Discuss World War I and the early years of aviation thru 1934.
WNW 1:32 SE.5a Phoenix Project
Mgunns
_VISITCOMMUNITY
Arizona, United States
Joined: December 12, 2008
KitMaker: 1,423 posts
AeroScale: 1,319 posts
Posted: Thursday, March 29, 2012 - 01:21 PM UTC
Greetings all:

I won't be entering this build in the KOTS II GB, unless Stephen and the championship committee say it is alright, as I have started this before and it ended up a mess, so it is just a build blog, but I wanted to tackle this after seeing Lance's fine SE.5a in McCuddens markings with the fine a/m parts I decided to resurrect this kit that I started about 4 years ago, melted some of the parts, got another kit, built it, and feel ready to try again to salvage this kit. I am not sure what markings I want to do it in so I have a 4 blade and two blade prop for whatever I decide.
Per usual the by now familiar box cover:

When I started this back in 08 I was new again to the WWI modeling side of the house and always liked the SE.5 and started in on this kit. My modeling skills were somewhat rusty and I rushed the model to include putting it under the space heater to hasten the drying of the paint: well as will happen I got distracted only to find to my horror much of the plastic had been melted. I was devestated. I quit the blog then and there. I tossed some parts, quickly retrieved them and now four years later am applying surgery and skills I have learned from building and this forum and am ready to try again.
Here are some of where I was at that time:

I had gotten further than this as I had the cockpit coming and paint on the airplane. I was frustrated as I was using PE for the first time and had not filed down the plastic, so I had fit problems, it was a mess.

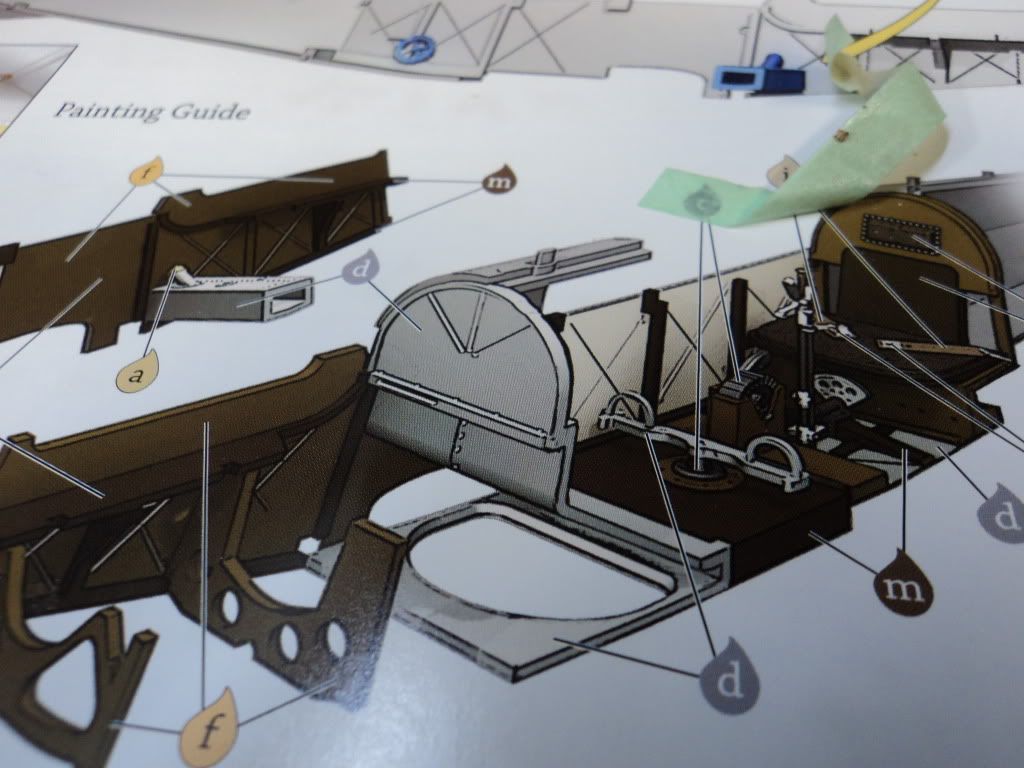
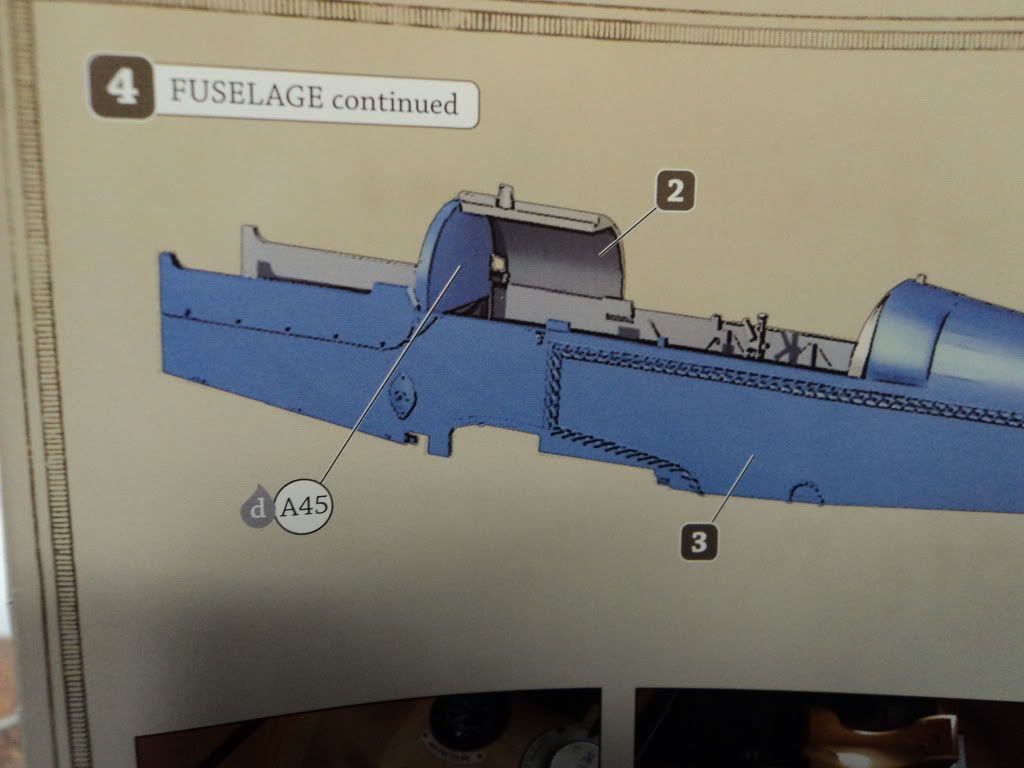
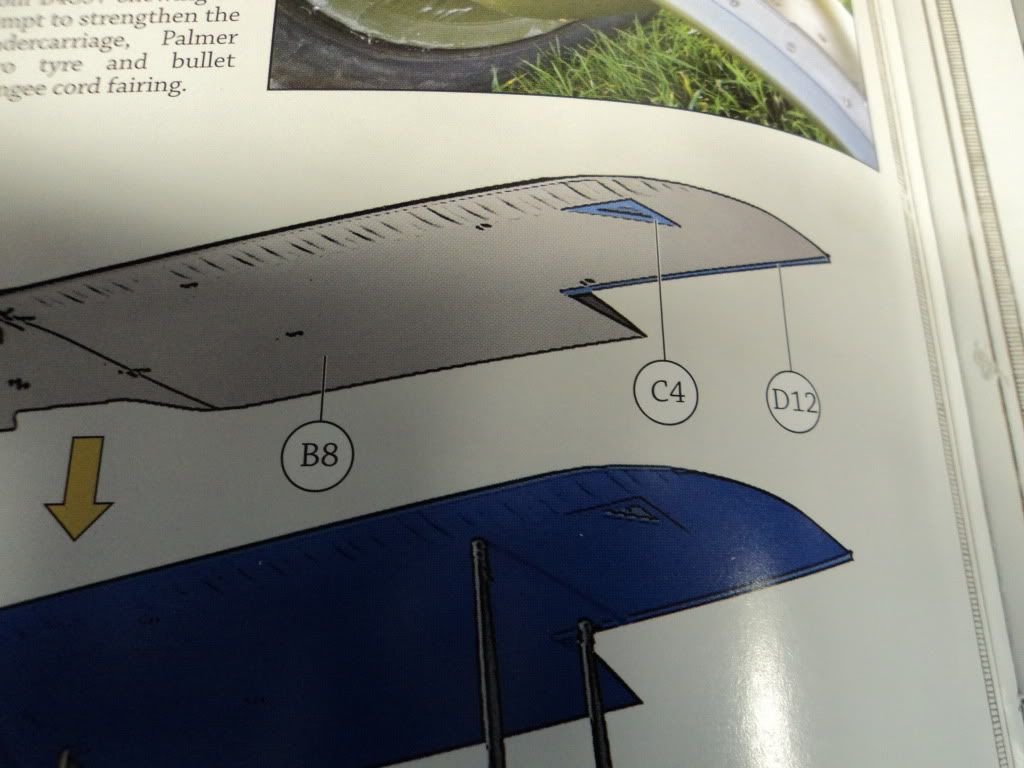
I had also missed the part in the instructions on page 8, parts D3 and D2 and on page 9 parts D12 and D13. The aileron mounting parts which hold the ailerons place in the wings: the instructions aren't real clear and unless one studies the instructions or makes the mistake they can be overlooked, as I did, they are shown below.


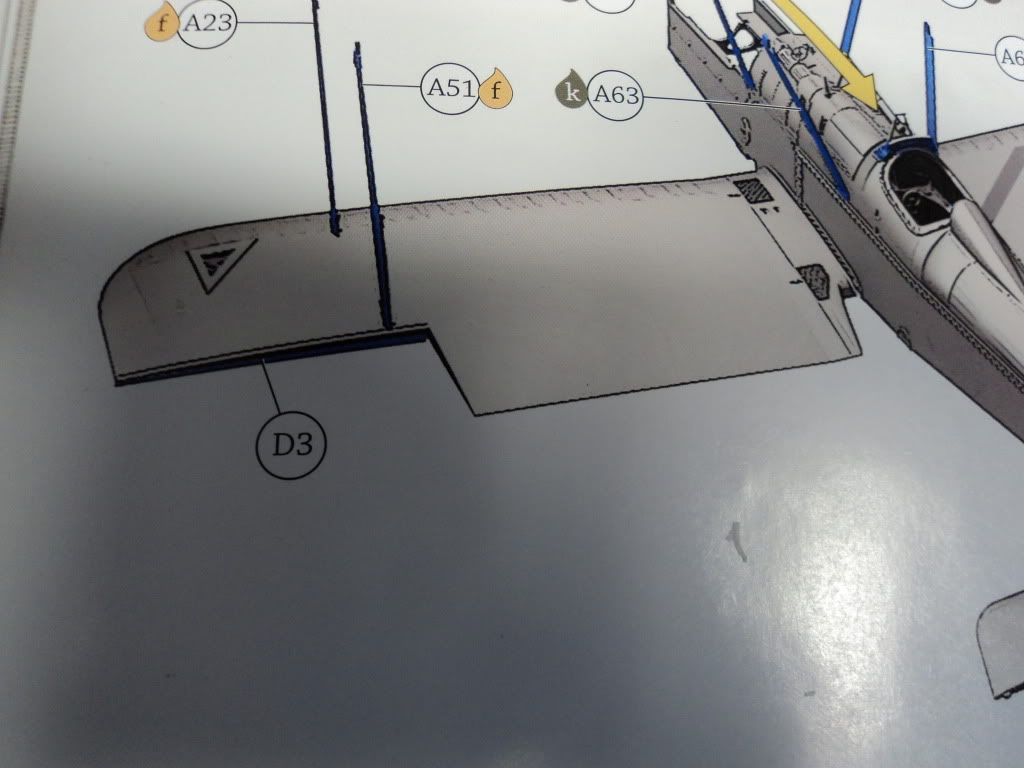
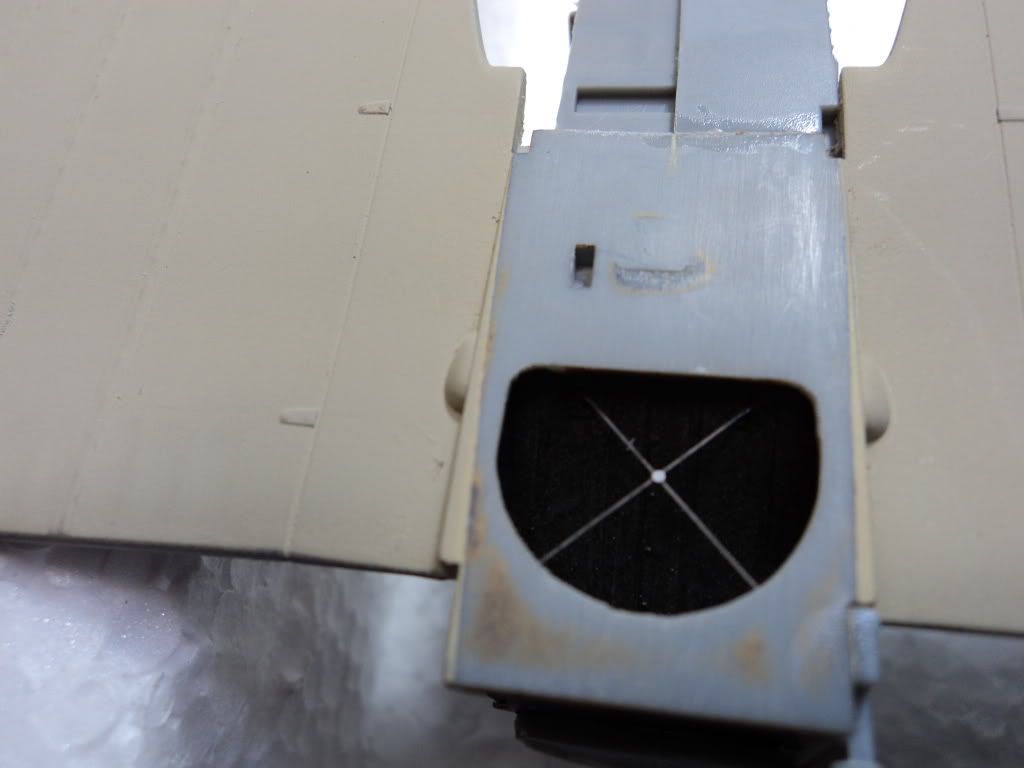
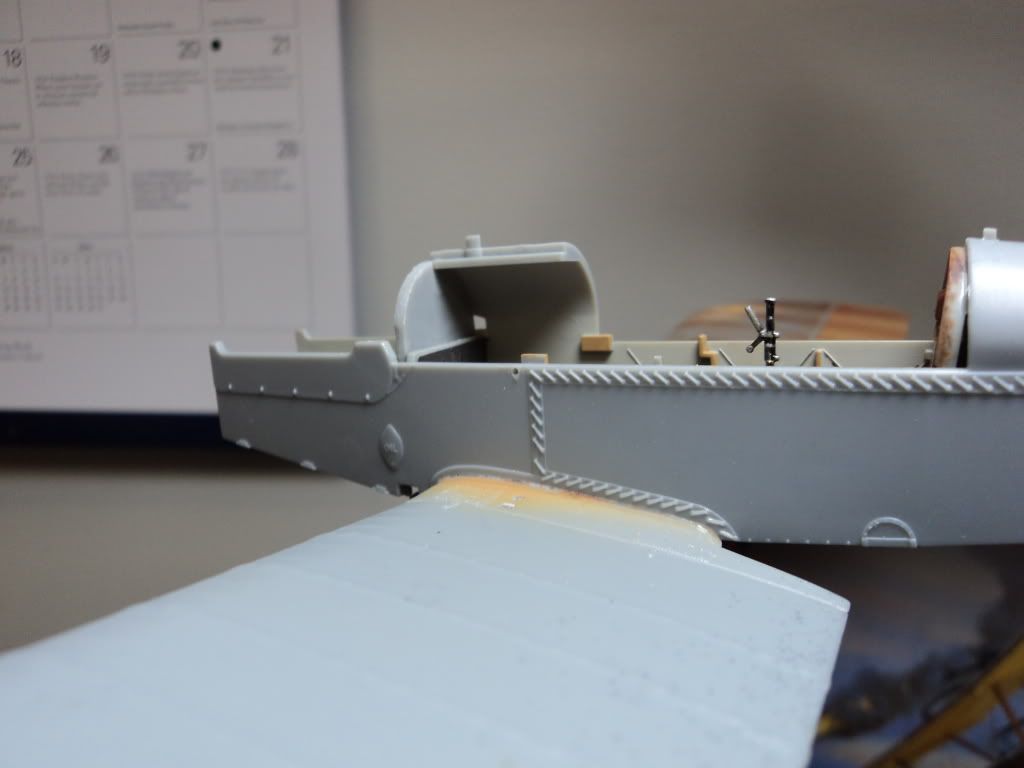
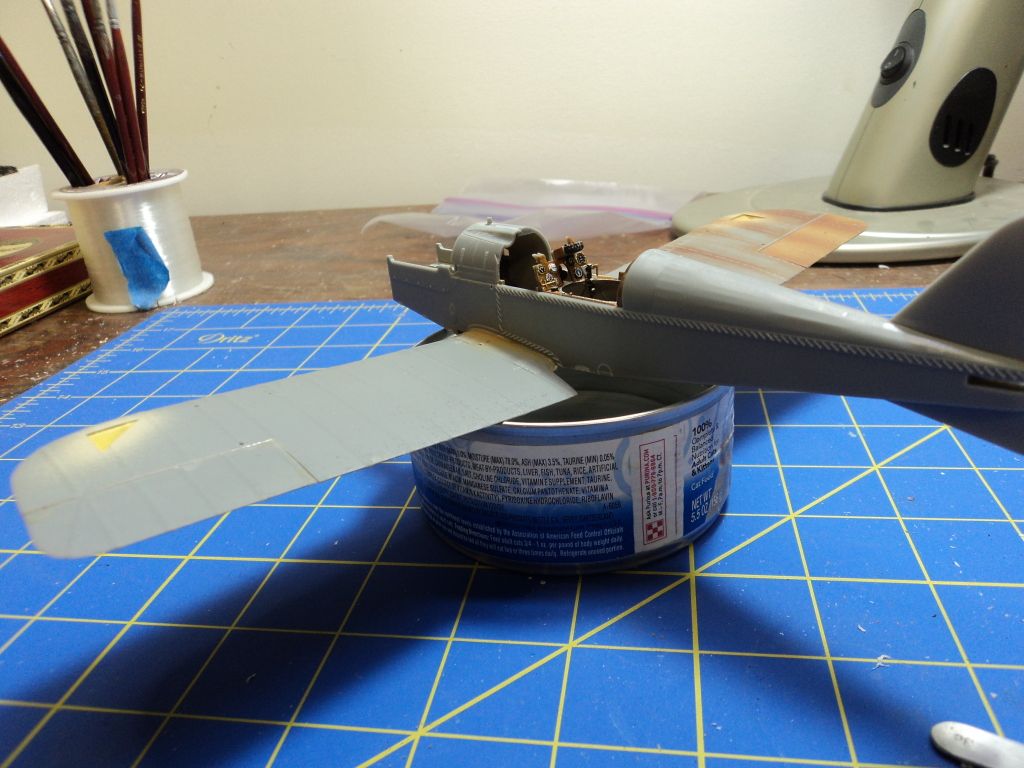
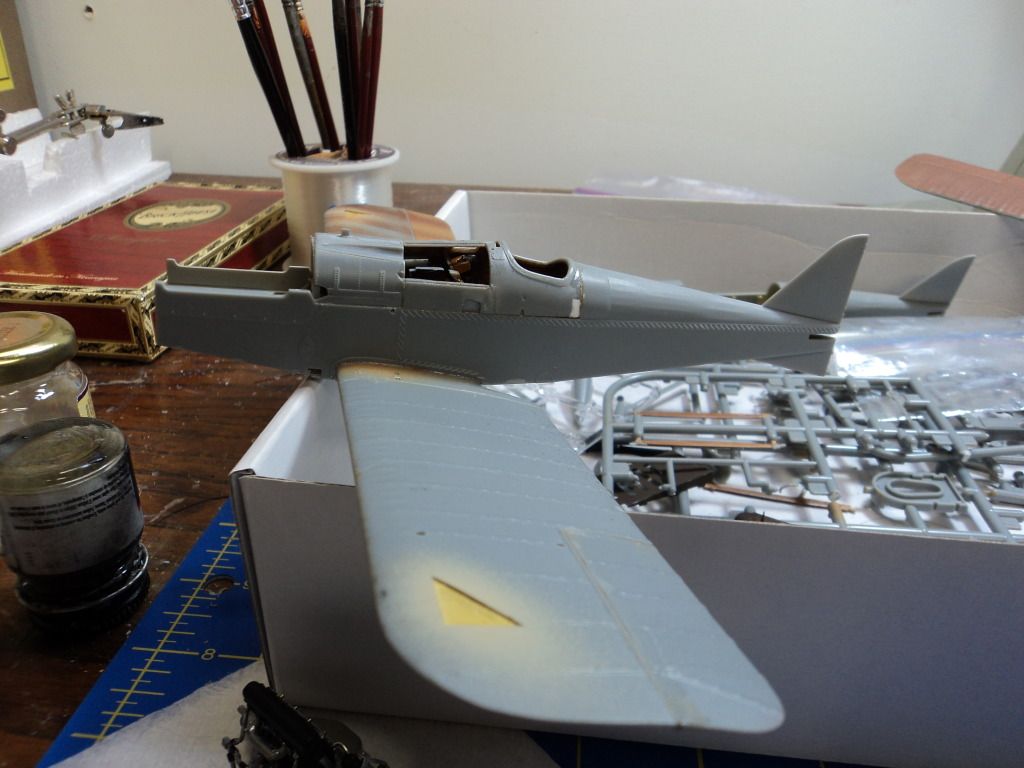
You can see in this photo where I had left those parts off by the gap. This has now been repaired.


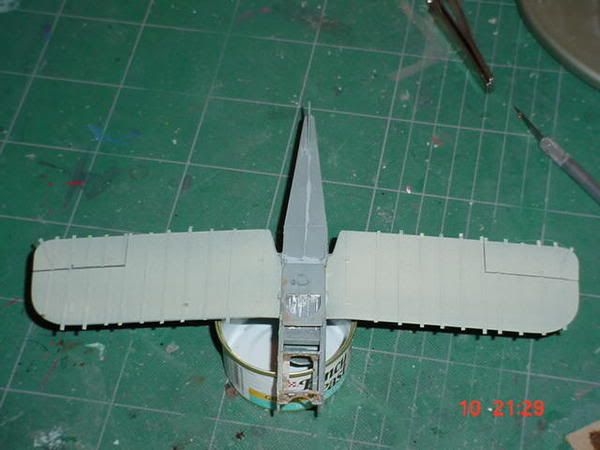
I took the ailerons off the wings and installed those parts that I had left off and repainted the undersurfaces of both wings.

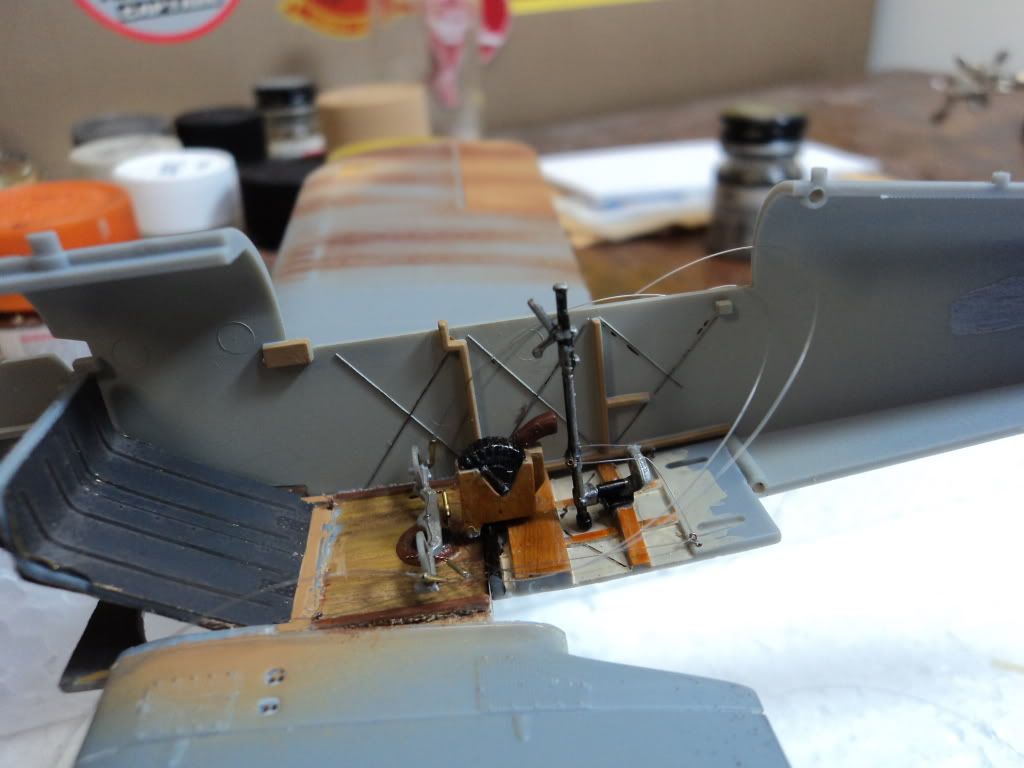
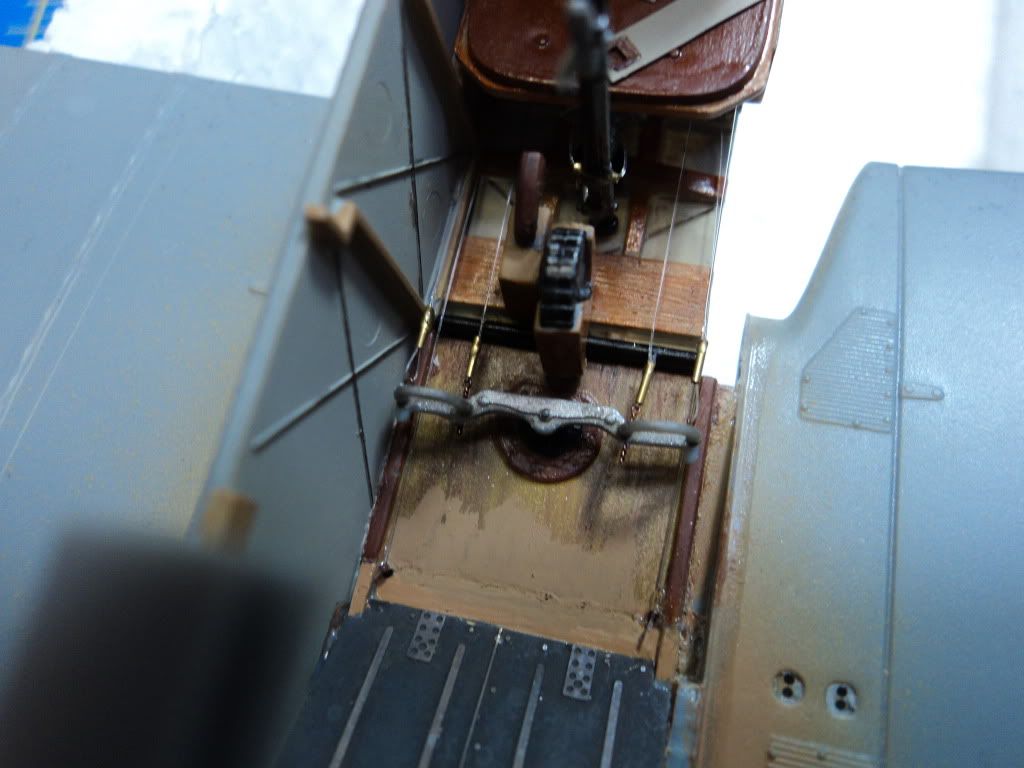
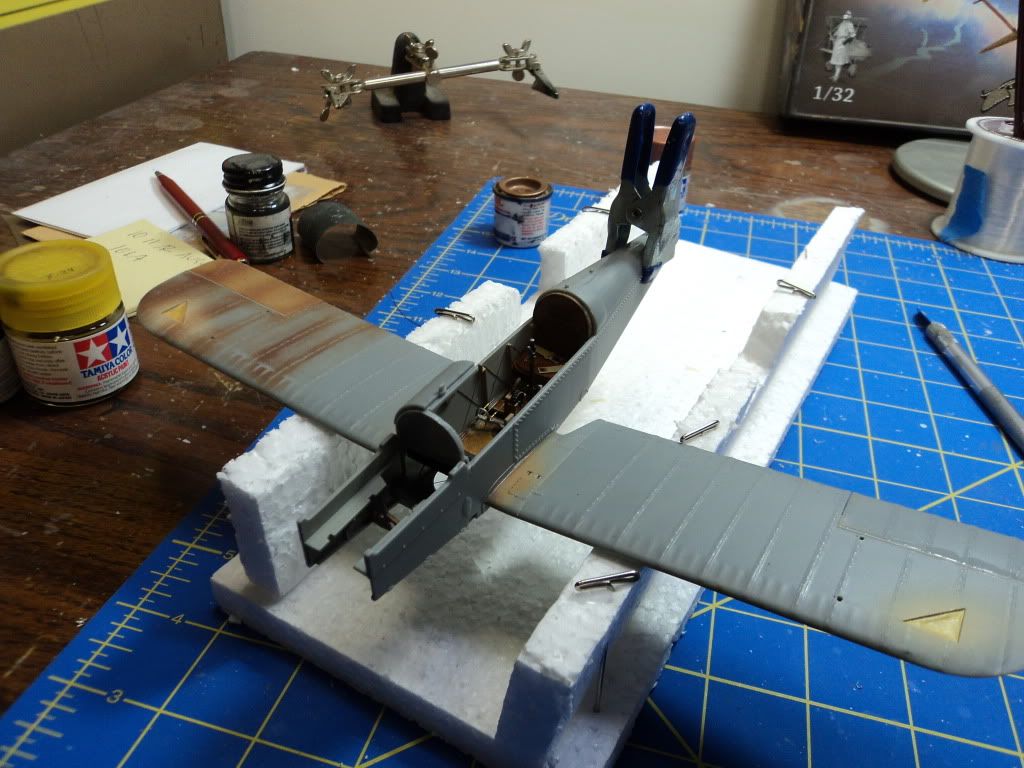
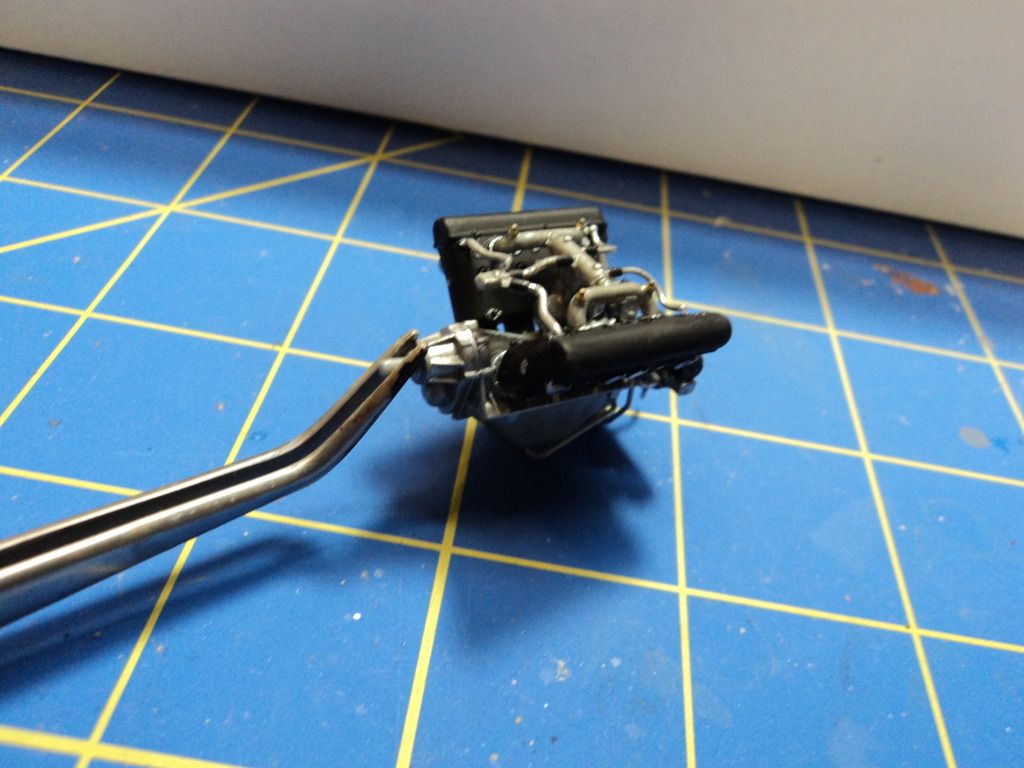
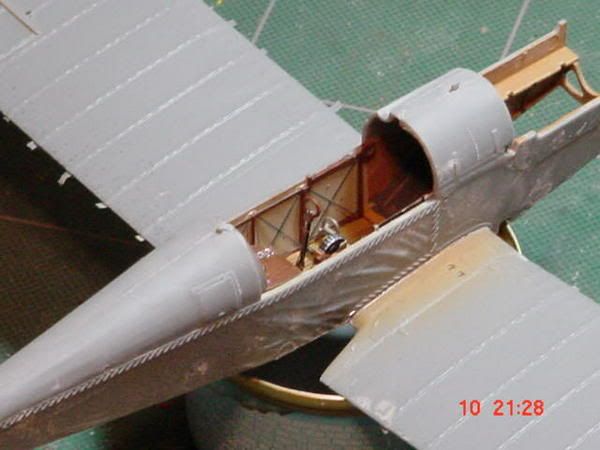
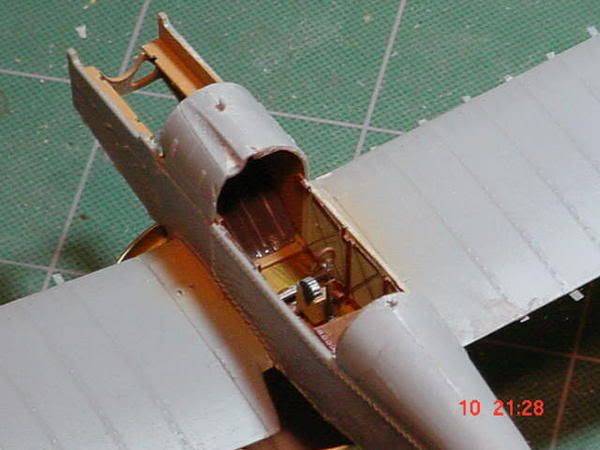
I am presently working on the cockpit interior and will try something different. I have seen some of the modelers assemble one fuselage half to the wing to enable the modeler access to the cockpit interior and rig the controls. That is where I am at now.

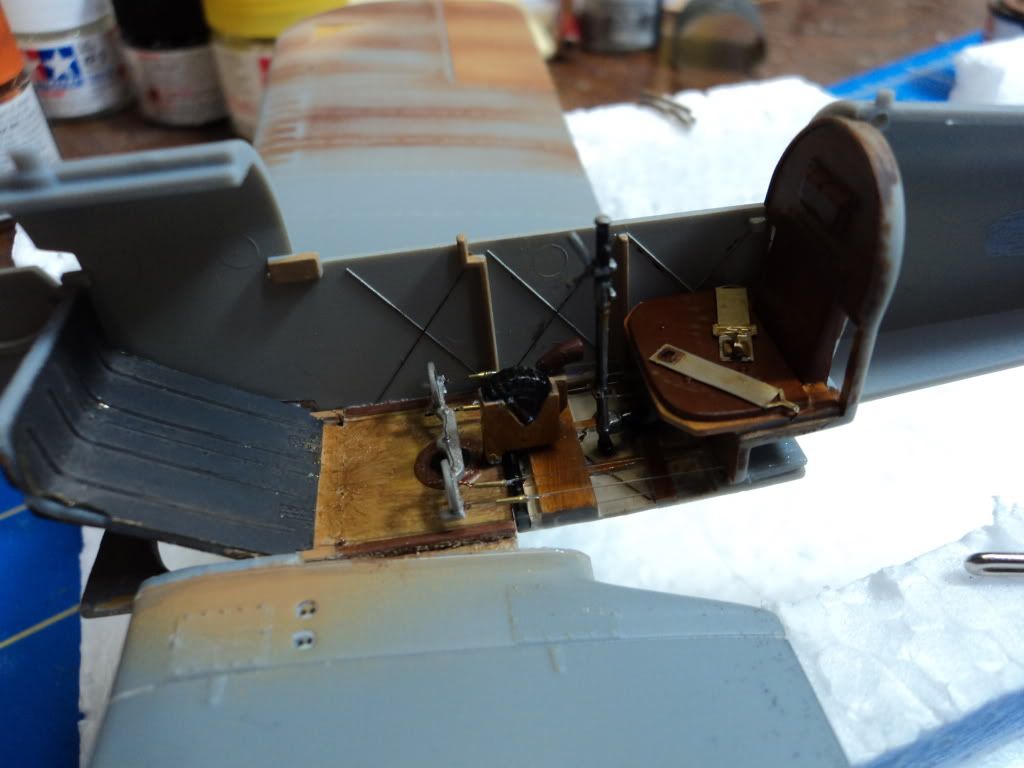
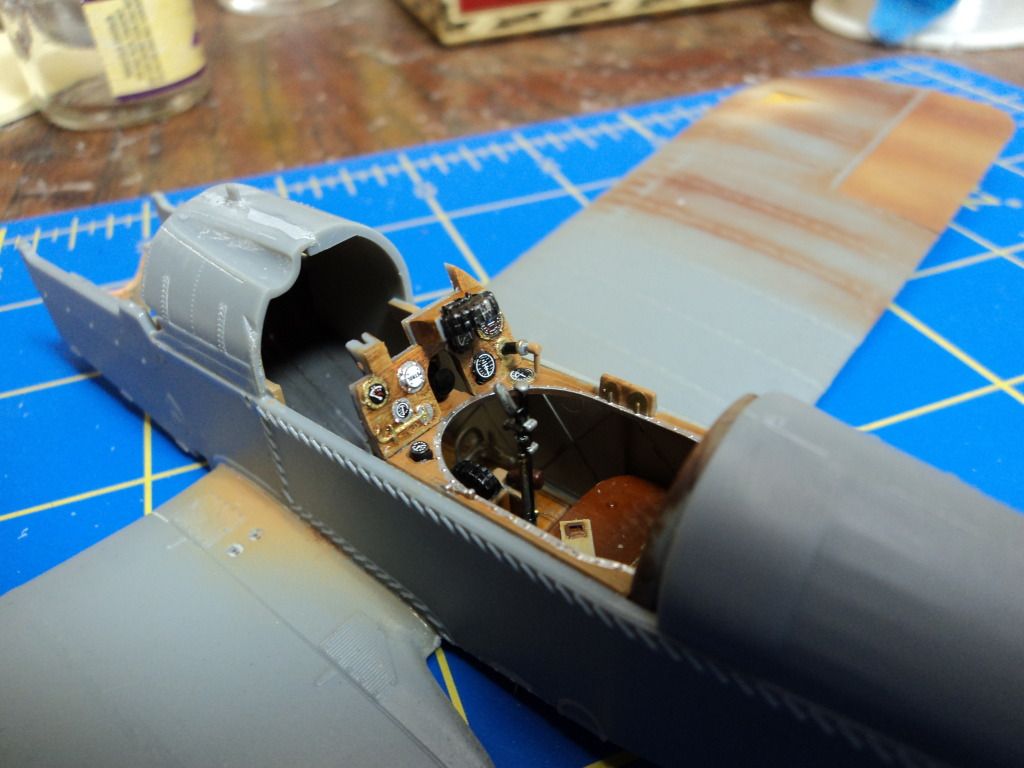
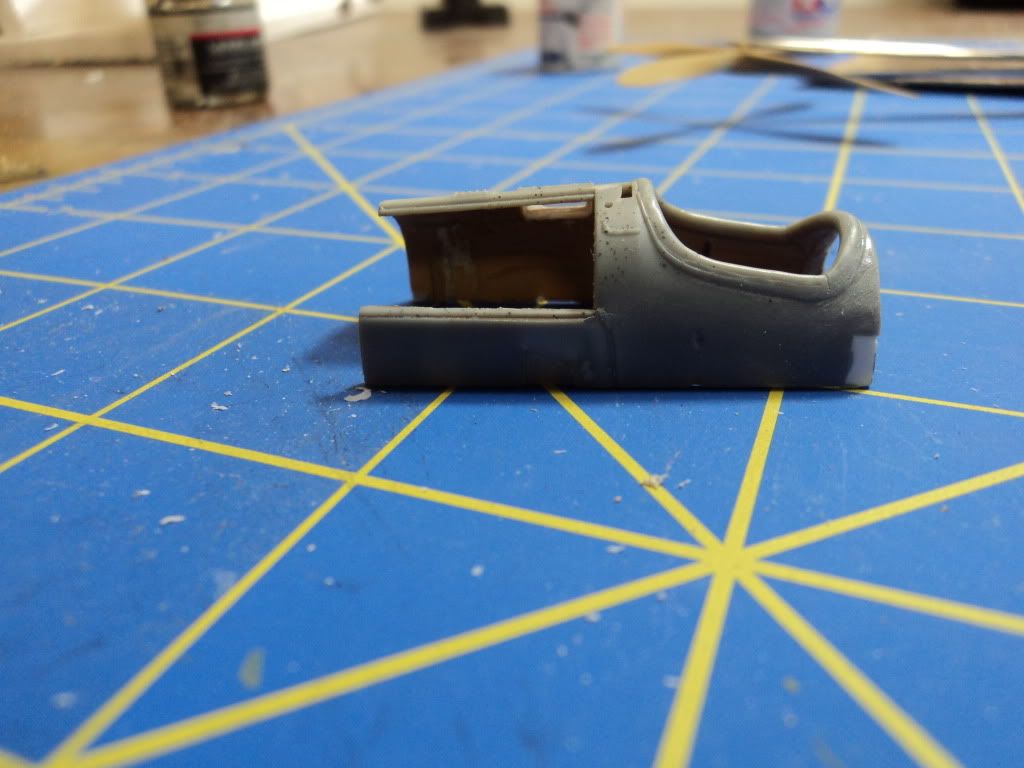
Here is the cockpit coming with repairs. Thre was a chunk out of the back side, you can see where I repaired it with sheet plastic and the forward part was off when I pulled the coming apart trying to salvage it. I had tossed it but managed to retrieve it from the trash and it is now repaired satisfactorialy.

Stay tuned for more of the rise of the Phoenix.

Thanks for stopping by.

Best
Mark
JackFlash
_VISITCOMMUNITY
Colorado, United States
Joined: January 25, 2004
KitMaker: 11,669 posts
AeroScale: 11,011 posts
Posted: Thursday, March 29, 2012 - 01:36 PM UTC
Nice save Mark! Its great to see the tenacity and skills you are applying.
Mgunns
_VISITCOMMUNITY
Arizona, United States
Joined: December 12, 2008
KitMaker: 1,423 posts
AeroScale: 1,319 posts
Posted: Thursday, March 29, 2012 - 01:39 PM UTC
Thanks Stephen:

This is going to be a fun build, not that they all aren't but this will be fun to finally see it through.

Best
Mark
lcarroll
_VISITCOMMUNITY
Alberta, Canada
Joined: July 26, 2010
KitMaker: 1,032 posts
AeroScale: 1,025 posts
Posted: Thursday, March 29, 2012 - 02:29 PM UTC

Quoted Text

Thanks Stephen:

This is going to be a fun build, not that they all aren't but this will be fun to finally see it through.

Best
Mark


As the old cheer goes, "go Mark"!! I'll be following along, this is going to be interesting!
I have a lot of "bits" kicking around here after my build, including several coamings, don't hesitate to ask if you need a widget or whatever.
I hope to build another (stock) version, would like to do APF Rhys David's for contrast to the heavily modified McCudden one. In the interim I'll be keeping an eye on this one.
Cheers,
Lance
OEFFAG_153
_VISITCOMMUNITY
Västra Götaland, Sweden
Joined: February 19, 2010
KitMaker: 1,473 posts
AeroScale: 1,450 posts
Posted: Thursday, March 29, 2012 - 06:48 PM UTC
Hello Mark,

I remember this one and its scrap with the heater. Nice to see you're salvaging it – I think you have a potential great build there.

Mikael
thegirl
_VISITCOMMUNITY
Alberta, Canada
Joined: January 19, 2008
KitMaker: 6,743 posts
AeroScale: 6,151 posts
Posted: Saturday, March 31, 2012 - 02:12 AM UTC
Will be following this one Mark .
Mgunns
_VISITCOMMUNITY
Arizona, United States
Joined: December 12, 2008
KitMaker: 1,423 posts
AeroScale: 1,319 posts
Posted: Monday, April 02, 2012 - 12:53 AM UTC

Okay Folks, here we go with more progress,I did some work on the interior that I hadn't done on the first go around. I followed some of Des' ideas and didn't button up the cockpit per the instructions. I rigged the controls using Bob's Buckles and "invisible thread" By not buttoning up the fuselage, I was able to rig the controls, and then thread the rigging material through the holes in the base of the seat and secure them in the back with super glue.


And now ready to button it up but not before putting the cross bracing beneath the floorboards.
I had the Eduard PE set for this a/c that I used some of in a previous build, but wasn't comfortable using it, so I put it to use this time, being more comfortable using it.

And finally got the fuselage buttoned up.

I had also used the prop boss on the two bladed prop but wanted to do a 4 bladed a/c this time, so I used two ammo drums, trimmed them down and drilled a hole, the results are shown below:

More news as it happens.

Thanks for stopping by.

Best
Mark
Mgunns
_VISITCOMMUNITY
Arizona, United States
Joined: December 12, 2008
KitMaker: 1,423 posts
AeroScale: 1,319 posts
Posted: Monday, April 02, 2012 - 02:16 PM UTC
Okay, one area of this kit that can cause the modeler a lot of grief, at least it did me, is part A45. On page three it shows part A45 in place, but it is unclear exactly how it is to be fixed to part A38 which appears on page five.


Then on page 4 it shows the assembly of A45 in place with the fuselage halves in place.


It is at this stage of assembling on page three that the modeler should refer quickly over to page five to see how how part A38 is fixed, then when the starboard fuselage half is fixed to the wing, part A45 can then be adjusted for proper fitment onto part A38. It is very confusing and can lead to a poor fit of that part of the cowling assembly.

Best
Mark
Mgunns
_VISITCOMMUNITY
Arizona, United States
Joined: December 12, 2008
KitMaker: 1,423 posts
AeroScale: 1,319 posts
Posted: Friday, April 06, 2012 - 04:44 AM UTC
Greetings all:

This project is now stalled. I inadvertantly tossed an interplane strut, WNW won't be taking orders until the 11th of April 12, so.....on to something else.

More as it happens.

L8R
Mark
Mgunns
_VISITCOMMUNITY
Arizona, United States
Joined: December 12, 2008
KitMaker: 1,423 posts
AeroScale: 1,319 posts
Posted: Tuesday, July 31, 2012 - 03:01 AM UTC
Greetings all:

As previously mentioned, I am busy during the summer with outdoor activities, however, this is going to be next on my hit parade to finish. I really like the SE.5 and want to keep the thread alive. Hopefully some of the tips I have mentioned regarding the instructions and assembly sequence will help some of the modelers doing this kit. Stay tuned for more developments.

Best

Mark
lcarroll
_VISITCOMMUNITY
Alberta, Canada
Joined: July 26, 2010
KitMaker: 1,032 posts
AeroScale: 1,025 posts
Posted: Tuesday, July 31, 2012 - 03:59 AM UTC
Mark,
I'm glad this project of yours is still alive and kicking.It's a great kit and I ordered another several days back; getting nervous about the potential for a "sold out" notice and really want to try it again in standard configuration vs. the modified version I did for KOTs.
Summer does get in the way of modelling progress for sure; I'm on a heavy schedule of "home improvement" (read painting house and window trim) along with trying to enjoy the good weather before another Winter sets in. I'll be watching for the imminent Phoenix to rise again!
Cheers,
Lance
Mgunns
_VISITCOMMUNITY
Arizona, United States
Joined: December 12, 2008
KitMaker: 1,423 posts
AeroScale: 1,319 posts
Posted: Wednesday, August 01, 2012 - 01:31 AM UTC
Hello Lance:

Thanks for checking it out. Yes, it is a good kit, has a few foibles, but overall a good kit. I am not sure where I am going to with it when I get back to it. I have the Pheon night fighter sheet for it and am thinking i will do it in that scheme. Summer does get in the way of modeling. Due to the crappy spring I did manage to make progress on kits that would have languished; but summer has taken its toll on my bench work. But it is fast fleeting. This month I have a very robust band schedule, so not much will get done this month. I am keeping abreast of the goings on and I do find it motivating. Your Albie is making good progress, at least you are making progress.
Take care Lance

Best
Mark
Mgunns
_VISITCOMMUNITY
Arizona, United States
Joined: December 12, 2008
KitMaker: 1,423 posts
AeroScale: 1,319 posts
Posted: Monday, October 22, 2012 - 04:28 AM UTC
Just an update, I am doing the instrument panel, WNW had sent the parts I requested and I am making progress. I will post photo's of progress as it occurs. I am looking forward to applying lessons learned to this kit. I am still a bit unsure if I want to do the McCudden a/c with the Squadron parts or one of the kit supplied markings or the PHEON models night fighter. Stand by.

Best
Mark
lcarroll
_VISITCOMMUNITY
Alberta, Canada
Joined: July 26, 2010
KitMaker: 1,032 posts
AeroScale: 1,025 posts
Posted: Monday, October 22, 2012 - 07:36 AM UTC
Mark,
Nice to see "Phoenix Rising" again! I'll be watching closely to witness you overcoming the past curse..........
Cheers,
Lance
warreni
_VISITCOMMUNITY
South Australia, Australia
Joined: August 14, 2007
KitMaker: 5,926 posts
AeroScale: 2,201 posts
Posted: Monday, October 22, 2012 - 02:07 PM UTC
Good luck Mr Krumrey...
CaptainA
_VISITCOMMUNITY
Indiana, United States
Joined: May 14, 2007
KitMaker: 3,117 posts
AeroScale: 2,270 posts
Posted: Tuesday, October 23, 2012 - 12:44 AM UTC
Good to see this one back up and running. When I finish my two current projects, I will literally need to dust mine off and get it going again. It is a good kit.
Mgunns
_VISITCOMMUNITY
Arizona, United States
Joined: December 12, 2008
KitMaker: 1,423 posts
AeroScale: 1,319 posts
Posted: Sunday, October 28, 2012 - 02:01 PM UTC

Quoted Text

Good to see this one back up and running. When I finish my two current projects, I will literally need to dust mine off and get it going again. It is a good kit.


Thanks Carl: I am glad to be working on it again. A few pictures of progress, not much but progress the same:

I finished the motor, part E18, I think it is an oil cap launched somewhere so it is gone.
I didn't spend a lot of time on the engine due to it will be covered. So here it is:

And Here


I did manage to get the instrument panel in and the cockpit buttoned up.


I am not sure what markings I am going to do it, but will figure it out.

Now on to weapons, painting and more assembly.

Thanks for stopping by.

Best

Mark
JackFlash
_VISITCOMMUNITY
Colorado, United States
Joined: January 25, 2004
KitMaker: 11,669 posts
AeroScale: 11,011 posts
Posted: Sunday, October 28, 2012 - 04:07 PM UTC
Go Mark go!
Dwaynewilly
_VISITCOMMUNITY
New York, United States
Joined: December 15, 2006
KitMaker: 365 posts
AeroScale: 344 posts
Posted: Monday, October 29, 2012 - 11:43 AM UTC
Mark,

Really shaping up nicely indeed!

Dwayne
thegirl
_VISITCOMMUNITY
Alberta, Canada
Joined: January 19, 2008
KitMaker: 6,743 posts
AeroScale: 6,151 posts
Posted: Monday, October 29, 2012 - 02:31 PM UTC
Nice to see you pick up on this one again Mark , will try and follow when ever I can .....


Terri
Mgunns
_VISITCOMMUNITY
Arizona, United States
Joined: December 12, 2008
KitMaker: 1,423 posts
AeroScale: 1,319 posts
Posted: Tuesday, October 30, 2012 - 10:29 AM UTC


Hi Terri:

Thanks for stopping by. I look forward to moving along on this and your comments.

Best

Mark

B24Liberator
_VISITCOMMUNITY
Minnesota, United States
Joined: November 07, 2008
KitMaker: 134 posts
AeroScale: 113 posts
Posted: Tuesday, October 30, 2012 - 01:01 PM UTC
Mark -

SE.5a project looks like it progressing well! Looking forward to seeing the finished product.

~ Johan
Mgunns
_VISITCOMMUNITY
Arizona, United States
Joined: December 12, 2008
KitMaker: 1,423 posts
AeroScale: 1,319 posts
Posted: Tuesday, October 30, 2012 - 01:25 PM UTC

Quoted Text

Mark -

SE.5a project looks like it progressing well! Looking forward to seeing the finished product.

~ Johan


And you shall Mr. Allert, and you shall! Baal->
OEFFAG_153
_VISITCOMMUNITY
Västra Götaland, Sweden
Joined: February 19, 2010
KitMaker: 1,473 posts
AeroScale: 1,450 posts
Posted: Tuesday, October 30, 2012 - 08:52 PM UTC
Nice work on the engine and instruments Mark! Great to see you "at it" again

Mikael
CaptainA
_VISITCOMMUNITY
Indiana, United States
Joined: May 14, 2007
KitMaker: 3,117 posts
AeroScale: 2,270 posts
Posted: Wednesday, October 31, 2012 - 03:23 AM UTC
All the recent pics turned into little red X's. Oh the horror.
 _GOTOTOP