_GOTOBOTTOM
World War II: Germany
Aircraft of Germany in WWII.
Hosted by Rowan Baylis
Bf109E-7/Trop, ICM, 1:72
Mecenas
Joined: December 23, 2007
KitMaker: 1,596 posts
AeroScale: 1,275 posts
Posted: Saturday, July 28, 2012 - 10:18 PM UTC
Hi,
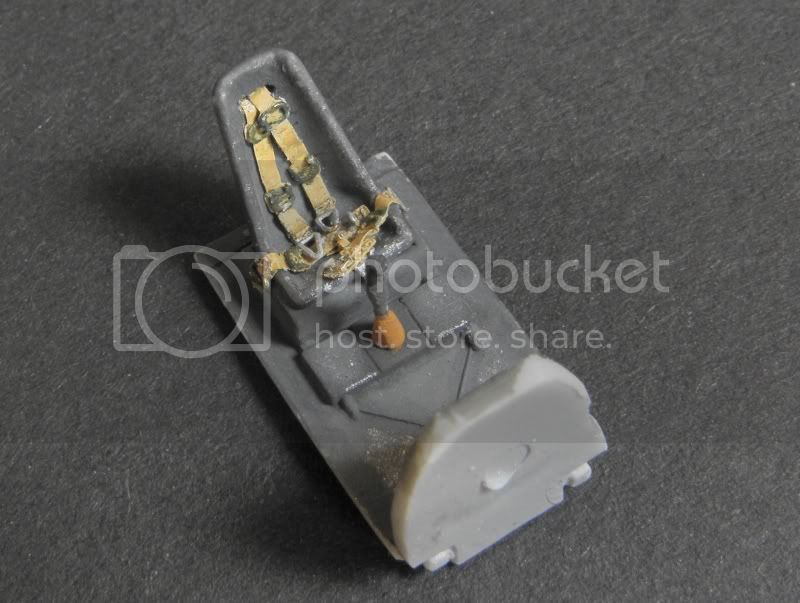
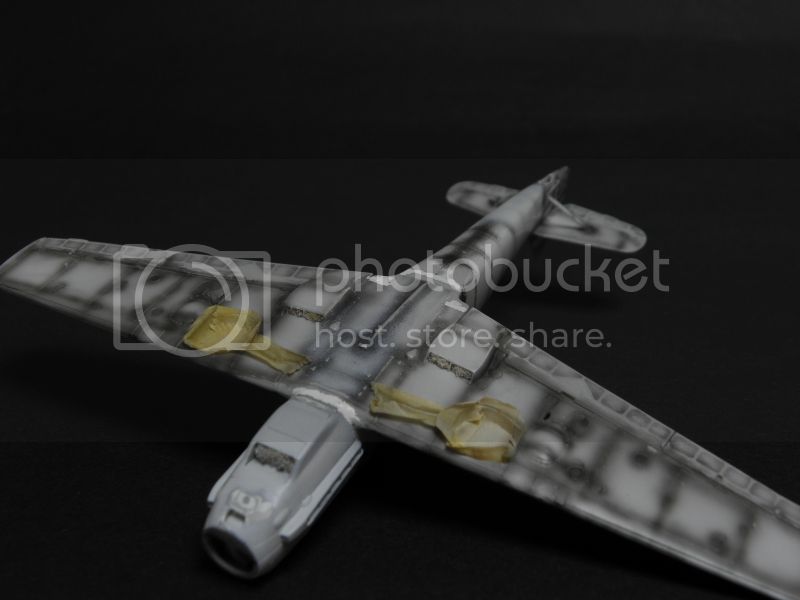
well, I have so many already started builds that one more or less won't make any change. Ok, but seriously I just want to build something almost out of the box, just for fun and without special attention to the details. All I want to improve are gun barrels (product of Master) and maybe making some seatbelts. If I quickly won't find any PE I'll try to scratchbuild them.

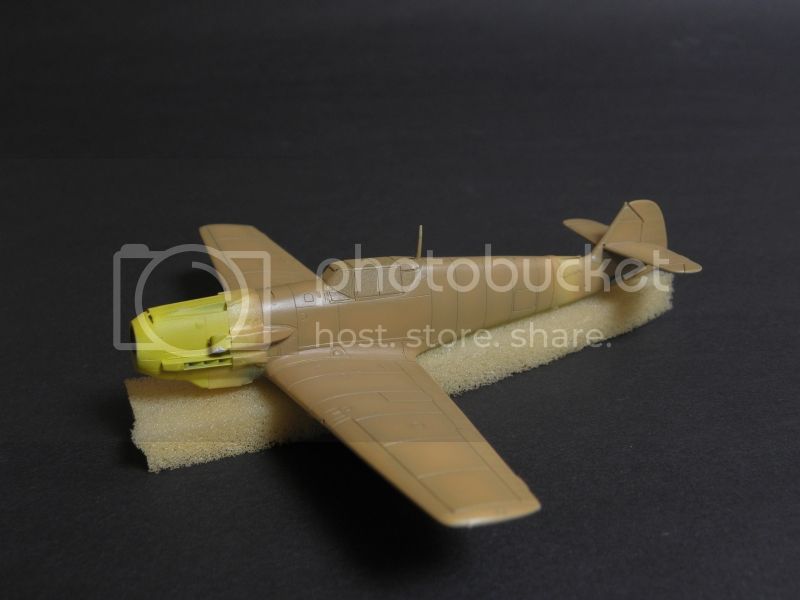
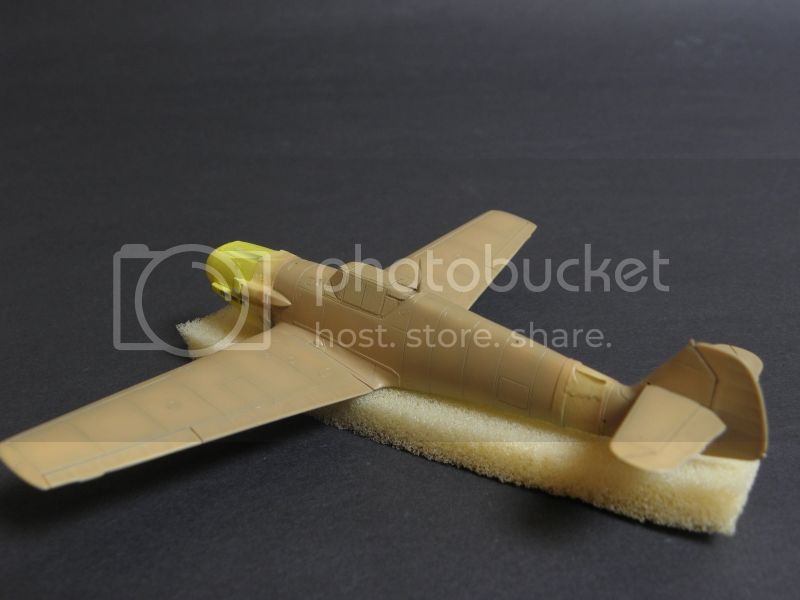
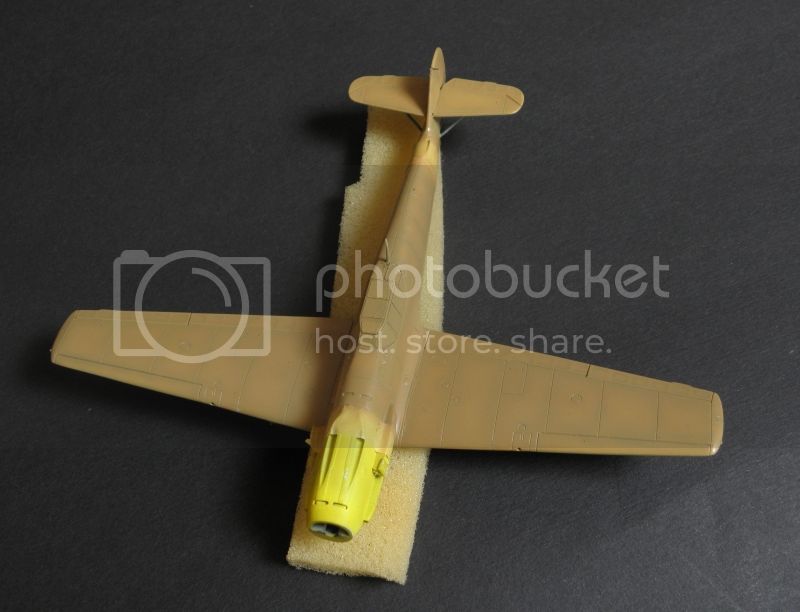
Here's the progress so far.

This the kit I use in this build.


I have reviewed it some time ago on Aeroscale => LINK to my review.

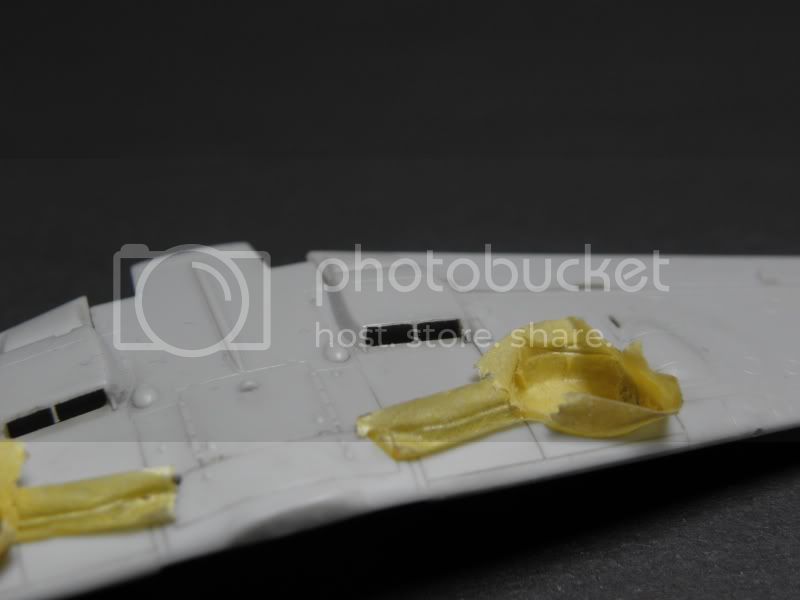
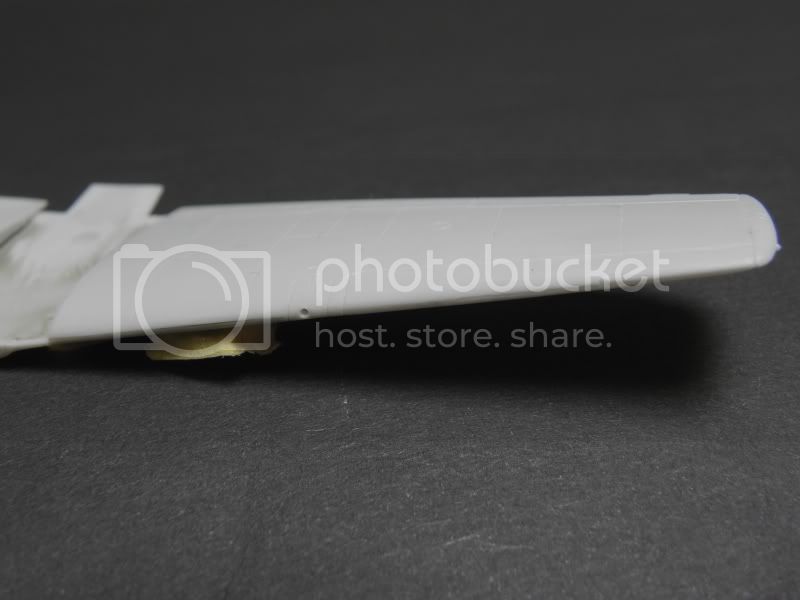
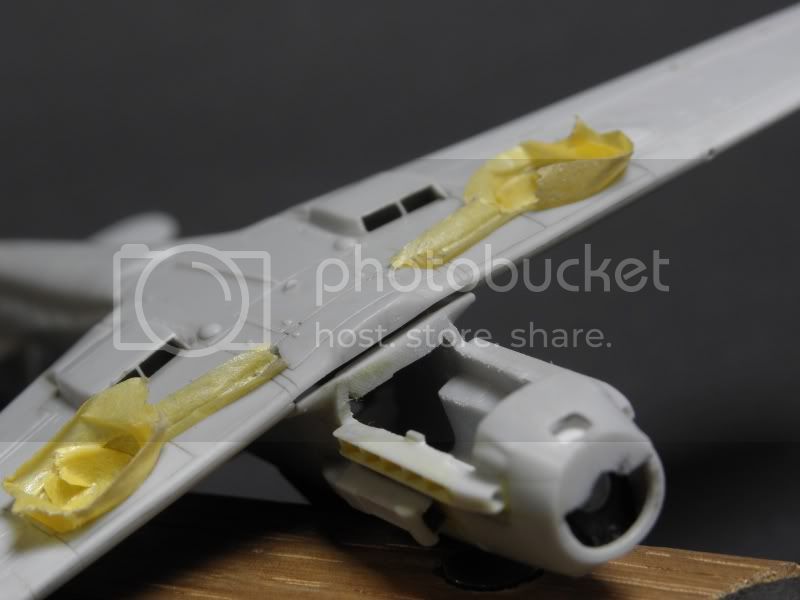
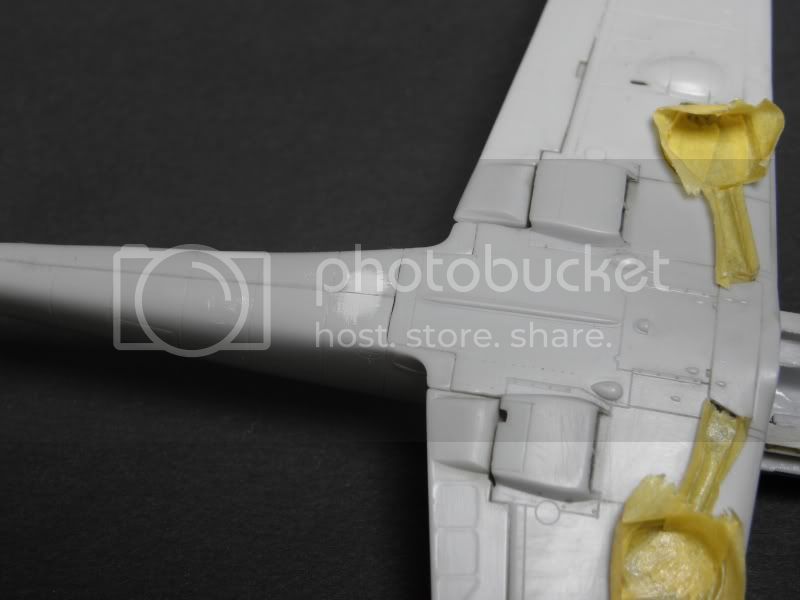
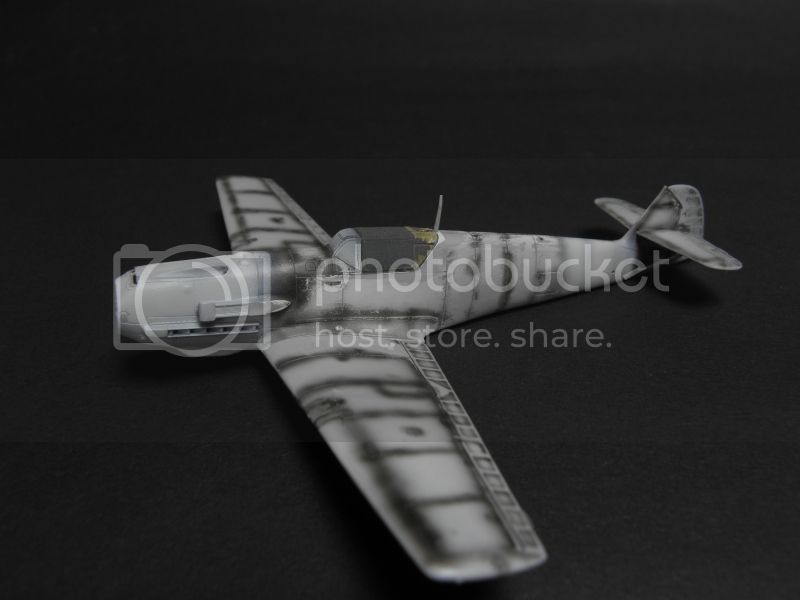
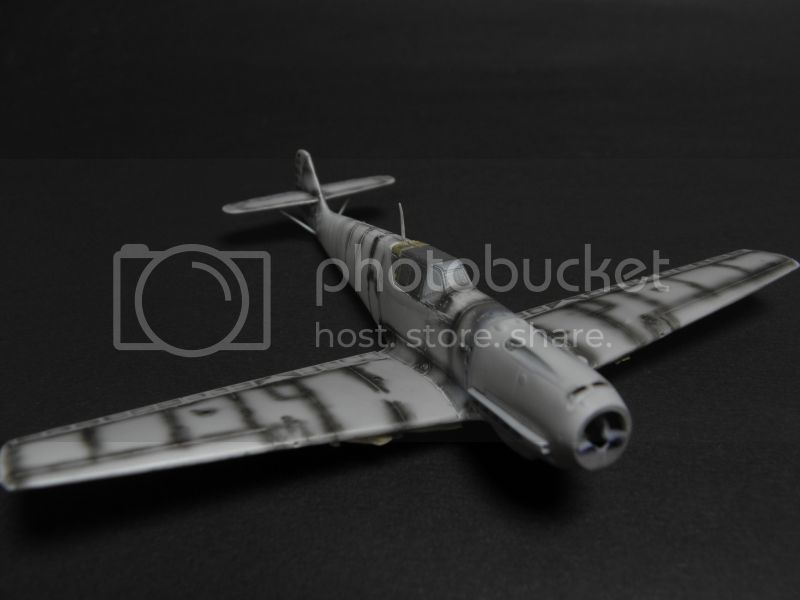
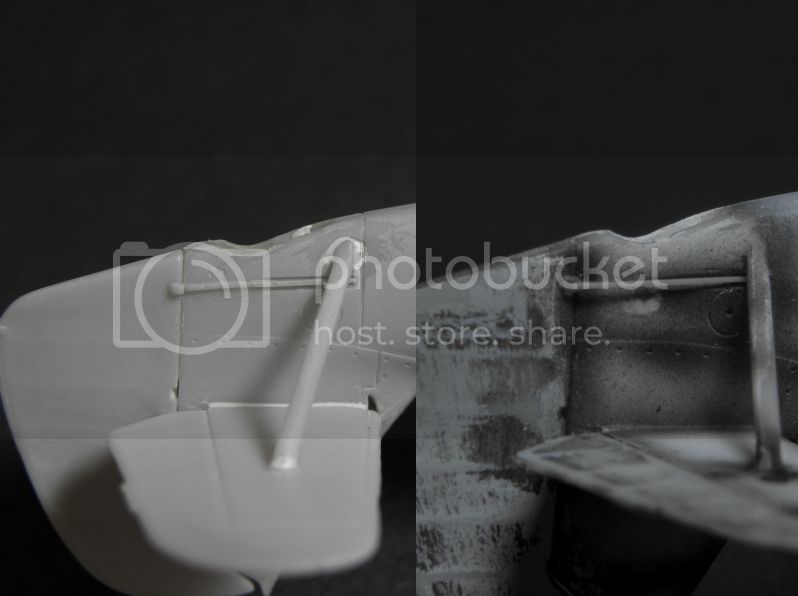
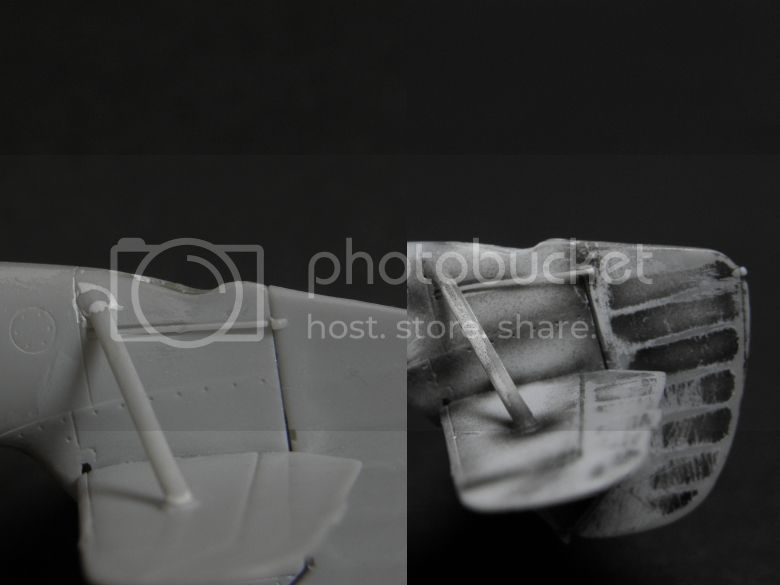
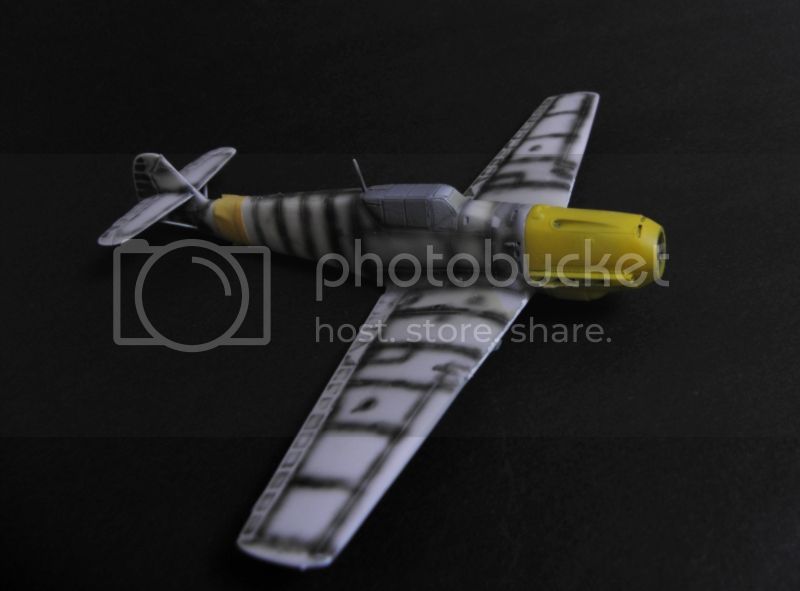
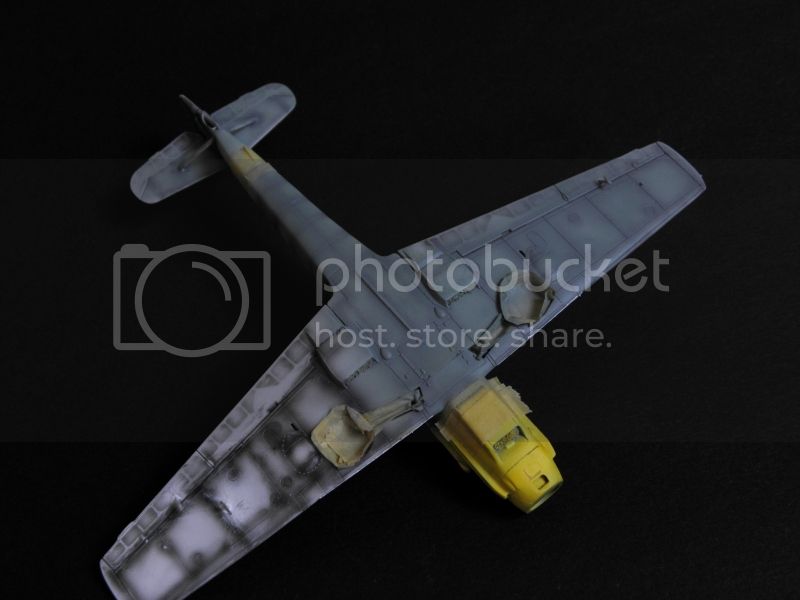
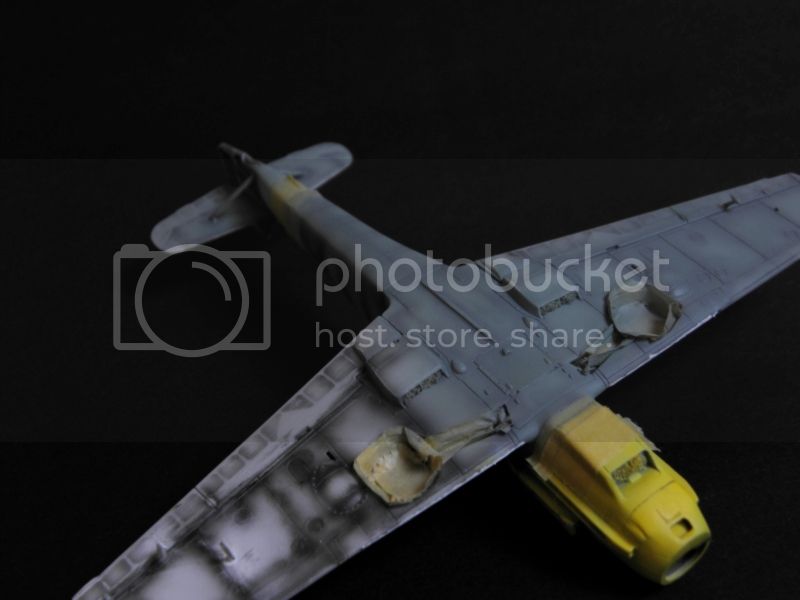
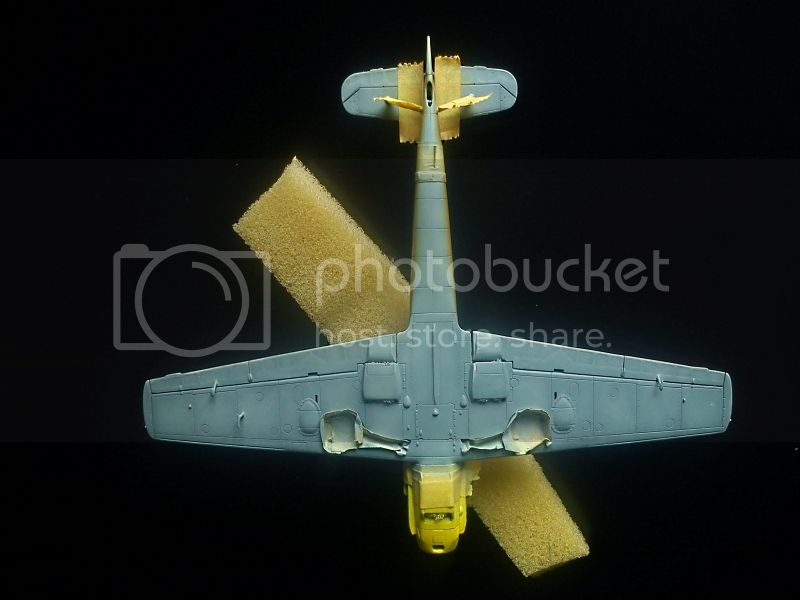
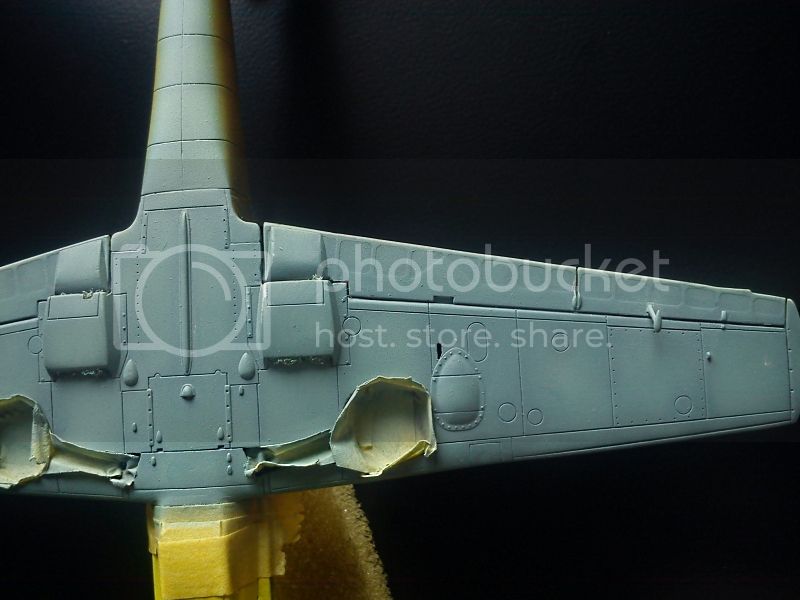
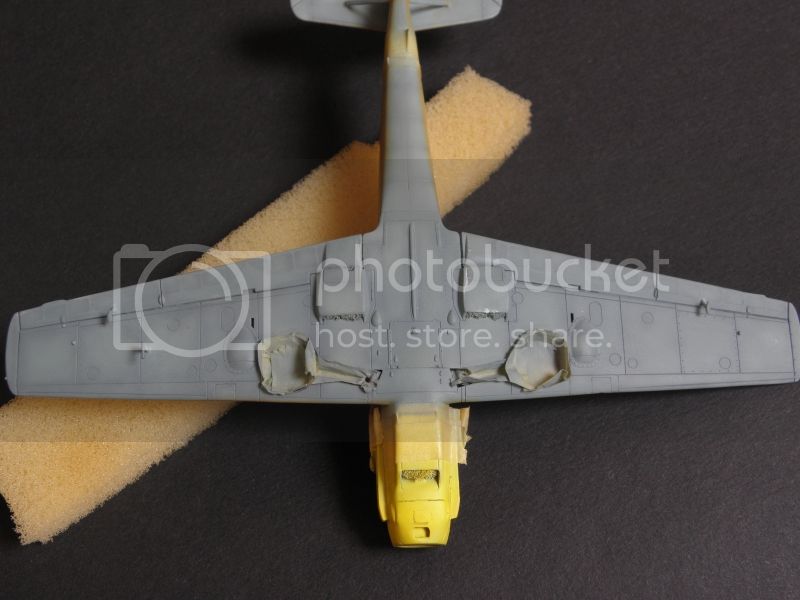
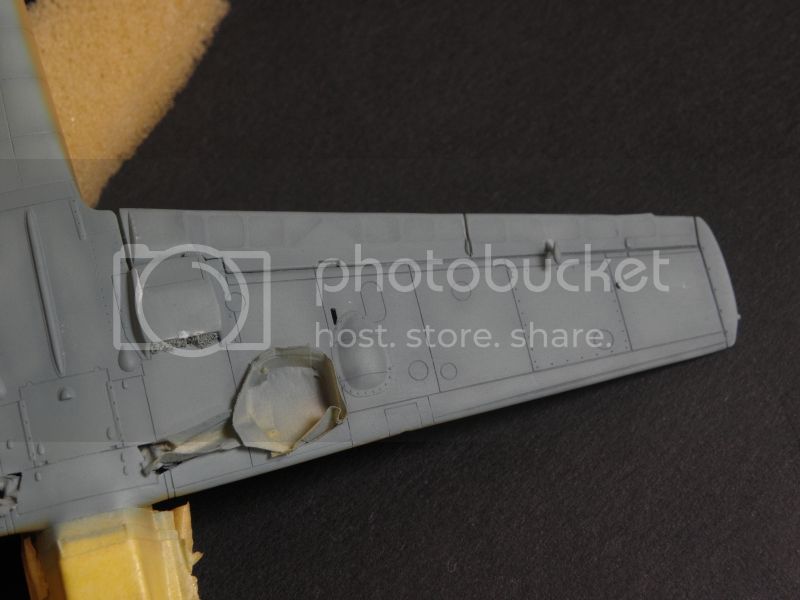
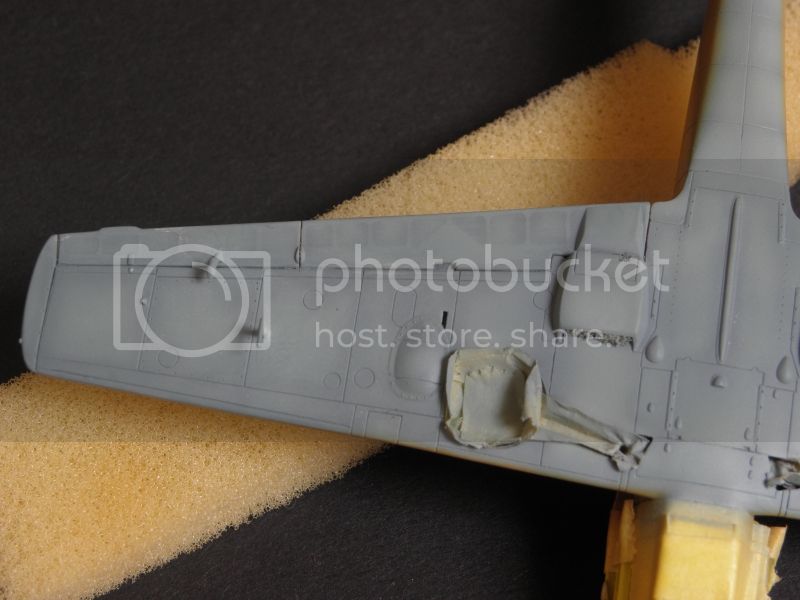
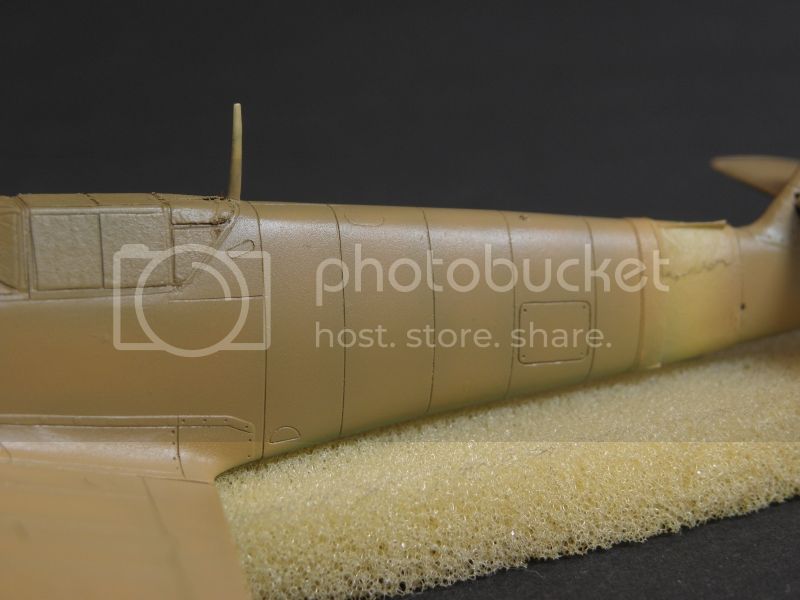
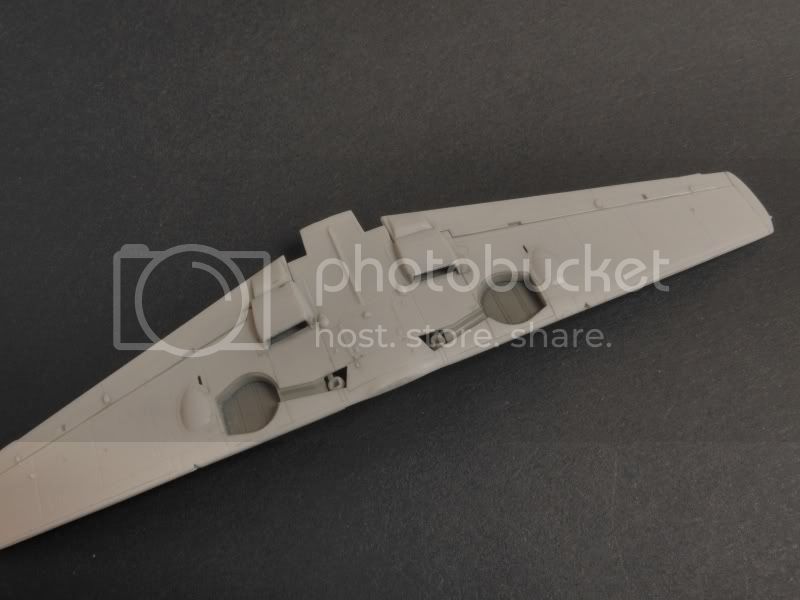
I have not done much yet. The wing is assembled, interior painted with RLM02 and the leading and trailing edges filled with CA glue, sanded, polished and rescribed.


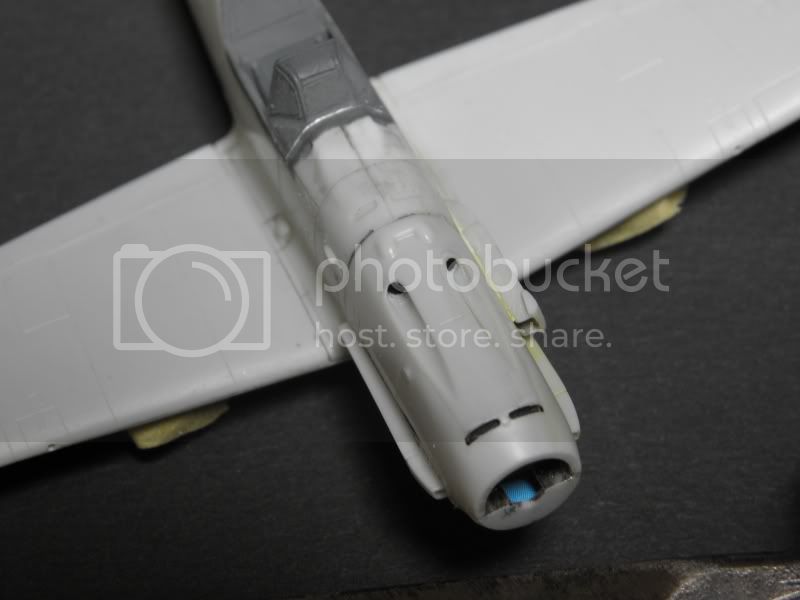
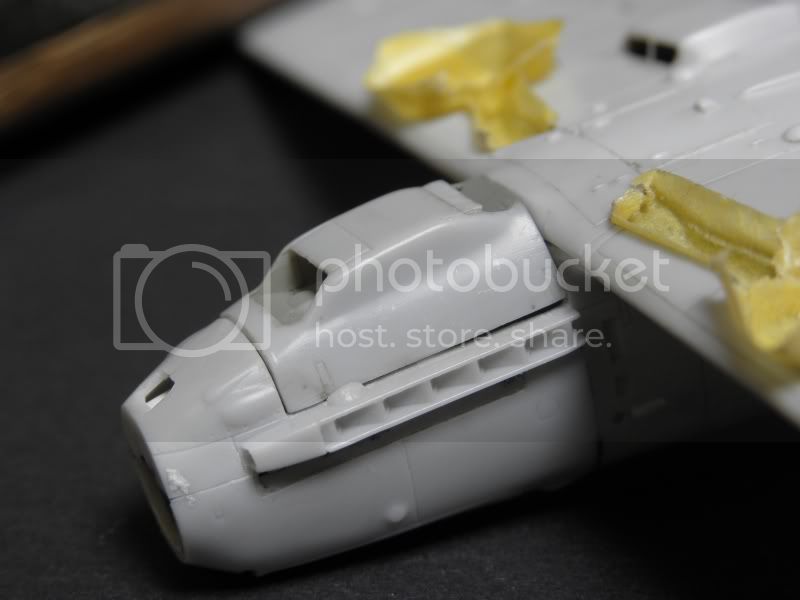
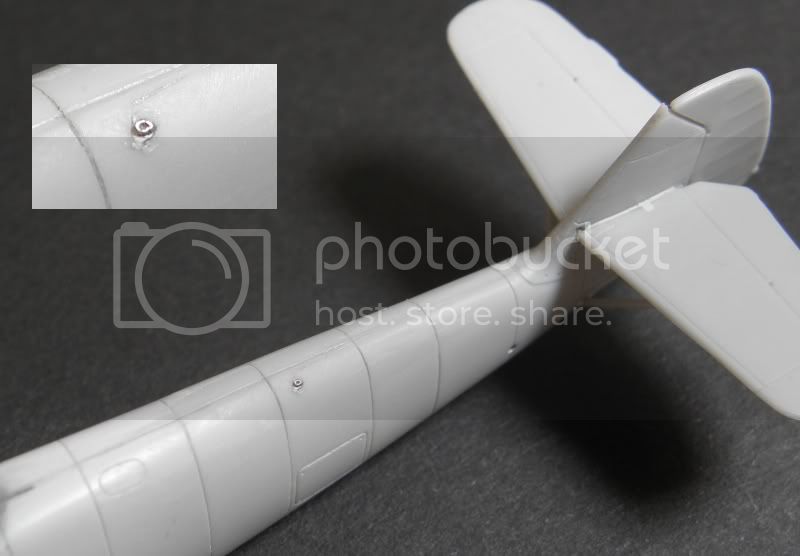
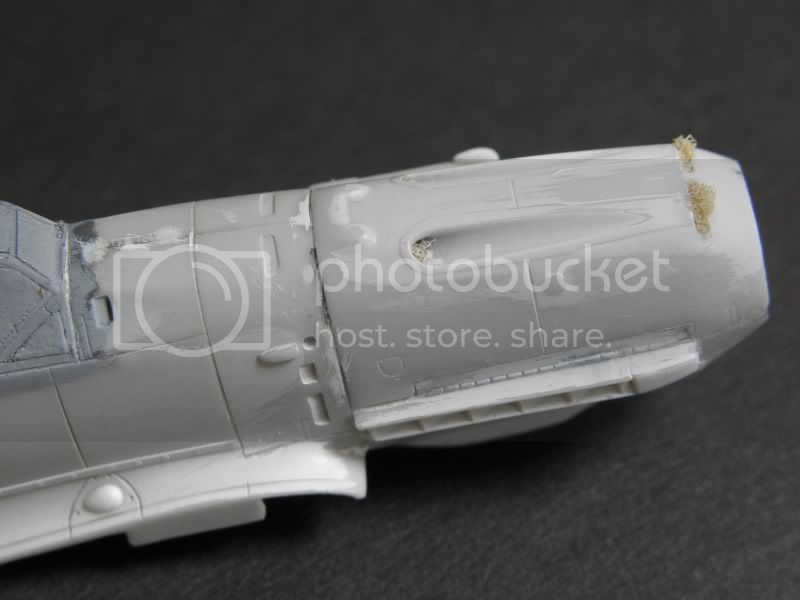
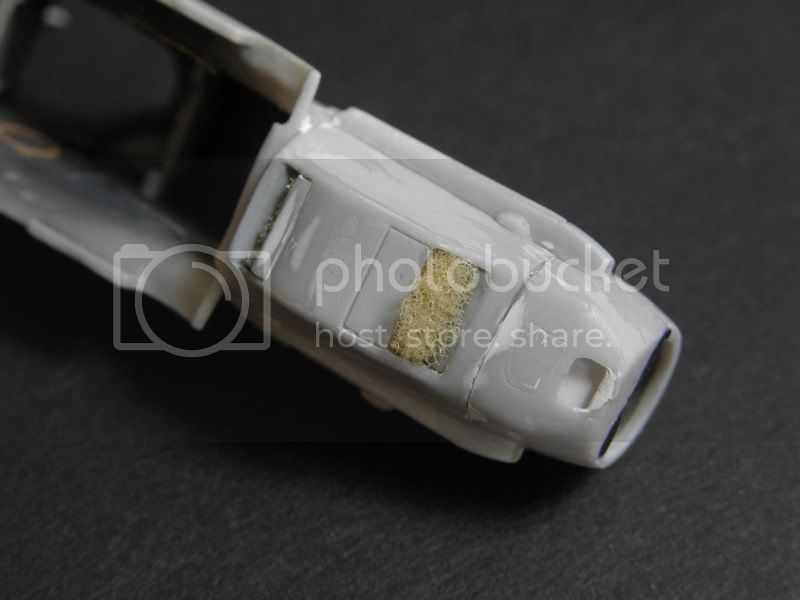
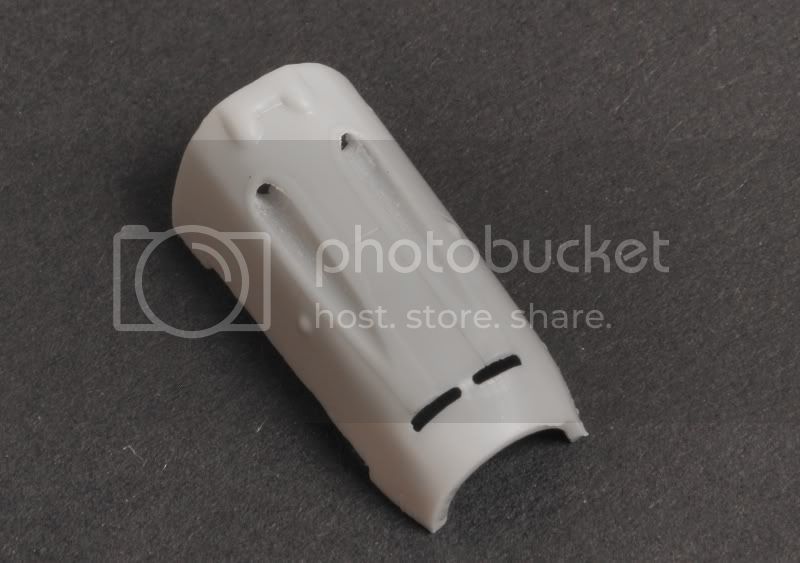
In the engine cowling I only removed the "gun barrels" and drilled the openings for new ones. Still need some final touches.


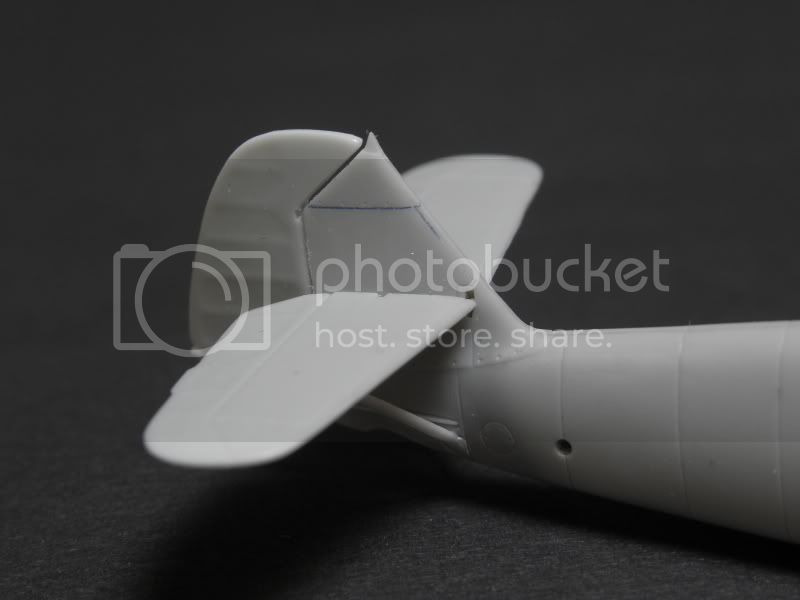
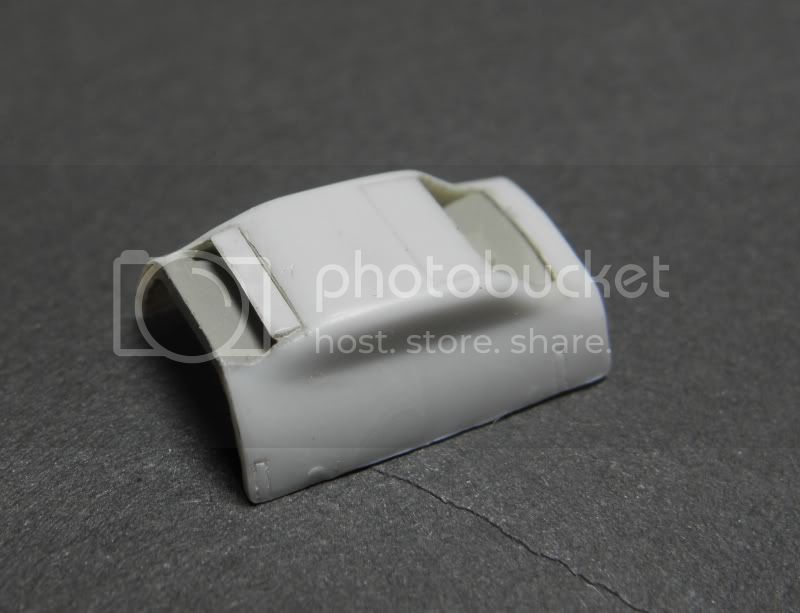
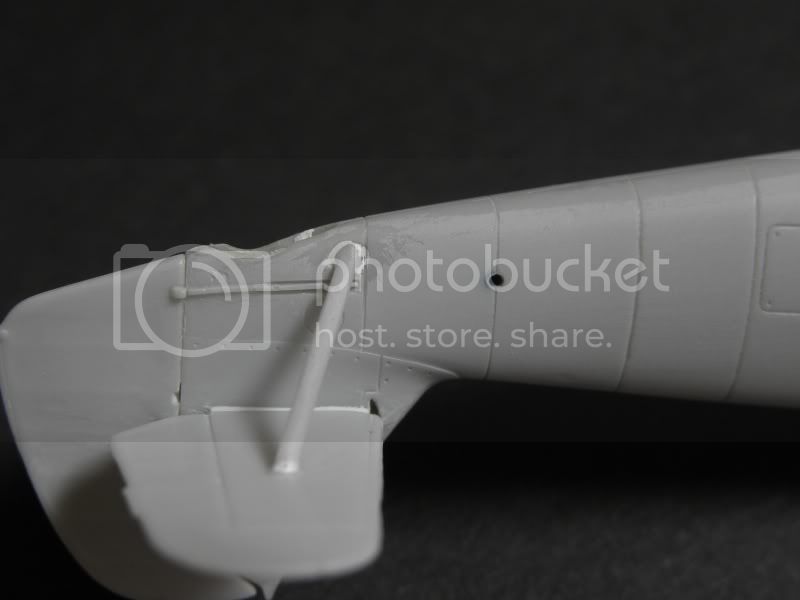
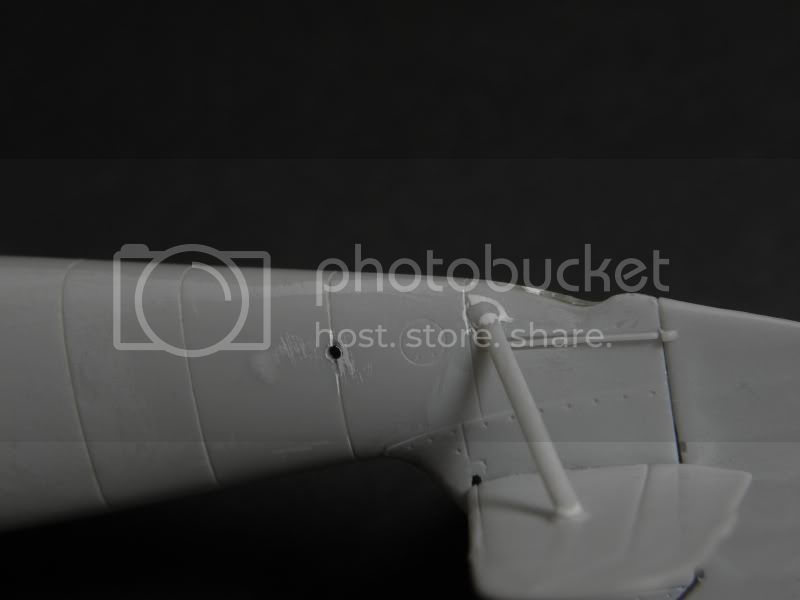
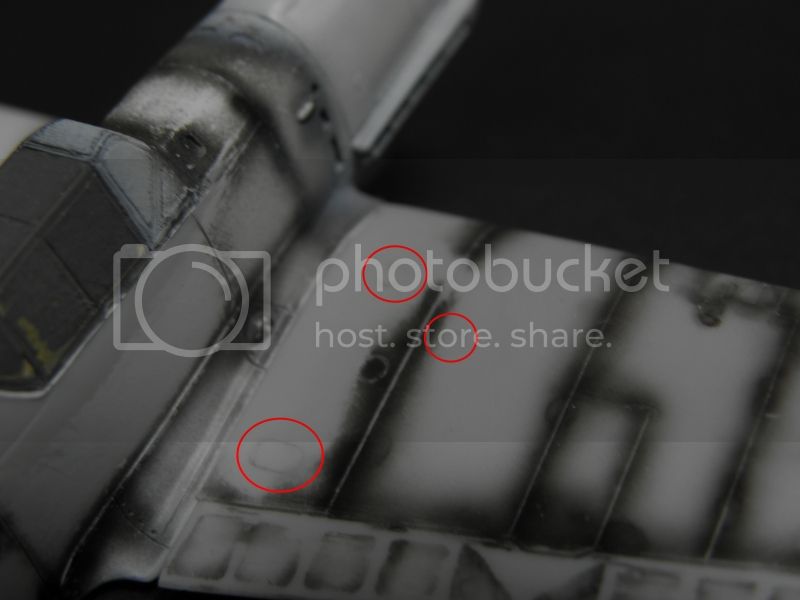
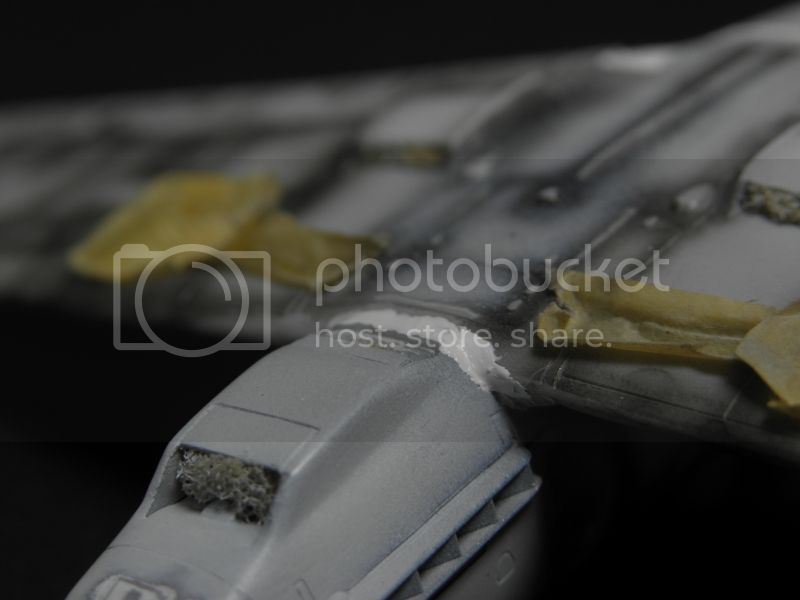
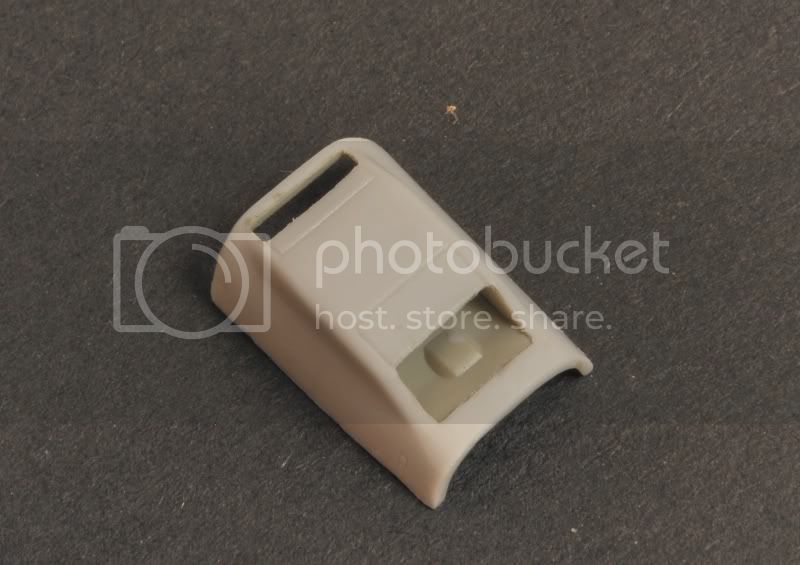
This is the lower air intake. I'm affraid I will have to remove this bulge as this is most probably some kind of support for the part I skipped (horizontal bar) which was not proper for E-7 variant.


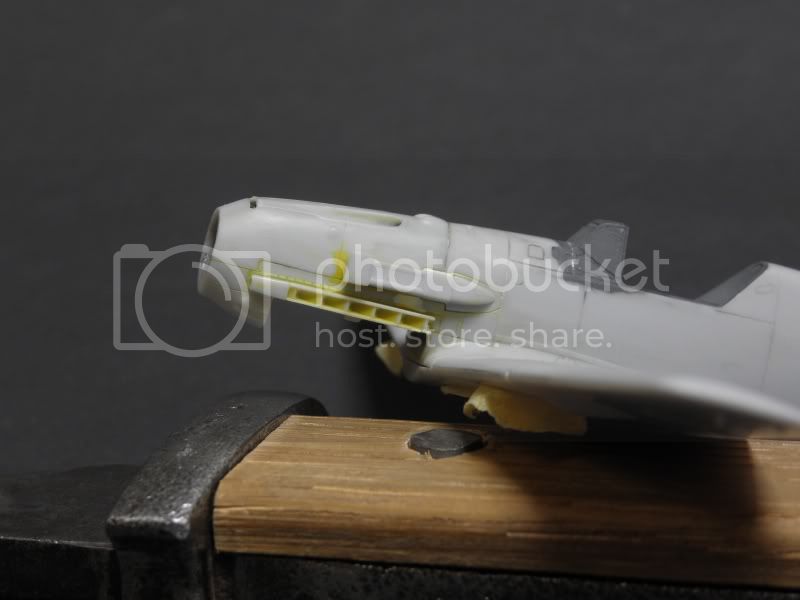
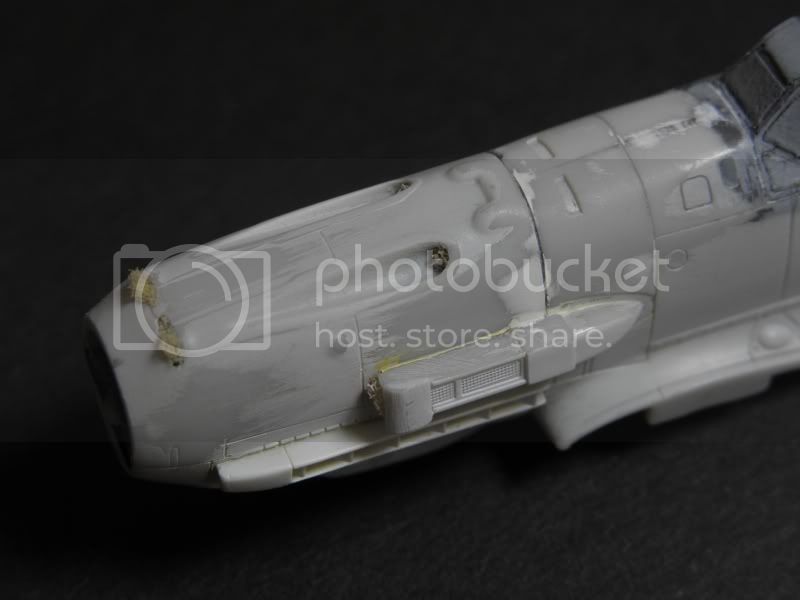
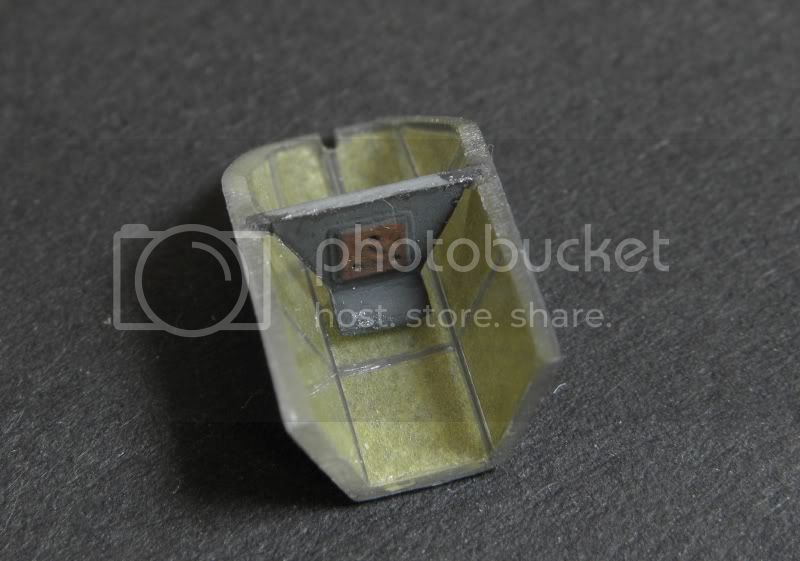
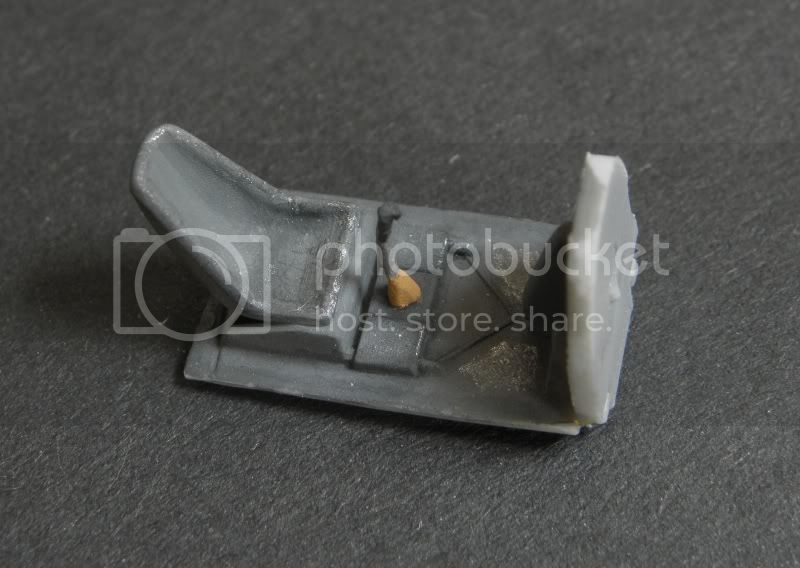
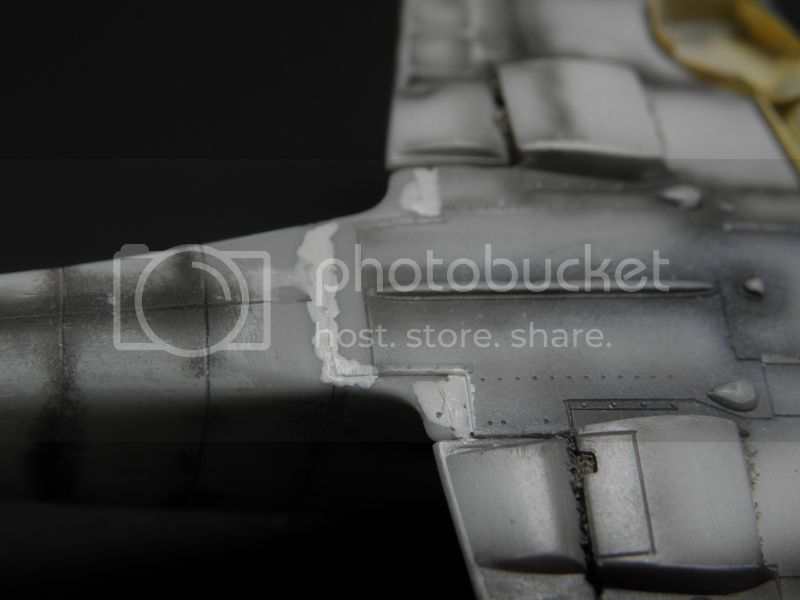
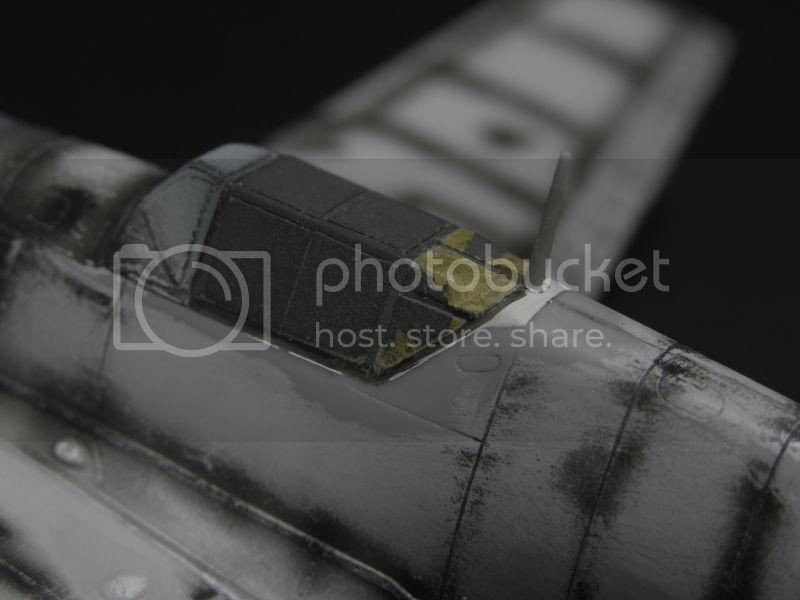
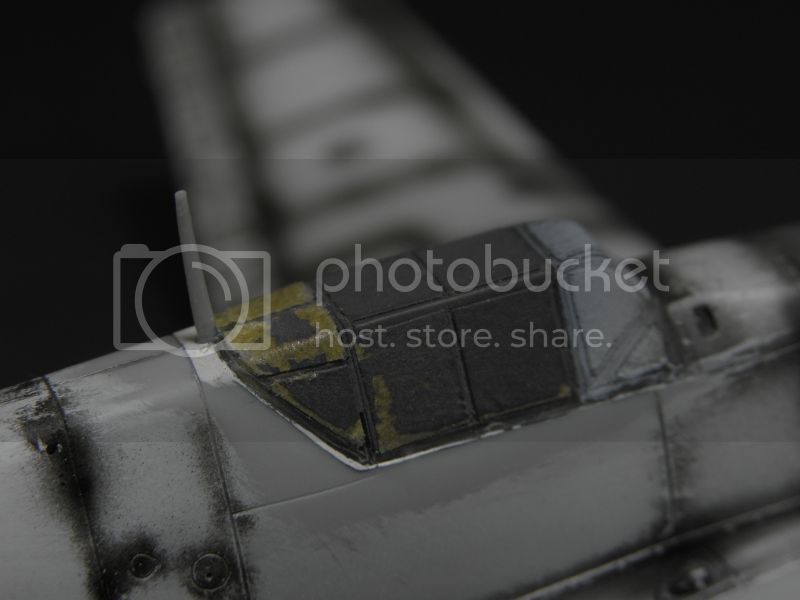
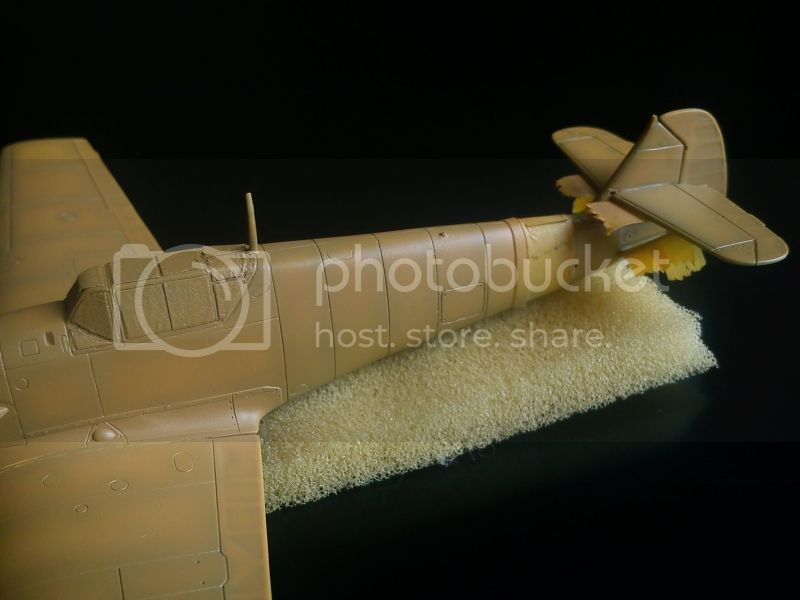
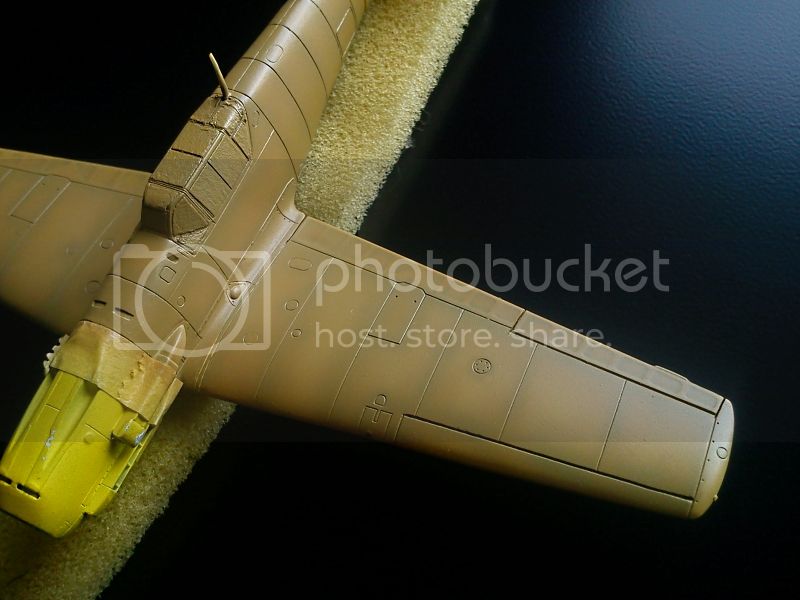
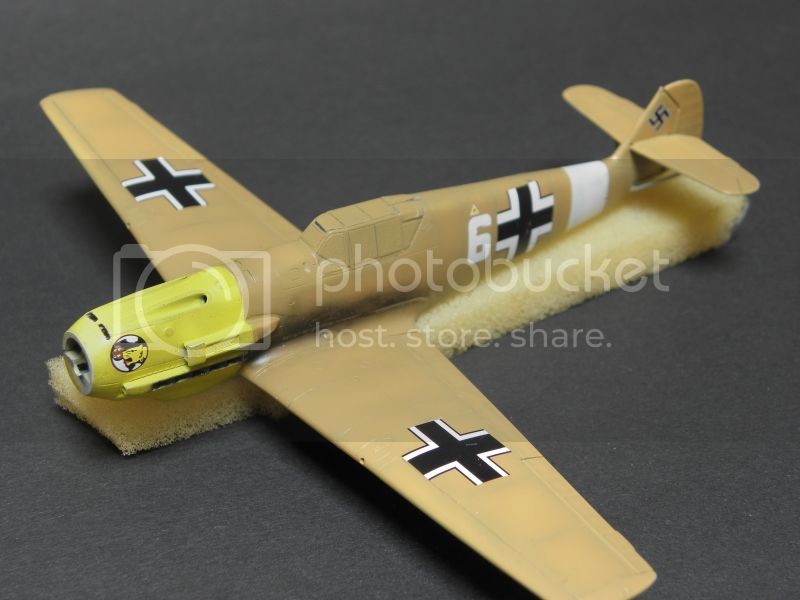
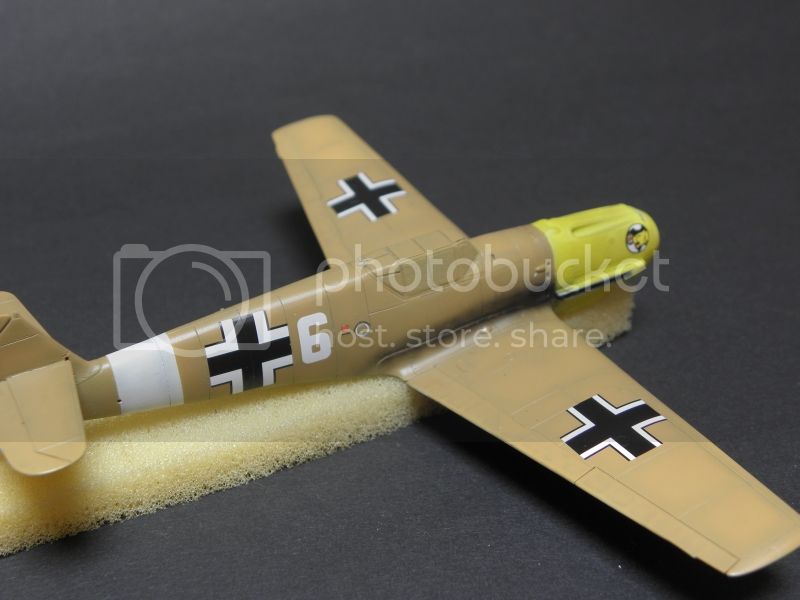
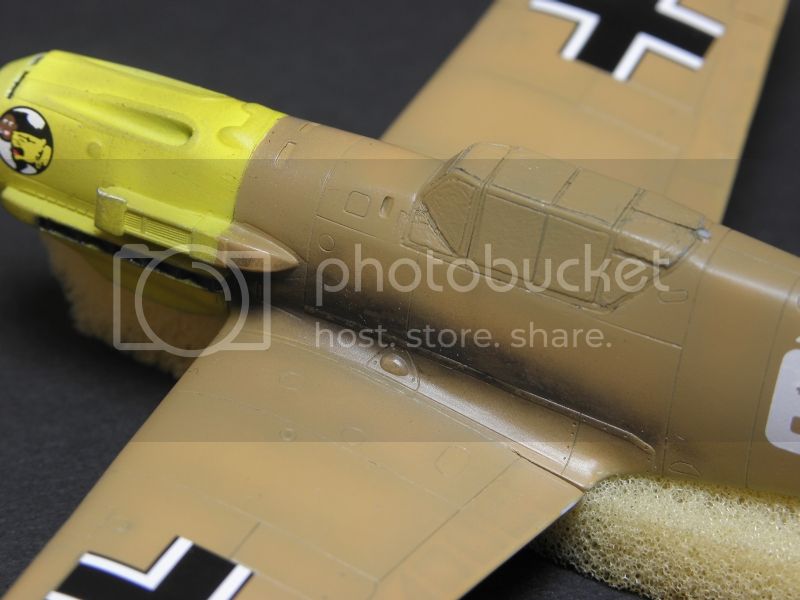
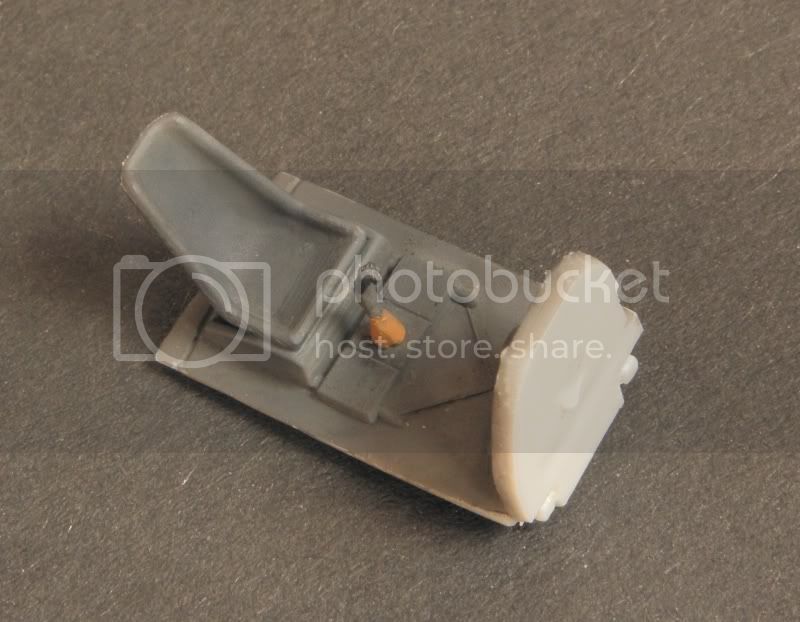
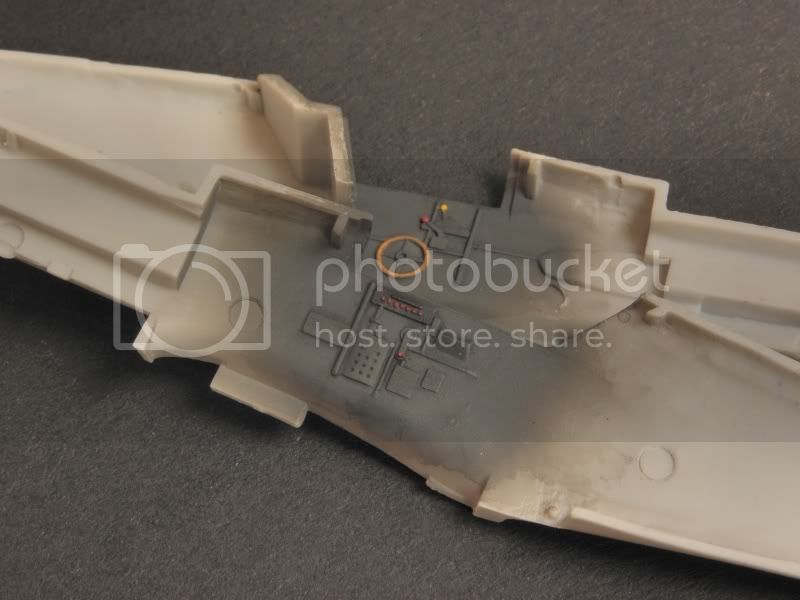
Most of the time I spent on painting interior. It was painted with RLM66. I found this is proper colour for late Emils, produced after summer-fall of 1940. I want to make an African machine of JG27 dated for October 1941 so I assume this colour is more appropriate. As you see nothing special was done here: painting the base colours, adding some very light fading effect to the centers of the "sections" and adding oil wash based on turpentine.


This week I want to glue the fuselage halves. It will be a fun as the fit is not perfect. The edged of halves are a bit curved so I'm affraid I will have to fill the spine and lower side with a lot of CA and rescribe all panel lines.
DougN1
_VISITCOMMUNITY
Georgia, United States
Joined: August 08, 2011
KitMaker: 410 posts
AeroScale: 409 posts
Posted: Tuesday, July 31, 2012 - 08:14 AM UTC
Looks like you're off to a great start! Always enjoy seeing 109's being built

Doug
Mecenas
Joined: December 23, 2007
KitMaker: 1,596 posts
AeroScale: 1,275 posts
Posted: Tuesday, July 31, 2012 - 07:03 PM UTC
Hi Doug, thanks for comment and encouragement.

Today I have just verbal report of progress. There are few small pipes/wires added in the cockpit and added a gentle chipping but this is just barely visible after closing the fuselage so I didn't take any picture. Fuselage is already closed and I spend most of time for applying CA glue on the joint line and on sanding it. I'm affraid I'll spend a lot of line here and also on rescribing the panel lines. That's why I avoid using a typical puty here - I prefer to rescribe lines on hardened glue than in soft putty. Pilot's seat was a bit sanded as there are visible splinters on the picture above.

Wings - just two steps here. In the air intake I have added vertical bars from the stretched sprue. To save time and avoid adjusting proper lenght I have cut a shallow notch in the front edge of intake which "catched" the bar. When glue dired I just cut off the remaining part and sanded the intake housing. In total about 5 minutes of work for each intake, excluding time for glue drying of course. Another step was filling the openings for MG FF barrels. These were far too big, misshaped and most probably slighty in wrong place. Once again from the stretched sprue I made a fat, more-less rounded peg and glued it using a Revell glue for plastic. When the leading edge was again sanded and polished I drilled new openings using 0,3 and then 0,5mm drill bits, this time perfectly rounded and fitted to the Master turned barrels.

I hope to take some pictures in a couple of days when I will have anything to show. All my progress could be shown on just two or three pictures.
Mecenas
Joined: December 23, 2007
KitMaker: 1,596 posts
AeroScale: 1,275 posts
Posted: Sunday, August 26, 2012 - 06:35 AM UTC
I don't have much time for modeling lately but here's what i managed to sculpt in my Emil.

Wings - sanded edges, new openings for MG FF's and added bars in the air intakes.


Tail wing and rudder already in place. I also drilled the openings for lifting the fuselage.


Engine nacelle also in place. It was too broad for fuselage but using three clamps did a good job.


I had to use some putty for filling large gap and filling joint line around air intake.


I also gently broaden fuselage with by inserting this bar. This way I avoing putting the gap at the joint of fuselage and wing.


Some correction of fuselage surface and rescribed panel lines.


I almost finished propeller. I was unpatient and damaged white paint on nosetip.


And here's corrected and upgraded lower cowling of engine. It will still need some love and tenderness to look acceptable.


Mecenas
Joined: December 23, 2007
KitMaker: 1,596 posts
AeroScale: 1,275 posts
Posted: Saturday, September 08, 2012 - 05:06 AM UTC
Here's another update of my progress.

Wings are almost ready for final painting. Nothing special here.


Fuselage spine got a new panel line and inlet for antenna wire.


I have sanded the openings for lifting fuselage and smoothed the sockets of tail wings supports.


Fitting of nose parts is one of the worst step of this kit. First I had difficulties while gluing parts together, later I had to use some putty and sand a lot. I bet when I cover it once again with Base White I'll find a lot of scratches left for further sanding.


And here are some trinkets, time consuming but necessery to be done.

Armour plate - painted and glued in place. Canopy frames are already painted on the exterior side.


Wheels - first painted whole with black. I masked the rims and using very diluted RLM66 I gently painted tires.


Cockpit interior - pilot seat had to be sanded to remove some scratches and splinters. I added some paint chipping and gentle black wash.


Landing gear - everything glued together. Covers were significantly thinned - using the brutal filing techniqe. Break wires were made of stretched styrene.


And these are the tiniestparts which still need some work.


Roxter
_VISITCOMMUNITY
Rigas, Latvia
Joined: July 04, 2007
KitMaker: 268 posts
AeroScale: 245 posts
Posted: Sunday, September 09, 2012 - 09:39 PM UTC
Really like your efforts in enhacing this model! Looking forward to see more pictures!
Mecenas
Joined: December 23, 2007
KitMaker: 1,596 posts
AeroScale: 1,275 posts
Posted: Monday, September 10, 2012 - 06:53 PM UTC
Hi Arseny,
thanks for your comment however I was hoping that somebody will notice some positive results of my work, not just efforts.
Mecenas
Joined: December 23, 2007
KitMaker: 1,596 posts
AeroScale: 1,275 posts
Posted: Tuesday, September 18, 2012 - 08:31 AM UTC
Ok, the cart keeps rollin' so here are two new shots from my workbench.

First one shows what I've done with the rudder controls - original ICM imitation was removed and then I scribed new gutter (is "gutter" a correct word in this meaning??). A new pusher will be made of something, most probably cooper wire or stretched sprue. This step is adviced to be carred before attaching tail wings and their supporting struts - much more space for operating with tools and sanding paper.


And this shot shows slighlty reworked pilot seat (made an opening for the seatbelts) and added seatbelts (these are from AML PE fret). The paint was scratched a bit while attaching but at this moment I have repainted them.

Mecenas
Joined: December 23, 2007
KitMaker: 1,596 posts
AeroScale: 1,275 posts
Posted: Saturday, September 22, 2012 - 07:41 AM UTC
This time I have a major update. The assembly process is almost finished. Cockpit interior is glued into the fuselage, canopy cover sits is place, the wing is attached to fuselage.


I found that some inspection panels are missing so I have scribed them on both wings.


Here's the comparison of rudder pushers "before" and "after" my intervention.


General fit of wing and fuselage was rather good although I still need do some filling and sanding.


A lot of time was wasted around canopy. Its fit with windshield was nearly perfect but the rear part was close to disaster. There were really large gaps and a huge step between canopy frame and fuselage spine. I had to build-up a fuselage. First I filled the gaps with CA glue and sanded. Then using Gunze Base White I gently applied its first coat and sanded. In next steps I've been building-up fuselage. Last step was the rescribing of lost panel lines. For me it looks more-less good but I'm affraid that spraying paint and a primer will reveal some scratched or minor gaps.


DougN1
_VISITCOMMUNITY
Georgia, United States
Joined: August 08, 2011
KitMaker: 410 posts
AeroScale: 409 posts
Posted: Tuesday, September 25, 2012 - 06:10 AM UTC
Nice work on getting the kit corrected and together. I often find it's those small, noticeable details that really make the difference between and average and outstanding model.

Doug
Jessie_C
_VISITCOMMUNITY
British Columbia, Canada
Joined: September 03, 2009
KitMaker: 6,965 posts
AeroScale: 6,247 posts
Posted: Tuesday, September 25, 2012 - 08:18 AM UTC
I have to keep reminding myself that this is 1/72. Simply outstanding work, Michal
mrockhill
_VISITCOMMUNITY
Pennsylvania, United States
Joined: June 17, 2009
KitMaker: 566 posts
AeroScale: 507 posts
Posted: Tuesday, September 25, 2012 - 08:55 AM UTC
Great job on your attention to detail! Im also impressed with the surface detail of the kit, Ill be on the look out for one! By shear coincidence I started working on a hasegawa 1/72 109E-3 yesterday and have also been working on improving the details. Keep up the excellent work
Mecenas
Joined: December 23, 2007
KitMaker: 1,596 posts
AeroScale: 1,275 posts
Posted: Wednesday, September 26, 2012 - 07:15 PM UTC
Thanks all for good words and encouregement. What's funny I don't build this kit with any aim of superdetailing and improving. Completely relaxed I just fix some issues here and there and thankfully sometimes it works better than I would expect.

Mike, from the place where I'm am I strongly dissuade you this kit, better take Tamiya kit. ICM is considered as a copy of Tamiya release but it also represents far worse quality. The same sprues are used also for early Emils like E-1 or E-3. In these cases forget about using ICM cockpit glazing - it's simply unusable - misshaped, not transparent and with blured frames. For E-4 and E-7 it's more less ok. The box contains all parts for E-1/3 and E-4/7 versions on one sprue so the only difference is...the boxart and decal sheet (also unusable). For my kit I paid about 30% of the price of Tamiya model but this was the second-hand price for Europe. I have no idea what's the price for Russian kits on overseas markets. ICM may be a good alternative for not-too-rich modelers or those having some experience and patience for a lot of sanding. However if you want to have straightforward build and do just some of corrections similar to mine Tamiya will save you a lot of time and putty.

Few words about my progress now but without pictures. The kit is almost ready for final priming. I have added those small bits under the wings - aileron mass balances and Pitot tube (with some scratchbuilding). Also some scribing and sanding was done here and there. If everything will go as planned I hope to start painting camouflage in a couple of days.
mrockhill
_VISITCOMMUNITY
Pennsylvania, United States
Joined: June 17, 2009
KitMaker: 566 posts
AeroScale: 507 posts
Posted: Saturday, September 29, 2012 - 08:09 PM UTC

Quoted Text

Mike, from the place where I'm am I strongly dissuade you this kit, better take Tamiya kit. ICM is considered as a copy of Tamiya release but it also represents far worse quality. The same sprues are used also for early Emils like E-1 or E-3. In these cases forget about using ICM cockpit glazing - it's simply unusable - misshaped, not transparent and with blured frames. For E-4 and E-7 it's more less ok. The box contains all parts for E-1/3 and E-4/7 versions on one sprue so the only difference is...the boxart and decal sheet (also unusable). For my kit I paid about 30% of the price of Tamiya model but this was the second-hand price for Europe. I have no idea what's the price for Russian kits on overseas markets. ICM may be a good alternative for not-too-rich modelers or those having some experience and patience for a lot of sanding. However if you want to have straightforward build and do just some of corrections similar to mine Tamiya will save you a lot of time and putty.


Im not too worried about the kit. I bought it and hasegawa 1/72 109g-6 for $9 USD at a flea market. Im just practicing improving the kit with little money invested. Thanks for your impressions of the 1/72 109 kits, very helpful. Ive only ever seen these 2 and the old airfix and academy.
Mecenas
Joined: December 23, 2007
KitMaker: 1,596 posts
AeroScale: 1,275 posts
Posted: Saturday, September 29, 2012 - 08:38 PM UTC

Quoted Text

Im just practicing improving the kit with little money invested.


This way you couldn't choose better. All your investments should be CA glue and a putty. And just to putt it loud and clear: for this build I have used just Gunze Base White applied with a toothpick just for final filling before polishing with fine sanding paper. All major gaps were first filled with CA to reinforce the joint, sanded with coarse paper and then filled with Base White. This sequence gave a nice final smoothness although it was more difficult to rescribe some panel lines in a putty than it would be in a hardened CA glue.
Mecenas
Joined: December 23, 2007
KitMaker: 1,596 posts
AeroScale: 1,275 posts
Posted: Sunday, September 30, 2012 - 04:48 AM UTC
Just a quick update with the progress of my Emil. This painting was done during last week but just few minutes ago I found some time to take few photos. All I done this week was applying the Base White surface primer and finishing/repairing of the preshading. Then a quick masking of the tail band and painting the engine nacelles with custom-made yellow (using some Vallejo Air acrylics). Vallejo Air, although dedicated for airbrushing, still needs some thinning (I prefer to use ca. 50% alcohol). They lay nicely but have problems with good adhesion, even in comparison with other acrylics. I'm not sure whether it was a good move to paint this colour at this step as I will have plenty opportunities to damage it.

Using some free time, which I didn't have much lately, I partialy painted the lower surfaces with the Pactra acrylic RLM78 colour. Tail wings are just lightly touched with paint, fuselage and center wing section is almost finished, starboard wing half-finished and port wing, as you see, is yet untouched. I dediced to use time-consuming method of painting each panel and section separately to achieve good effect of preshading. The effects are nice in my opinion but need a lot of time and a good airbrush. For the first time I'm using a Badger product, the Sotar 20/20, which I'll be reviewing for Aeroscale in the nearest future (hopefully this week) - this build is my testing ground for this airbrush.


Roxter
_VISITCOMMUNITY
Rigas, Latvia
Joined: July 04, 2007
KitMaker: 268 posts
AeroScale: 245 posts
Posted: Wednesday, October 03, 2012 - 09:43 PM UTC
Perfect inspiring build! Now I start to think of 1/72 scale bf-109. But I guess I would prefer late 109's by FineMolds

Anyway, thanks for sharing!
Mecenas
Joined: December 23, 2007
KitMaker: 1,596 posts
AeroScale: 1,275 posts
Posted: Wednesday, October 03, 2012 - 09:50 PM UTC
And here are some fresh pictures. Sorry for quality but I have taken them using my mobile phone. The painting is not yet finished but I haven't decided whether to go for a nice and clean or dusty, faded and worn Emil. Let's take it as a base for further finishing techniques.


DougN1
_VISITCOMMUNITY
Georgia, United States
Joined: August 08, 2011
KitMaker: 410 posts
AeroScale: 409 posts
Posted: Thursday, October 04, 2012 - 07:26 AM UTC
Looks good, and if you had not told me, I would have never known those were cell phone pics!

Doug
Mecenas
Joined: December 23, 2007
KitMaker: 1,596 posts
AeroScale: 1,275 posts
Posted: Sunday, October 07, 2012 - 09:56 PM UTC
Thanks Doug. I often need a simple camera at work but it's not very difficult to forget about taking it everyday. As it's easier to have a cell phone I bought one with a good camera inside. The problem is that my mobile does not have good macro, have simplified and mostly "auto" settings. These are good for family photos or ouside shots of large objects but as you know modeling photography is abosolutely different. Beside I had to take the photos with free hand so they are not as sharp as could be using a tripod.

Here are few new pictures depicting current progress. I have finished the "base" colours although few corrections still have to be done. This week I'll try to differentiate the base shades a bit but this step will require a lot of time and patience not to overdo the effect.


eseperic
_VISITCOMMUNITY
Croatia Hrvatska
Joined: November 06, 2009
KitMaker: 624 posts
AeroScale: 609 posts
Posted: Sunday, October 07, 2012 - 10:47 PM UTC
Hi Michal,

It's not only an effort... it looks fantastic! It's a neat small model, but I really like what you did so far! The overall fit of the plastic part doesn't look too bad, however. Keep your cart rolling!

All the best,
Entoni
Mecenas
Joined: December 23, 2007
KitMaker: 1,596 posts
AeroScale: 1,275 posts
Posted: Monday, October 08, 2012 - 02:59 AM UTC
Many thanks Entoni, much apreciated. The only place where the fit was good was the joint between fuselage and wings on the upper side. Everywhere else it was bad, especially around both engine nacelles and along fuselage halves joint. The main wings parts did not fit very good but after some surgery and corrections the final effect was rather positive. Anyway filling gaps, sanding, polishing and rescribing of panel lines was abosolutely the most time consuming part of the whole build process.
Mecenas
Joined: December 23, 2007
KitMaker: 1,596 posts
AeroScale: 1,275 posts
Posted: Wednesday, October 24, 2012 - 08:55 AM UTC
Ok, before I'll be able to post any update I need some advice from the Luftwaffe experten. I have decided to finish my model as a "white 6" of JG27.

Did this plane, and other Emils in Africa, had any stencils and other technical inscriptions? These pics may suggest that not but for me it would be very odd for Germans...

Here are three pics found in the internet at asisbiz.com


spiralcity
_VISITCOMMUNITY
Illinois, United States
Joined: October 14, 2012
KitMaker: 150 posts
AeroScale: 107 posts
Posted: Friday, October 26, 2012 - 09:13 AM UTC
She's moving along nicley. Great work on this kit.
Mecenas
Joined: December 23, 2007
KitMaker: 1,596 posts
AeroScale: 1,275 posts
Posted: Friday, November 02, 2012 - 02:13 AM UTC
Here's what I've done recently.

First of all the kit suffered some damage of a broken antenna mast and lost one of ailerons mass balances. I'll have to make the new ones somehow.

Some time ago I started decaling and added exhaust smoke on the fuselage sides. Decals will be done in the "basic" version - national markings and JG 27 emblem, individual number and just few stencils (fuel type, first aid kit, electric socket - as were most probably painted on this particular machine).

The exhaust smoke was my attempt to achieve the effect of few layers of smoke, as if the bottom layer was removed (damaged by ground crew or cleaned) and the new one came on it. I'm afraid I exaggerated with it so I wait on your opinions.

And here are some general views. German crosses and stencils comes from new Airfix Emil (made by Cartograf - absolutely marvelous), swastika (from Techmod set of swastikas, not so great but still good), JG27 emblem and number 6 comes from some Kagero publications about JG27 (decals are most probably made by Techmod). I had some adventure with the port side number but finally I somehow managed to get it more-less together (but still needs two touch-ups of paint).


Here's the undercarriage. It's actualy ready to be placed on finished model.


And an additional drop tank. It comes from Finemolds kit as was provided by a fellow modeler. I made few corrections and improvements (attachment of the tank to the rack) and added fuel pipes (although these absolutely can't be seen already). Everything was painted with some aluminum, then covered with RLM79 and randomly scratched with knife, razor saw, coarse sanding paper and other damaging stuff which I found on the workbench. All it needs is a final coat of matt varnish.

 _GOTOTOP