REVIEW
1:32 Fokker D.VII (Alb)
Merlin
 Senior Editor
#017
United Kingdom
Joined: June 11, 2003
KitMaker: 17,582 posts
AeroScale: 12,795 posts
Posted: Friday, December 07, 2012 - 09:53 PM UTC
Just in time for Christmas, Wingnut Wings have released their long-awaited Fokker D.VII - and it's a real cracker!
Link to Item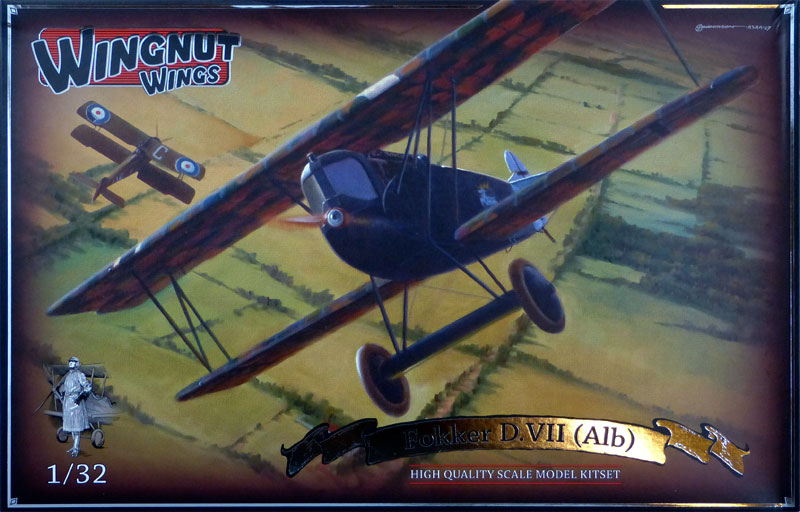
If you have comments or questions please post them here.
Thanks!
BEWARE OF THE FEW...
As I grow older, I regret to say that a detestable habit of thinking seems to be getting a hold of me. - H. Rider Haggard
Colorado, United States
Joined: January 25, 2004
KitMaker: 11,669 posts
AeroScale: 11,011 posts
Posted: Friday, December 07, 2012 - 11:51 PM UTC
Nice job on the review. I would recommend picking up Anthology 3 from Windsock. It outlines some finer points to the manufacturer's differences to early, mid and late production versions.
On the guns they were set at different levels for the engine installed at the factory. The overall height from the centerline to the top of the cam gear housing of a Mercedes D.IIIaü is 670 mm, the BMW IIIa is 687 mm.
17 mm=.68 inches, just a bit under 11/16".
". . .The most important thing is to know why you build and then get the most that you can out of building." via D.D.
England - South East, United Kingdom
Joined: November 06, 2005
KitMaker: 1,667 posts
AeroScale: 1,551 posts
Posted: Saturday, December 08, 2012 - 07:17 AM UTC
Great review Merlin, I agree pretty much with everything you say. I got my hands on the Fok & OAW versioins today! SWMBO let me play with one, I had to choose which would get wrapped for Xmas. I chose the Fok version to experiment with SO many choices...
A coupe of ever so shallow sinks in the right wing where the internal suppots are and the upper part of the axle wing, honestly they'd be hard to spot once painted.
Keith
Still can't cure the AMS even with sausage finger implants & olde eyes.
Merlin
 Senior Editor
#017
United Kingdom
Joined: June 11, 2003
KitMaker: 17,582 posts
AeroScale: 12,795 posts
Posted: Saturday, December 08, 2012 - 08:02 AM UTC
Cheers guys
And congratulations, Keith! I can't wait to see your build!

Quoted Text
A coupe of ever so shallow sinks in the right wing where the internal supports are and the upper part of the axle wing, honestly they'd be hard to spot once painted. Keith
That's interesting. I've just double-checked my kit in case I missed anything and those areas are entirely clear, so I guess there's a little bit of pot luck involved.
If you can resist the temptation to dive straight into a build (painful, I know!

), it could well be worth waiting for the next issue of Windsock Worldwide:
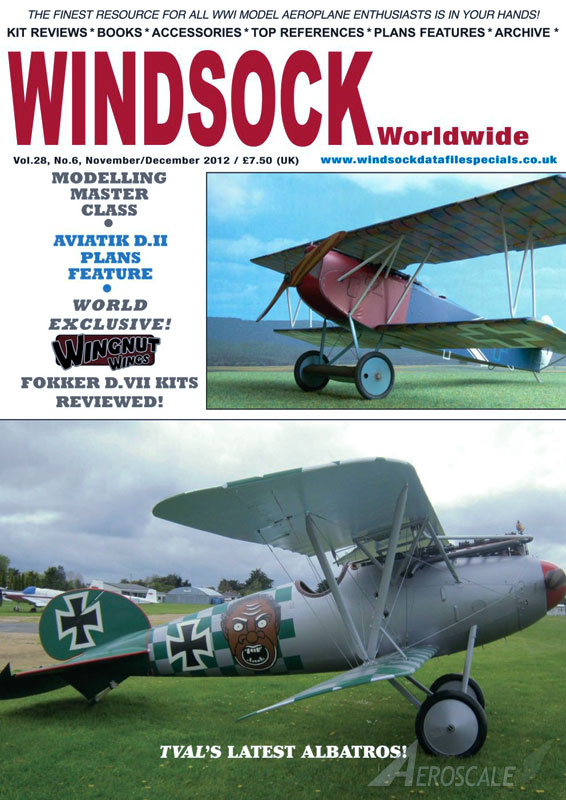
If Ray's past coverage of new Wingnut kits is anything to go by, he'll really go to town on the D.VII, offering lots of advice on how to get the utmost from them.
I wouldn't be a bit surprised if there's a full Windsock "Modelling Special" on the way at some point too...
All the best
Rowan

BEWARE OF THE FEW...
As I grow older, I regret to say that a detestable habit of thinking seems to be getting a hold of me. - H. Rider Haggard
England - South East, United Kingdom
Joined: November 06, 2005
KitMaker: 1,667 posts
AeroScale: 1,551 posts
Posted: Saturday, December 08, 2012 - 10:15 AM UTC
Wait? WAIT? WAIIIIIIIT? How very dare you?.....
I've waited 2 years.....
I think the ALB has a different axle wing though.
Too late to wait now. The knifes been out for hours.

Still can't cure the AMS even with sausage finger implants & olde eyes.
Alberta, Canada
Joined: July 26, 2010
KitMaker: 1,032 posts
AeroScale: 1,025 posts
Posted: Saturday, December 08, 2012 - 10:29 AM UTC
I really liked your Review Rowan, very good preview of what I hope to see at Christmas.
Great news on the inevitable publications from R.R. and the good folks at Albatros Pubs, I think..................!?!
This spurt in releases by WNW and the inevitable frenzy in the After Market sectors is akin to progressive bankruptsy; I hardly know where to start.
A great time to be modelling WWI in 1/32!
Cheers,
Lance


Officially Retired as of 20 August 2013 and looking forward to some un-interrupted bench time. Currently starting Roden's Nieuport 28 and hoping to follow that with another WNW Fokker DVII.
Merlin
 Senior Editor
#017
United Kingdom
Joined: June 11, 2003
KitMaker: 17,582 posts
AeroScale: 12,795 posts
Posted: Saturday, December 08, 2012 - 09:29 PM UTC
Quoted Text
I think the ALB has a different axle wing though.
Hi again Keith
You're quite right - that sprue (K) is the only one unique to the Albatros-built version.
I know it's nigh on impossible to wait for the magazine - I'll probably make a tentative start myself, if I can make a little time amid all the other reviews I'm working on...

All the best
Rowan

BEWARE OF THE FEW...
As I grow older, I regret to say that a detestable habit of thinking seems to be getting a hold of me. - H. Rider Haggard
Västra Götaland, Sweden
Joined: February 19, 2010
KitMaker: 1,473 posts
AeroScale: 1,450 posts
Posted: Sunday, December 09, 2012 - 09:18 PM UTC
NIce review Rowan, that is as close to a full 100% I've ever seen in a kit review.
Can't wait to lay my sweaty paws on mine... Tough, I guess that wou'nt happen until the New Year (Still no shipping notice...)

Mikael
P.S. Horrible thought: What if the Mayans were right, and the world will end on the 21st?

_________________________________________________________
Just finished the Wingnut Wings Taube. On to the Junkers D.1
Merlin
 Senior Editor
#017
United Kingdom
Joined: June 11, 2003
KitMaker: 17,582 posts
AeroScale: 12,795 posts
Posted: Sunday, December 09, 2012 - 09:31 PM UTC
Quoted Text
Horrible thought: What if the Mayans were right, and the world will end on the 21st? 
Hi Mikael
Perhaps it's just as well I've made a start - although I very much doubt I'll be finished by the 21st!

I've prepped and clipped the main parts of the engine together prior to painting:
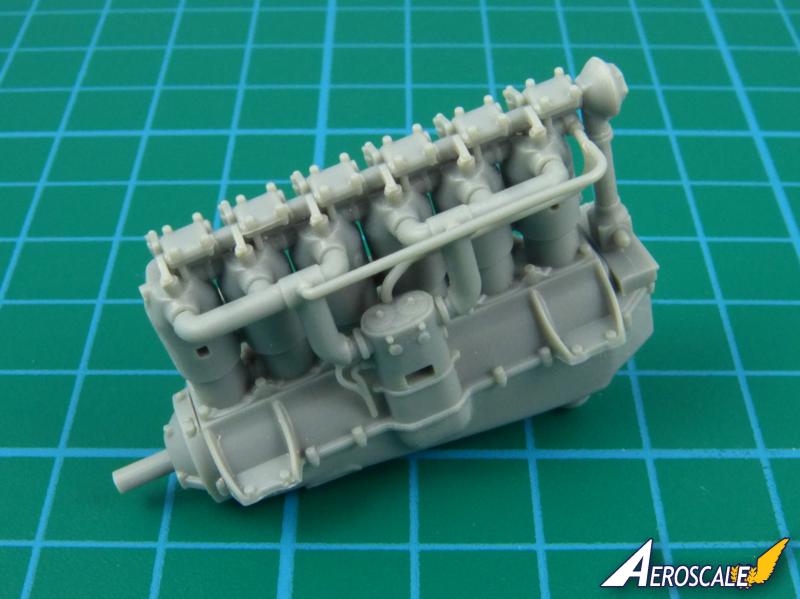
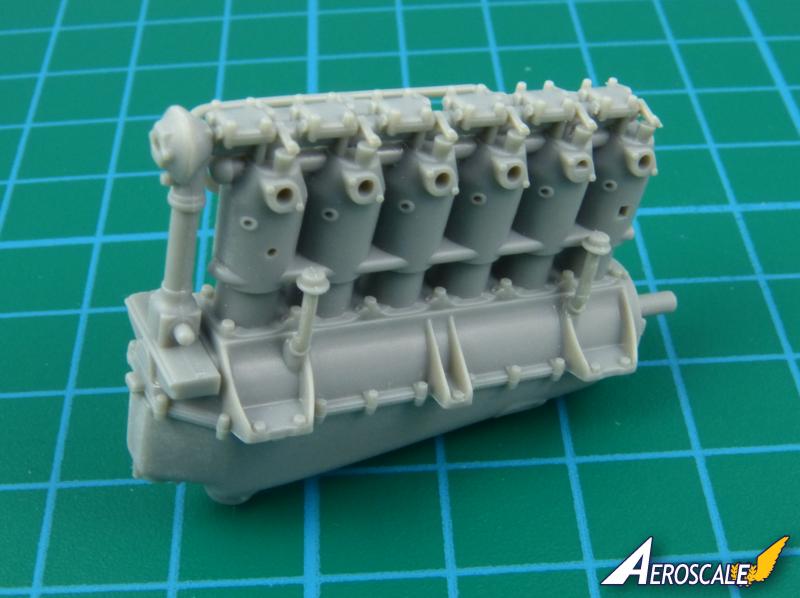
I'll add a little of the extra plumbing that's visible in Wingnut's reference shots, but will try not to get too bogged down and end up stalling...
All the best
Rowan

BEWARE OF THE FEW...
As I grow older, I regret to say that a detestable habit of thinking seems to be getting a hold of me. - H. Rider Haggard
England - South East, United Kingdom
Joined: February 05, 2008
KitMaker: 1,381 posts
AeroScale: 1,110 posts
Posted: Monday, December 10, 2012 - 03:48 AM UTC
mmuuuussstttt resist..........
Colorado, United States
Joined: January 25, 2004
KitMaker: 11,669 posts
AeroScale: 11,011 posts
Posted: Monday, December 10, 2012 - 04:05 AM UTC
". . .The most important thing is to know why you build and then get the most that you can out of building." via D.D.
England - South East, United Kingdom
Joined: November 06, 2005
KitMaker: 1,667 posts
AeroScale: 1,551 posts
Posted: Monday, December 10, 2012 - 04:55 AM UTC
Resistance is futile.... honestly it just kind of slips together... I've not many loose bits left on my FokVariant (apart from the wealth of spare bitses.
MMM precious spare bitses

Still can't cure the AMS even with sausage finger implants & olde eyes.
England - South East, United Kingdom
Joined: February 05, 2008
KitMaker: 1,381 posts
AeroScale: 1,110 posts
Posted: Monday, December 10, 2012 - 07:39 AM UTC
stop telling me how good it is !!!! enough !... i cant take it anymore.....sob sob sob ......
Merlin
 Senior Editor
#017
United Kingdom
Joined: June 11, 2003
KitMaker: 17,582 posts
AeroScale: 12,795 posts
Posted: Monday, December 10, 2012 - 10:39 AM UTC
Quoted Text
stop telling me how good it is !!!! enough !... i cant take it anymore.....sob sob sob ......
Hi Paul
Did anyone mention?... It's
really good!

Sorry!

All the best
Rowan

BEWARE OF THE FEW...
As I grow older, I regret to say that a detestable habit of thinking seems to be getting a hold of me. - H. Rider Haggard
Colorado, United States
Joined: January 25, 2004
KitMaker: 11,669 posts
AeroScale: 11,011 posts
Posted: Monday, December 10, 2012 - 04:02 PM UTC
Quoted Text
stop telling me how good it is !!!! enough !... i cant take it anymore.....sob sob sob ......
Hey Paul! I have a Battle Axe kit I could send to you free gratis!
". . .The most important thing is to know why you build and then get the most that you can out of building." via D.D.
England - South East, United Kingdom
Joined: February 05, 2008
KitMaker: 1,381 posts
AeroScale: 1,110 posts
Posted: Tuesday, December 11, 2012 - 04:34 AM UTC
Västra Götaland, Sweden
Joined: February 19, 2010
KitMaker: 1,473 posts
AeroScale: 1,450 posts
Posted: Tuesday, December 11, 2012 - 08:20 PM UTC
Quoted Text
Quoted Text
stop telling me how good it is !!!! enough !... i cant take it anymore.....sob sob sob ......
Hey Paul! I have a Battle Axe kit I could send to you free gratis!
Battle Axe – Oh the joy!


_________________________________________________________
Just finished the Wingnut Wings Taube. On to the Junkers D.1
Merlin
 Senior Editor
#017
United Kingdom
Joined: June 11, 2003
KitMaker: 17,582 posts
AeroScale: 12,795 posts
Posted: Tuesday, December 11, 2012 - 10:27 PM UTC
Hi again
I've come across a small point that may be something to watch out for. The axle wing has to be trimmed back for several of the colour schemes. I cut hard on the guidelines marked on the inner surfaces, and the result has left triangular parts of the axle projecting slightly either side - that I imagine should be flush?:
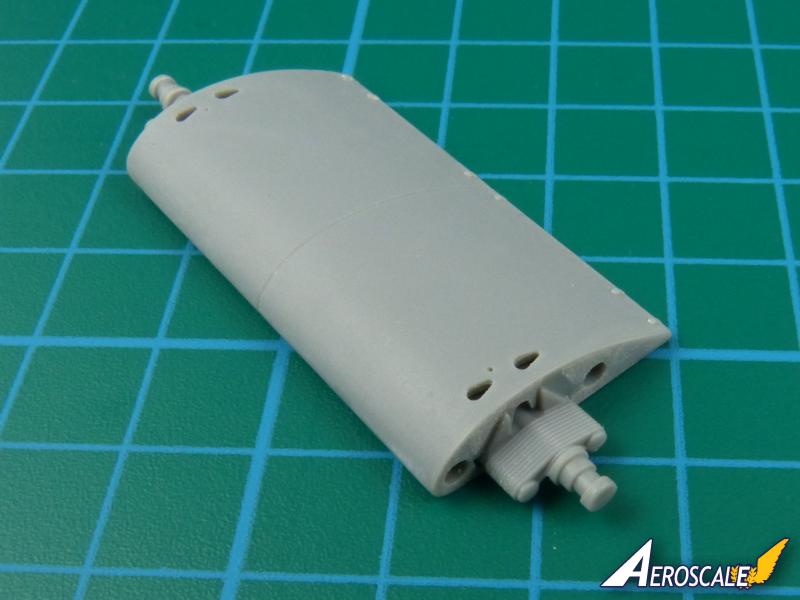
If the lugs are wrong, they'll be mostly hidden by the wheels, but if I was to build the axle wing again, I'd cut outside the guides and sand back carefully.
All the best
Rowan

BEWARE OF THE FEW...
As I grow older, I regret to say that a detestable habit of thinking seems to be getting a hold of me. - H. Rider Haggard
Merlin
 Senior Editor
#017
United Kingdom
Joined: June 11, 2003
KitMaker: 17,582 posts
AeroScale: 12,795 posts
Posted: Wednesday, December 12, 2012 - 05:14 AM UTC
Hi again
Back to the engine. One of the vintage reference photos in the kit's instructions shows a circular cover on the side of the crankcase, so I've represented it with a leftover instrument bezel and a disk of styrene:
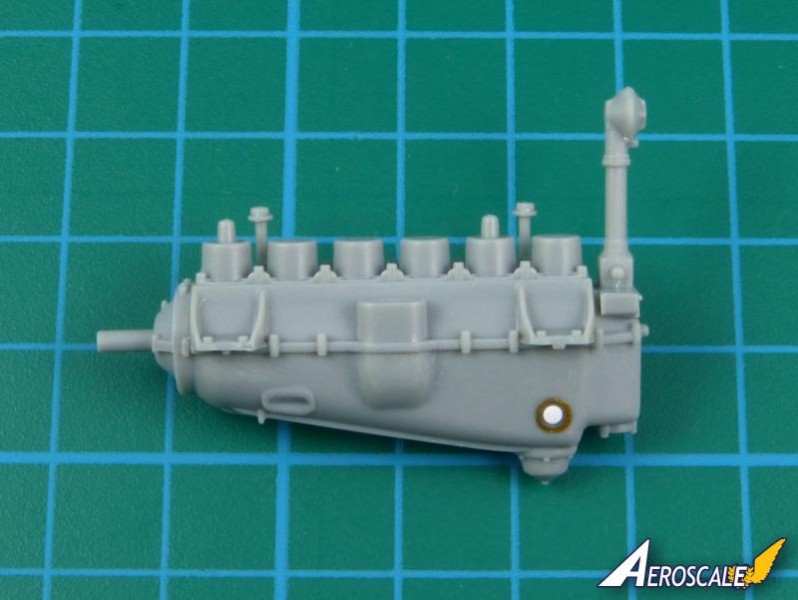
All the best
Rowan

BEWARE OF THE FEW...
As I grow older, I regret to say that a detestable habit of thinking seems to be getting a hold of me. - H. Rider Haggard
England - South East, United Kingdom
Joined: November 06, 2005
KitMaker: 1,667 posts
AeroScale: 1,551 posts
Posted: Wednesday, December 12, 2012 - 06:41 AM UTC
Rowan.
Ref the axlewing, Theres a cast metal boss there shaped like that, it is however joined across the top, the Undercarriage legs I believe are welded to this boss. So likely the better option would be to bridge the gap and trim back the material between it and the axle itseld to indicate a gap.
On the merc, ths ring you show is a little porthole type window, I presume to do a basic oil level check.
Now as you procede A word of warning/advice... well a few really.
Tolerances
Fragility.
Tight fit
No room for error.
All these are to be considered whilst building the interior and fitting it inside the fuselage.
Nuff said
Keith
Any disregard of the above can cause disaster.

Still can't cure the AMS even with sausage finger implants & olde eyes.
Merlin
 Senior Editor
#017
United Kingdom
Joined: June 11, 2003
KitMaker: 17,582 posts
AeroScale: 12,795 posts
Posted: Wednesday, December 12, 2012 - 07:03 AM UTC
Hi Keith
Cheers for the info and heads-up on what to look out for.
I've made a start painting, with a gloss basecoat for the lozenge decal panel and doing the basic colours on the engine parts. This is my first opportunity to try the Mr. Metal Color paints I bought a little while ago:
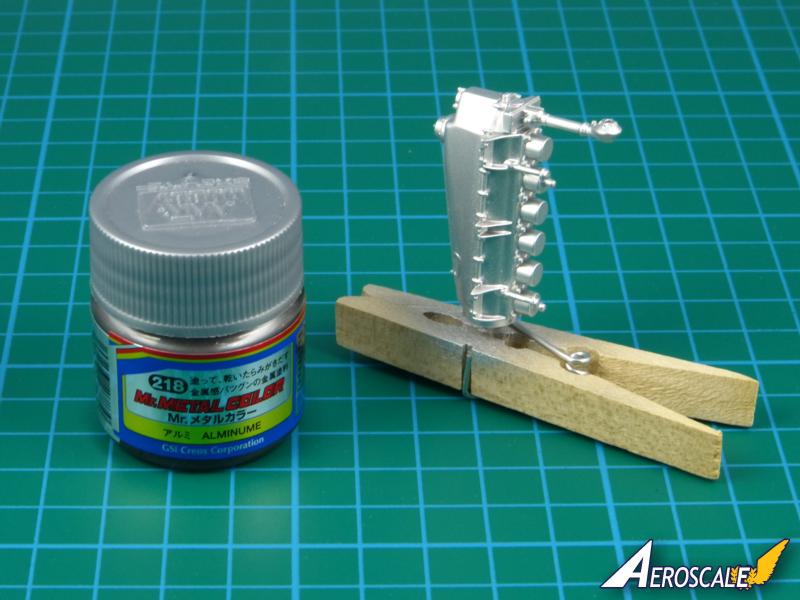
For anyone who hasn't used them, they are laquer-based and seem excellent - spraying really easily un-thinned, with very fine particles and drying quickly.
All the best
Rowan

BEWARE OF THE FEW...
As I grow older, I regret to say that a detestable habit of thinking seems to be getting a hold of me. - H. Rider Haggard
Colorado, United States
Joined: January 25, 2004
KitMaker: 11,669 posts
AeroScale: 11,011 posts
Posted: Wednesday, December 12, 2012 - 08:30 AM UTC
My D.VII review kit arrived along with my purchased D.VII kit. I'll post images later. On the Mercedes D.III & IIIa series the forward ports are breather holes for the carburetor. The rear ports are for threaded plugs added during factory installation of the oil feed lines. If memory serves there is another one near under the nose of the motor.
". . .The most important thing is to know why you build and then get the most that you can out of building." via D.D.
Merlin
 Senior Editor
#017
United Kingdom
Joined: June 11, 2003
KitMaker: 17,582 posts
AeroScale: 12,795 posts
Posted: Wednesday, December 12, 2012 - 08:53 PM UTC
Hi Stephen
Many thanks for the clarification - and I'm really pleased to see you've got your kits in time for Christmas.

I found some very useful shots for anyone wanting to add extra details to the engine
HERE.
I've been planning to build my kit as Hermann Pritsch's "Bowke!" and spotted a detail in the instructions' reference shots that they don't mention, and isn't covered by the kit parts - partly open wheel covers:
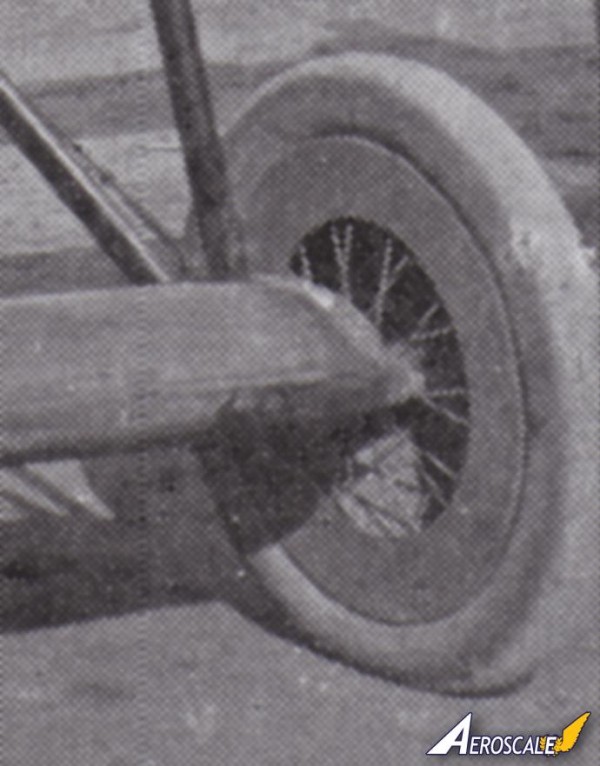
I'm not sure I'll even try to replicate this, but I'd welcome suggestions if there's a reasonably straightforward way to go about it.
All the best
Rowan

BEWARE OF THE FEW...
As I grow older, I regret to say that a detestable habit of thinking seems to be getting a hold of me. - H. Rider Haggard
Colorado, United States
Joined: January 25, 2004
KitMaker: 11,669 posts
AeroScale: 11,011 posts
Posted: Wednesday, December 12, 2012 - 10:27 PM UTC
I just looked at my kits tonight. The Fokker Schwerin built decals (#32011) for the wheels have cutaway center versions.

You can replicate this with .005 thou plastic sheet stock.
Never fear the spoken wheel ". . .The most important thing is to know why you build and then get the most that you can out of building." via D.D.
Merlin
 Senior Editor
#017
United Kingdom
Joined: June 11, 2003
KitMaker: 17,582 posts
AeroScale: 12,795 posts
Posted: Thursday, December 13, 2012 - 08:18 AM UTC
Hi Stephen
Neat. Have they included open wheels to go with the decals? If so, I can foresee a bit of cross-kitting ahead.

Thanks for the link to the spokes thread. I have to admit I haven't done any spokes since the 1970s, when I "laced" some wheels the hard way using Harry Woodman's technique - hence my reluctance to go there again if I want to make any progress on the kit before the world ends on the 21st!

I'd forgotten that the wonders of photo-etch make life so much easier - and I did actually come up with another couple of "cheats" that might work neatly in this instance while sat on the bus going to work at Oxfam today. We'll have to see - I've got plenty to keep me busy while I decide whether to butcher the wheels.

All the best
Rowan

BEWARE OF THE FEW...
As I grow older, I regret to say that a detestable habit of thinking seems to be getting a hold of me. - H. Rider Haggard


 ), it could well be worth waiting for the next issue of Windsock Worldwide:


 Sorry!


Sorry!


