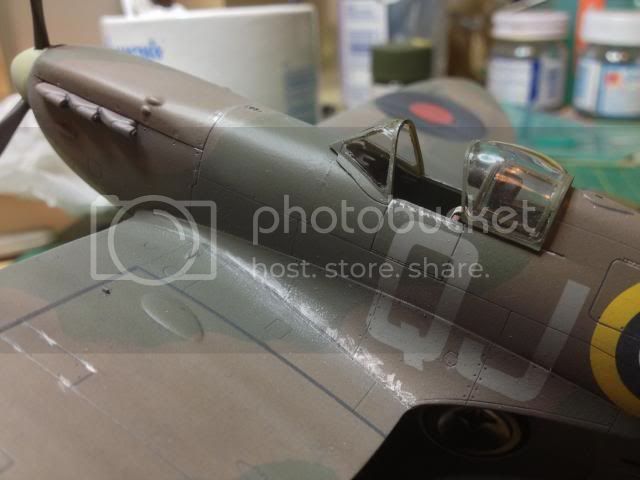
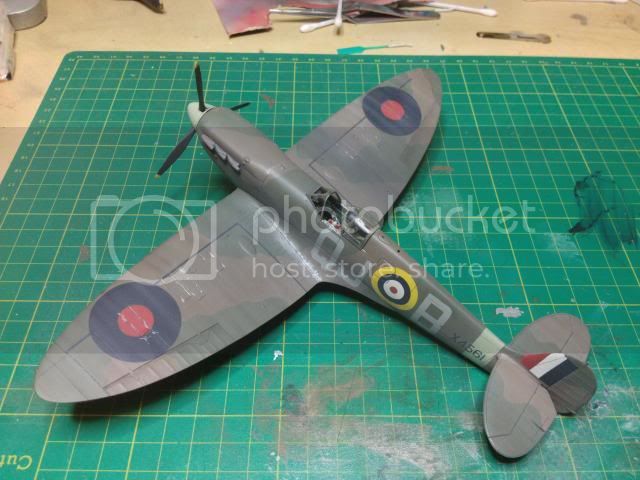
Things are looking up on the bench!
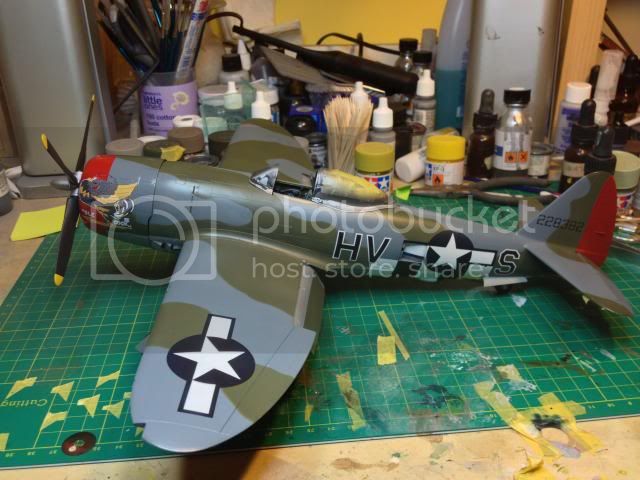
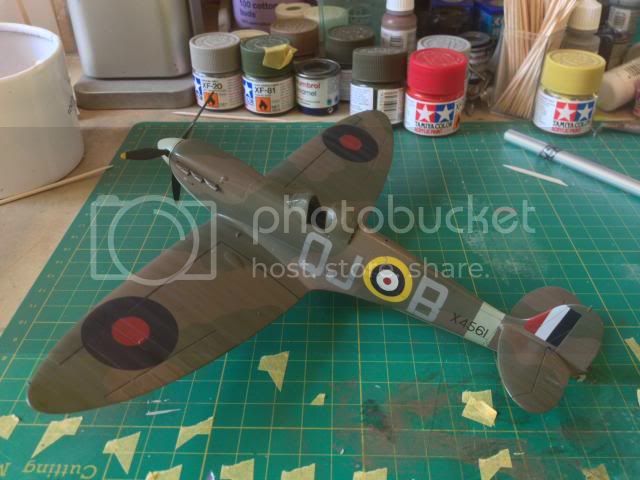
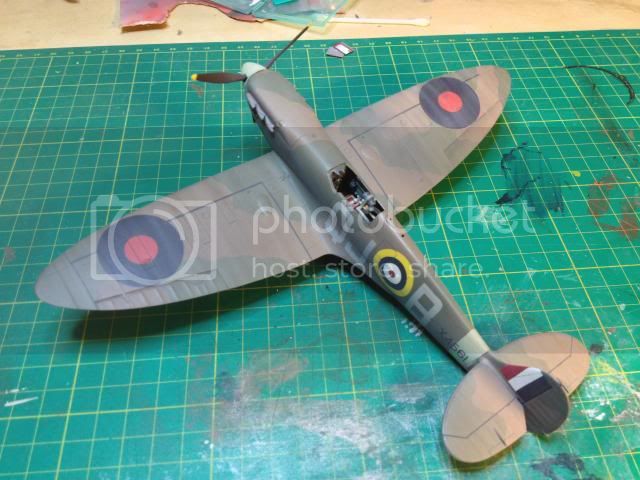
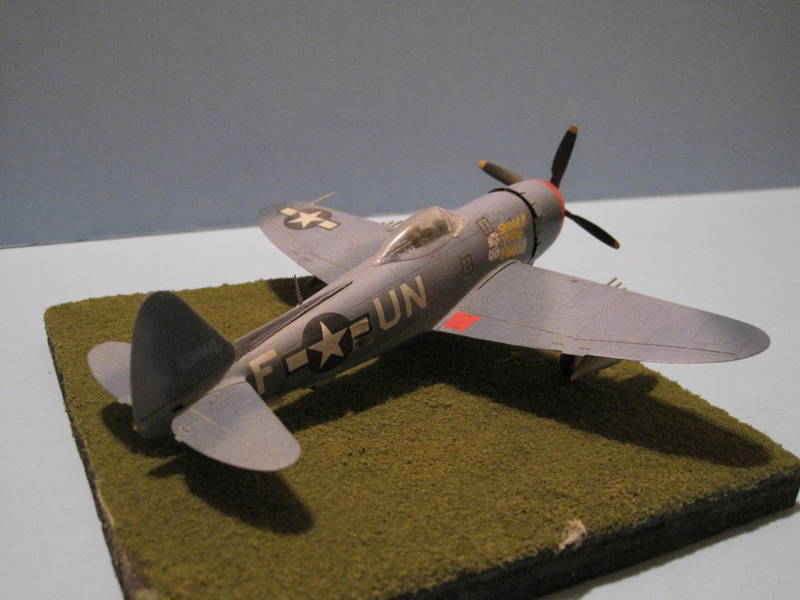
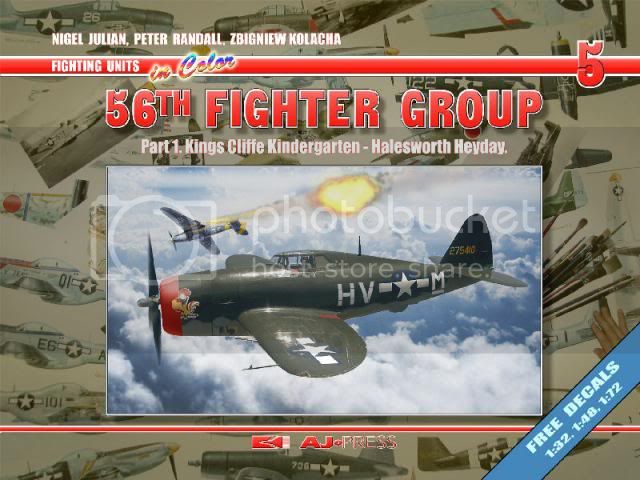
Tamiya Spitfire, started 2 years ago almost ready for weathering, 1:48th P47, started 1 year ago is halfway through having the markings painted on, and the 1:32 Thunderbolt, also started 2 years ago is also almost ready for weathering.
I might be about to actually finish a model, or even 3!!!
In a couple of months anyway
World War II
Discuss WWII and the era directly before and after the war from 1935-1949.
Hosted by Rowan Baylis
This is getting serious................
Posted: Thursday, April 25, 2013 - 08:39 AM UTC
drabslab
European Union
Joined: September 28, 2004
KitMaker: 2,186 posts
AeroScale: 1,587 posts
Joined: September 28, 2004
KitMaker: 2,186 posts
AeroScale: 1,587 posts
Posted: Thursday, April 25, 2013 - 09:34 AM UTC
You can do it, you can do it
Posted: Thursday, April 25, 2013 - 12:55 PM UTC
Don't burst a valve in your rush to get finished now Nige !
Posted: Thursday, April 25, 2013 - 05:39 PM UTC
Put on your war face and keep going Nige, you can do it
Posted: Thursday, April 25, 2013 - 09:42 PM UTC
Go on Nige you know you can
Posted: Friday, April 26, 2013 - 09:29 AM UTC
Nice one Nige!
Great looking builds - and full marks for staying focused! Are you thinking of starting a class in the latter ? - I could certainly do with a lesson or two!
All the best
Rowan
Great looking builds - and full marks for staying focused! Are you thinking of starting a class in the latter ? - I could certainly do with a lesson or two!
All the best
Rowan
golfermd
Maryland, United States
Joined: March 01, 2013
KitMaker: 152 posts
AeroScale: 98 posts
Joined: March 01, 2013
KitMaker: 152 posts
AeroScale: 98 posts
Posted: Friday, April 26, 2013 - 10:26 AM UTC
Keep going Nigel. Nice work on the decals. Those scare the bejeezus out of me. Quaking right now thinking about it.
Posted: Friday, April 26, 2013 - 10:38 AM UTC
I'll get there one day guys
Just keep chipping away at them, and of course, when I get a couple of them finished I can crack on with that lovely Tamiya 1:32 Mustang
Dan, the only decal is the white "base decal" on the big Thunderbolt cowling. I'll be adding the top decal next.
All the other markings on all three models are painted on using Miracle Masks
Nige
Joel_W
Associate Editor
New York, United States
Joined: December 04, 2010
KitMaker: 11,666 posts
AeroScale: 7,410 posts
Joined: December 04, 2010
KitMaker: 11,666 posts
AeroScale: 7,410 posts
Posted: Monday, April 29, 2013 - 04:03 AM UTC
Nigel, really impressive painting of those markings. I thought that they were perfectly applied decals. I've got a few shelf Queens that somehow just never seem to get finished, as I've moved on to other subjects.
As a matter of fact, I've moved on from armor back to aircraft, and hopefully will find some happy medium between the two.
Joel
As a matter of fact, I've moved on from armor back to aircraft, and hopefully will find some happy medium between the two.
Joel
Posted: Monday, April 29, 2013 - 10:12 AM UTC
Thanks Joel,
I really enjoy using the masks, and painted on markings especially come into their own when working in the larger 1:32 or 1:24th scales.
Leaps and bounds in progress,( by my standards anyway)over the last couple of days.
The 1:32 Hasegawa Bubbletop has now got its full cowling artwork. The Montex decals are extremely thin and this caused a few problems but I persevered and got the chicken choked,,( as the actress said to the bishop).
Stepping right away from this for a few days now and not going anywhere near that cowling again until its got at least 4 coats of Klear over that decal!
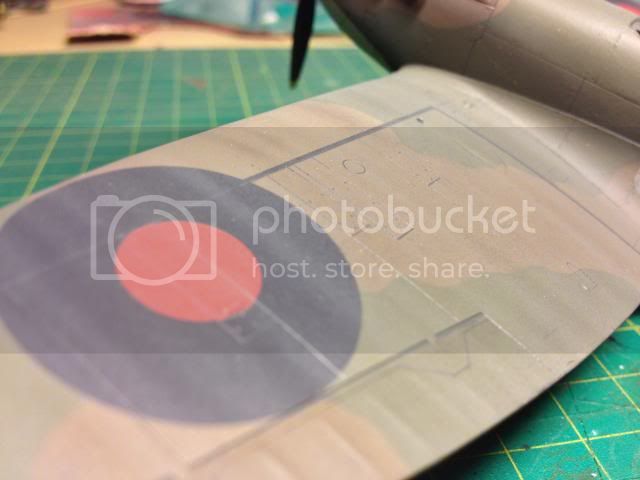
The national markings are painted on the Tamiya Razorback. Again, this wasn't entirely straight forward ( due to my own ineptitude) but I'm working my way through some touch ups and it'll soon be time for the code letters.
As with many stages of modelling, things look a lot worse before they get better and this is certainly the case with the Tamiya Spitfire as I've just slapped on a load of Promodeller wash
Looking very much like the little Spitfire will be first past the finishing post!
Nige
Posted: Wednesday, May 01, 2013 - 08:53 AM UTC
raypalmer
Ontario, Canada
Joined: March 29, 2010
KitMaker: 1,151 posts
AeroScale: 985 posts
Joined: March 29, 2010
KitMaker: 1,151 posts
AeroScale: 985 posts
Posted: Wednesday, May 01, 2013 - 02:19 PM UTC
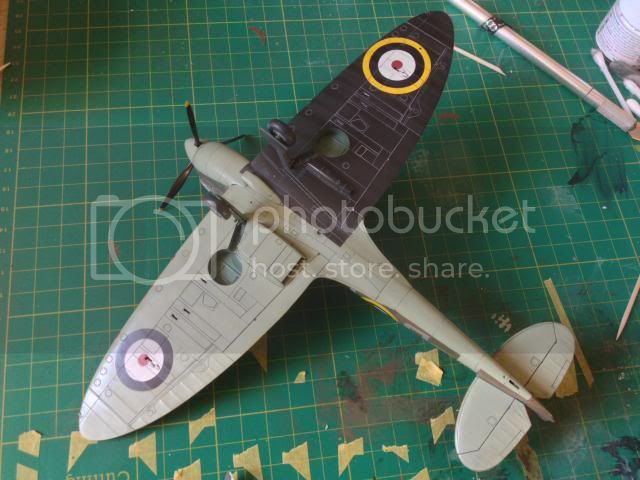
The belly is sheer perfection! That Cheronian scheme is tricky as heck
Posted: Wednesday, May 01, 2013 - 06:41 PM UTC
Hi Nige, That is looking very good
Posted: Thursday, May 09, 2013 - 09:44 PM UTC
Thanks guys
Always good to get a bit of encouragement
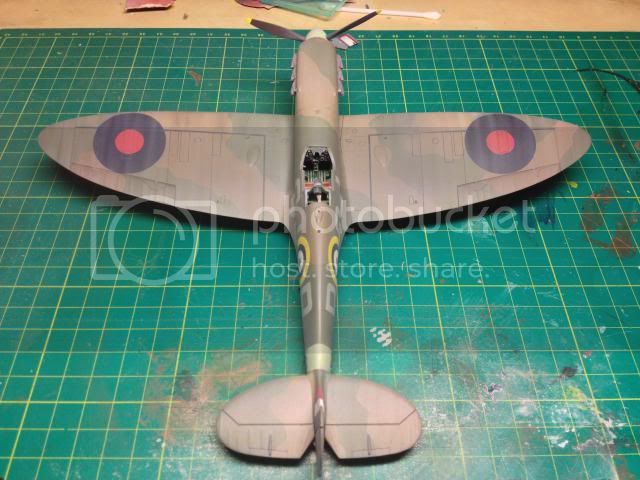
The Spit is almost done now. I got the matt varnish on last night. Just the paint chipping and fiddly bits to attach and she's done.
I've deliberately gone for a faded, streaky, well worn finish. Looks a bit bleached out in the photos but not so much in "real life"
What d'you think?
Nige
Posted: Friday, May 10, 2013 - 03:01 AM UTC
Beautiful work Nige, coming up very nicely indeed !
Posted: Friday, May 10, 2013 - 03:59 AM UTC
Way to go Nige, see you can do it
Posted: Friday, May 10, 2013 - 11:09 AM UTC
Cheers guys
I would like to have 2 of these finished for the Birmingham Show at the end of July
Siderius
Tennessee, United States
Joined: September 20, 2005
KitMaker: 1,747 posts
AeroScale: 1,673 posts
Joined: September 20, 2005
KitMaker: 1,747 posts
AeroScale: 1,673 posts
Posted: Friday, May 10, 2013 - 12:53 PM UTC
Nigel, great work there! Really enjoy looking at your builds. I had a question for you. Regarding the P-47 with blue camoflauge, I wondered about the green camo applied over it? I am familiar with the 56th fighter groups P-47M's. The 61, 62, and 63rd all came with different experimental camo patters. I built a 72 scale M version in two blues, didn't get the contrast right between the blues but it was a fun build nonetheless. That was 7 years back or so. Could you address the color issue for me? Again thanks for sharing. Russell
Posted: Friday, May 10, 2013 - 10:05 PM UTC
Thanks Russell.
The "blue" P-47 I'm working on at the moment is grey. It's painted with the Tamiya Ocean Grey/RAF Dark Green, and a good excuse to show one of the results of using Miracle Masks up close
This was my take on the 63rd FS Blues from about 6 years ago. All custom mixed to match the photos I have as closely as I could due to the actual colours used being unknown.
Nige
Quoted Text
I had a question for you. Regarding the P-47 with blue camoflauge, I wondered about the green camo applied over it? I am familiar with the 56th fighter groups P-47M's. The 61, 62, and 63rd all came with different experimental camo patterns.
The "blue" P-47 I'm working on at the moment is grey. It's painted with the Tamiya Ocean Grey/RAF Dark Green, and a good excuse to show one of the results of using Miracle Masks up close
This was my take on the 63rd FS Blues from about 6 years ago. All custom mixed to match the photos I have as closely as I could due to the actual colours used being unknown.
Nige
BlackWidow
European Union
Joined: August 09, 2009
KitMaker: 1,732 posts
AeroScale: 1,336 posts
Joined: August 09, 2009
KitMaker: 1,732 posts
AeroScale: 1,336 posts
Posted: Saturday, May 11, 2013 - 09:42 AM UTC
Quoted Text
... I built a 72 scale M version in two blues, didn't get the contrast right between the blues but it was a fun build nonetheless. That was 7 years back or so. Could you address the color issue for me? Again thanks for sharing. Russell
I'm far away from being a colour expert, especially when it comes to these "strange" camos but on Tamiya's P-47 M kit they give a mixture of 3 colours, XF-1 Black, XF-2 White and XF-17 Sea Blue (each 1/3). AeroMaster gives Dark Blue and Medium Blue on their decal sheets. When I will build a M I would go for Tamiya XF-18 Medium Blue and Agama A4 Sea Blue. Would that come close? Tamiya's Sea Blue is a little too dark, I guess.
Siderius
Tennessee, United States
Joined: September 20, 2005
KitMaker: 1,747 posts
AeroScale: 1,673 posts
Joined: September 20, 2005
KitMaker: 1,747 posts
AeroScale: 1,673 posts
Posted: Saturday, May 11, 2013 - 12:42 PM UTC
I don't really know Torsten. I know Nigel is very expert in the 56th fighter group, more than I am. I also know about color shifting of color photographs taken during WWII. A perfect example is the flight of four Supermarine Spitfire MK V's over North Africa. I believe this was no. 417 squadron, a Canadian squadron based in North Africa.
The point is, the colors on the aircraft must be azure blue on the bottom, middlestone over dark earth on the top. At least I think so!
Interestingly, the Spitfires colors are hard to discern in this particular photograph.
I wonder if we could be having similar problems with determining the colors on the late war P-47M's. I thought that the 61st squadron had green-grey camoflauge over grey camoflauge. The 62nd had black on top and natural metal on bottom. The 63rd, which we have been discussing was the two types of blues with the natural metal undersides.
It is funny that so many references for the 63rd fighter squadron, 56th fighter group, have two blues over a natural metal underside. It is all a bit confusing.
I am not trying to argue with Nigel, again, he is quite expert in this arena. I must admit, the two blues are sort of eye catching even if not completely accurate!! LOL Russell
P.S. Your models look great Nigel by the way!!
Posted: Sunday, May 12, 2013 - 02:22 AM UTC
Hi guys,
Quick answer as I really don't want this thread to turn into a P-47M colours discussion
Torsten,
When I've done a 63rd FS P-47M (2 shades of blue topsides)I mixed my own colours up for a mixture of Tamiya and Vallejo colours as I didn't find the recommended Tamiya mixes looked anything like my reference photos.
Experiment, have fun, and remember that the actual colours used ( or mixes of), are unknown.
Russell,
Your getting your squadrons mixed up
P-47M's
61st FS Black topside.
62nd FS RAF Green/Grey
63rd FS Light blue/dark blue.
Underside of all three squadrons P-47M's remained unpainted.
Later delivery aircraft didn't get painted and remained overall NMF.
The 61st FS P-47 I'm building at the moment is from July 1944 era. Grey/green topsides on this particular aircraft with a light grey underside.
Interesting that viewing the photos on your own individual monitor the ocean grey appeared "blue".
Hope this clears a few things up.
Right,,
Back to my little Spitfire
Nige
PS,
Coming soon.....................
Quick answer as I really don't want this thread to turn into a P-47M colours discussion
Torsten,
When I've done a 63rd FS P-47M (2 shades of blue topsides)I mixed my own colours up for a mixture of Tamiya and Vallejo colours as I didn't find the recommended Tamiya mixes looked anything like my reference photos.
Experiment, have fun, and remember that the actual colours used ( or mixes of), are unknown.
Russell,
Quoted Text
I wonder if we could be having similar problems with determining the colors on the late war P-47M's. I thought that the 61st squadron had green-grey camoflauge over grey camoflauge. The 62nd had black on top and natural metal on bottom. The 63rd, which we have been discussing was the two types of blues with the natural metal undersides.
It is funny that so many references for the 63rd fighter squadron, 56th fighter group, have two blues over a natural metal underside. It is all a bit confusing.
Your getting your squadrons mixed up
P-47M's
61st FS Black topside.
62nd FS RAF Green/Grey
63rd FS Light blue/dark blue.
Underside of all three squadrons P-47M's remained unpainted.
Later delivery aircraft didn't get painted and remained overall NMF.
The 61st FS P-47 I'm building at the moment is from July 1944 era. Grey/green topsides on this particular aircraft with a light grey underside.
Interesting that viewing the photos on your own individual monitor the ocean grey appeared "blue".
Hope this clears a few things up.
Right,,
Back to my little Spitfire
Nige
PS,
Coming soon.....................
BlackWidow
European Union
Joined: August 09, 2009
KitMaker: 1,732 posts
AeroScale: 1,336 posts
Joined: August 09, 2009
KitMaker: 1,732 posts
AeroScale: 1,336 posts
Posted: Sunday, May 12, 2013 - 07:51 AM UTC
Quoted Text
Torsten,
When I've done a 63rd FS P-47M (2 shades of blue topsides)I mixed my own colours up for a mixture of Tamiya and Vallejo colours as I didn't find the recommended Tamiya mixes looked anything like my reference photos.
Experiment, have fun, and remember that the actual colours used ( or mixes of), are unknown.
....
Your getting your squadrons mixed up
P-47M's
61st FS Black topside.
62nd FS RAF Green/Grey
63rd FS Light blue/dark blue.
Underside of all three squadrons P-47M's remained unpainted.
Later delivery aircraft didn't get painted and remained overall NMF.....
Thanks for the info, Nige! That really helps as I didn't know that. I just wrote it down for my next T'bolt kit.
Posted: Monday, May 13, 2013 - 01:04 PM UTC
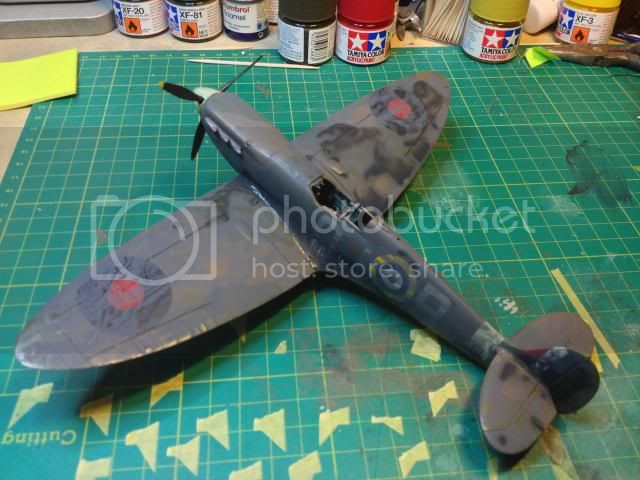
Onto the home stretch now with the little Tamiya Spit.
Paint chips and a bit more general wear and tear added tonight.
I'm looking at it thinking, " maybe a little more chipping here, a bit more there", so I guess that means it's time to stop before I overdo it?
Harsh overhead light is washing out the camo scheme again but it has the benefit of showing up the areas that have received attention in the paint chipping department.
So, unless I decide to add more weathering, it's just a case of adding the dangly bits and the Spits going to be finished.
Nige