Airfix 1:72 Typhoon. New Mould

#029
England - East Midlands, United Kingdom
Joined: December 23, 2005
KitMaker: 6,249 posts
AeroScale: 3,270 posts
Posted: Wednesday, May 22, 2013 - 09:45 AM UTC
Right then Mayfield and Rigby

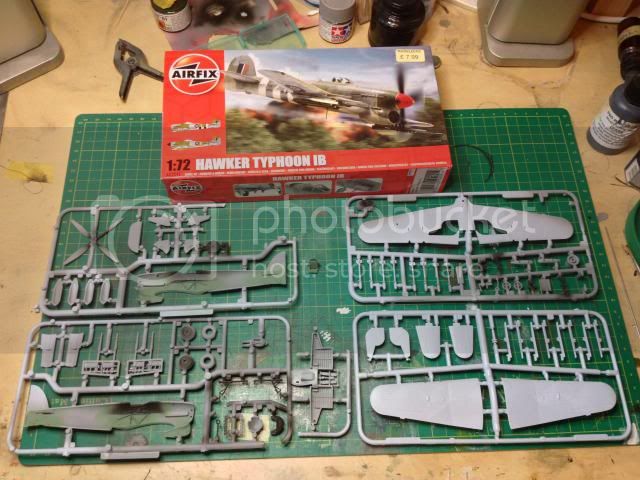
This is a ,,ahem,,cough cough..."speed build" of the new mould Airfix Typhoon. I must say it's a little beauty of a kit, and I love the approach Airfix/Hornby are taking to our hobby!.
By "speed build" I mean a straight OOB fun build, no intense research, just building for the sheer enjoyment of it.
Made a start tonight on painting the cockpit and few other bits and pieces.
Nige

It's not the same, better, but not the same...
England - South East, United Kingdom
Joined: September 15, 2004
KitMaker: 4,728 posts
AeroScale: 1,351 posts
Posted: Wednesday, May 22, 2013 - 10:16 AM UTC
On the bench...
Italeri A129 Mangusta
British Bulldog Spitfire theme build
Holdfast
 President
#056
England - South West, United Kingdom
Joined: September 30, 2002
KitMaker: 8,581 posts
AeroScale: 4,913 posts
Posted: Wednesday, May 22, 2013 - 06:00 PM UTC
So, the time starts.....now

When you say speed build how many months/years, do you expect it to take?

I reckon that you have got the neighbour in to build it while you are working

MAL the MASK
BULLDOG # 6 (President)
BEWARE OF THE FEW
Sappers: First in, last out. (UBIQUE)
It's not the same, better, but not the same.

#029
England - East Midlands, United Kingdom
Joined: December 23, 2005
KitMaker: 6,249 posts
AeroScale: 3,270 posts
Posted: Thursday, May 23, 2013 - 07:21 AM UTC
I'm not going to get drawn into a timescale hahahaha.
Lets just say I want to try and at least do
something on this everyday I'm home, even if it's only 10 or 15 minutes.

I'd forgotten how small 1:72 is!
Nige

It's not the same, better, but not the same...
England - South East, United Kingdom
Joined: March 07, 2005
KitMaker: 868 posts
AeroScale: 690 posts
Posted: Saturday, May 25, 2013 - 11:01 PM UTC
Hi Nige,
..just started this one too. Looks superb (in the box). Juggling all the various bits to go inside the fuselage halves before closing up is proving a little tricky though.
By the way, if looking for Typhoon refs, if you haven't got the 4-volume Classic 2nd TAF series there is a marvellous selection of 2nd TAF Typhoon pics in the Imperial War museum's "Air ministry collection 1943-45", pages of 'em
http://www.iwm.org.uk/collections/listing/object-205012634?items_per_page=10&page=9
AussieReg
 Associate Editor
#007
Victoria, Australia
Joined: June 09, 2009
KitMaker: 8,156 posts
AeroScale: 3,756 posts
Posted: Saturday, May 25, 2013 - 11:20 PM UTC
Quoted Text
Right then Mayfield and Rigby 
By "speed build" I mean a straight OOB fun build, no intense research, just building for the sheer enjoyment of it.
Oh, ok, a disclaimer before we even get started.
Looking forward to following this one mate, best of luck with the build. Compared with the big VFS Jug, almost anything will be small !
Cheers, D
ON the bench
Revell 1/24 '53 Corvette (building as '54)
Revell 1/24 BMW 507 Coupe and Cabrio
Italeri 1/48 Me262 B-1a/U1 Nightfighter
Monogram 1/24 '57 Chevy Nomad
Dragon 1/350 USS Frank Knox DD-742
Sør-Trøndelag, Norway
Joined: October 23, 2012
KitMaker: 189 posts
AeroScale: 142 posts
Posted: Sunday, May 26, 2013 - 07:07 AM UTC
Just orderet it from hobbyshop.cz. Just €4,65. Can't wait to get my fingers on it, as it looks like a beautiful kit!

I just love the resent offerings from Airfix. (I hope a FW 190 and a P-47 is in the pipelines, and maybe a 1:72 scale Mosquito)
Building the world, one piece at the time.
Holdfast
 President
#056
England - South West, United Kingdom
Joined: September 30, 2002
KitMaker: 8,581 posts
AeroScale: 4,913 posts
Posted: Sunday, May 26, 2013 - 07:30 PM UTC
So what about paint masks?
MAL the MASK
BULLDOG # 6 (President)
BEWARE OF THE FEW
Sappers: First in, last out. (UBIQUE)
It's not the same, better, but not the same.

#029
England - East Midlands, United Kingdom
Joined: December 23, 2005
KitMaker: 6,249 posts
AeroScale: 3,270 posts
Posted: Tuesday, May 28, 2013 - 10:12 AM UTC
No modelling over the weekend due to marathon stint of both work and play,and finished off with the Memorial Day Service at Madingley,Cambridge.
A short visit to the bench tonight and that was all it took to get the cockpit finished. All I added was a set of Eduard seatbelts.
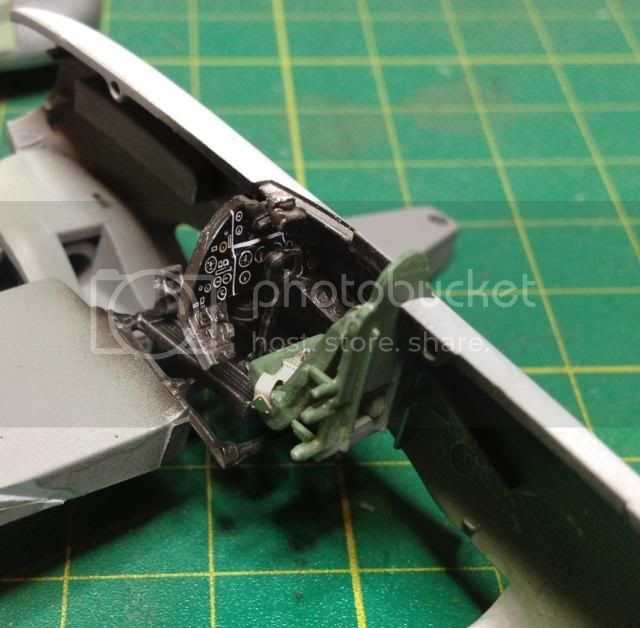
And then all that was needed was a quick test fit and the fusalage was together and taped ready for an overnight dry.
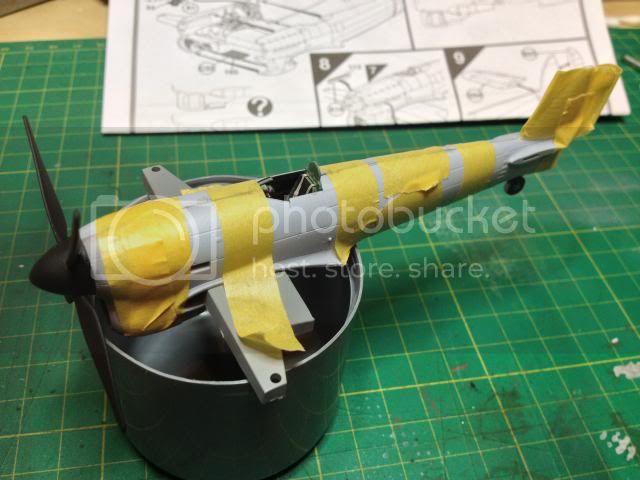
Good excuse for a test fit of the prop

Masks...
I want to do this straight OOB and just get a quick build done as a change to the heavily researched builds which have been taking me a couple of years on average to get finished. So it's decals for this one.
I'm not even going for the invasion striped option as I want to get it finished ASAP.
Next job will be to get the wings on, but before then I have drill holes for the ordnance.
What d'ya reckon I should go for?
Bare wings?
Bombs?
Rockets?
Nige

It's not the same, better, but not the same...
AussieReg
 Associate Editor
#007
Victoria, Australia
Joined: June 09, 2009
KitMaker: 8,156 posts
AeroScale: 3,756 posts
Posted: Tuesday, May 28, 2013 - 03:20 PM UTC
Quoted Text
What d'ya reckon I should go for?
Bare wings?
Bombs?
Rockets?
Rockets, go for the WHOOSH factor, and no more of these 13 hour nanna-naps old man.
Looking great BTW, I'm sure you are enjoying a quick, simple build for a change.
Cheers, D
ON the bench
Revell 1/24 '53 Corvette (building as '54)
Revell 1/24 BMW 507 Coupe and Cabrio
Italeri 1/48 Me262 B-1a/U1 Nightfighter
Monogram 1/24 '57 Chevy Nomad
Dragon 1/350 USS Frank Knox DD-742
England - South East, United Kingdom
Joined: September 15, 2004
KitMaker: 4,728 posts
AeroScale: 1,351 posts
Posted: Tuesday, May 28, 2013 - 05:27 PM UTC
Looking good Nige, sometimes a quick simple build is what the doctor ordered and you can feel refreshed and ready for a more complex build after.
Oh of course whizz bangs...
On the bench...
Italeri A129 Mangusta
British Bulldog Spitfire theme build
Holdfast
 President
#056
England - South West, United Kingdom
Joined: September 30, 2002
KitMaker: 8,581 posts
AeroScale: 4,913 posts
Posted: Tuesday, May 28, 2013 - 06:45 PM UTC
Looking good Nige, and it is a quick build (so far

)
Definitely go for rockets but don't forget the correct fill bands are: 1" (0.36mm) light green band around the war head body about 1/3rd from the nose and 1/2" (0.18mm)red and white bands on the nose

I understand about the mask/decals thing, no problem

So this should be finished by the end of the week?
MAL the MASK
BULLDOG # 6 (President)
BEWARE OF THE FEW
Sappers: First in, last out. (UBIQUE)
It's not the same, better, but not the same.
England - South East, United Kingdom
Joined: March 07, 2005
KitMaker: 868 posts
AeroScale: 690 posts
Posted: Thursday, May 30, 2013 - 12:35 AM UTC
ermm, yes, thanks Mal.
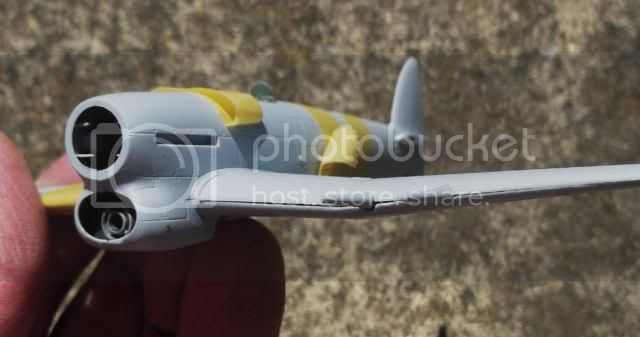
looking good Nige - hope you have fewer problems than I did getting the wings on....any hints appreciated. For my next one I was thinking of putting the wheel well insert straight on top of the wing rather than in the fuselage half ?

#029
England - East Midlands, United Kingdom
Joined: December 23, 2005
KitMaker: 6,249 posts
AeroScale: 3,270 posts
Posted: Thursday, May 30, 2013 - 10:23 AM UTC
Got all that Mal,,,err thanks

Saved and noted for the MDC build

Neil,
Havent had much chance to do more than glance at this today as it's been manic at AirFramed HQ.
Although I havent got the gun bays in the wings as yet, or the bottom wing attached even, but the general fit of the wings seemed better if I removed the lugs on the top section wing root side.
I've done this on one side only and it lets the top section sit slightly more forward.
I'll probably get chance to have a better muck about with it on Saturday

Nige

It's not the same, better, but not the same...
Holdfast
 President
#056
England - South West, United Kingdom
Joined: September 30, 2002
KitMaker: 8,581 posts
AeroScale: 4,913 posts
Posted: Monday, June 10, 2013 - 06:29 PM UTC
MAL the MASK
BULLDOG # 6 (President)
BEWARE OF THE FEW
Sappers: First in, last out. (UBIQUE)
It's not the same, better, but not the same.

#029
England - East Midlands, United Kingdom
Joined: December 23, 2005
KitMaker: 6,249 posts
AeroScale: 3,270 posts
Posted: Monday, June 10, 2013 - 07:41 PM UTC
This ain't no regular speed build lol
I managed 20 minutes at the bench last night and got a bit done in this!
Going to try and get a bit more done tonight,
It's not the same, better, but not the same...
England - South East, United Kingdom
Joined: September 15, 2004
KitMaker: 4,728 posts
AeroScale: 1,351 posts
Posted: Monday, June 10, 2013 - 09:00 PM UTC
I'll keep following along Nige, as I've just picked one up myself

On the bench...
Italeri A129 Mangusta
British Bulldog Spitfire theme build
Holdfast
 President
#056
England - South West, United Kingdom
Joined: September 30, 2002
KitMaker: 8,581 posts
AeroScale: 4,913 posts
Posted: Tuesday, June 11, 2013 - 12:28 AM UTC
I suppose I ought to post the progress on my 1/72 Airfix Spitfire Mk I, rather than slag you off for being slack!

MAL the MASK
BULLDOG # 6 (President)
BEWARE OF THE FEW
Sappers: First in, last out. (UBIQUE)
It's not the same, better, but not the same.

#029
England - East Midlands, United Kingdom
Joined: December 23, 2005
KitMaker: 6,249 posts
AeroScale: 3,270 posts
Posted: Tuesday, June 11, 2013 - 05:35 AM UTC
Quoted Text
I suppose I ought to post the progress on my 1/72 Airfix Spitfire Mk I, rather than slag you off for being slack! 
Aye, and post some progress pics of an Airfix Tiger Moth too

Did you manage to get to the Post Office?
Attaching the top part of the wings is something to look out for as Neil pointed out in an earlier post.
If you go for the neat seam on the leading edge you're going to get a step at the wing root by the looks of things.
This is where I'm at now so I'll be working out the best way round this later tonight,,unless I get distracted.
With the Dornier being raised yesterday I have an urge to watch Battle Of Britain with the volume turned up loud

It's not the same, better, but not the same...

#372
United Kingdom
Joined: March 10, 2010
KitMaker: 2,568 posts
AeroScale: 1,619 posts
Posted: Tuesday, June 11, 2013 - 09:05 AM UTC
Its looking good. I've been waiting for a decent typhoon to be kitted and you've very nearly convinced me to rush out and get one.
On the bench: 1/72 Mosquito, Lightning F.6, DH.2,
AMT Vulcan Shuttle Surak.
Cyber-Hobby 1:35 Sherman Firefly IC - still stalled.

#029
England - East Midlands, United Kingdom
Joined: December 23, 2005
KitMaker: 6,249 posts
AeroScale: 3,270 posts
Posted: Tuesday, June 11, 2013 - 09:52 AM UTC
It's a lovely little kit and for less than £8 you can't go wrong

Working my way round the slightly problematic top wing fix at the moment.
To start I cut off the locating lugs, which allows the wing to sit slightly further forward and makes for a flush fit at the trailing edge.
Initially I've only glued the trailing edge and around the ring to the inboard cannon.
Next step was to one up and glue the rear half of the wing root.
Once dry it'll just be a case of lifting the leading edge slightly to line up the forward wing root, and then a small amount if filler or plastic are spacer on the leading edge between the wing root and the inboard cannon.

Nige
It's not the same, better, but not the same...

#029
England - East Midlands, United Kingdom
Joined: December 23, 2005
KitMaker: 6,249 posts
AeroScale: 3,270 posts
Posted: Tuesday, June 11, 2013 - 10:42 AM UTC
Heres how it worked out,
Wings together with plastic card spacers glued in the gaps.
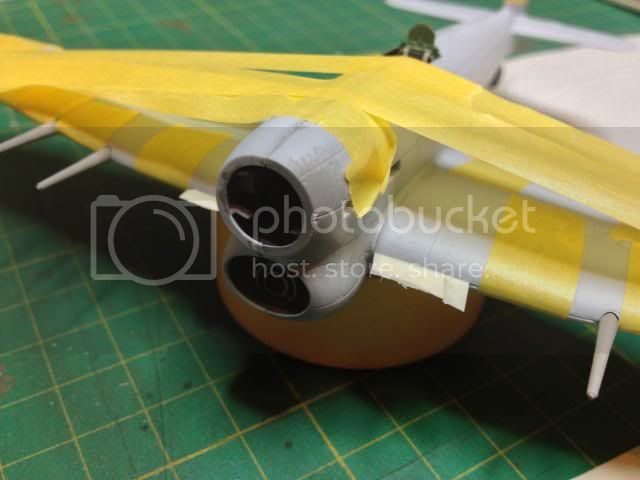
And then the excess trimmed off
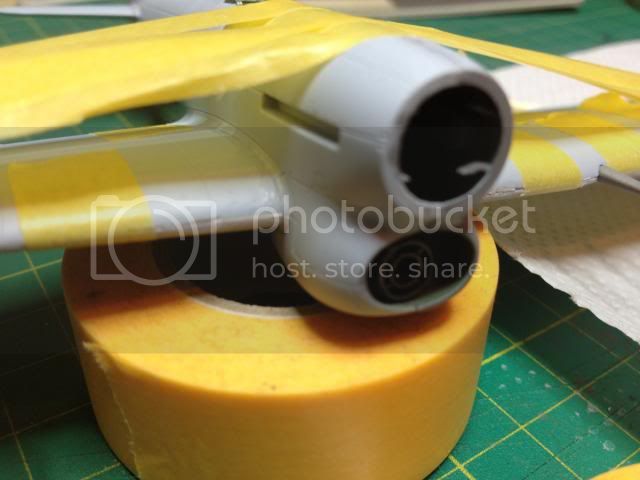
An overnight set and then I'll see how it looks tomorrow

Nige

It's not the same, better, but not the same...

#372
United Kingdom
Joined: March 10, 2010
KitMaker: 2,568 posts
AeroScale: 1,619 posts
Posted: Tuesday, June 11, 2013 - 10:50 AM UTC
Is that a common problem with the kit then?
I had some issues recently with fitting the intakes to their new Gnat which took a fair bit of fiddling and carving to fix. Still not 100% happy with it.
On the bench: 1/72 Mosquito, Lightning F.6, DH.2,
AMT Vulcan Shuttle Surak.
Cyber-Hobby 1:35 Sherman Firefly IC - still stalled.
Holdfast
 President
#056
England - South West, United Kingdom
Joined: September 30, 2002
KitMaker: 8,581 posts
AeroScale: 4,913 posts
Posted: Tuesday, June 11, 2013 - 07:31 PM UTC
Quoted Text
Aye, and post some progress pics of an Airfix Tiger Moth too
Did you manage to get to the Post Office?
Tiger Moth? I haven't got a clue what you are talking about?
Post office?
Tiffies coming on

MAL the MASK
BULLDOG # 6 (President)
BEWARE OF THE FEW
Sappers: First in, last out. (UBIQUE)
It's not the same, better, but not the same.

#029
England - East Midlands, United Kingdom
Joined: December 23, 2005
KitMaker: 6,249 posts
AeroScale: 3,270 posts
Posted: Tuesday, June 11, 2013 - 09:39 PM UTC
Might get some more done today

PM you re post office

It's not the same, better, but not the same...


