Ola Guys and Gals
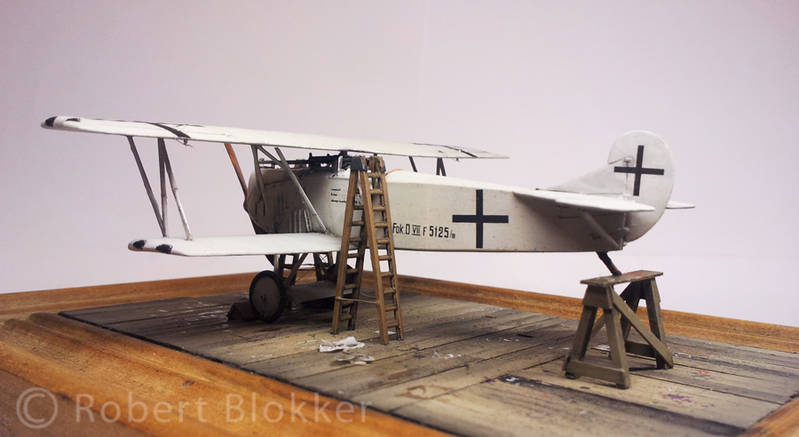
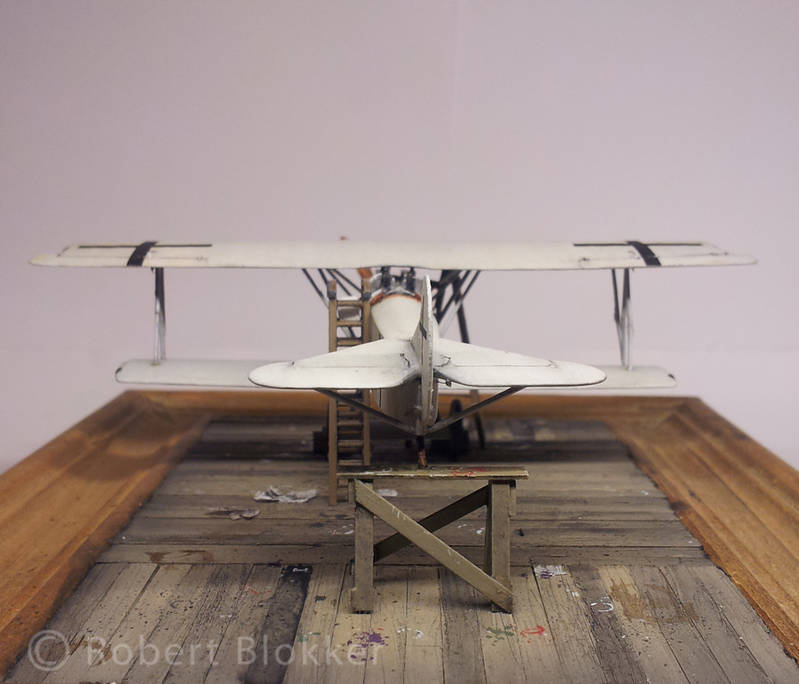
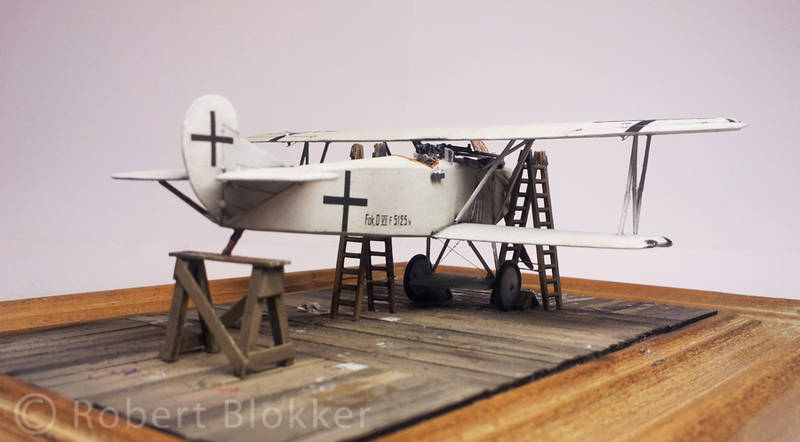
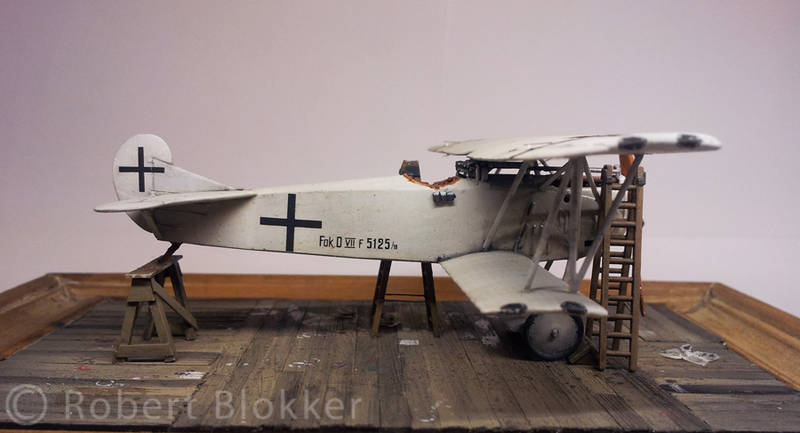
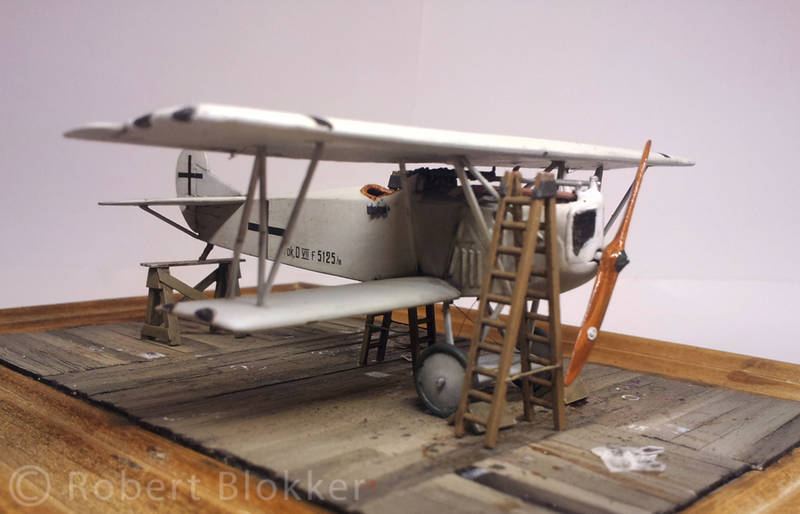
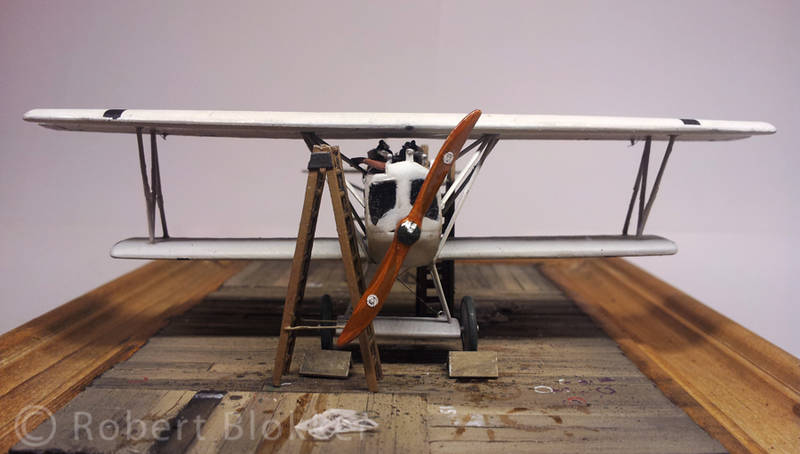
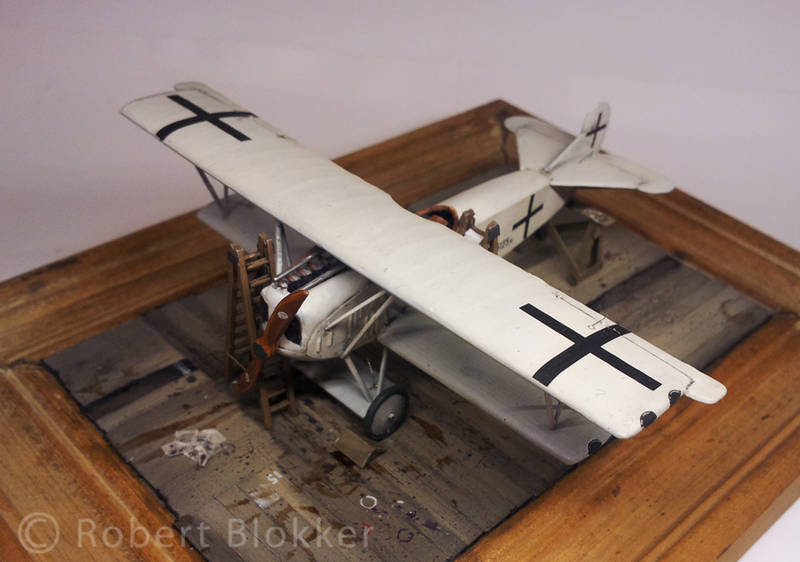
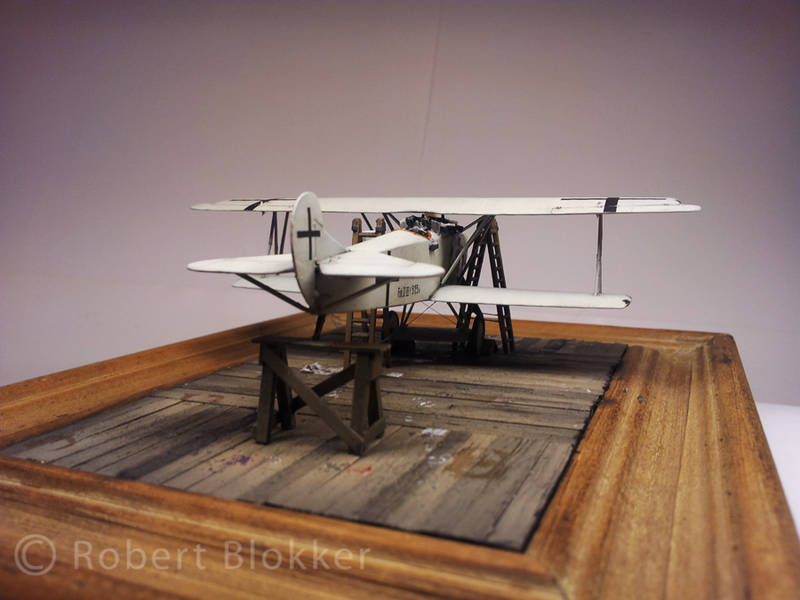
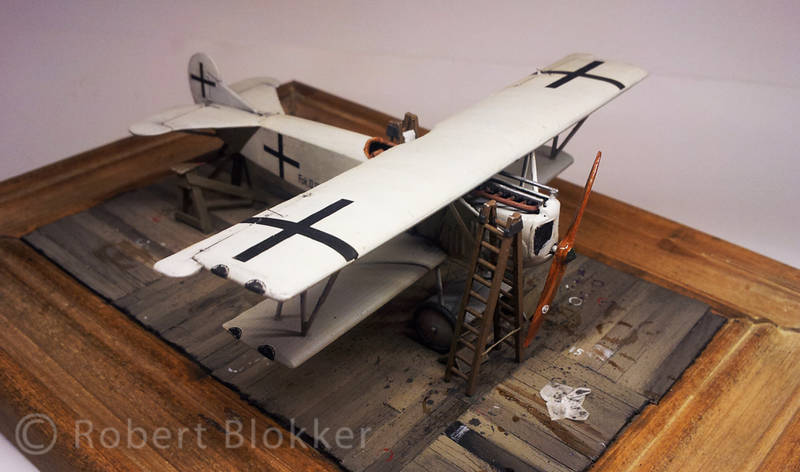
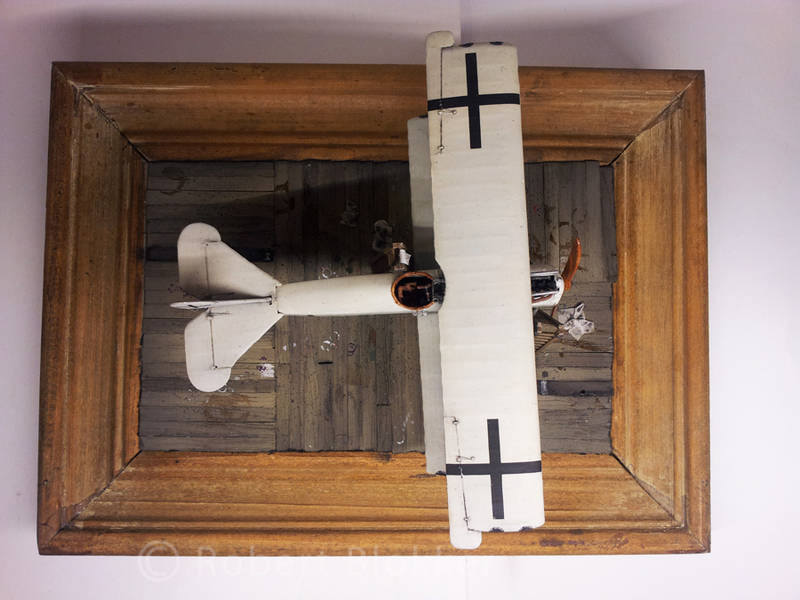
It seems I can't shake off the wings virus. And I have another WW1 flyer finished. My second Roden 1:72 Fokker D.VII F and the version I built this time is the All white Fokker D.VII F flown by Hermann Goering when he flew in the Flying circus. I decided to go a bit further on the baseplate and wanted it to look like it was under maintenance in a makeshift hangar (the book I have on the flying circus shows aircraft being maintenanced in a tent) I saw in several diorama's from other builders that they had the aircraft with it's tail on a trestle. I thought that looked quite cool even though I had no clue why they did it. Later I heard from somebody with a lot of knowledge that they did it to aim the MG's.
Also when I was decalling the aircraft I dropped it. Breaking off the top wing and the outer struts each broke into 4 nearly identical pieces which gave me an interesting puzzle for a few days. The wing and struts are still not perfect but I did the best I could.
Anyway I talk too much. Here are the pictures.
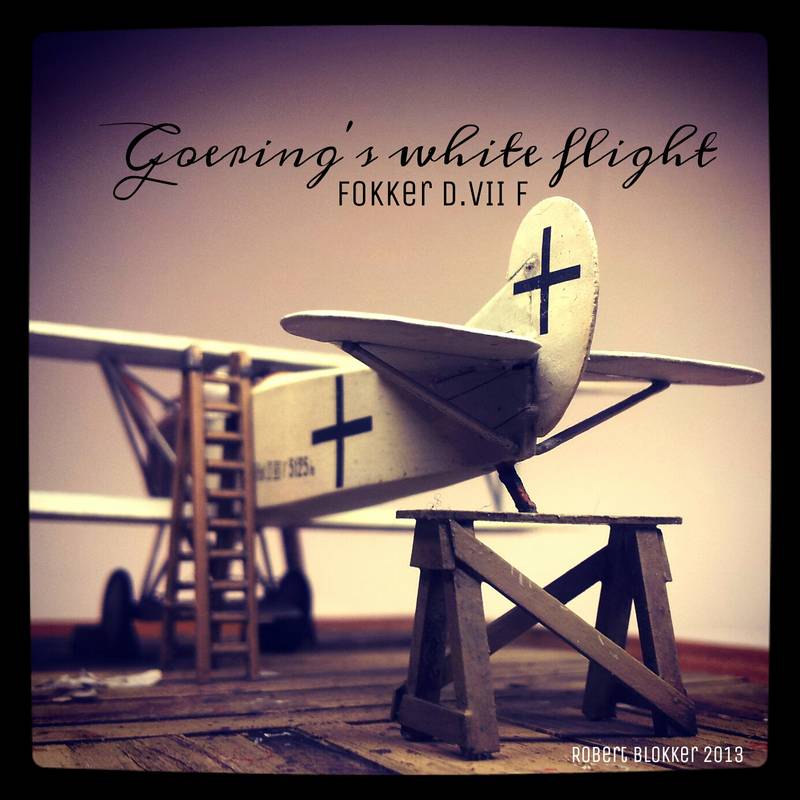
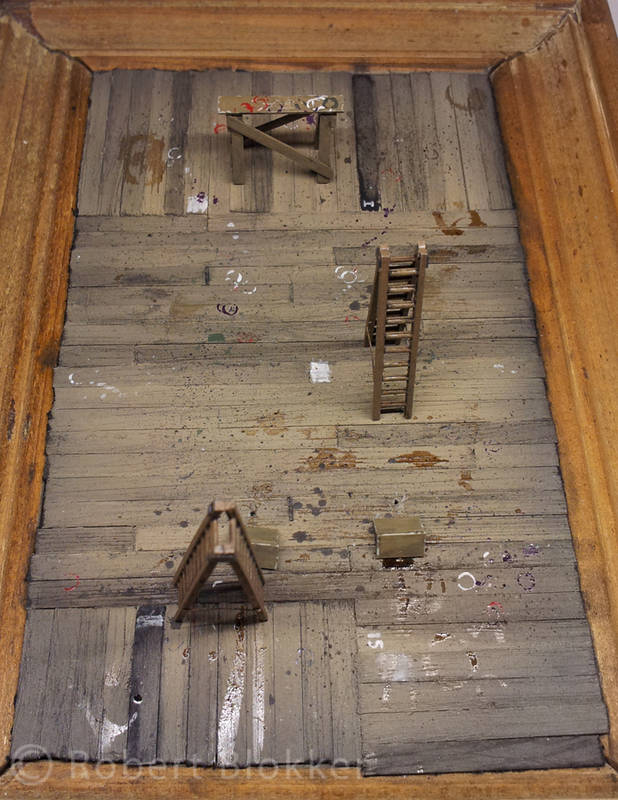
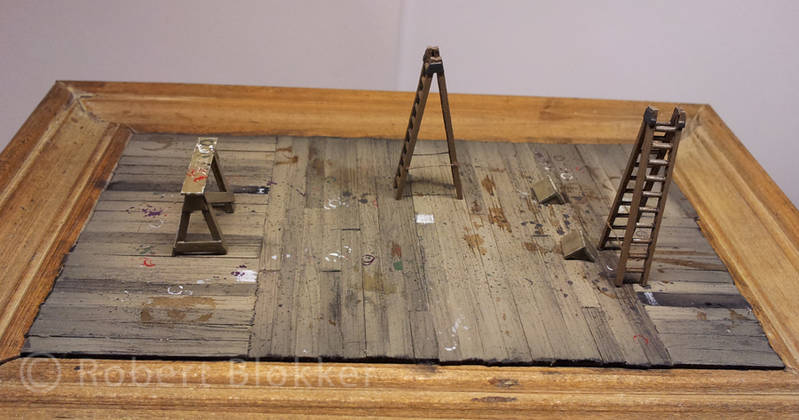
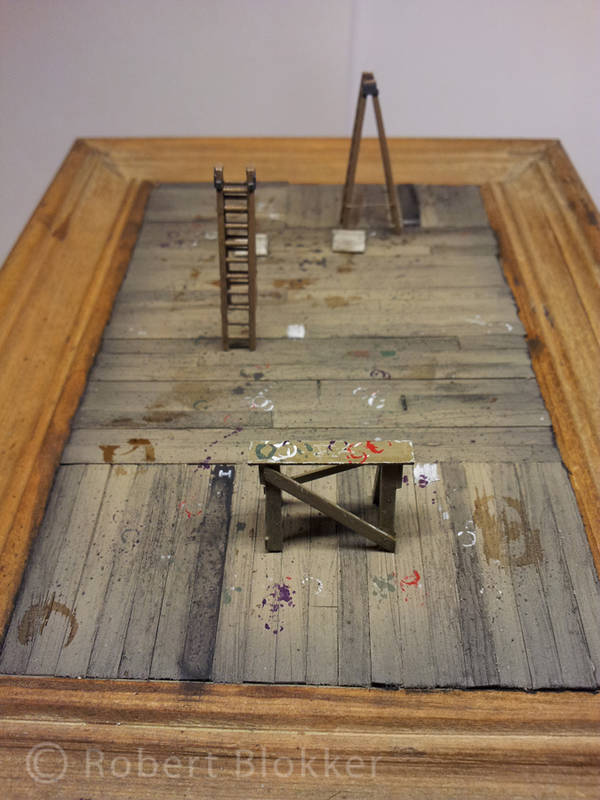
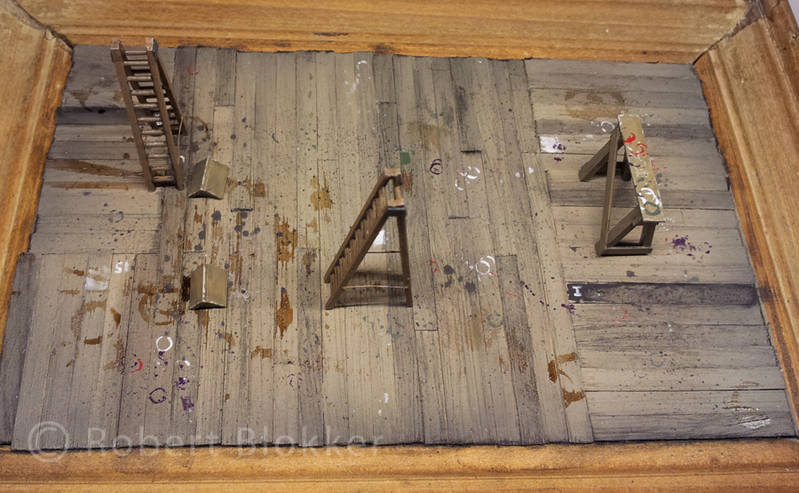
First a few shots of the finished floor. I wanted to give the impression that this was the place where they not only serviced aircraft but also where camo was applied. No clue if this was done in the same area during WW1 but I thought it looked pretty cool.
And now with the Aircraft in place
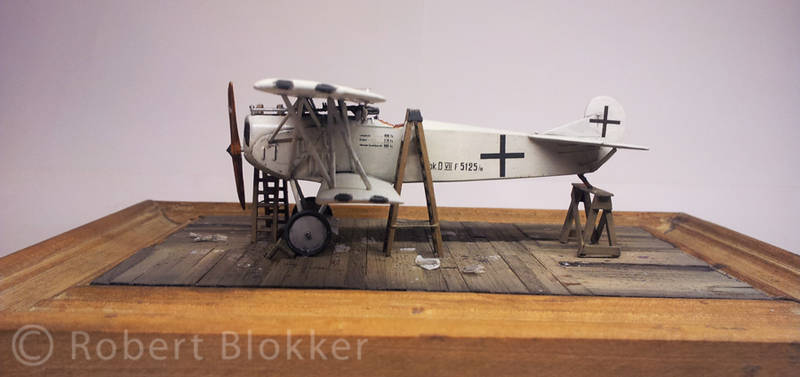
Looking forward to any feedback.
With friendly greetz
Robert Blokker
Early Aviation
Discuss World War I and the early years of aviation thru 1934.
Hosted by Jim Starkweather
Goering's White Flight finished.
Posted: Wednesday, June 12, 2013 - 08:57 AM UTC
JackFlash
Colorado, United States
Joined: January 25, 2004
KitMaker: 11,669 posts
AeroScale: 11,011 posts
Joined: January 25, 2004
KitMaker: 11,669 posts
AeroScale: 11,011 posts
Posted: Wednesday, June 12, 2013 - 10:01 AM UTC
Interesting display. This is the Eduard 1:48 weekend kit?
windysean
Wisconsin, United States
Joined: September 11, 2009
KitMaker: 1,917 posts
AeroScale: 563 posts
Joined: September 11, 2009
KitMaker: 1,917 posts
AeroScale: 563 posts
Posted: Wednesday, June 12, 2013 - 01:59 PM UTC
Nicely done! A neat subject too, back when Herrman was a daring young ace.
Thanks for posting.
Thanks for posting.
OEFFAG_153
Västra Götaland, Sweden
Joined: February 19, 2010
KitMaker: 1,473 posts
AeroScale: 1,450 posts
Joined: February 19, 2010
KitMaker: 1,473 posts
AeroScale: 1,450 posts
Posted: Wednesday, June 12, 2013 - 07:01 PM UTC
Very, very nice! Especially love the ground work – the spilled paint and oil looks most convincing!
Mikael
Mikael
Posted: Wednesday, June 12, 2013 - 07:52 PM UTC
@ Stephen
Thanks for your reply and your compliments. 1:48 would have been easier and less fragile. But this is the 1:72 Roden D.VII F.
@ Sean
Thanks for the compliments as well. Yeah later Goering was too big to fit into that tiny cockpit.
@ Mikael
The groundwork is the main reason the aircraft still got finished despite all the setbacks. After breaking the struts for the third time it came extremely close to a single flight against the wall. But with the floor starting to look so good I decided to keep going on with the Fokker as I wanted result in a short time. No time to completely built a new D.VII.
lcarroll
Alberta, Canada
Joined: July 26, 2010
KitMaker: 1,032 posts
AeroScale: 1,025 posts
Joined: July 26, 2010
KitMaker: 1,032 posts
AeroScale: 1,025 posts
Posted: Thursday, June 13, 2013 - 12:02 AM UTC
Robert,
Very nice effect; the base really compliments the aircraft. How did you achieve the weathered/aged grey colour of the planks of wood on the flooring and what did you use for the planks? It is very realistic.
Cheers,
Lance
Very nice effect; the base really compliments the aircraft. How did you achieve the weathered/aged grey colour of the planks of wood on the flooring and what did you use for the planks? It is very realistic.
Cheers,
Lance
jimb
New York, United States
Joined: August 25, 2006
KitMaker: 2,539 posts
AeroScale: 231 posts
Joined: August 25, 2006
KitMaker: 2,539 posts
AeroScale: 231 posts
Posted: Thursday, June 13, 2013 - 12:24 AM UTC
Very convincing. Looks like the paint crew just finished up. Nicely done.
Jim
Jim
DrIAce
California, United States
Joined: August 14, 2011
KitMaker: 59 posts
AeroScale: 56 posts
Joined: August 14, 2011
KitMaker: 59 posts
AeroScale: 56 posts
Posted: Thursday, June 13, 2013 - 04:01 AM UTC
Dittos to the above, nice work.
Posted: Thursday, June 13, 2013 - 05:43 AM UTC
Ola Guys
Thanks for the compliments.
@ Lance. To start. The only wood in the whole thing is the pictureframe on which it is mounted. The floor was made with strips of styrene that were the same width but not the same thickness. used 2 thicknesses of Evergreen for it. Every strip is scored once or twice with a piece of rough grit sandingpaper to create the woodstructure. Then it was airbrushed with 2 colors of Tamiya Acrylics. A dirty greyish brown for the edges and buff in the center giving the idea that that section of floor is shined on by a lamp. And finally the whole thing got washed with black oilpaint and the thickness of the wash was varied to get color differences in the individual planks.
goodn8
Berlin, Germany
Joined: October 12, 2008
KitMaker: 709 posts
AeroScale: 651 posts
Joined: October 12, 2008
KitMaker: 709 posts
AeroScale: 651 posts
Posted: Thursday, June 13, 2013 - 06:18 AM UTC
Robert,
very nice work and display indeed!
Well, i´m not a Goering-Fan but your artwork is great.
Despite the fact that Goering flew the white 5125 only once or twice (when takin over JG1 he flew it to Metz-Frescaty). He was then mostly in an administrative role and scored no victories in it. So there were not much maintainence necessary with a new painted and unabused aircraft.
And about Ace: Jasta 11 had a total of 350 victories,Goering scored one in JG1 ...
Anyway - top modelling!
Cheers T.
Posted: Thursday, June 13, 2013 - 06:39 AM UTC
@ Thomas
Thanks for the compliments. Really appreciated.
To be honest... I have been building aircraft for a few weeks now. And my knowledge is paperthin. Only have one book and I'm still at the stage where I built things because they look cool I have no idea what I'm doing and I have no clue if it is accurate. That is why I'm so happy with people like you who have a sound knowledge of the subject at hand.
goodn8
Berlin, Germany
Joined: October 12, 2008
KitMaker: 709 posts
AeroScale: 651 posts
Joined: October 12, 2008
KitMaker: 709 posts
AeroScale: 651 posts
Posted: Thursday, June 13, 2013 - 06:48 AM UTC
These were no critics - i really enjoy your whole work!
It´s a real eye-catcher -
Groet naar Holland,
Thomas
It´s a real eye-catcher -
Groet naar Holland,
Thomas
Posted: Thursday, June 13, 2013 - 07:05 AM UTC
@ Thomas
I understood it as it was. And even if it was critique I could handle that as well. I'm glad you enjoy my work.
Und die schone grusse zuruck.
Robert Blokker
I understood it as it was. And even if it was critique I could handle that as well. I'm glad you enjoy my work.
Und die schone grusse zuruck.
Robert Blokker
Jessie_C
British Columbia, Canada
Joined: September 03, 2009
KitMaker: 6,965 posts
AeroScale: 6,247 posts
Joined: September 03, 2009
KitMaker: 6,965 posts
AeroScale: 6,247 posts
Posted: Thursday, June 13, 2013 - 08:45 AM UTC
Robert, can you put together a "how to" for that fabulous wood floor? I'm sure that many of our members would love to see a step-by-step tutorial on how you manged such a well-used look.
Posted: Thursday, June 13, 2013 - 08:49 AM UTC
Ola Jessica
Thanks for the compliments. And it should not really be a problem to make a little how to. I still have enough material to create another one. Give me a bit of time and I will put together something.
lcarroll
Alberta, Canada
Joined: July 26, 2010
KitMaker: 1,032 posts
AeroScale: 1,025 posts
Joined: July 26, 2010
KitMaker: 1,032 posts
AeroScale: 1,025 posts
Posted: Thursday, June 13, 2013 - 02:16 PM UTC
Robert,
Hard to believe the planks are styrene...........they are really well done! I'll be following your "How To" very closely, Thanks.
Cheers,
Lance
Hard to believe the planks are styrene...........they are really well done! I'll be following your "How To" very closely, Thanks.
Cheers,
Lance
Posted: Sunday, June 16, 2013 - 11:57 PM UTC
Ola Lance
It is one of those tricks that I picked up a long time ago and it works terrific. But I will show you all how to do it in the very near future. First I need to buy a new desktop lamp otherwise I can't make good pictures.
chris1
Auckland, New Zealand
Joined: October 25, 2005
KitMaker: 949 posts
AeroScale: 493 posts
Joined: October 25, 2005
KitMaker: 949 posts
AeroScale: 493 posts
Posted: Monday, June 17, 2013 - 07:40 AM UTC
Hi Robert,
Awesome build and a great diorama.
Does white count as camo??
Do you have any build photos would like to see more.
Chris
Awesome build and a great diorama.
Quoted Text
but also where camo was applied
Does white count as camo??
Do you have any build photos would like to see more.
Chris
JackFlash
Colorado, United States
Joined: January 25, 2004
KitMaker: 11,669 posts
AeroScale: 11,011 posts
Joined: January 25, 2004
KitMaker: 11,669 posts
AeroScale: 11,011 posts
Posted: Monday, June 17, 2013 - 09:12 AM UTC