_GOTOBOTTOM
Early Aviation
Discuss World War I and the early years of aviation thru 1934.
KotS III GB Sopwith Triplane N533
lcarroll
_VISITCOMMUNITY
Alberta, Canada
Joined: July 26, 2010
KitMaker: 1,032 posts
AeroScale: 1,025 posts
Posted: Sunday, November 03, 2013 - 11:26 AM UTC
Well, better late then never! With three and a half weeks remaining I decided to enter my latest Build, started a few days back, and hopefully will make the 30 Nov. deadline. I decided to give it a couple of days to get an idea of how practical this plan was, so far the Build is stepping right along so here we go!
The specific aircraft I've chosen is N533, one of six twin Vickers Gun versions built by Clayton and Shuttleworth. This aircraft, one of several named Black Maria by it's pilot, Canadian Raymond Collishaw, was used by him in July 1917 in the destruction of two Albatros DV''s. Collishaw was the C Flight Commander of Naval 10 Squadron and led the famous "Black Flight, was the War's highest scoring Tripe Pilot with 34 kills on type, and survived the War with a total of 60 Kills.
First, the Kit with references and After Market goodies:


The Westrop book is a very enjoyable read, and has excellent Profiles and photos as a bonus feature.
The rest of the References I'll be using...........


I'll be using the excellent Pheon Decal Sheet for this Build, N533 is the Profile at the lower left.


The After Market bits I'm considering for the Build, the HGW Seat Belts will be used for sure however only the wide "Lapbelt" as fitted to the original aircraft.


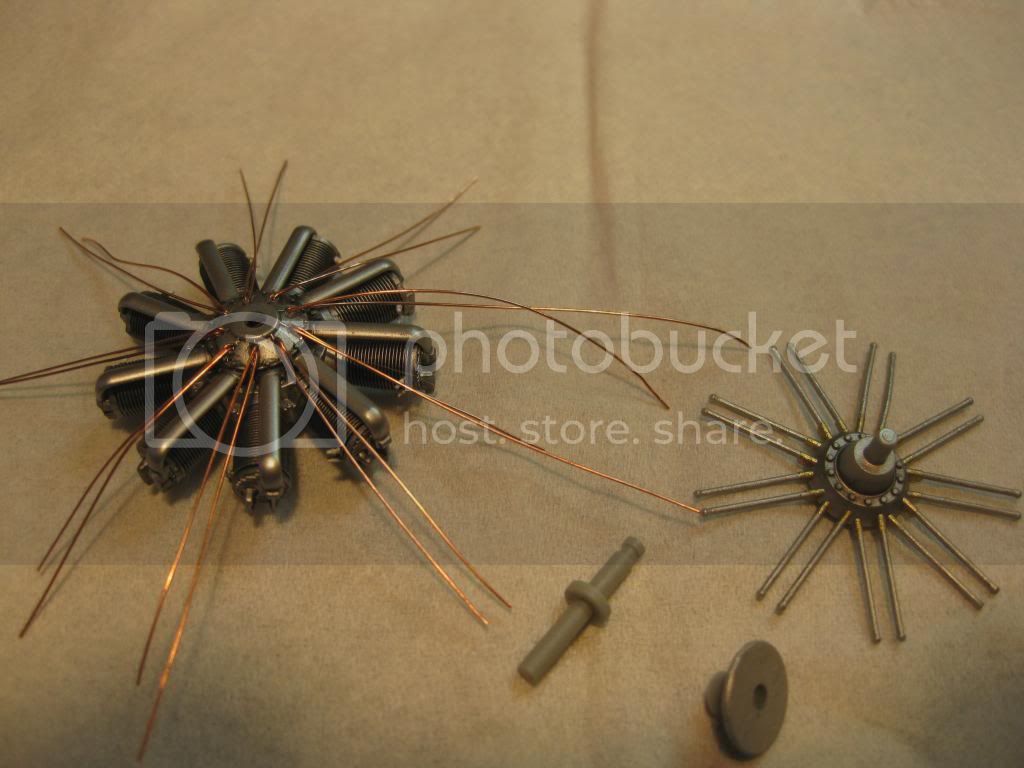
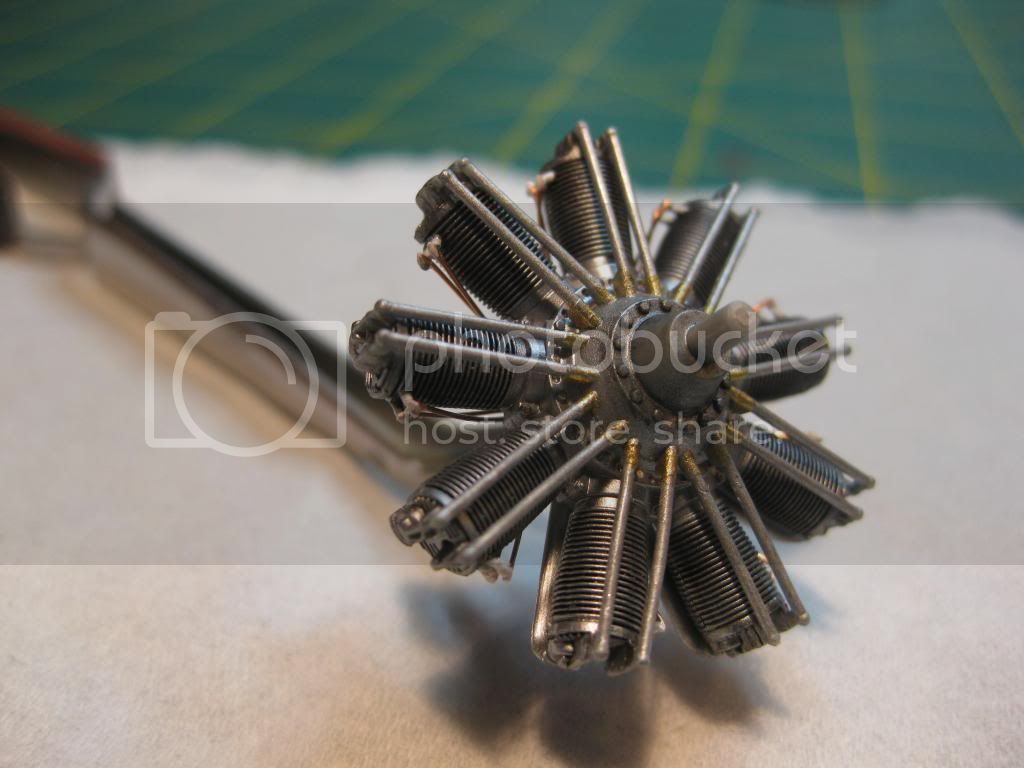
Since starting I've completed painting of most wood finish sub components and will be concentrating on the cockpit starting tomorrow. The engine has been completed and tucked away for later installation. The engine, the 130 HP Clerget 9b version, was finished with various Alclad II colours, the cylinders given a pinwash of semi-gloss black enamel, and copper wire added for the ignition wires. In retrospect I should have used the thinner wire I tried first as that used appears to me a little "overscale" however it will be all but invisible on the finished model. Here's some shots of the finished product.....
First, the assemblies prior to completion:


.............and a few shots of the finished product.


And, other then a lot of drying bits and pieces that's progress til now. I'll publish another update once the cockpit module starts to come together in the next several days.
Cheers,
Lance
rochaped
_VISITCOMMUNITY
Lisboa, Portugal
Joined: August 27, 2010
KitMaker: 679 posts
AeroScale: 669 posts
Posted: Sunday, November 03, 2013 - 11:51 AM UTC
Lance,

You're off to a great start.
That engine is amazing so far, and with all those goodies your Triplane sure promises something good down the road.

Keep it up
redcap
_VISITCOMMUNITY
England - East Midlands, United Kingdom
Joined: November 06, 2005
KitMaker: 753 posts
AeroScale: 311 posts
Posted: Sunday, November 03, 2013 - 11:55 AM UTC
A fabulous start on the engine and I look forward to seeing this build progress.

Well done Lance!
Gary
JackFlash
_VISITCOMMUNITY
Colorado, United States
Joined: January 25, 2004
KitMaker: 11,669 posts
AeroScale: 11,011 posts
Posted: Sunday, November 03, 2013 - 04:19 PM UTC
Wow! Looking forward to this.
OEFFAG_153
_VISITCOMMUNITY
Västra Götaland, Sweden
Joined: February 19, 2010
KitMaker: 1,473 posts
AeroScale: 1,450 posts
Posted: Sunday, November 03, 2013 - 08:00 PM UTC
Hi Lance,

Nice to see you at it – and you're off to a great start!

This kit is very high on my to do pile at the moment (I even started with the engine). It does feel like a very sweet kit indeed!

I really look forward to your build!

Mikael
lcarroll
_VISITCOMMUNITY
Alberta, Canada
Joined: July 26, 2010
KitMaker: 1,032 posts
AeroScale: 1,025 posts
Posted: Thursday, November 07, 2013 - 04:11 PM UTC
Just a brief update before I leave for the weekend to visit Family.
I've been working away at the cockpit area and have completed most of the sub components. My photos only cover about one-half the progress so I'll have to update this when I return Monday or Tuesday.
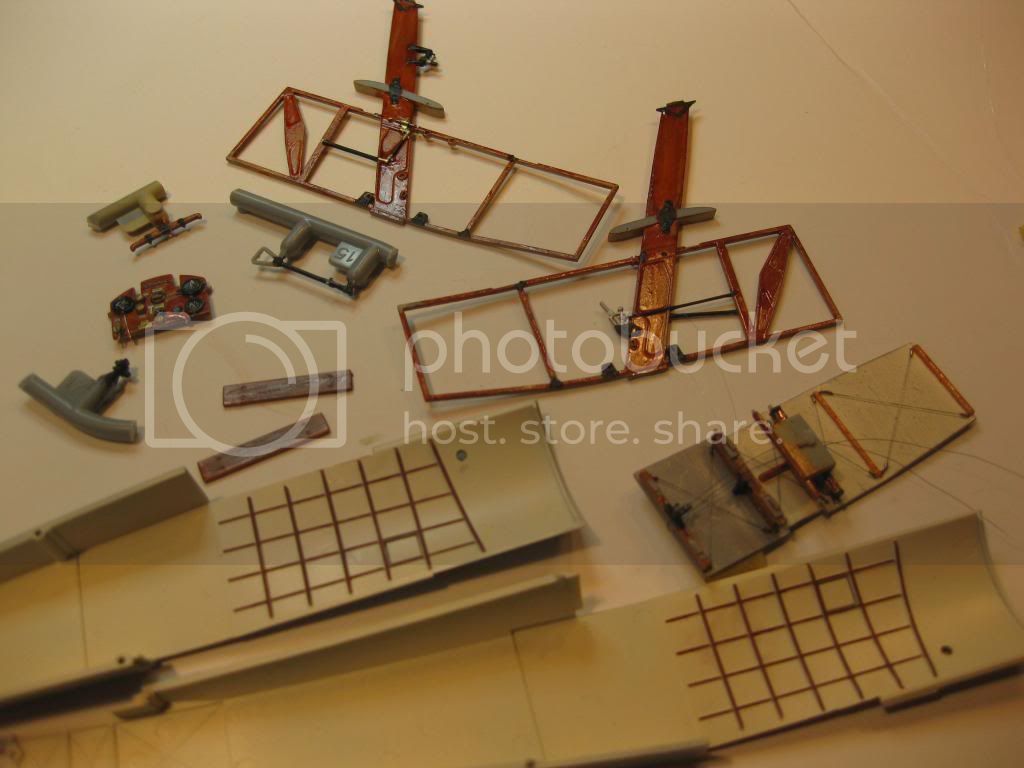
Here's most of the "bits" in an almost complete stage. The instrument panel still needed the compass at this point and rigging of all the flight control cables and side frame bracing had still to come.


And here's the Floor component ready for rigging, then the seat etc.


The Instrument Panel received a lot of time; Aeroclub Bezels were added to most instruments, molded copper lines removed and replaced with copper wire, and a "Pulsemeter" glass bowl made from stretched clear sprue substituted for the molded version. This required some delicate sanding with progressively fine paper to get it back to transparency.


I've since completed the rigging of the flight control wires and the side frame bracing wires however haven't got photos yet. I'll provide more photos and another update when I return Monday-Tuesday.
Cheers,
Lance
JackFlash
_VISITCOMMUNITY
Colorado, United States
Joined: January 25, 2004
KitMaker: 11,669 posts
AeroScale: 11,011 posts
Posted: Friday, November 08, 2013 - 04:38 AM UTC
Two thumbs up!
SpeedyJ
_VISITCOMMUNITY
Bangkok, Thailand / ไทย
Joined: September 17, 2013
KitMaker: 1,617 posts
AeroScale: 212 posts
Posted: Friday, November 08, 2013 - 04:59 AM UTC
Outstanding. I'm real excited about the controlpanel.
Have a very nice weekend.

Robert Jan
OEFFAG_153
_VISITCOMMUNITY
Västra Götaland, Sweden
Joined: February 19, 2010
KitMaker: 1,473 posts
AeroScale: 1,450 posts
Posted: Friday, November 08, 2013 - 05:17 AM UTC
This is looking brilliant Lance – that panel is very impressive!

Mikael
phantom_phanatic309
#372
_VISITCOMMUNITY
United Kingdom
Joined: March 10, 2010
KitMaker: 2,568 posts
AeroScale: 1,619 posts
Posted: Tuesday, November 12, 2013 - 11:52 AM UTC
I have to agree with everyone else, thats one awesome control panel!
Looking forward to seeing more.
lcarroll
_VISITCOMMUNITY
Alberta, Canada
Joined: July 26, 2010
KitMaker: 1,032 posts
AeroScale: 1,025 posts
Posted: Saturday, November 16, 2013 - 03:13 PM UTC
Stephen(s), Robert, and Mikael,
Thank you for the positive feed back.
I'm finally ready to post another update, making good progress however not as fast as I'd like.
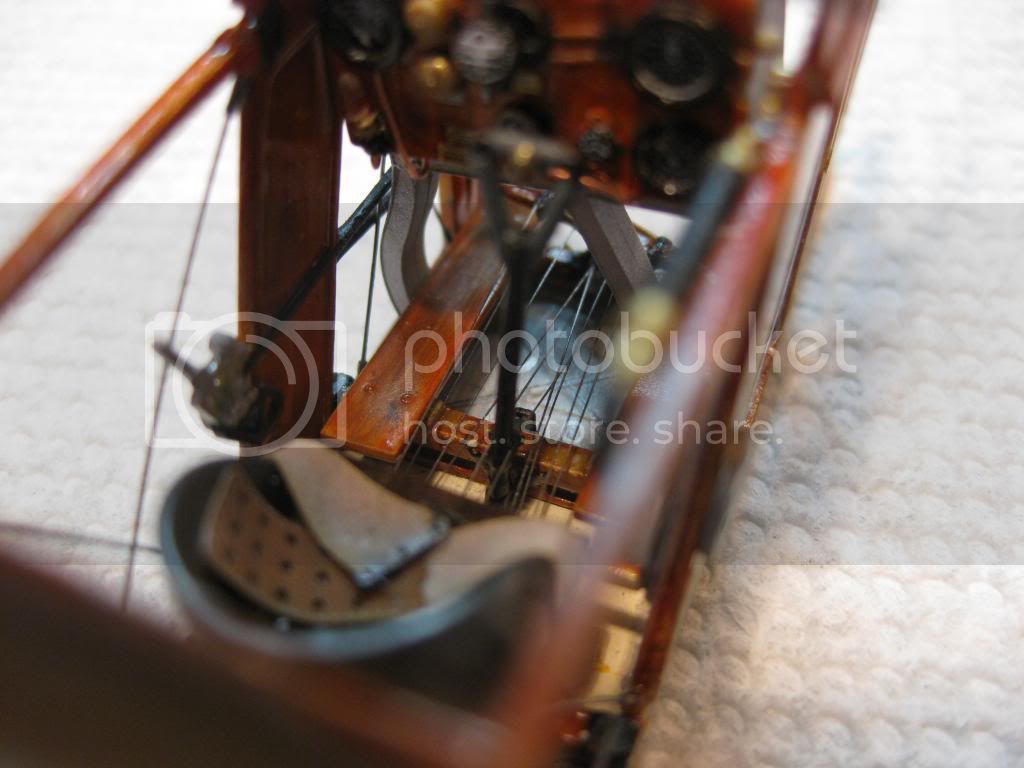
I've completed the cockpit module starting with the floor assembly, installed the seat and HGW Belt Set (the laser cut one) (Magnificent Product!) and got in all of the flight control cables. The latter, all .004" Dai Riki Mono, were finished with Mr. Metal Colour "Stainless, the seat was sprayed Alclad II "Steel".


The cross-bracing of the side frame members was done with #9 Guitar wire and .5mm Brass Tube. I can honestly say I re-glued every one of then at least twice more, as fitting every thing together and checking for initial fit resulted in numerous finger/wire conflicts!


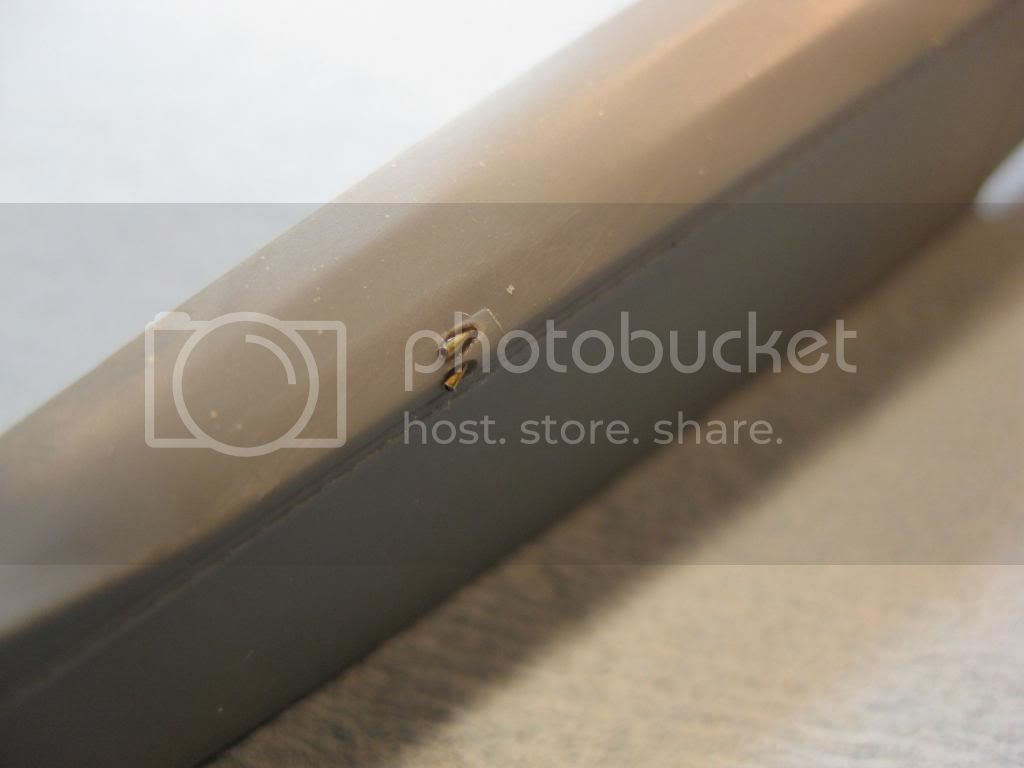
I also added fairleads for the stabiliser control cables using .5mm brass tube; this will be filled in and sanded prior to painting.


The fuselage side frame members have been added to the floor component, the fuel and ammo cans along with the instrument panel placed in the frame, and it's starting to look like an aircraft. The left shell ejector chute had to be hacked off to get the previous component into place: it was then attached to its original position once the panel was installed.


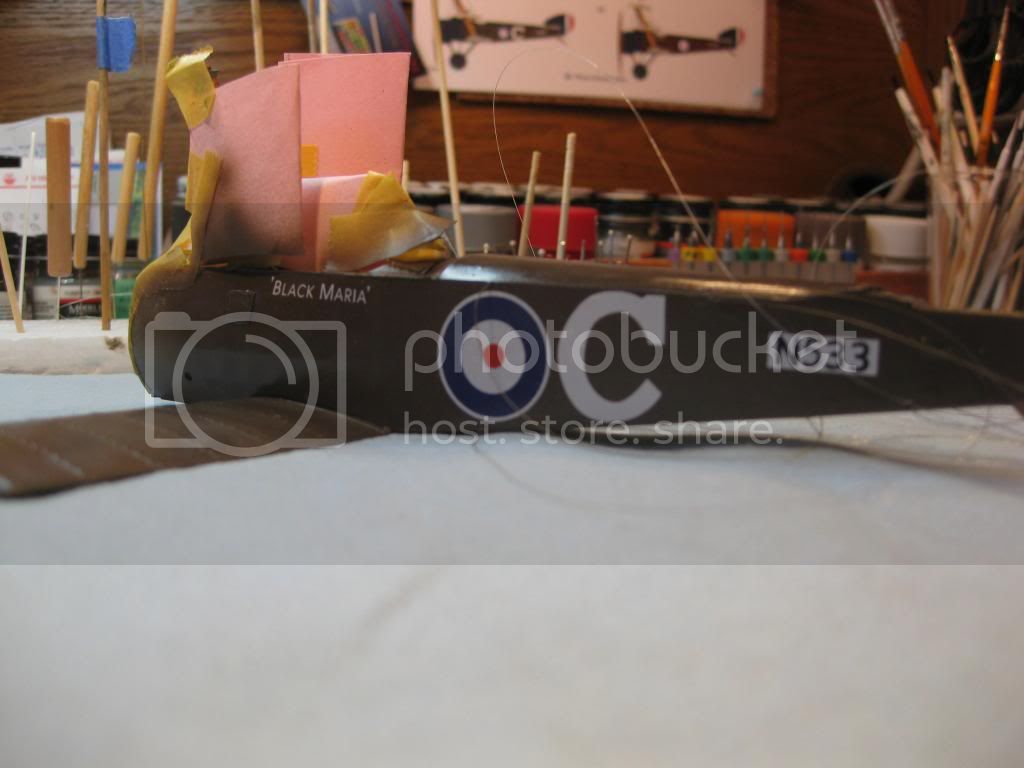
At this point the assembly was installed in the left fuselage half, and the fuselage was later "closed up".


The fuselage is now closed up and awaiting a coat of CDL on the appropriate areas. I found it a very tight fit however it worked well. There was a great deal of scraping and cleaning up done prior to final assembly, the fit is extremely tight!
Cheers,
Lance

lcarroll
_VISITCOMMUNITY
Alberta, Canada
Joined: July 26, 2010
KitMaker: 1,032 posts
AeroScale: 1,025 posts
Posted: Monday, November 18, 2013 - 04:11 AM UTC
I got the CDL sprayed on the lower surfaces and now that it's dry I'm masking prior to shooting a few thin coats of my version of PC12 later today. I'll be interested in feedback on the shade I've come up with, kind of sounds like the description on a Single Malt or wine bottle; a "choclatey" finish with an infusion of olive, a hint of latte, and an overall deeply striking impression of the tropical variety" blah blah blah!! Photos to follow soon............
Cheers,
Lance
JackFlash
_VISITCOMMUNITY
Colorado, United States
Joined: January 25, 2004
KitMaker: 11,669 posts
AeroScale: 11,011 posts
Posted: Monday, November 18, 2013 - 11:52 AM UTC
PC12 has a bit of iron oxide in it. So its a bit more red than PC10.
lcarroll
_VISITCOMMUNITY
Alberta, Canada
Joined: July 26, 2010
KitMaker: 1,032 posts
AeroScale: 1,025 posts
Posted: Monday, November 25, 2013 - 10:00 AM UTC
Finally have some more progress to report. She is all closed up, the CDL and PC12 are on and two coats of Future were added prior to applying the decals.
I mixed the PC12 using my standard PC10 Mix as a base. (50-50 mix of Model Master Olive Drab FS34087 and Faded Olive Drab#2051) I added about 30% of their RAL 8017 Schokoladenbraun and 10% S/G White to lighten it up a bit. I like the result; it's a chocolatey reddish brown and, let's face, the debate over the absolute true colour will likely never be resolved!
Here's the upper wing contrasted to the PC10 on my Se5a...............thoughts??


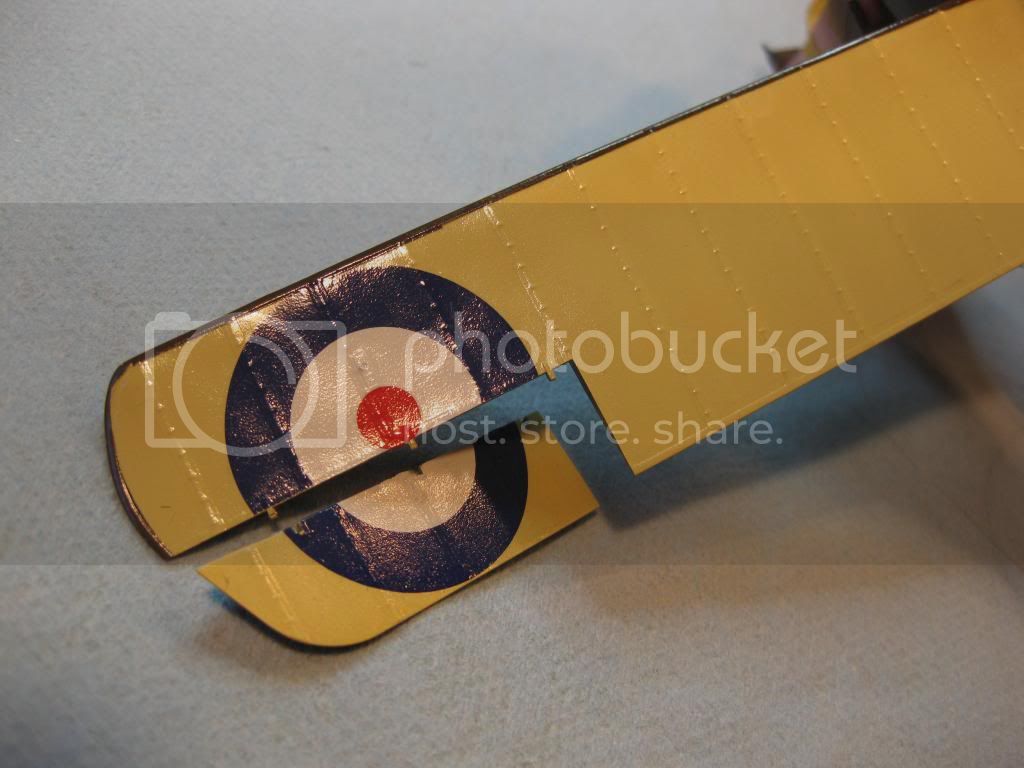
The Pheon Decals went on, as always, beautifully and here she is in her, for now, shiny glory. Once the decals are completely dry I'll be spraying on a few light coats of Semi Gloss Acryl Clear to provide a base for the chalk Pastels and pigments I'll use for the Post Shading.


And the bottom of the lower wing in CDL (this shows much darker then in the flesh) with a camera induced reminder to touch up the return or wrap under top colour border.


I should mention that, for the first time, I hand brushed the Future as I have a terrible time getting it on with an airbrush; I was very pleased with the results, less clean up and an excellent finish thus I'll use this method from now on.
I have to travel away to a family event, won't return until early next week so there will be a delay in further progress. Once I return it will be a day or two of Post Shading and Weathering; I decided to Post Shade only on this one so we'll see how that works out.......or not?!?!
More when I return..........
Cheers,
Lance
Jessie_C
_VISITCOMMUNITY
British Columbia, Canada
Joined: September 03, 2009
KitMaker: 6,965 posts
AeroScale: 6,247 posts
Posted: Monday, November 25, 2013 - 10:01 AM UTC
That's shaping up to be another real beauty!
phantom_phanatic309
#372
_VISITCOMMUNITY
United Kingdom
Joined: March 10, 2010
KitMaker: 2,568 posts
AeroScale: 1,619 posts
Posted: Monday, November 25, 2013 - 10:49 AM UTC
Looking fantastic! I love the wood effect paintwork in the cockpit.
Was PC12 the usual colour that Tripes were painted in? I ask as I have the Revell 1/72 starting to edge its way closer to actually being built.
GhostHawk
_VISITCOMMUNITY
Cordoba, Argentina
Joined: January 27, 2011
KitMaker: 268 posts
AeroScale: 264 posts
Posted: Monday, November 25, 2013 - 12:15 PM UTC
Excelent...!!!!

Diego
lcarroll
_VISITCOMMUNITY
Alberta, Canada
Joined: July 26, 2010
KitMaker: 1,032 posts
AeroScale: 1,025 posts
Posted: Tuesday, November 26, 2013 - 03:43 AM UTC

Quoted Text

Looking fantastic! I love the wood effect paintwork in the cockpit.
Was PC12 the usual colour that Tripes were painted in? I ask as I have the Revell 1/72 starting to edge its way closer to actually being built.


Stephen,
Thanks for the complimentary comments.
The PC12 vs Pc10 question is a good one; the more references you check the more the answer becomes cloudy. The WNW Instructions and the excellent Windsock Datafile #22 for the Sopwith Tripe provide some good but often contradictory statements on the colour applied. It appears to me that there is no definitive answer on any particular airframe, as both colours were used, possibly on a "supply and demand" basis as well. I am a fan of the "were just never going to be sure" lobby when it comes to absolutes on colours of the aircraft we all love to model with complete accuracy; the real evidence is most often lost to time. Having said that I chose PC12 for N533 for some variety from the PC10 some call "boring" when viewing British Subjects! No one can call me wrong any more then I can say I'm right.................!?!? (Based on the information I have read; there is no doubt more info available that others may wish to add that could shatter my logic)
From my perspective the foregoing types of issues add enjoyment to the Hobby, I always enjoy the "bunfights" that develop over "the real colour of PC10 or PC12 or similar quandaries! The real colour of von Richthofen's DR1 has been debated for years against the genuine samples that have faded with time for example.
I'd be interested in hearing from others on this one; any thoughts Jackflash?


Cheers,
Lance
JackFlash
_VISITCOMMUNITY
Colorado, United States
Joined: January 25, 2004
KitMaker: 11,669 posts
AeroScale: 11,011 posts
Posted: Tuesday, November 26, 2013 - 11:06 AM UTC
As far as I know Lance, all Sopwith Triplanes left the factory in PC 12. It was part of the contract specs for RNAS aircraft at the time. Historians Ian Huntley and Mike Westrop (the author of the Naval 10 book you have in the title shot)both taught me that. As to the exact tone of the colour, I would say you nailed it. Honestly I have done far too much digging to be too pendantic on the subject of colours. While primary government colours were chosen at higher levels the in the field applications tend to vary.

Since MvR's "all-red" Fok.Dr.I 425/17 was painted at the factory by A. Fokker's orders and presented to him, we can safely assume that it was all one shade when it left the factory. But the burned oil exhaust may have begun to change it by his death. (Fokker did the same thing to Goring's white Fok. D.VII). Fortunately we still have some fine research fiends doing the work of digging up good facts.
lcarroll
_VISITCOMMUNITY
Alberta, Canada
Joined: July 26, 2010
KitMaker: 1,032 posts
AeroScale: 1,025 posts
Posted: Tuesday, December 03, 2013 - 02:02 AM UTC
Thanks for the insight Stephen. Given that PC12 was the specification it makes perfect sense that they left the Factories in that colour; as you point out though, once in the field all bets are off.
Cheers,
Lance
lcarroll
_VISITCOMMUNITY
Alberta, Canada
Joined: July 26, 2010
KitMaker: 1,032 posts
AeroScale: 1,025 posts
Posted: Friday, December 06, 2013 - 10:03 AM UTC
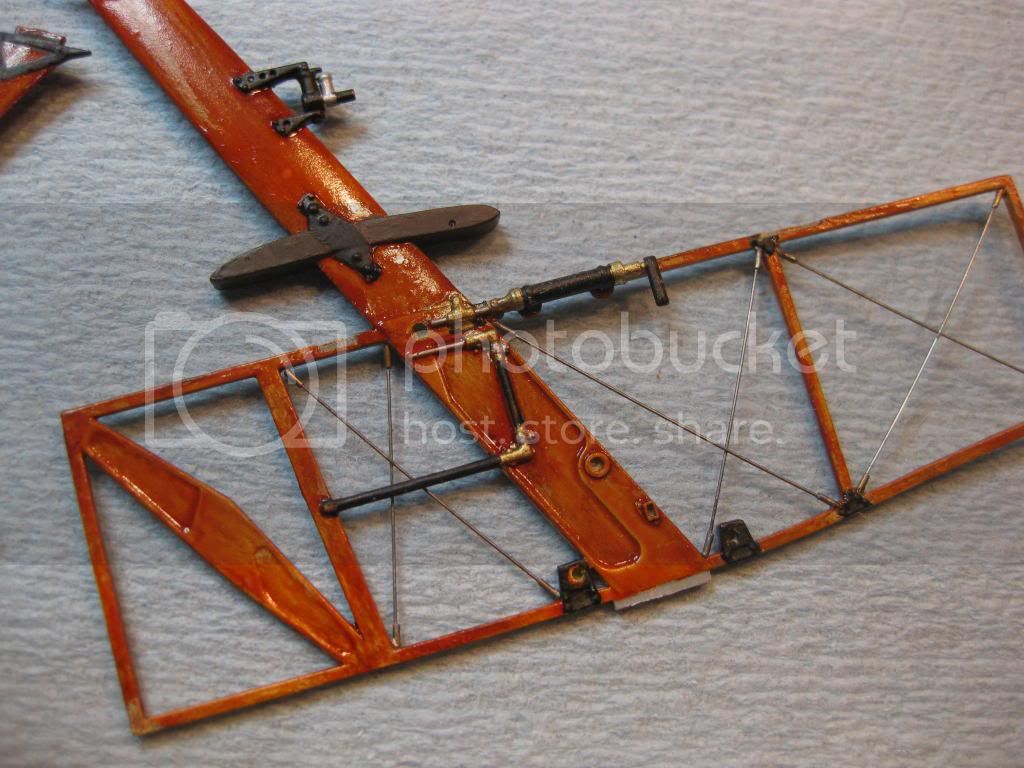
I'm back from a week away and have an update on some progress over the last several days. She's no longer clean and shiny as I've completed the pastel post shading on the major components. I use chalk pastels as it's easily removed if things go sideways. The majority of the work is the taping; here's the upper wing and rudder for illustration. Prior to this I applied a few light coats of Model Master Acryl Clear Flat which gives the pastels a surface to grip on.


.......and the results. I use the Q-Tips in place of makeup applicators which I go through at a tremendous rate. The shading appears quite "stark" here but the sealing coat tones it down significantly.


..and some shots of the rest of the major components:


I also touched up the lower surface PC12 "wrapover" and the aileron edges. Now it all gets a sealing coat of Acryl Semi Gloss Clear and I can start on the pre rigging phase. In between I hope to finish up the metal fittings on the remaining struts, touch up the prop, and finish the guns.
Last, I may strip the cowling and nose panels and re-do them as I think I've over done the chipping. So far I'm on schedule to finish by our deadline on 16 December. Hopefully another update in 3 days or so.........
Cheers,
Lance
redcap
_VISITCOMMUNITY
England - East Midlands, United Kingdom
Joined: November 06, 2005
KitMaker: 753 posts
AeroScale: 311 posts
Posted: Friday, December 06, 2013 - 11:03 AM UTC
Brilliant progress. This is shaping up to be a cracker!

Gary
phantom_phanatic309
#372
_VISITCOMMUNITY
United Kingdom
Joined: March 10, 2010
KitMaker: 2,568 posts
AeroScale: 1,619 posts
Posted: Monday, December 09, 2013 - 11:58 AM UTC

Quoted Text


Quoted Text

Looking fantastic! I love the wood effect paintwork in the cockpit.
Was PC12 the usual colour that Tripes were painted in? I ask as I have the Revell 1/72 starting to edge its way closer to actually being built.


Stephen,
Thanks for the complimentary comments.
The PC12 vs Pc10 question is a good one; the more references you check the more the answer becomes cloudy. The WNW Instructions and the excellent Windsock Datafile #22 for the Sopwith Tripe provide some good but often contradictory statements on the colour applied. It appears to me that there is no definitive answer on any particular airframe, as both colours were used, possibly on a "supply and demand" basis as well. I am a fan of the "were just never going to be sure" lobby when it comes to absolutes on colours of the aircraft we all love to model with complete accuracy; the real evidence is most often lost to time. Having said that I chose PC12 for N533 for some variety from the PC10 some call "boring" when viewing British Subjects! No one can call me wrong any more then I can say I'm right.................!?!? (Based on the information I have read; there is no doubt more info available that others may wish to add that could shatter my logic)
From my perspective the foregoing types of issues add enjoyment to the Hobby, I always enjoy the "bunfights" that develop over "the real colour of PC10 or PC12 or similar quandaries! The real colour of von Richthofen's DR1 has been debated for years against the genuine samples that have faded with time for example.
I'd be interested in hearing from others on this one; any thoughts Jackflash?


Cheers,
Lance


Lance and Stephen, thanks for the advice. Humbrol 98 Chocolate seems to look very similar, but as both you rightly say weathering, dirt and fuel staining will change the colour considerably once in the field. It's also nicely different from the usual Olive Drab PC10.
The builds coming along very nicely Lance.
lcarroll
_VISITCOMMUNITY
Alberta, Canada
Joined: July 26, 2010
KitMaker: 1,032 posts
AeroScale: 1,025 posts
Posted: Friday, December 13, 2013 - 04:12 PM UTC
I've made some significant progress in the past several days, it's time for an update however a brief one as I scramble to the finish line. As Stephen said "tick-tick-tick"; less then 72 hours to closing time and I'm not there yet!
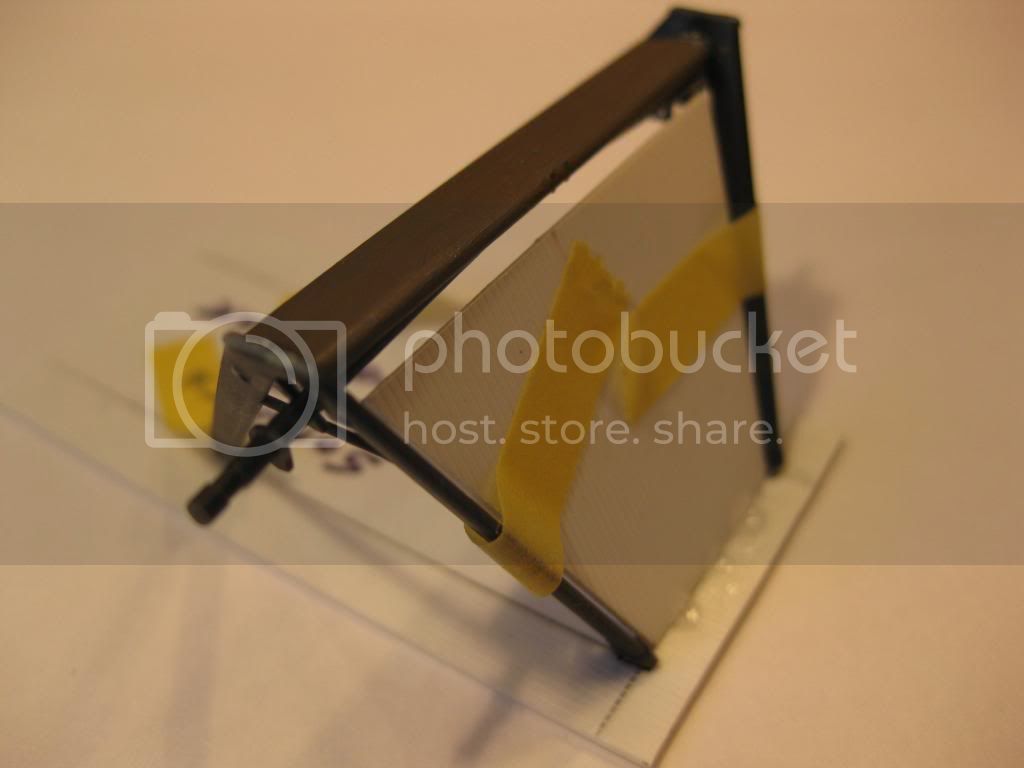
I finally finished most of the sub-components so started to assemble the beast in preparation for rigging. Once the nose engine panels and guns were installed I built a simple jig from sheet styrene to assemble the landing gear with the correct spacings and angles. I was more then happy with the results.
Here's the Guns done in Alclad Gunmetal, Kit PE and brass tubing barrels added, and some flat steel highlights. Still some touch up required on the cocking levers.


and the wheels ready for installation:


The finished cowling for the previously completed engine:


and the maintenance warning on the cowling.


Next, the landing gear jig and a few shots during set up:


The gear was dry fitted and the alignment was excellent.


Next step was assembly of the middle and upper wings which went extremely well with no alignment aids nor my normal Biplane Assembly Jig (She's a Triplane don't you know!)

Here's a couple of shots after the upper wing was in place as the rigging commenced.


Rigging to go and addition of the landing gear. With some touch up and weathering she'll be complete; hopefully before Midnight Monday!
Cheers,
Lance
OEFFAG_153
_VISITCOMMUNITY
Västra Götaland, Sweden
Joined: February 19, 2010
KitMaker: 1,473 posts
AeroScale: 1,450 posts
Posted: Friday, December 13, 2013 - 09:24 PM UTC
Hi Lance,

Looking very, very nice my friend – love the weathering and the PC12 shade  – spot on!

Mikael
 _GOTOTOP