Maskmania is about to happen.

All masks have been used and all masks have delivered above and beyond all my expectations! And they weren't low! There are quite a lot of images further down, but a few comments first.
In the instructions, Mal suggests - Mal, feel free to correct any misinterpretations - that you gloss coat the model. He gives two reasons for this. One - it's easier to move the masks to their exact location and two - it gives you a protective barrier, so that you can remove your painted markings if anything goes wrong. This is of course dependent on you using different kinds of paint.
Though this is a good suggestion, I still chose to ignore it and simply applied the masks straight onto the painted surface and I also chose to use the same kind of paint - either Tamiya or Gunze acrylics. I'm not a risk taker generally, so that's not why I decided on this approach. The reasons were first that I never thought of protecting the underlying paint job when I did the invasion stripes or the leading edges and if Tamiya tape worked, then the masks probably would too. The second reason was that if it worked, I would have saved myself one layer of paint. On the other hand, as I have to put some decals on now, it would have been good to have that gloss surface. I might do it that way on the other Spit.
One note on the colours. Though I like the colours to be as correct as possible, I don't really care that much. The goal is a nice looking model and if Gunze has got a colour called sky and it's close enough, then I'll use it. This means that I made an estimation of the insignia red and insignia blue. I'm happy with them when I see them in reality. In the pictures the blue comes out too blue.
Also worth mentioning is the fantastic instructions that Mal provides for all the masks. They are really easy to understand and follow and there are individual instructions for every kind of mask. Even more impressive is the thought process behind the construction of the masks, which makes them so easy to use and to get the results you want.
Pictures...
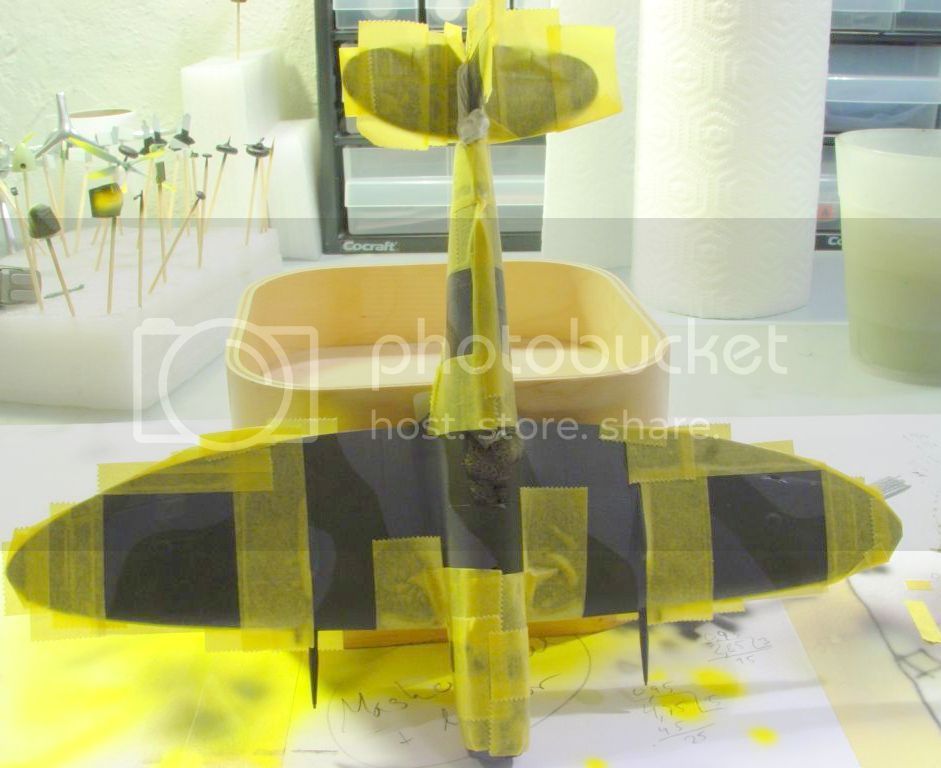
The masks are all on and Tamiya tape has been added to prevent any risk of overspray. It's not the best picture, but the masks are in the areas that lack yellow tape.

I prefer to mask away, even if it means that I have to buy an extra roll of tape, or two.
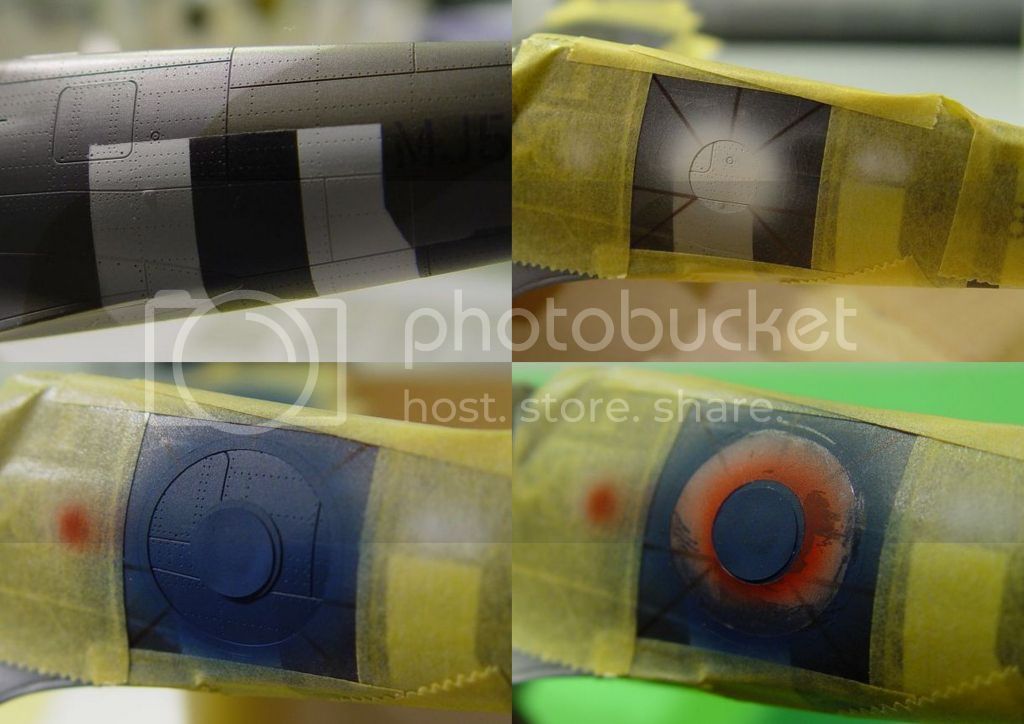
Four images of the underside of the wing. 1. No mask. 2. Mask added, but the two inner rings have been removed and the exposed area painted white. This was the first step for all masks requiring white and all those masks were painted in the same session. 3. The two inner mask parts transferred to a safe place. Only the outer of the two was to go back, but I found it easier to handle that part if I left it still connected to the centre. It got a bit flimsy on its own. 4. The red centre has been painted and an oversized mask used to cover it, and blue has been added. The blue isn't this blue in reality.
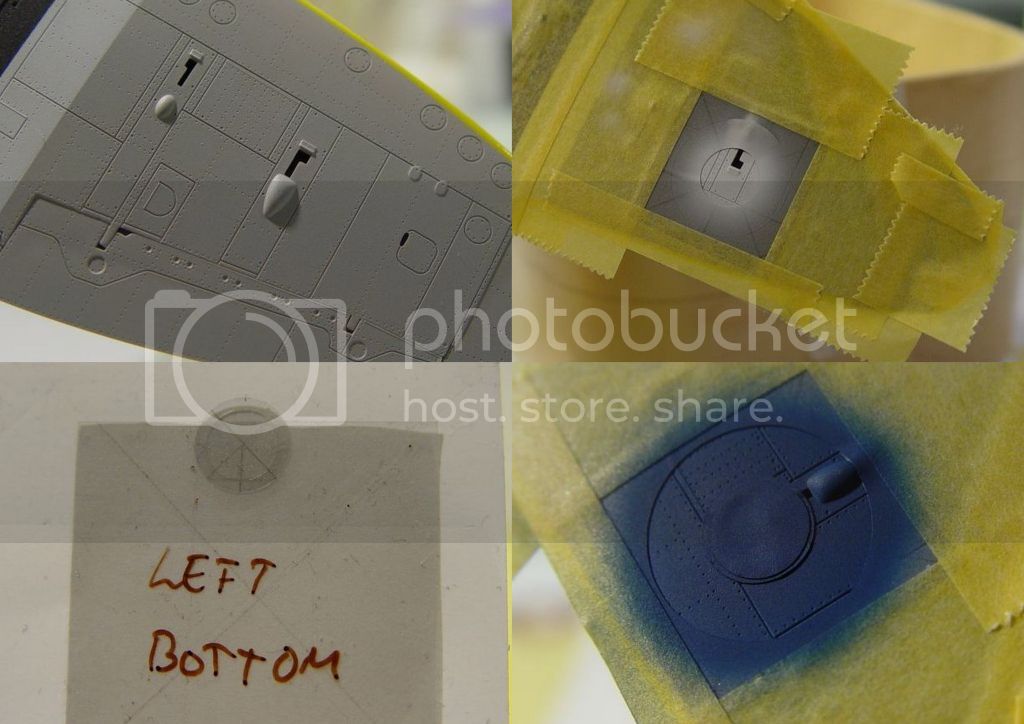
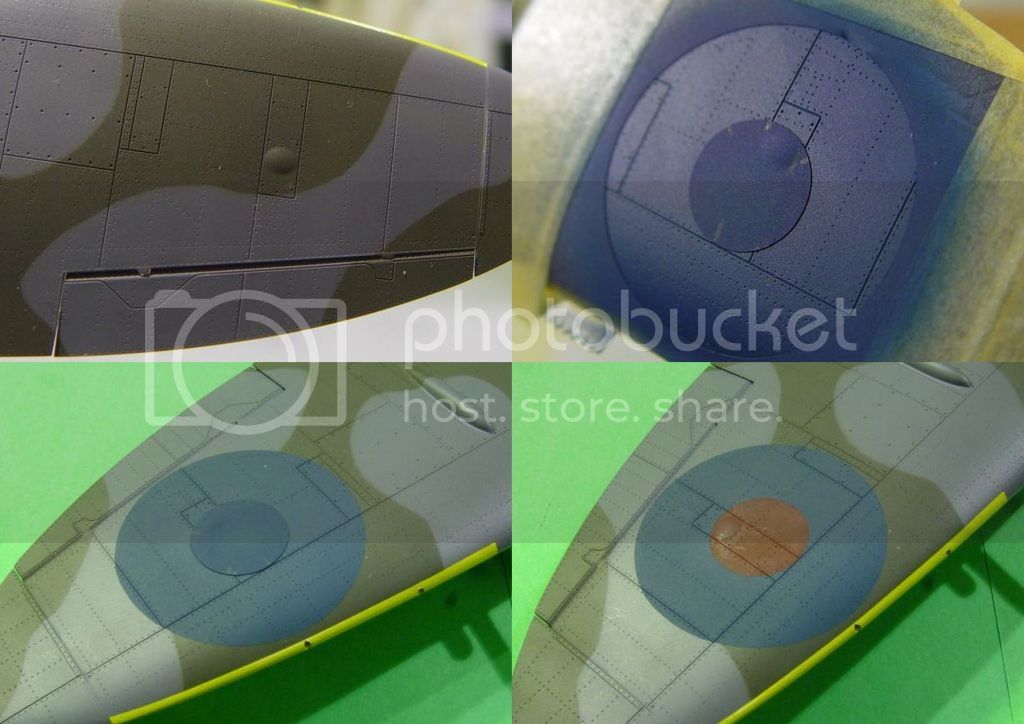
The coat of arms in four steps. 1. No mask. 2. White paint used to give a base for the yellow colour. I used Gunze's RLM04. 3. New mask added and red paint sprayed. 4. End result. There is some kind of red fibre on the left side. It's not paint.

I think you get it now. 1. No mask. 2. Mask added. 3. White and red done, masks replaced and blue sprayed. 4. End result.
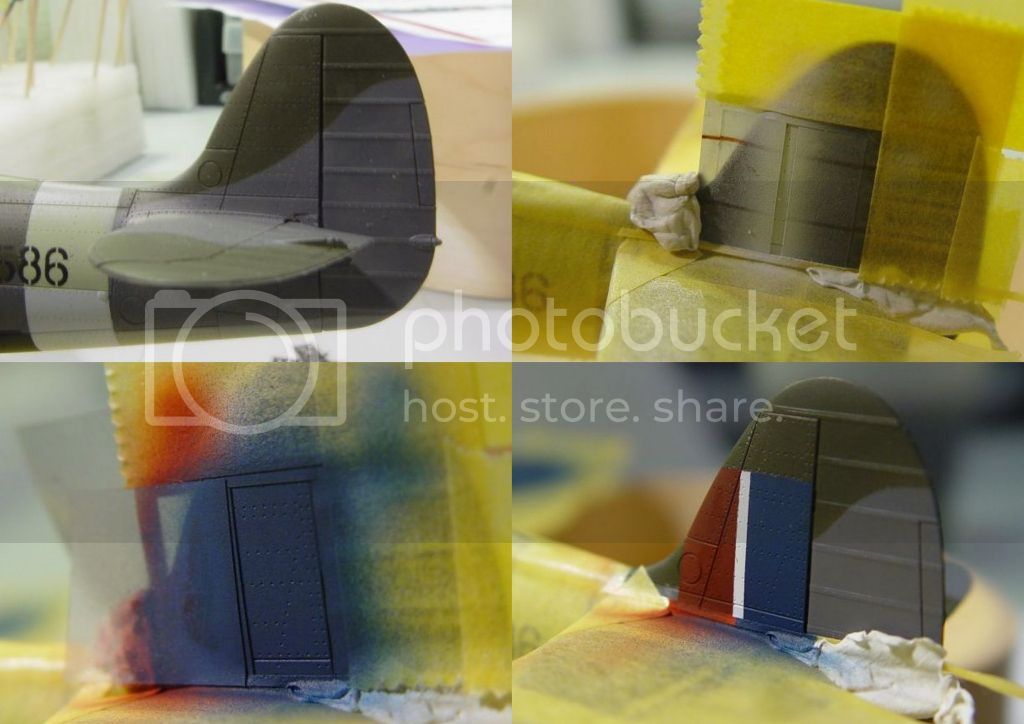
Same thing on the fuselage. One problem here was the invasion stripes. As they would end up under a part of the roundel, they might shine through as white and yellow aren't the colours that have the best coverage. It worked out fine. The fourth image shows the mask after the blue has been painted, but before I have removed the outer ring element that should be painted yellow.
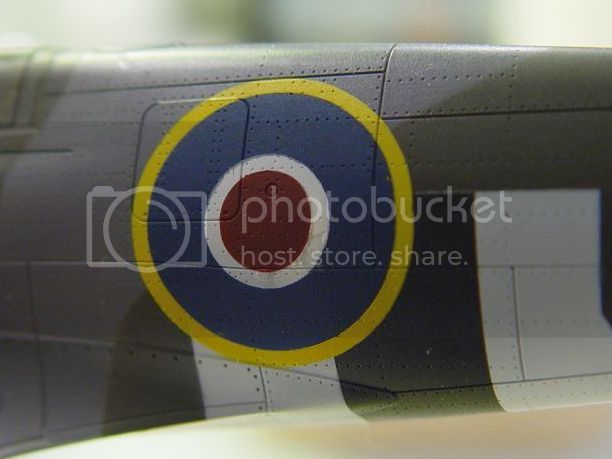
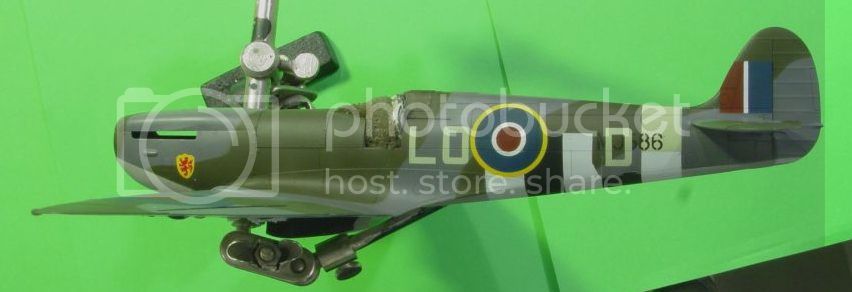
The fuselage roundel completed. Just as with the lion shield, I sprayed a thin white layer before I sprayed the yellow.
And this is the top of the wing.
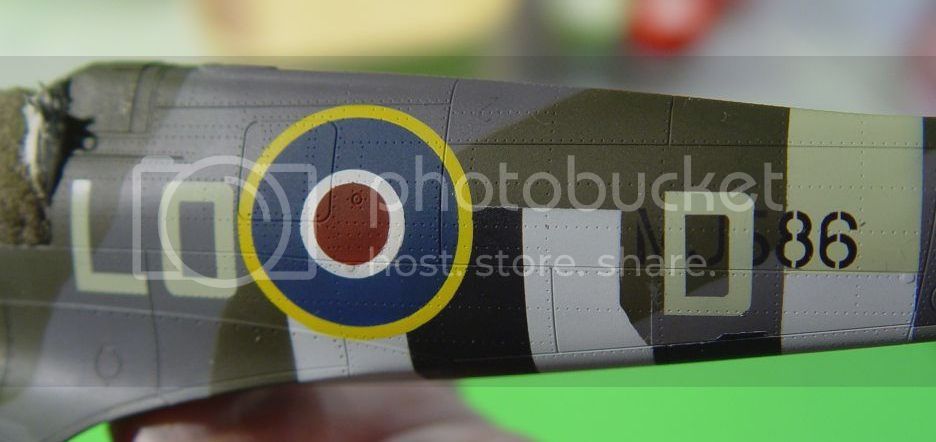
A side view of the roundel and the code letters. No difference between letters and fuselage band. The obvious benefit of painting everything.
Next - more painting but now without precut masks. I have to change the yellow on the leading edges and the no walk lines will be added.
Long post, but I hope it was both instructive and inspiring.
/Fred