

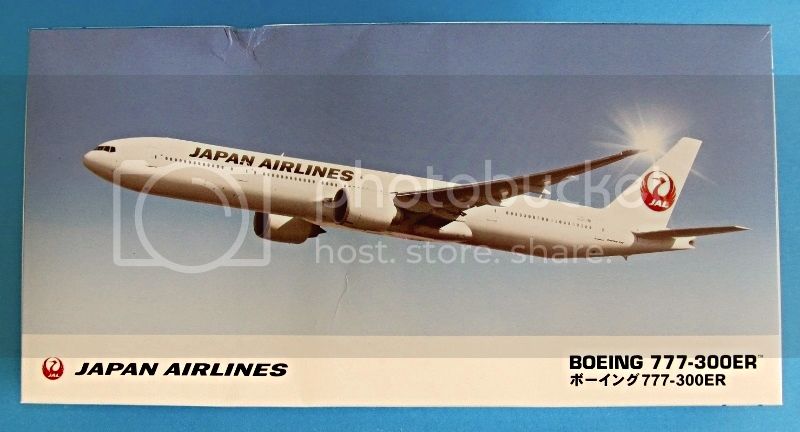
Hasegawa and Hobbico have been kind enough to provide samples of their newest 1/200 airliner kits to Aeroscale. The first is in the markings of All Nipon Airlines, Japan's major domestic carrier. The second wears Japan Air Lines' uniform. Each is a 777-300 ER which is now the Queen of long-range airline operations the world over.
A short while ago, I posted a review of the ANA kit. Today, Mcleod took delivery of the JAL kit. In this thread, the two of us will build these two kits in parallel. Stay tuned...
Modern (1975-today)
Discuss the modern aircraft age from 1975 thru today.
Discuss the modern aircraft age from 1975 thru today.
Hosted by Jim Starkweather
Dual build Boeings: 777 and 777

Jessie_C


Joined: September 03, 2009
KitMaker: 6,965 posts
AeroScale: 6,247 posts

Posted: Monday, March 24, 2014 - 03:40 PM UTC

Mcleod
Joined: April 07, 2010
KitMaker: 1,028 posts
AeroScale: 939 posts
Posted: Monday, March 24, 2014 - 05:22 PM UTC
So it begins.
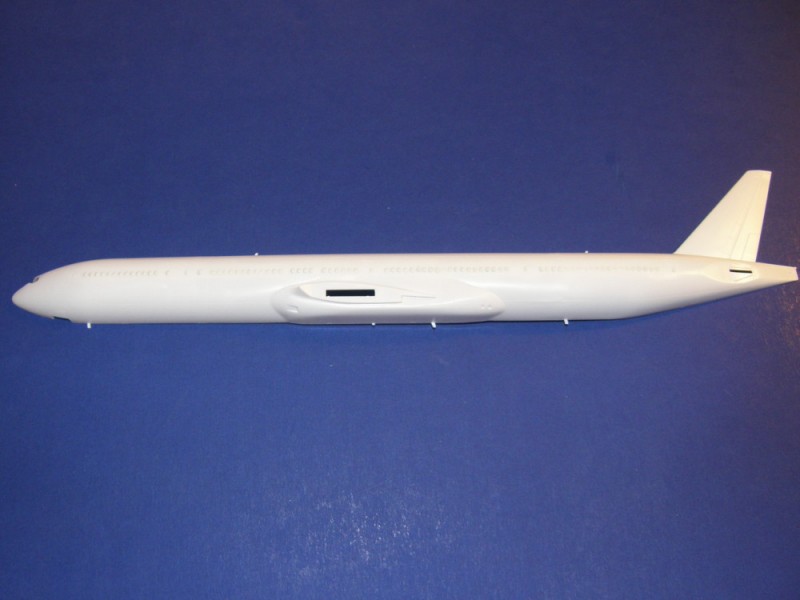
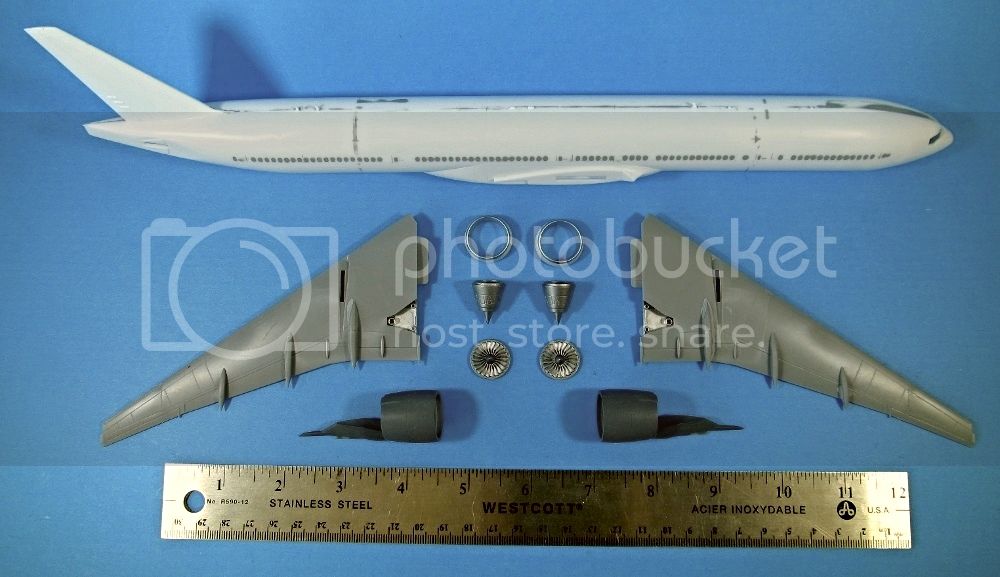
This is the lovely Boeing 777 in 1/200th scale that arrived today. The box slightly damaged in the post, but, the contents entirely intact.
I will also be submitting an in-box review describing my personal view of the kit, very soon. With that in mind, I'll keep this a build blog, using modelling technique familiar to my bench. I truly hope I'm able to give a good showing, and that two modellers using different methods proves interesting.
In the middle of the night I begin, with the fuselage. Prepping it for tomorrow's real start.
This is the lovely Boeing 777 in 1/200th scale that arrived today. The box slightly damaged in the post, but, the contents entirely intact.

I will also be submitting an in-box review describing my personal view of the kit, very soon. With that in mind, I'll keep this a build blog, using modelling technique familiar to my bench. I truly hope I'm able to give a good showing, and that two modellers using different methods proves interesting.
In the middle of the night I begin, with the fuselage. Prepping it for tomorrow's real start.


Mcleod
Joined: April 07, 2010
KitMaker: 1,028 posts
AeroScale: 939 posts
Posted: Wednesday, March 26, 2014 - 11:41 AM UTC
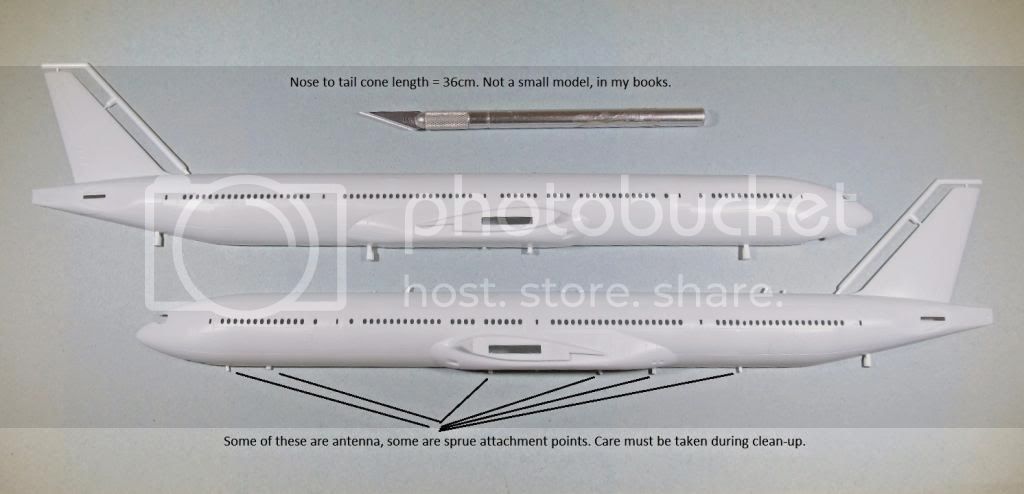
This Hasegawa Boeing 777ER is a very nice kit, indeed. The only issue I have with the kit, lay in the fuselage moldings.
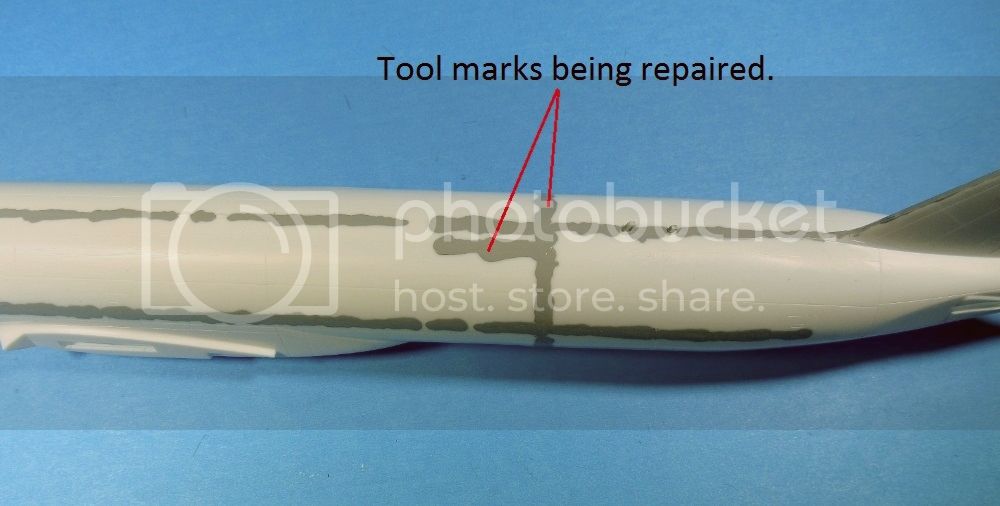
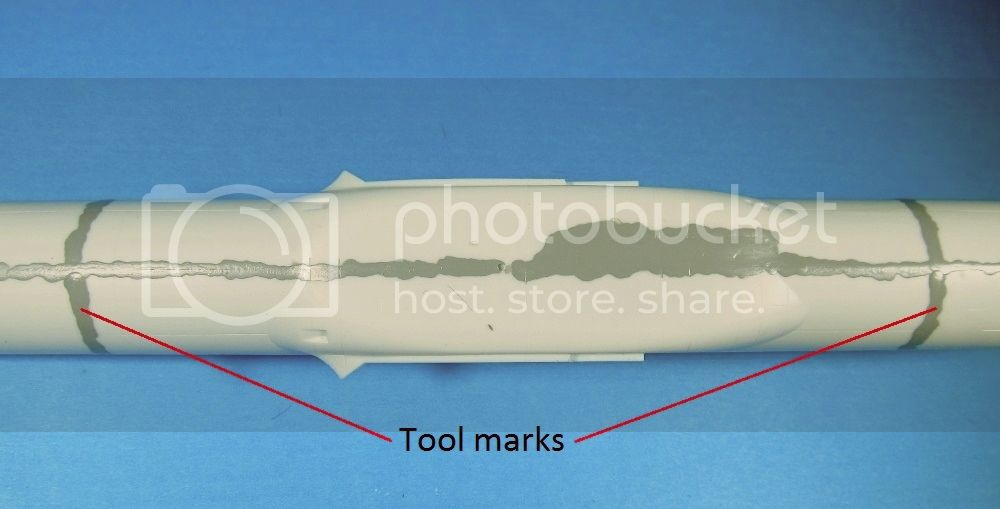
It seems that Hasegawa would have manufactured the fuselage toolings in three parts, and joined them for the injection process. For ease and cost effectiveness in manufacturing other models of the triple 7, that tooling structure would make perfect sense.
Unfortunately, that left obvious tool marks on the fuselage halves, where the tools were joined (at least on my example). Not saying that this will be an issue for most in this smaller scale. If you did wish to fix it, though, it will take some filler and re-scribing.
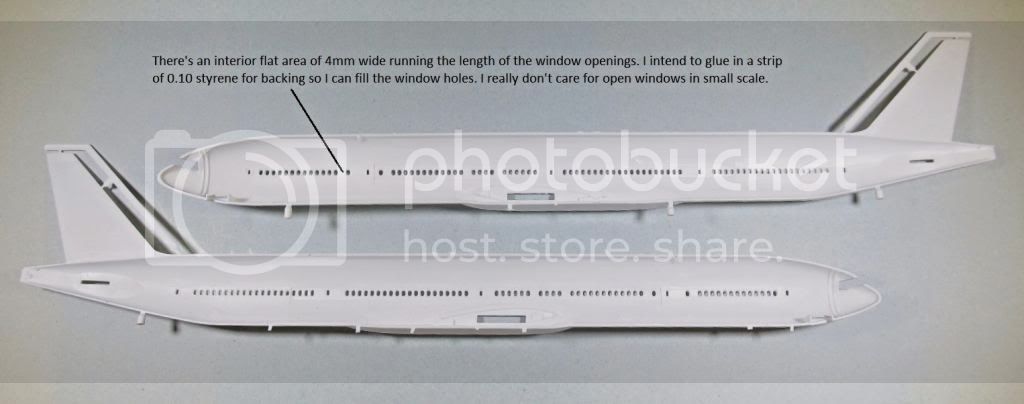
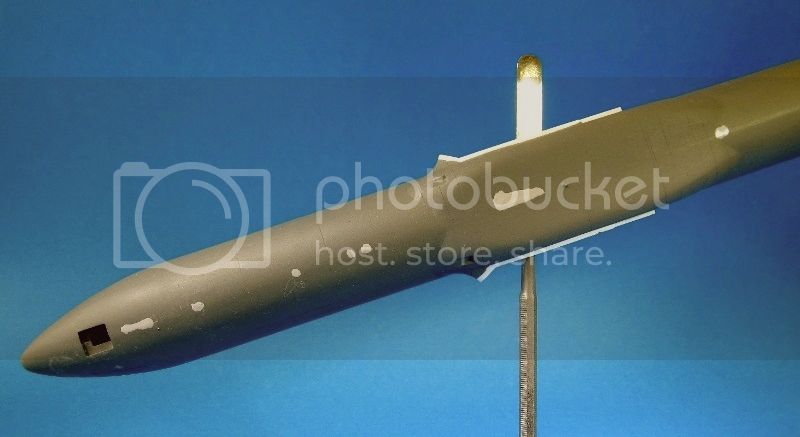
Anyway, prior to joining the fuselage halves, I added some small extra forward weight to compliment Hasegawa's included bolt in a bulkhead method. This is not likely necessary; I just happen to like the feel of heavier models. In the photo you can also see a portion of the 0.10 Evergreen strip I glued in. My intentions were to put backing on the open windows before I begin filling them.
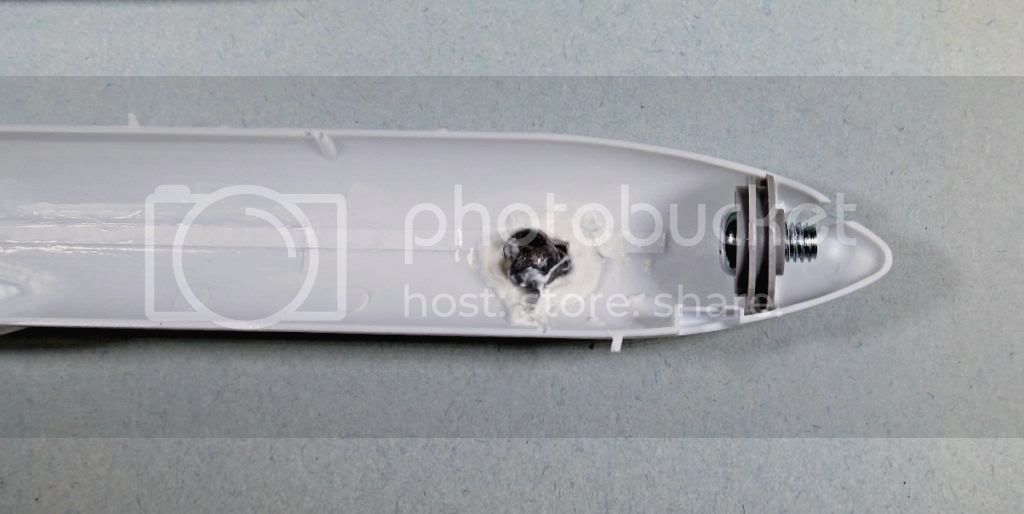
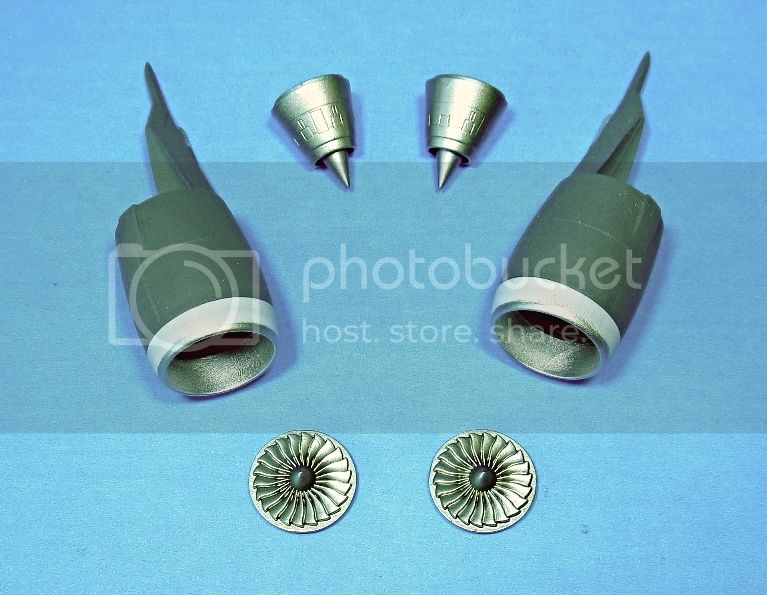
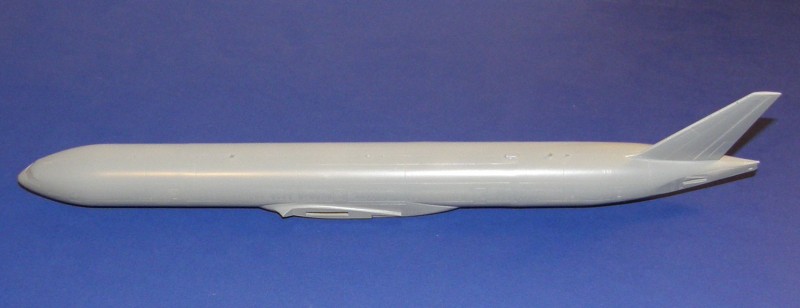
And, this next photo is my present progress. The fuselage is ready for filling, sanding and scribing; the excellent fit engine cowls are joined; the engine collector rings are primed in white, and the engine itself is primed in dark gray. I'm hoping the different rattle-can prime colors will make a shade difference when I spray on Alclad top coat.
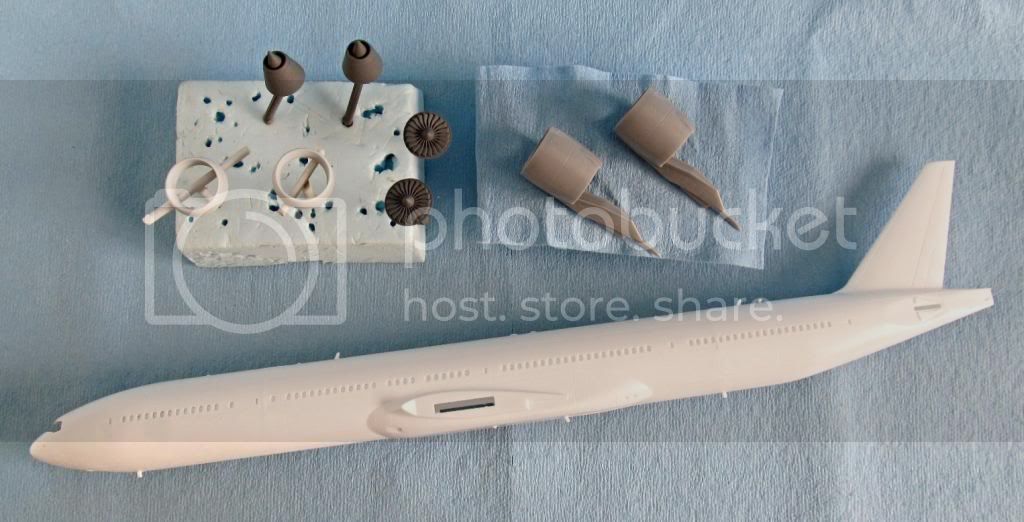
Look at the size of those engines. So obviously huge
It seems that Hasegawa would have manufactured the fuselage toolings in three parts, and joined them for the injection process. For ease and cost effectiveness in manufacturing other models of the triple 7, that tooling structure would make perfect sense.
Unfortunately, that left obvious tool marks on the fuselage halves, where the tools were joined (at least on my example). Not saying that this will be an issue for most in this smaller scale. If you did wish to fix it, though, it will take some filler and re-scribing.

Anyway, prior to joining the fuselage halves, I added some small extra forward weight to compliment Hasegawa's included bolt in a bulkhead method. This is not likely necessary; I just happen to like the feel of heavier models. In the photo you can also see a portion of the 0.10 Evergreen strip I glued in. My intentions were to put backing on the open windows before I begin filling them.

And, this next photo is my present progress. The fuselage is ready for filling, sanding and scribing; the excellent fit engine cowls are joined; the engine collector rings are primed in white, and the engine itself is primed in dark gray. I'm hoping the different rattle-can prime colors will make a shade difference when I spray on Alclad top coat.

Look at the size of those engines. So obviously huge
Jessie_C
Joined: September 03, 2009
KitMaker: 6,965 posts
AeroScale: 6,247 posts
Posted: Wednesday, March 26, 2014 - 01:38 PM UTC
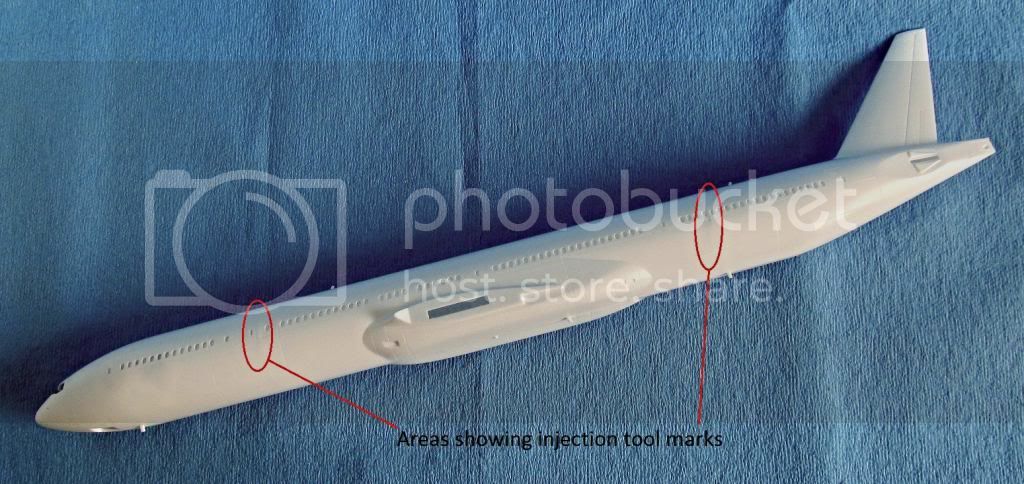
My kit has less-pronounced marks where the mould inserts go, so I suspect it's an individual kit issue. That said, they are definitely there, and if I were doing a bare metal scheme they'd need to be polished out very carefully.
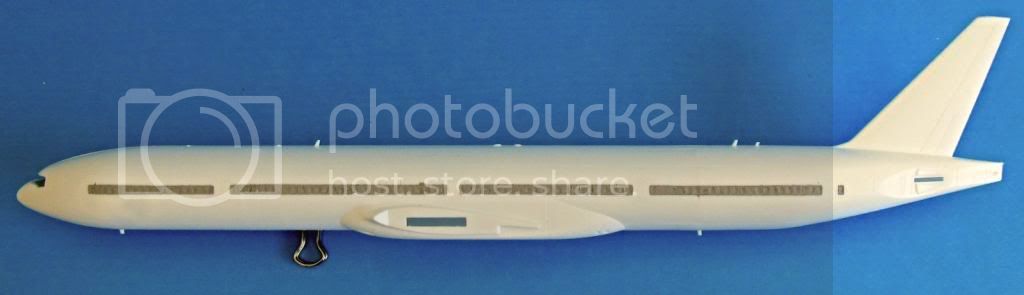
My model will also have the windows filled, because ANA's cheatline goes over almost the entire line, and it's printed solid rather than with openings. I don't trust myself not to ruin it by trimming out all those windows, and also the decal windows are pretty sharp looking. I take a slightly different approach to filling in windows. First, roll out a snake of Milliput
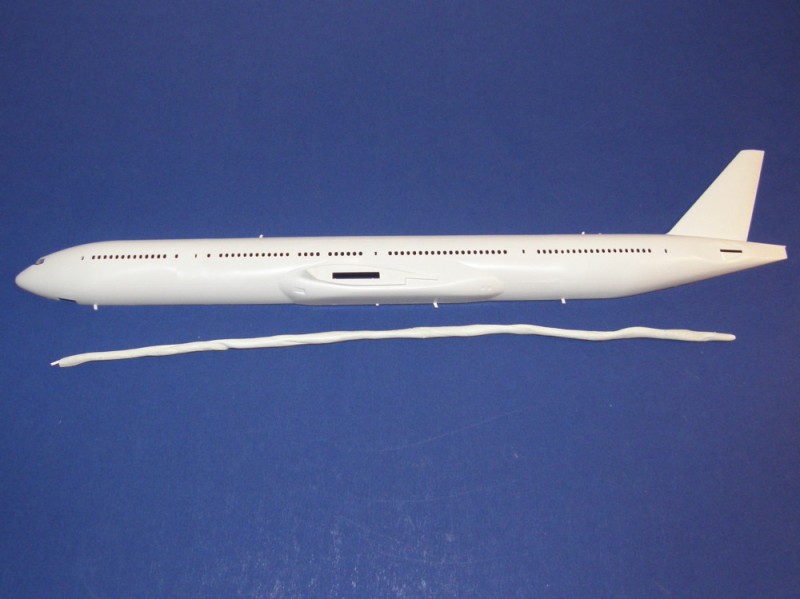
Press it into the window openings from behind
So that it protrudes from the openings
Trim the bits sticking out with your putty knife, then smooth everything off with a finger dipped in water. Milliput dries rock hard, so once it's dry I'll be able to sand it nice and smooth without worrying about the putty falling out of those tiny little holes.
My model will also have the windows filled, because ANA's cheatline goes over almost the entire line, and it's printed solid rather than with openings. I don't trust myself not to ruin it by trimming out all those windows, and also the decal windows are pretty sharp looking. I take a slightly different approach to filling in windows. First, roll out a snake of Milliput
Press it into the window openings from behind
So that it protrudes from the openings
Trim the bits sticking out with your putty knife, then smooth everything off with a finger dipped in water. Milliput dries rock hard, so once it's dry I'll be able to sand it nice and smooth without worrying about the putty falling out of those tiny little holes.
Mcleod
Joined: April 07, 2010
KitMaker: 1,028 posts
AeroScale: 939 posts
Posted: Thursday, March 27, 2014 - 02:36 PM UTC
The milliput snake idea is obviously a less labor intensive way of filling the windows, and may well prove that women has evolved faster than old school man. However, I would have to have fresher milliput than the hardened stuff in my drawer. So, I'm trudging along with my tube of filler.
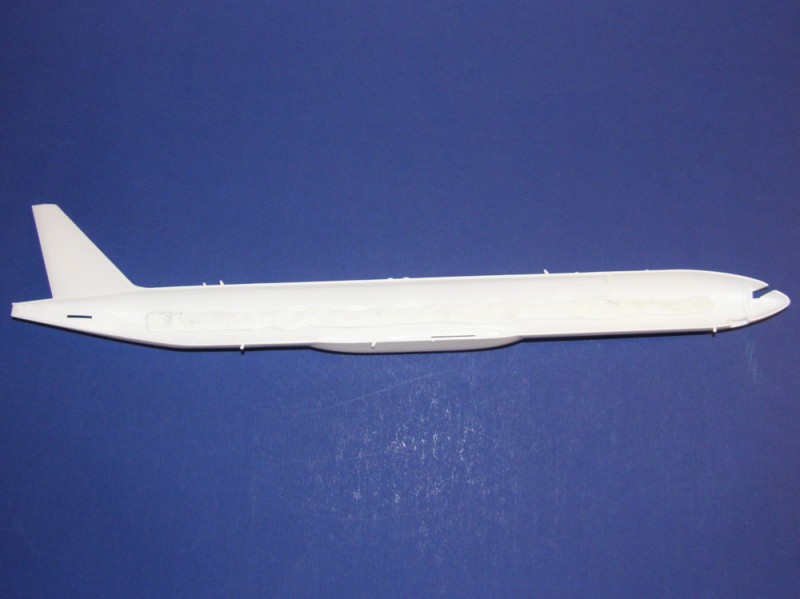
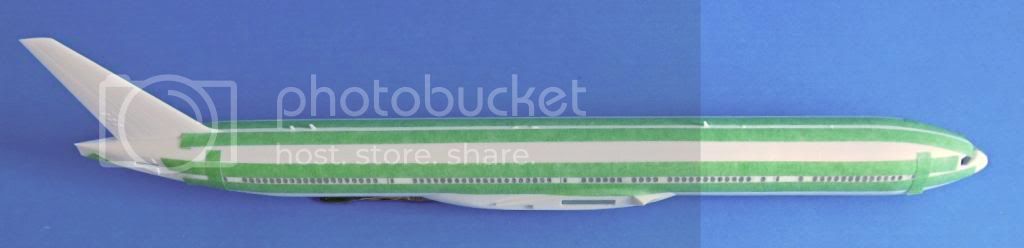
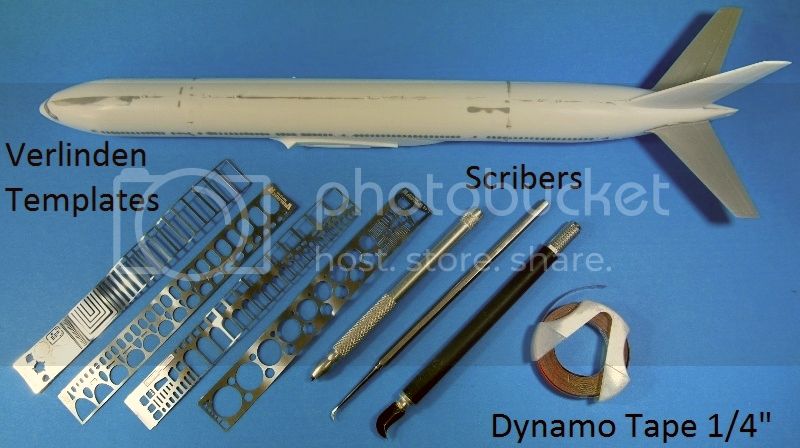
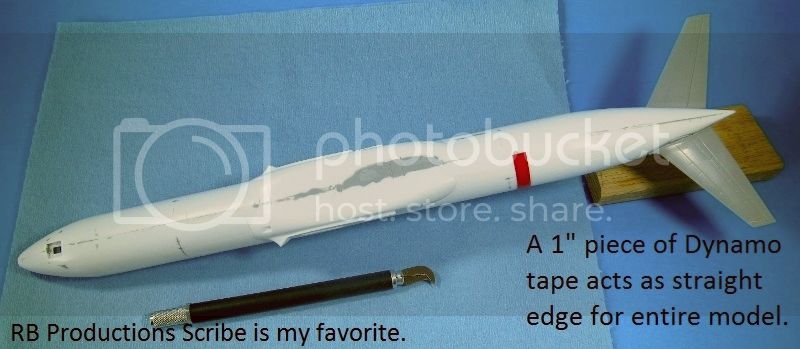
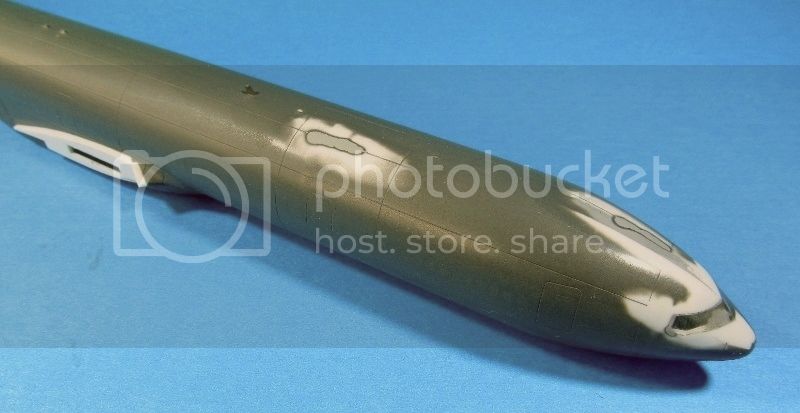
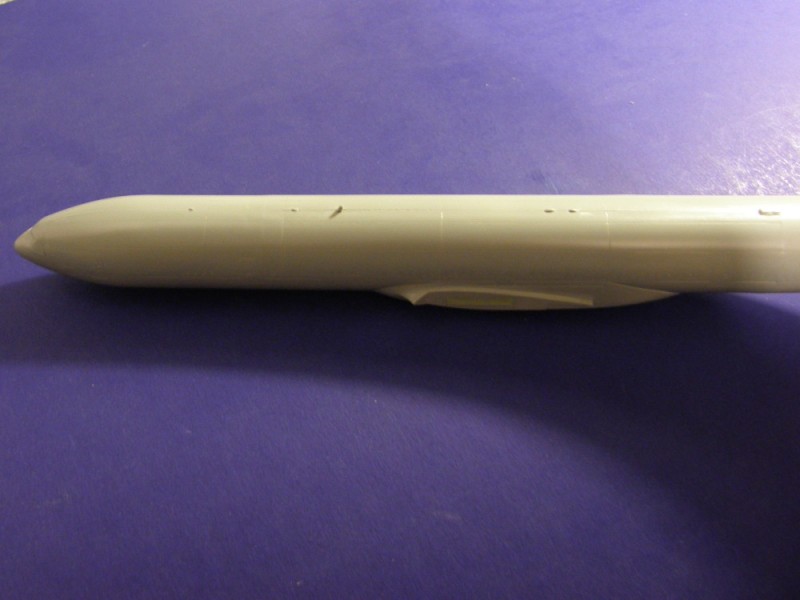
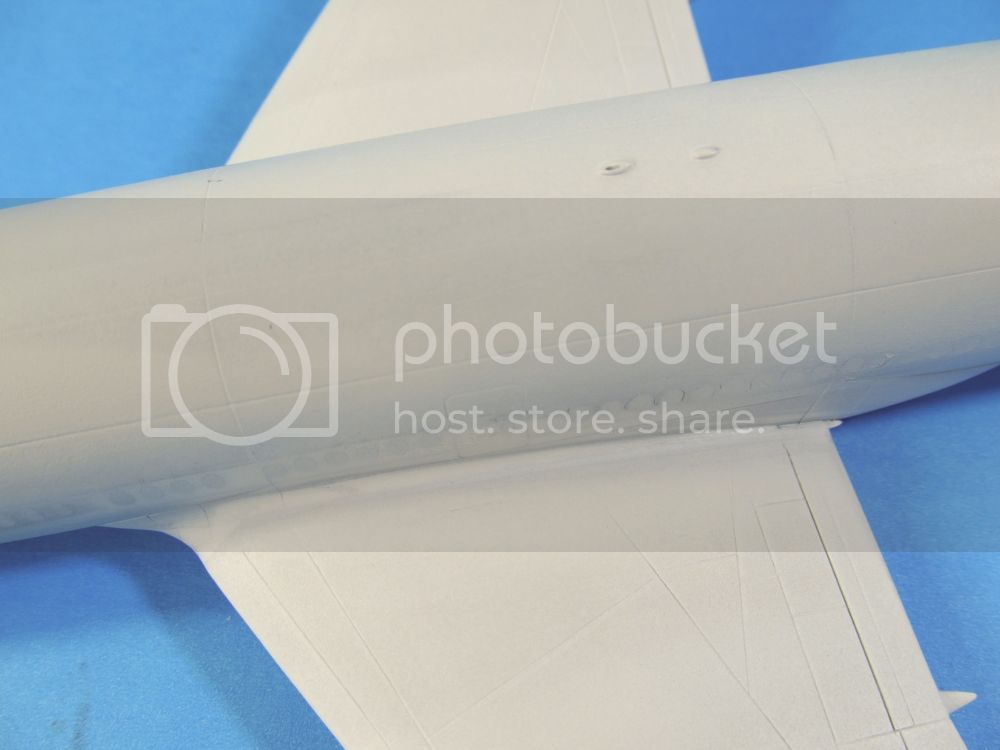
The fuselage; you'll be seeing quite a few fuselage photos:
I've taped her out to protect detail and prevent me having to rescribe more than is necessary.

Then after squeezing in a pile of filler, I thought I might use my nuclear sanding block to assist removing the bulk of dried excess. That proved to be a mistake; the block is overly aggressive.

So I removed the tape, leaving these small strips of filler, and wet-sanded them away with a gentler emery stick
Then I retaped, top and bottom, and port and starboard.
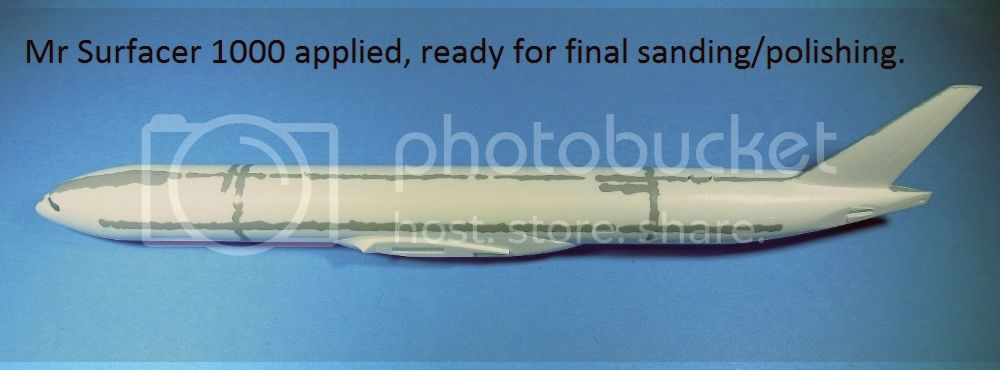
The final steps are to dab on Mr surfacer 500 first, sand her down, and then do it all again with Mr Surfacer 1000.
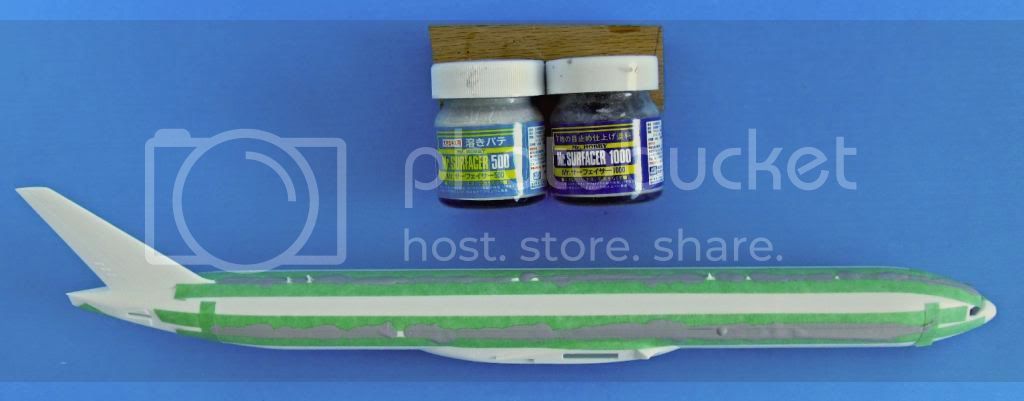
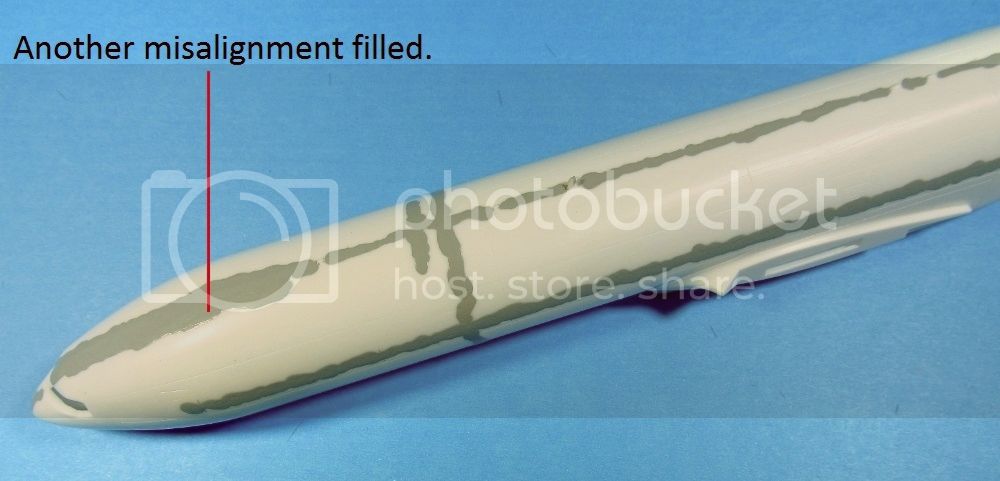
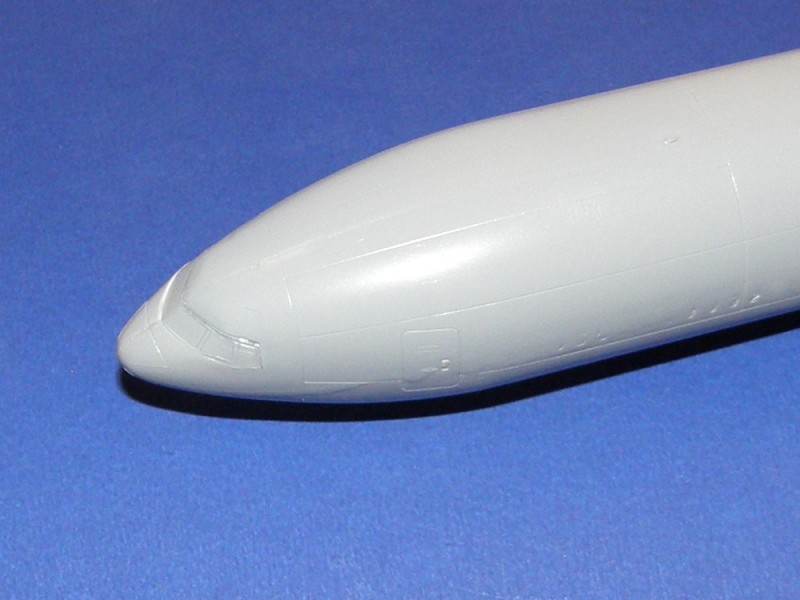
Tomorrow, when I've completed the bulk of this fuselage work, there will still be a couple of tooling and sink marks to repair. Plus the nose cone has small issues; I believe the 3-part tooling has left one fuselage halve slightly longer (fingernail thickness) than the other. This is proving to be an annoyance only, and I'll have her all straightened out within the next couple of days.
Ben
The fuselage; you'll be seeing quite a few fuselage photos:
I've taped her out to protect detail and prevent me having to rescribe more than is necessary.

Then after squeezing in a pile of filler, I thought I might use my nuclear sanding block to assist removing the bulk of dried excess. That proved to be a mistake; the block is overly aggressive.

So I removed the tape, leaving these small strips of filler, and wet-sanded them away with a gentler emery stick

Then I retaped, top and bottom, and port and starboard.

The final steps are to dab on Mr surfacer 500 first, sand her down, and then do it all again with Mr Surfacer 1000.

Tomorrow, when I've completed the bulk of this fuselage work, there will still be a couple of tooling and sink marks to repair. Plus the nose cone has small issues; I believe the 3-part tooling has left one fuselage halve slightly longer (fingernail thickness) than the other. This is proving to be an annoyance only, and I'll have her all straightened out within the next couple of days.
Ben
Mcleod
Joined: April 07, 2010
KitMaker: 1,028 posts
AeroScale: 939 posts
Posted: Monday, March 31, 2014 - 04:42 PM UTC
Actually, I expect to be working on that fuselage for another couple of sessions. One for final sanding, and one for rescribing/polishing. I'll let the photo's do the talking:

to be continued. Ben


to be continued. Ben
Mcleod
Joined: April 07, 2010
KitMaker: 1,028 posts
AeroScale: 939 posts
Posted: Tuesday, April 01, 2014 - 06:31 AM UTC
So, I spent roughly 1hr., wet sanding the filled fuselage and polishing it up with a fine, wet emery stick. It looks to be ready for scribing.
After each sanding session, I washed her with Dawn detergent in luke warm water. Believe me, Dawn dosen't leave a greasy film like that cheap stuff does, so its a favorite (no, this is not a commercial break). Anyway, I was playing with some other parts during the drying times:
Wings and engines are coming along nicely.
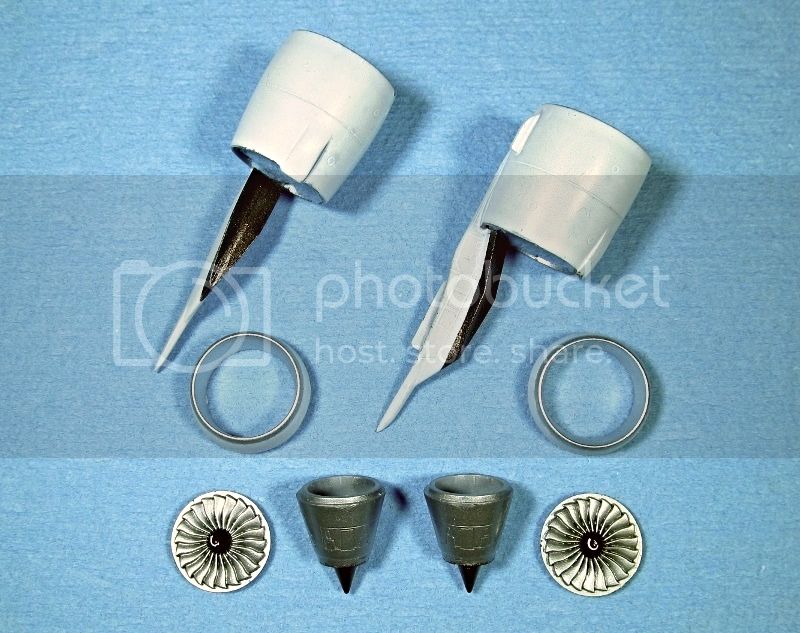
As far as the engines go, some parts have been Alcladed. Fitting those exhaust cones into the rear nacelle's is a-bit fiddley, but, it can be done. Some touching up may be required. Hope you can see where I'm heading with this:
continuation coming up...
After each sanding session, I washed her with Dawn detergent in luke warm water. Believe me, Dawn dosen't leave a greasy film like that cheap stuff does, so its a favorite (no, this is not a commercial break). Anyway, I was playing with some other parts during the drying times:

Wings and engines are coming along nicely.
As far as the engines go, some parts have been Alcladed. Fitting those exhaust cones into the rear nacelle's is a-bit fiddley, but, it can be done. Some touching up may be required. Hope you can see where I'm heading with this:

continuation coming up...
Mcleod
Joined: April 07, 2010
KitMaker: 1,028 posts
AeroScale: 939 posts
Posted: Friday, April 04, 2014 - 06:41 AM UTC
This build isn't happening overly quick, however, I am trying to make a nice job of it.
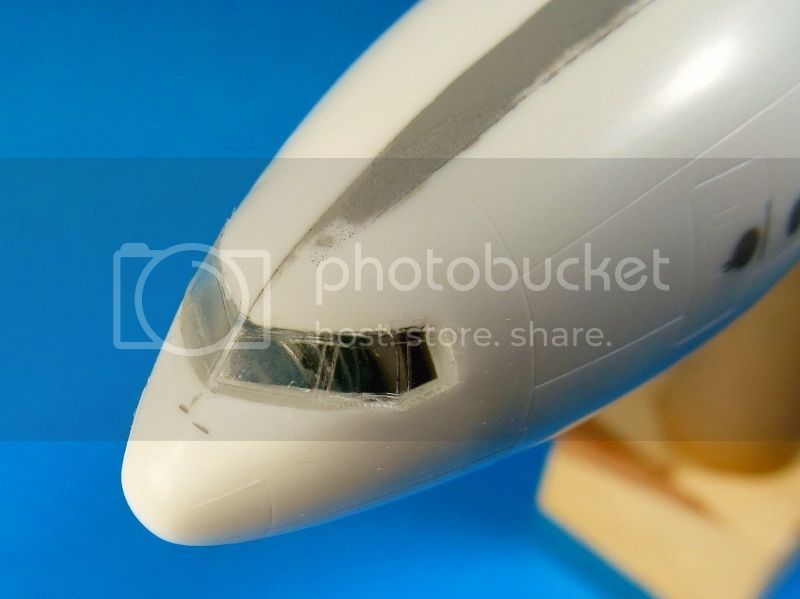
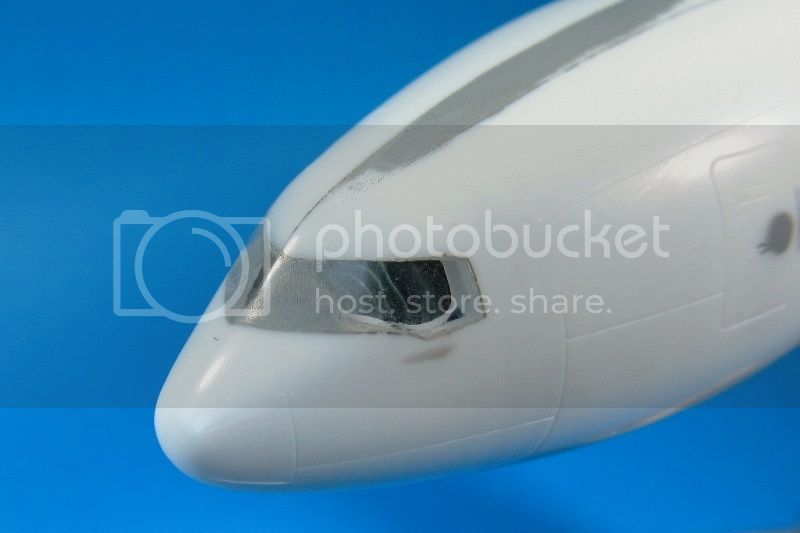
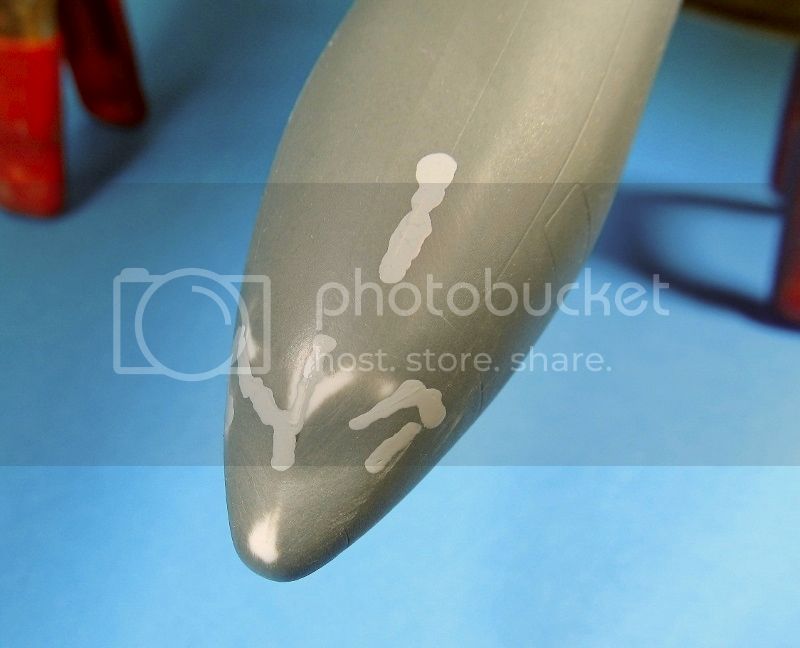
I've joined in the front cockpit windows. The fit is actually quite nice. My chosen glue was Humbol ClearFix.
Then I mudded her up so bad, you'd think it was in a pie fight.
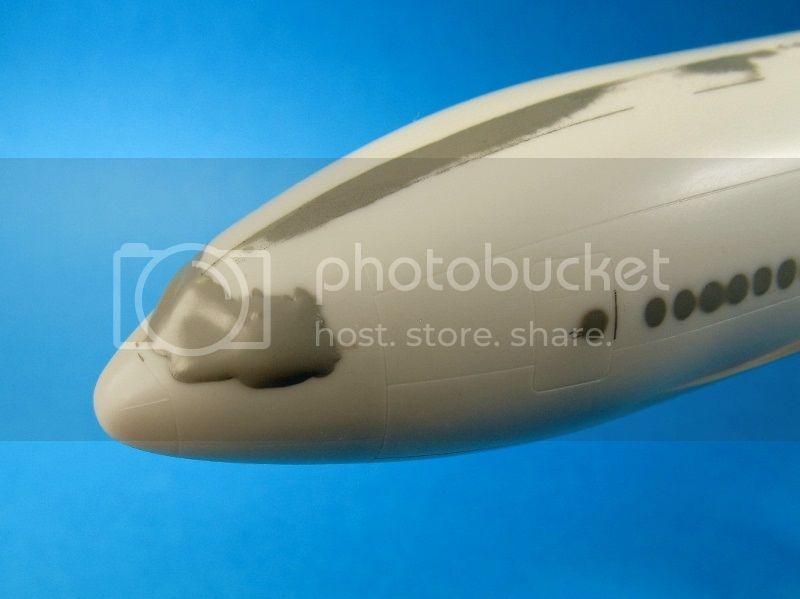
It all sanded and polished out nicely. Don't forget, I'm using Hasegawa's fine looking window decals. Hence, I've removed all the windscreen detail.
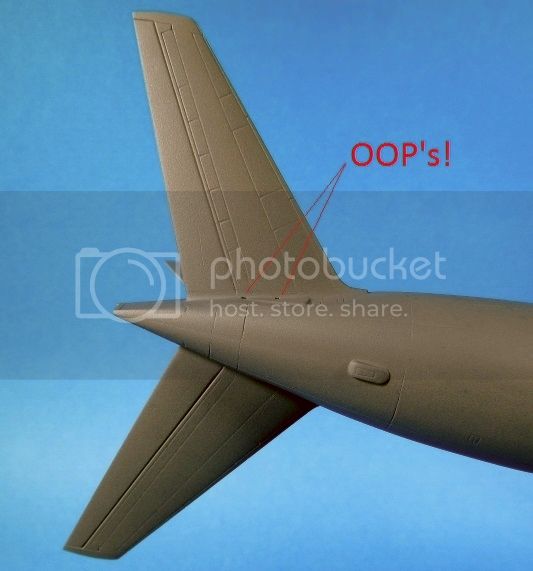
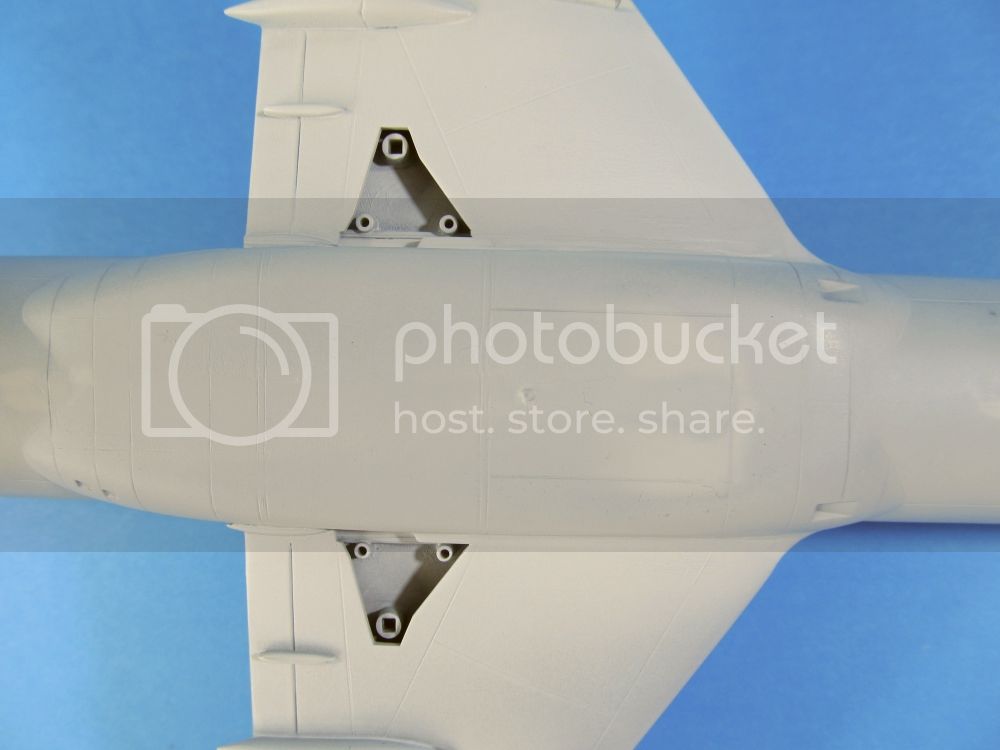
I've also attached the one piece horizontal stabilizers, mudding up the seams with Mr Surfacer 1000. Then, using Q-Tips dipped in nail polish remover, I was able to dress up the joins some-what.
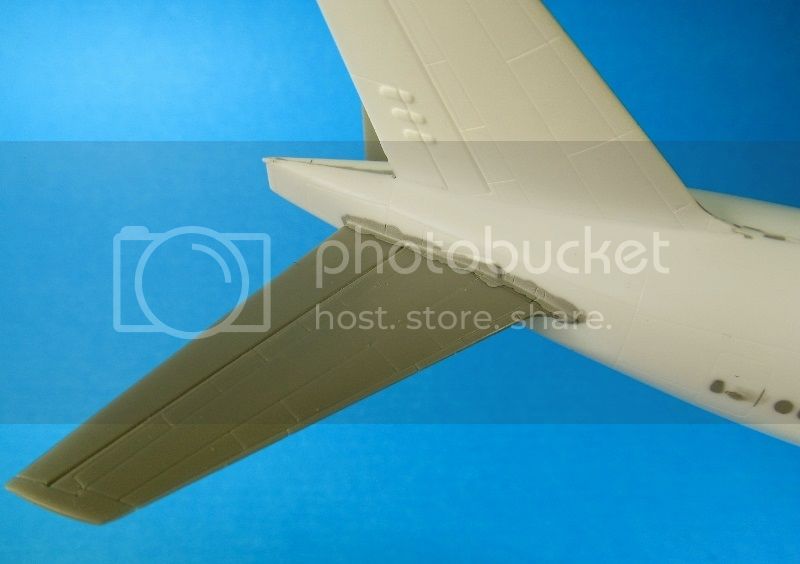

Thanks for looking .
I've joined in the front cockpit windows. The fit is actually quite nice. My chosen glue was Humbol ClearFix.

Then I mudded her up so bad, you'd think it was in a pie fight.

It all sanded and polished out nicely. Don't forget, I'm using Hasegawa's fine looking window decals. Hence, I've removed all the windscreen detail.

I've also attached the one piece horizontal stabilizers, mudding up the seams with Mr Surfacer 1000. Then, using Q-Tips dipped in nail polish remover, I was able to dress up the joins some-what.


Thanks for looking
.Mcleod
Joined: April 07, 2010
KitMaker: 1,028 posts
AeroScale: 939 posts
Posted: Saturday, April 05, 2014 - 01:24 PM UTC
I'm trying to get a little bit done every day, and feel it is progressing very well. For today's efforts, I'm going to let the photo's do the talking once again:

Nobody seems to want to input in this thread, but, by the view count I know their looking.
That's just as good Ben
Ben


Nobody seems to want to input in this thread, but, by the view count I know their looking.
That's just as good
Ben
JClapp

#259

Joined: October 23, 2011
KitMaker: 2,265 posts
AeroScale: 1,715 posts

Posted: Saturday, April 05, 2014 - 09:38 PM UTC
oh yes, Im watching.
Youre really going all-out. going to be fabulous
Youre really going all-out. going to be fabulous


tinbanger
Joined: February 04, 2008
KitMaker: 2,507 posts
AeroScale: 1,814 posts

Posted: Saturday, April 05, 2014 - 10:12 PM UTC
Jessica and Ben I am watching your builds !
Nice to see Civil builds on this site we should have our own forum for Civil AC!
Nice to see Civil builds on this site we should have our own forum for Civil AC!

Mcleod
Joined: April 07, 2010
KitMaker: 1,028 posts
AeroScale: 939 posts
Posted: Monday, April 07, 2014 - 04:20 AM UTC
Thanks for your acknowledgements, Richard and Jonathan. It is appreciated.
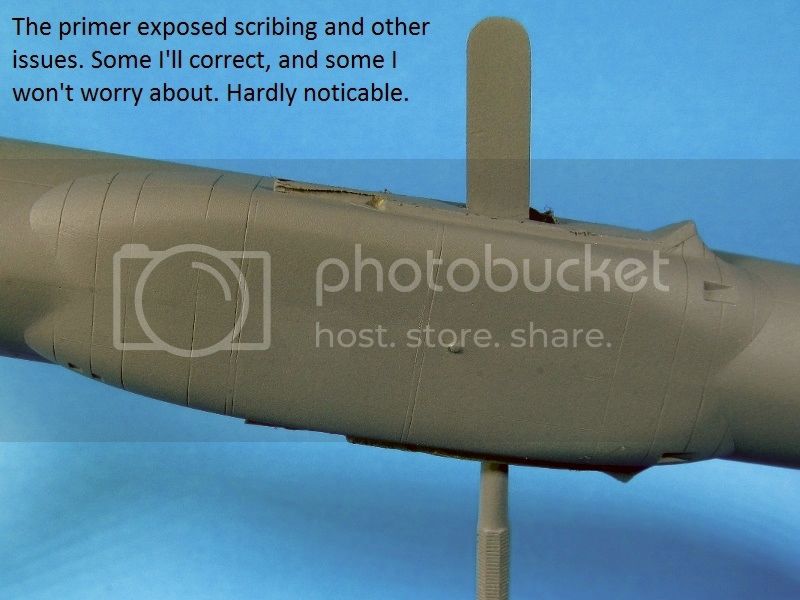
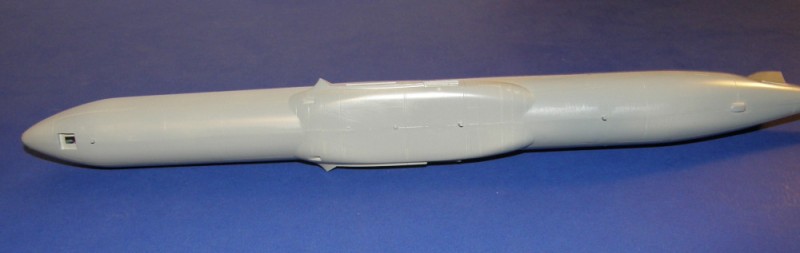
After priming that fuselage, I found there were some areas still needing attention. So I slapped on a little more Mr Surfacer 1000, hoping to correct deficiencies.
I'll have to rescribe here and there.
Sadly, my family has been attacked with a flu bug, and I find it necessary to rest from modelling for a couple of days until the sickness passes.
However, this is where I leave it for now:

I'm considering putting those engines together, and joining them to the wings before I actually attach the wings to the fuselage. The wing to fuselage join might prove to be a weak spot, and I worry about working with engine attachment after the wings are joined. Dressing in the engines may prove stressful to the wing join.
Any thoughts???
After priming that fuselage, I found there were some areas still needing attention. So I slapped on a little more Mr Surfacer 1000, hoping to correct deficiencies.


I'll have to rescribe here and there.
Sadly, my family has been attacked with a flu bug, and I find it necessary to rest from modelling for a couple of days until the sickness passes.
However, this is where I leave it for now:

I'm considering putting those engines together, and joining them to the wings before I actually attach the wings to the fuselage. The wing to fuselage join might prove to be a weak spot, and I worry about working with engine attachment after the wings are joined. Dressing in the engines may prove stressful to the wing join.
Any thoughts???
tinbanger
Joined: February 04, 2008
KitMaker: 2,507 posts
AeroScale: 1,814 posts
Posted: Monday, April 07, 2014 - 06:07 AM UTC
"The wing to fuselage join might prove to be a weak spot, and I worry about working with engine attachment after the wings are joined."
Hi Ben!
If you are worried about the wing joint strength I would drill and dowel at the root, as for the engines try to make a support jig out of strip material or Lego to aid with alignment and while the glue dry's to keep them straight.
Hi Ben!
If you are worried about the wing joint strength I would drill and dowel at the root, as for the engines try to make a support jig out of strip material or Lego to aid with alignment and while the glue dry's to keep them straight.

bdanie6
Joined: November 09, 2008
KitMaker: 615 posts
AeroScale: 459 posts

Posted: Monday, April 07, 2014 - 08:39 AM UTC
Hi Ben,
I just took a look at this build blog and it's looking very good. These old eyes have a hard enough time with 1/48, so usually I let small scale stuff go by,I decided to take a peek. Glad I did.
As for attaching the wings and engines, a dowel of wood or plastic would be a good idea and remember, super glue is your friend.
I'll be watching from the sidelines
Later
Joel_W
Joined: December 04, 2010
KitMaker: 11,666 posts
AeroScale: 7,410 posts
Posted: Monday, April 14, 2014 - 09:08 AM UTC
Jessica & Ben,
I just found your duel build this afternoon as I don't visit the modern sub-form that often, but with my new found fondness for Jet aircraft that will be changing. Unfortunately, I don't know much about modern civil jet airliners other then finding my boarding gate at the airport.
Having a duel build of the same plane by two different manufactures will surely prove interesting, as each of you have already demonstrated different approaches to similar building situations.
I'll have to agree with Ben that Jessica's approach to filling in those window openings looks easier with less sanding, polishing, and re-scribing needed.
As for your concerns about the wing/fuselage joints, the wing tabs and mounting surfaces look more then adequate to offer a secure bonding surface. If you do opt to glue the engines on 1st, aren't you creating a lot more work in masking them out so you can paint the wings?
I'll be following your builds through to completion.
Joel
Mcleod
Joined: April 07, 2010
KitMaker: 1,028 posts
AeroScale: 939 posts
Posted: Tuesday, April 15, 2014 - 06:23 AM UTC
Thanks for all your comments, gentlemen.
Sadly, I'm unable to get anymore photos of my progress into this PC for some reason. The camera is taking very good photos, but, I can't seem to download them from camera into the PC. So, I'm waiting for my computer smart son to show up, and help me out.
It's very frustrating; I wanted to show you the new wing attachment dehidral adjuster I built on this past Sunday. I call it the 'Frankencontraption'.
Guess it will have to wait until I can download photos again.
Ben 
Sadly, I'm unable to get anymore photos of my progress into this PC for some reason. The camera is taking very good photos, but, I can't seem to download them from camera into the PC. So, I'm waiting for my computer smart son to show up, and help me out.
It's very frustrating; I wanted to show you the new wing attachment dehidral adjuster I built on this past Sunday. I call it the 'Frankencontraption'.
Guess it will have to wait until I can download photos again.
Ben
bdanie6
Joined: November 09, 2008
KitMaker: 615 posts
AeroScale: 459 posts
Posted: Tuesday, April 15, 2014 - 08:03 AM UTC
No worries Ben, we'll all be here waiting patiently. Maybe Jess can take up some of the slack with an update on her builds? 
Later
Later
Mcleod
Joined: April 07, 2010
KitMaker: 1,028 posts
AeroScale: 939 posts
Posted: Tuesday, April 15, 2014 - 02:07 PM UTC
Bruce, I wouldn't get too worried about Jessica. She's likly got me skinned out and is waiting for me to hurry up. 
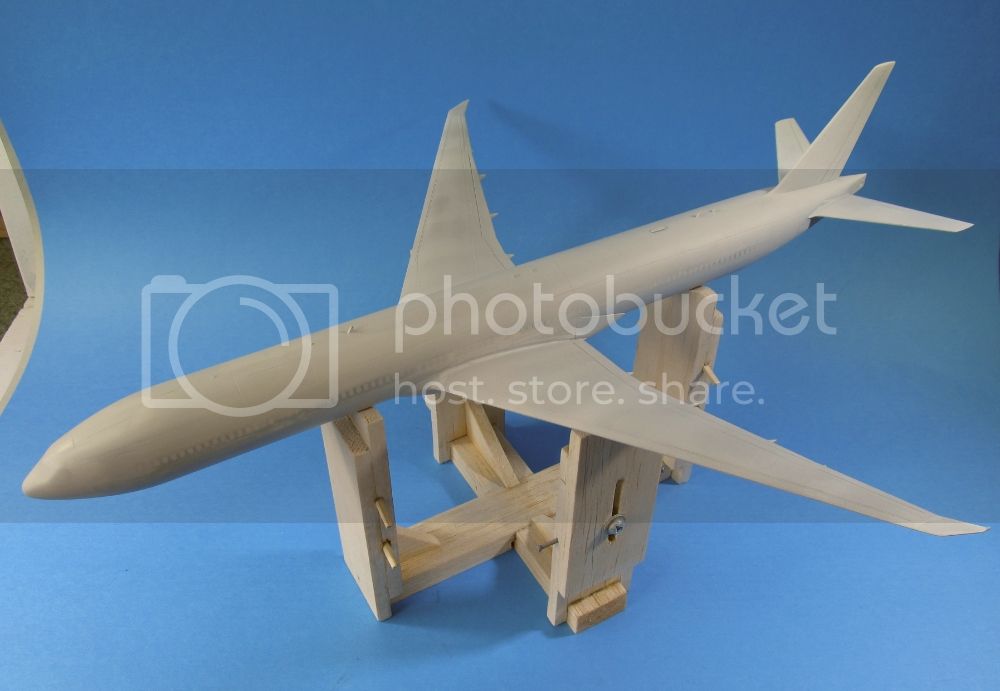
Anyway, here is the 'Frankencontraption' I built on Sunday, especially for this model:
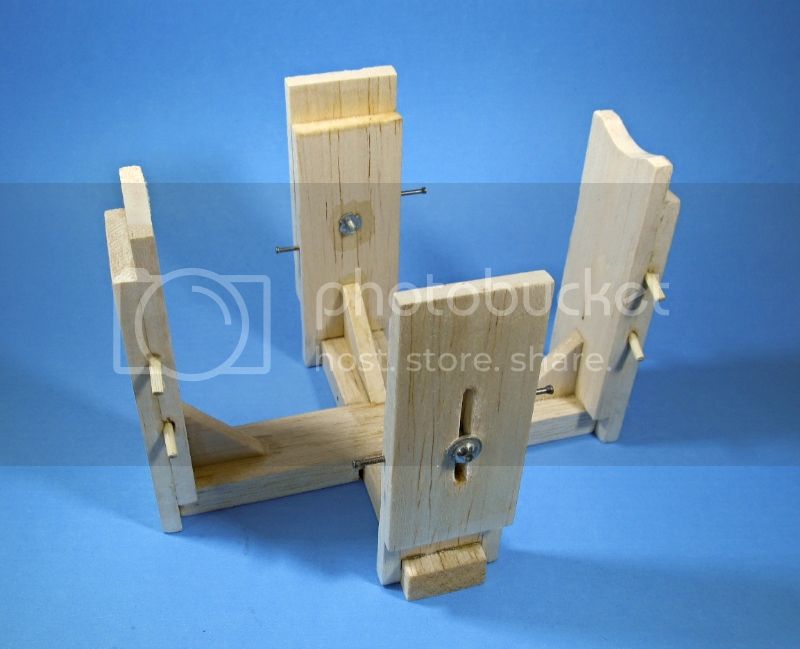
I hope you can see there really is a method to my madness.
The driver link between my camera and PC is acting up, so I can only load photos onto my sons PC and then email them to mine. It's a pain in the root, so I'm hoping the effect on posting isn't overly harsh. I'll still try my best until this issue is resolved.
Happy modelling Ben
Anyway, here is the 'Frankencontraption' I built on Sunday, especially for this model:


I hope you can see there really is a method to my madness.
The driver link between my camera and PC is acting up, so I can only load photos onto my sons PC and then email them to mine. It's a pain in the root, so I'm hoping the effect on posting isn't overly harsh. I'll still try my best until this issue is resolved.
Happy modelling
BenJessie_C
Joined: September 03, 2009
KitMaker: 6,965 posts
AeroScale: 6,247 posts
Posted: Tuesday, April 15, 2014 - 04:24 PM UTC
Alas, this working for a living lark has me way behind in my modelling. I've barely got the first coat of primer on the fuselage and it desperately needs some more filling and sanding.
Joel_W
Joined: December 04, 2010
KitMaker: 11,666 posts
AeroScale: 7,410 posts
Posted: Wednesday, April 16, 2014 - 03:03 AM UTC
Ben, I'm super impressed with your homemade stand. Think I'll try to build one myself, as every time I look online for one, I just can't convince myself to spend the money on it. Just call me Cheap.
Jess, nice to see your latest update. And yeah, work has a tendency to get in the way of ones personal life and interests. I'm semi retired and still find work does that way too often.
You're making progress, and that's all that counts.
Joel
Jess, nice to see your latest update. And yeah, work has a tendency to get in the way of ones personal life and interests. I'm semi retired and still find work does that way too often.
You're making progress, and that's all that counts.
Joel
JClapp
#259
Joined: October 23, 2011
KitMaker: 2,265 posts
AeroScale: 1,715 posts
Posted: Wednesday, April 16, 2014 - 03:59 AM UTC
that is a nice jig. Adjustable and all. 
Mcleod
Joined: April 07, 2010
KitMaker: 1,028 posts
AeroScale: 939 posts
Posted: Saturday, April 19, 2014 - 04:33 PM UTC
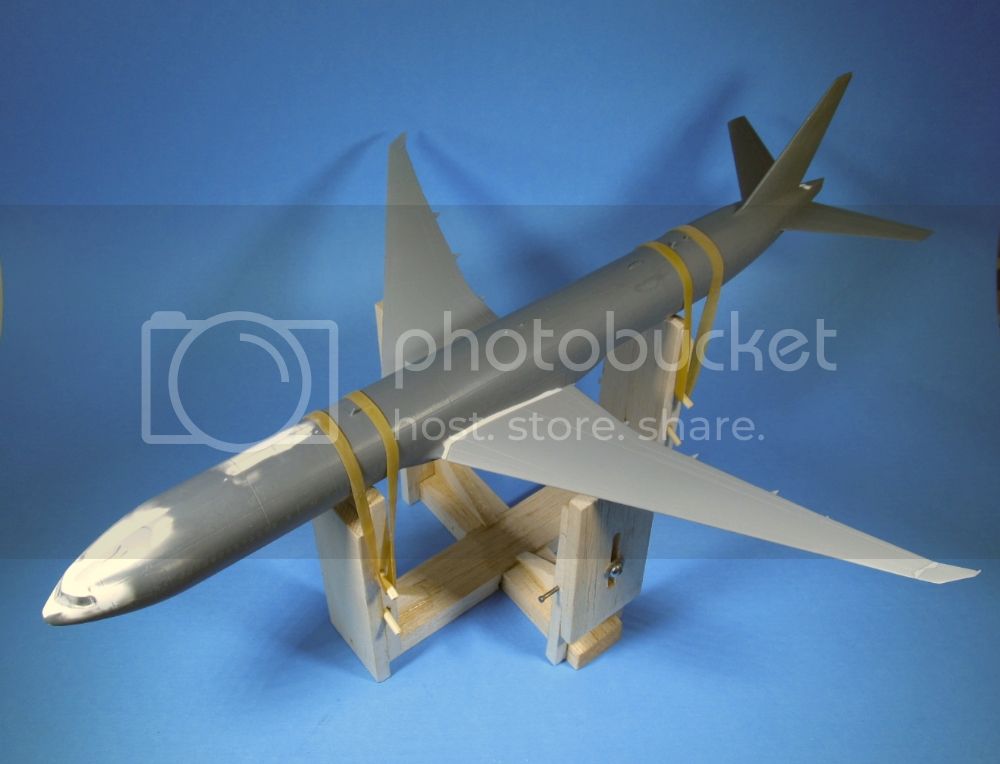
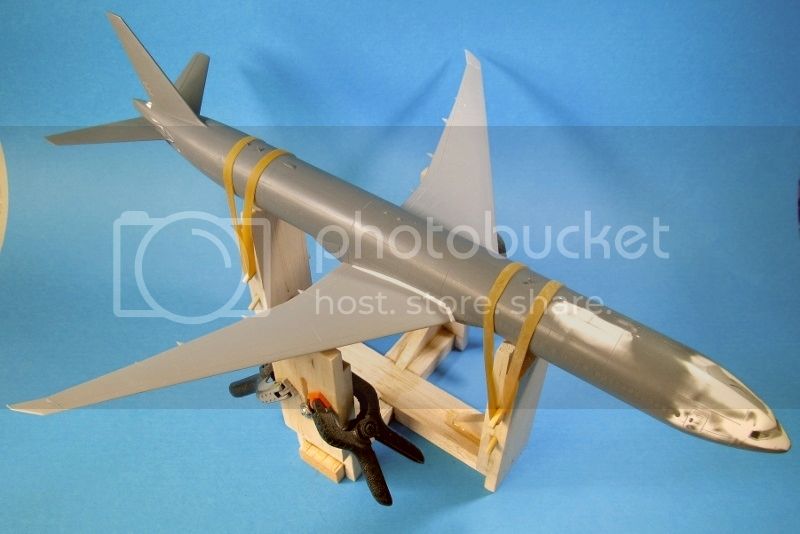
I did happen to get the wings on. They were secured with the epoxy applied in the attachedment slots. After drying, the seams were melted together using the Pro-Weld and a flow applicator. Then the seams were filled with Cyano.
The dehidral form works nicely. Although, the angle is just eye-balled comparing to a 3-view.
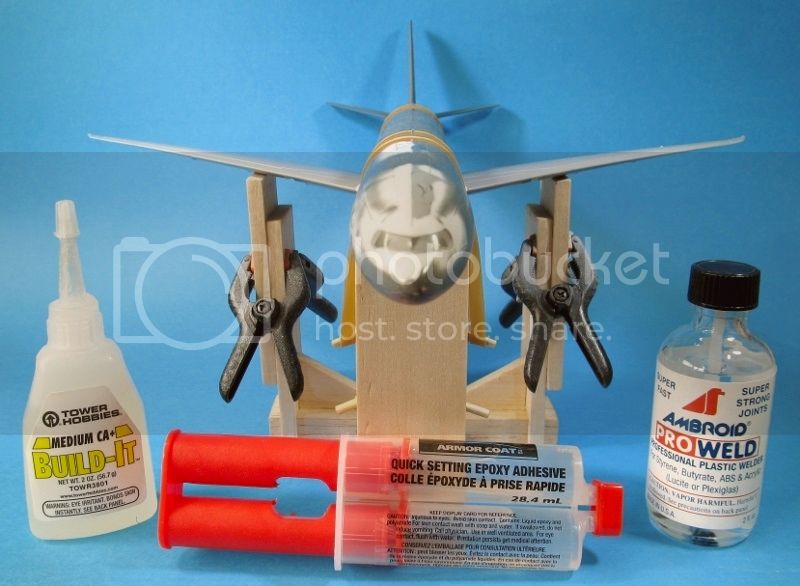
The form keeps her good and still While drying.
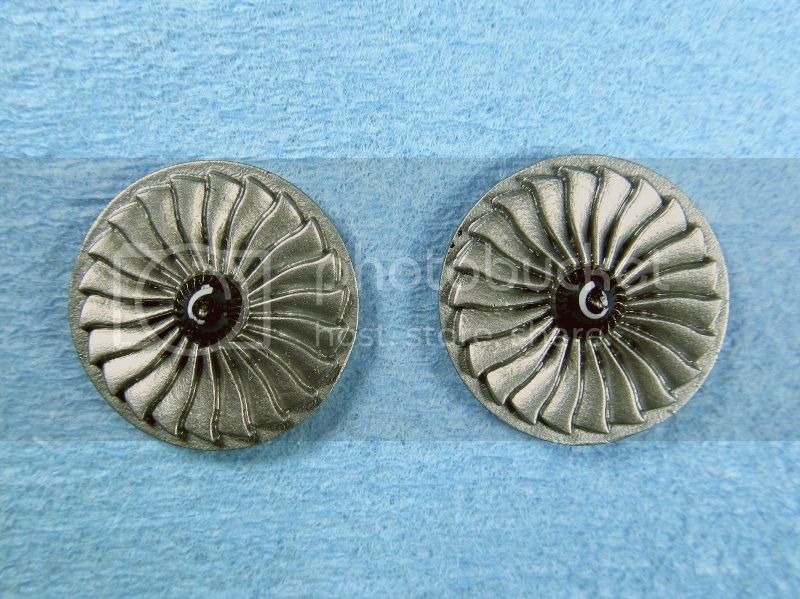
I tried to put on those tiny, curly-wig decals onto the engine fan cones. It proved to be impossible with any accuracy, considering the cones are so sharp, and the miniature decals are on round decal film. I kinda made a mess of it:
Anyway, I'm painting the engines unattached. Basically as per the paint scheme callouts on the instructions. The burn't iron color is Tamiya Bronze (X-33).
The model currently has been primed white, and is ready to get finish colors applied. Took photos and tried to load them on my failing PC; it failed. So those photos will come later.
Till then, enjoy an iced tea.
Ben
The dehidral form works nicely. Although, the angle is just eye-balled comparing to a 3-view.

The form keeps her good and still While drying.

I tried to put on those tiny, curly-wig decals onto the engine fan cones. It proved to be impossible with any accuracy, considering the cones are so sharp, and the miniature decals are on round decal film. I kinda made a mess of it:

Anyway, I'm painting the engines unattached. Basically as per the paint scheme callouts on the instructions. The burn't iron color is Tamiya Bronze (X-33).

The model currently has been primed white, and is ready to get finish colors applied. Took photos and tried to load them on my failing PC; it failed. So those photos will come later.
Till then, enjoy an iced tea.
BenJoel_W
Joined: December 04, 2010
KitMaker: 11,666 posts
AeroScale: 7,410 posts
Posted: Sunday, April 20, 2014 - 03:19 AM UTC
Ben,
Nice job gluing up those wings. They're on there for good.
Those two spiral decals look next to impossible. Your efforts came out pretty good if you ask me. I was thinking that maybe cutting some Tamiya tape in a spiral pattern, then painting them with enamel paint just might work.
Joel
Nice job gluing up those wings. They're on there for good.
Those two spiral decals look next to impossible. Your efforts came out pretty good if you ask me. I was thinking that maybe cutting some Tamiya tape in a spiral pattern, then painting them with enamel paint just might work.
Joel
Jessie_C
Joined: September 03, 2009
KitMaker: 6,965 posts
AeroScale: 6,247 posts
Posted: Sunday, April 20, 2014 - 03:41 AM UTC
Actually the spirals look just about right on. They're usually asymmetrical these days anyway. Given that their purpose is to let the ramp personnel know when an engine is running it's been found that the off-centre positioning gives a better visual indication.
Mcleod
Joined: April 07, 2010
KitMaker: 1,028 posts
AeroScale: 939 posts
Posted: Saturday, April 26, 2014 - 03:34 PM UTC
Thanks for the rays of hope regarding the engine-fan spirals. I guess they just had to grow on me; I'm used to them now.
This post describes my progress to date, more with pictures and few words.
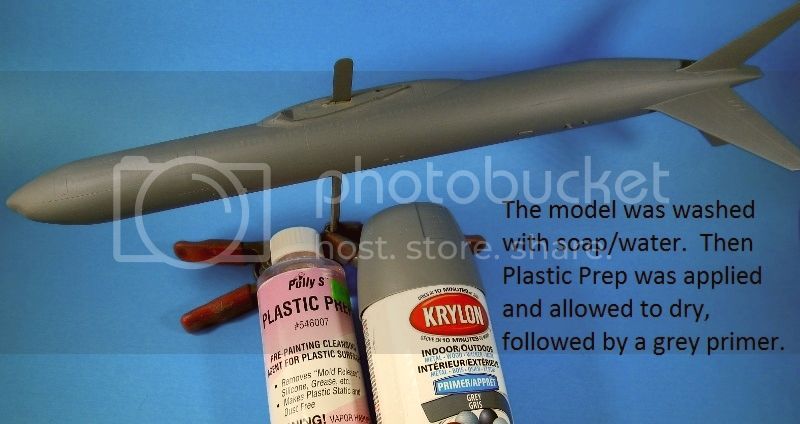
Primed:
Wing and tailplane joins:
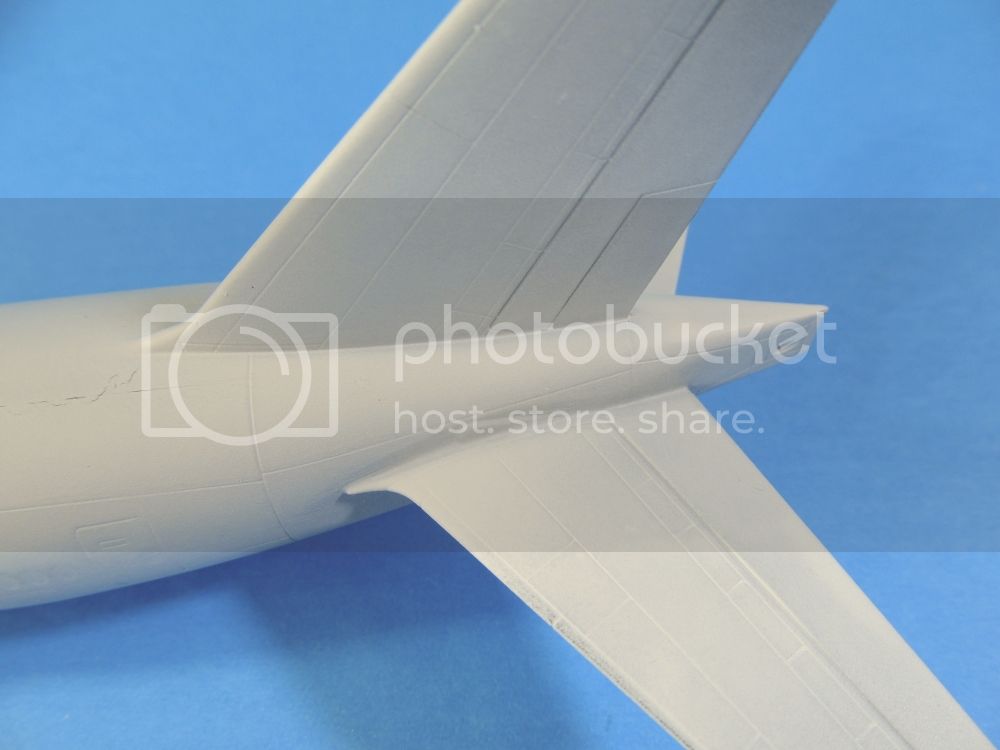
Believe it or not, these next photos show the wings with final Lt.Grey applied. Hard to see in the photos. I still have to apply the silver leading edges and a darker grey on the wing bottoms. Then the fuse will recieve final white coats.

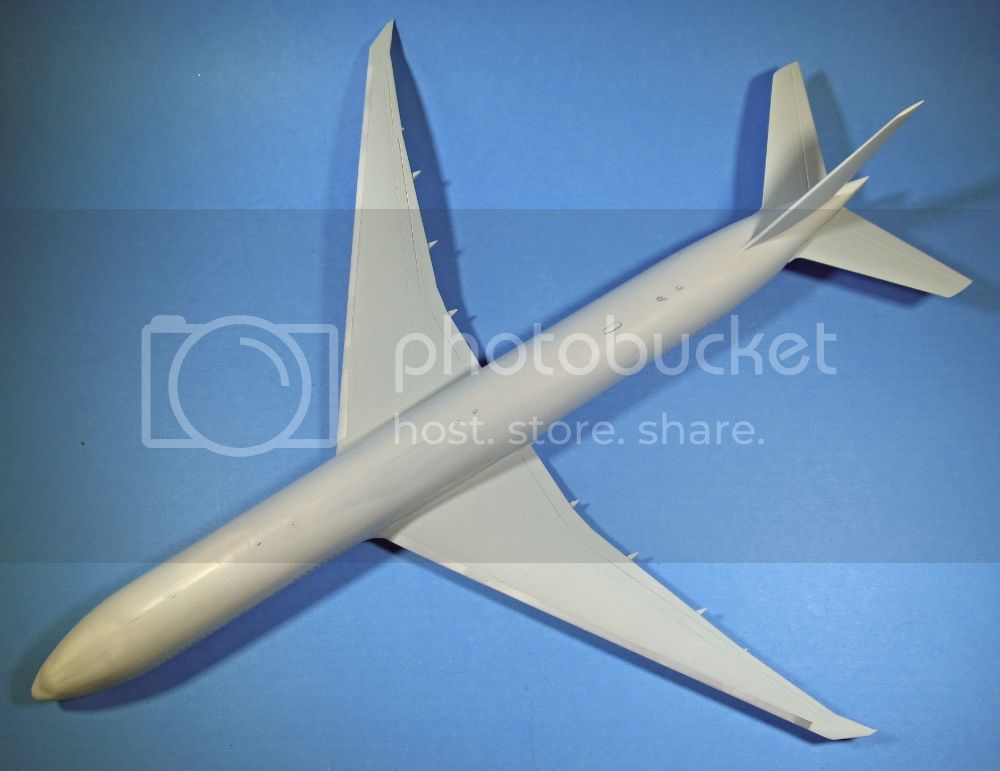
Allowing at least 48hrs dry time between the enamel paint coats, I'm expecting the finishing stages to take awhile. That's OK; perhaps I'll have a new hard-drive for my own PC by them, and can stop borrowing my daughters to post with.
Till next time, Ben
This post describes my progress to date, more with pictures and few words.
Primed:

Wing and tailplane joins:


Believe it or not, these next photos show the wings with final Lt.Grey applied. Hard to see in the photos. I still have to apply the silver leading edges and a darker grey on the wing bottoms. Then the fuse will recieve final white coats.


Allowing at least 48hrs dry time between the enamel paint coats, I'm expecting the finishing stages to take awhile. That's OK; perhaps I'll have a new hard-drive for my own PC by them, and can stop borrowing my daughters to post with.
Till next time,
Ben |

WEB HOSTING BY


Copyright ©2021 AeroScale and Kitmaker Network, a subsidiary of Silver Star Enterprises
All Rights Reserved. Please read our Conditions of Use and Privacy Policy.
All Rights Reserved. Please read our Conditions of Use and Privacy Policy.