OFFICIAL: Overshadowed Fighters of WWII
Buenos Aires, Argentina
Joined: September 07, 2006
KitMaker: 918 posts
AeroScale: 688 posts
Posted: Sunday, March 08, 2015 - 05:32 AM UTC
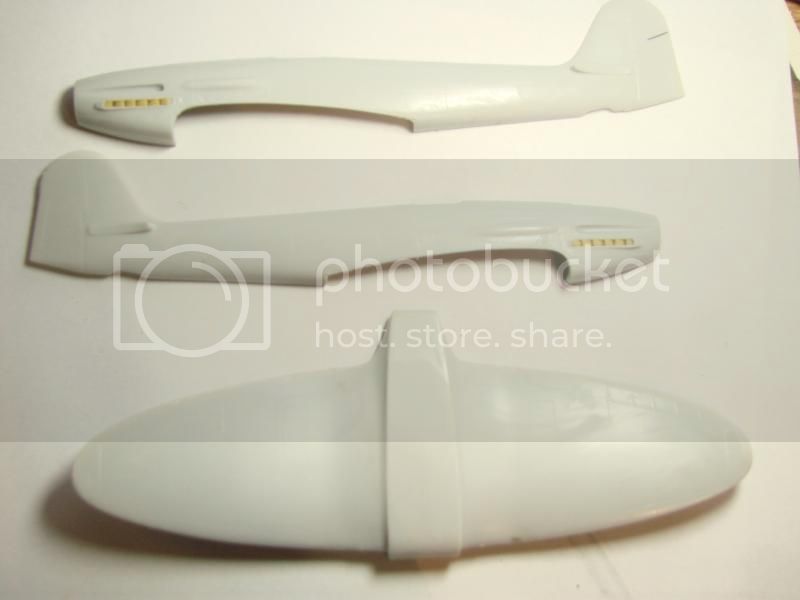
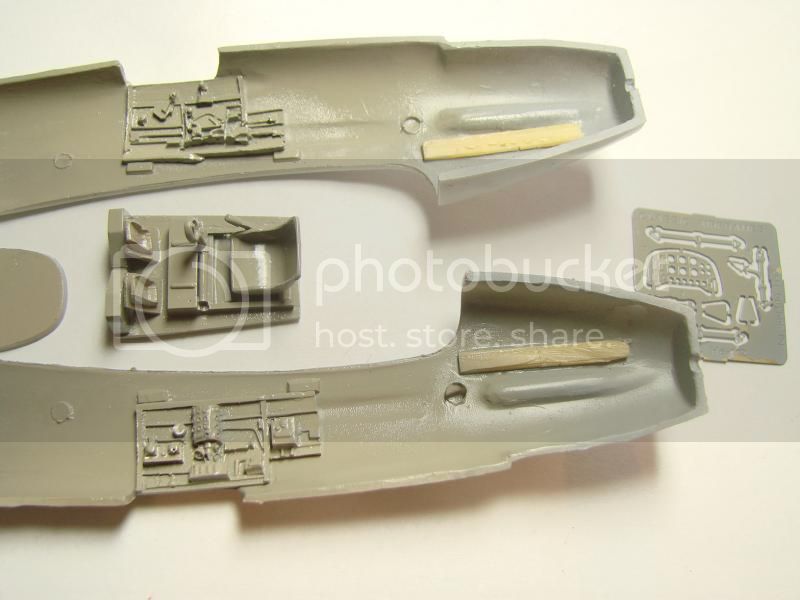
I´d began with the model. Some photos,
Oregon, United States
Joined: January 13, 2014
KitMaker: 107 posts
AeroScale: 105 posts
Posted: Sunday, March 08, 2015 - 05:53 AM UTC
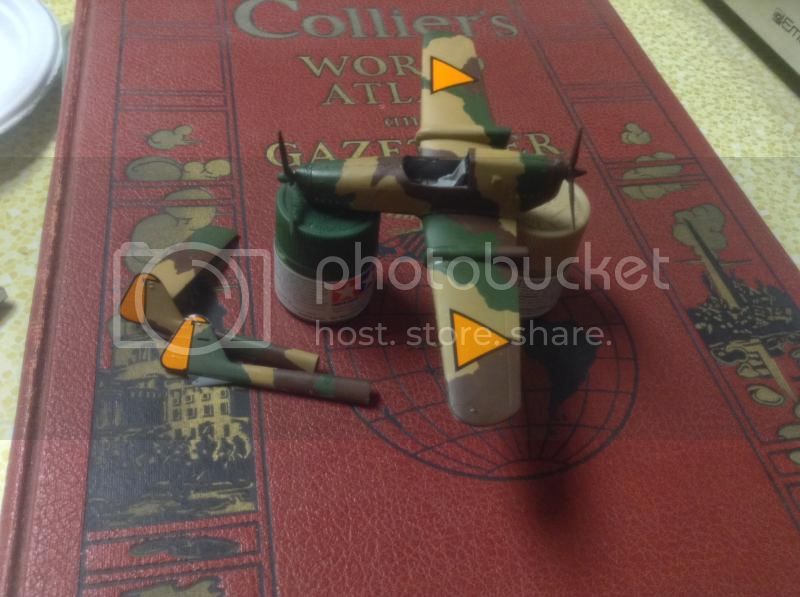
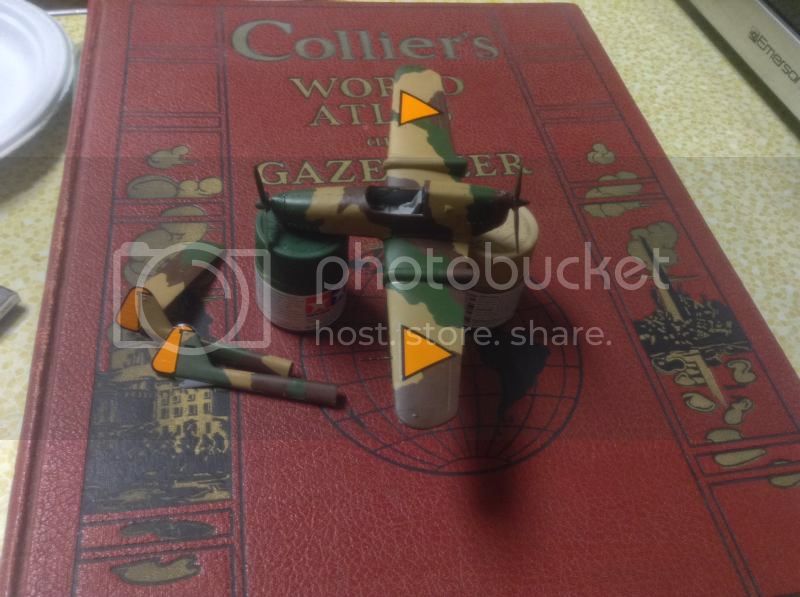
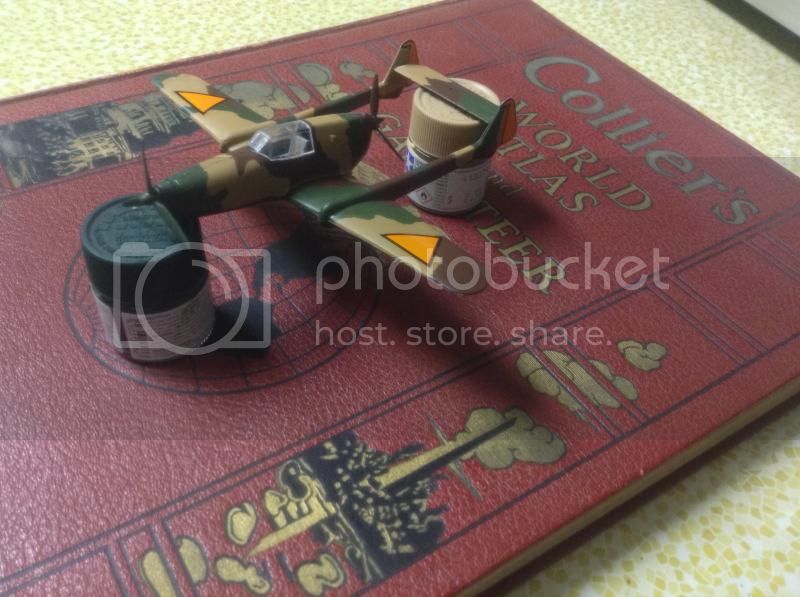
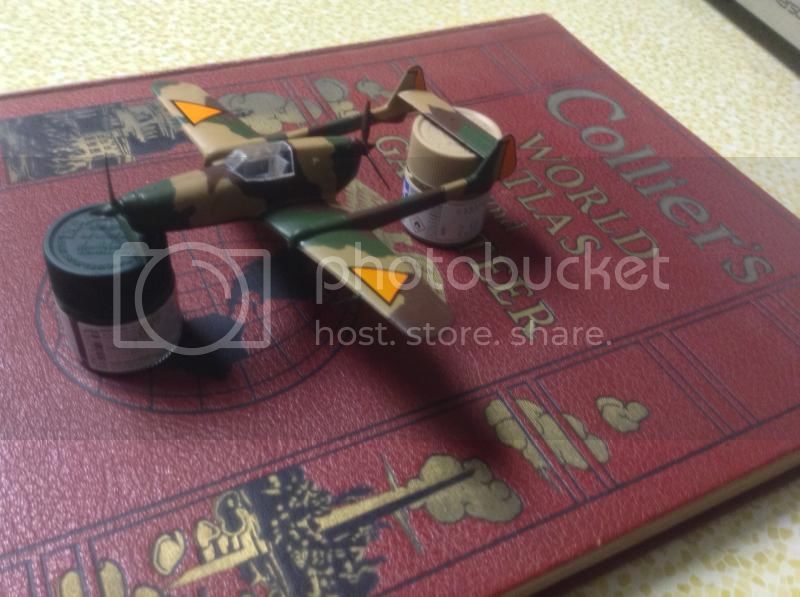
Further progress on the D-XXIII, straightened out the prop blade as well as attached the rear prop. I've also painted the camouflage on the tail booms and applied the first decals to her.
On the WIF Workbench: 1/72 IL-2 Sturmovik (Cuban Air Force)
"I shall either find a way or I shall make one." - supposedly, Hannibal Barca

#305
Christchurch, New Zealand
Joined: February 01, 2006
KitMaker: 1,673 posts
AeroScale: 1,517 posts
Posted: Sunday, March 08, 2015 - 06:50 AM UTC
Hi Jeff really pleased it worked out for you, how well it works really depends on just how hard the material is the needle is made from. But you can usually resurrect them fairly easily.
Kuching, Malaysia
Joined: June 19, 2002
KitMaker: 216 posts
AeroScale: 128 posts
Posted: Sunday, March 08, 2015 - 05:14 PM UTC
Thanks for kind words, Rowan.
Yeah, the Whirlwind have some much potential, imagine it with the right engines.. Even with the Peregrine, it performed well, without much updates for quite a long while...
Oregon, United States
Joined: January 13, 2014
KitMaker: 107 posts
AeroScale: 105 posts
Posted: Monday, March 09, 2015 - 06:11 AM UTC
Got the tail booms and canopy on:
On the WIF Workbench: 1/72 IL-2 Sturmovik (Cuban Air Force)
"I shall either find a way or I shall make one." - supposedly, Hannibal Barca
Merlin
 Senior Editor
#017
United Kingdom
Joined: June 11, 2003
KitMaker: 17,582 posts
AeroScale: 12,795 posts
Posted: Tuesday, March 10, 2015 - 01:07 AM UTC
Hi again
Great work in the latest updates everyone!

I built the CA He 112 years ago and really enjoyed it. It's a fantastic aircraft that deserves a mainstream 1:48 kit.
I've been tinkering with the Reppu and have got the basic cockpit parts done:
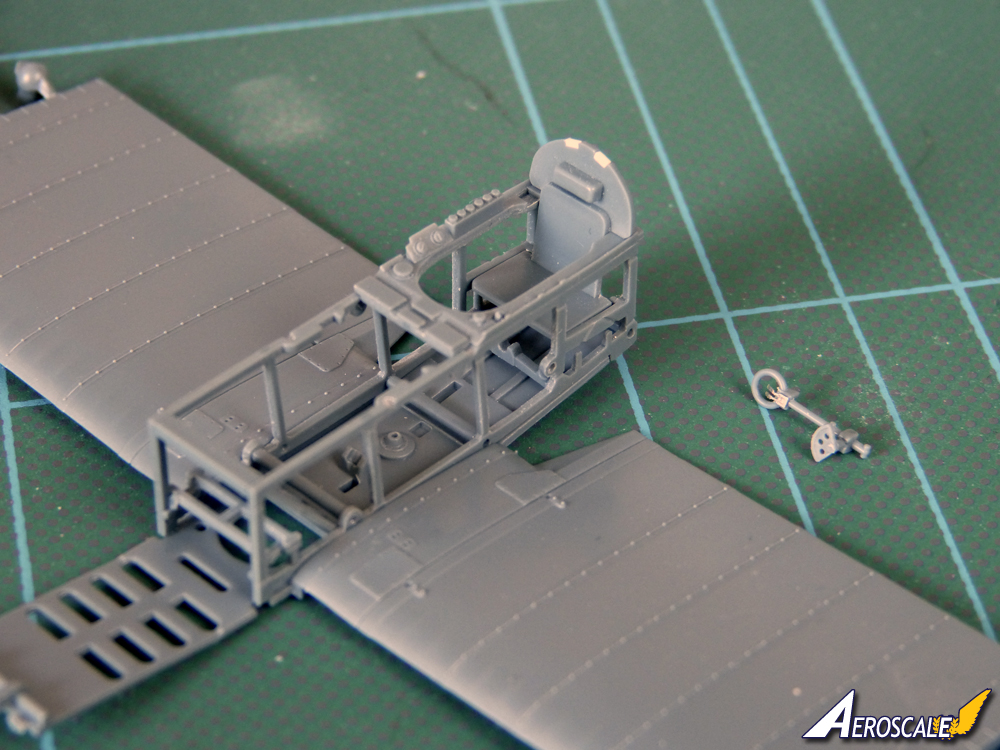


I think the instrument panel looks reasonable with the faces punched out from kit decal (the blue instrument is a bit off centre - I don't know if that's my fault or down to registration on the decal - I didn't check properly before diving in with the punch & die! LOL!)
I wish I'd thinned the seat edges. I knew I should! As it is, it looks like it was cast in concrete.

The fuel pump is hastily scratch-done after the carpet monster ate the original...
Anyway, what's done is done. I must dig out a harness from somewhere, and there's still a bit to do with weathering and shading, but the basics are in place.
All the best
Rowan

BEWARE OF THE FEW...
As I grow older, I regret to say that a detestable habit of thinking seems to be getting a hold of me. - H. Rider Haggard
Ontario, Canada
Joined: February 04, 2008
KitMaker: 2,507 posts
AeroScale: 1,814 posts
Posted: Tuesday, March 10, 2015 - 02:52 AM UTC
" The Die Hards"
43rd MIDDLESEX REGIMENT
MACHINE GUN CORPS
XXX CORP
The most effective way to do it, is to do it.
- Amelia Earhart

#523
Idaho, United States
Joined: February 28, 2014
KitMaker: 342 posts
AeroScale: 250 posts
Posted: Tuesday, March 10, 2015 - 03:27 AM UTC
Rowan,
I think the CP looks Great!
This may be a dumb question but you said you use a Punch set to get them cut out. Where do you get a punch set like that?
I have letter punches for wood working but no cut out ones.
Thanks
Jeff D

#363
Pennsylvania, United States
Joined: January 08, 2014
KitMaker: 425 posts
AeroScale: 401 posts
Posted: Tuesday, March 10, 2015 - 04:31 AM UTC
Eduard 1/48 P-400 Limited EditionEveryone seems to be making good progress. Nice dry brushing detail on the panel, Rowan. I really need to take some time and practice that.
I re-scribed the last couple of panel lines I needed to clean up on my P-39 and touched up the primer. I hit all of the panel lines with Alclad gloss black base and set it aside to dry. I should be able to lay the Neutral Gray on the undersurface this week and hopefully start the OD topsides on Sunday.
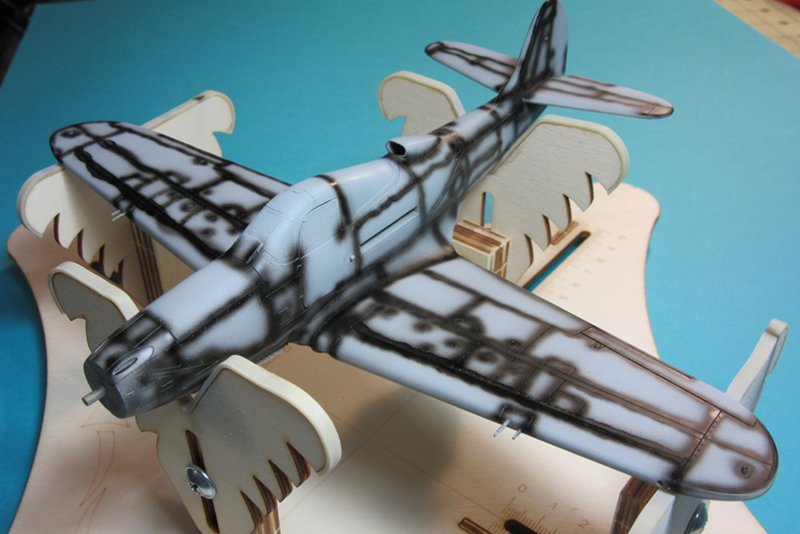
I want to plan out some tonal variations in the OD before I start painting the upper surfaces.
On the Bench:
The Big Three: Eduard 1:48 Bf 109G-2 Trop
Radial Fighters: Hasegawa 1:48 Ki84 Frank
The Mighty Eighth: Eduard 1:48 P-51D-10
Merlin
 Senior Editor
#017
United Kingdom
Joined: June 11, 2003
KitMaker: 17,582 posts
AeroScale: 12,795 posts
Posted: Tuesday, March 10, 2015 - 12:17 PM UTC
Hi Richard and Paul
Great progress on the Gladiator and Airacobra.

I really must get one of those wooden jigs - they look so useful.
@ Jeff - I used
C.B. Model Products's punch & die set for the instruments.
All the best
Rowan

BEWARE OF THE FEW...
As I grow older, I regret to say that a detestable habit of thinking seems to be getting a hold of me. - H. Rider Haggard

#041
Kobenhavn, Denmark
Joined: July 20, 2006
KitMaker: 10,069 posts
AeroScale: 3,788 posts
Posted: Tuesday, March 10, 2015 - 12:55 PM UTC
Nice progress, Paul. Looking forward to see more.
Beautiful cockpit, Rowan. Really great details and nice work with the instrument panel.
Campaign'oholic - 252+ campaigns completed
Merlin
 Senior Editor
#017
United Kingdom
Joined: June 11, 2003
KitMaker: 17,582 posts
AeroScale: 12,795 posts
Posted: Wednesday, March 11, 2015 - 02:47 AM UTC
Many thanks Jesper
I did a bit more work today with washes and on the engine. No pics to show yet - hopefully in a day or so.
All the best
Rowan

BEWARE OF THE FEW...
As I grow older, I regret to say that a detestable habit of thinking seems to be getting a hold of me. - H. Rider Haggard
Merlin
 Senior Editor
#017
United Kingdom
Joined: June 11, 2003
KitMaker: 17,582 posts
AeroScale: 12,795 posts
Posted: Wednesday, March 11, 2015 - 04:07 AM UTC
Quoted Text
Nice dry brushing detail on the panel, Rowan. I really need to take some time and practice that.
Cheers Paul
Some people can't stand dry-brushing, but an old-schooler like me can hardly model without it.

Your gap-filling prowess has got me thinking I need to spend a good few hours rethinking how I tackle seams.

All the best
Rowna

BEWARE OF THE FEW...
As I grow older, I regret to say that a detestable habit of thinking seems to be getting a hold of me. - H. Rider Haggard

#523
Idaho, United States
Joined: February 28, 2014
KitMaker: 342 posts
AeroScale: 250 posts
Posted: Wednesday, March 11, 2015 - 05:37 AM UTC
Thanks Rowan,
I sent them and email today and Unfortunately they no longer sell those.
Oh well.......
I saw some in MicroMark but I think I may try some leather, punches first for the price....
I order a set today that has 1.5, 2, 2.5, 3 3.5 and 4mm size hollow punches....
Hopefully they will work, but worth a try for the price.
Thanks again,
Jeff D
JPTRR
 Managing Editor
#051
Tennessee, United States
Joined: December 21, 2002
KitMaker: 7,772 posts
AeroScale: 3,175 posts
Posted: Wednesday, March 11, 2015 - 06:10 AM UTC
Gang,
Sorry to just join the party. Great models, all.
Martyn - Dutch aircraft were beautiful with that camo and orange national markings!
Rowan, Reppu looks wonderful!
Richard - any Gladiator will be a winner!
If they demand your loyalty, give them integrity; if they demand integrity, give them your loyalty.--Col John Boyd, USAF
“Any plan where you lose your hat is a bad plan.”
Merlin
 Senior Editor
#017
United Kingdom
Joined: June 11, 2003
KitMaker: 17,582 posts
AeroScale: 12,795 posts
Posted: Thursday, March 12, 2015 - 12:50 AM UTC
Hi again
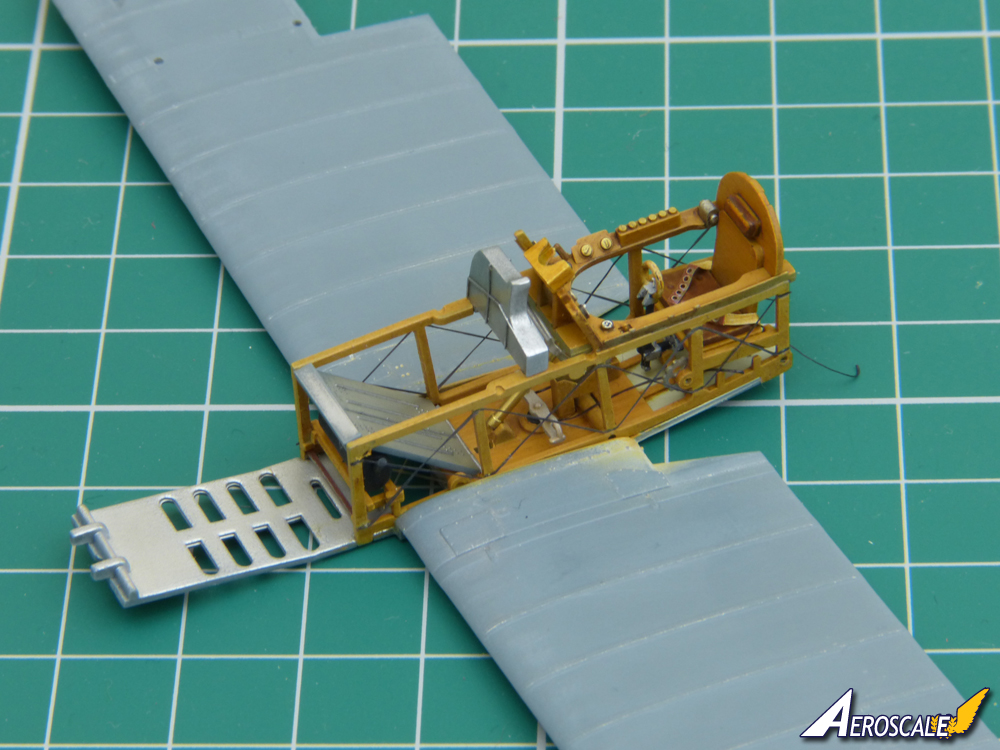
A couple of update shots. The cockpit is basically done and ready to install. I'm leaving off the shoulder harness until I see how well everything fits, and may well drape it over the side of the cockpit for a bit of extra "life".
I've been tinkering with the engine:
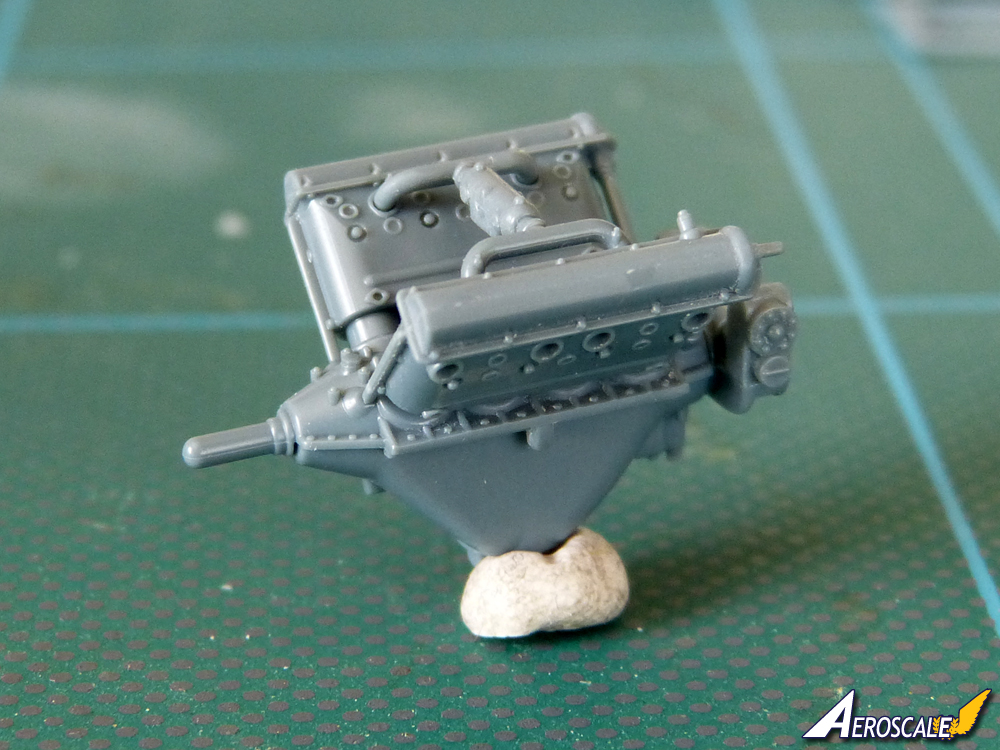
By rights it needs a few extra ignition cables, but I don't know if I can be bothered as it will be all-but-hidden in the cowling. I don't know if the coppery colour is accurate either, but it adds a bit of interest.

All the best
Rowan

BEWARE OF THE FEW...
As I grow older, I regret to say that a detestable habit of thinking seems to be getting a hold of me. - H. Rider Haggard
Ontario, Canada
Joined: February 04, 2008
KitMaker: 2,507 posts
AeroScale: 1,814 posts
Posted: Thursday, March 12, 2015 - 01:25 AM UTC
Nice work Rowan!

" The Die Hards"
43rd MIDDLESEX REGIMENT
MACHINE GUN CORPS
XXX CORP
The most effective way to do it, is to do it.
- Amelia Earhart

#523
Idaho, United States
Joined: February 28, 2014
KitMaker: 342 posts
AeroScale: 250 posts
Posted: Thursday, March 12, 2015 - 03:33 AM UTC
That looks outstanding Rowan.
I can't wait to try and do that with Dials on a CP.
The rest of the cockpit looks great as well......

#363
Pennsylvania, United States
Joined: January 08, 2014
KitMaker: 425 posts
AeroScale: 401 posts
Posted: Friday, March 13, 2015 - 03:29 AM UTC
Eduard 1/48 P-400 Limited EditionI got stuck late at work a bit this week so I didn't get a chance to lay down paint on the undersides until today. I hit it with several light coats of neutral gray and lightened the centers of some panels with a mix of aircraft gray and neutral gray. So far so good, I am going to work on the prop and landing gear some this weekend while the enamel cures.
Rowan, I saw earlier you mentioned using a seed warmer after spraying enamels? Is that something relatively inexpensive and does it help speed up cure time by a large bit?
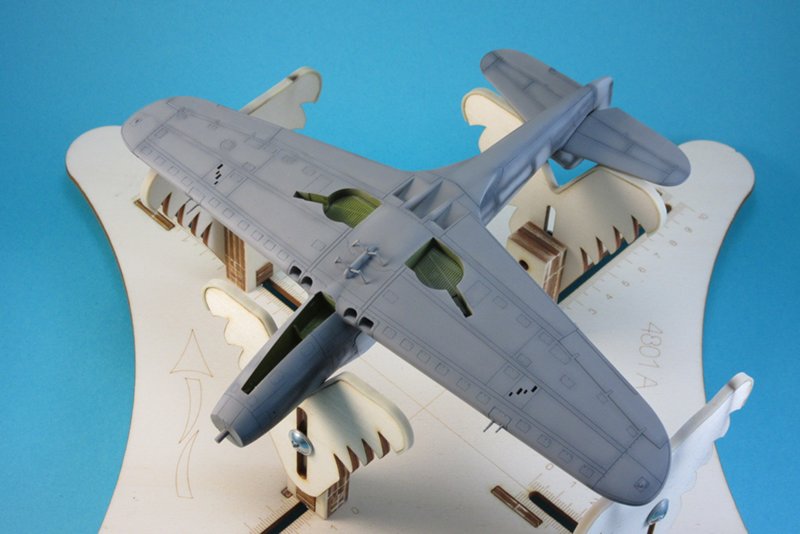 Undersides are done, I used Model Master Neutral Gray enamel. The pic is a bit bleanched out for some reason, but there is are lot of interesting tonal differences in the gray due to pre- and post-shading.
 On the Bench:
The Big Three: Eduard 1:48 Bf 109G-2 Trop
Radial Fighters: Hasegawa 1:48 Ki84 Frank
The Mighty Eighth: Eduard 1:48 P-51D-10
Merlin
 Senior Editor
#017
United Kingdom
Joined: June 11, 2003
KitMaker: 17,582 posts
AeroScale: 12,795 posts
Posted: Friday, March 13, 2015 - 01:29 PM UTC
Hi Paul
Beautiful work - it's looking set to be an absolute stunner!

The heated propagator I bought a few years ago cost about £15 (they still seem to be less than £20). It's really useful, not only for speeding paint and cement drying times, but also for warming paint (and even the airbrush itself) prior to spraying in cold weather so it flows smoother.
I've hit a few poor joints on the Reppu now I've fully assembled the fuselage and wings. Probably my fault, due to lack of preparation. Hopefully I'll get some time to sort them out this weekend between shifts at Oxfam.
All the best
Rowan

BEWARE OF THE FEW...
As I grow older, I regret to say that a detestable habit of thinking seems to be getting a hold of me. - H. Rider Haggard

#363
Pennsylvania, United States
Joined: January 08, 2014
KitMaker: 425 posts
AeroScale: 401 posts
Posted: Friday, March 13, 2015 - 05:11 PM UTC
Hmm, my wife wants to do a bit of shopping today. I think I'll swing by the Home Depot and take a look at the gardening supplies then.
On the Bench:
The Big Three: Eduard 1:48 Bf 109G-2 Trop
Radial Fighters: Hasegawa 1:48 Ki84 Frank
The Mighty Eighth: Eduard 1:48 P-51D-10

#363
Pennsylvania, United States
Joined: January 08, 2014
KitMaker: 425 posts
AeroScale: 401 posts
Posted: Saturday, March 14, 2015 - 07:52 AM UTC
Well it turns out neither Lowe's nor Home Depot carry seed warming mats in store, so I turned to Amazon Prime. $22 later it should be here Wednesday. Considering I use enamels almost exclusively for exterior colors, it should get a lot of use. Thanks for the tip, Rowan!
Oh, and it turns out when you ask the nice gentlemen in the gardening section for warming mats, they want to know exactly what you are looking to grow with hydroponics equipment. He looked a little doubtful when I said styrene instead of pot.

On the Bench:
The Big Three: Eduard 1:48 Bf 109G-2 Trop
Radial Fighters: Hasegawa 1:48 Ki84 Frank
The Mighty Eighth: Eduard 1:48 P-51D-10
Merlin
 Senior Editor
#017
United Kingdom
Joined: June 11, 2003
KitMaker: 17,582 posts
AeroScale: 12,795 posts
Posted: Saturday, March 14, 2015 - 02:30 PM UTC
Hi Paul
I think people could begin to wonder if you bought a bunch of them together with daylight lamps...

To begin with, my local chemist asked me what some of the chemicals I buy are for, but I think she's used to it by now.

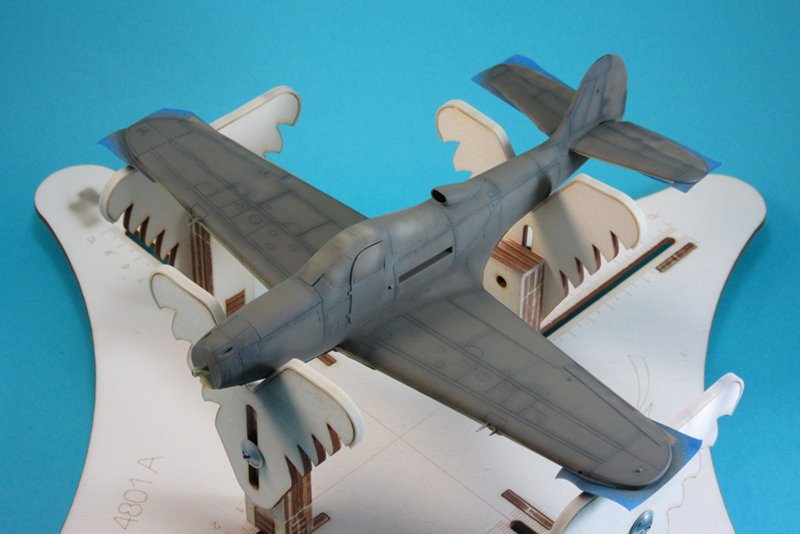
I've got the Reppu starting to look aircraft-shaped:
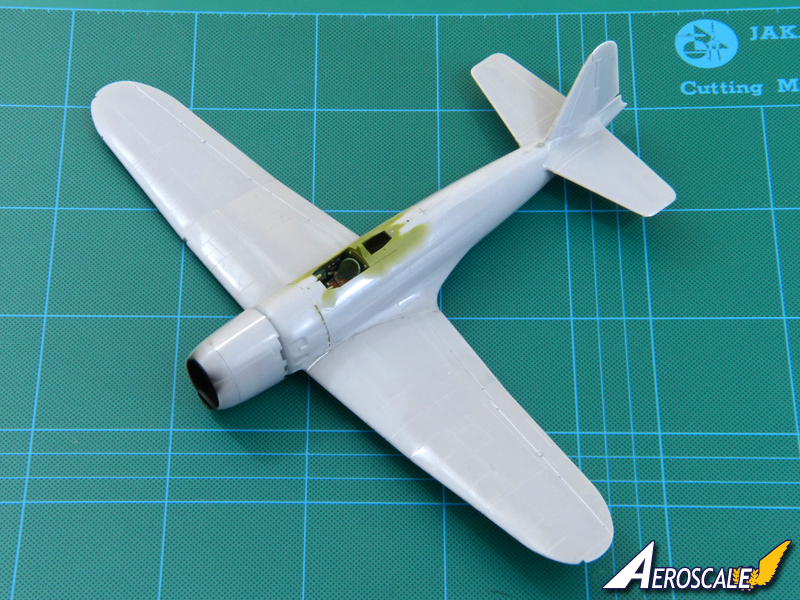
I often don't bother with a primer, but I reckon I will this time in order to double- and triple-check the joints, especially as the undersides (where most of the sanding and filling work is) will be natural metal.
All the best
Rowan

BEWARE OF THE FEW...
As I grow older, I regret to say that a detestable habit of thinking seems to be getting a hold of me. - H. Rider Haggard

#363
Pennsylvania, United States
Joined: January 08, 2014
KitMaker: 425 posts
AeroScale: 401 posts
Posted: Saturday, March 14, 2015 - 09:11 PM UTC
Eduard 1/48 P-400 Limited EditionOlive Drab applied, all I need to do now is fade the fabric surfaces and add the white trim. I am hoping to have her ready for gloss coats and decals by next weekend.
 The main camouflage work is finished. I did light coats of olive drab, faded olive drab, and an olive drab / dark earth mix to vary the tone up across different areas. All Model Master enamels again.
I ran into a snag with the wheels. I had picked up a set of True Details early style wheels, but I shouldn't have bothered. The landing gear axles do not fit at all, being much narrower than the holes on the hubs of the resin wheels. I am guessing they were designed for the old Monogram kit (no mention on the TD packaging about specific kits) and that it had much thicker axles. I would have to drill the holes, fill them with plastic rid, and then redrill a smaller hole to seat them on the axles. Eduard's wheels have equally good detail and don't require all of that work so I'll be using the kit wheels.
Just a friendly warning to anyone else with the Eduard kit. Don't bother with replacing the wheels.
On the Bench:
The Big Three: Eduard 1:48 Bf 109G-2 Trop
Radial Fighters: Hasegawa 1:48 Ki84 Frank
The Mighty Eighth: Eduard 1:48 P-51D-10
Ontario, Canada
Joined: February 04, 2008
KitMaker: 2,507 posts
AeroScale: 1,814 posts
Posted: Sunday, March 15, 2015 - 05:13 AM UTC
Getting the wing struts glued to the lower wing and then time to prime:-


" The Die Hards"
43rd MIDDLESEX REGIMENT
MACHINE GUN CORPS
XXX CORP
The most effective way to do it, is to do it.
- Amelia Earhart


 I built the CA He 112 years ago and really enjoyed it. It's a fantastic aircraft that deserves a mainstream 1:48 kit.


 I really must get one of those wooden jigs - they look so useful.


 To begin with, my local chemist asked me what some of the chemicals I buy are for, but I think she's used to it by now.


