Hi guys and girls after three panel line wash attempts I'm done with it! Each time they pretty much failed! So now it's onto the weathering. The build has been troublesome to say the least but I will get it finished .... or die trying! Hopefully it wont come to that! For a more detailed incident report see my build log. Anyway here are the pics so far such as they are.
c4willy
#305
Christchurch, New Zealand Joined: February 01, 2006
KitMaker: 1,673 posts
AeroScale: 1,517 posts
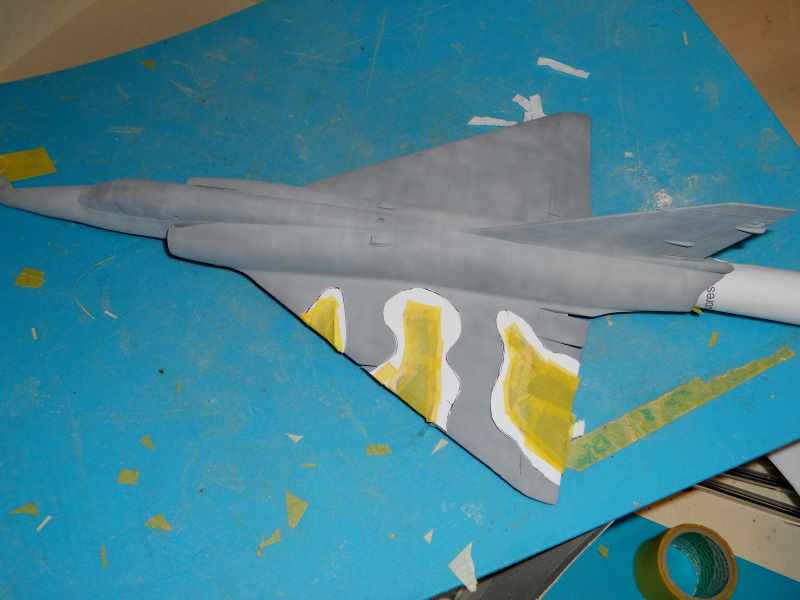
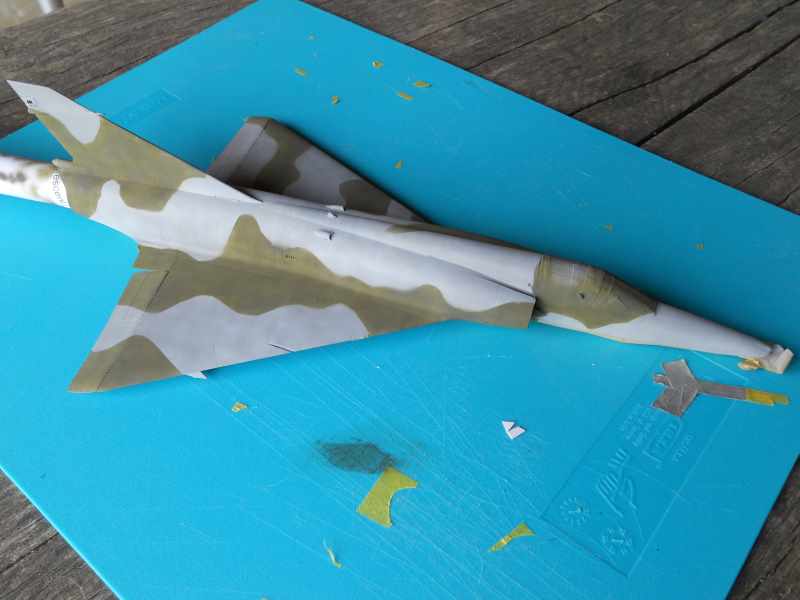
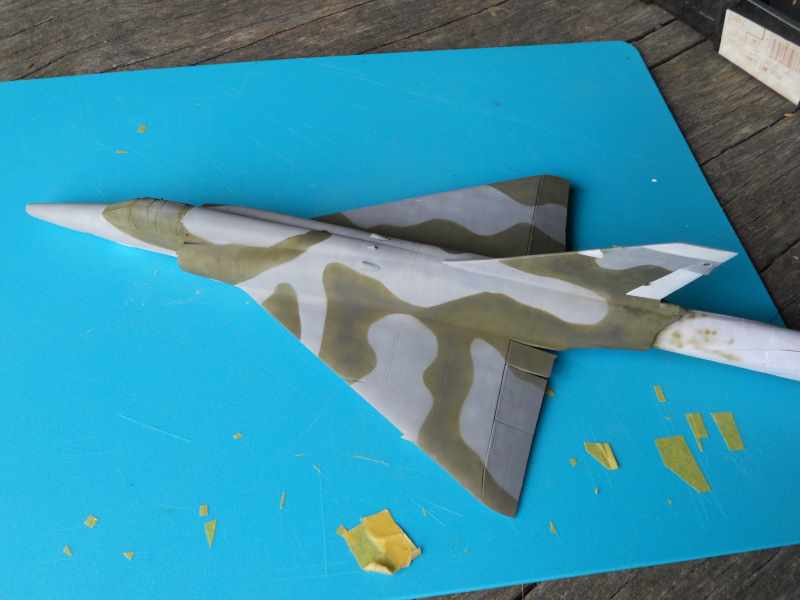
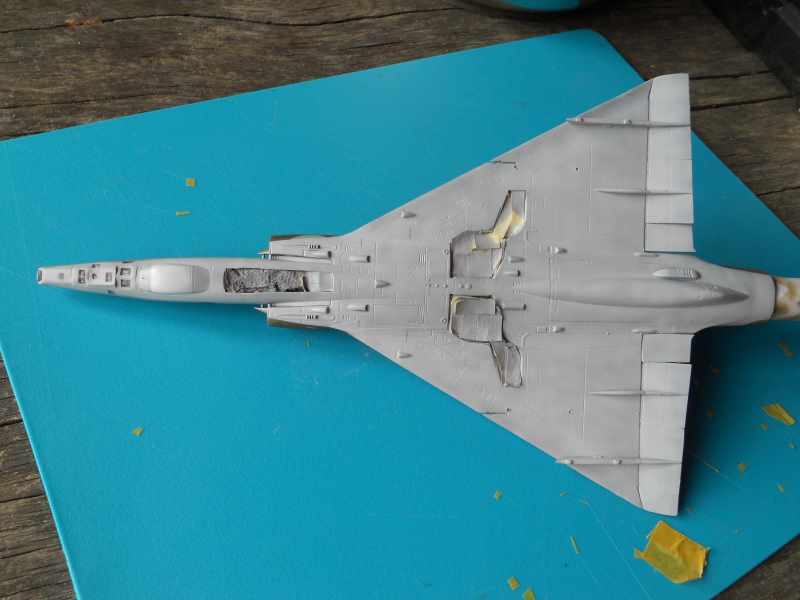
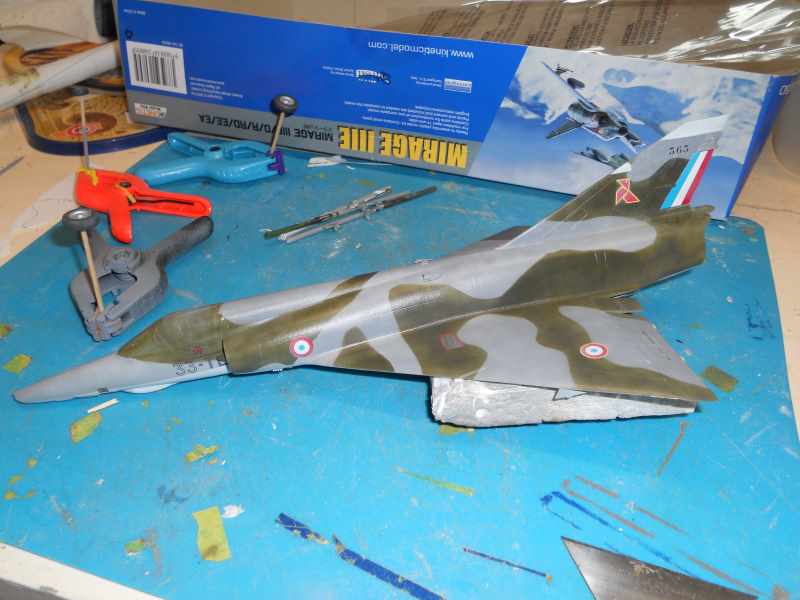
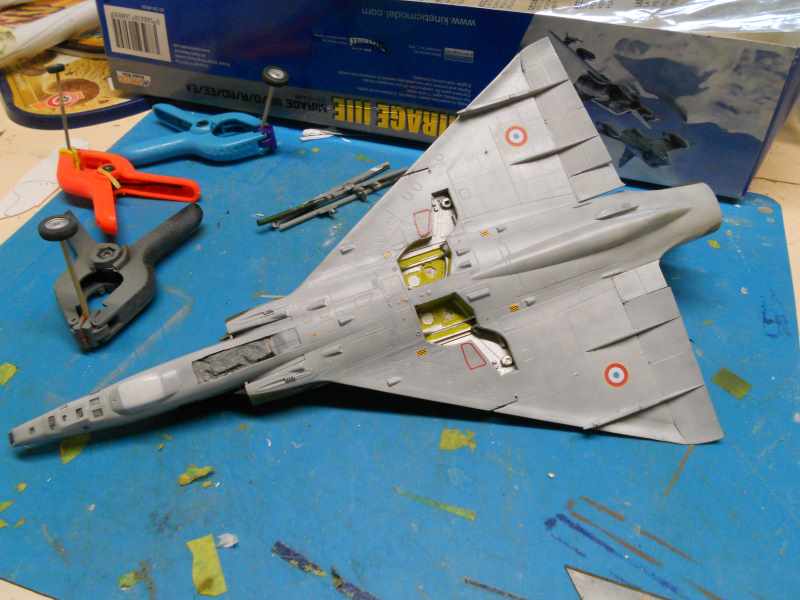
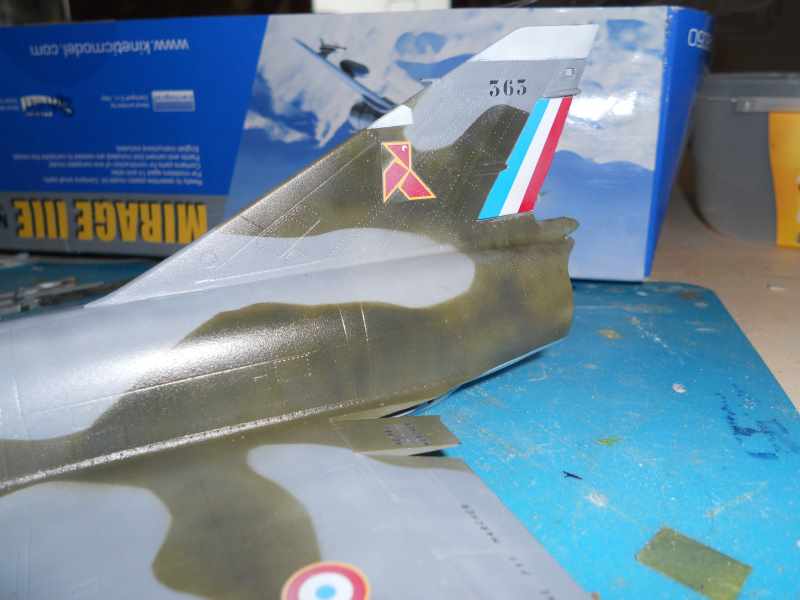
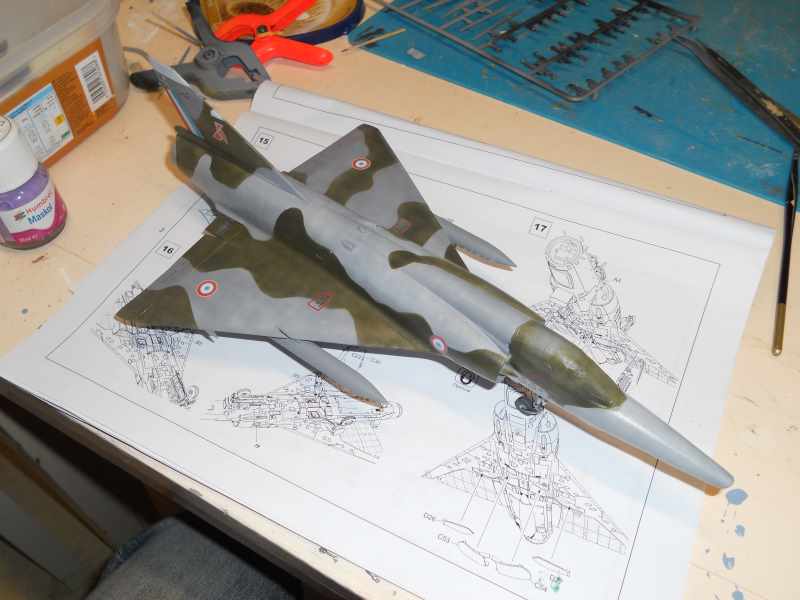
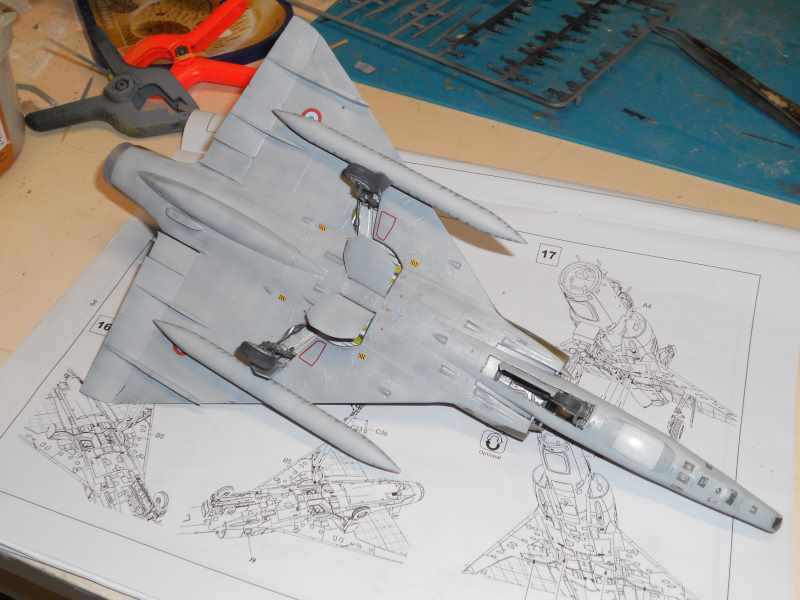
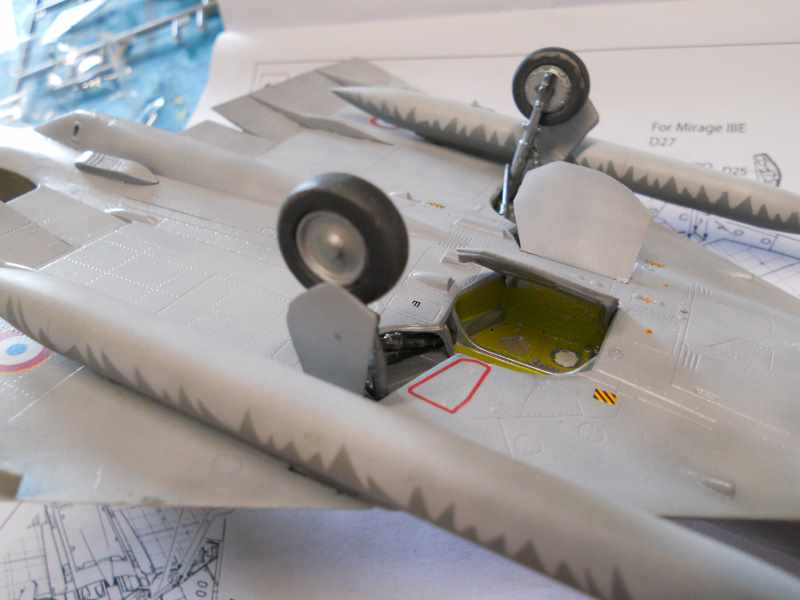
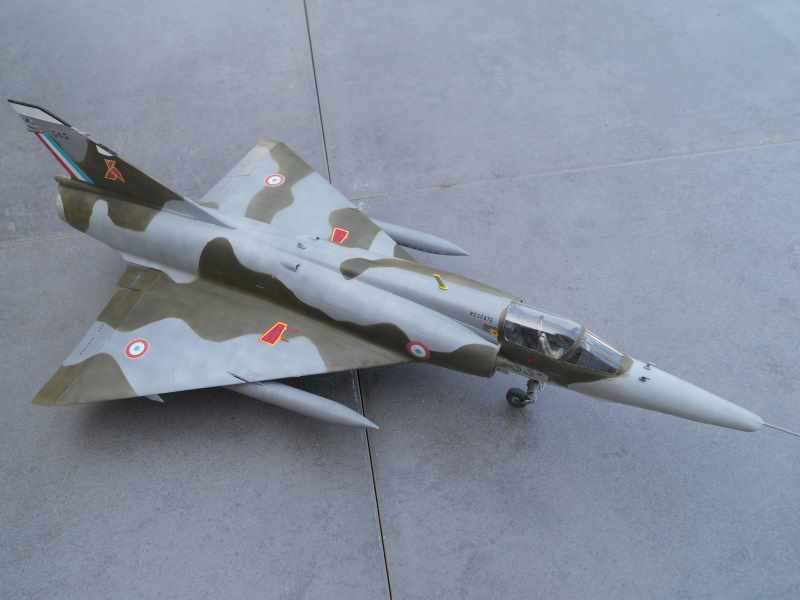
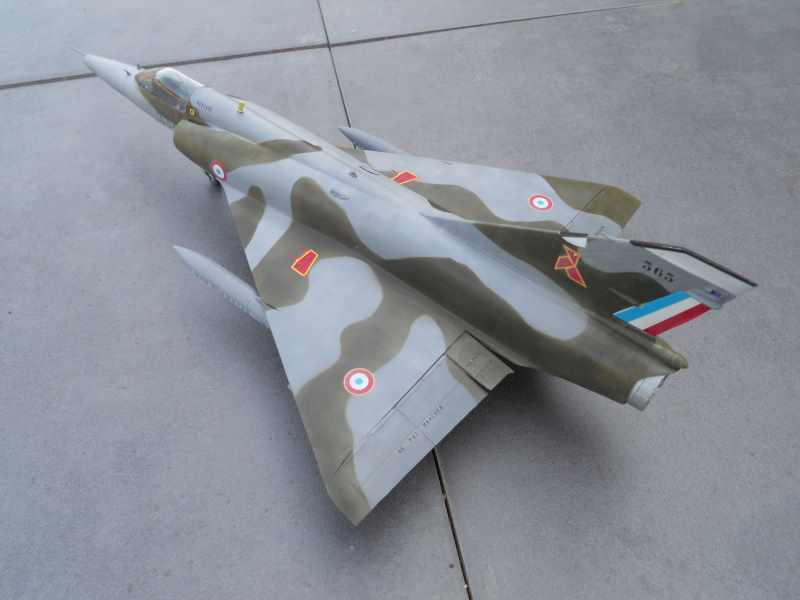
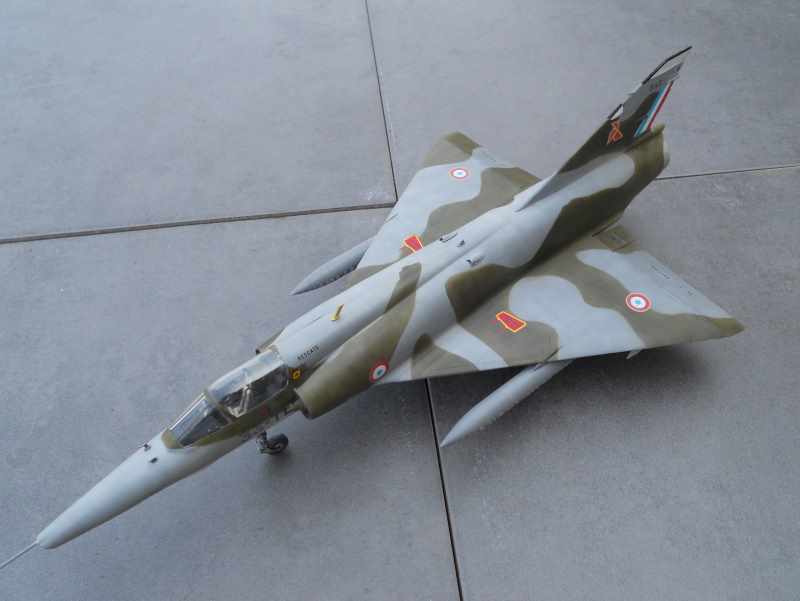
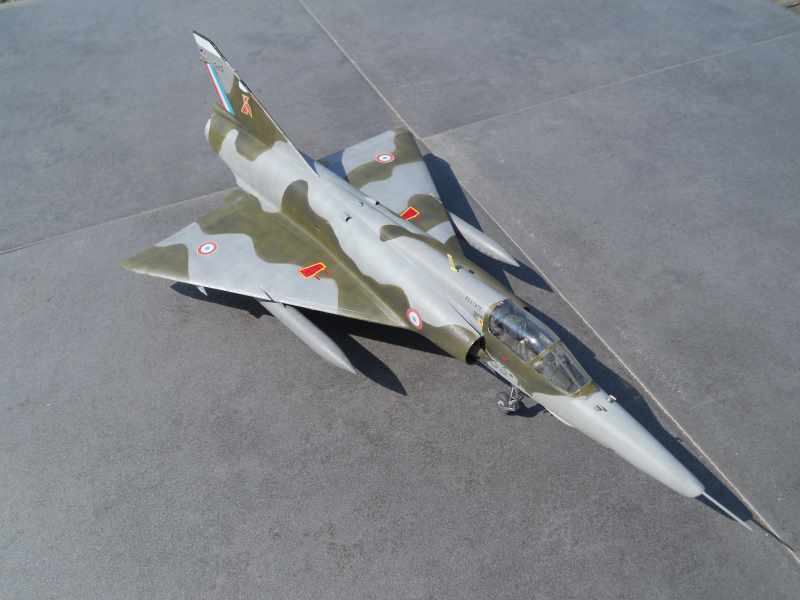
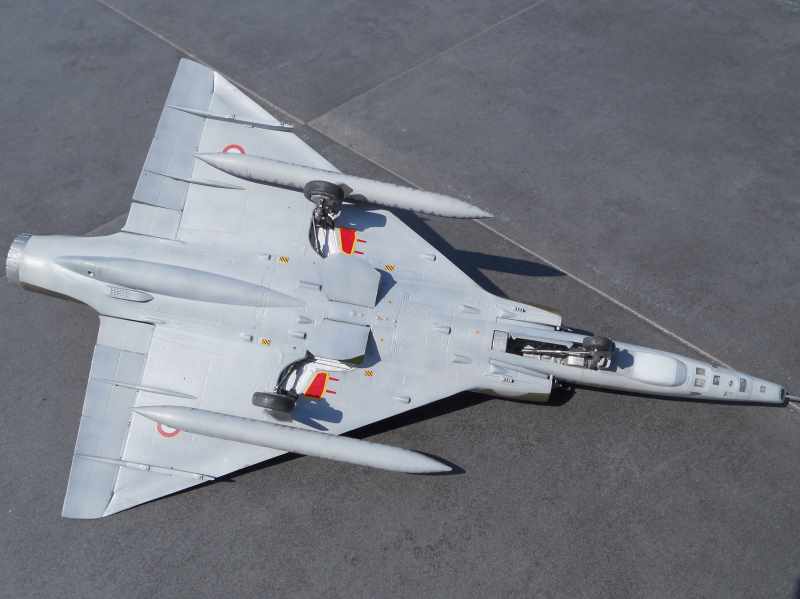
Hi all I blew up the kits painting guide to 1/48 scale and traced the demarcation line of the upper disruptive camouflage. I was then able to create masks using a combination of paper and Tamiya tape. It was a bit of a slow process, but I dont feel confident painting the dark green freehand with my clumsy hands. As with the grey colour I wanted a fairly faded look to the dark green. I had a go at painting the rather jagged demarcation line seen on some Mirage III fuel tanks. Masking tape was taken off after I finished spraying and it does not look to bad. Some touch ups will be necessary though. The radar sensors on the tail and the Doppler radar bulge were masked and painted white. I have also painted the rudder white as the red, white and blue flash is placed there. I took the masks away from the camera windows and I will over spray these with Klear when I apply the gloss coat before decaling. I have started applying the decals. I did spray a coat of heavily diluted grey over the decals whilst they were still on the sheet to tone the colour down. It works quite well, but there are a couple of areas that are over the green camouflage that will need touching up a little. The motif on the tail is a good example. It might have been easier to trim the excess carrier film before over spraying. I think the decals look much better toned down. On this build I noticed that the AdA Mirage IIIs had distinctly faded markings so I tried to tone them down a wee bit. It would be a lot easier to apply the paint while the decals are on the model, but I was a bit worried about messing up the upper surface disruptive colour. I did try the technique on the spare decals with this release. If you use my approach you have to be careful of the excess paint on the decal sheet floating off the backing paper when its soaking in water. The undercarriage has been attached, not too difficult although the instructions are a little vague. I have dropped the inner gear doors a little; these are usually closed when power is on. During time of inactivity these doors gradually drop when the hydraulics lose pressure. I also attached the supersonic wing fuel tanks. Well I have finished my build of the Kinetic 1/48 Mirage IIIRD. I have really enjoyed the build, it went together reasonably well as you can see. There were a few fit problems and the instructions have some part number errors on it. Despite this I would still recommend the kit highly and as far as I am concerned the finished model certainly captures the look of this delta wing aircraft very well. Tim
TangoOscarMike
Australia Joined: April 02, 2015
KitMaker: 35 posts
AeroScale: 16 posts
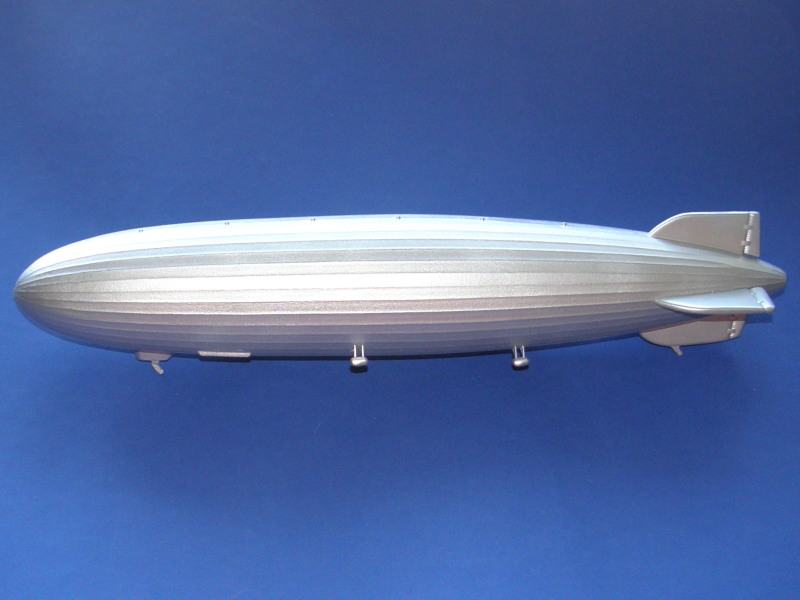
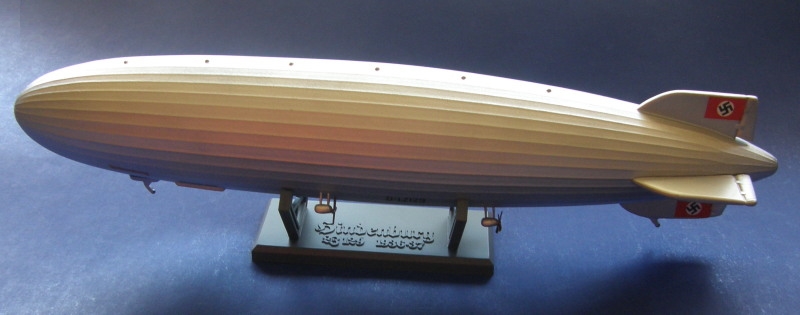
Painting the Hindenburg is finished. There are two strips of fabric on the belly which were left un-doped. At a guess it's so condensation could evaporate out of the inside of the envelope. I masked off two strips of the previously applied white. Next, decals!
When once you have tasted flight you will walk the Earth with your eyes turned skyward.
For there you have been, and there you will always long to return.
-Leonardo Da Vinci
Jessie_C
British Columbia, Canada Joined: September 03, 2009
KitMaker: 6,965 posts
AeroScale: 6,247 posts
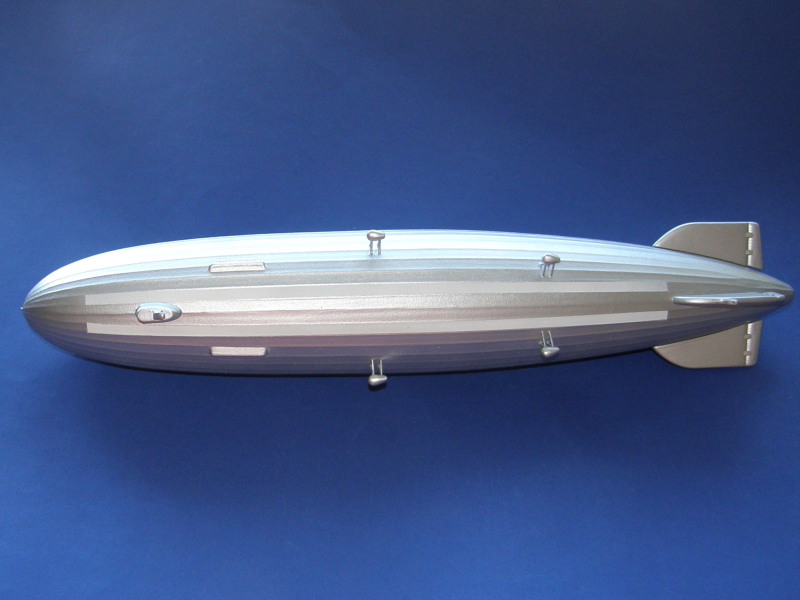
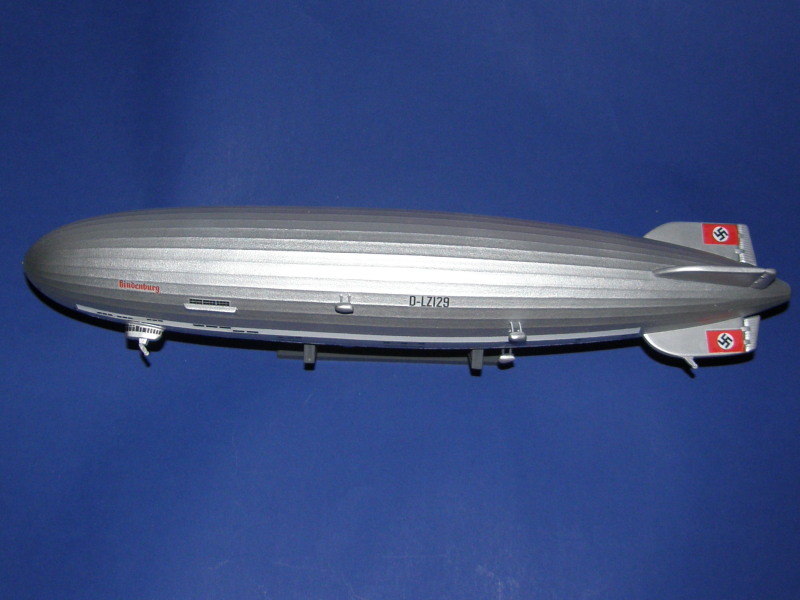
As promised, decals. This is where the current release shines over the 1975 kit. The decal sheet provides all the windows. All in all, there isn't that much colour on an airship. I decided not to apply the 1936 Large Summer Sporting Event Logo because due to copyright concerns; the rings are printed separately instead of interlocking, and I just didn't have the spoons to deal with them tonight. The Swastikas were printed in two halves, which was slightly annoying. In 1975 AMT didn't care about European laws. It's also fairly difficult to take a flash photo of a mostly silver model and not have excessive glare.
When once you have tasted flight you will walk the Earth with your eyes turned skyward.
For there you have been, and there you will always long to return.
-Leonardo Da Vinci
Jessie_C
British Columbia, Canada Joined: September 03, 2009
KitMaker: 6,965 posts
AeroScale: 6,247 posts
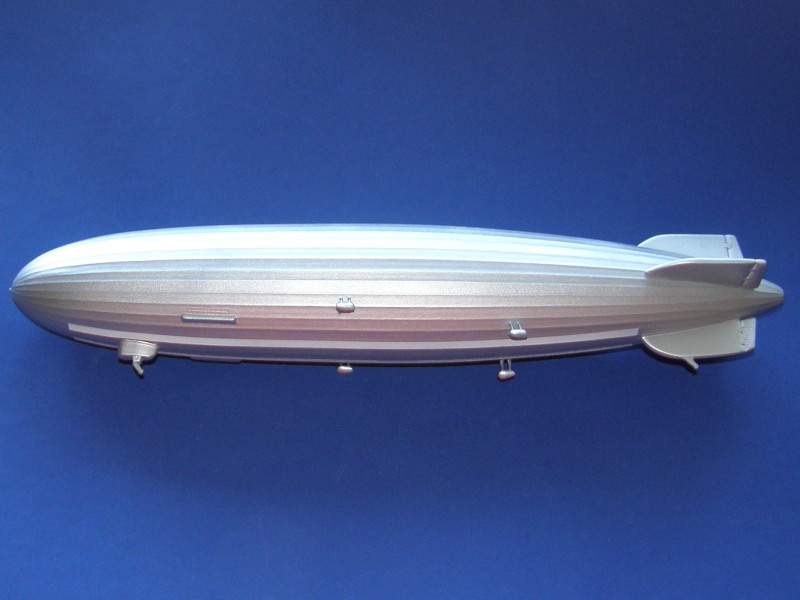
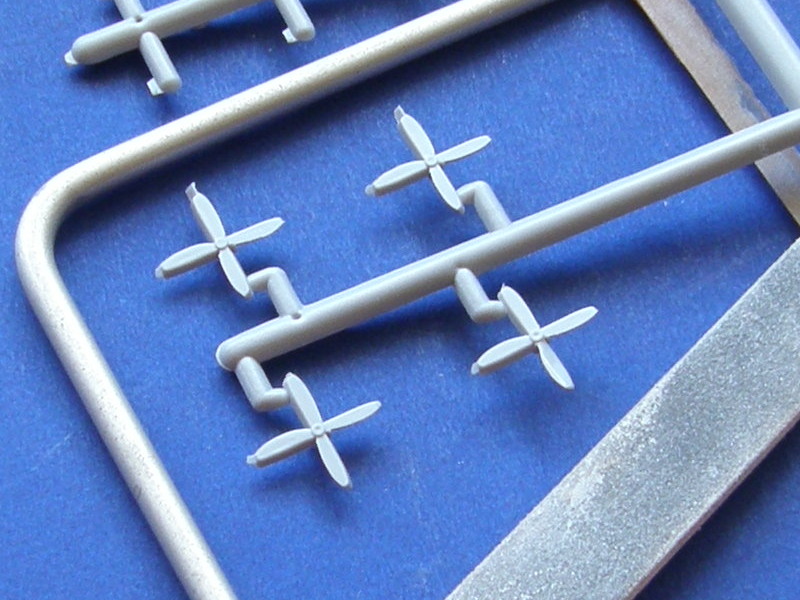
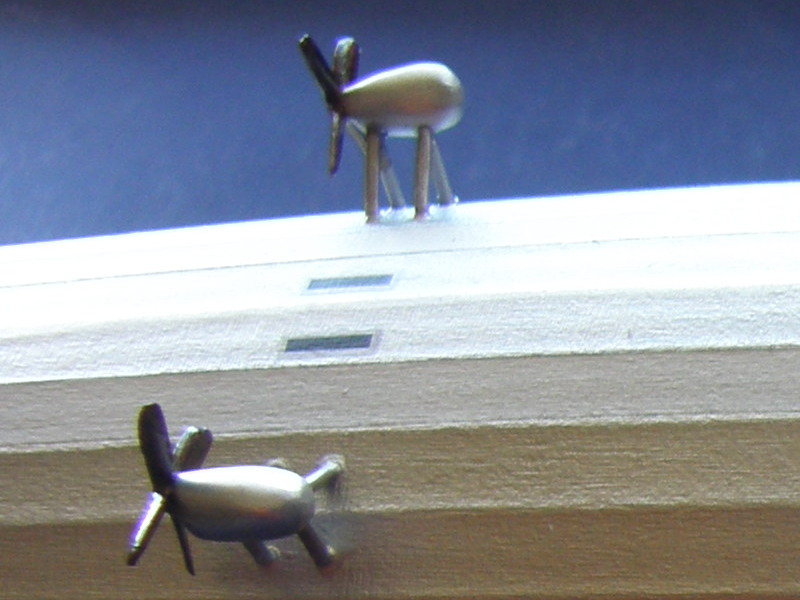
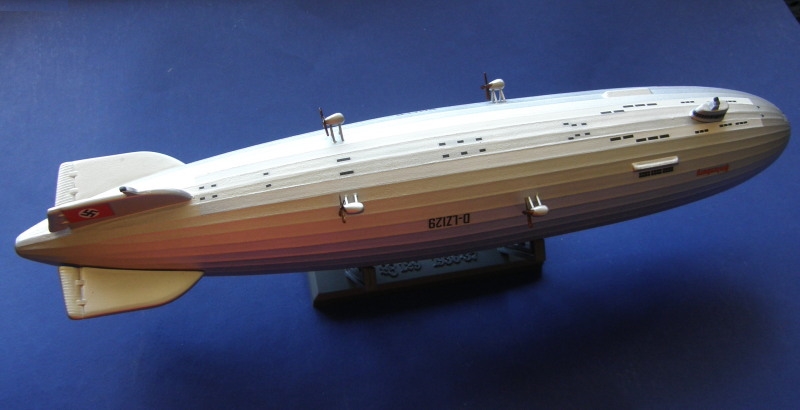
When turning air bludgeoners into propellers, felxi-files and sanding sticks are your friends. It took me about 20 minutes to subdue all those blades, and I only snapped one! A little paint later and the Hindenburg is finished! A look at those propellers And overall shots
When once you have tasted flight you will walk the Earth with your eyes turned skyward.
For there you have been, and there you will always long to return.
-Leonardo Da Vinci
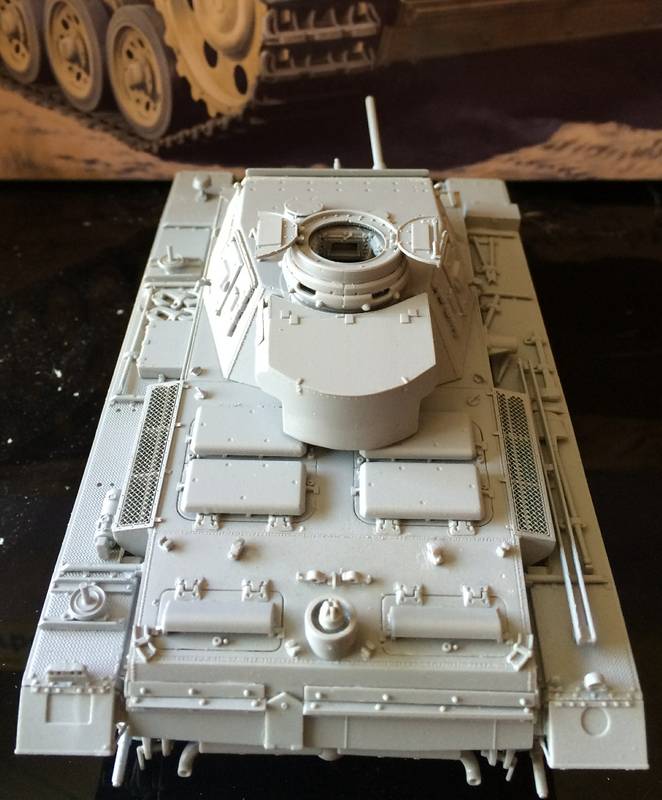
Construction is now done. Great fit although the track links requires some effort to fit.
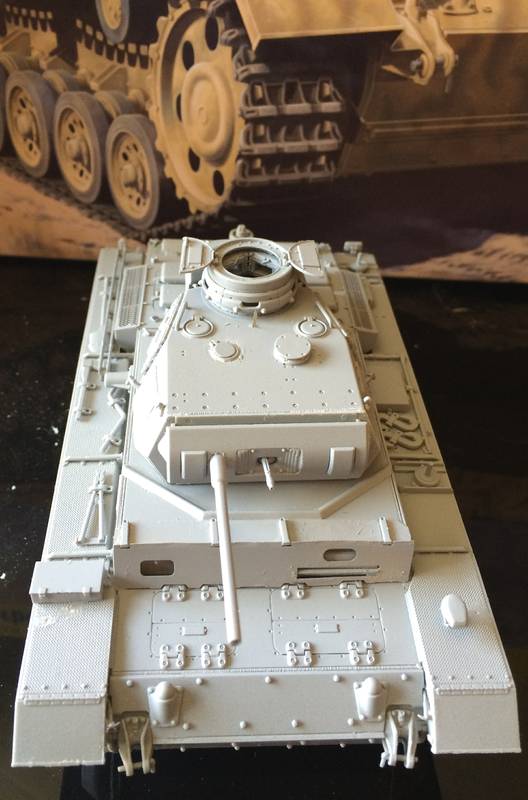
I do know this tank was never constructed, but the design is very interesting. Sort of a mix of Panther and T-34 design characteristics. I found it weird that there was no kugelblende for the hull machine gun so I used one from a panther kit. I also could not resist hanging som track links on the turret side. Interesting that jacks and fire extinguisher are doubled. I wonder if that is according to original plans or part of Hobbyboss's artistic license.
More to follow
Campaign'oholic - 252+ campaigns completed
MichaelSatin
Campaigns Administrator AEROSCALE
Colorado, United States Joined: January 19, 2008
KitMaker: 3,909 posts
AeroScale: 2,904 posts
HobbyBoss 1/35 Hungarian heavy tank. A nice kit that kind of feels like a 90ties Tamiya kit. The tracks require some patience and a lot of sanding and trimming.
The Hungarian tank is a strange mix of Panther and T-34. The running gear is clearly inspired by the T-34 with the tracks in particular very close to T-34 tracks. The hull and turret closer to a Panther. If HobbyBoss really made this of real plans it is clear to see where the Hungarians got their inspiration
I added a kugel blende for the hull machine gun and could not help myself adding tracks to the turret sides - Panther style
I went for a fall camouflage and equal fall 1945 mud to the suspension. Wanted to show a factory fresh machine just starting out the fighting at the front.
Comments welcome
Campaign'oholic - 252+ campaigns completed
Charlie-66
#186
Texas, United States Joined: May 24, 2006
KitMaker: 771 posts
AeroScale: 13 posts
Here is my campaign entry: Tamiya's new 1/48 Panzer 38(t). I love this tank and bought the kit as soon as it was released. I have been working on it off and on for the last couple months and am nearing completion.
MichaelSatin
Campaigns Administrator AEROSCALE
Colorado, United States Joined: January 19, 2008
KitMaker: 3,909 posts
AeroScale: 2,904 posts
Posted: Saturday, September 19, 2015 - 01:18 PM UTC
Okay guys and girls I'm finally done with the Bv141 it's been a real struggle of late to find the motivation to work on any models, but I've managed to push past it and move forward. So here are a couple of pics to show her off.
c4willy
#305
Christchurch, New Zealand Joined: February 01, 2006
KitMaker: 1,673 posts
AeroScale: 1,517 posts
Well, I know I stalled out on the Typhoon. Turned out something got misaligned in the radiator area and one of the oddly shaped side panels just wouldn't fit right. Of course your gaze automatically goes to that area on the Tiffie. So the fun kind of went out of it. Who knows, I might get back to it yet. Great kit otherwise. How about everyone else?
Michael
On the bench:
Sorta depends on your definition of "on the bench"...