Air Campaigns
Want to start or join a group build? This is where to start.
Want to start or join a group build? This is where to start.
Hosted by Frederick Boucher, Michael Satin
OFFICIAL: Vac and Resin Campaign
Posted: Sunday, July 19, 2015 - 02:59 AM UTC
Nicely done Richard, the tool worked perfectly! 

Posted: Wednesday, July 22, 2015 - 12:43 PM UTC
He 119 progress update, all parts clean up ready to paint. 


Posted: Sunday, July 26, 2015 - 06:22 AM UTC
More update pics. 


Posted: Sunday, July 26, 2015 - 03:40 PM UTC
Looking good, eMan. 

Posted: Friday, July 31, 2015 - 08:41 PM UTC
Floats on and painted black:-


Posted: Saturday, August 01, 2015 - 10:02 AM UTC
Planet Models 1/72 He 119 finished. 


Posted: Saturday, August 01, 2015 - 06:10 PM UTC
That is wonderful!  the glass house nose is really beautiful. what a strange and wonderful aircraft.
 the glass house nose is really beautiful. what a strange and wonderful aircraft.

Scrodes

Joined: July 22, 2012
KitMaker: 771 posts
AeroScale: 763 posts

Posted: Sunday, August 02, 2015 - 01:26 AM UTC
Quoted Text
AHH! fun with photo bucket again
Imgur is your friend. 100% of the time, it works 100% of the time.
www.imgur.com
Posted: Tuesday, August 04, 2015 - 04:17 AM UTC
Brass painted, up next will be gold for the wing tips:


dcandal

Joined: September 07, 2006
KitMaker: 918 posts
AeroScale: 688 posts

Posted: Friday, August 07, 2015 - 05:13 PM UTC
Posted: Friday, August 07, 2015 - 07:48 PM UTC
Another strange and different aircraft. looks like fun! 


dcandal

Joined: September 07, 2006
KitMaker: 918 posts
AeroScale: 688 posts

Posted: Saturday, August 08, 2015 - 07:27 PM UTC
Posted: Monday, August 10, 2015 - 09:19 PM UTC
I'm going to have to bow out of this one. Haven't managed to do as much as I would like and with a holiday coming up there is no way I will finish by the deadline.
Looking forward to seeing everyone's builds cone together.
Looking forward to seeing everyone's builds cone together.
Posted: Tuesday, August 11, 2015 - 01:01 AM UTC
E-Man
Love the 119, Nicely done and nice shading....
Looks great!
Love the 119, Nicely done and nice shading....
Looks great!
Posted: Tuesday, August 11, 2015 - 04:42 AM UTC
Almost ready to decal:


Ranger74

Joined: April 04, 2002
KitMaker: 1,290 posts
AeroScale: 87 posts

Posted: Tuesday, August 18, 2015 - 02:38 AM UTC
Sorry for the long absence. Ya'll have made great progress and completed some great planes. I had been battling a 3-month long sinus infection concurrently with a six-week bout of bronchitis. Finally had a balloon sinoplasty 10 days ago and it has made a big difference, but not a complete solution. Got to work on my allergies next. I also had to complete anew kit for a review article.
Now with all that out of the way, I have been working on both the Northrup N1M flying wing (vac) and the Curtiss A-8 Shrike (resin). The N1M has been a fight, but is coming along:

I completed three wheel wells, built cockpit tub over the manin gear wells and around front gear well.

I had to add spacer strips along front to get correct side profile. I have photos of completed basic airframe, but they wouldn't transfer. Get back to them later.
The underside showing wheel wells.
Now with all that out of the way, I have been working on both the Northrup N1M flying wing (vac) and the Curtiss A-8 Shrike (resin). The N1M has been a fight, but is coming along:

I completed three wheel wells, built cockpit tub over the manin gear wells and around front gear well.

I had to add spacer strips along front to get correct side profile. I have photos of completed basic airframe, but they wouldn't transfer. Get back to them later.

The underside showing wheel wells.

Ranger74

Joined: April 04, 2002
KitMaker: 1,290 posts
AeroScale: 87 posts

Posted: Tuesday, August 18, 2015 - 04:19 AM UTC
Below photo of the N1M with engine air intakes added. At first I wondered how I was to do this, but when looking through parts I figured out two halves per intake were provided. I cracked the seams between lower and upper halves on left side while cutting out hole for intake. For the bent-wing (early) N1M I will add intakes prior to joining fuselage halves.


Ranger74

Joined: April 04, 2002
KitMaker: 1,290 posts
AeroScale: 87 posts

Posted: Tuesday, August 18, 2015 - 04:28 AM UTC
I have finished filling all the seams and smoothing the same. I have a white primer coat and have painted bottoms of wing and horizontal stabs yellow.

I was originally going to paint this plane with yellow wings and OD fuselage with colorful squadron markings. I decided I have plenty of yellows in my collection, so I will be painting a subject from the 1932/33 Army Air Corps camo tests.

The instructions show all yellow belly, but I can find no other reference for this paint scheme. The undersides were changed to light blue for the 1933 tests. I have this color scheme from one of my references, but can't figure out the belly colors behind the wing leading edge.
 Looking at it in a larger format on my screen the belly looks like it might be original olive drab.
Any comments?

I was originally going to paint this plane with yellow wings and OD fuselage with colorful squadron markings. I decided I have plenty of yellows in my collection, so I will be painting a subject from the 1932/33 Army Air Corps camo tests.

The instructions show all yellow belly, but I can find no other reference for this paint scheme. The undersides were changed to light blue for the 1933 tests. I have this color scheme from one of my references, but can't figure out the belly colors behind the wing leading edge.
 Looking at it in a larger format on my screen the belly looks like it might be original olive drab.
 Any comments?
Posted: Tuesday, August 18, 2015 - 04:49 AM UTC
Good to see you back in action Jeff. sorry to hear about your health problems.
both your projects are looking good. the wing root fairing on the shrike look excellent. I have only the same book you have refering to the 1933 Camoflage tests so cant really add any info. The model will look awesome regardless of what you decide to do.
both your projects are looking good. the wing root fairing on the shrike look excellent. I have only the same book you have refering to the 1933 Camoflage tests so cant really add any info. The model will look awesome regardless of what you decide to do.


Ranger74

Joined: April 04, 2002
KitMaker: 1,290 posts
AeroScale: 87 posts

Posted: Wednesday, August 19, 2015 - 11:33 PM UTC
Jonathan,
Thank you for the kind words. The sinoplasty has made a big difference.
I have finally starting painting the Shrike's underside. Took me two efforts to come up with a shade of light blue close enough to the original paint. The N1M has airframe almost complete just blending in the propeller shaft fairings and the underside tail bumper. I finished rescribing all control surfaces and other panel lines. Being mostly wood, not many panel lines.
Posted: Saturday, August 22, 2015 - 10:01 PM UTC
Hi Jessica and mates,
I'm sorry to tell you that I resign from this campaign. Too much things on my hands, so I can't get me into the mood for my little resin kit....
Maybe it'll end up in one of the Hangar Queen campaigns Have fun and good success for your builds!

I'm sorry to tell you that I resign from this campaign. Too much things on my hands, so I can't get me into the mood for my little resin kit....
Maybe it'll end up in one of the Hangar Queen campaigns
 Have fun and good success for your builds!
Posted: Saturday, August 22, 2015 - 10:24 PM UTC
C'est la vie, Peter. See you around the place!
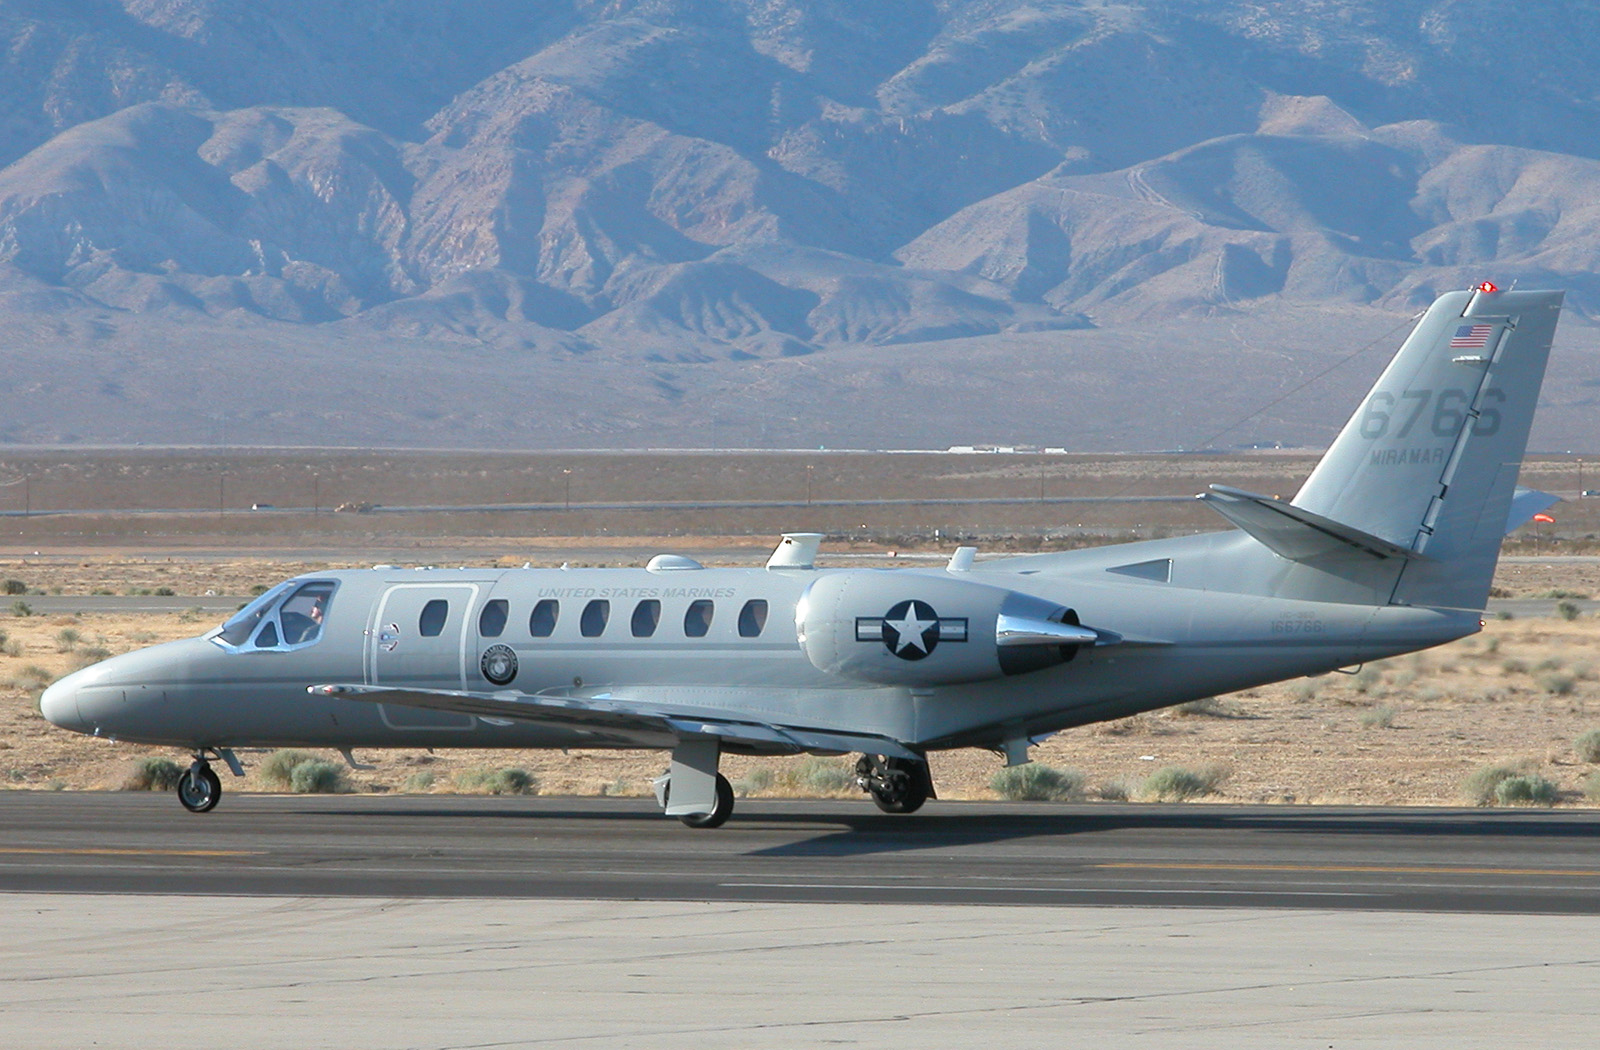
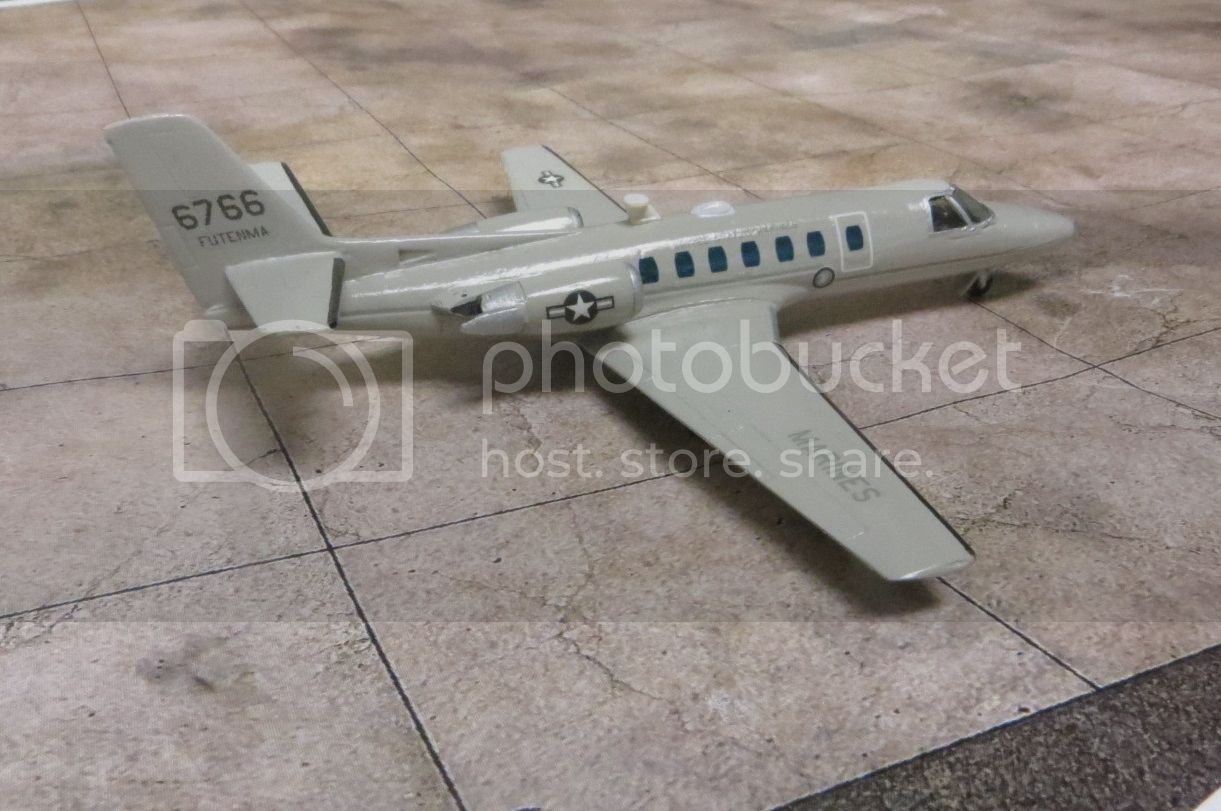
My resin kit project is nearing completion. This is an Anigrand bonus kit that comes with the C-17. It is a Cessna Citation with markings for a Marine Corps UC-35B, like this one
the fuselage is a solid casting. it will be a tail sitter without some intervention, so I drilled a hole as big as I could in the meatiest part of the front end and fill the cavity with lead.

Then filed it is smooth as I could

The CG is well forward now!

all built and painted


getting ready to apply decals.

My resin kit project is nearing completion. This is an Anigrand bonus kit that comes with the C-17. It is a Cessna Citation with markings for a Marine Corps UC-35B, like this one

the fuselage is a solid casting. it will be a tail sitter without some intervention, so I drilled a hole as big as I could in the meatiest part of the front end and fill the cavity with lead.
Then filed it is smooth as I could
The CG is well forward now!

all built and painted
getting ready to apply decals.
Posted: Sunday, August 23, 2015 - 01:50 AM UTC
Finished



Posted: Sunday, August 23, 2015 - 04:35 AM UTC
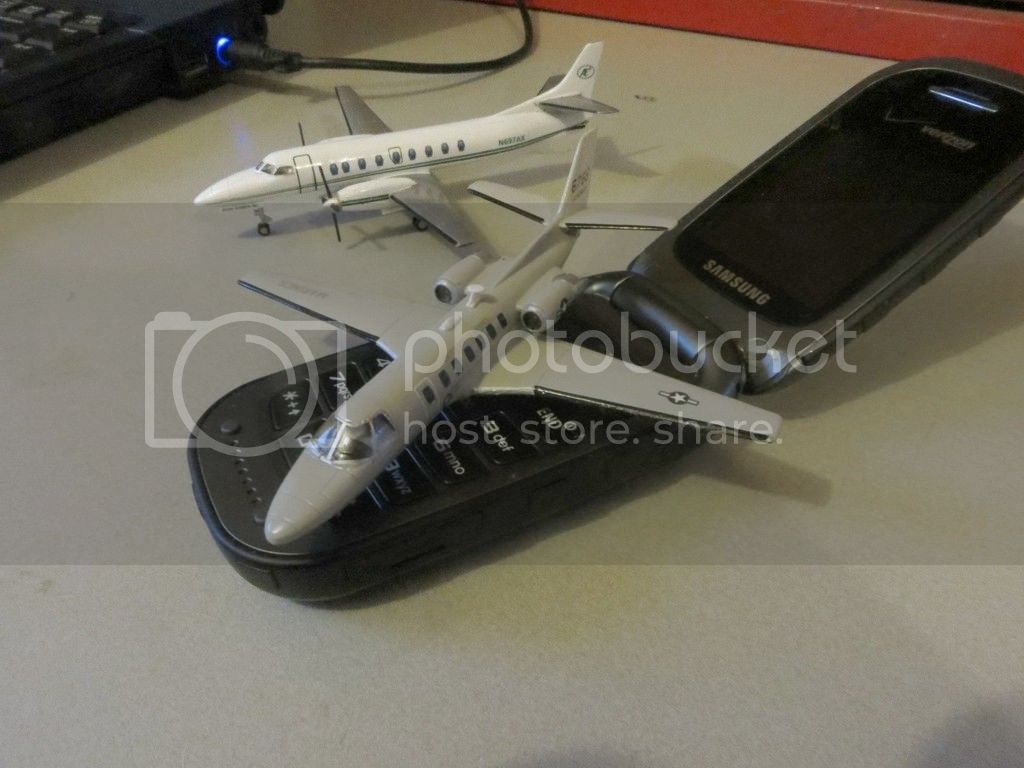
I was asked for a scale reference. It is 1/144 scale.

Posted: Sunday, August 23, 2015 - 05:05 AM UTC
Nice build Jonathan!
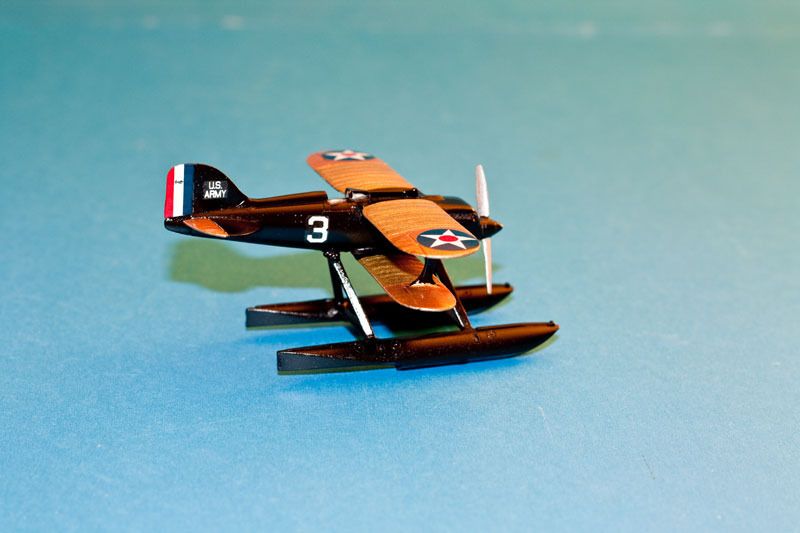
Here is my completed entry for this campaign:
CMR's Curtiss R3C-2 in 1/72 scale.
Winner of eight contest at the Baltimore Schnider Trophy races 26th October 1925.
Piloted by Lieutenant James Doolittle.


Here is my completed entry for this campaign:
CMR's Curtiss R3C-2 in 1/72 scale.
Winner of eight contest at the Baltimore Schnider Trophy races 26th October 1925.
Piloted by Lieutenant James Doolittle.


 |


