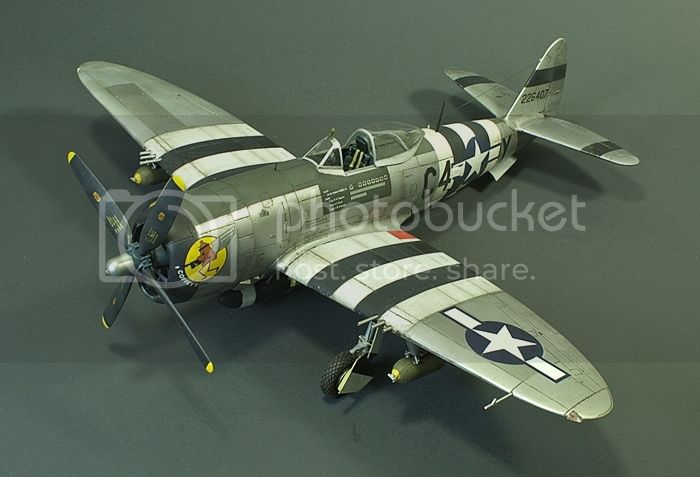
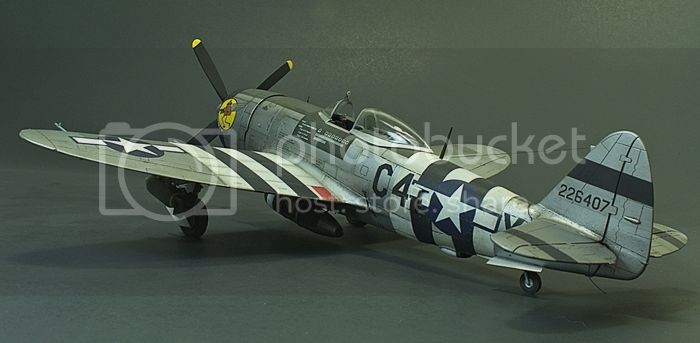
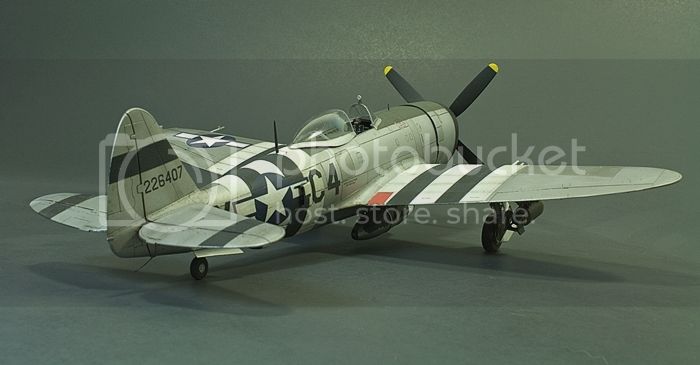
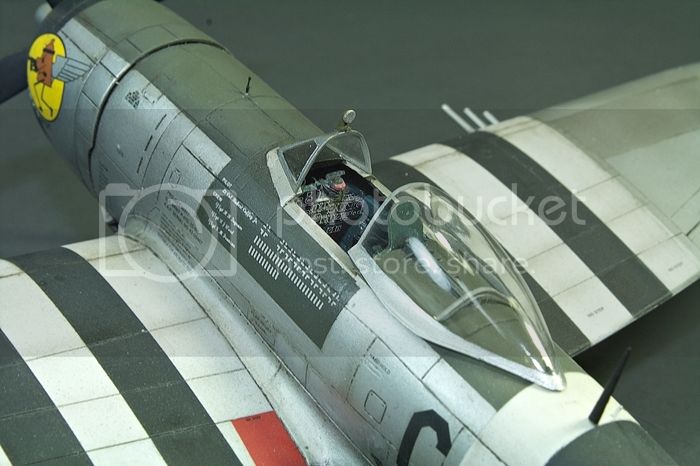
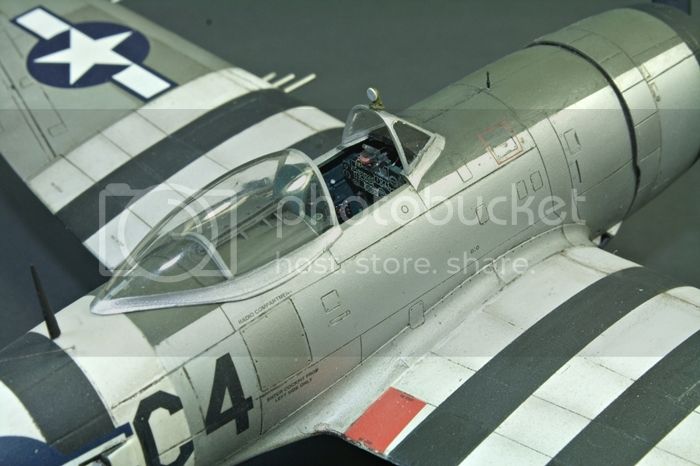
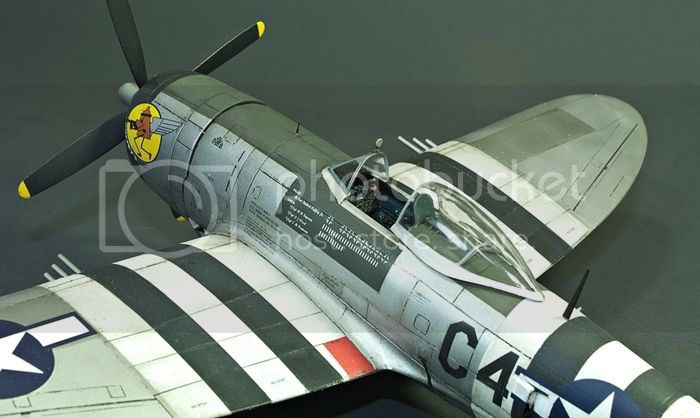
Hasegawa 1/48 P-47D-25 USAAF 9th Air force
Joel_W
 Associate Editor
New York, United States
Joined: December 04, 2010
KitMaker: 11,666 posts
AeroScale: 7,410 posts
Posted: Sunday, May 17, 2015 - 10:42 PM UTC
Dave,
What an absolutely impressive build. Fantastic camo paint scheme, and your decaling does indeed look like paint. You should consider changing your callsign

Joel
On my Workbench:
Monogram 1/24 scale 427 Shelby Cobra
Just Completed:
Beemax 1/24 scale BMW M3 E30 1992 Evolution II
Merlin
 Senior Editor
#017
United Kingdom
Joined: June 11, 2003
KitMaker: 17,582 posts
AeroScale: 12,795 posts
Posted: Monday, May 18, 2015 - 02:54 AM UTC
Hi Dave
This really is shaping up to be an outstanding build!

I hope you intend to submit it for the Frontpage when it's finished.

All the best
Rowan

BEWARE OF THE FEW...
As I grow older, I regret to say that a detestable habit of thinking seems to be getting a hold of me. - H. Rider Haggard
Ontario, Canada
Joined: February 04, 2009
KitMaker: 743 posts
AeroScale: 151 posts
Posted: Tuesday, May 19, 2015 - 05:19 AM UTC
Quoted Text
Dave,
What an absolutely impressive build. Fantastic camo paint scheme, and your decaling does indeed look like paint. You should consider changing your callsign 
Joel
Thanks Joel,
Thanks for commenting on the build. It is very much appreciated.
In terms of my call sign I sent a request to change it a couple of years back to a more generic call sign as I want to do more than just armour subjects but I got no response so I am thinking it's not possible.
http://ghmicro.wix.com/twis-first-cut
Ontario, Canada
Joined: February 04, 2009
KitMaker: 743 posts
AeroScale: 151 posts
Posted: Tuesday, May 19, 2015 - 05:23 AM UTC
Hi Rowan,
Thank you for your kind words. They are certainly much appreciated. Yes I can do that once she's done. I would also like to put it in the P-47D SIG. Is that possible too?
http://ghmicro.wix.com/twis-first-cut
Joel_W
 Associate Editor
New York, United States
Joined: December 04, 2010
KitMaker: 11,666 posts
AeroScale: 7,410 posts
Posted: Tuesday, May 19, 2015 - 05:00 PM UTC
Quoted Text
Quoted Text
Dave,
What an absolutely impressive build. Fantastic camo paint scheme, and your decaling does indeed look like paint. You should consider changing your callsign 
Joel
Thanks Joel,
Thanks for commenting on the build. It is very much appreciated.
In terms of my call sign I sent a request to change it a couple of years back to a more generic call sign as I want to do more than just armour subjects but I got no response so I am thinking it's not possible.
Dave,
It's just code. It can be changed. I would suggest you get in touch with Rowan, and he'll either take care of it, or point you in the correct direction.
Joel
On my Workbench:
Monogram 1/24 scale 427 Shelby Cobra
Just Completed:
Beemax 1/24 scale BMW M3 E30 1992 Evolution II
Ontario, Canada
Joined: February 04, 2009
KitMaker: 743 posts
AeroScale: 151 posts
Posted: Tuesday, May 19, 2015 - 09:39 PM UTC
Thanks Joel,
I will ask him.
Dave.
http://ghmicro.wix.com/twis-first-cut
Merlin
 Senior Editor
#017
United Kingdom
Joined: June 11, 2003
KitMaker: 17,582 posts
AeroScale: 12,795 posts
Posted: Tuesday, May 19, 2015 - 11:52 PM UTC
Hi there
While it can be done, I'm afraid changing call-signs is outside my area of admin control. It's down to the discretion of Staff_Jim - and, as you all know, he's a busy man, so be aware he might not be able to get to do it straight away.
We'll see if we can syndicate the finished build over to P-47 Heaven once the Feature's live.

All the best
Rowan

BEWARE OF THE FEW...
As I grow older, I regret to say that a detestable habit of thinking seems to be getting a hold of me. - H. Rider Haggard
Auckland, New Zealand
Joined: October 25, 2005
KitMaker: 949 posts
AeroScale: 493 posts
Posted: Wednesday, May 20, 2015 - 02:19 AM UTC
Hi Dave,
She certainly is looking good,You can never have enough Thunderbolts.
Although as she stands at the moment perhaps it should be Thunderzebra 😂😂😂.
Waiting for the next update.
Chris
"A Geek is someone who has found something more interesting than sex."
Neil Degrasse Tyson
Ontario, Canada
Joined: February 04, 2009
KitMaker: 743 posts
AeroScale: 151 posts
Posted: Wednesday, May 20, 2015 - 05:21 AM UTC
Quoted Text
Hi there
While it can be done, I'm afraid changing call-signs is outside my area of admin control. It's down to the discretion of Staff_Jim - and, as you all know, he's a busy man, so be aware he might not be able to get to do it straight away.
We'll see if we can syndicate the finished build over to P-47 Heaven once the Feature's live. 
All the best
Rowan 
Thanks Rowan I will contact Jim.
http://ghmicro.wix.com/twis-first-cut
Ontario, Canada
Joined: February 04, 2009
KitMaker: 743 posts
AeroScale: 151 posts
Posted: Wednesday, May 20, 2015 - 05:24 AM UTC
Hi Chris,
Thanks very much for stopping by having a look and taking the time to post your comments. They are much appreciated.
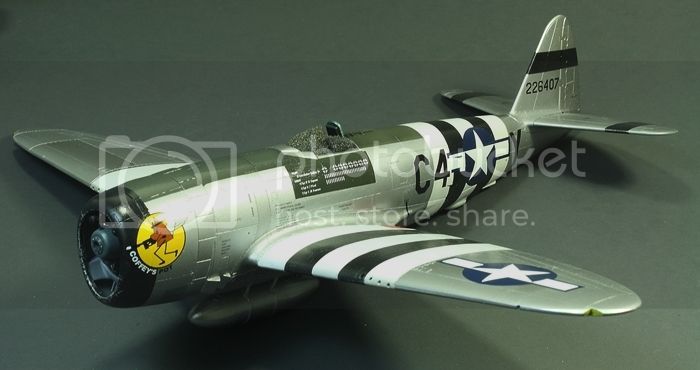
I was looking at pictures again of Coffey's Pot and I noticed the black invasion stripe comes down on the end of the supercharger intake and I was like oh no I think I missed this little detail. So I had a look again at my build and I did bring the stripe down over the end of the super charger intake . Whew, glad I followed the specified dimensions (18 inches for each strip on the fuselage, 20 inches for the wing stripes but scaled down to 1/48.)
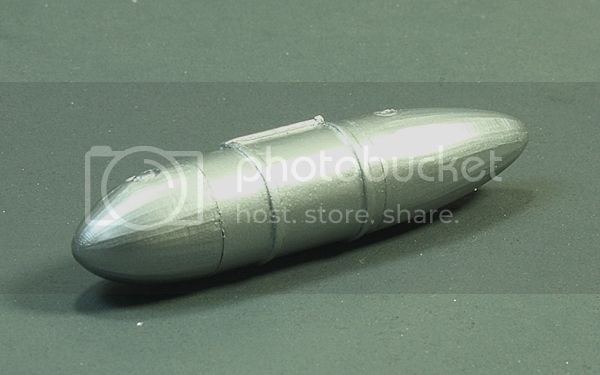
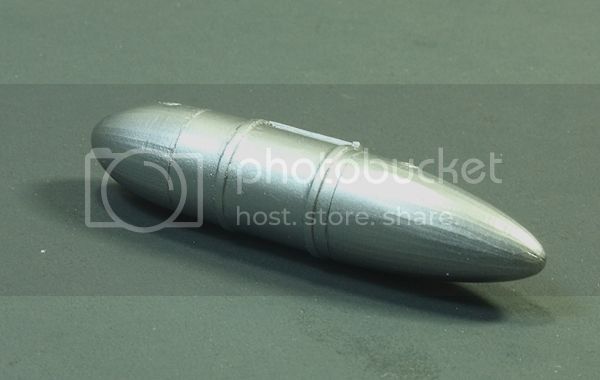
I am working on the belly tank at the moment. Not too too much effort given my limited bench time during the week.
Dave,
http://ghmicro.wix.com/twis-first-cut
Ontario, Canada
Joined: February 04, 2009
KitMaker: 743 posts
AeroScale: 151 posts
Posted: Monday, May 25, 2015 - 01:55 AM UTC
Quoted Text
Dave,
What an absolutely impressive build. Fantastic camo paint scheme, and your decaling does indeed look like paint. You should consider changing your callsign 
Joel
I missed this but Joel, the invasion stripes are not decals. They are painted on.

http://ghmicro.wix.com/twis-first-cut
Ontario, Canada
Joined: February 04, 2009
KitMaker: 743 posts
AeroScale: 151 posts
Posted: Tuesday, May 26, 2015 - 03:42 AM UTC
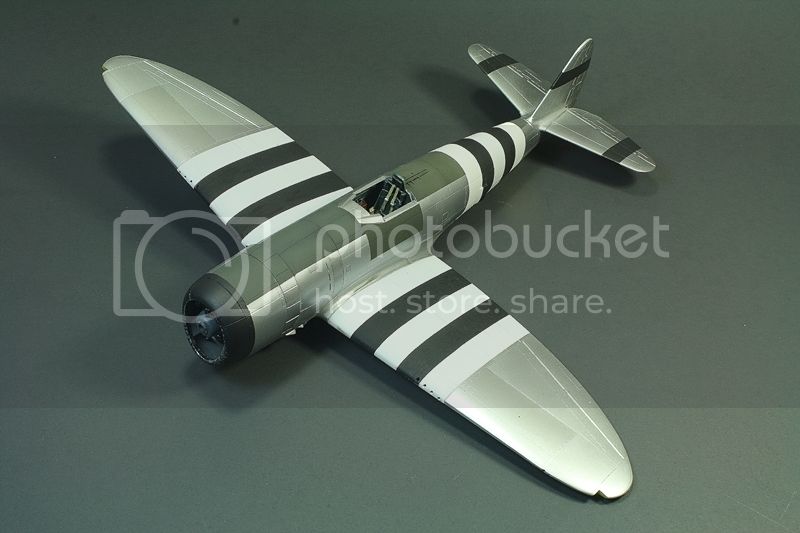
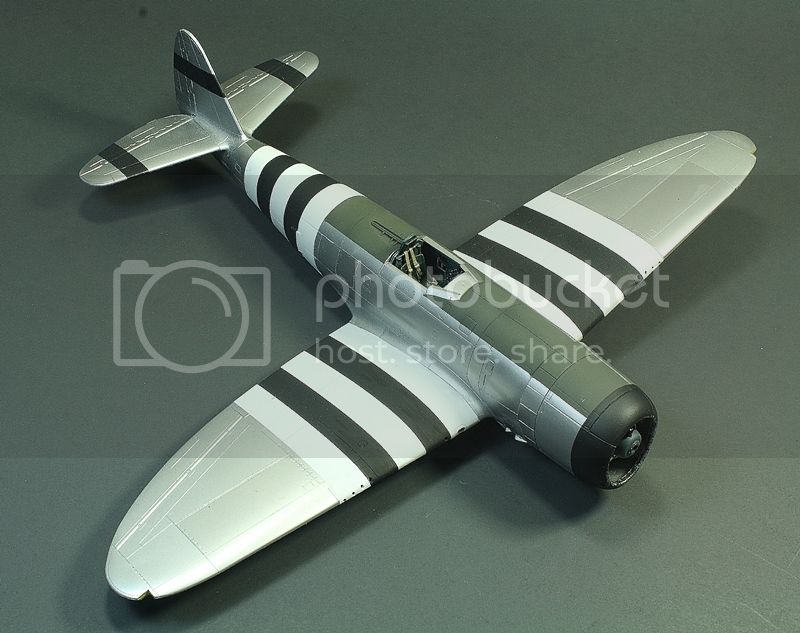
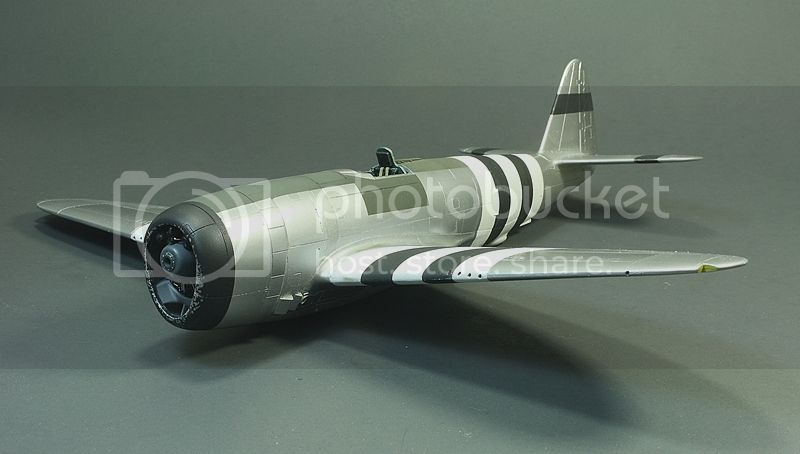
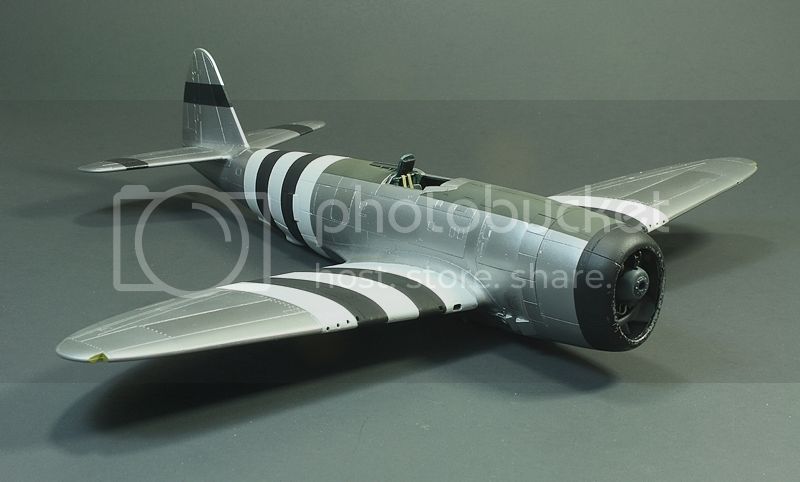
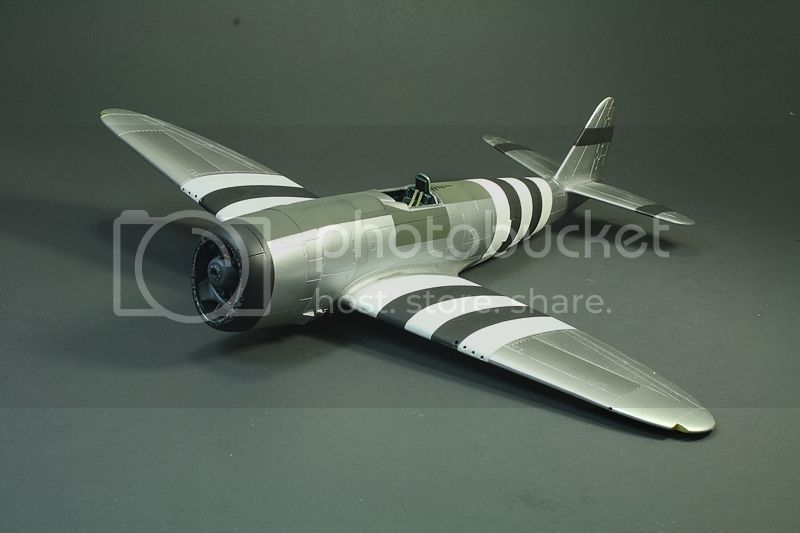
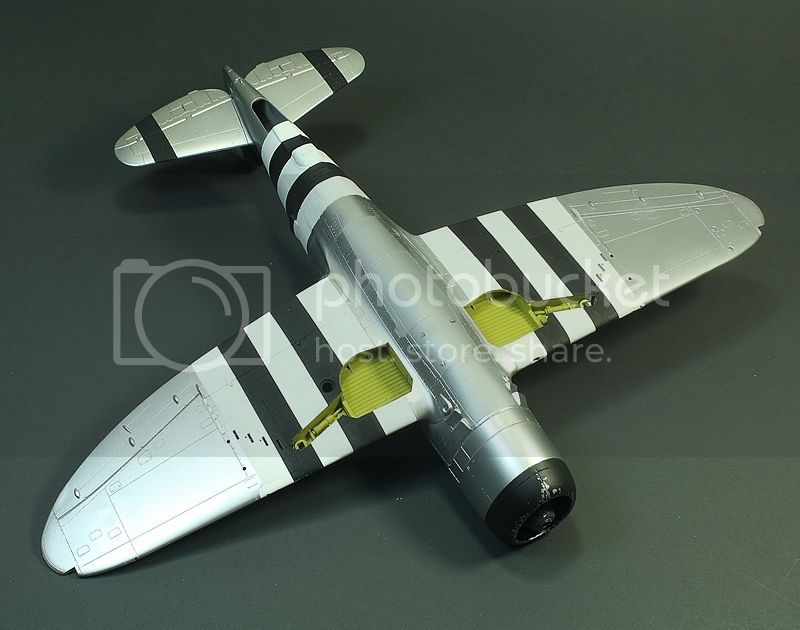
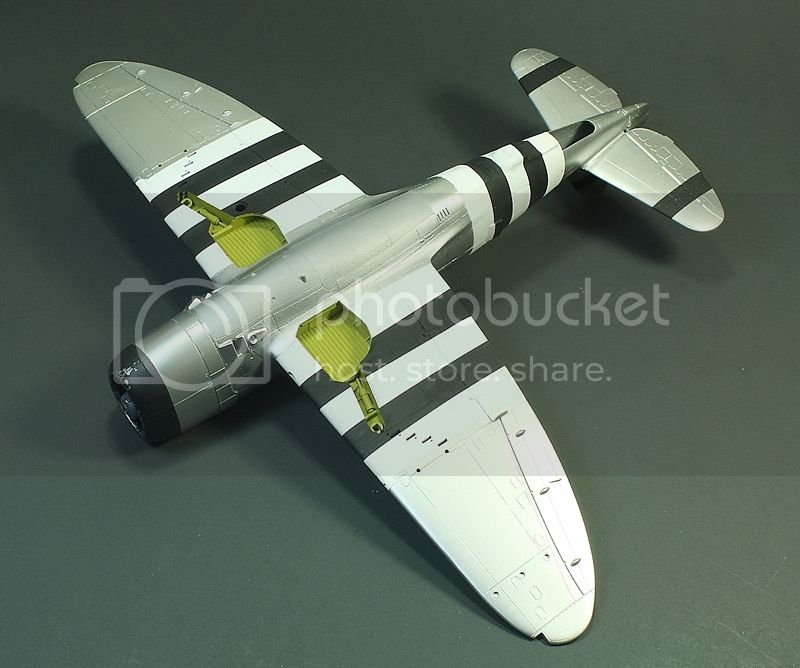
Back with another update. Painting is essentially done.
Invasion Stripes:
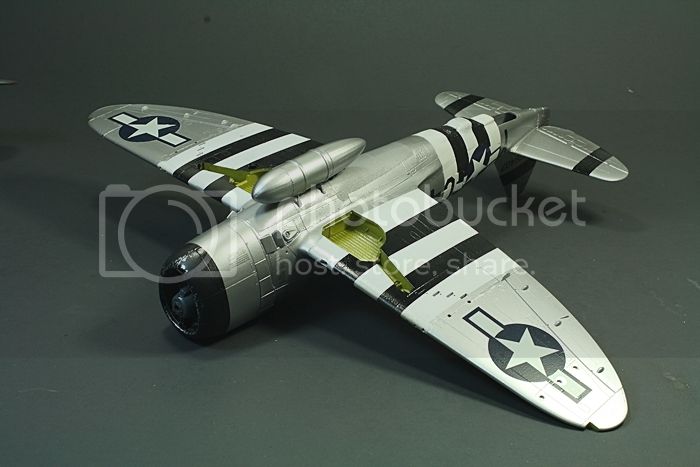
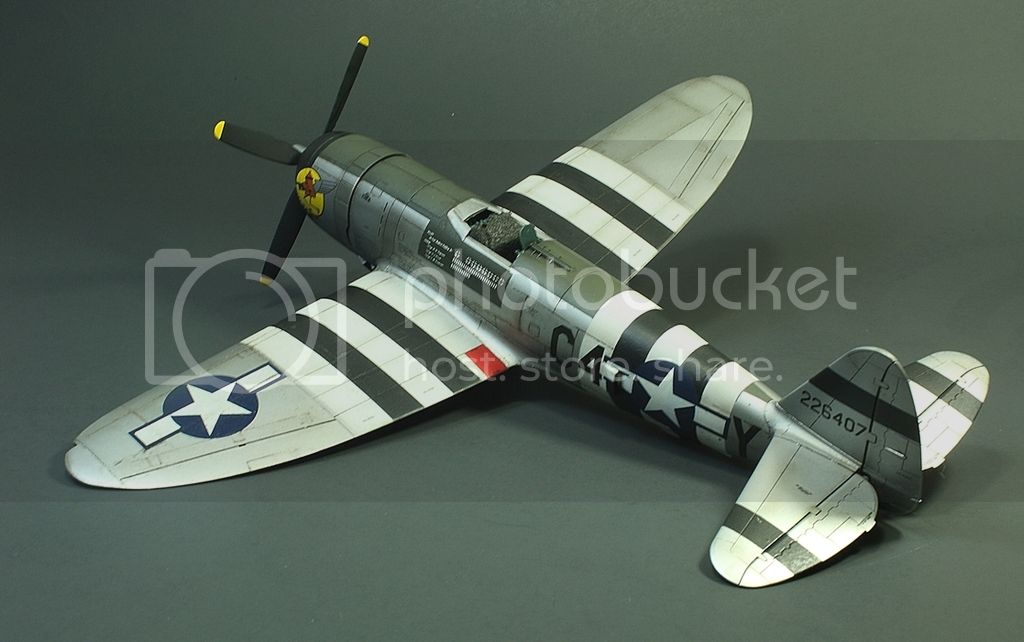
Bottom Invasion stripes painted on as well as ETO stripes on tail. You will see a bit of a notch in the outer white panel then the white stripe running down just inside of the pylon mount. Coffey's P-47D had this notch and white stripe running down the bottom just inside of the pylon so I copied this feature.
Anti-Glare Panel:
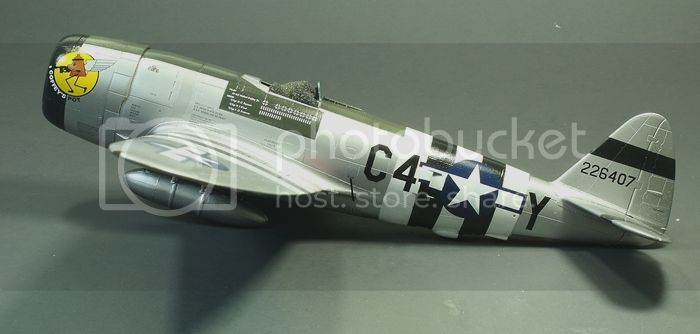
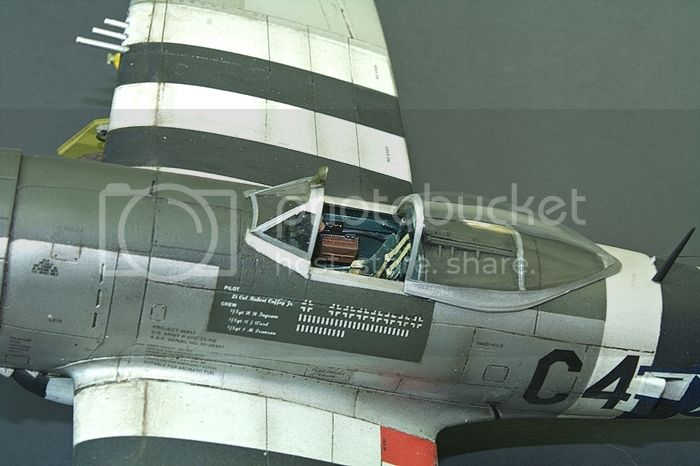
I had some issues with the anti glare panel in which I painted it too narrow and also covered the windscreen area and cockpit sides. Ooops. So,I consulted my references and my new MMP book on the bubbletop P-47D and re-did the panel and the cowling. In terms of the colours I was gong to go with Tamiya OD mixed with a little XF-60 Dark Yellow for scale effect but after searching around the net I found that the anti-glare panels on the P-47D bubbletops were factory pained Dark Olive Drab 41 not Olive Drab 613. Now, there are some variations in DOD 41 but I found most looked similar to Tamiya's XF-74 JGSF Olive Drab so this is what i went with. I faded it out a bit on the panel itself but also chose to use it straight out of the bottle for the Pilot/Ground Crew Panal on the side of the cockpit. I was going to paint this black but after seeing the profile from Barracuda Studios which shows it as DOD 41 I went with green.
Keel:
I wanted to do this a different colour than the aircraft itself. Just a personal choice really and so I painted it Alclad Dull Aluminum.
Hope you like it
http://ghmicro.wix.com/twis-first-cut
Joel_W
 Associate Editor
New York, United States
Joined: December 04, 2010
KitMaker: 11,666 posts
AeroScale: 7,410 posts
Posted: Tuesday, May 26, 2015 - 05:36 PM UTC
Dave,
The invasion strips came out absolutely perfect. No matter how hard I looked, I just can't find an error. Well done.
As for the color of the anti glare panel. Originally, as you've found out OD was officially designated Dark Olive Drab 41, which was made up of 7 or so different pigments, plus Cadmium as a paint stabilizer. It was also needed for the production of steel, so it was in very short supply. Because of the complex formula for ANA 41. and that the pigments varied greatly as per source, or at times even some pigments were left out. So the final color varied Batch to batch. By 1944 the USA/USAAF switched to OD ANA 613 which was somewhat darker. The color was comprised of less pigments, so the color was more consistant. The USAAF really didn't care for the color over ANA 41, so unofficially stayed with ANA 41 while the Army switched to ANA 613. The other issue, was that ANA 41 faded very quickly to all sorts of weird colors. Some P-38s anti glare panels actually turned a shade that looked like purple!
The issue is that all these paints faded so quickly that trying to match the original color chip really doesn't matter. Your representation looks dead on my monitor, which is another issue entirely. Unless you're viewing these pictures on a color corrected monitor, who knows what others are seeing.
I'm really looking forward to your next update, which should have the decals and marking on.
Joel
On my Workbench:
Monogram 1/24 scale 427 Shelby Cobra
Just Completed:
Beemax 1/24 scale BMW M3 E30 1992 Evolution II
AussieReg
 Associate Editor
#007
Victoria, Australia
Joined: June 09, 2009
KitMaker: 8,156 posts
AeroScale: 3,756 posts
Posted: Tuesday, May 26, 2015 - 06:23 PM UTC
Looking great Dave, very nice paintwork all round!
Cheers, D
ON the bench
Revell 1/24 '53 Corvette (building as '54)
Revell 1/24 BMW 507 Coupe and Cabrio
Italeri 1/48 Me262 B-1a/U1 Nightfighter
Monogram 1/24 '57 Chevy Nomad
Dragon 1/350 USS Frank Knox DD-742
Alberta, Canada
Joined: January 19, 2008
KitMaker: 6,743 posts
AeroScale: 6,151 posts
Posted: Wednesday, May 27, 2015 - 05:52 AM UTC
She sure is coming along quit well with the paint work

Terri
Ontario, Canada
Joined: February 04, 2009
KitMaker: 743 posts
AeroScale: 151 posts
Posted: Tuesday, June 02, 2015 - 05:54 PM UTC
Terri and Damian,
Thanks for the kind comments. They are much appreciated. I am just decaling the a/c up and will post some pics soon. It doesn't look that great with the gloss coat on it as the combination of gloss coat and NMF under lighting is kind of blinding.

http://ghmicro.wix.com/twis-first-cut
Ontario, Canada
Joined: February 04, 2009
KitMaker: 743 posts
AeroScale: 151 posts
Posted: Friday, June 05, 2015 - 08:12 PM UTC
http://ghmicro.wix.com/twis-first-cut
Ontario, Canada
Joined: February 04, 2009
KitMaker: 743 posts
AeroScale: 151 posts
Posted: Friday, June 05, 2015 - 08:15 PM UTC
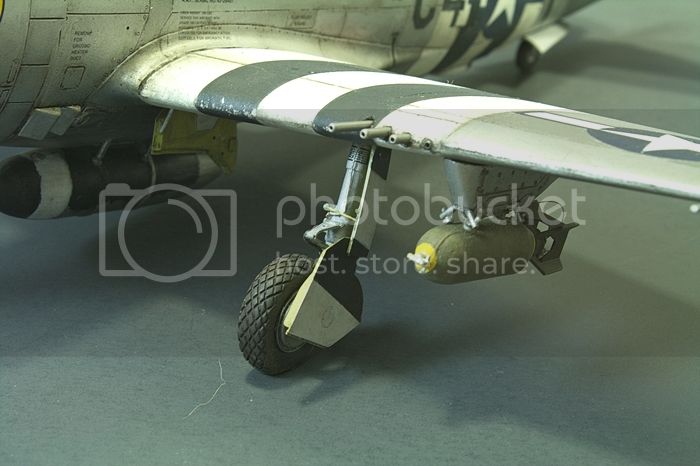
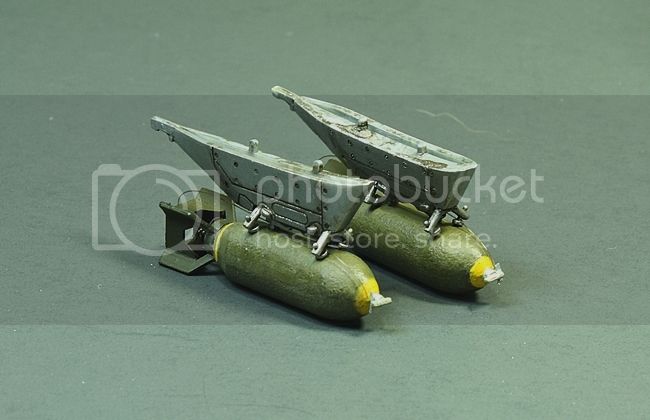
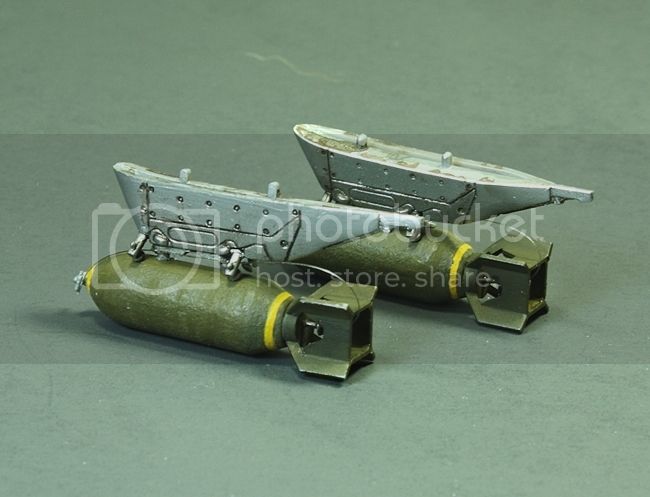
Bombs completed. I also added fuse wires for the bombs as well. The yellow markers were painted on by hand as the kit did not come with decals for these.
http://ghmicro.wix.com/twis-first-cut
Ontario, Canada
Joined: February 04, 2009
KitMaker: 743 posts
AeroScale: 151 posts
Posted: Friday, June 05, 2015 - 08:18 PM UTC
http://ghmicro.wix.com/twis-first-cut
Ontario, Canada
Joined: February 04, 2009
KitMaker: 743 posts
AeroScale: 151 posts
Posted: Friday, June 05, 2015 - 08:20 PM UTC
And a quick shot of the port side of the aircraft with panel lines complete, additional weathering and flat coat on.
http://ghmicro.wix.com/twis-first-cut
Joel_W
 Associate Editor
New York, United States
Joined: December 04, 2010
KitMaker: 11,666 posts
AeroScale: 7,410 posts
Posted: Saturday, June 06, 2015 - 07:32 PM UTC
Dave,
Your build just continues to amaze me. Honestly, it's IPMS contest winning quality, it's that good.
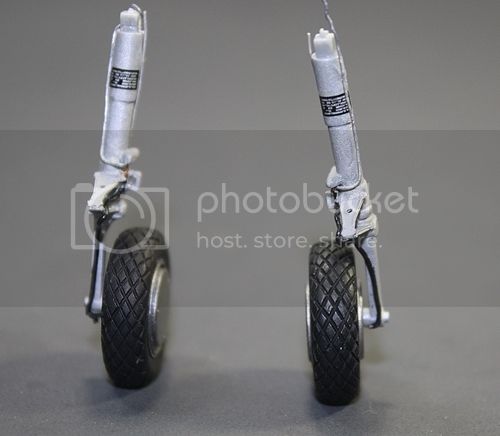
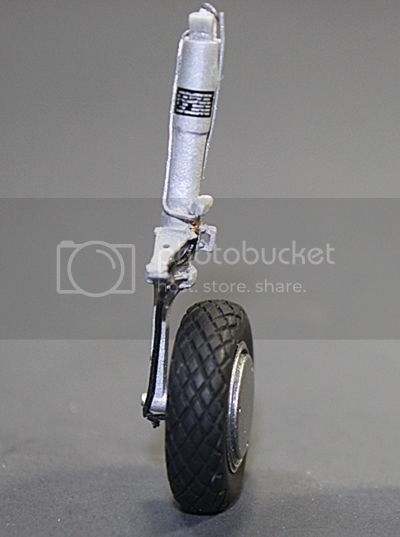
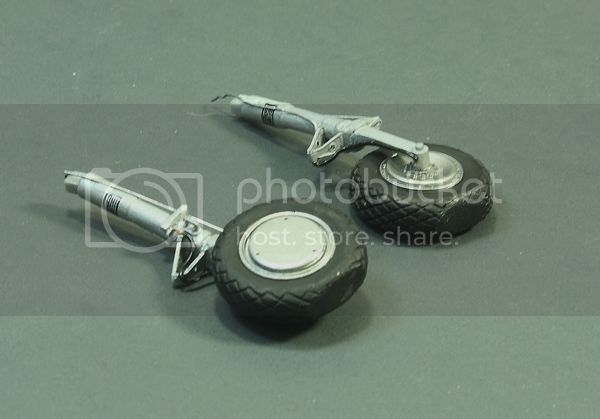
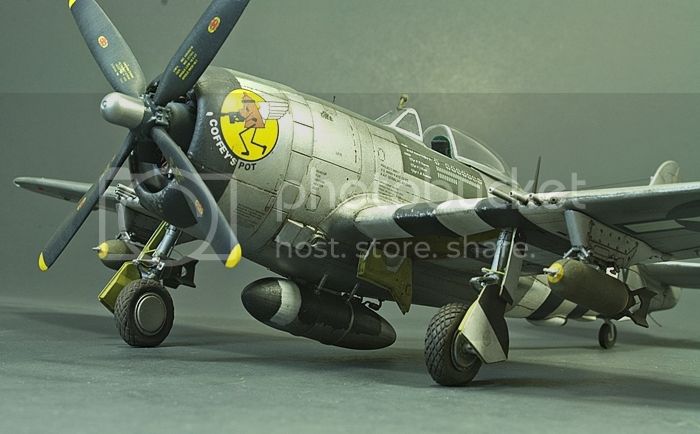
The bomb racks with the bombs painted with the rough textured paint, looks so good, it more then equals what I've seen in 1/32 scale. The AM Wheels and Landing Gear is detailed including those place cards, and weathered just right. The overall weathering from what I can see, really adds to the build, which isn't so easy to accomplish with a NMF.
I can't tell you how much I'm enjoying following your build, and taking notes for both of my Tamiya 1/48 scale Jugs just waiting to reach the workbench.
Joel
On my Workbench:
Monogram 1/24 scale 427 Shelby Cobra
Just Completed:
Beemax 1/24 scale BMW M3 E30 1992 Evolution II
Ontario, Canada
Joined: February 04, 2009
KitMaker: 743 posts
AeroScale: 151 posts
Posted: Tuesday, June 09, 2015 - 10:11 PM UTC
Wow super kind comments Joel. Thank you very much. I am glad you like it and I hope I am contributing to the community to provide some food for thought so to speak to others wanting to build a jug.
I am nearing the finish line on this one. A bit more weathering and some fiddly bits to put on like the antenna, mast, canopy, windscreen etc. then she will be done.
http://ghmicro.wix.com/twis-first-cut
Ontario, Canada
Joined: February 04, 2009
KitMaker: 743 posts
AeroScale: 151 posts
Posted: Saturday, June 20, 2015 - 02:49 AM UTC
http://ghmicro.wix.com/twis-first-cut
Ontario, Canada
Joined: February 04, 2009
KitMaker: 743 posts
AeroScale: 151 posts
Posted: Saturday, June 20, 2015 - 02:58 AM UTC
And a theme shot.

http://ghmicro.wix.com/twis-first-cut
Joel_W
 Associate Editor
New York, United States
Joined: December 04, 2010
KitMaker: 11,666 posts
AeroScale: 7,410 posts
Posted: Saturday, June 20, 2015 - 03:10 AM UTC
Dave,
Simply an outstanding build. Your NMF has that "used but not abused" look to it.
Thank you for sharing your build blog with us. I enjoyed every single update.
Joel
On my Workbench:
Monogram 1/24 scale 427 Shelby Cobra
Just Completed:
Beemax 1/24 scale BMW M3 E30 1992 Evolution II


 I hope you intend to submit it for the Frontpage when it's finished.



I hope you intend to submit it for the Frontpage when it's finished.


