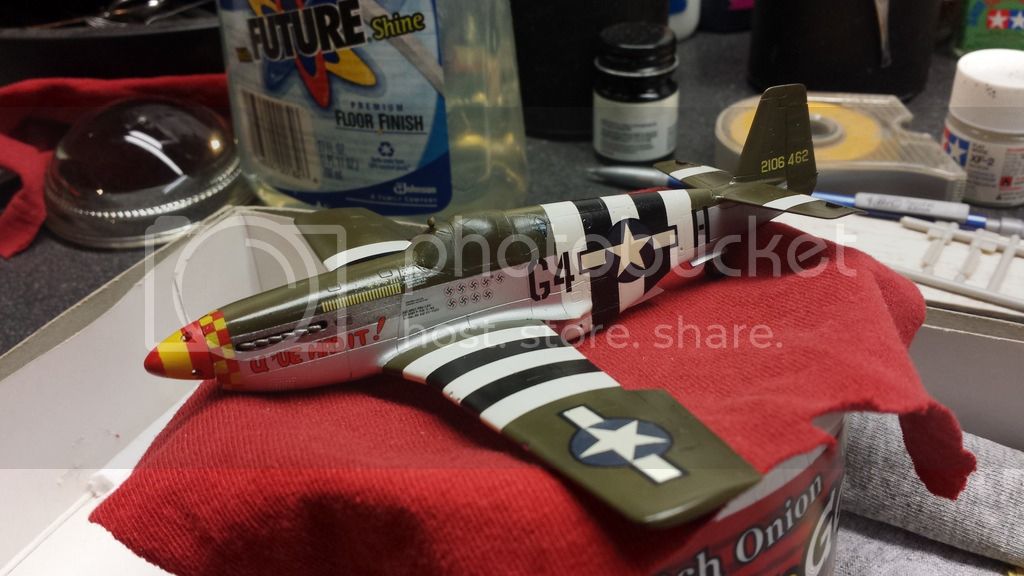
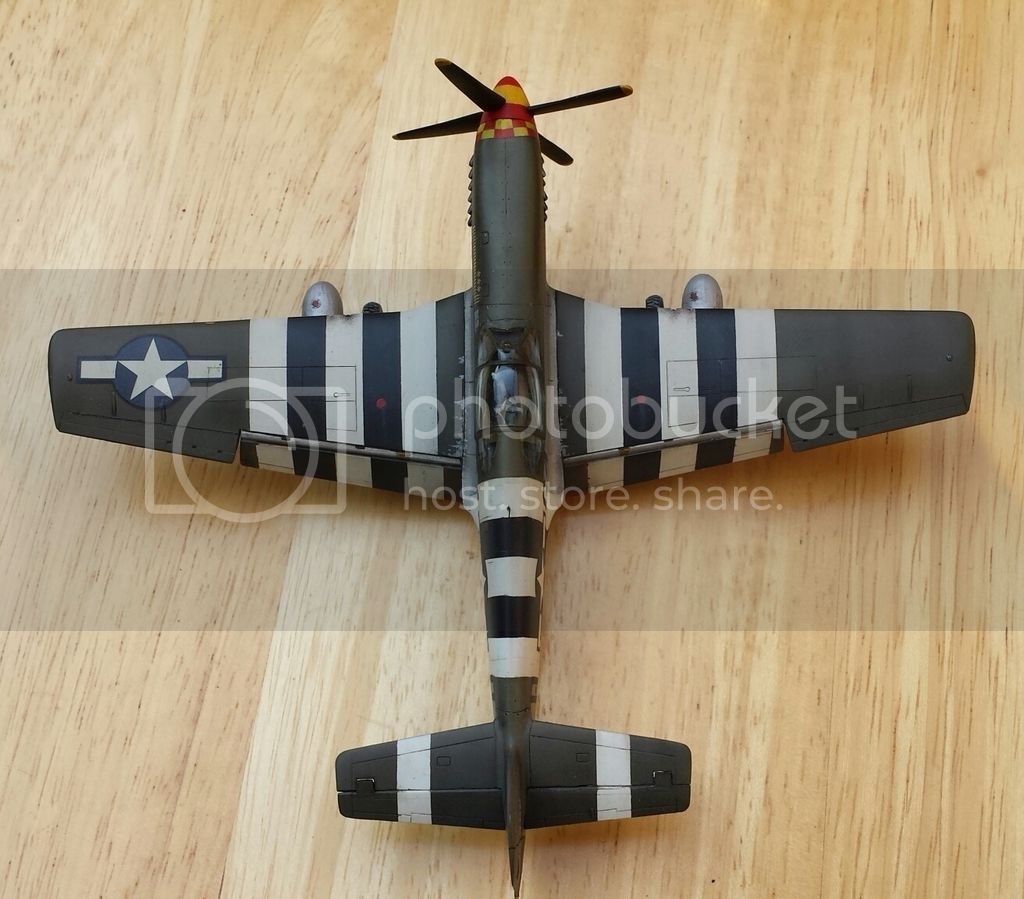
Thanks for the encouragement on the decals Joel, they may end up there for the long haul!
My Usk decals arrived and they are definitely not going to work. They are nice, but they are 1/48th. It would certainly help if the scale was labeled somewhere, anywhere, aside from the footnote inside the folded instructions about suitable kits (monogram and hasegawa mustangs, so these are pre tamiya) obviously the size is a giveaway but I got them off ebay after getting the sheet number out of the Valiant Wings, Airframe and Miniature Early Mustang book, listed as 1/72 (They listed no 1/48 decals under Usk).
((Added revision 8/13, Ive discovered that Usk made both 1/72 and 1/48 sheets with "Uve had it!" (G4*H)But they differ in the 2nd profile on the sheet, which I totally ignored. I located all the sheets I could with G4*H and bought the cheapest one. So I drew the short straw this time, as a review of my choices showed both scales represented. Still, I find it odd the decals arent labeled up front as to scale))
Thankfully I also accepted an offer of some ones spares, they have yet to arrive but I still have the week ahead of me. Hopefully there are no further issues but at least I have Brians kind offer above as a plan C. I doubt the national insignia will arrive in time but these are growing on me anyway. I think I can touch them up some.
Ive made some progress over last few days, Im sarcastically proud to announce that I have completed a 5th round of OD touch ups!!! Never say never. Im really happy with the results though, it was using a lighter shade so I got to add a little more variation into some of the rest of the OD. I also got to blend in the rearview mirror to the canopy and get it painted. The rear face has superchrome foil.
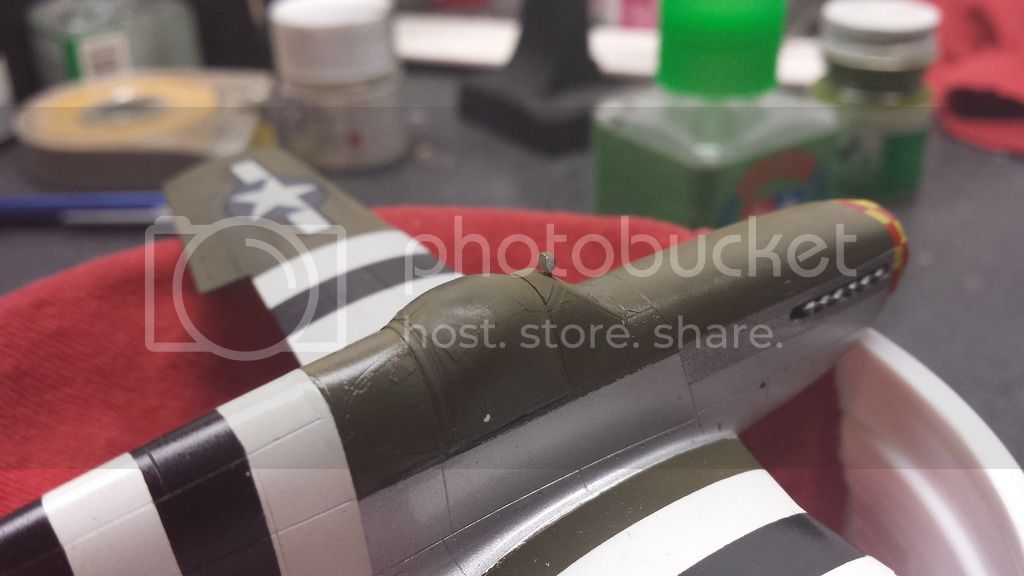
I decided the drop tanks needed further work, I seem to have missed that they appeared to have an extra set of straps.... so they went back under the knife and will be much improved when I get them painted again. The extra straps interfered with the drop tank stencils or I might have left them alone.
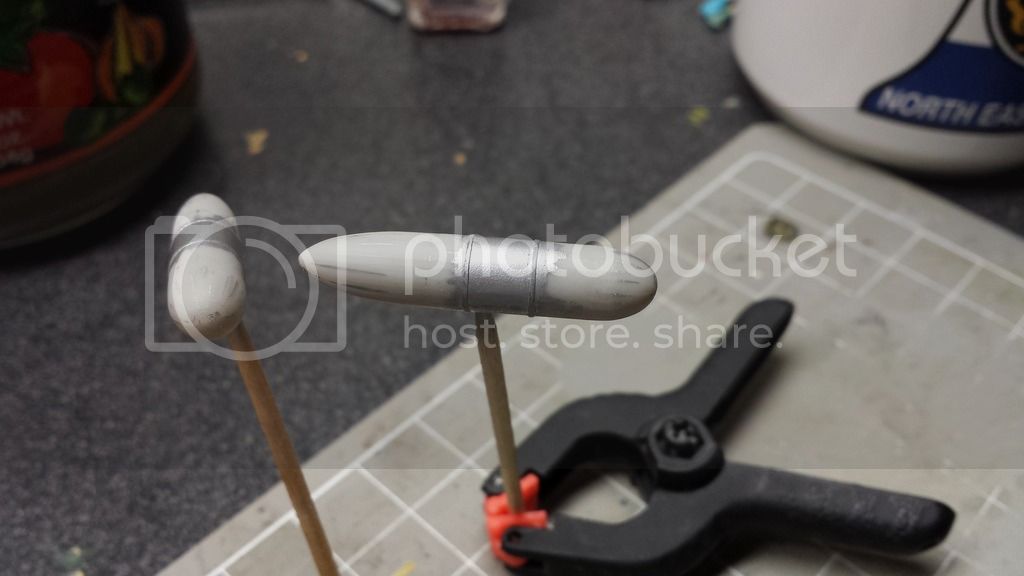
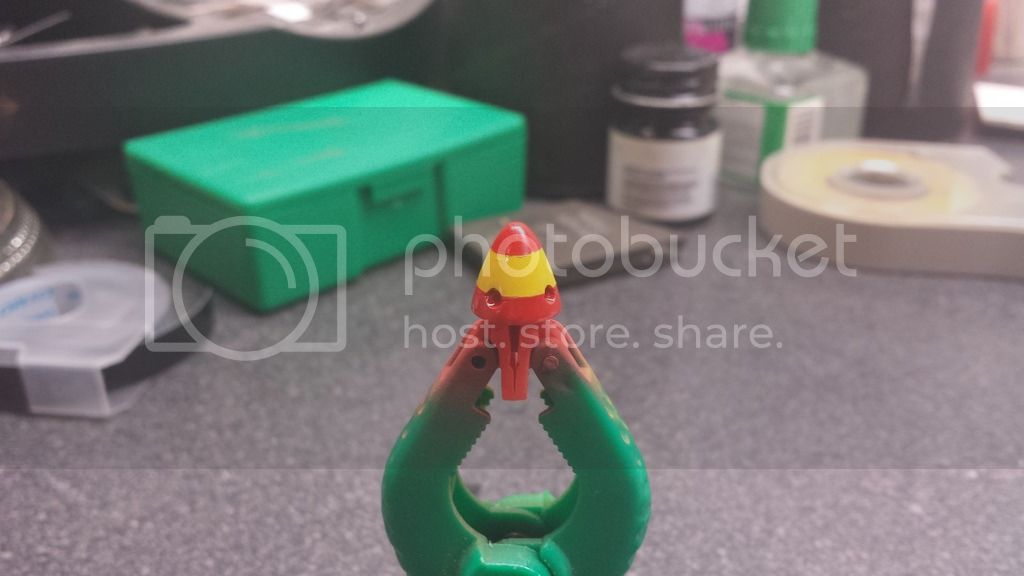
And saving the best for last I got the spinner finished! Not at all perfect but the shape and size hide it well and it looks decent to me. Thats the last of my anticipated challenges done and behind me
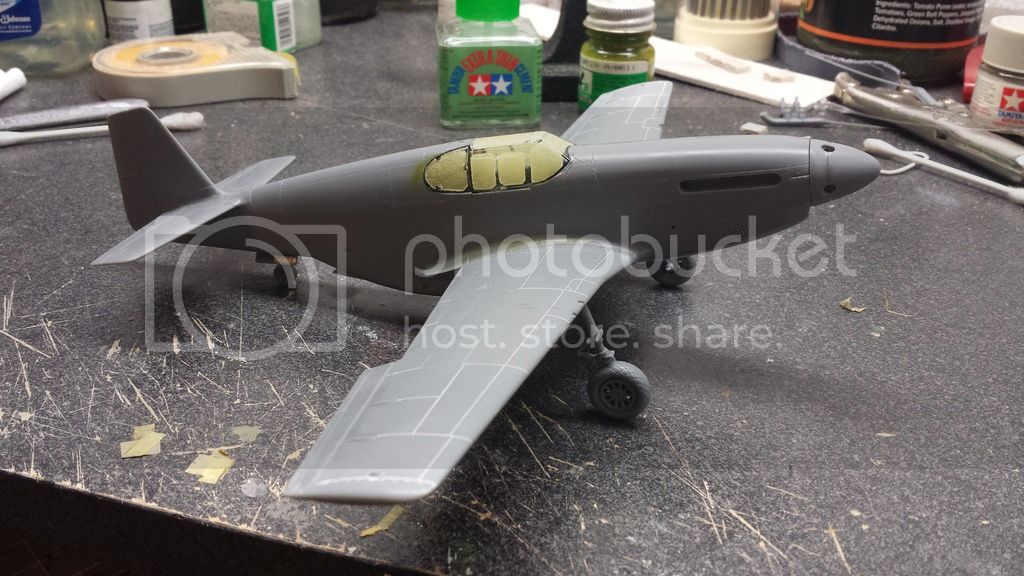
Fortunately Ive have this build lingering in the background keeping my interest in mustangs alive and well and give me something else to work on while this current build tries my patience and luck.
World War II
Discuss WWII and the era directly before and after the war from 1935-1949.
Hosted by Rowan Baylis
Hasegawa 1/72 P51b
mrockhill
Pennsylvania, United States
Joined: June 17, 2009
KitMaker: 566 posts
AeroScale: 507 posts
Joined: June 17, 2009
KitMaker: 566 posts
AeroScale: 507 posts
Posted: Sunday, August 09, 2015 - 08:01 AM UTC
Joel_W
Associate Editor
New York, United States
Joined: December 04, 2010
KitMaker: 11,666 posts
AeroScale: 7,410 posts
Joined: December 04, 2010
KitMaker: 11,666 posts
AeroScale: 7,410 posts
Posted: Sunday, August 09, 2015 - 06:43 PM UTC
Mike,
At some point just walk away from the touch ups, and look at the model as a single whole display piece. You can drive yourself nuts going over and over individual spots.
The spinner came out exceptional, especially when one considers it that it's 1/72 scale.
So you have another P-51 in the works. This time it's a B or is it a C?
Joel
mrockhill
Pennsylvania, United States
Joined: June 17, 2009
KitMaker: 566 posts
AeroScale: 507 posts
Joined: June 17, 2009
KitMaker: 566 posts
AeroScale: 507 posts
Posted: Sunday, August 09, 2015 - 09:50 PM UTC
Joel, had this blem appeared anywhere but on top of the nose I would have just touched it up with a brush and never mentioned it, but it was worth the 20min of work.
The spinner painting has been a good experience since there will be plenty more nose stripes in the future, I just need to refine my method some for smaller models. It was hard to manipulate the tiny spinner and hold the cutting assembly in such close proximity. Ill be thinking about this for awhile.
The other mustang is a 1/48 tamiya that will be a B model in Nick "Cowboy" Megura's "Ill wind" markings. I started this sometime last year and its been on and off, just to have a mustang to work on if im in the mood. So when this current build has been slow or set aside for drying Ive got this to fall back on and help keep motivation and interest up to build mustangs. If I had a spitfire or a 109 it might lure me away from the current project in tougher times of the build. Fortunately I have a smorgasbord of hangar queens of various flavors for such occasions
Posted: Monday, August 10, 2015 - 10:40 AM UTC
Hi Mike,
I was liking your spinner, too. It certainly inspired me to think on how I could do it. I began to think about drilling enough into the back of the spinner that you could either use a drill press (turned off)' or even a pin vise. I have trouble with keeping my hands steady, so I'd need something that could stay spinning on an even keel.
Maybe the right kind odd counter-sink bit could hold the spinner without sinking too deeply into the styrene.
My unsteady hands always keep me from being overly adventurous when it comes to painting. If I can't mask it, I usually won't try it.
Gary
mrockhill
Pennsylvania, United States
Joined: June 17, 2009
KitMaker: 566 posts
AeroScale: 507 posts
Joined: June 17, 2009
KitMaker: 566 posts
AeroScale: 507 posts
Posted: Wednesday, August 12, 2015 - 09:01 PM UTC
Gary, I think next time i may just use a vsriation of this method to mark the tape and then gently cut by hand. I got a little into the finish when I cut this time, still not anywhere as bad as the first time but enough to think about revising my method. Good thing I have a bunch of mustangs in the stash, I should have it figured out by the last one!
Been busy getting the decals on and clear coating. About to go work on the first wash, its definitely down to the nitty gritty but work is light these last2 days this week, I hope to take full advantage heres a sneak peek at her about half way through decals, im quite pleased if I must say.
My decal debacle turned out just fine. I recieved word of help as far as extra decals go and I got sent the whole sheet! This allowed me to skip replacing the national insignia and just double up the kit decals (that seem thin for hasegawa), they are much improved! The white is off, more ivory but I feel it works perfect as the invasion stripes should appear fresher than the insignia
Joel_W
Associate Editor
New York, United States
Joined: December 04, 2010
KitMaker: 11,666 posts
AeroScale: 7,410 posts
Joined: December 04, 2010
KitMaker: 11,666 posts
AeroScale: 7,410 posts
Posted: Thursday, August 13, 2015 - 01:59 AM UTC
Mike,
The decaling really looks quite good. The extra effort was certainly worth it.
Joel
The decaling really looks quite good. The extra effort was certainly worth it.
Joel
mrockhill
Pennsylvania, United States
Joined: June 17, 2009
KitMaker: 566 posts
AeroScale: 507 posts
Joined: June 17, 2009
KitMaker: 566 posts
AeroScale: 507 posts
Posted: Saturday, August 15, 2015 - 08:50 AM UTC
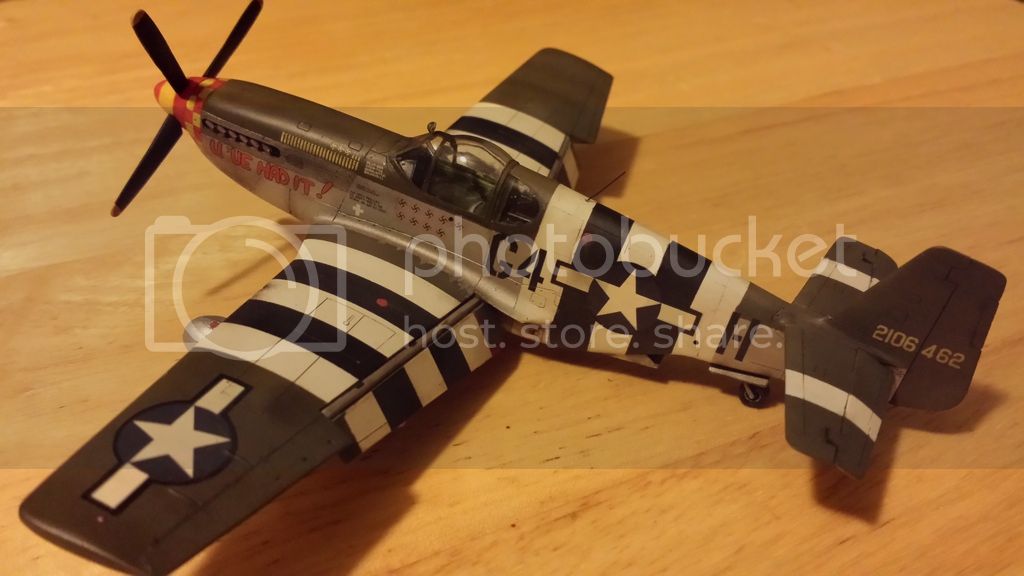
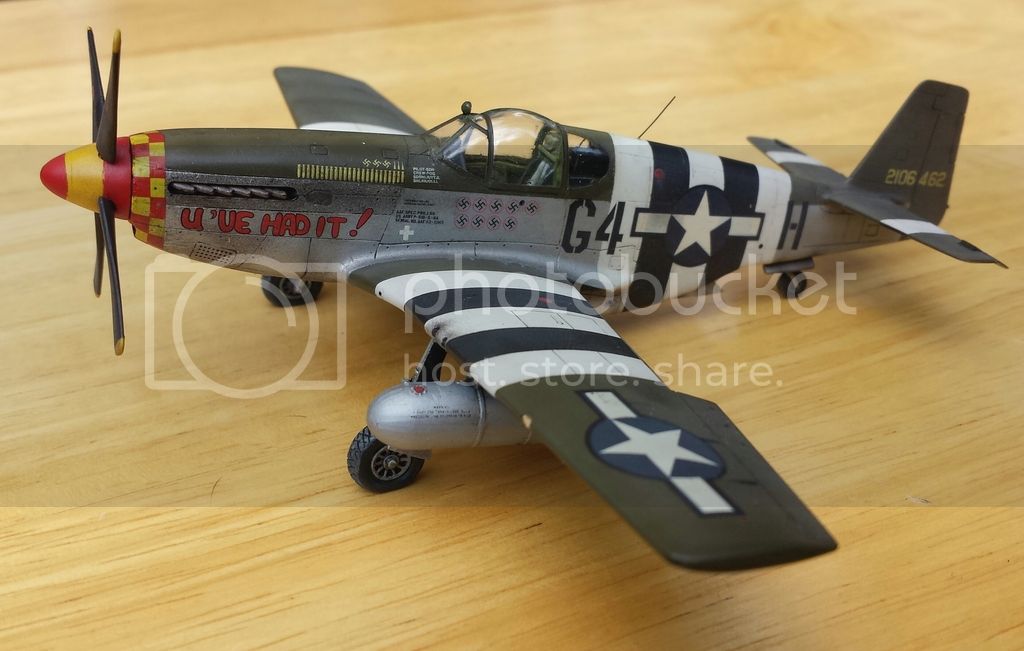
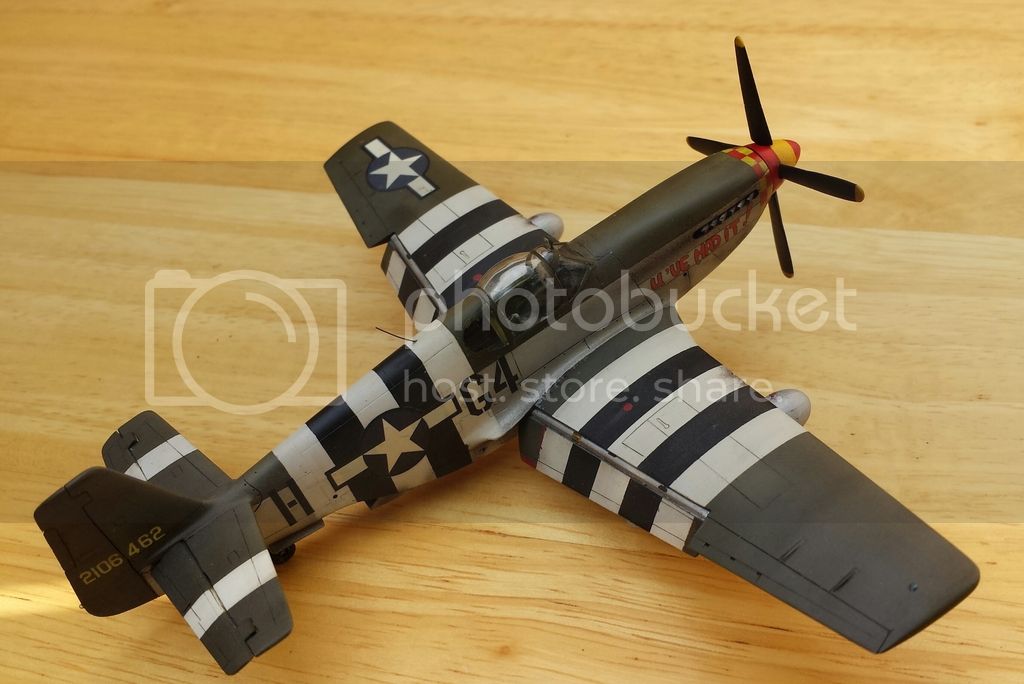
Shes finally Done!
Finished up about 2am saturday morning Not usually when I like to end projects but today was a busy day and I wasnt sure I would have time. Today was also the final deadline for the campaign, so finishing was a must.
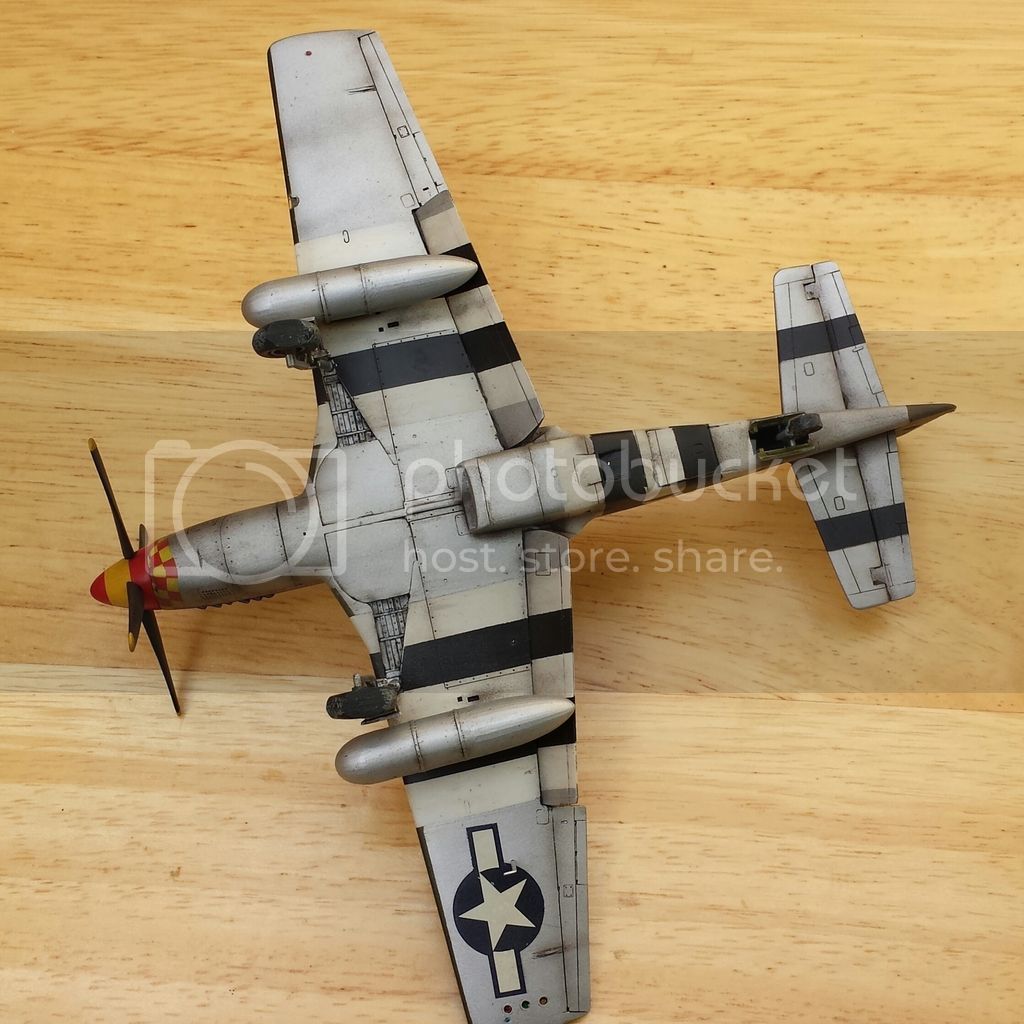
Much of the last few days was mostly drying time for the various stages of finishing. After decals I sealed the decals with a thin coat of future then after that dried I gave her a wash with an overall dirty grey brown oil wash with some darker and lighter variations on the underside to represent the plethora of possible leaking fluids. No too much though, 357ths aircraft typically seemed to be on the cleaner side. I also took a shot at fuel stains with a light gray oil mix, I kept it small but I think is heading in the right direction.
Over this I used my usual MM acyrl flat which worked as well as usual for me. After that dried I did some chipping with silver pencil and then selective airbrushing of the infamous thinned tamiya black/brown mix. I cut a quick stencil for the exhaust stacks and painted them with a mix of tamiya hull red and black thinnly misted over the existing NMF.
After weathering it was time to unmask the canopy, where upon I found the price I was to pay for skimping on drying time with future. The foil was an absolute bear to remove. I assume the the foils glue melded with uncure future and voila! I use tooth picks shaped into chisels and usually it comes up in stips and larger bits. This time I fought a battle of tiny bits and small chunks but it came off eventually. Some residue from the glue is normal and a qtip with wd40 will clean it up without wrecking the acrylic finishes beneath. A thin brushing of future cleaned up the blems and all was good as new.
A hole was drilled into the spine and an antenna was made from stretched sprue. Wing navigation lights are blobs of micro kristal clear. I used the thickest goop from the bottom so they keep shape better. Worked good, my placement not so hot but its tough to tell. Next I glued the landing gear sat her on her wheels and got the sit evened and blocked in place to dry for a couple hours. The true details wheels lived up to their reputation, they're really really flat but they were cheap and better than kit. I skipped on brake lines, just not prominent enough on mustangs to be missed much in this scale.
After that had set, I attached the gear doors and then on went the drop tanks. These were left clean except for pin washes around the details. I also skipped on plumbing these, mostly because of time but they arent really missed. I wouldnt have minded giving it a shot, Next time! Last bit was the pitot tube and to push the finished prop on
I'm really happy with the build. Definitely a notch up from my last build with just a couple building flaws Ill keep to myself but are lessons noted for the future. I cant think of one detour to add a detail or one case of stopping progress to fix goof ups that I regret. I also dont feel like I shorted myself with the details I decided to skip. The only improvement I'd like to make is another prop, the blades are way too thick and look clumbsy. I couldnt add even the slightest of chips on the prop as you would be drawn to the scale 2 inch thick blade edges. (The tamiya 1/72 F-51D that followed me home from todays adventures has a possible spare!) I should have time to work on more pictures tomorrow.
Posted: Saturday, August 15, 2015 - 07:04 PM UTC
Hi Mike
Really nice. You should submit this one for a Feature.
All the best
Rowan
Really nice. You should submit this one for a Feature.
All the best
Rowan
Joel_W
Associate Editor
New York, United States
Joined: December 04, 2010
KitMaker: 11,666 posts
AeroScale: 7,410 posts
Joined: December 04, 2010
KitMaker: 11,666 posts
AeroScale: 7,410 posts
Posted: Sunday, August 16, 2015 - 01:02 AM UTC
Mike,
Nicely done. I'm glad I was along for the ride.
Joel
Nicely done. I'm glad I was along for the ride.
Joel
Posted: Sunday, August 16, 2015 - 06:35 AM UTC
Looks great, Mike! Learned a few things watching, too.
Gary
Gary
mrockhill
Pennsylvania, United States
Joined: June 17, 2009
KitMaker: 566 posts
AeroScale: 507 posts
Joined: June 17, 2009
KitMaker: 566 posts
AeroScale: 507 posts
Posted: Sunday, August 16, 2015 - 04:25 PM UTC
Thanks for the compliments guys, its been fun sharing this build with you all! Its was really nice to see something leave the bench too, hopefully it'll shake some of these hangar queens loose.
Rowan, Ill see what I can put together and get it submitted
mrockhill
Pennsylvania, United States
Joined: June 17, 2009
KitMaker: 566 posts
AeroScale: 507 posts
Joined: June 17, 2009
KitMaker: 566 posts
AeroScale: 507 posts
Posted: Monday, August 17, 2015 - 05:32 AM UTC
Some final pics of the build
matrixone
Oregon, United States
Joined: February 07, 2004
KitMaker: 869 posts
AeroScale: 862 posts
Joined: February 07, 2004
KitMaker: 869 posts
AeroScale: 862 posts
Posted: Monday, August 17, 2015 - 06:12 AM UTC
Fantastic work Mike!
I really like the weathering on it too.
Matrixone
I really like the weathering on it too.
Matrixone
Joel_W
Associate Editor
New York, United States
Joined: December 04, 2010
KitMaker: 11,666 posts
AeroScale: 7,410 posts
Joined: December 04, 2010
KitMaker: 11,666 posts
AeroScale: 7,410 posts
Posted: Monday, August 17, 2015 - 08:58 PM UTC
Mike,
Just an impressive build. Your weathering is just perfect, not over done. One would have a hard time discerning if your build was 1/72 or 1/48 scale. It's that good.
Joel
Just an impressive build. Your weathering is just perfect, not over done. One would have a hard time discerning if your build was 1/72 or 1/48 scale. It's that good.
Joel
mrockhill
Pennsylvania, United States
Joined: June 17, 2009
KitMaker: 566 posts
AeroScale: 507 posts
Joined: June 17, 2009
KitMaker: 566 posts
AeroScale: 507 posts
Posted: Monday, August 17, 2015 - 09:22 PM UTC
Thanks guys for your compliments! I dont have many people on my end here to show builds to that can grasp the amount of work we can put into these.
This definitely is my best model to date. 1/72 has been treating me well and I cant wait till the next build in this scale. It should be an Italeri c.202 for the thunder and lightning campaign starting next month