Hi Joel
Thanks for the feedback - I really appreciate it.
Regards,
Kobus
Cold War (1950-1974)
Discuss the aircraft modeling subjects during the Cold War period.
Discuss the aircraft modeling subjects during the Cold War period.
Hosted by Tim Hatton
1/72 Tamiya F-51D
Kilo_Uniform

Joined: July 03, 2015
KitMaker: 280 posts
AeroScale: 141 posts

Posted: Monday, November 30, 2015 - 09:28 PM UTC
mrockhill

Joined: June 17, 2009
KitMaker: 566 posts
AeroScale: 507 posts

Posted: Wednesday, December 02, 2015 - 11:17 AM UTC
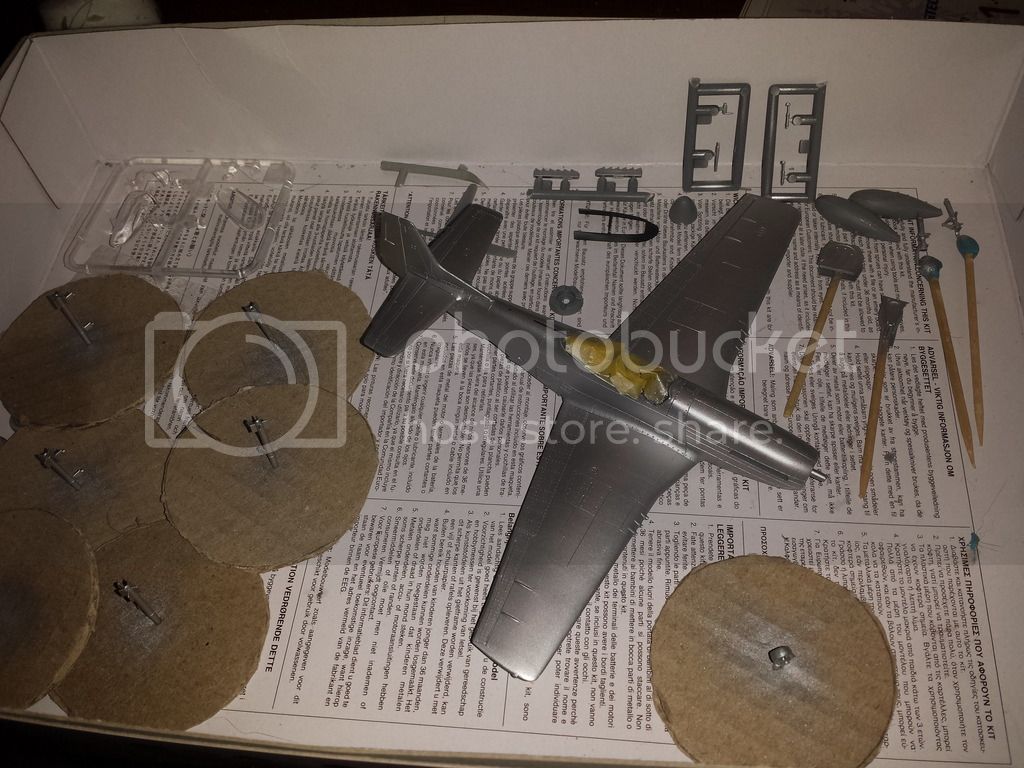
1st round of AS12 is on. Tomorrow hopefully will be round 2 so I can paint the 2nd sides of the gear doors, wheels and take care of the few needed touch ups on in the surface finish. 

Kilo_Uniform

Joined: July 03, 2015
KitMaker: 280 posts
AeroScale: 141 posts

Posted: Wednesday, December 02, 2015 - 04:21 PM UTC
Hi Mike
I really like your cardboard disks - excellent idea sir!
Regards,
Kobus
I really like your cardboard disks - excellent idea sir!
Regards,
Kobus
mrockhill

Joined: June 17, 2009
KitMaker: 566 posts
AeroScale: 507 posts

Posted: Thursday, December 03, 2015 - 03:03 AM UTC
Thanks kobus! To be honest I've never done this before but they worked brilliantly for holding and painting the HVARs. I usually use tooth picks and poster tac but I was looking for an alternate method as I was short on poster tac. I saw them sitting on top of the pile in my workshop trashcan when the idea hit me. They were just scraps left over from a non modelling project 

mrockhill

Joined: June 17, 2009
KitMaker: 566 posts
AeroScale: 507 posts

Posted: Saturday, December 12, 2015 - 11:05 PM UTC
Progress on my F-51 has ground to a halt and these cursed dry transfers are the reason. I cant figure them out at all and directions (the extent of which is on pg1) are extremely vague, which is as polite as I can be. To be honest they inspire visions of hellfire so Ive put them down for now. The company website was no help and the silence online regarding them is deafening and should have been a clue not to buy them. I thought again about the kit decals but "was that too fast" is waaay overdone, "buckeye blitz vi" is incomplete and will require more masking than im interested in getting into. Finally the 3rd option isnt well represented by the decals at all.
I may need to find decals of just USAF korea vintage numbers to build a random aircraft from one of my refs. I tried to see if I could mix match the kit numbers but they are different sizes and fonts! I may also look back into the SAAF decals from Mav I originally considered, simple and different.
I may need to find decals of just USAF korea vintage numbers to build a random aircraft from one of my refs. I tried to see if I could mix match the kit numbers but they are different sizes and fonts! I may also look back into the SAAF decals from Mav I originally considered, simple and different.
mrockhill

Joined: June 17, 2009
KitMaker: 566 posts
AeroScale: 507 posts

Posted: Sunday, December 20, 2015 - 07:04 AM UTC
A new direction!
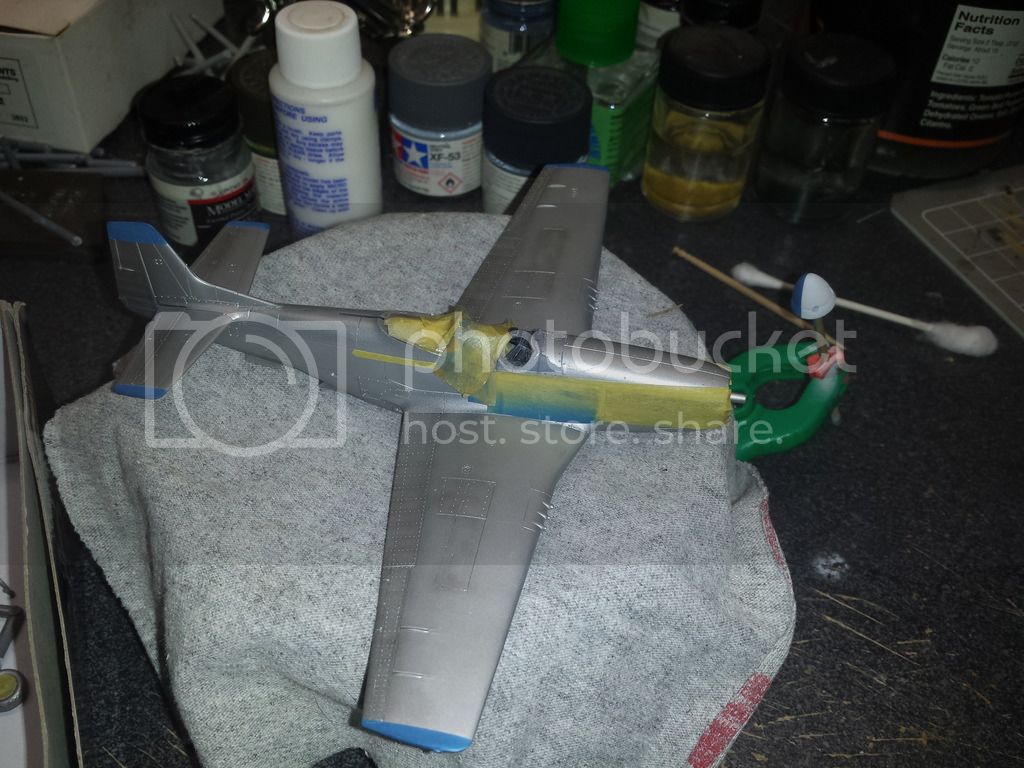
Frustrated with my lack of success with my decal/transfers and not wanting another unfinished kit around I decided a little free styling was in order. My research into korean F-51s introduced me to several interesting USAF schemes that dont seem to modelled often. So I've decided to instead of building a specific aircraft to build a ficticious aircraft by scrambling the kit serial numbers, skipping on nose art and finish it as an anonymous workhorse. Ive chosen the blue markings and blinkered spinner of the 39th FIS. Here it is as of this evening

I had glued the windscreen in place with micro kristal clear and was less impressed with its fit, it stuck out slightly on all 3 sides. After deciding it had to be better I started sanding away with micro mark sanding pads. It came loose eventually and needs to be reattached but its much improved.
Im also getting all the dangly bits together. I almost switched to hanging bombs under the wings but found the kit bombs undersized for 500lb, probably suppose to be 250, not in any F-51 pics that I've seen. So I'm sticking with napalm tanks. HVARs are nearly painted and tires are next. Also the canopy still needs to be dealt with.
Frustrated with my lack of success with my decal/transfers and not wanting another unfinished kit around I decided a little free styling was in order. My research into korean F-51s introduced me to several interesting USAF schemes that dont seem to modelled often. So I've decided to instead of building a specific aircraft to build a ficticious aircraft by scrambling the kit serial numbers, skipping on nose art and finish it as an anonymous workhorse. Ive chosen the blue markings and blinkered spinner of the 39th FIS. Here it is as of this evening

I had glued the windscreen in place with micro kristal clear and was less impressed with its fit, it stuck out slightly on all 3 sides. After deciding it had to be better I started sanding away with micro mark sanding pads. It came loose eventually and needs to be reattached but its much improved.
Im also getting all the dangly bits together. I almost switched to hanging bombs under the wings but found the kit bombs undersized for 500lb, probably suppose to be 250, not in any F-51 pics that I've seen. So I'm sticking with napalm tanks. HVARs are nearly painted and tires are next. Also the canopy still needs to be dealt with.

Posted: Sunday, December 20, 2015 - 10:51 AM UTC
Looks nice, Mike. I like the blue tips. Sorry to hear those transfers didn't work out. They woulda looked sweet.
Gary
Gary
mrockhill

Joined: June 17, 2009
KitMaker: 566 posts
AeroScale: 507 posts

Posted: Sunday, December 20, 2015 - 05:55 PM UTC
Thanks Gary, Im liking the blue as well. It was between this or the red markings of the 67th but the blinkered spinner won out in the end. I havent tried too hard with the transfers but my enthusiasm for the subject had evaporated, perhaps another day... ive wanted to check out the newer airfix P-51D in 1/72! 


mrockhill

Joined: June 17, 2009
KitMaker: 566 posts
AeroScale: 507 posts

Posted: Friday, December 25, 2015 - 09:30 AM UTC
Some progress made on this lazy christmas day!
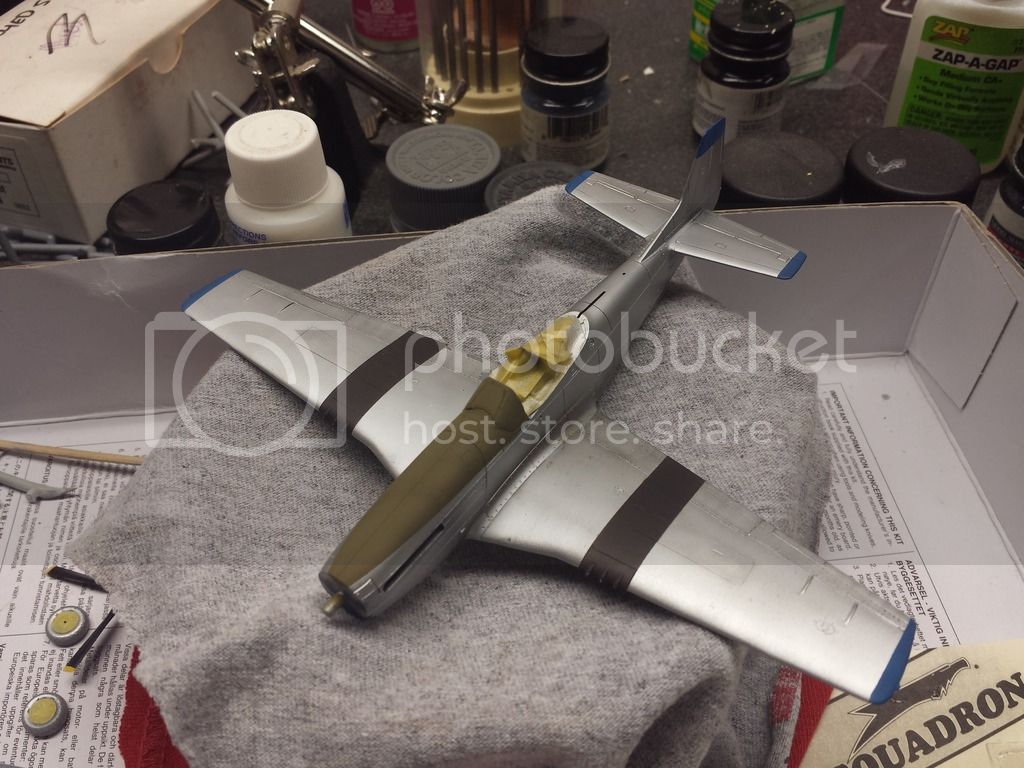
Got the canopy masked and the cowl OD anti glare was sprayed with 2 shades of tamiya OD lightened with dark yellow over some black preshading to break up the monotone look a little. Next, on a whim, I added some black wing stripes I noted in several period photos. I sprayed these with a blend of tamiya semi gloss black and flat red, around 70/30. With my stripes and cowl done I can touch up the AS12 and get on to decalling!!

Got the canopy masked and the cowl OD anti glare was sprayed with 2 shades of tamiya OD lightened with dark yellow over some black preshading to break up the monotone look a little. Next, on a whim, I added some black wing stripes I noted in several period photos. I sprayed these with a blend of tamiya semi gloss black and flat red, around 70/30. With my stripes and cowl done I can touch up the AS12 and get on to decalling!!

Joel_W

Joined: December 04, 2010
KitMaker: 11,666 posts
AeroScale: 7,410 posts

Posted: Friday, December 25, 2015 - 11:49 PM UTC
Mike,
I've been off line for a while as my old all in one computer just gave out after less then 3 years. Got the new system up and running, and I'm trying to catch up on all the threads.
I'm more then impressed with you technique for the anti glare panel. Between the black basing, and the paint color modulation it is about the best I've seen.
As for your issues with the dry transfers, I used them back in the 70s. they do take a lot of work to get lined up and applied correctly. What exactly were the issues that caused you such grief?
Joel
mrockhill

Joined: June 17, 2009
KitMaker: 566 posts
AeroScale: 507 posts

Posted: Thursday, December 31, 2015 - 06:39 PM UTC
Joel, Honestly I couldnt figure them out. The instructions I posted, that came with them were all I could find and not at all detailed. I have zero experience with dry transfers which could also be the culprit but I tried rubbing everything everywhich way but couldnt find a way to get them off the sheet.
Physically they are very different than the archer set I have for an M10 tank destroyer project. All the numbers and company logos are also transfers and Ive been trying using them so as to not wreck the rest. They work really nice as stickers but arent thin enough in this mode for my tastes and will likely be troublesome around panel lines.
Not being interested in further frustration or another hangar queen I altered my plan, and thus far I'm quite happy with it. Some more bench time would be nice but these holidays have been more demanding work wise than in years past

Joel_W

Joined: December 04, 2010
KitMaker: 11,666 posts
AeroScale: 7,410 posts

Posted: Friday, January 01, 2016 - 12:35 AM UTC
Mike,
Same here. I really never much cared for dry transfers as they require so much work to get placed right the 1st time as there is no final tweaking. It's hit or miss, and start all over again.
Joel
Same here. I really never much cared for dry transfers as they require so much work to get placed right the 1st time as there is no final tweaking. It's hit or miss, and start all over again.

Joel

spaarndammer

Joined: January 28, 2007
KitMaker: 1,945 posts
AeroScale: 388 posts

Posted: Friday, January 01, 2016 - 01:40 AM UTC
Hi Mike,
It looks great so far! Too bad the decals were not usable, but i think the way you are now taking will also give nice results.
Why did you use red to brake the color of the black?

Jelger
It looks great so far! Too bad the decals were not usable, but i think the way you are now taking will also give nice results.
Why did you use red to brake the color of the black?

Jelger
mrockhill

Joined: June 17, 2009
KitMaker: 566 posts
AeroScale: 507 posts

Posted: Friday, January 01, 2016 - 04:09 AM UTC
Jelger, To be honest I did it on a recommendation once in a internet discussion of painting all black aircraft. I tried it on my 1/72 P-51b I built over the summer and really liked how it looked. It sounds strange but when seen in person it just looks right, in my opinion at least.
 |


