_GOTOBOTTOM
Cold War (1950-1974)
Discuss the aircraft modeling subjects during the Cold War period.
Hosted by Tim Hatton
1/72 Tamiya F-51D
mrockhill
_VISITCOMMUNITY
Pennsylvania, United States
Joined: June 17, 2009
KitMaker: 566 posts
AeroScale: 507 posts
Posted: Sunday, August 23, 2015 - 09:16 AM UTC
So there I was, having just finished a 1/72 p-51b and still feeling the need for not only another 1/72 build but also another mustang. The ongoing fighter bomber campaign seems a perfect excuse to scratch both itches with this tamiya f-51d.

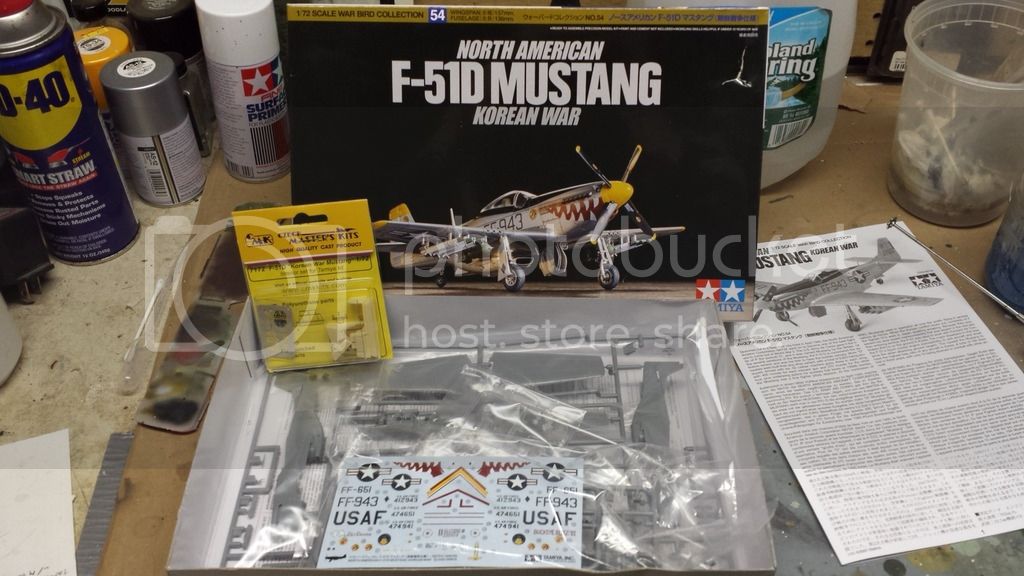
The f-51d, as it served in korea is the quintessential fighter bomber. From 1944 to 1950 the p51d went from the envy of many fighter pilots the world over to an unglorious extension of the US Ordnance Department.
You may notice a CMK resin interior set. I've since decided I wanted to keep this build simple and not use it this time. Being a nicely detailed kit It shouldnt be hard to leave it alone and keep up momentum.

I'm not sure yet about markings just yet just that this will be a korean war mustang of some flavor. The kit decals arent too exciting and so far I've found the after market devoid of 1/72 USAF options but the search continues. Im also considering ROKAF, RAAF and SAAF schemes if available.

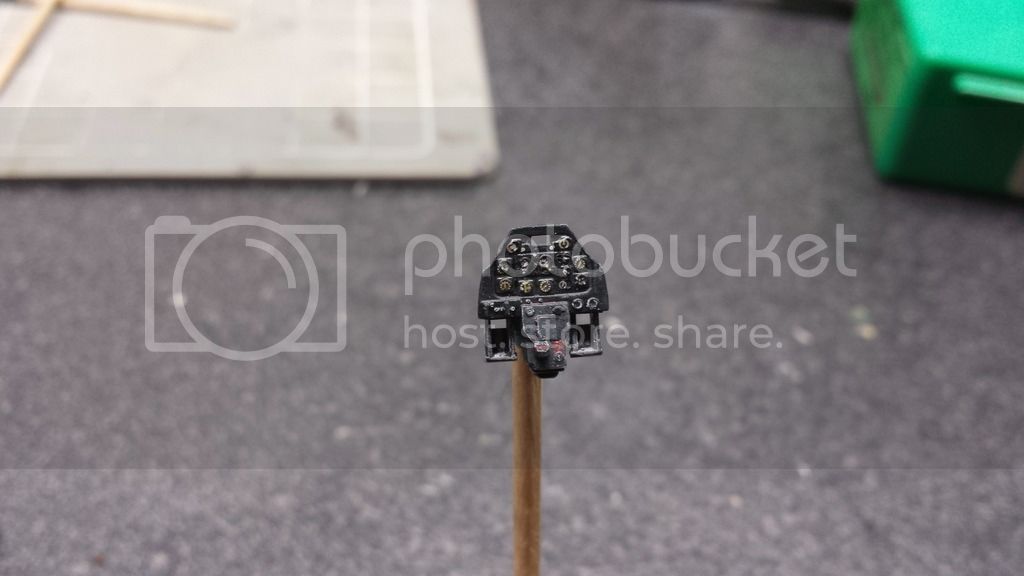
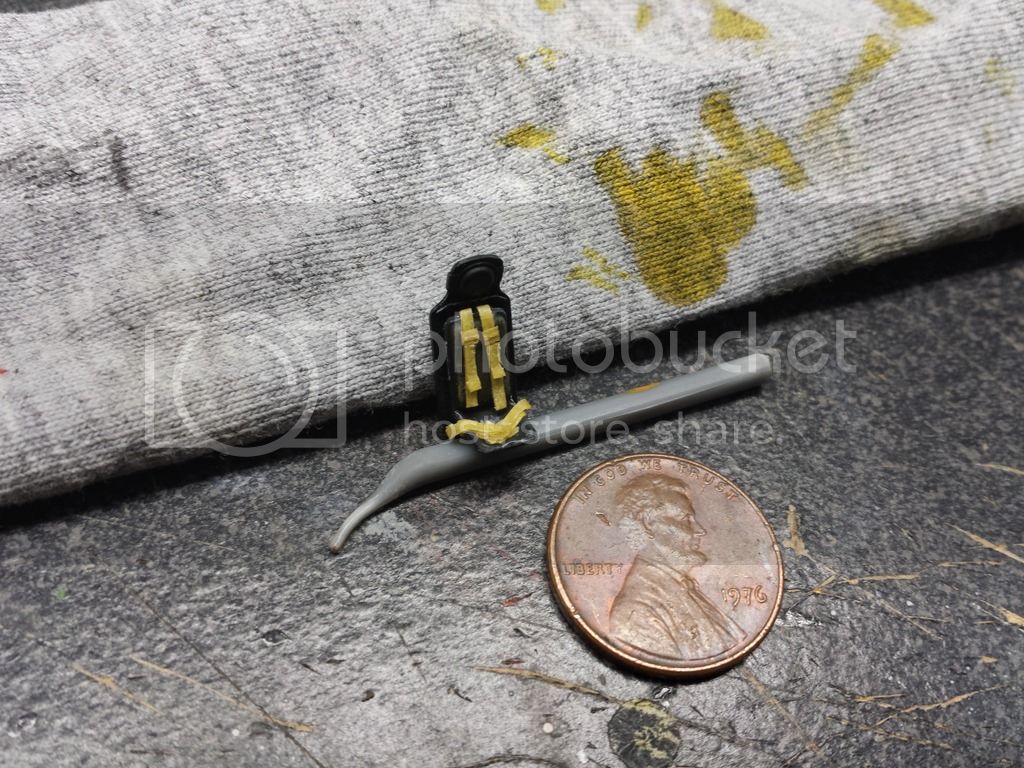
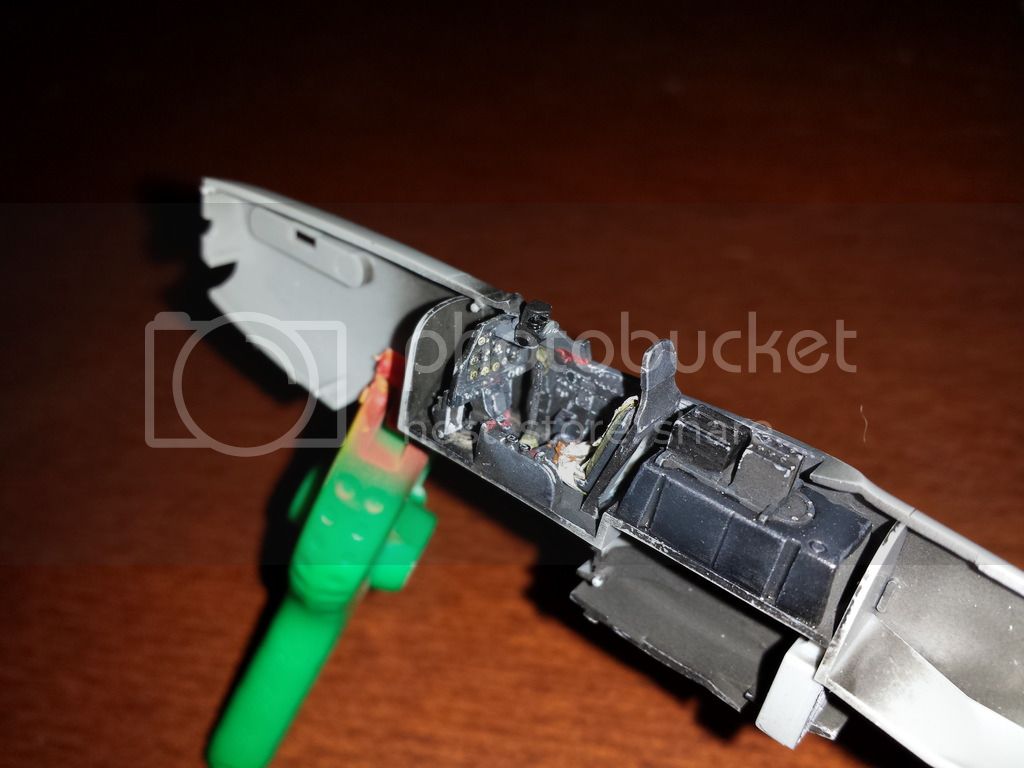
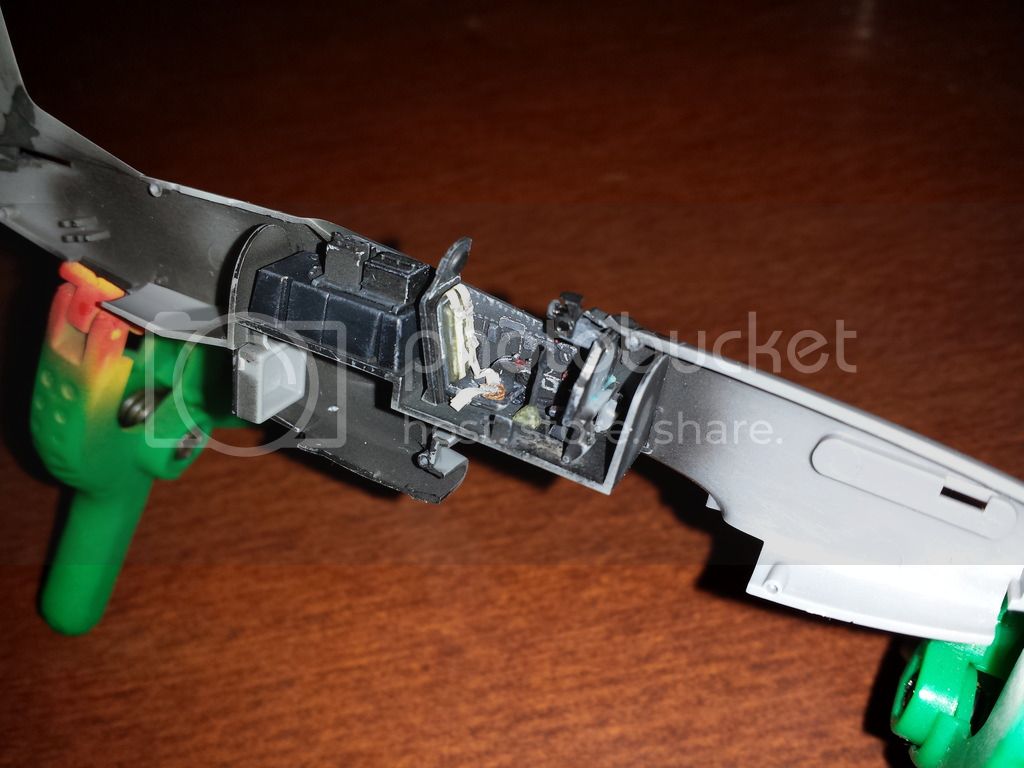
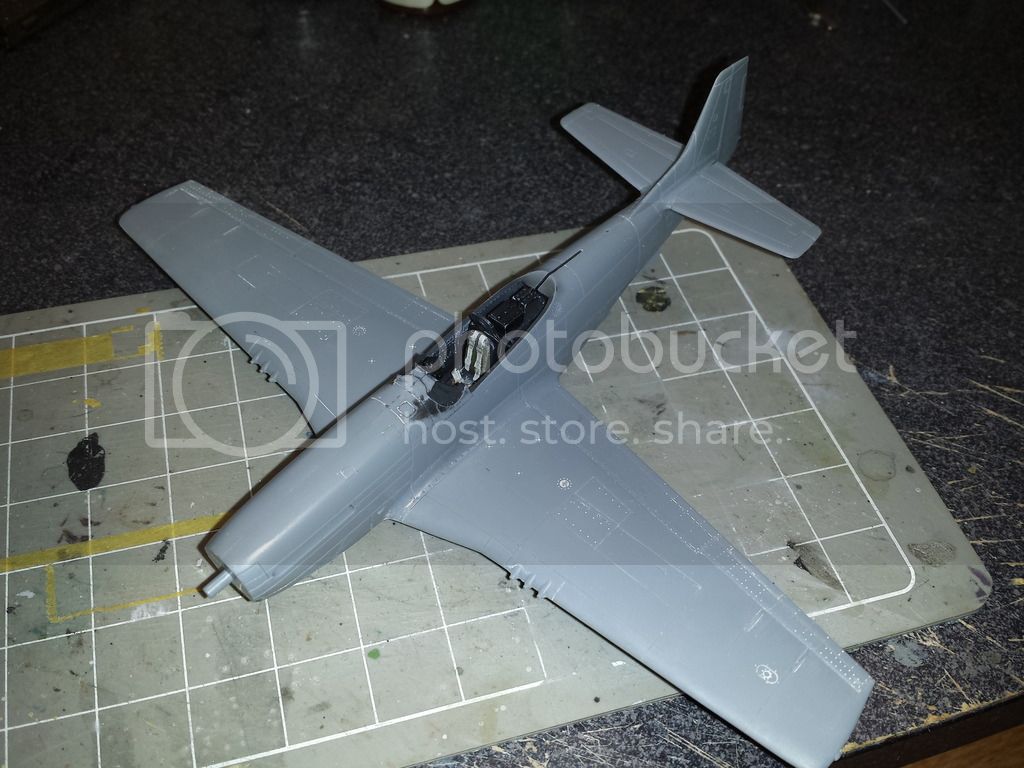
I started this build in the front office. Many korean war mustangs had been refurbished and got black painted cockpits so I gave the interior a coat of tamiya flat black, followed with nato black and then german grey high lights. Next I painted various boxes and cockpit structures varying shades of black and dark gray and then dry brushed it overall with dark gray. The next step was a black wash and after that dried out came the color pencils mainly using red and a couple shades of gray. OD bits are painted with tamiya OD and dry brushed with dark yellow. Here is where I stand as of now

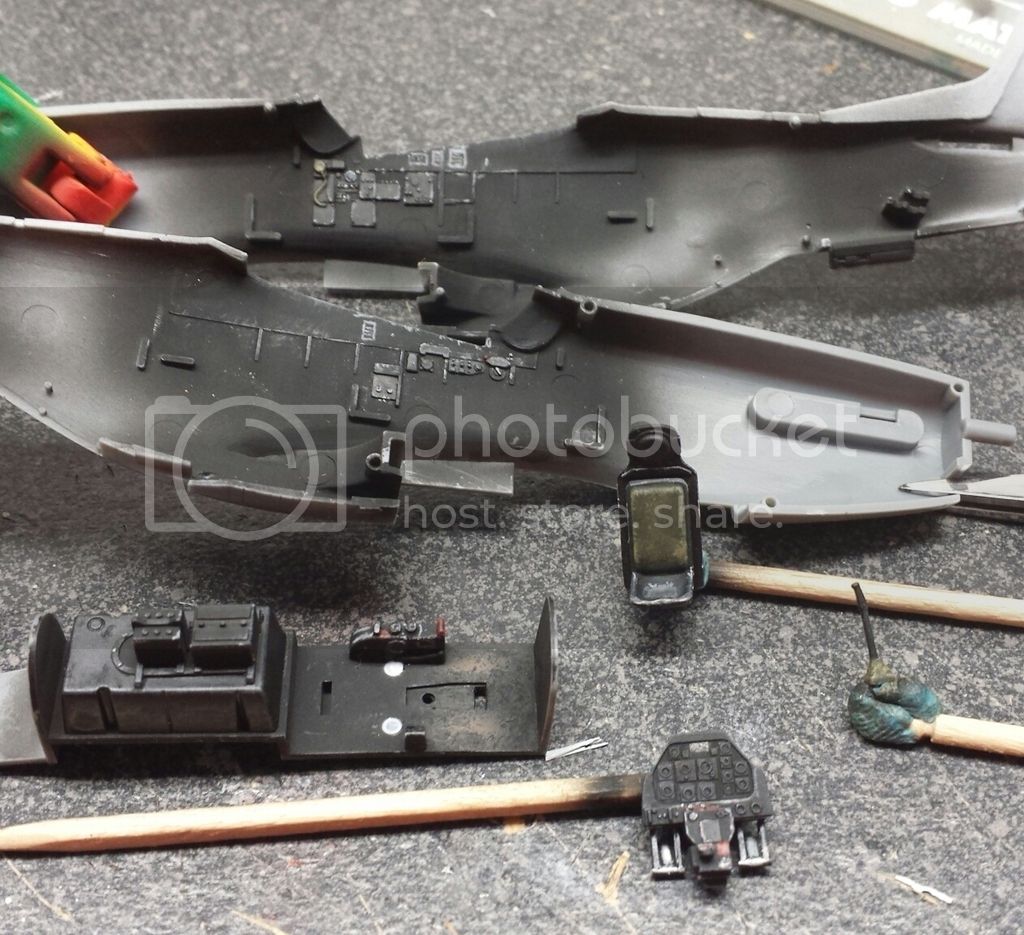
Not shown is the K14 gunsight which is coming along just as nicely. To finish up the cockpit I just need to decal the instrument panel and make up a harness. The white blobs on the cockpit floor is micro kristal clear on the wing tank fuel gauges.
GazzaS
#424
_VISITCOMMUNITY
Queensland, Australia
Joined: April 23, 2015
KitMaker: 4,648 posts
AeroScale: 1,938 posts
Posted: Sunday, August 23, 2015 - 12:50 PM UTC
Man, your 1/72 pits look better than my 1/48 pits! Keep this up and I'll be inspired to do an NMF P 51 to go with the Jug I built earlier.

Gary
Joel_W
Staff MemberAssociate Editor
AUTOMODELER
_VISITCOMMUNITY
New York, United States
Joined: December 04, 2010
KitMaker: 11,666 posts
AeroScale: 7,410 posts
Posted: Sunday, August 23, 2015 - 07:08 PM UTC
Mike,
Nice start on another 'Stang. I'll be following right along. I guess by the Korean war that every WW11 fighter was used in the fighter bomber roll. The Corsairs sure do look like the brethren of the F-51Ds.

Joel
mrockhill
_VISITCOMMUNITY
Pennsylvania, United States
Joined: June 17, 2009
KitMaker: 566 posts
AeroScale: 507 posts
Posted: Sunday, August 23, 2015 - 09:53 PM UTC
Thanks guys for the compliments and for tagging along on another mustang adventure!

Gary, building and painting the cockpits is my favorite part, always has been. I've finished waaay more pits than builds so I've had alot of practice. I think this will be another closed canopy build but I still do everything I can for practice and to try different techniques. This time I tried distressing the plywood floor using sponge bits to simulate chipping of the floor paint with mild success, to be tried again in the future!

Joel, unfortunately for the USAF their first choice, the P-47 couldnt be rounded up in sufficient quantities so the mustang filled the role. The corsair faired much better with its more rugged engine and lack of a vulnerable liquid cooling system. The USAF apparently has a long standing hatred of successful ground attack aircraft which continues to this day.
Joel_W
Staff MemberAssociate Editor
AUTOMODELER
_VISITCOMMUNITY
New York, United States
Joined: December 04, 2010
KitMaker: 11,666 posts
AeroScale: 7,410 posts
Posted: Monday, August 24, 2015 - 01:56 AM UTC
Mike,
To bad that Republic didn't start making A10 Thunderbolt 11s back then.
Joel
mrockhill
_VISITCOMMUNITY
Pennsylvania, United States
Joined: June 17, 2009
KitMaker: 566 posts
AeroScale: 507 posts
Posted: Wednesday, September 02, 2015 - 10:20 AM UTC
Decals have arrived! Now I feel like I have more of a direction with this build. Id committed to building a korean war aircraft and wanted something other than kit. It was pretty tough to find any qualifying decals in this scale that werent 30-40years old. After searching far and wide and almost buying a sweet SAAF sheet I found some KA models decals for RoKAF mustangs that really caught my eye. Ive chosen this one

The runners up were

I've never seen decals like these before. Supposedly you can, withe the same sheet, use them as regular old stickers, as water slide decals that we're all use to and also as dry transfers, a method thats Ive always been interested in trying.


Im not sure how but I do know people use to be thrown into lakes or burned at the stake for lesser feats of sorcery. And they were classy enough to make unique national insignia for each aircraft depicted, differing in minor details, which inspired some confidence. What was not to like!?

The decals have no provided history but from my reading I believe 2 of these invluding my choice were from project "Bout One" in the early days of the war. South korea had no real airforce when the war kicked off, all focus had been placed on building their ground forces. The RoKAF consisted only of under 2000 personnel with a couple dozen pilots, some L4s, some L5s and a few T6s. "Bout One" brought together american fighter bomber pilots from Jet squadrons based in japan, 10 F-51ds that had been target tugs for several years, and the most experienced korean pilots and placed them on the front line on 30 june 1950, only 5 days after the north invaded! The US pilots and ground crew were to be instructors and advisors but when it became obvious that the task was understandably over the heads of most of the student pilots the instructors began flying the bulk of the combat sorties. Eventually the koreans began flying effective combat missions as well as keeping the aging aircraft maintained. By the end of the war RoKAF was the only AF operating mustangs in combat.

A slightly different, american flown aircraft in the early desparate days of the war, an ideal subject
GazzaS
#424
_VISITCOMMUNITY
Queensland, Australia
Joined: April 23, 2015
KitMaker: 4,648 posts
AeroScale: 1,938 posts
Posted: Wednesday, September 02, 2015 - 01:06 PM UTC
Hey Mike,
Nice set of decals. They'll definitely look sweet on that NMF finish.

Gary

Edit: typos
Emeritus
_VISITCOMMUNITY
Uusimaa, Finland
Joined: March 30, 2004
KitMaker: 2,845 posts
AeroScale: 1,564 posts
Posted: Wednesday, September 02, 2015 - 09:13 PM UTC
Those are some very interesting looking decals! While I can understand how they can be used either like stickers or waterslide decals, I wonder how they work as dry transfers. I presume they'd have to have the printing on both sides then?

It's interesting how the instructions go with the waterslide method. I'd probably dip them in water and let them loosen from the sheet. Just peeling them off looks daunting, having always treated decals as something quite fragile and needing careful handling to avoid damaging them. How's the decal film like?
Joel_W
Staff MemberAssociate Editor
AUTOMODELER
_VISITCOMMUNITY
New York, United States
Joined: December 04, 2010
KitMaker: 11,666 posts
AeroScale: 7,410 posts
Posted: Wednesday, September 02, 2015 - 09:27 PM UTC
Mike,
Those decals are a 1st for me as I've never seen anything like them before, so I did a few Google searches, but came up with no relevant information.

I would assume that used as dry transfers would yield the thinnest decal and most likely the strongest bond Since the dry transfer seems to seat on top of a clear decal sheet.

Joel
mrockhill
_VISITCOMMUNITY
Pennsylvania, United States
Joined: June 17, 2009
KitMaker: 566 posts
AeroScale: 507 posts
Posted: Thursday, September 03, 2015 - 10:50 AM UTC
Joel, Im going to be using them as dry transfer but will be practicing with a couple spares. I may try one as a decal if practice goes well but they do look to have lots of thick carrier film. Will be interesting to see how well they can be trimmed or if they are magically much thinner and im just seeing the "sticker" portion.

I finished my instrument panel. I used the kit decal settled into place with micro sol and set. After it dried the instruments a brushing over of a tamiya smoke to kill the nuclear bright white and then gone over with thinned tamiya clear yellow to give it some life. Then I flat coated the panel and gave each dial a blob of micro kristal clear.

The decal got a little off but not horrible. It shouldnt standout especially if I close the canopy which I may end up doing depending on how much fidgeting around I have to do to get the canopy to sit right in the open position. Im not interested in much fidgeting on this build, just burning up residual P51 enthusiasm.
Joel_W
Staff MemberAssociate Editor
AUTOMODELER
_VISITCOMMUNITY
New York, United States
Joined: December 04, 2010
KitMaker: 11,666 posts
AeroScale: 7,410 posts
Posted: Friday, September 04, 2015 - 12:27 AM UTC
Mike,
The IP looks pretty good. Can't see how it would be an issue with the canopy open if you want to go that way.

Glad to hear that you're going to try the dry transfer method. If you never used them before, alignment is a critical factor, as you really can't move them around. Archer has a few videos on how use them. Back in the 70s they were the really popular for lettering so you didn't get any flash or silvering. alignment was a real issue for me. Eventually I tried I use to lay out lines with thin pcs of masking tape.

Joel
mrockhill
_VISITCOMMUNITY
Pennsylvania, United States
Joined: June 17, 2009
KitMaker: 566 posts
AeroScale: 507 posts
Posted: Saturday, November 14, 2015 - 06:03 AM UTC
Still signs of life on my F-51D build! Work has been crazy the last few months and hasnt let up. So I have to make time for building these days.
I finally finished my tamiya tape seat harness and im pretty happy with it

I hope to get the harness painted and the cockpit closed up by tomorrow night!
Joel_W
Staff MemberAssociate Editor
AUTOMODELER
_VISITCOMMUNITY
New York, United States
Joined: December 04, 2010
KitMaker: 11,666 posts
AeroScale: 7,410 posts
Posted: Saturday, November 14, 2015 - 08:26 PM UTC
Mike,
Those harnesses and seatbelts are 1st class even before one realizes that you made them from tape. How did you make those buckles
Joel
mrockhill
_VISITCOMMUNITY
Pennsylvania, United States
Joined: June 17, 2009
KitMaker: 566 posts
AeroScale: 507 posts
Posted: Friday, November 20, 2015 - 02:02 PM UTC
I managed to get the cockpit finished and the fuselage together at the beginning of this past week. Snapped a couple pics before closing it up.


As of today I've got the major construction complete and tomorrow Ill take care of sealing up any seams still showing. Then I need to start cleaning up the landing gear bits and get everything ready for some tamiya as12.
GazzaS
#424
_VISITCOMMUNITY
Queensland, Australia
Joined: April 23, 2015
KitMaker: 4,648 posts
AeroScale: 1,938 posts
Posted: Friday, November 20, 2015 - 03:19 PM UTC
Mike,
That looks way too good for 1/72. Very nice!
Joel_W
Staff MemberAssociate Editor
AUTOMODELER
_VISITCOMMUNITY
New York, United States
Joined: December 04, 2010
KitMaker: 11,666 posts
AeroScale: 7,410 posts
Posted: Friday, November 20, 2015 - 07:16 PM UTC
Mike,
The cockpit really looks quite good.

Do you decant the AS12, or use the rattle can?
Joel
mrockhill
_VISITCOMMUNITY
Pennsylvania, United States
Joined: June 17, 2009
KitMaker: 566 posts
AeroScale: 507 posts
Posted: Sunday, November 29, 2015 - 10:18 AM UTC
Joel, I appologize for not having responded to you here, I just figured out Id accidently hid your posts for I dont know how long!

So without further delay, Thanks for your compliments on my mustangs cockpit! And yes I decant the AS12 from the rattle can. Apparently it has a shelf life too as I have to clean out my jar from my P51b and decant a new batch.


Having got the major portions of the airframe together Ive been busy this weekend getting all the other small parts up to speed and ready for paint. Quite alot of it...okay pretty much everything, is getting AS12 for at least a base coat. Most was cleaning seams and ejector marks from landing gear bits but the exhausts got hollowed out as well with only 1 minor slip!

Some extra attention was given to the ordnance. I used my dremel with a cutting bit to add some often seen dents to my napalm tanks. These areas were then smoothed out with 0000 steel wool.

I assembled the HVARs and while I declined to thin out the fins, I used a pin to add exhaust ports to the ends of the rockets. The tamiya rockets have an odd band around where the warhead meets the body. I ran my exacto around the rear of the band to leave a realistic join and then sanded the bands off, much better looking!

Lastly, I botched the canopy, which im not too upset about. Tamiyas multi part approach to the bubble canopy is over complex and requires a bit of work to make presentable or even sit right if posed open. I had cut the locating tab and was polishing the frame smooth to reduce the visibility of the thick canopy edge, especially at the rear. Anyhow it got away from me. So with a smile I ordered up some vac formed replacement canopies for a hasegawa kit. On these the frame will be integral to the canopy eliminating that goofy seam. The much improved scale thickness is welcome and with the thinner frame it should look better when posed open. All I need to do is fab up suport brace, possibly salvage the tamiya frame.
Kilo_Uniform
_VISITCOMMUNITY
Gauteng, South Africa
Joined: July 03, 2015
KitMaker: 280 posts
AeroScale: 141 posts
Posted: Sunday, November 29, 2015 - 10:37 AM UTC
Hi Mike

Excellent work on one of my all-time favourite aircraft - and in 1/72 scale as well!!

Just some questions about decanting the AS12 from the rattle can - how do you do it without making a mess? What do you decant the paint into? Can the decanted paint be used without any hassle?

Thanks in advance.
Kobus
GazzaS
#424
_VISITCOMMUNITY
Queensland, Australia
Joined: April 23, 2015
KitMaker: 4,648 posts
AeroScale: 1,938 posts
Posted: Sunday, November 29, 2015 - 10:40 AM UTC
Mike,
Nice idea for the napalm tanks. I reckon it would be alright for any metal tank, as they were reused quite often.

Just looking at your fingers holding those 1/72 scale stacks makes my eyes hurt!

Gary
Joel_W
Staff MemberAssociate Editor
AUTOMODELER
_VISITCOMMUNITY
New York, United States
Joined: December 04, 2010
KitMaker: 11,666 posts
AeroScale: 7,410 posts
Posted: Sunday, November 29, 2015 - 07:51 PM UTC
Mike,
No big deal with misplacing my posts. My wife often wishes she could do the same with me

I know more then a few guys that decant Tamiya paint as it's lacquer. Thinned 50/50 with their lacquer thinner, it air brushes incrediable well, and lays down as smooth as silk.

The few times I decanted any paint, I've done it in the garage over newspaper and wore gloves. I tape a straw cut in half that bends, and tape it as best as I can to the nozzle. Then using a small jar about the size of a baby food jar, I tape the top of the jar, poke a hole for the straw, and depress the nozzle. No real messes, but then you need to degas the paint over the next several hours.

Those exhaust headers look great. Same for scribing of the rocket tips. It's touches like that which really makes your builds so special.

Joel

Kilo_Uniform
_VISITCOMMUNITY
Gauteng, South Africa
Joined: July 03, 2015
KitMaker: 280 posts
AeroScale: 141 posts
Posted: Sunday, November 29, 2015 - 07:59 PM UTC
Hi Joel

Thank you for the feedback on decanting the rattle can paint. Just one (or 2) more question(s) - do you shake the rattle can as if you were going to spray with it before you decant? Isn't the pressure of the paint in the rattle can too great for a seal over a bottle such as a baby food one?

Regards (and thanks in advance),
Kobus
spaarndammer
_VISITCOMMUNITY
Noord-Holland, Netherlands
Joined: January 28, 2007
KitMaker: 1,945 posts
AeroScale: 388 posts
Posted: Sunday, November 29, 2015 - 11:57 PM UTC
Great job on this Mustang in my favorite scale. I am following this with interest. Nice choice of decals.

Was the instrument panel decal one piece? Though you write it got a bit off, it looks pretty good to me. It sits pretty well on the dials. Did you had to use lots of set and sol?


Jelger
mrockhill
_VISITCOMMUNITY
Pennsylvania, United States
Joined: June 17, 2009
KitMaker: 566 posts
AeroScale: 507 posts
Posted: Monday, November 30, 2015 - 01:40 AM UTC
Thanks for checking out my F-51 build guys! Im glad to have this build underway again and I've greatly enjoyed learning about the use of Mustangs by all the UN forces in korea.

Gary, Thanks for your compliments, they make my eyes hurt too and occasionally go crossed. Usually my issue is my hands cramping but I probably just need to drink more.....err... water

Joel, Thanks for your compliments! Those excess bands tamiya placed on the rockets drove me nuts, they had to go! I like my ordnance so they need to look right.

Kobus, Thanks for stopping in and sharing some mustang love! Joel outlined decanting already, and nicely at that! To answer your last questions... yes,do shake the can well before decanting. And No, its actually quite uneventful and can probably be done without anything covering the jar, but its a really good idea. Just be easy on the trigger till you get the feel. Then allow to off gas for several hours. It will last in jar for a couple weeks at most and will require more thinning as times goes by. Ive been able to airbrush it unthinned but it best to test because as I mentioned it gets thicker with time.

Jelger, Thank you for the compliments! Im hoping these decals work out, they are definitely unusual. The instrument panel was single decal, which I should have cut into 2 or 3 pieces. I was just lazy on this one, but as you noticed its not very noticeable.

My enthusiasm for my subject got a big boost when a fellower modeller shared this period photo of my F-51 
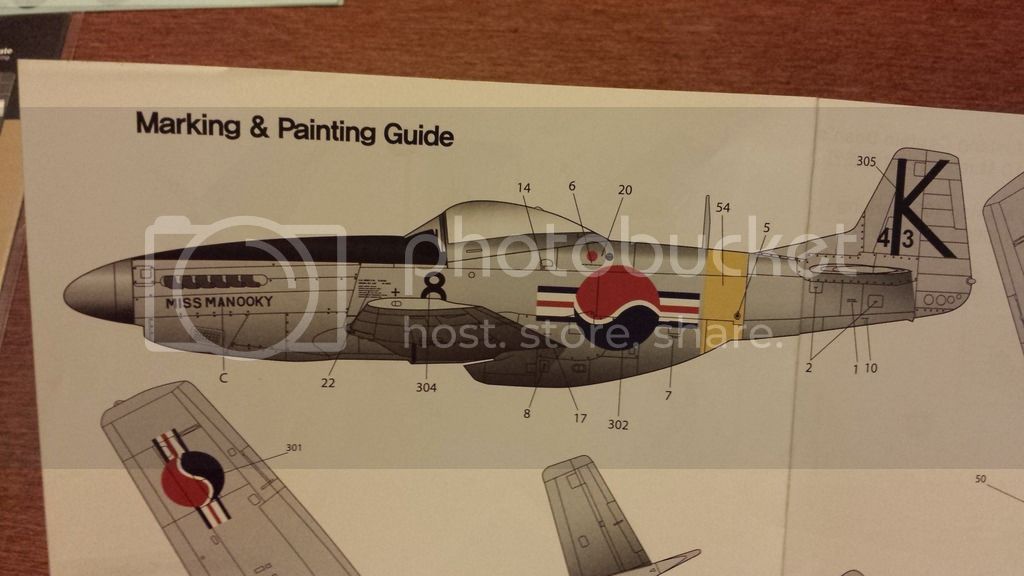
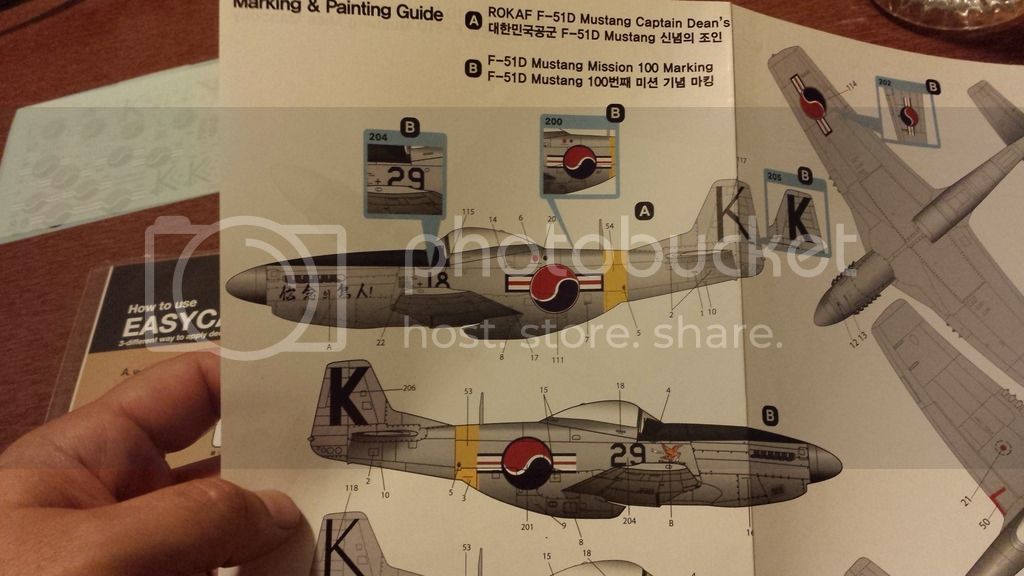
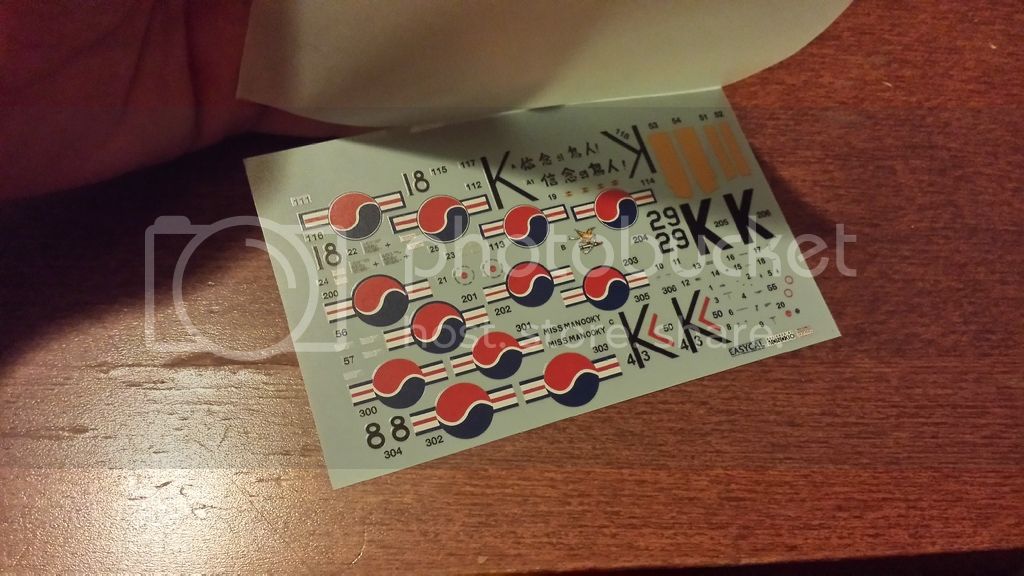
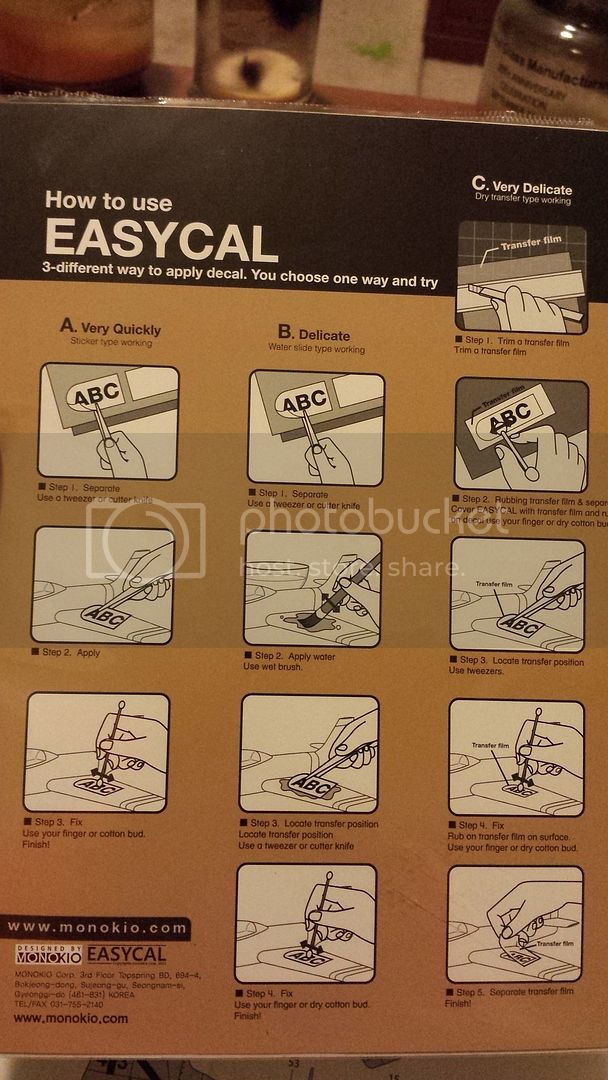
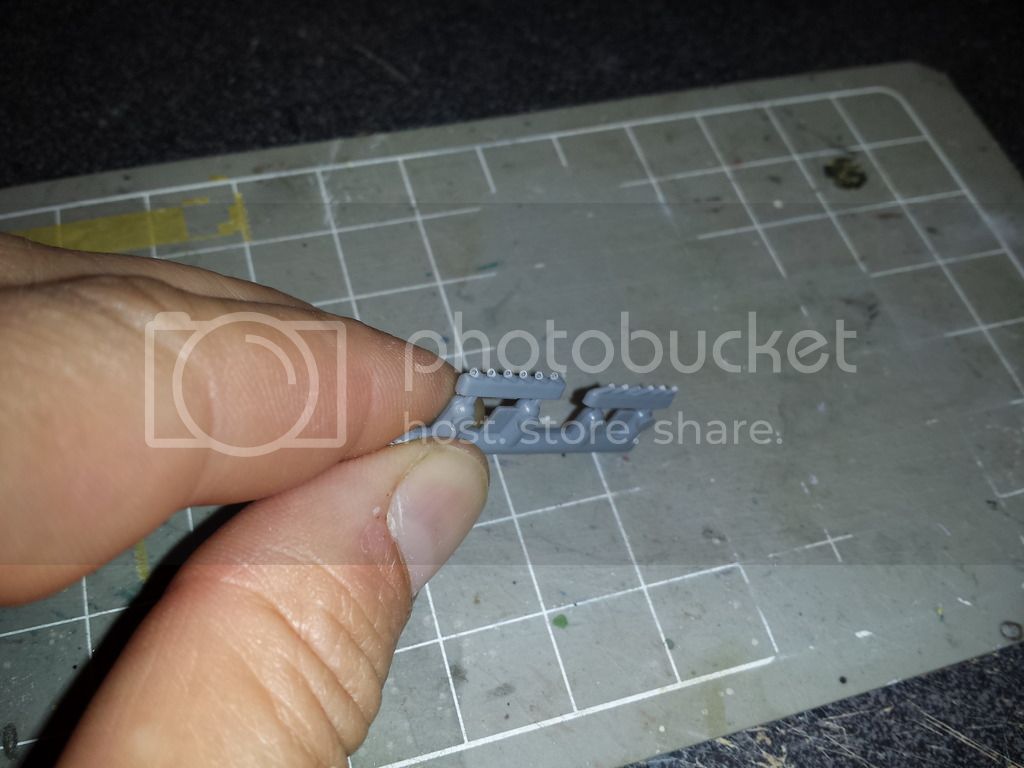
much more interesting than the decal directions show!!!
Kilo_Uniform
_VISITCOMMUNITY
Gauteng, South Africa
Joined: July 03, 2015
KitMaker: 280 posts
AeroScale: 141 posts
Posted: Monday, November 30, 2015 - 10:17 AM UTC
Hi Mike

Thank you for clarifying.

Keep up the good work! Looking forward to seeing her finished.

Regards,
Kobus
Joel_W
Staff MemberAssociate Editor
AUTOMODELER
_VISITCOMMUNITY
New York, United States
Joined: December 04, 2010
KitMaker: 11,666 posts
AeroScale: 7,410 posts
Posted: Monday, November 30, 2015 - 09:18 PM UTC

Quoted Text

Hi Joel

Thank you for the feedback on decanting the rattle can paint. Just one (or 2) more question(s) - do you shake the rattle can as if you were going to spray with it before you decant? Isn't the pressure of the paint in the rattle can too great for a seal over a bottle such as a baby food one?

Regards (and thanks in advance),
Kobus


Kobus,
I've only done the decanting a few times. And yes, you need to shake the can well, or you will get an uneven mix of paint, and mostly propellant. The paint will run some what run up the sides of the jar, but not uncontrollably. That's why you need to tape it good. But it settles down to the bottom. Just decant want you need plus a little more. And still remember that you have to thin it for air brushing.

Joel
 _GOTOTOP