_GOTOBOTTOM
World War II
Discuss WWII and the era directly before and after the war from 1935-1949.
Hosted by Rowan Baylis
Two Gustavs in 1/48
GazzaS
#424
_VISITCOMMUNITY
Queensland, Australia
Joined: April 23, 2015
KitMaker: 4,648 posts
AeroScale: 1,938 posts
Posted: Wednesday, August 26, 2015 - 01:04 PM UTC
Hi Everyone!
I've acquired two 109G6's and will blog a little as I build them. I don't have much skill or modelling experience, but learn a bit more with every thread I read and every lesson I apply.
My two kits are both supplied with decals to dress them up as either Hartmann's Black Tulip (actually buildable as either a G6 or G14) and Graf's Red Tulip. I'm not too fond of either scheme, and tend to prefer markings that are less ostentatious and flown by less well known pilots.
Hartmann's plane is supplied by Hasegawa. It comes with a large decal sheet with all of the stencils. Graf's 109 has a more basic decal set and is built by KA models.
The Hasegawa kit is already underway.

I've done some preshading.

The cockpit from above and behind. Me and my airbrush weren't getting on so well. I ended up stripping it down as much as I could and giving it a thorough cleaning.

Only my second set of seatbelts! They'r made of aluminum foil painted a shade of buff that may be a bit too dark. I left areas bare to simulate buckles. I imagine that once closed-up, very little will be visible. Maybe by the time I use an Erla canopy my skills will have improved.
This weekend I picked up some Kagero Profile books for the 109. Each book provides decal sets in three scales for each of the eight depicted aircraft.

Pardon the glare...this is a G6/R6 in a Reichvertiedigung scheme.

This is an aircraft deployed at Sicily prior to Husky.
Being the largest production variant, the G6 can be found with many personal markings, front markings, unit markings, and loadouts.
The KA Models offering has the option for Werfer Granate 21 mortar launchers to be fitted. I just can't make myself use that much red!
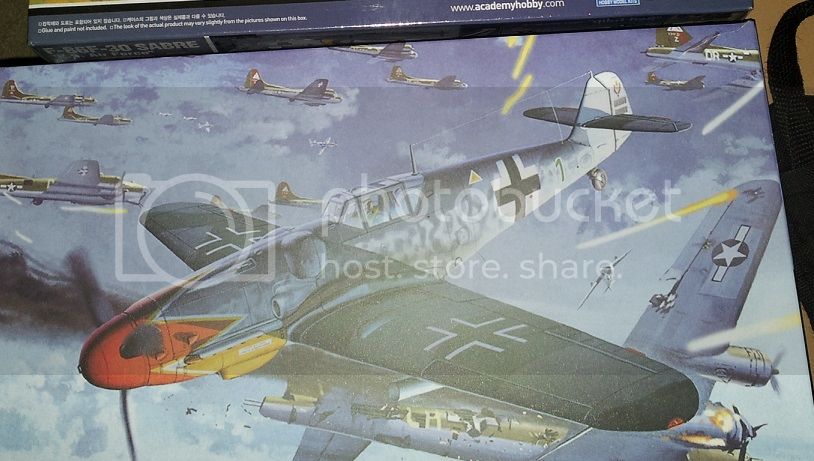

If you have questions or comments, please feel free to share. If you have 109 info, I'm always wanting to learn more.

Thank you for looking,

Gary


SGTJKJ
#041
_VISITCOMMUNITY
Kobenhavn, Denmark
Joined: July 20, 2006
KitMaker: 10,069 posts
AeroScale: 3,788 posts
Posted: Wednesday, August 26, 2015 - 04:33 PM UTC
Very cool choices, Gary. I actually love the tulip decals. I will drop you a PM

Looking forward to see more
Joel_W
Staff MemberAssociate Editor
AUTOMODELER
_VISITCOMMUNITY
New York, United States
Joined: December 04, 2010
KitMaker: 11,666 posts
AeroScale: 7,410 posts
Posted: Thursday, August 27, 2015 - 10:53 PM UTC
Gary,
Looking forward to following your double build blog. 2nd effort on pre-shading really looks so much better.

Joel
BlackWidow
_VISITCOMMUNITY
European Union
Joined: August 09, 2009
KitMaker: 1,732 posts
AeroScale: 1,336 posts
Posted: Friday, August 28, 2015 - 12:29 AM UTC
Gary, I've locked in. Hartmann is still very famous over here, Graf not so much. Did you know, that Hartmann later had also "his" black tulip on his personal Canadair Sabre in his Bundesluftwaffe time in the 1950s? In fact, the whole wing of JG 71 was painted with those tulips.
One of my plans for 2016 is a triple build of 109's flown by Gerd Barkhorn, so maybe I can learn something in you blog. What scale are the kits? 1/72 or 1/48?

Happy modelling!
Torsten
GazzaS
#424
_VISITCOMMUNITY
Queensland, Australia
Joined: April 23, 2015
KitMaker: 4,648 posts
AeroScale: 1,938 posts
Posted: Friday, August 28, 2015 - 12:29 PM UTC
Hello Friends,
Thank you for your replies and kind words!

@ Jesper, I've replied to your last PM

@ Joel, with your last two builds, you've set forth some excellent examples for me to follow. Hopefully some improvement will show.

@ Torsten, Thank you for the information about Hartmann, his personal F-86, and JG-71. Glad to have you along!

Today's update:
Because I've not wanted to pay high paint prices, I've been struggling to learn how to make artist acrylics act like model paint. Google and U-tube gave me enough answers to put it to work in the last couple of days. All of the paint you will see today was squeezed from a tube, and mixed to approximate RLM colors.


Because this will be a Mediterranean aircraft, she awaits white underside wingtips and the white fuselage band. I like the way the pre-shading shows through.


I applied the RLM75 to the top surfaces after masking. I used masking tape for the splinter scheme and photo frisket for the wing leading edges.

I'm also working on the propeller spinner. Just my luck that of the three schemes I'd narrowed this build down to, one had a white spinner, and two had tight linear spirals with only 1mm wide alternating bands of white and black. I made this decal in hopes that it will take me to an acceptable solution.

It's proving very difficult!
The kit comes with two white and one yellow spirals, but they are the more well-known broader type.

This is the dorsal view of my Regensburg-built 109. Each of the three main 109 factories (Erla, Regensburg, and Weiner-Neustadt) applied the 74/75/76 camoflage in patterns that allow them to be distinguished from eachother.

A forward view:

I used liquid mask on the canopy. Acrylic paint is easier to remove with a toothpick than applying masking tape to perfection.
Starboard side:

Regensburg 109's were notabel for the scalloped edges around the camoflage scheme as well as how far it came down the sides of the fuselage. Another noteworthy identifier is that the side mottling (not yet applied, here) is applied in diagonal streaks.

Thank you for looking,

Gary
mrockhill
_VISITCOMMUNITY
Pennsylvania, United States
Joined: June 17, 2009
KitMaker: 566 posts
AeroScale: 507 posts
Posted: Saturday, August 29, 2015 - 06:14 AM UTC
Gary youre well on your way to a beautiful pair of 109s! It looks to me that youve done well working with your available paint, itll be fun watching you bring it together.... no pressure

I really like those kagero top color series, unfortunately they lead to excuses for more kits in the stash!
GazzaS
#424
_VISITCOMMUNITY
Queensland, Australia
Joined: April 23, 2015
KitMaker: 4,648 posts
AeroScale: 1,938 posts
Posted: Saturday, August 29, 2015 - 07:06 AM UTC
Hi Mike,
And thank you! I hear what you're saying about those Kagero books. Because of the included decal sets and detail available I feel like I should find a way to use all of them available in my chosen scale of 1/48. But that would be mad...or would it?

Small update today. I finished the camouflage scheme, theatre bands, and the spinner though I'm not completely satisfied with the spinner. I've given up on trying for the 1mm white/black and found a midway point.

I ended up partitioning some 3mm Tamiya tape into 1mm bands, cutting and sticking as I worked my way down from the firing aperture to the base of the spinner. I may strip it and try later, or just leave it as my lesson for the next one. There's no shortage of 109's out there.

Ventral side nothing much new here except the wingtips and fuselage band.

I'll stop here to take a few minutes and tell you what I think of the kit. I found the parts well molded and without much flash. External details like access ports to lubricate pulleys to control surfaces are clearly molded.

I only used putty on a few areas. Wing leading edges, leading edge of rudder, and the big joint between lower wing and aft fuselage all needed fine rivulets.

The kit itself is a combination of sprues from other versions and one large sprue that is marked for that kit only. For instance, the wing sprue is marked: Bf109F/K. It requires the rounded wheel wells be made square and a new panel line inscribed on the upper surface.

And I have no real qualms with that until it clashes with my own reality.
For instance, the hallmark of the G6 is it's bulges. In historical construction, the forward nacelle bulges were machined out of the same piece that covered the engine. No seams. The rear part of the bulge was it's own separate piece attached to the fuselage. Likewise the wheel bulges were machined into the same sheet that covered the upper wing. Again, no seams.
The bulges for this kit are all separate pieces, and a little big to my eyes. A bit of very gingerly sanding, some very thin putty, and I got to a semi-acceptable result though I doubt my new shapes are perfect. I have digital calipers, but don't use them in situations where I find their accuracy will spoil my enthusiasm for modelling.

This is my second Hasegawa kit in 1/48 scale, and overall, I'm impressed with their quality. In both, the decal sheets are very comprehensive, and the instructions easy to read and completely useful.

Thank you for reading!

Gary
Joel_W
Staff MemberAssociate Editor
AUTOMODELER
_VISITCOMMUNITY
New York, United States
Joined: December 04, 2010
KitMaker: 11,666 posts
AeroScale: 7,410 posts
Posted: Saturday, August 29, 2015 - 08:30 PM UTC
Gary,
Nice job on the overall camo splinter paint scheme. It really looks quite well done to me. What I'm really impressed with is how you've used artist tube oils in the proper colors for air brushing. I'm assuming that you had to mix all your own colors. Very well done.

Joel
BlackWidow
_VISITCOMMUNITY
European Union
Joined: August 09, 2009
KitMaker: 1,732 posts
AeroScale: 1,336 posts
Posted: Saturday, August 29, 2015 - 08:58 PM UTC

Quoted Text

.... I finished the camouflage scheme, theatre bands, and the spinner though I'm not completely satisfied with the spinner. I've given up on trying for the 1mm white/black and found a midway point ....

Gary


Gary, nice progress so far! As for the spinner spirals, they are also never my friend. If I use the decals, they never do what they should do and if I paint the spiral it most likely looks unsatisfactory. Some months ago I bought a sheet of spiral masks from Eduard. They are in different sizes, shapes and thickness. I guess they are for all kind of Luftwaffe aircrafts, especially Bf 109 and Fw 190. You might try them with your next build. The number is EX 500. I can try to make a photo of the instructions and post it here, if you like.

Torsten
berndm
_VISITCOMMUNITY
Niedersachsen, Germany
Joined: March 26, 2014
KitMaker: 844 posts
AeroScale: 630 posts
Posted: Saturday, August 29, 2015 - 10:29 PM UTC
Fine looking Messerschmitts ! Hasegawas 1/48 kits are for most very nice and well detailed kits.
Your paint works looks excellent so far.
GazzaS
#424
_VISITCOMMUNITY
Queensland, Australia
Joined: April 23, 2015
KitMaker: 4,648 posts
AeroScale: 1,938 posts
Posted: Sunday, August 30, 2015 - 10:40 AM UTC
Hi Everyone!
Just a small update after I answer the above posts:

@ Joel, Thank you. I'm actually using artist acrylics, but the principle is the same and clean-up doesn't have as many noxious smells. I'm glad you like my improved paintwork. I've learned a lot recently, mostly from reading these forums.

@ Torsten, Thank you for directing me to the Eduard masks. I certainly will try them. I think I will have to do the spinner all over again, I can't live with it.

@ Bernd, thank you for your compliments! I'm glad you stopped in.

After my last post, I decided that I would put some brake lines on the landing gear.


I used .2mm copper wire and aluminum foil around the exposed oleo strut. The gear are dry-fitted at the moment just for the picture. Once decals and weathering is done, I'll add the fragile pieces, and tuck in the brake lines. I will have to remove those injector marks in the wheel.

Thank you for looking!

Gary

Edit: content
Joel_W
Staff MemberAssociate Editor
AUTOMODELER
_VISITCOMMUNITY
New York, United States
Joined: December 04, 2010
KitMaker: 11,666 posts
AeroScale: 7,410 posts
Posted: Sunday, August 30, 2015 - 07:56 PM UTC
Gary,
your brake lines look great. I've never tried using Al foil for the oleos. It has to be quicker then going through the full Alcad process.
Joel
berndm
_VISITCOMMUNITY
Niedersachsen, Germany
Joined: March 26, 2014
KitMaker: 844 posts
AeroScale: 630 posts
Posted: Sunday, August 30, 2015 - 11:12 PM UTC
Hi Gary, some self made add ons like break lines are a nice touch, looking good !
Your wheels have faced some muddy airstrips, also very nice.

On my LW aircrafts, i spray and mask my propeller spirals, a hit and miss thing, after all...
GazzaS
#424
_VISITCOMMUNITY
Queensland, Australia
Joined: April 23, 2015
KitMaker: 4,648 posts
AeroScale: 1,938 posts
Posted: Sunday, August 30, 2015 - 11:15 PM UTC
Hi Joel,
The microsol glue for foil is pressure activated, so the process is:
Paint the back of the foil, give a few minutes to dry.

Cut close to size.

Burnish it on with a toothpick.

Then trim off the excess.

I'm pretty sure I spent less than five minutes doing it.

Gary
GazzaS
#424
_VISITCOMMUNITY
Queensland, Australia
Joined: April 23, 2015
KitMaker: 4,648 posts
AeroScale: 1,938 posts
Posted: Sunday, August 30, 2015 - 11:19 PM UTC
Hi Bernd,
Thank you very much! I'm still working on getting wheel wheathering to a believable state.

Gary
berndm
_VISITCOMMUNITY
Niedersachsen, Germany
Joined: March 26, 2014
KitMaker: 844 posts
AeroScale: 630 posts
Posted: Sunday, August 30, 2015 - 11:26 PM UTC

Quoted Text

Hi Bernd,
Thank you very much! I'm still working on getting wheel wheathering to a believable state.

Gary


Gary, wheels on muddy airstrips look like yours, for the Graf aircraft, i would go for a more subtle weathering.
Modelling is just a hobby, so its up to the builder, how much dirt is right.
Keep up the good work !
Joel_W
Staff MemberAssociate Editor
AUTOMODELER
_VISITCOMMUNITY
New York, United States
Joined: December 04, 2010
KitMaker: 11,666 posts
AeroScale: 7,410 posts
Posted: Monday, August 31, 2015 - 12:06 AM UTC

Quoted Text

Hi Joel,
The microsol glue for foil is pressure activated, so the process is:
Paint the back of the foil, give a few minutes to dry.

Cut close to size.

Burnish it on with a toothpick.

Then trim off the excess.

I'm pretty sure I spent less than five minutes doing it.

Gary


Gary,
It takes me more then that just to get my AB ready for the 1st coat of black gloss base. Going to give it a try. There is some product out there which I think is called Bare Metal Foil. Might see about that as well.
Joel
GazzaS
#424
_VISITCOMMUNITY
Queensland, Australia
Joined: April 23, 2015
KitMaker: 4,648 posts
AeroScale: 1,938 posts
Posted: Monday, August 31, 2015 - 10:15 AM UTC
Hi Joel,
I know from recent experience how much time that can be taken by airbrush prep and cleaning. Ive yet to try Bare Metal Foil. Ive heard of some people using it for canopy masking as well. I went with separate glue and foil for cost saving. At the time, I figured with my inexperience, I didn't want to ruin expensive sheeting.

Best of luck,

Gary
mrockhill
_VISITCOMMUNITY
Pennsylvania, United States
Joined: June 17, 2009
KitMaker: 566 posts
AeroScale: 507 posts
Posted: Monday, August 31, 2015 - 05:31 PM UTC
Ive used bare metal foil for landing gear oleos on my last couple builds. I'm still ironing out details mostly around keeping the pieces in place. The glue being somewhat weak I think it works better in larger pieces. I have regular aluminum BMF and superchrome sheets. The superchrome isnt the chromiest (pretty sure thats not a word)more like polished stainless but I think it can do the job. Now whether it can yield better results than a more painstaking alclad paint job, I have my doubts but it is certainly quicker.
Joel_W
Staff MemberAssociate Editor
AUTOMODELER
_VISITCOMMUNITY
New York, United States
Joined: December 04, 2010
KitMaker: 11,666 posts
AeroScale: 7,410 posts
Posted: Monday, August 31, 2015 - 07:22 PM UTC

Quoted Text

Ive used bare metal foil for landing gear oleos on my last couple builds. I'm still ironing out details mostly around keeping the pieces in place. The glue being somewhat weak I think it works better in larger pieces. I have regular aluminum BMF and superchrome sheets. The superchrome isnt the chromiest (pretty sure thats not a word)more like polished stainless but I think it can do the job. Now whether it can yield better results than a more painstaking alclad paint job, I have my doubts but it is certainly quicker.


Mike,
Interesting that you had issues with the BMF sticking. From what I've read on various boards the stuff is really thin, and prone to wrinkles. I think that Gary's method of regular foil and Micro glue might be an easier way to go.

So far all I've ever used for Oleos is at 1st Testors Silver paint, now it's been Alcads. But the process of primer, polish, then a black Gloss, then polish, then the Alcad Stainless Steel ( I opted not to use Chrome as it's just too shiny ), takes two days. Of course I could just skip the gray primer, and go straight to the Gloss Black base, just not to sure how well it will stick to the plastic as I have to mask the Oleos to paint and weather the struts.

Joel
GazzaS
#424
_VISITCOMMUNITY
Queensland, Australia
Joined: April 23, 2015
KitMaker: 4,648 posts
AeroScale: 1,938 posts
Posted: Monday, August 31, 2015 - 11:12 PM UTC
Hi guys,
When I took the plunge into foil and models, I used my information from this link:
http://www.finescale.com/~/media/import/files/pdf/6/7/d/foiledlightning1.pdf

For an outlay of 8 bucks I have enough material to do the Jug I built a while ago and possibly 3 or 4 more. Because the glue is pressure activated you don't end up with contact-cement like accidents. And because it's so inexpensive, errors are a lot easier to fix without hurting the frugal part of your conscience.

Just don't go pinching your wife's Reynolds wrap. You want the cheapest, thinnest foil you might find at a dollar store. The stuff I used was made in The People's Republic using the brand name Brawny....lol.

Best Wishes,

Gary
Joel_W
Staff MemberAssociate Editor
AUTOMODELER
_VISITCOMMUNITY
New York, United States
Joined: December 04, 2010
KitMaker: 11,666 posts
AeroScale: 7,410 posts
Posted: Tuesday, September 01, 2015 - 03:06 AM UTC
Gary,
Thanks for that link. Will be looking for some cheap foil at the dollar stores.
Joel
matrixone
_VISITCOMMUNITY
Oregon, United States
Joined: February 07, 2004
KitMaker: 869 posts
AeroScale: 862 posts
Posted: Tuesday, September 01, 2015 - 05:56 AM UTC
Nice job on the 109's and am looking forward to seeing more of them.

Matrixone
GazzaS
#424
_VISITCOMMUNITY
Queensland, Australia
Joined: April 23, 2015
KitMaker: 4,648 posts
AeroScale: 1,938 posts
Posted: Tuesday, September 01, 2015 - 10:18 AM UTC
Hey Les,
Thank you! I'm held up at the spnner, currently. I don't want to proceed until i can master the tight spiral that goes with the scheme I'm working with.

Gary
matrixone
_VISITCOMMUNITY
Oregon, United States
Joined: February 07, 2004
KitMaker: 869 posts
AeroScale: 862 posts
Posted: Tuesday, September 01, 2015 - 11:12 PM UTC
Gary,
I have found its easier to hand paint the spinner spirals if they are the thin tight spirals.
The key is to use a liner brush that has long thin bristles, start at the tip of the spinner and work your way towards the rear...be sure to mount the spinner on a round toothpick so you can slowly rotate the spinner as you are painting on the spiral.


Les
 _GOTOTOP