Italeri 1/72 SM.81 Pipistrello

#305
Christchurch, New Zealand
Joined: February 01, 2006
KitMaker: 1,673 posts
AeroScale: 1,517 posts
Posted: Friday, November 20, 2015 - 02:57 AM UTC
@Joel: Yes I actually found a colour photo of a SM.81 on the Russian front and it had a splotch camo job! I've started with the green and I'll move onto the brown next.
@Matt: Nice to see you here Matt. Yes the Italian camouflage paint jobs are some of the most colourful and hardest to achieve. It's not like anyone will will produce this bird in 1/48th now is there? Is there????
Anyway I've made a start and it may be a mite to busy in places but I'll just keep plodding away at it.


Joel_W
 Associate Editor
New York, United States
Joined: December 04, 2010
KitMaker: 11,666 posts
AeroScale: 7,410 posts
Posted: Friday, November 20, 2015 - 07:02 PM UTC
Chris,
What an outstanding start to your paint job. I'm sure that's about how they actually did them.
Joel
On my Workbench:
Monogram 1/24 scale 427 Shelby Cobra
Just Completed:
Beemax 1/24 scale BMW M3 E30 1992 Evolution II
Nordrhein-Westfalen, Germany
Joined: March 22, 2015
KitMaker: 671 posts
AeroScale: 614 posts
Posted: Friday, November 20, 2015 - 07:17 PM UTC
Cheers Chris

,
You got a steady hand! Very fine lines on Your bird! Which pressure did You use to spray it?
Oliver

On the desk: Probably a Panzer III.

#305
Christchurch, New Zealand
Joined: February 01, 2006
KitMaker: 1,673 posts
AeroScale: 1,517 posts
Posted: Saturday, November 21, 2015 - 12:53 AM UTC
Thanks Joel I appreciate your confidence in my abilities! It has been a learning curve that's for sure.

Oliver thanks it was an interesting effort. As to spraying pressure it was around 7 or 8 psi and the paint was quite thin as per Joel's recommendations. Anything more then that and it spidered quite badly. But the control valve on my compressor (a 30ltr tank home handyman type not one specifically for an airbrush) isn't really capable of very fine adjustments so it took some trial and error to get the pressure set.
Okay folks watch this space brown to come. Just squiggles here and there not a solid pattern like the green, just a counterpoint to break up the pattern I guess.

#305
Christchurch, New Zealand
Joined: February 01, 2006
KitMaker: 1,673 posts
AeroScale: 1,517 posts
Posted: Saturday, November 21, 2015 - 07:11 AM UTC

#424
Queensland, Australia
Joined: April 23, 2015
KitMaker: 4,648 posts
AeroScale: 1,938 posts
Posted: Saturday, November 21, 2015 - 08:43 AM UTC
Hi Chris,
I fear that once you weather and clearcoat, your second brown will disappear against the base color. I was expecting the color to be closer to chocolate brown. On my screen, your newest color looks like caramel.
Gary
"Artillery adds dignity, to what would otherwise be an ugly brawl."
Frederick The Great

#305
Christchurch, New Zealand
Joined: February 01, 2006
KitMaker: 1,673 posts
AeroScale: 1,517 posts
Posted: Saturday, November 21, 2015 - 09:39 AM UTC
Hi Gary it's a very good match for the FS number that's quoted for the colour and from what I could tell from the other colour schemes the two colours are very close with the second being more of a milk chocolate shade. It may disappear but I'll take that chance and see where it goes.
Joel_W
 Associate Editor
New York, United States
Joined: December 04, 2010
KitMaker: 11,666 posts
AeroScale: 7,410 posts
Posted: Saturday, November 21, 2015 - 08:28 PM UTC
Chris,
I'm really impressed with the overall look of that camo scheme.
If your regulator doesn't have the minute adjustments needed, you can either change the regulator, or just add the 2nd one to it, which is the preferred way to go, as the open pressure from the tank could be more then the gauge can handle.
Joel
On my Workbench:
Monogram 1/24 scale 427 Shelby Cobra
Just Completed:
Beemax 1/24 scale BMW M3 E30 1992 Evolution II

#305
Christchurch, New Zealand
Joined: February 01, 2006
KitMaker: 1,673 posts
AeroScale: 1,517 posts
Posted: Monday, November 23, 2015 - 01:34 PM UTC
Thanks Joel I appreciate the vote of confidence. Yes I had thought of doing that Joel but it's an expense that will have to wait for now.
Alabama, United States
Joined: June 17, 2014
KitMaker: 121 posts
AeroScale: 118 posts
Posted: Monday, November 23, 2015 - 11:06 PM UTC
Chris,
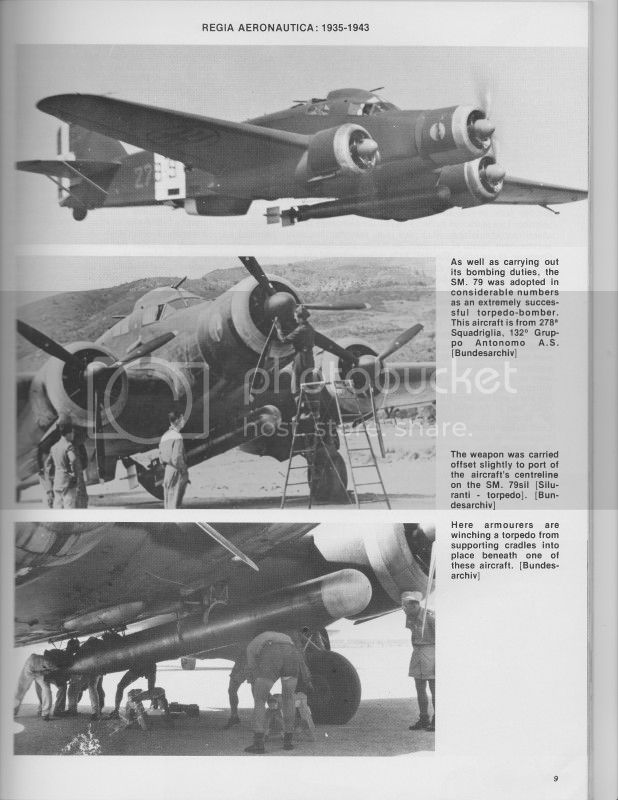
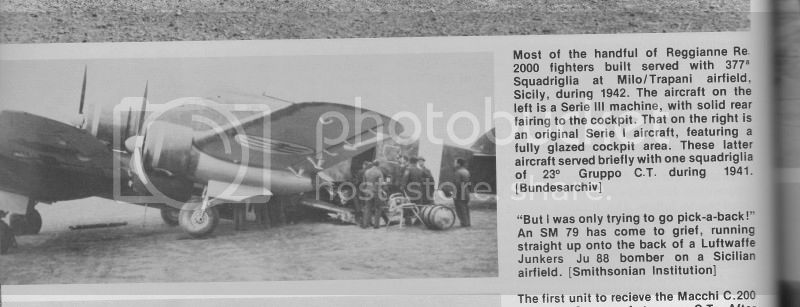
An excellent rendition of a difficult subject, both as the model (based on the old super model kit), and the original aircraft (anything with an Italian camo scheme). In looking at your progress shots I noticed it looked to me like your top/underside paint schemes seemed to meet in the middle of the wing leading edge. That got me to thinking that I remembered reading someplace that on Italian aircraft the top scheme was carried over the leading edge. I then got motivated enough to go down to the dungeon and dig through the tomes of ancient knowledge and came up with these shots:

Trying to get a good shot of the underside of an aircraft is something of a challenge.

Apparently an SM79 trying to mate with a Ju88 (a JM84?)

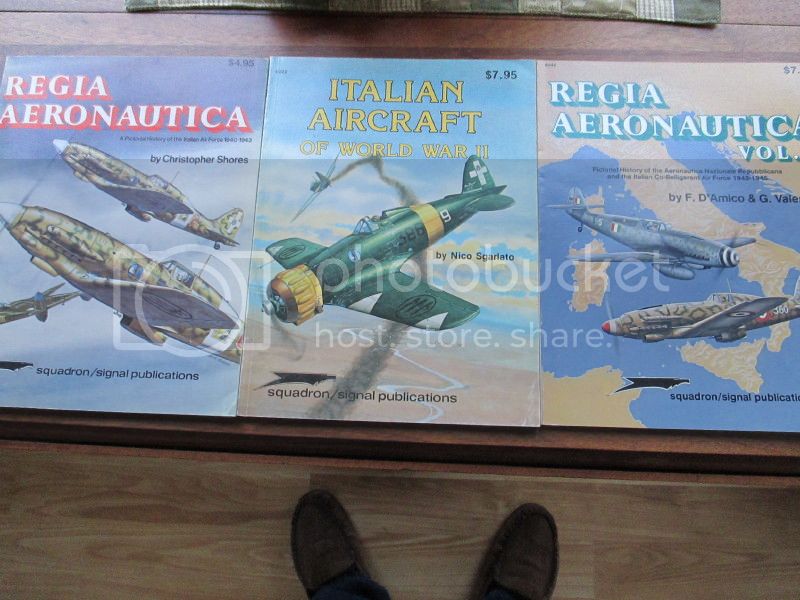
There does seem to be quite a bit of variance on how much overlap the top scheme was wrapped over the leading edge, but in almost every instance the top was carried over the leading edges. This whole topic is added just as an aside for general consumption and info, and is certainly not finding any fault with what is an excellent build of a difficult subject. And as a final note, credit where credit is due:

I'm surely looking forward to the next step.
Carry on.

#305
Christchurch, New Zealand
Joined: February 01, 2006
KitMaker: 1,673 posts
AeroScale: 1,517 posts
Posted: Monday, November 23, 2015 - 11:42 PM UTC
Thanks for the info Thearmorer, I'm aware of the wrap around but the information provided with the kit doesn't call for it. I also must admit that I have little in the way of reference material where this particular aircraft is concerned. In this particular instance I'll trust that Italeri have got it correct. There is little in the way of information on the Web regarding this particular scheme so who's to say that Italeri got it wrong?
And your information is very welcome in any of my builds. The open sharing of information and the discussion that ensues is always enjoyable. And there have been many times when an error has been missed by the modeller but has been seen by one of his fellows. Case in point being the HobbyBoss Bv141 I wasn't even aware that the propeller was wrong, HobbyBoss had it spinning the wrong way!

#305
Christchurch, New Zealand
Joined: February 01, 2006
KitMaker: 1,673 posts
AeroScale: 1,517 posts
Posted: Sunday, November 29, 2015 - 12:48 AM UTC

#424
Queensland, Australia
Joined: April 23, 2015
KitMaker: 4,648 posts
AeroScale: 1,938 posts
Posted: Sunday, November 29, 2015 - 01:51 AM UTC
Looks great, Chris!
Glad to see the engines on. The last brown you added shows up better in the distance shots. It's a nice loking color scheme. On these between the wars designed bombers they really used a lot of wing area to compensate for a lack of horsepower.
Gary
"Artillery adds dignity, to what would otherwise be an ugly brawl."
Frederick The Great
Joel_W
 Associate Editor
New York, United States
Joined: December 04, 2010
KitMaker: 11,666 posts
AeroScale: 7,410 posts
Posted: Sunday, November 29, 2015 - 07:39 PM UTC
Chris,
Like Gary said, the darker brown really does standout. Looks fantastic.
Joel
On my Workbench:
Monogram 1/24 scale 427 Shelby Cobra
Just Completed:
Beemax 1/24 scale BMW M3 E30 1992 Evolution II
Gauteng, South Africa
Joined: July 03, 2015
KitMaker: 280 posts
AeroScale: 141 posts
Posted: Sunday, November 29, 2015 - 08:02 PM UTC
Hi Chris
Awesome camo job!
The darker brown really works well.
Regards,
Kobus
Overijssel, Netherlands
Joined: September 13, 2003
KitMaker: 339 posts
AeroScale: 244 posts
Posted: Sunday, November 29, 2015 - 11:54 PM UTC
Hi Chris are you from Holland and did you buy some cake? What a camo


gr TC

#305
Christchurch, New Zealand
Joined: February 01, 2006
KitMaker: 1,673 posts
AeroScale: 1,517 posts
Posted: Monday, November 30, 2015 - 11:45 AM UTC
@Gary: Thanks buddy! It's all thanks to you Gary, I was going to leave it as is, but your comments got the old thought processes going and I knew I had to find something more of a contrast. Yeah and particularly Italian aircraft as their engines were always very under powered. But it makes for a great subject though.
@Kobus: My thanks Kobus, great to see you here in amongst my build log. And welcome to Aeroscale we're a great and diverse bunch but as Joel stated in his build log, more like a family.
@Joel: Thanks Joel, I was of two minds but it really did turn out very well. I hope to get it to the Joel Willstein level of excellence in the near future. (LOL I promise to stop referring to your work as the Joel Willstein level of excellence ... at some point)
@Lars: LOL pardon? You'll have to explain the reference to me Lars. And thanks for the kind comment.
Joel_W
 Associate Editor
New York, United States
Joined: December 04, 2010
KitMaker: 11,666 posts
AeroScale: 7,410 posts
Posted: Monday, November 30, 2015 - 10:48 PM UTC
[quote]@
....
@Joel: Thanks Joel, I was of two minds but it really did turn out very well. I hope to get it to the Joel Willstein level of excellence in the near future. (LOL I promise to stop referring to your work as the Joel Willstein level of excellence ... at some point)...
Chris,
I'm flattered, but I'm an average modeler at best.
Joel
On my Workbench:
Monogram 1/24 scale 427 Shelby Cobra
Just Completed:
Beemax 1/24 scale BMW M3 E30 1992 Evolution II
Overijssel, Netherlands
Joined: September 13, 2003
KitMaker: 339 posts
AeroScale: 244 posts
Posted: Monday, November 30, 2015 - 11:13 PM UTC
Hi Chris,
the camo reminded me of the LSD trip kind of sheme you see on tv lol... Same can happen when you eat space cake, that is cake with weed.
And indeed I mean it as a compliment it really looks cool!
gr TC

#305
Christchurch, New Zealand
Joined: February 01, 2006
KitMaker: 1,673 posts
AeroScale: 1,517 posts
Posted: Friday, December 04, 2015 - 10:09 AM UTC
You're too kind Lars! My thanks for your keen assessment. It's been a really fun camo scheme aside from the odd frustration. It's turned out pretty well.

#305
Christchurch, New Zealand
Joined: February 01, 2006
KitMaker: 1,673 posts
AeroScale: 1,517 posts
Posted: Friday, December 04, 2015 - 02:04 PM UTC
Joel_W
 Associate Editor
New York, United States
Joined: December 04, 2010
KitMaker: 11,666 posts
AeroScale: 7,410 posts
Posted: Saturday, December 05, 2015 - 06:00 AM UTC
Chris,
A most impressive decal application. They truly look like they were painted on.
Joel
On my Workbench:
Monogram 1/24 scale 427 Shelby Cobra
Just Completed:
Beemax 1/24 scale BMW M3 E30 1992 Evolution II

#305
Christchurch, New Zealand
Joined: February 01, 2006
KitMaker: 1,673 posts
AeroScale: 1,517 posts
Posted: Saturday, December 05, 2015 - 12:04 PM UTC
Thanks Joel they snugged down really nicely. I'm really rather pleased with the result.

#305
Christchurch, New Zealand
Joined: February 01, 2006
KitMaker: 1,673 posts
AeroScale: 1,517 posts
Posted: Tuesday, December 29, 2015 - 03:02 PM UTC
Joel_W
 Associate Editor
New York, United States
Joined: December 04, 2010
KitMaker: 11,666 posts
AeroScale: 7,410 posts
Posted: Thursday, December 31, 2015 - 02:08 AM UTC
Everything is coming together quite nicely. the tail rigging really came out quite well.
Joel
On my Workbench:
Monogram 1/24 scale 427 Shelby Cobra
Just Completed:
Beemax 1/24 scale BMW M3 E30 1992 Evolution II


