Les,
You are naking some rapid progress and giving me a lesson in painting at the same time.
Looking good!
Gaz
World War II
Discuss WWII and the era directly before and after the war from 1935-1949.
Discuss WWII and the era directly before and after the war from 1935-1949.
Hosted by Rowan Baylis
A few models in-progress
Posted: Tuesday, June 14, 2016 - 03:49 AM UTC
matrixone

Joined: February 07, 2004
KitMaker: 869 posts
AeroScale: 862 posts

Posted: Thursday, June 16, 2016 - 03:26 AM UTC
Thanks Gary!
The wings on the Me 262's were painted and soon after the engines were glued to the wings and a little touch up painting was done.


Some tactical markings still need to be painted on and then these models will get their coat of Future.
Matrixone
The wings on the Me 262's were painted and soon after the engines were glued to the wings and a little touch up painting was done.


Some tactical markings still need to be painted on and then these models will get their coat of Future.
Matrixone
Posted: Thursday, June 16, 2016 - 05:00 AM UTC
Les,
Those are two beauties! and that intake looks surprisingly metallic. What did you use to get that look?
Gaz
Those are two beauties! and that intake looks surprisingly metallic. What did you use to get that look?
Gaz
matrixone

Joined: February 07, 2004
KitMaker: 869 posts
AeroScale: 862 posts

Posted: Saturday, June 18, 2016 - 09:29 PM UTC
Gary,
The intake with the BMF finish was painted with a custom mix of 'metall'.
It looks far too bright now but after a little weathering and the flat clear coat it should look more like it belongs on this type of aircraft.
Matrixone
The intake with the BMF finish was painted with a custom mix of 'metall'.
It looks far too bright now but after a little weathering and the flat clear coat it should look more like it belongs on this type of aircraft.
Matrixone
matrixone

Joined: February 07, 2004
KitMaker: 869 posts
AeroScale: 862 posts

Posted: Sunday, June 19, 2016 - 08:01 AM UTC
The tactical markings were masked and painted.


After these pictures were taken the models were given a coat of Future and next will be decaling.
Matrixone


After these pictures were taken the models were given a coat of Future and next will be decaling.
Matrixone
Posted: Sunday, June 19, 2016 - 08:17 AM UTC
Lovely work Les, I really like the asymmetric paint jobs that you lay down on these builds. I really need to overcome my OCD and start throwing some odd replacement panels onto my future works.
Cheers, D
Cheers, D
matrixone

Joined: February 07, 2004
KitMaker: 869 posts
AeroScale: 862 posts

Posted: Sunday, June 19, 2016 - 08:34 AM UTC
Thanks Damian!
Some of the late war Luftwaffe planes had some interesting schemes in part because after the supply chain broke down getting spare parts to keep aircraft flying was a challenge for the crew chiefs and parts were robbed from grounded aircraft to keep others flying.
I have no photographic proof ''yellow 3'' ever had an unpainted jet intake but when engines were changed out the replacement engine often did not have the intake painted, I wanted my model of ''yellow 3'' to look like it had at least one engine change during its service life.
Matrixone

lespauljames

Joined: January 06, 2007
KitMaker: 3,661 posts
AeroScale: 369 posts

Posted: Sunday, June 19, 2016 - 09:35 PM UTC
Those 262's look fantastic, i hope mine turn out that nice. !
Posted: Monday, June 20, 2016 - 12:42 AM UTC
Les,
Nice looking birds! Your white markings look great.
Gaz
Nice looking birds! Your white markings look great.
Gaz
matrixone

Joined: February 07, 2004
KitMaker: 869 posts
AeroScale: 862 posts

Posted: Monday, June 20, 2016 - 07:01 AM UTC
Thanks guys!
No pictures this time but decaling is nearly finished on these two.
I am having some trouble with the KG(j)54 blue/white checkered tail band on the Me 262A-1a, the decals crumbled and cracked near the tail on the upper side and I'm concerned about being able to match the shade of blue on the decal if I should have to do some touch-up painting.
Aside from this the rest of the decals went on without any fuss.
Matrixone
matrixone

Joined: February 07, 2004
KitMaker: 869 posts
AeroScale: 862 posts

Posted: Wednesday, June 22, 2016 - 02:38 AM UTC
I repaired the decals by touching them up with paint, not perfect but it will actually add to the heavy weathered effect this model will be getting.
Here is ''yellow 3'' after the decals were added and some paint chipping done too, this aircraft looked like it had seen a lot of action during its operational life and the model will be weathered to match. The rest of the paint chipping will be done near the end of the build.

The Me 262A-2a ''white Y'' was a bomber and in most cases they were well cared for so this model won't be getting anymore paint chipping than what is seen here.

Matrixone
Here is ''yellow 3'' after the decals were added and some paint chipping done too, this aircraft looked like it had seen a lot of action during its operational life and the model will be weathered to match. The rest of the paint chipping will be done near the end of the build.

The Me 262A-2a ''white Y'' was a bomber and in most cases they were well cared for so this model won't be getting anymore paint chipping than what is seen here.

Matrixone
Posted: Wednesday, June 22, 2016 - 03:02 AM UTC
Les,
They both look great! The Dalmatian pattern on the tail is quite interesting.
Gaz
They both look great! The Dalmatian pattern on the tail is quite interesting.
Gaz
Posted: Wednesday, June 22, 2016 - 08:35 AM UTC
Great work Les, so much going on with both of these schemes that make them really interesting.
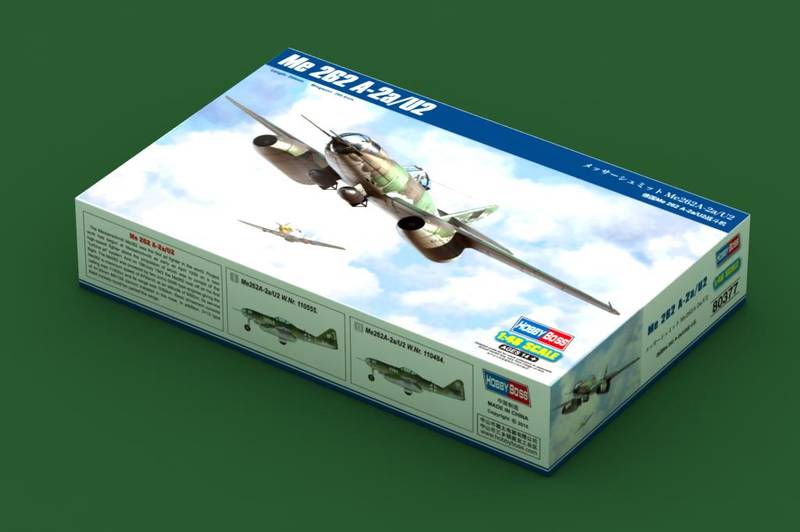
Sort of off-topic, I hope you don't mind, but I stumbled across this new release from Hobby Boss. I can stop looking for the old Dragon/TriMaster kit that has eluded me for so long!


It doesn't seem to have hit the shops here yet but hopefully soon
Cheers, D
Sort of off-topic, I hope you don't mind, but I stumbled across this new release from Hobby Boss. I can stop looking for the old Dragon/TriMaster kit that has eluded me for so long!


It doesn't seem to have hit the shops here yet but hopefully soon

Cheers, D
matrixone

Joined: February 07, 2004
KitMaker: 869 posts
AeroScale: 862 posts

Posted: Wednesday, June 22, 2016 - 09:47 PM UTC
Thank you Gary and Damian!
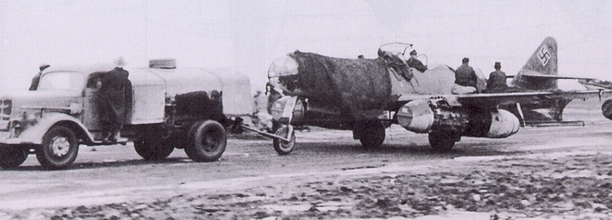
That's great news about the new glass nose version of the Me 262. Years ago I built a couple 1/72 scale MPM kits of that aircraft and always wanted to build a larger and better detailed kit of it. Lots of good what-if possibilities with this type of model.
Matrixone
That's great news about the new glass nose version of the Me 262. Years ago I built a couple 1/72 scale MPM kits of that aircraft and always wanted to build a larger and better detailed kit of it. Lots of good what-if possibilities with this type of model.
Matrixone

BlackWidow

Joined: August 09, 2009
KitMaker: 1,732 posts
AeroScale: 1,336 posts

Posted: Wednesday, June 22, 2016 - 11:11 PM UTC
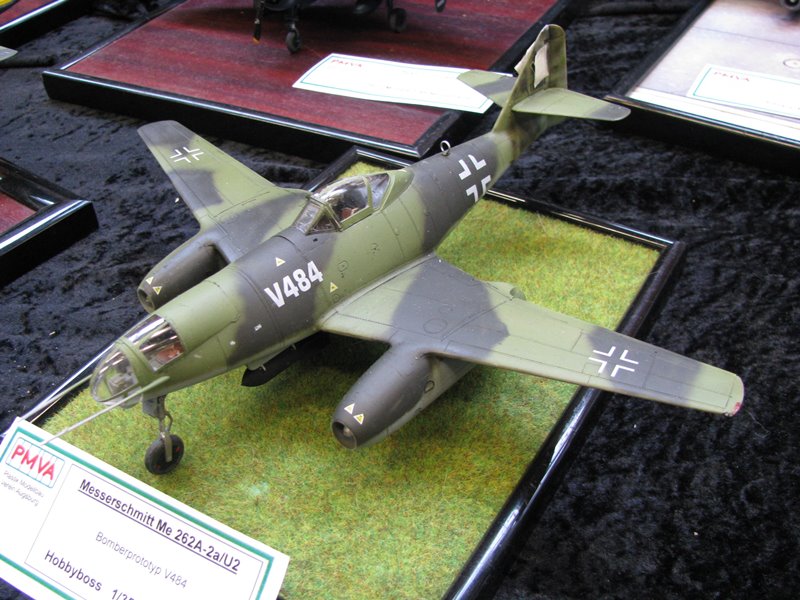
Interesting paintwork on the Me 262, Les. If you're intested, the glas nosed 262 can be build. A friend of mine showed his model on our expo in Mannheim recently ....

Torsten

Torsten

matrixone

Joined: February 07, 2004
KitMaker: 869 posts
AeroScale: 862 posts

Posted: Thursday, June 23, 2016 - 10:45 PM UTC
Torsten,
Your friend did a great job on that model, can't wait to be able to build one of those.
Matrixone
Your friend did a great job on that model, can't wait to be able to build one of those.

Matrixone
matrixone

Joined: February 07, 2004
KitMaker: 869 posts
AeroScale: 862 posts

Posted: Wednesday, June 29, 2016 - 07:11 AM UTC
Getting close to finishing these Me 262's.
These are the bombs for the Me 262A-2a. After looking at photographs of bombs used in WWII one thing I noticed about them is they were not always painted neatly and some scuffs and scrapes of the paint could be seen on them so I thought I would try and weather at least one of the bombs on the Me 262A-2a and leave the other 'factory fresh'.

I used oil paint to add weathering effects on the models, sadly because of the gloss finish on the models it does not photograph well. After the flat clear coat is sprayed on the work I did should be a lot more visible.


Matrixone
These are the bombs for the Me 262A-2a. After looking at photographs of bombs used in WWII one thing I noticed about them is they were not always painted neatly and some scuffs and scrapes of the paint could be seen on them so I thought I would try and weather at least one of the bombs on the Me 262A-2a and leave the other 'factory fresh'.

I used oil paint to add weathering effects on the models, sadly because of the gloss finish on the models it does not photograph well. After the flat clear coat is sprayed on the work I did should be a lot more visible.


Matrixone
 |


