Brian & Bill - Thank you both for the compliments- this has been a very enjoyable experience for me , both the build and the blog . Thanks for following along.
Cheers! Richard
General Aircraft
This forum is for general aircraft modelling discussions.
This forum is for general aircraft modelling discussions.
Hosted by Jim Starkweather
Hucks type starter truck build

rdt1953

Joined: February 06, 2015
KitMaker: 1,098 posts
AeroScale: 900 posts

Posted: Sunday, July 03, 2016 - 04:57 PM UTC

rdt1953

Joined: February 06, 2015
KitMaker: 1,098 posts
AeroScale: 900 posts

Posted: Tuesday, July 12, 2016 - 01:57 AM UTC
I've been able to squeeze in a little time at the model bench - our household has plunged head first into this century with ductless air conditioning and that makes for quiet, cool and dry conditions so modeling is now more of a summertime activity than it had been in the past.
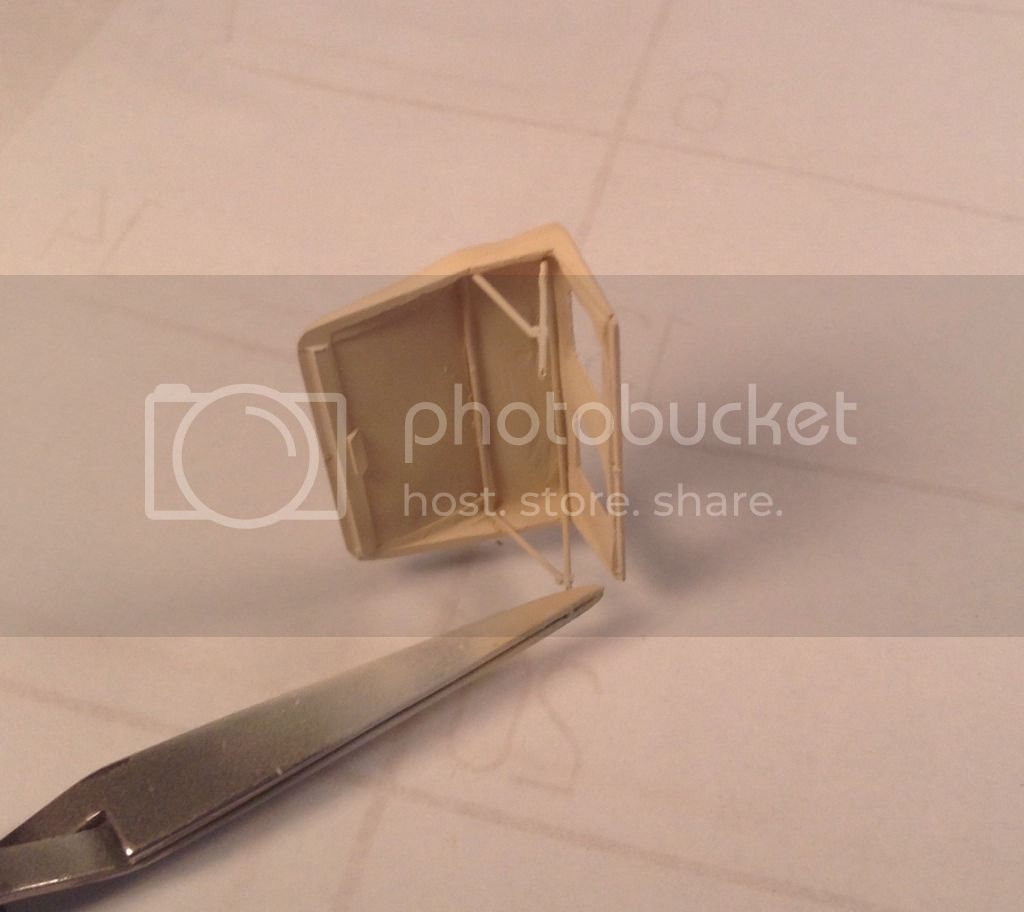
I have made the top bows for both the Hucks truck and fuel truck study model and begun paint work on the tops as well. The bows themselves were simply bent out of .020 brass rod and fastened to the underside of the tops.
Their folding intersections were detailed up with leftover photo etch bits from the spares box.

I mixed a light beige color using Tamiya XF 2 Flat White and XF 55 Deck Tan with a tiny bit of XF 60 Dark Yellow to kick it towards the khaki/brown color family of the trucks.

The front platform has been permanently attached and the IJA star added to the grill guard. This is the kit part with it's mounting pin removed and it's base was thinned down by sanding and a small vertical saw kerf was cut in the back to straddle the center bar in the grill guard.
The small vertical chests were painted with Tamiya Flat Red toned down with a touch of Tamiya Red Brown. The trucks themselves were airbrushed with various tones of the base color and washes/filters done with burnt umber oils.
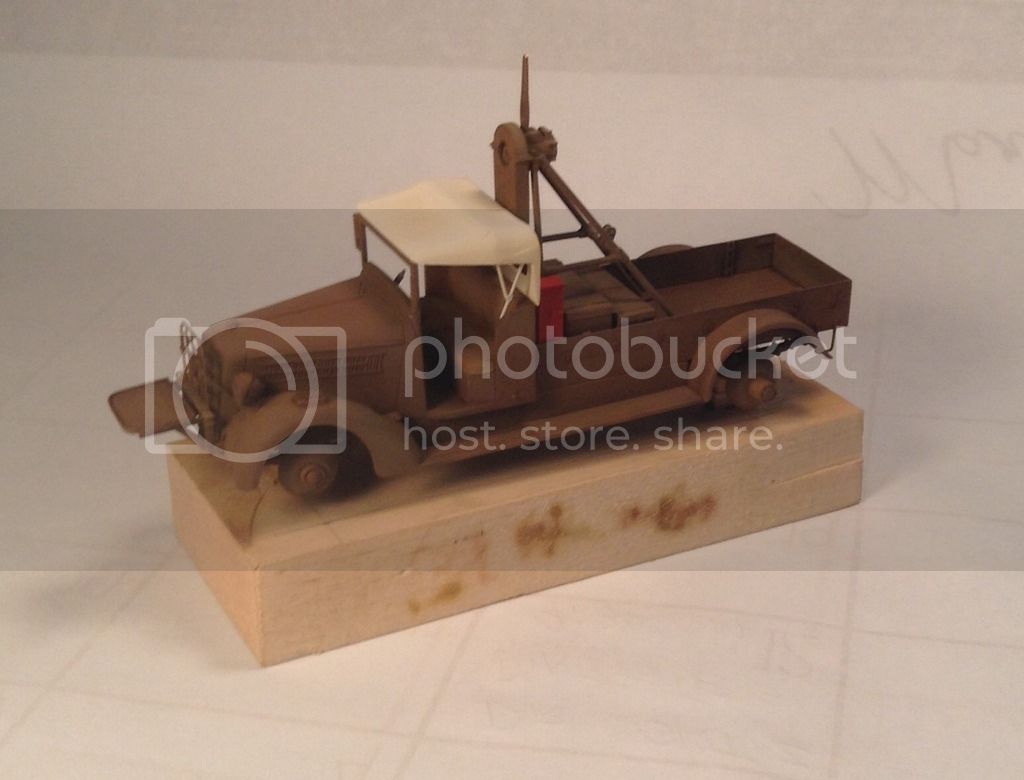


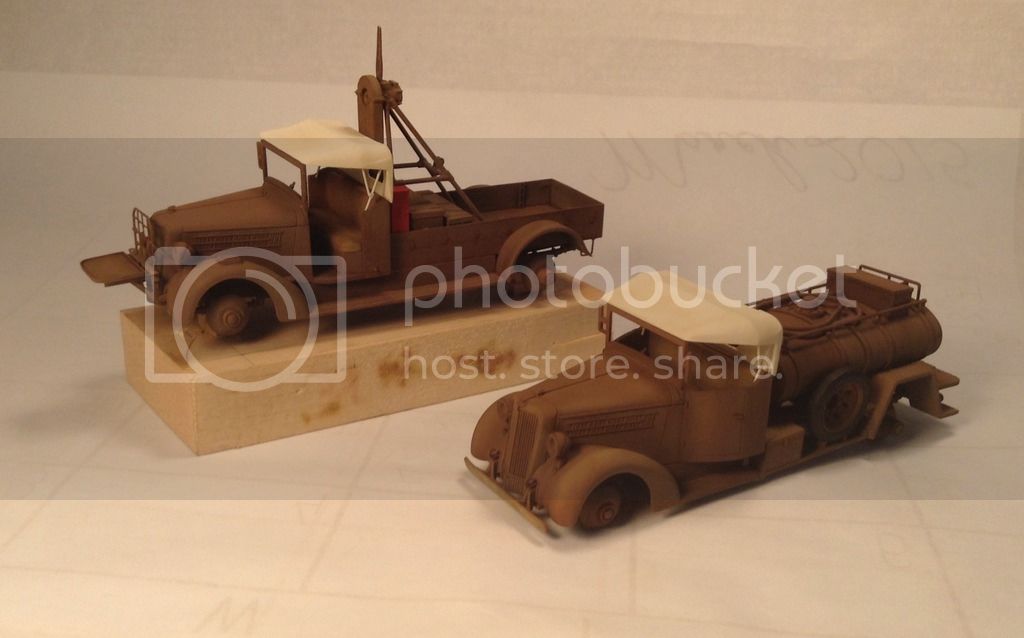
Next will be finishing up the undersides of the chassis, painting tires and mounting the wheels so the starter shaft can finally be attached and the last component- the boom for the shaft - can begin.
As always I welcome all input and comments and Thanks for looking- Cheers ! Richard
I have made the top bows for both the Hucks truck and fuel truck study model and begun paint work on the tops as well. The bows themselves were simply bent out of .020 brass rod and fastened to the underside of the tops.
Their folding intersections were detailed up with leftover photo etch bits from the spares box.

I mixed a light beige color using Tamiya XF 2 Flat White and XF 55 Deck Tan with a tiny bit of XF 60 Dark Yellow to kick it towards the khaki/brown color family of the trucks.


The front platform has been permanently attached and the IJA star added to the grill guard. This is the kit part with it's mounting pin removed and it's base was thinned down by sanding and a small vertical saw kerf was cut in the back to straddle the center bar in the grill guard.
The small vertical chests were painted with Tamiya Flat Red toned down with a touch of Tamiya Red Brown. The trucks themselves were airbrushed with various tones of the base color and washes/filters done with burnt umber oils.


Next will be finishing up the undersides of the chassis, painting tires and mounting the wheels so the starter shaft can finally be attached and the last component- the boom for the shaft - can begin.
As always I welcome all input and comments and Thanks for looking- Cheers ! Richard
Kilo_Uniform

Joined: July 03, 2015
KitMaker: 280 posts
AeroScale: 141 posts

Posted: Tuesday, July 12, 2016 - 09:49 AM UTC
Hi Richard,
Looking very good! Really like the look of the trucks. Can't wait for the next update.
Regards,
Kobus
Looking very good! Really like the look of the trucks. Can't wait for the next update.
Regards,
Kobus
Posted: Tuesday, July 12, 2016 - 10:24 PM UTC
Quoted Text
I mixed a light beige color using Tamiya XF 2 Flat White and XF 55 Deck Tan with a tiny bit of XF 60 Dark Yellow to kick it towards the khaki/brown color family of the trucks.
* * * *
The small vertical chests were painted with Tamiya Flat Red toned down with a touch of Tamiya Red Brown. The trucks themselves were airbrushed with various tones of the base color and washes/filters done with burnt umber oils.
Next will be finishing up the undersides of the chassis, painting tires and mounting the wheels so the starter shaft can finally be attached and the last component- the boom for the shaft - can begin.
As always I welcome all input and comments and Thanks for looking- Cheers ! Richard
So this red-chocolate/burnt-umber look is the real life finish for these vehicles? I know very little (i.e. nothing) about WWII era Japanese trucks and almost thought I was looking at a primer.
Where did you get the research materials!?
Brian

rdt1953

Joined: February 06, 2015
KitMaker: 1,098 posts
AeroScale: 900 posts

Posted: Wednesday, July 13, 2016 - 12:19 AM UTC
Brian - I wish I could tell you that these colors are accurate but I can't. I used the kit instructions as a jumping off point . Hasegawa has you mix Gunze 55 Khaki with 41 Red Brown at a 4 to 1 ratio. As I'm sure you are aware Gunze colors are difficult to get here in the USA so I substituted Tamiya XF 49 Khaki and XF 64 Red Brown at a 2 to 1 ratio which got me close to the brownish color on the box photos but a little more to the Khaki side which I hoped to filter to brownish with the umber wash. As Murphy's law demonstrates it worked beautifully on the study model - not so well on the Hucks truck and I am baffled as to why. Same paint,conditions etc. At this point I am giving up on the wash for the hood and going airbrush alone as the washes kept leaving tide marks when dry but only on the Hucks truck. In hind site I probably should have sealed the paint with a clear coat yet I've never had to do it before and the study model backs this up as it gave me exactly the look I was after. Go figure !
There seems to be a dearth of information on these trucks ,color included. I am fully prepared to play the " artistic license " card along with "differing effects of differing environments" and "wartime variation in suppliers " in my defense but truth be told I only take the research thing so far. BTW, the trucks look more brown in the photos than in actuality. Thanks for your interest and I certainly welcome any leads to accurate color info- if not for this build then for the next. Richard
There seems to be a dearth of information on these trucks ,color included. I am fully prepared to play the " artistic license " card along with "differing effects of differing environments" and "wartime variation in suppliers " in my defense but truth be told I only take the research thing so far. BTW, the trucks look more brown in the photos than in actuality. Thanks for your interest and I certainly welcome any leads to accurate color info- if not for this build then for the next. Richard

rdt1953

Joined: February 06, 2015
KitMaker: 1,098 posts
AeroScale: 900 posts

Posted: Saturday, July 16, 2016 - 10:32 PM UTC
A quick update- I thought I might post a few photos that I took outdoors today in bright sunlight to try to give a more accurate idea of the colors/paintwork . Hopefully the subtle variation in tones will show to a greater advantage.
I am getting ready to permanently attach the soft top and mast/chaincase so here is a shot of the interior and bed while it can still be seen.
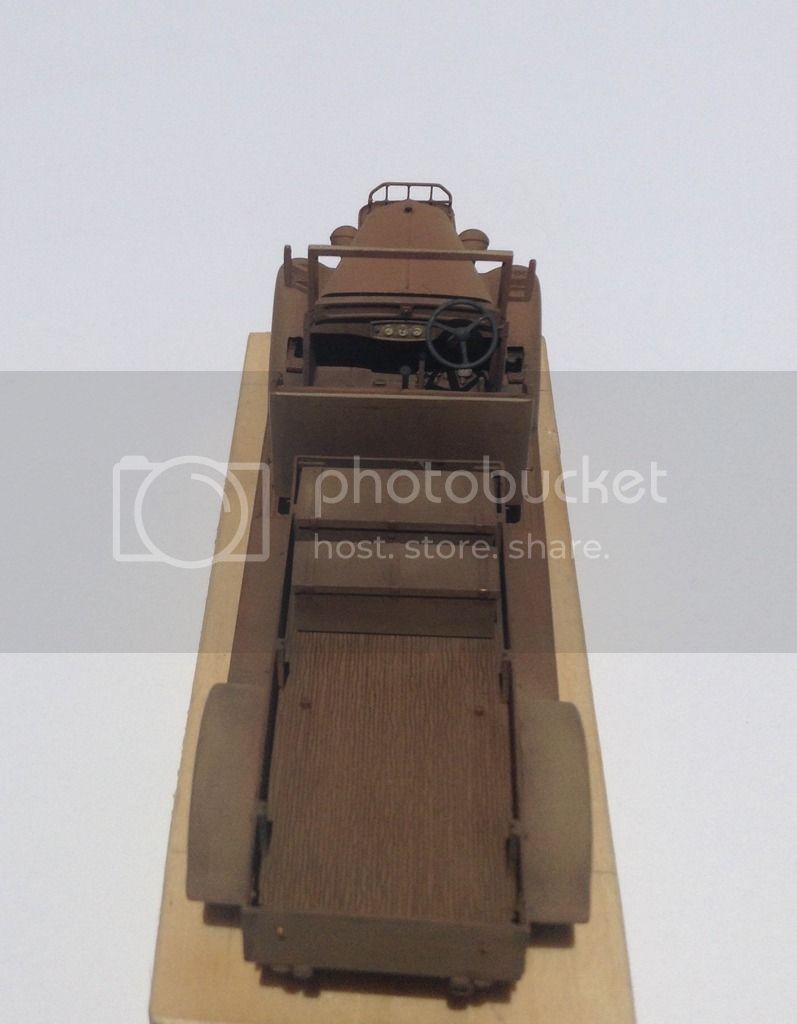
And here is the truck complete with wheels/tires -

I would have had some shots with the top but had to repair the top bows on one side and have some paint touch up to do- Thanks for looking ! -Richard
I am getting ready to permanently attach the soft top and mast/chaincase so here is a shot of the interior and bed while it can still be seen.

And here is the truck complete with wheels/tires -

I would have had some shots with the top but had to repair the top bows on one side and have some paint touch up to do- Thanks for looking ! -Richard

rdt1953

Joined: February 06, 2015
KitMaker: 1,098 posts
AeroScale: 900 posts

Posted: Monday, July 18, 2016 - 05:55 AM UTC
The starter shaft and shear poles have finaly been permanently attached- a milestone of sorts- so I thought I might post a photo in celebration. Here is the truck with the prop height fixture just before applying medium CA at the various joints .( and right after accidentally dripping same on left rear fender - ugh ! )
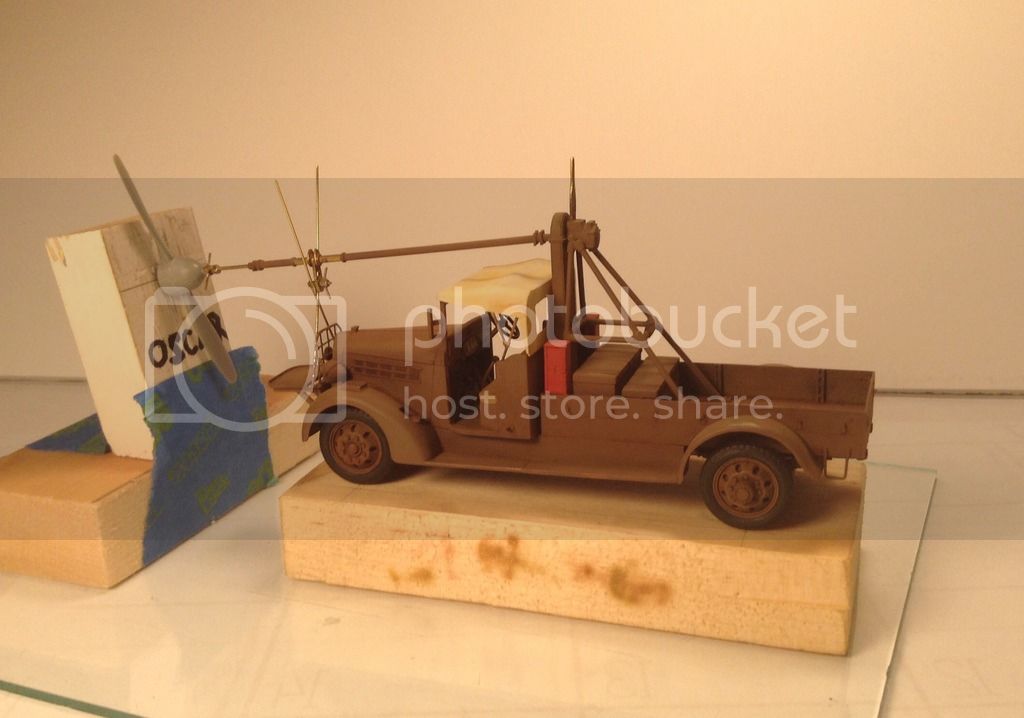
I have now returned to some metal work with the start of the boom which raises/lowers the shaft itself- more to follow . Cheers ! Richard

I have now returned to some metal work with the start of the boom which raises/lowers the shaft itself- more to follow . Cheers ! Richard
Posted: Monday, July 18, 2016 - 06:06 AM UTC
Marvelous!

GhostHawk

Joined: January 27, 2011
KitMaker: 268 posts
AeroScale: 264 posts

Posted: Monday, July 18, 2016 - 06:51 AM UTC
Excelent...!!!
Posted: Monday, July 18, 2016 - 08:22 AM UTC
Superb.

rdt1953

Joined: February 06, 2015
KitMaker: 1,098 posts
AeroScale: 900 posts

Posted: Wednesday, July 20, 2016 - 07:35 AM UTC
Gentlemen- Thank you all for following and for your kind compliments.
I have made considerable progress on the triangulated boom arrangement which hangs from the kingpost atop the mast and acts, I believe , as an equilibrator to balance out the mass of the starter shaft in order that the forward end can be more easily raised or lowered by the crew to accomodate different aircraft. The shaft bearing hangs from the forward end of the boom by a chain and the after end of the boom is linked to the sheave on the rear horizontal strut on the mast unit by what I believe to be a bungee cord. Torsional forces of the shaft as well as some gravitational loads are held in check by the shear poles/clamp gear .

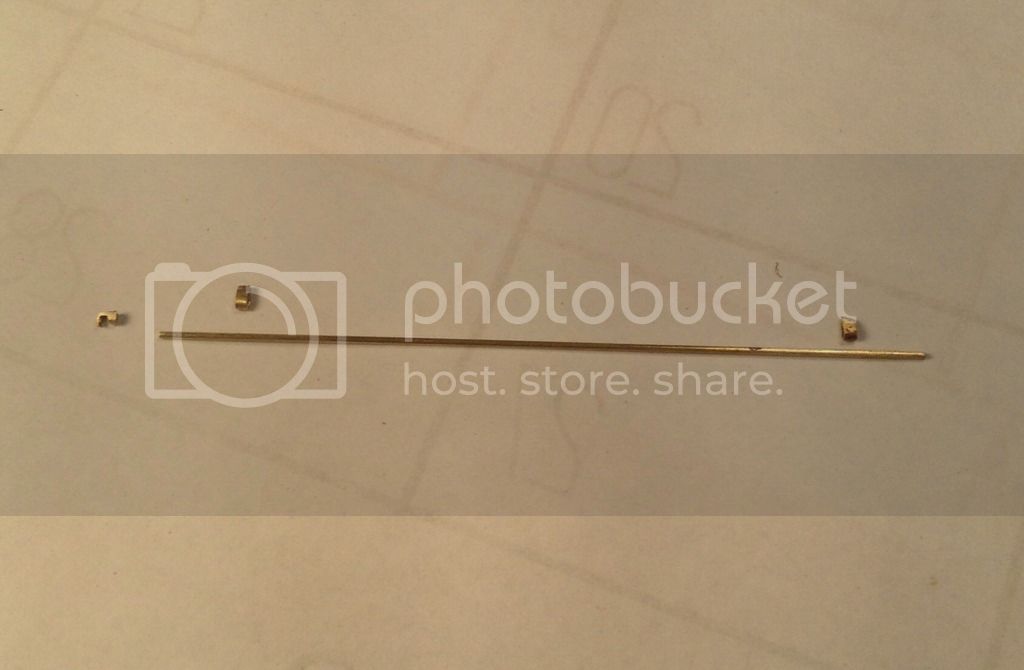
I started by making the the small fitting on the forward end of the boom from a piece of 3/32 OD brass tube. I first filed half way through the tube on one end and then flattened the remaining piece in the plain jaw pliers.
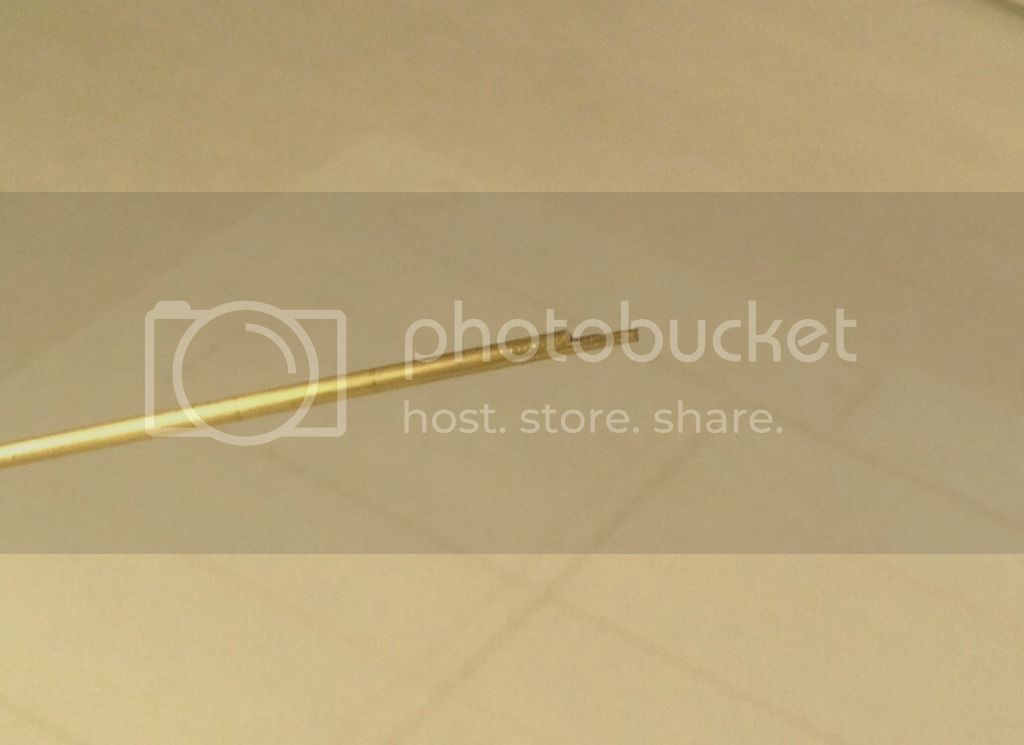

Outer surfaces were next trued up by rubbing on sandpapers backed up by machinists blocks.

The end was then turned down 90 degrees and drilled to accept a pin to hold the chain.

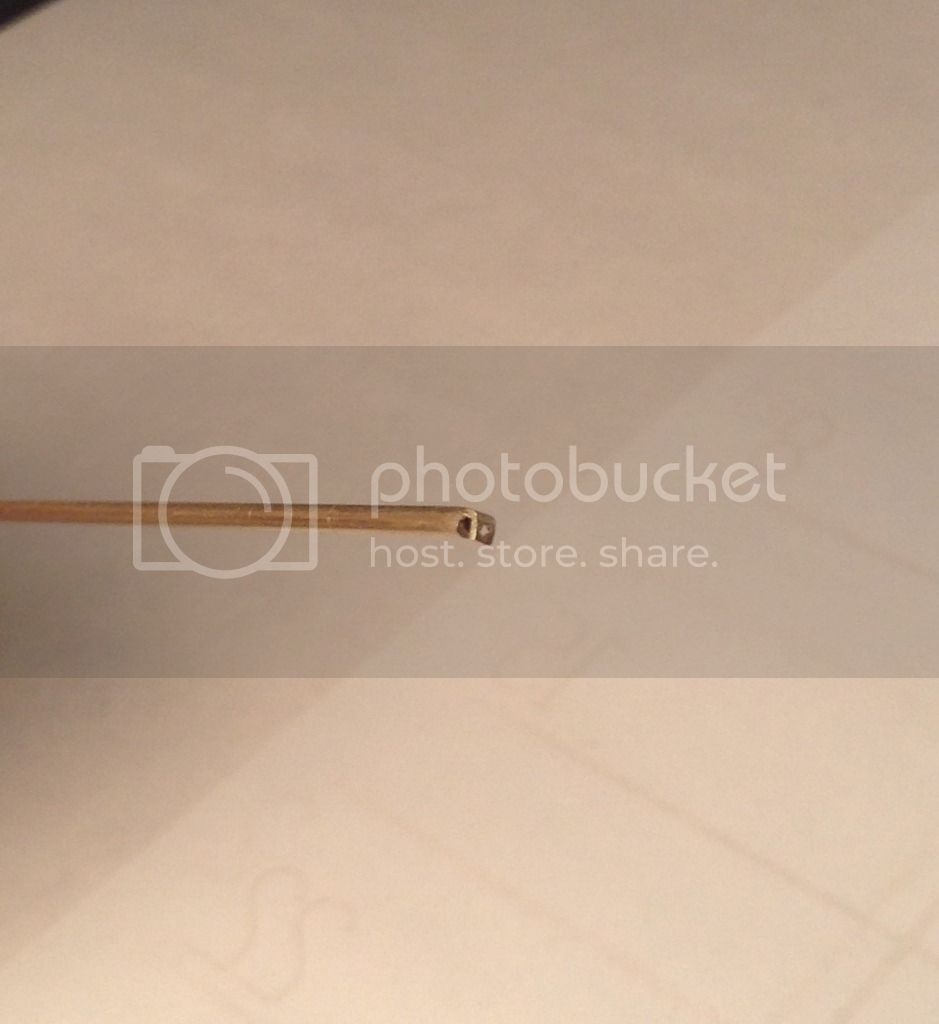
The boom itself was made from .032 " brass rod. The two swage blocks on either end that connect the guy wire to the boom were made by squeezing 3/32" tube and cutting to length and filling to shape.

Here is the boom being laid out on the working drawing-
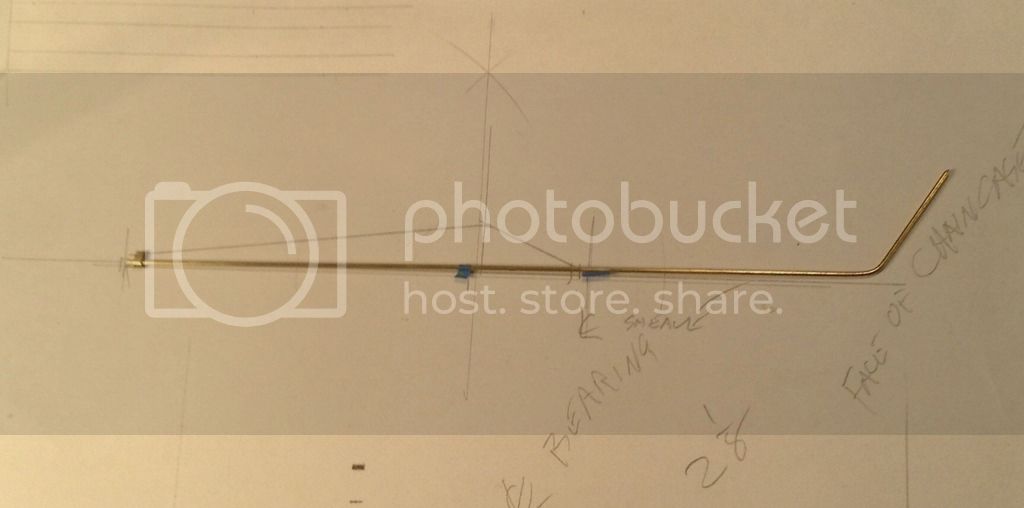
and here are the components so far -
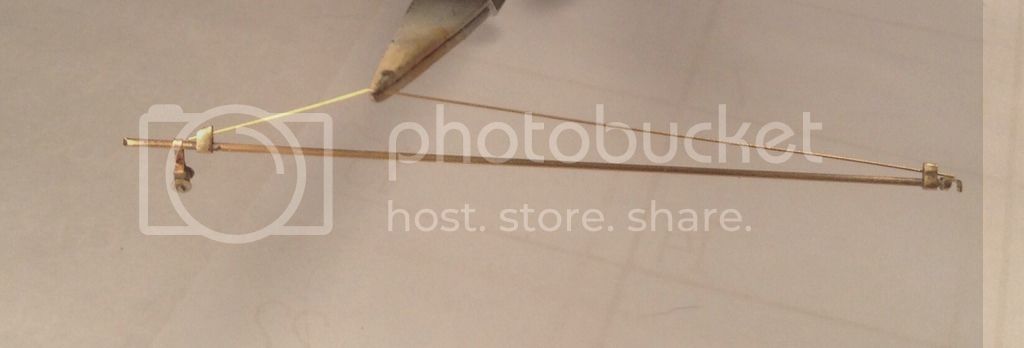
And the boom and fittings soldered up and shaped with guy wire and chain dry fitted.

Next will be the fabrication of the small sheave fitting on the after end of the boom. Thanks for looking- Cheers ! Richard
I have made considerable progress on the triangulated boom arrangement which hangs from the kingpost atop the mast and acts, I believe , as an equilibrator to balance out the mass of the starter shaft in order that the forward end can be more easily raised or lowered by the crew to accomodate different aircraft. The shaft bearing hangs from the forward end of the boom by a chain and the after end of the boom is linked to the sheave on the rear horizontal strut on the mast unit by what I believe to be a bungee cord. Torsional forces of the shaft as well as some gravitational loads are held in check by the shear poles/clamp gear .

I started by making the the small fitting on the forward end of the boom from a piece of 3/32 OD brass tube. I first filed half way through the tube on one end and then flattened the remaining piece in the plain jaw pliers.


Outer surfaces were next trued up by rubbing on sandpapers backed up by machinists blocks.

The end was then turned down 90 degrees and drilled to accept a pin to hold the chain.


The boom itself was made from .032 " brass rod. The two swage blocks on either end that connect the guy wire to the boom were made by squeezing 3/32" tube and cutting to length and filling to shape.

Here is the boom being laid out on the working drawing-

and here are the components so far -

And the boom and fittings soldered up and shaped with guy wire and chain dry fitted.

Next will be the fabrication of the small sheave fitting on the after end of the boom. Thanks for looking- Cheers ! Richard

rdt1953

Joined: February 06, 2015
KitMaker: 1,098 posts
AeroScale: 900 posts

Posted: Saturday, July 23, 2016 - 04:13 AM UTC
Short update- the last component ( I think !) has been made. This is the small sheave that hangs from the after end of the boom. I punched out two small discs from brass shim stock with the Waldron punch/die set and drilled two .020 " holes in their centers. Another piece of brass shim was cut to width and bent to form a stirrup with a piece of 1/16 " brass tube as the sheave itself. A piece of .020" brass rod through all for the axle and all were soldered together.
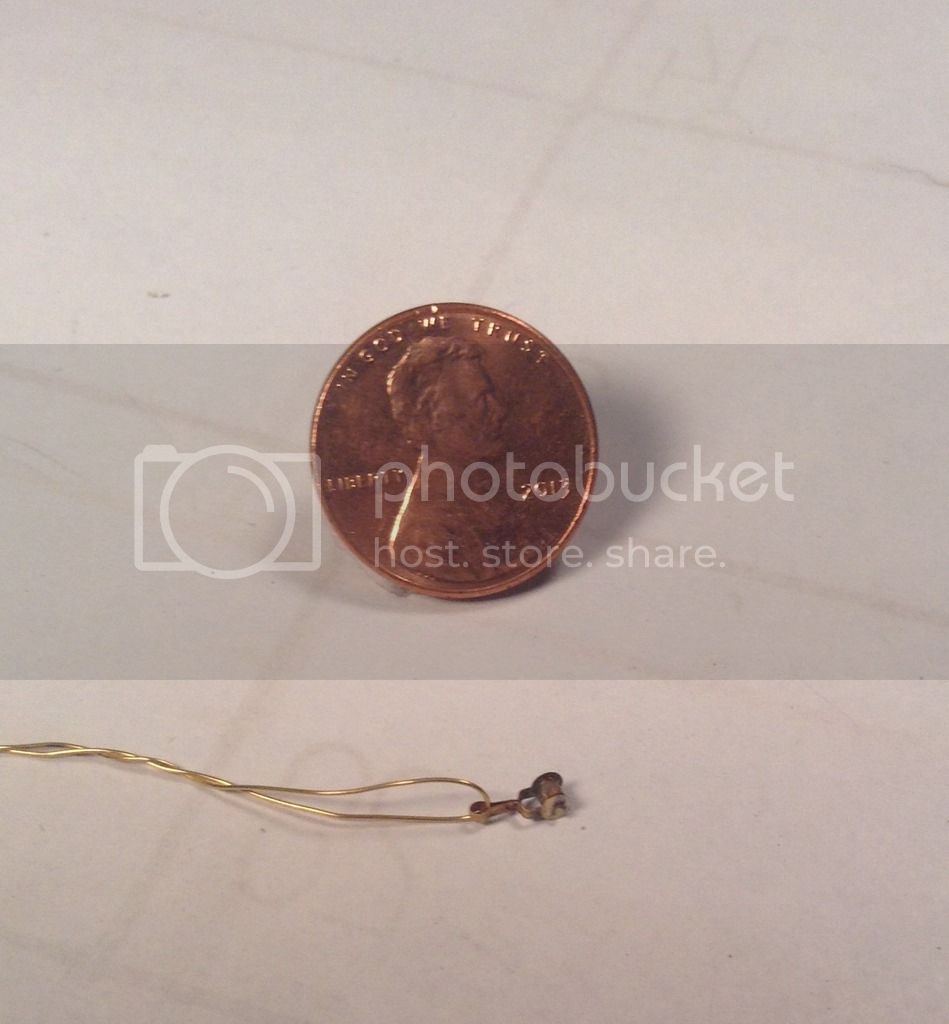
Here is the complete boom assembly including the sheave and guy wire.
I made a pair of spacers out of post it notes to temporarily hold the boom parallel to the starter shaft - two holes punched out in each - again using the Waldron punch/die set-for the respective diameters of the shaft and boom and slitted so they could be passed around the shaft/boom.
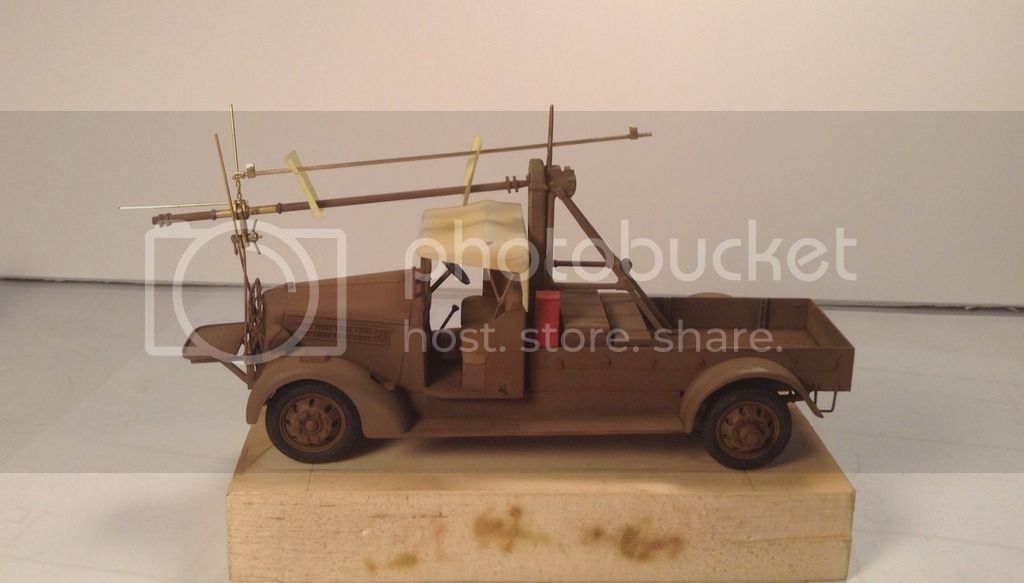

I have also fitted and attached the guy wire and started the base and a resin pilot figure - more to follow and thanks for watching - Cheers ! - Richard

Here is the complete boom assembly including the sheave and guy wire.

I made a pair of spacers out of post it notes to temporarily hold the boom parallel to the starter shaft - two holes punched out in each - again using the Waldron punch/die set-for the respective diameters of the shaft and boom and slitted so they could be passed around the shaft/boom.


I have also fitted and attached the guy wire and started the base and a resin pilot figure - more to follow and thanks for watching - Cheers ! - Richard

rdt1953

Joined: February 06, 2015
KitMaker: 1,098 posts
AeroScale: 900 posts

Posted: Thursday, July 28, 2016 - 04:02 AM UTC
A brief update- I have been working on finishing up the truck while at the same time working on a base, figure , and some bits to put in the bed.
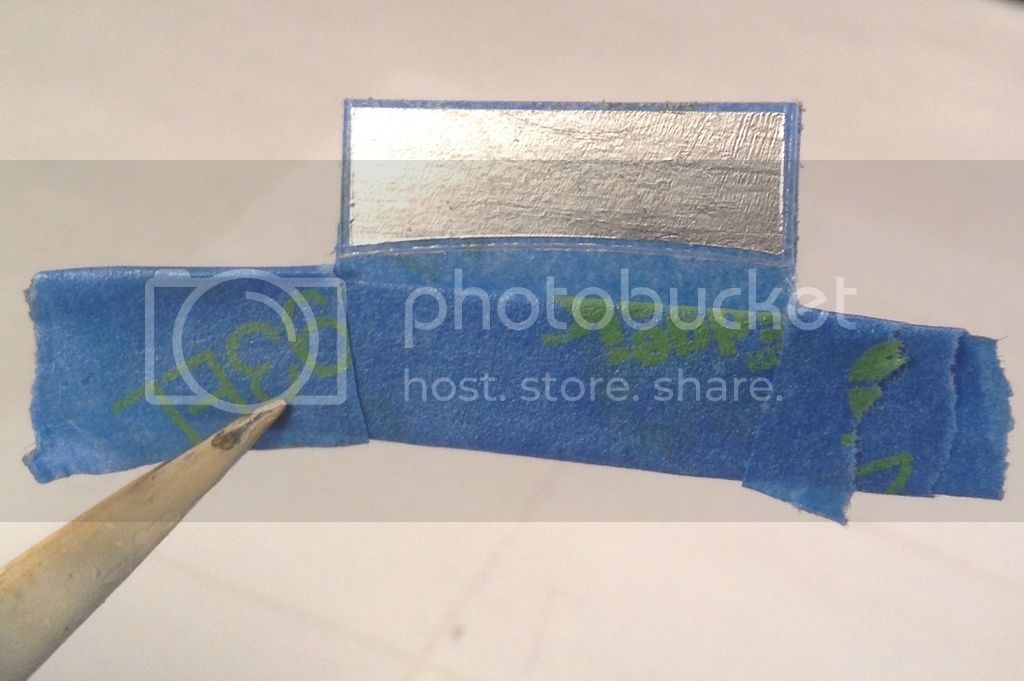
I wanted to have the windshield open and as the kit part is overly thick for scale appearance so I made a new one of .010 " clear styrene . I first put down a piece of Bare Metal Foil on the clear stock and scored the foil using the kit windshield as a template. I then cut the clear stock outside of this by 1/32" or so to allow for a frame. The foil around the perimeter was removed and the windshield backed by blue tape to mask the inside and serve as a handle for spraying.
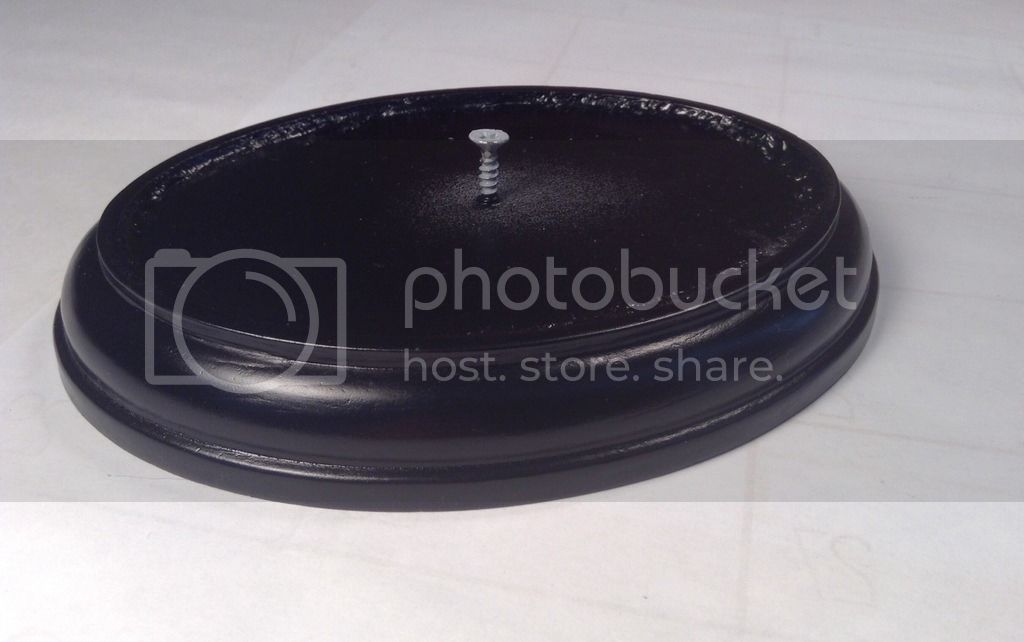
For the base I am using an oval rosette which is a handrail component from interior stair work and these can be purchased in your local big box home center.
I mortised out the center with a router leaving a rim to contain the celluclay. The base was primed with two coats of white pigmented shellac tinted with black . This is an excellent primer as it dries rock hard in 20 minutes or so and sands beautifully. The finish coat is satin black from a rattle can.
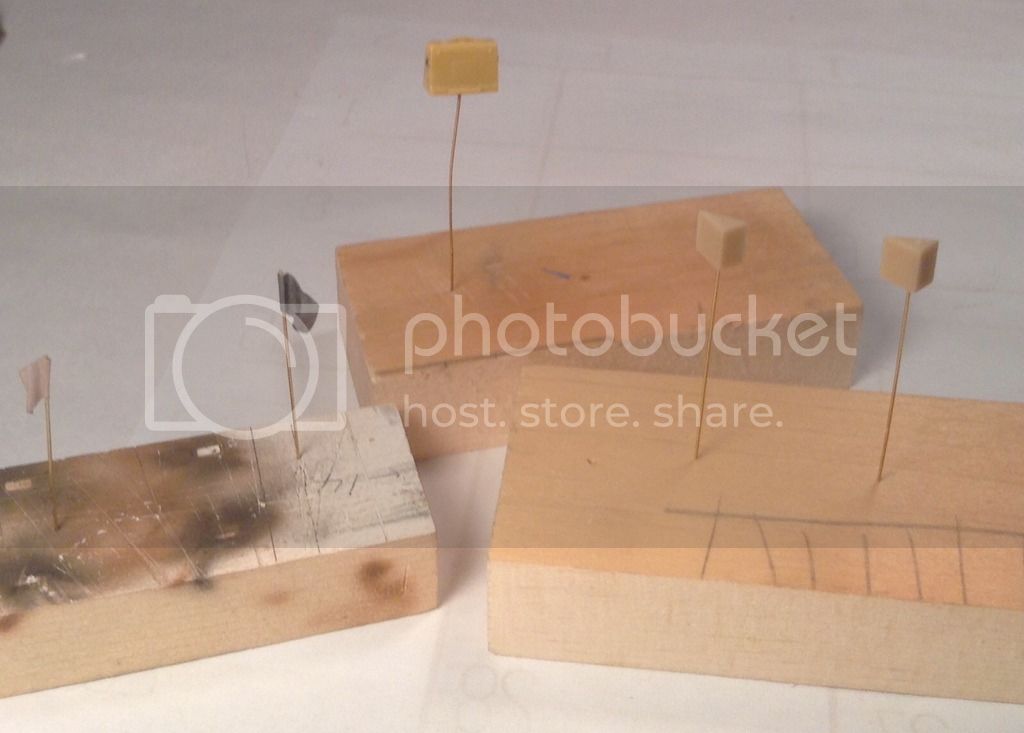
I've prepped the kit supplied mechanic's toolchest and wheel chocks for paint and made signal flags for the mast - one of tissue/matte medium and another of metal foil. I'll choose the one that looks the best after paint.
I've also assembled and primed the resin pilot figure- this is from the Hasegawa Ki 61 kit and is a very nice figure indeed.

Hope to have all completed early next week as my brother in law has convinced me to go to the IPMS Nats in South Carolina- Road Trip !
Thanks for looking - Richard
I wanted to have the windshield open and as the kit part is overly thick for scale appearance so I made a new one of .010 " clear styrene . I first put down a piece of Bare Metal Foil on the clear stock and scored the foil using the kit windshield as a template. I then cut the clear stock outside of this by 1/32" or so to allow for a frame. The foil around the perimeter was removed and the windshield backed by blue tape to mask the inside and serve as a handle for spraying.

For the base I am using an oval rosette which is a handrail component from interior stair work and these can be purchased in your local big box home center.
I mortised out the center with a router leaving a rim to contain the celluclay. The base was primed with two coats of white pigmented shellac tinted with black . This is an excellent primer as it dries rock hard in 20 minutes or so and sands beautifully. The finish coat is satin black from a rattle can.

I've prepped the kit supplied mechanic's toolchest and wheel chocks for paint and made signal flags for the mast - one of tissue/matte medium and another of metal foil. I'll choose the one that looks the best after paint.

I've also assembled and primed the resin pilot figure- this is from the Hasegawa Ki 61 kit and is a very nice figure indeed.

Hope to have all completed early next week as my brother in law has convinced me to go to the IPMS Nats in South Carolina- Road Trip !
Thanks for looking - Richard
Posted: Thursday, July 28, 2016 - 07:23 AM UTC
Quoted Text
Hope to have all completed early next week as my brother in law has convinced me to go to the IPMS Nats in South Carolina- Road Trip !
Thanks for looking - Richard
As well he should! It's a winner in every respect! Keep us posted.

rdt1953

Joined: February 06, 2015
KitMaker: 1,098 posts
AeroScale: 900 posts

Posted: Saturday, July 30, 2016 - 02:50 AM UTC
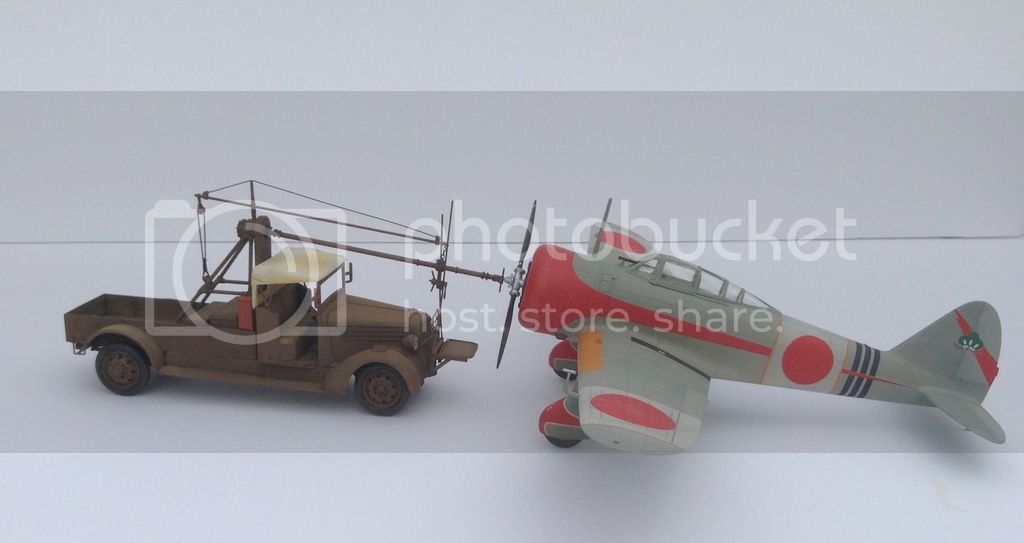
The truck is nearly finished- just need to mount the windshield and signal flag both of which will be done after mounting the truck to it's base.
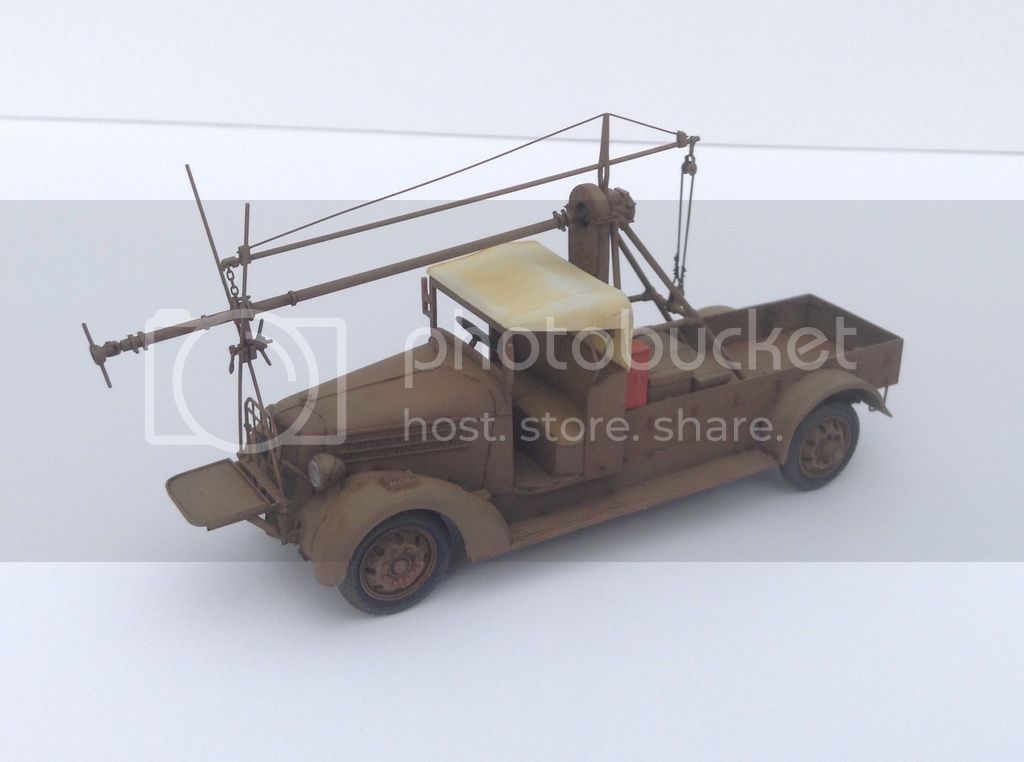
Here are a couple shots posed with a Ki 27


Here is the figure in paint-

The whole thing may be wrapped up tomorrow so more posts if it happens. Thanks for following and all comments welcome- Cheers- Richard

Here are a couple shots posed with a Ki 27


Here is the figure in paint-

The whole thing may be wrapped up tomorrow so more posts if it happens. Thanks for following and all comments welcome- Cheers- Richard

rdt1953

Joined: February 06, 2015
KitMaker: 1,098 posts
AeroScale: 900 posts

Posted: Sunday, July 31, 2016 - 06:37 PM UTC
I'm calling this one done. Here are a few pics - I wanted to take them outdoors but as it's a little windy today I had to do it by a sunny window. My apologies for the composition ,etc as I only had a sunbeam on the floor to work with and keeping the subject out of the shadow of the i pad proved difficult. My brother in law has promised to shoot it properly with tripod, macro etc so when that happens I'll post them. We are traveling together to the IPMS USA Nats in SC this week so we'll see how it does - first time entry for me.


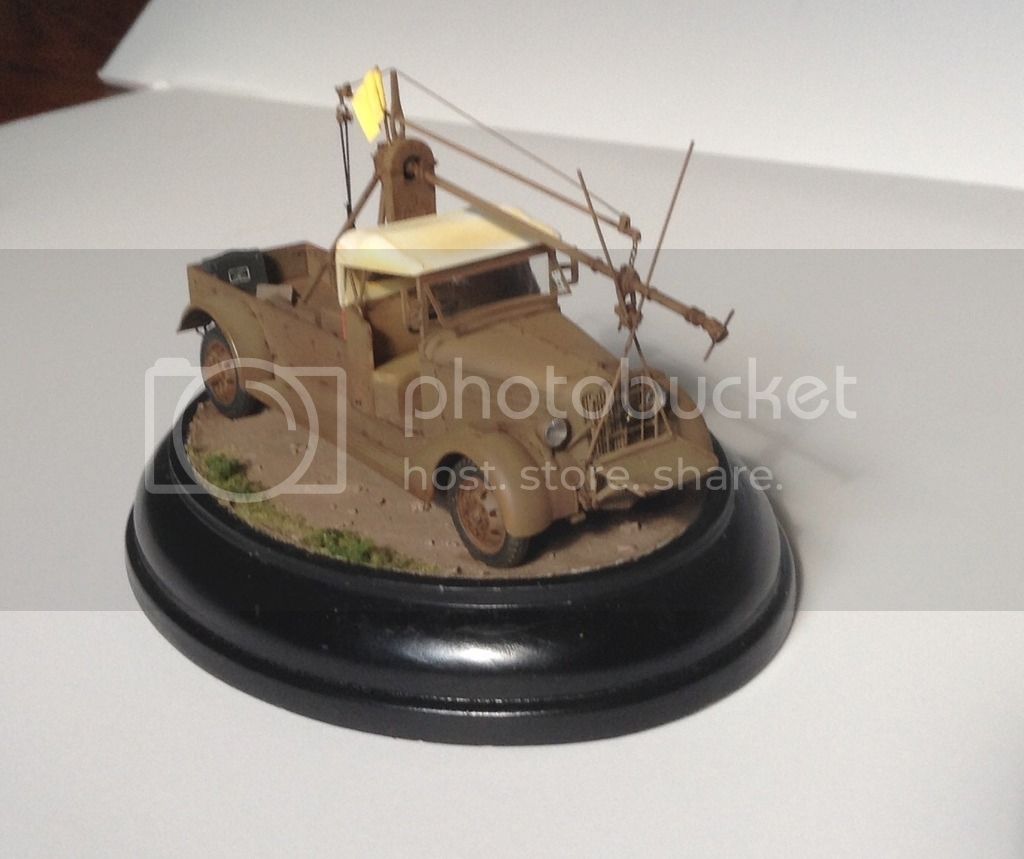
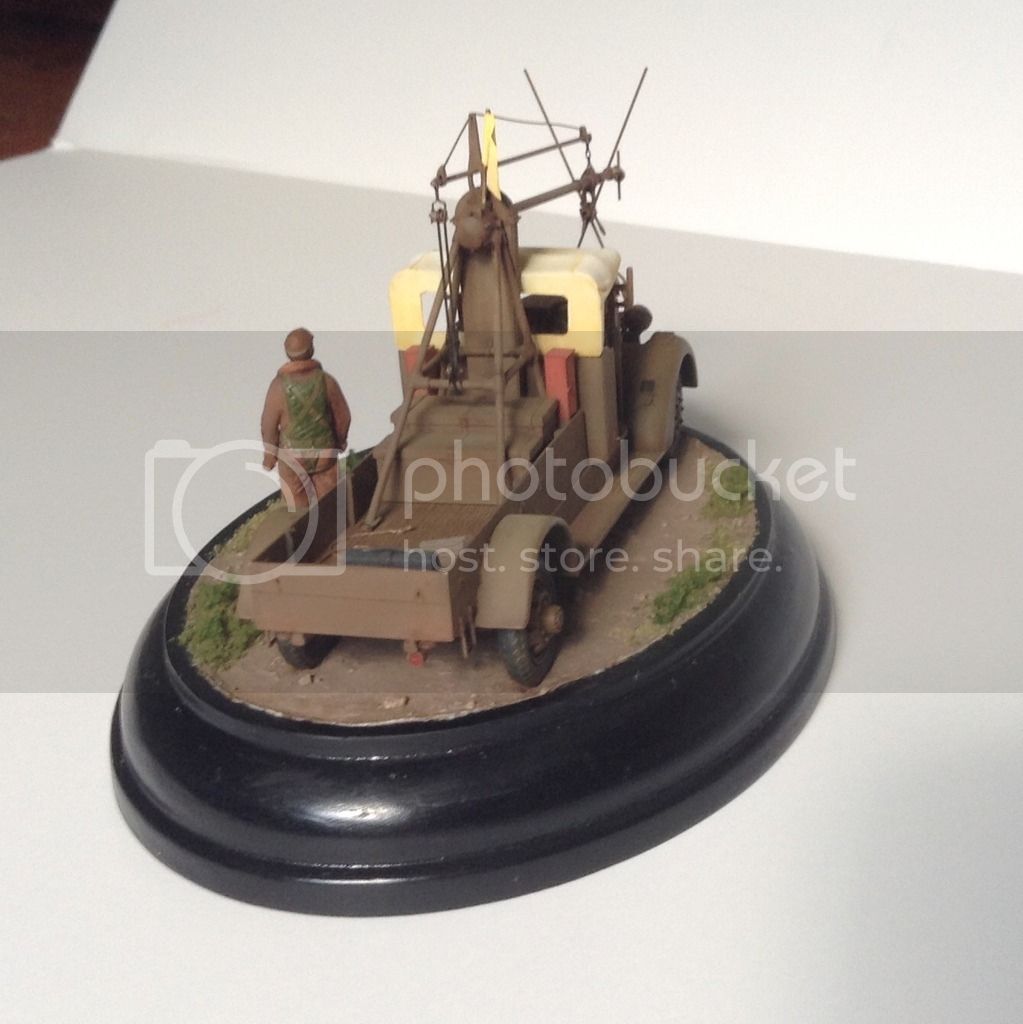
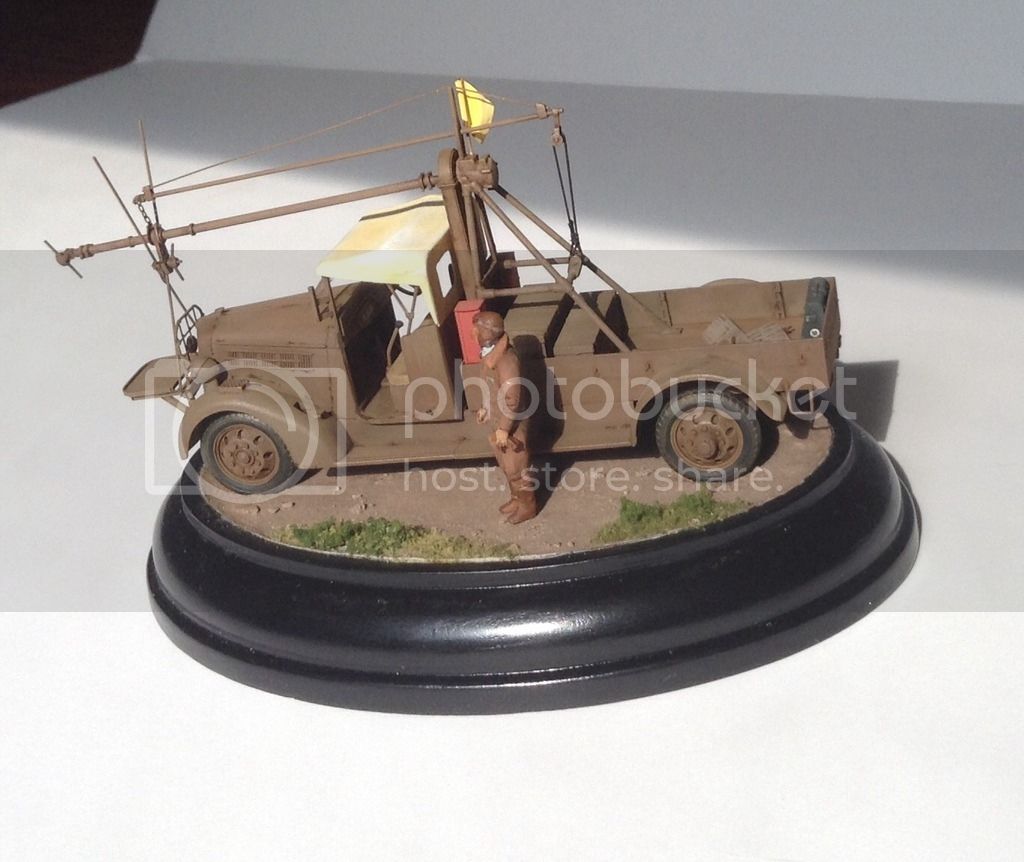

Thanks to everyone for their interest and I welcome all comments- Cheers -Richard


Thanks to everyone for their interest and I welcome all comments- Cheers -Richard
Kilo_Uniform

Joined: July 03, 2015
KitMaker: 280 posts
AeroScale: 141 posts

Posted: Sunday, July 31, 2016 - 08:01 PM UTC
Hi Richard,
Awesome! - I think I have used that word before when commenting on your work - and I do believe it is appropriate.
Your work is absolutely outstanding - well done Sir!
Best of luck with your entry into the competition.
Kind regards,
Kobus
Awesome! - I think I have used that word before when commenting on your work - and I do believe it is appropriate.
Your work is absolutely outstanding - well done Sir!
Best of luck with your entry into the competition.
Kind regards,
Kobus

rdt1953

Joined: February 06, 2015
KitMaker: 1,098 posts
AeroScale: 900 posts

Posted: Monday, August 01, 2016 - 02:40 AM UTC
Kobus- Thanks yet again for all of your praise- sharing this has been a very nice experience for me and I'm anxious to start something new when I return
and do it again ! Cheers - Richard
and do it again ! Cheers - Richard
Posted: Monday, August 01, 2016 - 06:20 AM UTC
A fantastic end. You certainly deserve a win for this jewel. It's flawless.

rdt1953

Joined: February 06, 2015
KitMaker: 1,098 posts
AeroScale: 900 posts

Posted: Monday, August 01, 2016 - 03:39 PM UTC
Brian - Thanks for following and also for the many compliments. I'll be sure to post the results of the Nats when I return . I'm debating the next project- it may be the Oscar but reading Gazs' posts have the wheels turning on a foil covered subject. Hmm- so many kits , so little time. Meanwhile I anxiously await the fuselage joining on your B 17 - All the best to you- Richard

rdt1953

Joined: February 06, 2015
KitMaker: 1,098 posts
AeroScale: 900 posts

Posted: Thursday, August 11, 2016 - 01:35 AM UTC
As promised here is the outcome of my entry in the U.S. IPMS Nats last week in Columbia S.C.
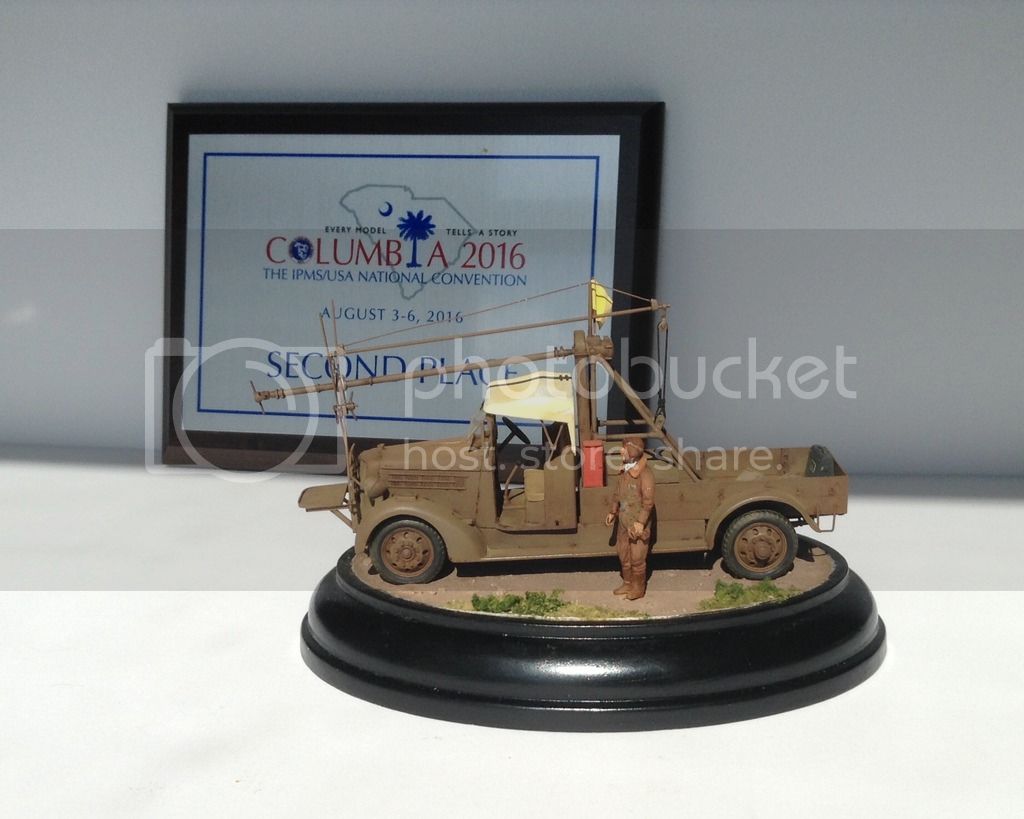
The Hucks truck took second place in Armor Conversions/Scratchbuilds.
A very well deserved first place went to a 1/48 scale early mine protected vehicle converted from , I believe , a Land Rover .
This was my first experience competing in an IPMS event of any sort so needless to say I am thrilled with the result. The level of workmanship on so many entries boggles the mind and each day brought more sensory overload and had my mind wanting to try every genre in every scale- now I am even more confused as to my next effort. So there it is folks- Thanks to all for your interest ! Cheers ! Richard
Posted: Thursday, August 11, 2016 - 02:12 AM UTC
WELL DESERVED!! Delighted to hear it!

justsendit

Joined: February 24, 2014
KitMaker: 3,033 posts
AeroScale: 60 posts

Posted: Thursday, August 11, 2016 - 03:26 AM UTC
Congratulations! I really enjoyed following your amazing work! 
—mike

—mike
 |


