Steffen,
I'm more then impressed that you already have the base camo paint scheme on, which by the way, looks great. the feathered edges are exceptionally done.
Like Andy said, it takes me a week just to open the box and sort out the parts, find the decal sheet, and read through the instructions.
Joel
Hosted by Rowan Baylis
Boulton Paul Defiant Mk.I - 1/48 Airfix
Joel_W

Joined: December 04, 2010
KitMaker: 11,666 posts
AeroScale: 7,410 posts

Posted: Sunday, March 27, 2016 - 01:24 AM UTC
Posted: Sunday, March 27, 2016 - 02:39 AM UTC
Thank you Oliver and Joel,
actually I could have been even faster but as this is my vacation I try to build something without stressing myself too much.
As for preparation: I try to start projects when I have everything I want for the build. My problem is to find motivation to start at all... BIG problem if I have too much aftermarket (say Su-24 with all Konplekt Zip corrections, Aires pit and wheelbays plus Eduard... very complicated to keep track of all instructions).
Example: Today I had some spare time due to drying paint and I started Zvezdas Pe-2 (outstanding kit btw) and to find out which panels will be replace with eduard and what parts have to be sanded flat, must get interior color (our not) and can be built in when is not an easy task ... so I started with the wings
So you see this is just a normal build when you have some time and do not need to care fore anything else... hope to get on some decals tomorrow (and at some point I need to think about how to get in the painted turret without damaging it)
all the best
Steffen
actually I could have been even faster but as this is my vacation I try to build something without stressing myself too much.
As for preparation: I try to start projects when I have everything I want for the build. My problem is to find motivation to start at all... BIG problem if I have too much aftermarket (say Su-24 with all Konplekt Zip corrections, Aires pit and wheelbays plus Eduard... very complicated to keep track of all instructions).
Example: Today I had some spare time due to drying paint and I started Zvezdas Pe-2 (outstanding kit btw) and to find out which panels will be replace with eduard and what parts have to be sanded flat, must get interior color (our not) and can be built in when is not an easy task ... so I started with the wings

So you see this is just a normal build when you have some time and do not need to care fore anything else... hope to get on some decals tomorrow (and at some point I need to think about how to get in the painted turret without damaging it)
all the best
Steffen
Posted: Sunday, March 27, 2016 - 11:30 AM UTC
That is looking very good Steffen, I'm particularly impressed with the camo, looks pretty accurate  and remember that I have intimate knowledge of it after designing camo masks for the Defiant. I will be starting your marking masks tomorrow, after the holiday
 and remember that I have intimate knowledge of it after designing camo masks for the Defiant. I will be starting your marking masks tomorrow, after the holiday
Posted: Sunday, March 27, 2016 - 12:36 PM UTC
Quoted Text
That is looking very good Steffen, I'm particularly impressed with the camo, looks pretty accurateand remember that I have intimate knowledge of it after designing camo masks for the Defiant. I will be starting your marking masks tomorrow, after the holiday
Cheers Mal,
you are very forgiving (see below) I tried to keep close to the instructions, which looked good to me compared to the picture from Osprey AoA.
AND
Quoted Text
...the feathered edges are exceptionally done....
I know this is wrong and I wanted the camo as sharp as I could. Sadly I missed to buy Tamiyas new "curve tape" in time for my build ... for the next I will be using Mal's Miracle Masks
all the best
Steffen
Posted: Sunday, March 27, 2016 - 03:49 PM UTC
Hi again Steffen
It's looking great!
Remember Edgar Books telling us the anecdote about Boulton Paul painters bevelling the edges of their paint masks to produce slightly soft edges? There are certainly shots of day-finish Defiants where the division between the colours isn't pin-sharp. I'll go for the "tight-not-crisp" look on mine.
All the best
Rowan
It's looking great!

Remember Edgar Books telling us the anecdote about Boulton Paul painters bevelling the edges of their paint masks to produce slightly soft edges? There are certainly shots of day-finish Defiants where the division between the colours isn't pin-sharp. I'll go for the "tight-not-crisp" look on mine.
All the best
Rowan

Posted: Sunday, March 27, 2016 - 05:03 PM UTC
Cheers Rowan!
Yes, Edgar is being missed... still I think such feathering would come out as sharp line in 1/48 scale.
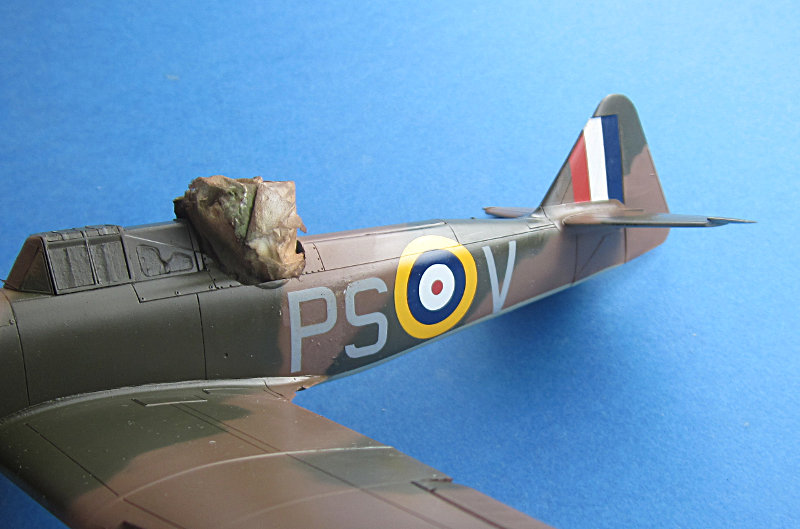
Anyway, here we have a slow start on the decals. They have a strange performance that I will have to adapt to (already screwed the fin decal on the other side)
all the best
Steffen
Yes, Edgar is being missed... still I think such feathering would come out as sharp line in 1/48 scale.
Anyway, here we have a slow start on the decals. They have a strange performance that I will have to adapt to (already screwed the fin decal on the other side)

all the best
Steffen
Joel_W

Joined: December 04, 2010
KitMaker: 11,666 posts
AeroScale: 7,410 posts

Posted: Sunday, March 27, 2016 - 09:10 PM UTC
Steffen,
Those kit decals really settled down well.
Joel
Those kit decals really settled down well.
Joel

greif8

Joined: January 17, 2006
KitMaker: 673 posts
AeroScale: 492 posts

Posted: Sunday, March 27, 2016 - 09:34 PM UTC
Very nice camo job Steffen. I hope I am able to get the tones right on my Spitfire build; your's look spot on.
Posted: Sunday, March 27, 2016 - 09:43 PM UTC
Well, that is not the problem.
I used my standard Klear-decal-Klear approach and the decals melted when I tried to apply them with Klear.. just noticed it too late. I manufactured something with the Xtradecal decals but these are of different styles (and color) than those provided with the kit.
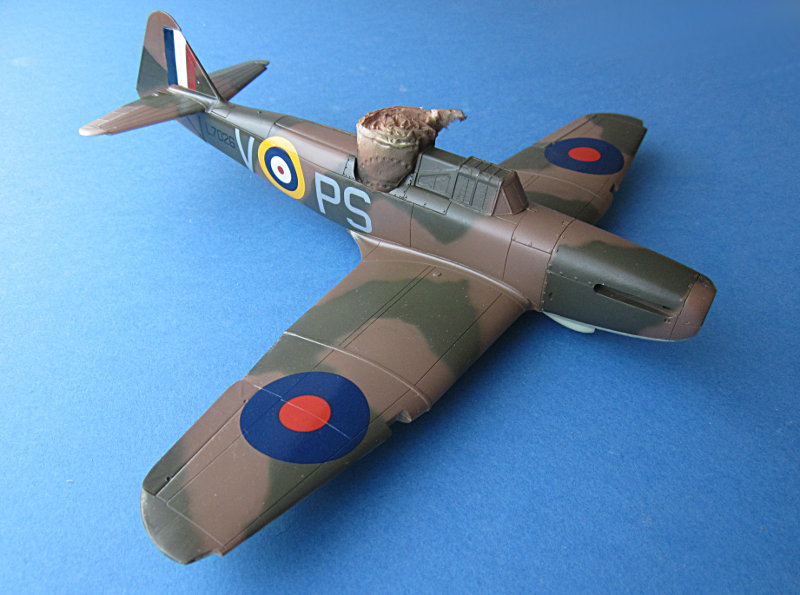
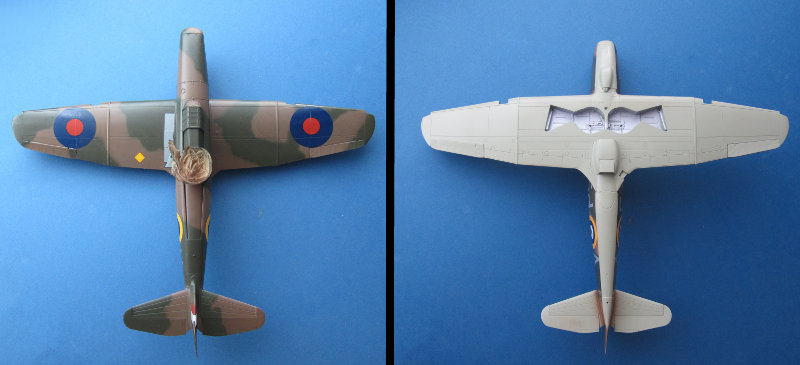
Main decals are on now and I also airbrushed the wheel well aluminium (decanted TS30). I'll let it dry overnite and add teh stencils tomorrow ... the Pe-2 is a ride on its own and the name says it all: PE² ... but I digress
all the best
Steffen
PS: Ernest you tend to post when I do ... I used Tamiya paint Sky, Flat Earth and Dark Green 2.. IMHO the brown is too reddish, but it looks good and the lifecolor paint is not as friendly as Tamiya (Lifecolour has a more umber "greenish" tone)
I used my standard Klear-decal-Klear approach and the decals melted when I tried to apply them with Klear.. just noticed it too late. I manufactured something with the Xtradecal decals but these are of different styles (and color) than those provided with the kit.

Main decals are on now and I also airbrushed the wheel well aluminium (decanted TS30). I'll let it dry overnite and add teh stencils tomorrow ... the Pe-2 is a ride on its own and the name says it all: PE² ... but I digress

all the best
Steffen
PS: Ernest you tend to post when I do ... I used Tamiya paint Sky, Flat Earth and Dark Green 2.. IMHO the brown is too reddish, but it looks good and the lifecolor paint is not as friendly as Tamiya (Lifecolour has a more umber "greenish" tone)
Posted: Monday, March 28, 2016 - 08:48 PM UTC
Hi again,
the decals are finally on and I also sprayed a layer of Klear to seal everything. Now it dries before the washing.
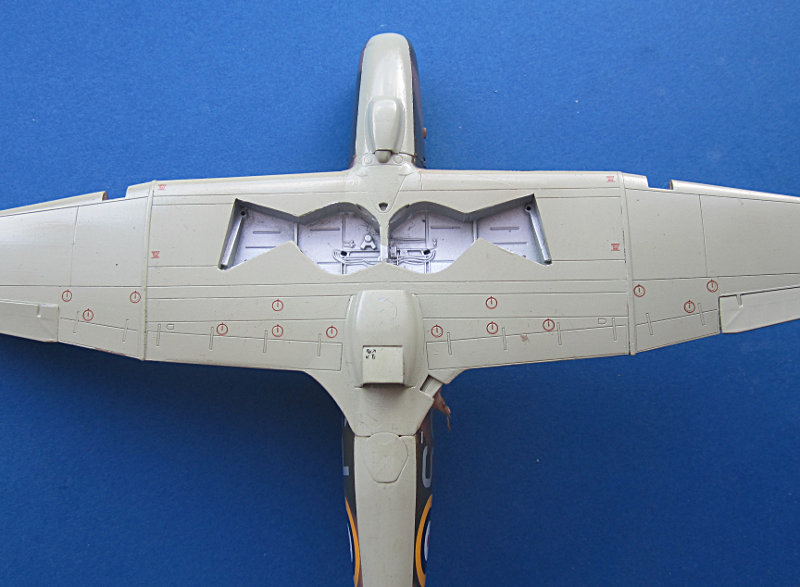
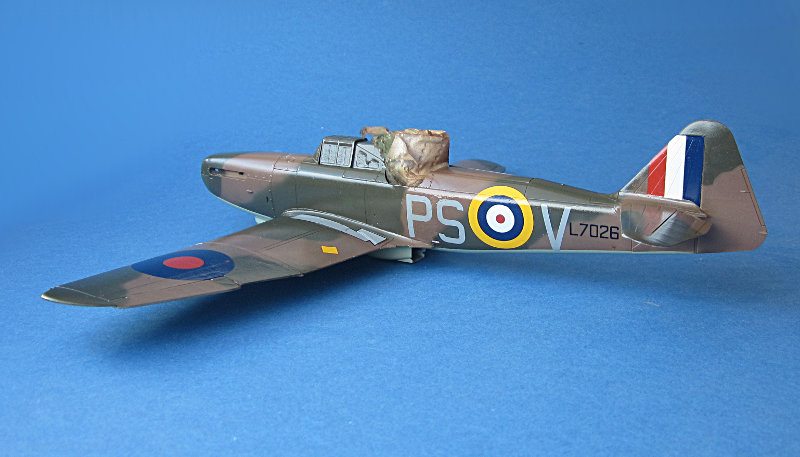
I have a problem with the color of the undercarriage .. .why black? and which parts must be black. I have seen the WA that Rowan posted, but I am not 100% convinced as this is a museum nightfighter and who knows what was repainted a certain color just because it was at hand???
all the best
Steffen
the decals are finally on and I also sprayed a layer of Klear to seal everything. Now it dries before the washing.


I have a problem with the color of the undercarriage .. .why black? and which parts must be black. I have seen the WA that Rowan posted, but I am not 100% convinced as this is a museum nightfighter and who knows what was repainted a certain color just because it was at hand???
all the best
Steffen
Joel_W

Joined: December 04, 2010
KitMaker: 11,666 posts
AeroScale: 7,410 posts

Posted: Monday, March 28, 2016 - 11:59 PM UTC
Steffen,
I to have had the same concerns about restorations. The only time I take one as gospel, is if it's done here in the States by the National Air and Space Museum.
Joel
I to have had the same concerns about restorations. The only time I take one as gospel, is if it's done here in the States by the National Air and Space Museum.
Joel
Posted: Tuesday, March 29, 2016 - 02:09 AM UTC
Hi again Steffen
Looking good!
Re: the undercarriage. Looking at period photos, black seems correct for a nightfighter, but there are some nice clear IWM shots in the Mushroom book that show a different finish on the earlier Defiants. The wheel hubs look like n/m, and the legs are darker (but not black). They seem to have a metallic sheen in many shots, so it could be a darker aluminium protective paint.
All the best
Rowan
Looking good!

Re: the undercarriage. Looking at period photos, black seems correct for a nightfighter, but there are some nice clear IWM shots in the Mushroom book that show a different finish on the earlier Defiants. The wheel hubs look like n/m, and the legs are darker (but not black). They seem to have a metallic sheen in many shots, so it could be a darker aluminium protective paint.
All the best
Rowan

Posted: Tuesday, March 29, 2016 - 02:21 AM UTC
Thank you Rowan!
The Mushroom book is in the mail and I only have the Osprey AoA as reference). I think I will go with NMF and maybe use a darker tone (AS12 for example).
all the best
Steffen
The Mushroom book is in the mail and I only have the Osprey AoA as reference). I think I will go with NMF and maybe use a darker tone (AS12 for example).
all the best
Steffen
Posted: Tuesday, March 29, 2016 - 12:13 PM UTC
yep, I went with silver for the undercarriage for my 1/72 scale build 
This is looking good Steffen, I started mine yesterday, what an absolutely gorgeous kit I also started the Airfix 1/72 scale Bristol Beaufighter and that too is a stunning kit. These Airfix new tools are just sublime, I have their Gloster Meteor on order too, and I started their 1/72 Curtis Hawk last week
  I'm hooked on modelling all over again

This is looking good Steffen, I started mine yesterday, what an absolutely gorgeous kit
 I also started the Airfix 1/72 scale Bristol Beaufighter and that too is a stunning kit. These Airfix new tools are just sublime, I have their Gloster Meteor on order too, and I started their 1/72 Curtis Hawk last week
  I'm hooked on modelling all over again
Posted: Tuesday, March 29, 2016 - 06:18 PM UTC
Cheers Mal, glad you have some fun in building models!
Well, as for myself. The Pe-2 is sucking some of the joy but I proceed with the Defiant quite well (even if a bit slower). Some might know whats next ... lets get messi
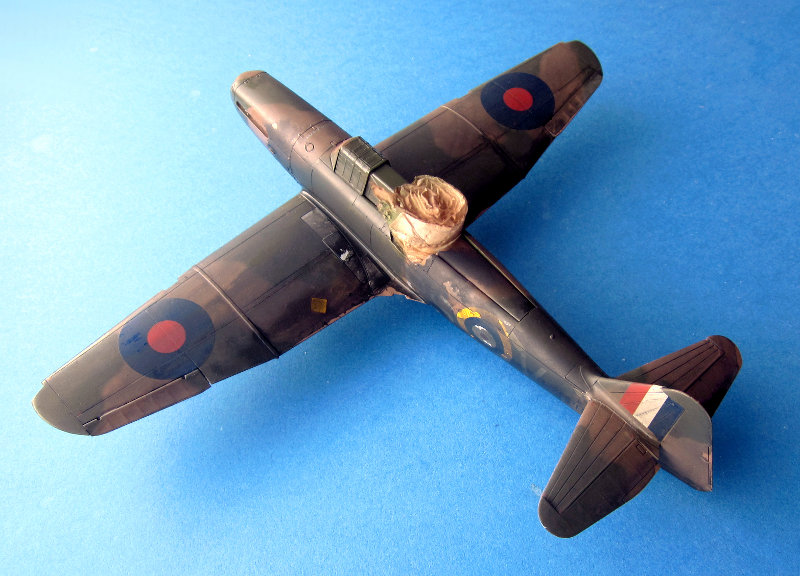
Yes I know, panel line washing is rather old school. But I am not a big fan of panel highlighting, zenithal Painting or colour modulation. I try such things from time to time, just to break the routine but this is my standard approach. When I wipe the excess away I often get an irregular staining that helps making it look less uniform... just to have something for the eye to stick on
all the best
Steffen
Well, as for myself. The Pe-2 is sucking some of the joy but I proceed with the Defiant quite well (even if a bit slower). Some might know whats next ... lets get messi

Yes I know, panel line washing is rather old school. But I am not a big fan of panel highlighting, zenithal Painting or colour modulation. I try such things from time to time, just to break the routine but this is my standard approach. When I wipe the excess away I often get an irregular staining that helps making it look less uniform... just to have something for the eye to stick on

all the best
Steffen
Posted: Tuesday, March 29, 2016 - 11:11 PM UTC
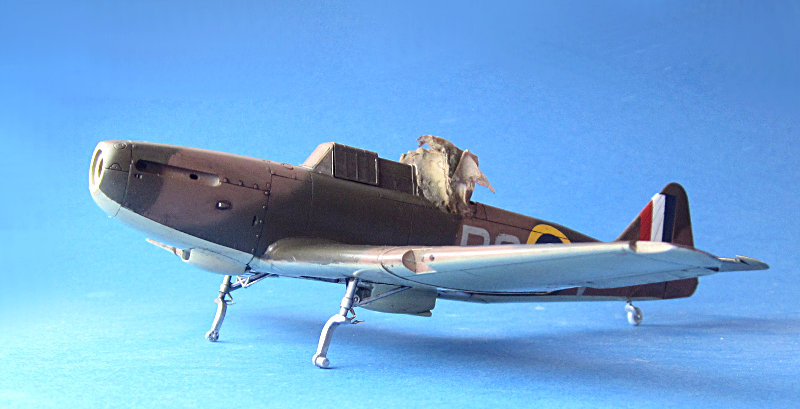
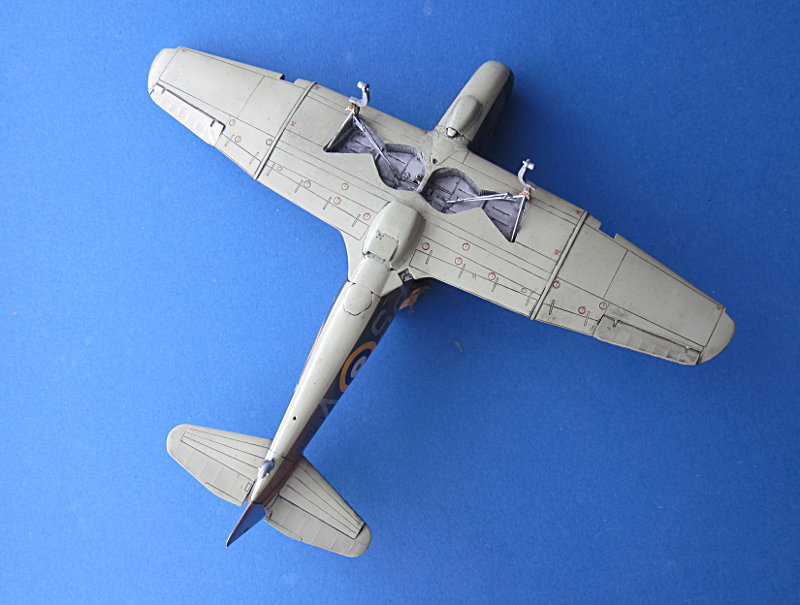
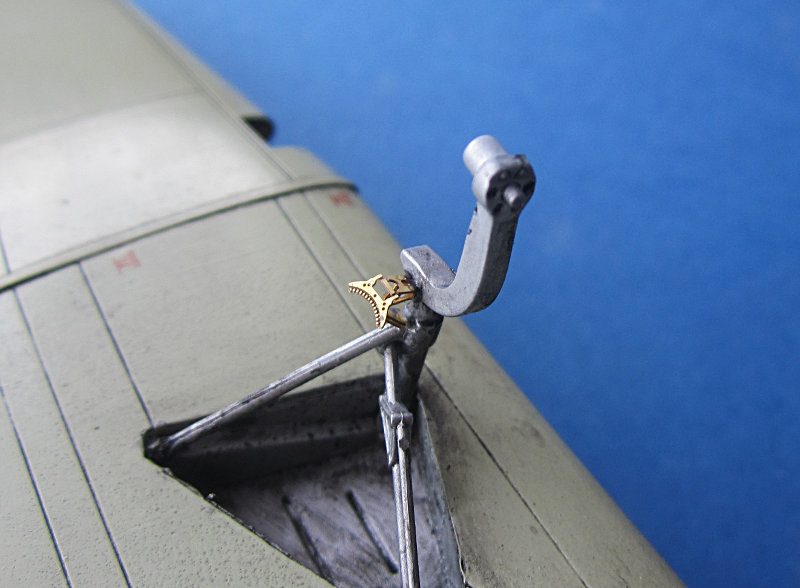
I cleaned it and added a few more photo etched parts to the under carriage
all the best
Steffen


all the best
Steffen
Joel_W

Joined: December 04, 2010
KitMaker: 11,666 posts
AeroScale: 7,410 posts

Posted: Wednesday, March 30, 2016 - 12:01 AM UTC
Steffen,
Nice results from the Sludge wash. I to prefer to use that method more times then not, but I do post shade, and/or use my modified black basing method depending on the colors of the base color coat. I find that the sludge wash often adds that used dirt look that helps to blend all the various weathering elements together.
Joel
Posted: Thursday, March 31, 2016 - 04:56 PM UTC
Cheers Joel.
my main effect is to show the structure and make the a/c look less uniform --- in real life they are in most cases but I find that boring for my models.
Here is the actual state of the kit:
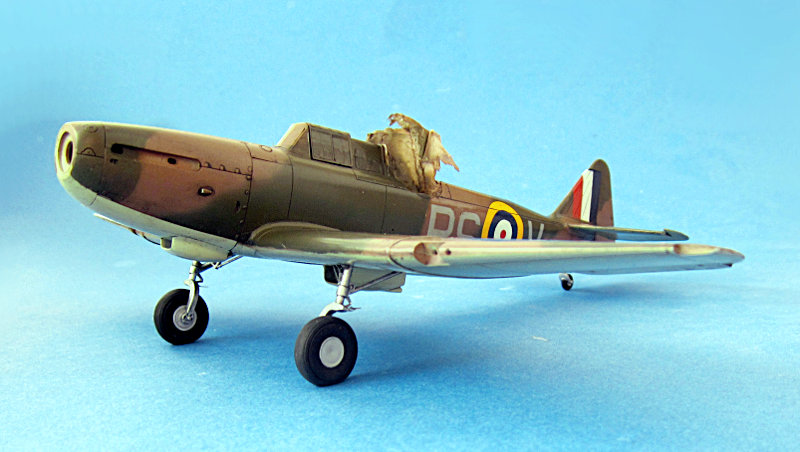
Today I got eduards 109G-6 and as announce this is a kit I really want to build so the Defiant will proceed with less focus... I still try to finish it soon.
all the best
Steffen
my main effect is to show the structure and make the a/c look less uniform --- in real life they are in most cases but I find that boring for my models.
Here is the actual state of the kit:

Today I got eduards 109G-6 and as announce this is a kit I really want to build so the Defiant will proceed with less focus... I still try to finish it soon.
all the best
Steffen
Posted: Friday, April 01, 2016 - 12:05 PM UTC
Hi Steffen,
And I have now started the Airfix 1/72 Dakota, another stunning kit, it was only £10.99!
Your defiant is looking good, just one thing, I think that the mud scrapers are on upside down, the open end should be close to the tyres?
And I have now started the Airfix 1/72 Dakota, another stunning kit, it was only £10.99!
Your defiant is looking good, just one thing, I think that the mud scrapers are on upside down, the open end should be close to the tyres?
Posted: Friday, April 01, 2016 - 01:12 PM UTC
Cheers Mal
as I wrote just have fun modelling no matter how many Airfix models you are starting
PE parts: That were my feelings too, but I double checked the Eduard instructions and this is how it is shown there. Is it possible they only come down when the U/C is retracted to get rid of the dirt before flying?
all the best
Steffen
as I wrote just have fun modelling no matter how many Airfix models you are starting

PE parts: That were my feelings too, but I double checked the Eduard instructions and this is how it is shown there. Is it possible they only come down when the U/C is retracted to get rid of the dirt before flying?
all the best
Steffen
Posted: Saturday, April 02, 2016 - 11:35 AM UTC
Quoted Text
Is it possible they only come down when the U/C is retracted to get rid of the dirt before flying?
I don't think so, the kit ones and the 1/72 scale kit ones are close to the tyres, and if they were to work like that they would act as a brake, stopping the wheel turning before any dirt/mud was removed? I do also believe that the serrated edge that Eduard depict represent bristles, as these items are brushes not scrapers? They are fitted below the oleo so they would retain there position, so no need to retract. They were an "innovation" because of the need to operate from grass airfields and found not to be necessary, see the Spitfire and Hurricane, to name but 2 aircraft that don't use this contraption

rochaped

Joined: August 27, 2010
KitMaker: 679 posts
AeroScale: 669 posts

Posted: Saturday, April 02, 2016 - 02:19 PM UTC
Steffen,
Your Defiant is looking really good.
May I ask if you masked or freehanded the green/brown camouflage?
By reading your blog it seems the kit builds very well, without vices.
Even so, it would take me weeks to get to were you are right now
The defiant brings back childhood memories, since the old 1/72 Airfix must have been one of my earliest build attempts. Wonder if the all black shark mouth version is available in the quarter scale??
Cheers
Pedro
Your Defiant is looking really good.
May I ask if you masked or freehanded the green/brown camouflage?
By reading your blog it seems the kit builds very well, without vices.
Even so, it would take me weeks to get to were you are right now

The defiant brings back childhood memories, since the old 1/72 Airfix must have been one of my earliest build attempts. Wonder if the all black shark mouth version is available in the quarter scale??
Cheers
Pedro
Posted: Saturday, April 02, 2016 - 02:44 PM UTC
Thanks Mal and Pedro!
Mal: I bent them down .. no problem, but I should not change my mind too often. With the u/c doors installed you dont see much of it anyway.
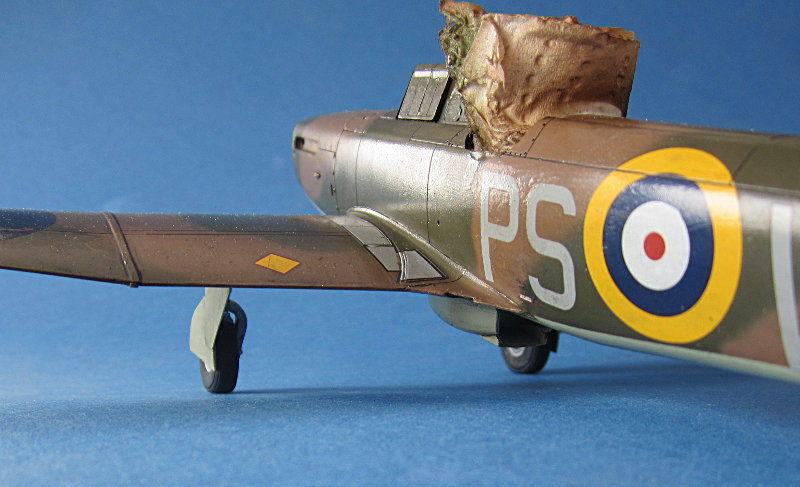
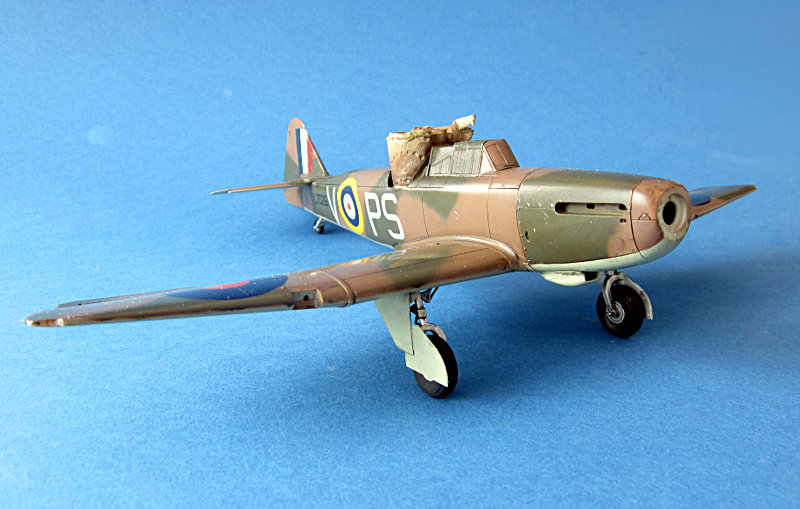
@Pedro: The Camo is airbrushed free hand. I had no masks at hand so I tried my best.... I did not want to mask the whole model on my own so it is not fully correct, but I like it (it was diskussed earlier in this thread). That you are a bit slower is fully understandable as you add sooooo much stuff on your own which needs a lot of time for research alone .. still did not finish my Su-7BKL because of you
as I wrote steps are few because of this:
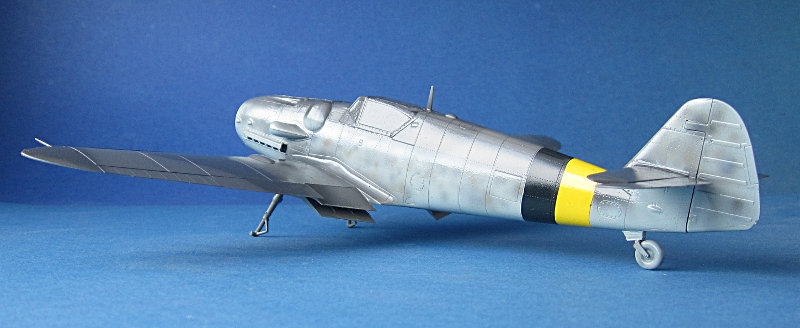
(new Eduard Bf 109G-6)
all the best
Steffen
Mal: I bent them down .. no problem, but I should not change my mind too often. With the u/c doors installed you dont see much of it anyway.


@Pedro: The Camo is airbrushed free hand. I had no masks at hand so I tried my best.... I did not want to mask the whole model on my own so it is not fully correct, but I like it (it was diskussed earlier in this thread). That you are a bit slower is fully understandable as you add sooooo much stuff on your own which needs a lot of time for research alone .. still did not finish my Su-7BKL because of you

as I wrote steps are few because of this:

(new Eduard Bf 109G-6)
all the best
Steffen
Posted: Saturday, April 02, 2016 - 03:14 PM UTC
Steffen,
Nice looking Gustav! Wish you had done the blog here instead. I have a lot of 109's to build.
Gary
Nice looking Gustav! Wish you had done the blog here instead. I have a lot of 109's to build.
Gary
Posted: Saturday, April 02, 2016 - 03:55 PM UTC
Hi again Steffen
Looking good. (Nice work on the new Gustav too.)
Mal's right about the mud scrapers - you can see them in the walkaround, so I fear Eduard must have muddled their instructions somehow.
All the best
Rowan
Looking good. (Nice work on the new Gustav too.)

Mal's right about the mud scrapers - you can see them in the walkaround, so I fear Eduard must have muddled their instructions somehow.
All the best
Rowan

 |


