Florida, United States
Joined: August 23, 2015
KitMaker: 170 posts
AeroScale: 109 posts
Posted: Tuesday, June 28, 2016 - 09:14 AM UTC
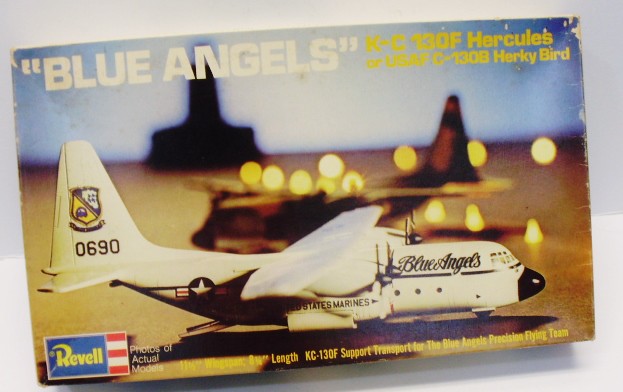
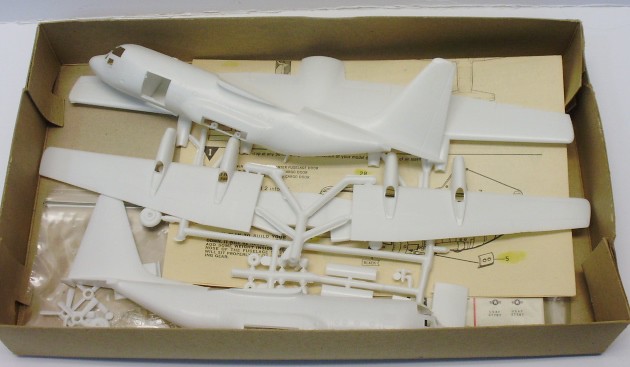
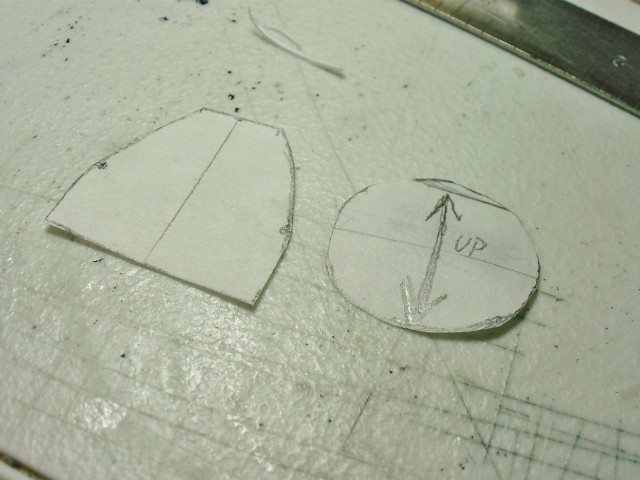
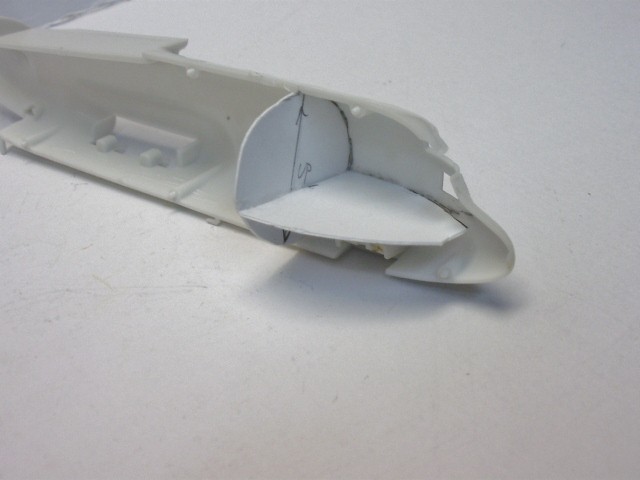
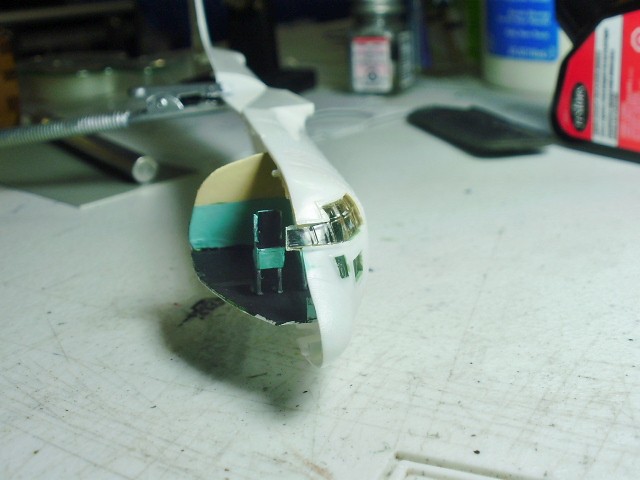
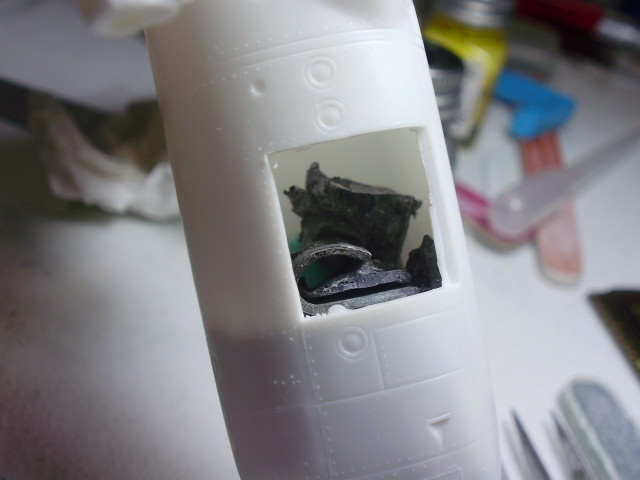
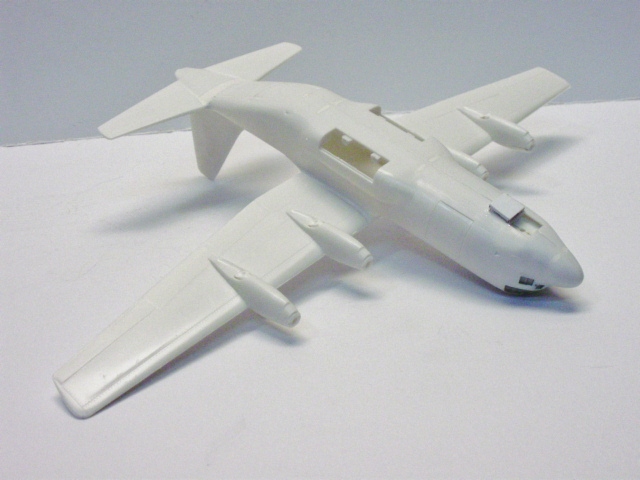
I am going to start a C-130B using the old Revell 1/140 kit which dates from 1956. I was originally going to do a C-130E from the 70s in SEA camo but this kit has no wing tanks. So I decided to do it as a B model which rarely had tanks. I am thinking of an early 60s bird with NMF. I am also attempting to do some scratch building, a rudementary cockpit with a couple seats and maybe control yoke and IP. Not sure how much can be seen through these tiny windows. So far I have the deck and bulkhead built and painted. The colors are close, I have no real good close up pictures of the interior so I am using what I find on line. Here's where I am at. I started the scratch building with paper templates, then when they fit good enough I committed them to .015 plastic card stock.---John
 Herk 1
 by
jvandeu53, on Flickr
 Herk 2
 by
jvandeu53, on Flickr
 Herk 9
 by
jvandeu53, on Flickr
Florida, United States
Joined: August 23, 2015
KitMaker: 170 posts
AeroScale: 109 posts
Posted: Tuesday, June 28, 2016 - 09:18 AM UTC
Here is the cockpit floor and bulkhesd installed and given a coat of paint. I will be designing up the seats next.---John
 Herk 4
 by
jvandeu53, on Flickr
 Herk 8
 by
jvandeu53, on Flickr
Florida, United States
Joined: August 23, 2015
KitMaker: 170 posts
AeroScale: 109 posts
Posted: Tuesday, June 28, 2016 - 10:01 AM UTC
This is the color scheme I am basing my colors on. It will be close but not exact, especially in the odd 1/140 small scale.---John
 C-130 69-6580 cockpit
 by
jvandeu53, on Flickr
Florida, United States
Joined: August 23, 2015
KitMaker: 170 posts
AeroScale: 109 posts
Posted: Tuesday, June 28, 2016 - 10:19 AM UTC
I found a color I had made 2 years ago for a C-130 project that never got off the ground, so to speak. I think this looks close to the cockpit photo I posted, looks more like seafoam green to me.---John
 Herk 10
 by
jvandeu53, on Flickr

#259
Massachusetts, United States
Joined: October 23, 2011
KitMaker: 2,265 posts
AeroScale: 1,715 posts
Posted: Tuesday, June 28, 2016 - 12:00 PM UTC
Nice project.

I love "classic plastic".
The cockpit will be well worth doing, it will be fairly visible inside that greenhouse.
Florida, United States
Joined: August 23, 2015
KitMaker: 170 posts
AeroScale: 109 posts
Posted: Tuesday, June 28, 2016 - 09:36 PM UTC
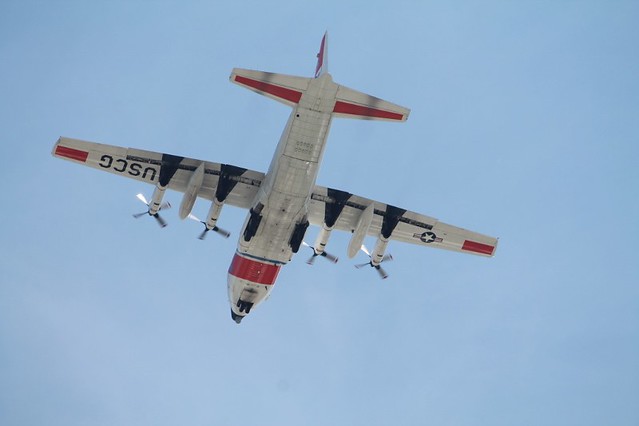
Thanks, I have 3 reasons to do this project, I have always loved the Herks looks, they buzz my home every week and my older brother was a Herk maintainer back in the early 70s at Forbes AFB. This one just fly over about an hour ago, I live close to Clearwater USCG Station in Florida.I believe this is an HC-130H---John
 IMG_6604 (800x533)
 by
jvandeu53, on Flickr
Florida, United States
Joined: August 23, 2015
KitMaker: 170 posts
AeroScale: 109 posts
Posted: Tuesday, June 28, 2016 - 11:09 PM UTC
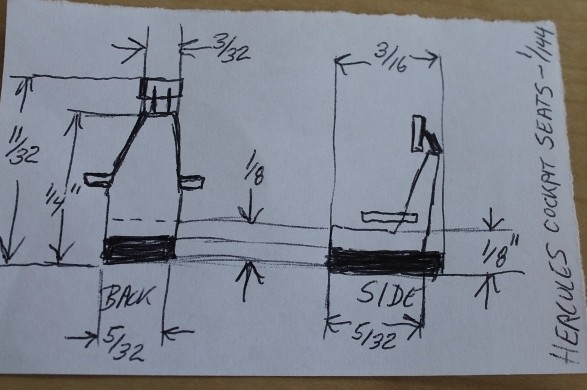
These are some plans I sketched out a few years ago to scratch build seats for a 1/144 Hercules. I want to see if they are feasible in such a small scale.---John
 C-130 Hercules seats in 1-144 1
 by
jvandeu53, on Flickr
#259
Massachusetts, United States
Joined: October 23, 2011
KitMaker: 2,265 posts
AeroScale: 1,715 posts
Posted: Wednesday, June 29, 2016 - 12:36 AM UTC
Florida, United States
Joined: August 23, 2015
KitMaker: 170 posts
AeroScale: 109 posts
Posted: Wednesday, June 29, 2016 - 12:49 AM UTC
That's quite the job you did on that 1/144 cockpit!---John
#259
Massachusetts, United States
Joined: October 23, 2011
KitMaker: 2,265 posts
AeroScale: 1,715 posts
Posted: Wednesday, June 29, 2016 - 12:51 AM UTC
Alas, still not finished.
here it is before closing upThat reminds me, don't forget the nose weight!
Florida, United States
Joined: August 23, 2015
KitMaker: 170 posts
AeroScale: 109 posts
Posted: Wednesday, June 29, 2016 - 03:23 AM UTC
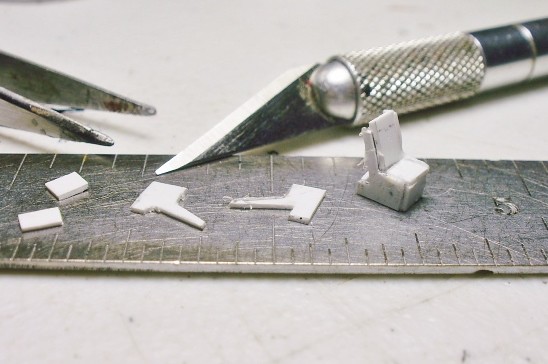
Here's my start to the seats. Needs some refinement but moving right along.---John
 OLYMPUS DIGITAL CAMERA
 by
jvandeu53, on Flickr
Florida, United States
Joined: August 23, 2015
KitMaker: 170 posts
AeroScale: 109 posts
Posted: Thursday, June 30, 2016 - 01:27 AM UTC
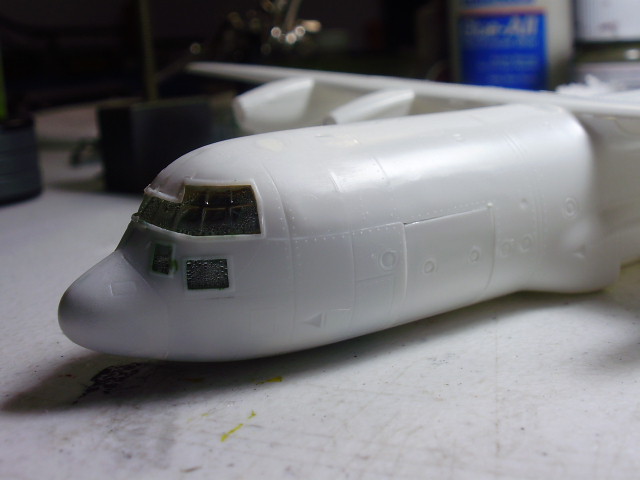
The seats are in, I am going no further on the interior. It's a waste of time as nothing can be seen. The "glass" is so thick and distorted it would be a waste of time detailing things unseeable through that "prism". Now to add weight and close it up.The Minicraft 1/144 kit came in today and has decals for a NMF B model from the 60s so I can use those for this build and find aftermarket E decals for that SEA camo build. I will check out the Minicraft glass to see if it's any better to see inside. Revell's is horrid.---John
 Herk 15
 by
jvandeu53, on Flickr
Florida, United States
Joined: August 23, 2015
KitMaker: 170 posts
AeroScale: 109 posts
Posted: Thursday, June 30, 2016 - 06:36 AM UTC
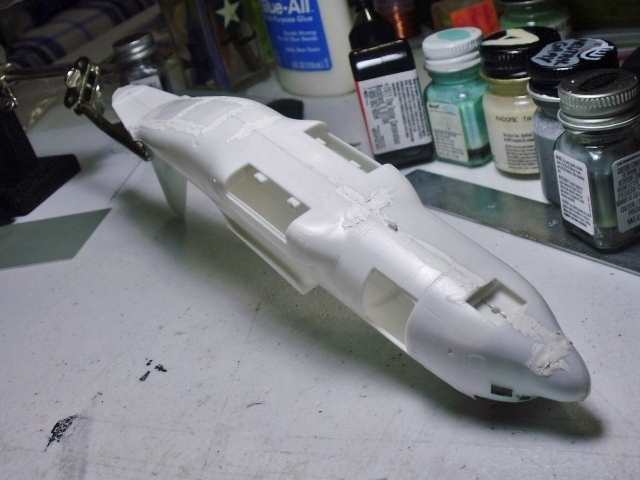
I added some weight in the nose and wheel well area and glued it shut. I also added the rear cargo door and ramp, puttied them
up and the fuselage. I left the side forward cargo door off to add more weight.---John
 Herk 18
 by
jvandeu53, on Flickr
#259
Massachusetts, United States
Joined: October 23, 2011
KitMaker: 2,265 posts
AeroScale: 1,715 posts
Posted: Thursday, June 30, 2016 - 01:49 PM UTC
too bad, I guess not surprising, the vintage window transparencies are so poor. Minicraft took an altogether different approach.
Florida, United States
Joined: August 23, 2015
KitMaker: 170 posts
AeroScale: 109 posts
Posted: Saturday, July 02, 2016 - 01:01 AM UTC
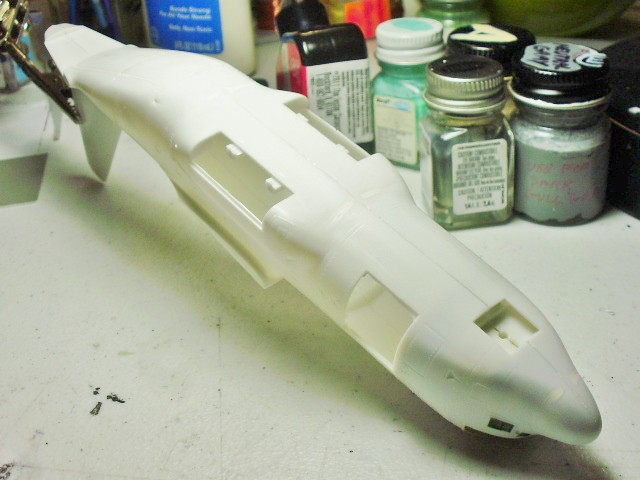
The fuselage is all cleaned up and sanded down and I have the wing halves together.---John
 Herk 21
 by
jvandeu53, on Flickr
 Herk 20
 by
jvandeu53, on Flickr
Florida, United States
Joined: August 23, 2015
KitMaker: 170 posts
AeroScale: 109 posts
Posted: Monday, July 18, 2016 - 09:29 AM UTC
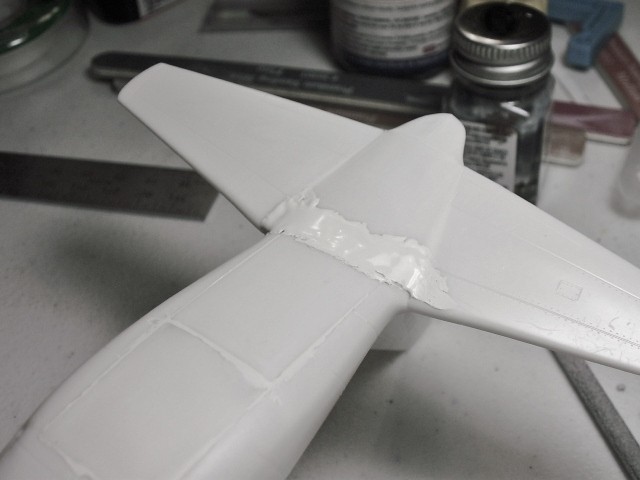
I have the wings and horizontal stabilizers attached. I think I need to do some minor adjusting on the wing dihedral, not as radical as the Intruder was though. There is also quite a gap between the area on the bottom of the horizontal stabilizers and the cargo door ramp.---John
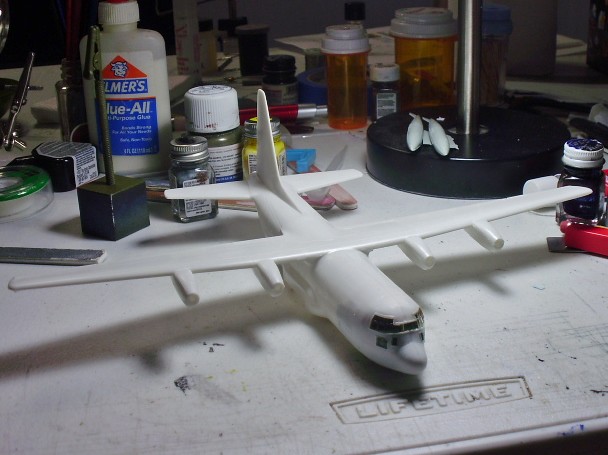 OLYMPUS DIGITAL CAMERA
 by
jvandeu53, on Flickr
Florida, United States
Joined: August 23, 2015
KitMaker: 170 posts
AeroScale: 109 posts
Posted: Monday, July 18, 2016 - 09:44 AM UTC
Here's a picture of the C-130B I am modeling. It's from the early 60's, when they were in NMF. The Minicraft kit has the decals for this plane, 61-0950.---John
 C-130B 610950 1964 Germany
 by
jvandeu53, on Flickr
Florida, United States
Joined: August 23, 2015
KitMaker: 170 posts
AeroScale: 109 posts
Posted: Monday, July 18, 2016 - 08:22 PM UTC
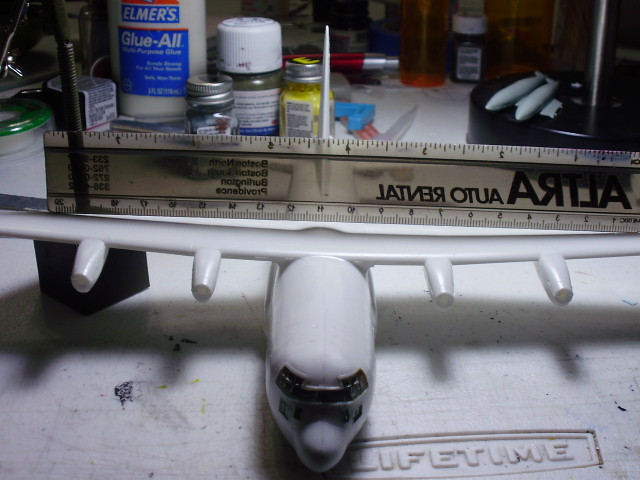
The wing is opposite of the Intruder problem, it drooped down and this droops up, tried pressure but I may have to use hot water, it's stubborn. The gap in the tail to cargo door area looks like a penny slot, maybe I should use it as a bank?---John
 Herk 23
 by
jvandeu53, on Flickr
 Herk 24
 by
jvandeu53, on Flickr
Florida, United States
Joined: August 23, 2015
KitMaker: 170 posts
AeroScale: 109 posts
Posted: Tuesday, July 19, 2016 - 07:10 AM UTC
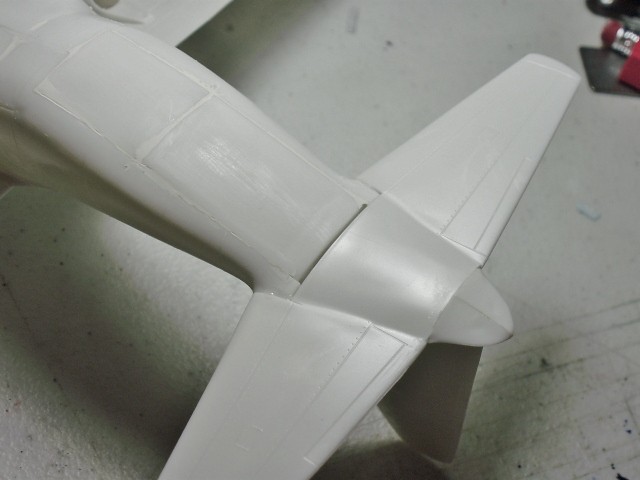
I added more weight, some lead car tire weights, to the backside of the cockpit bulkhead and closed up the side cargo door. The slot I filled by the cargo door-tail area needed a second coat of Tamiya putty. I will be scratch building the jet exhausts for
the engines next.---John
 OLYMPUS DIGITAL CAMERA
 by
jvandeu53, on Flickr
 Herk 26
 by
jvandeu53, on Flickr
 Herk 27
 by
jvandeu53, on Flickr
Florida, United States
Joined: August 23, 2015
KitMaker: 170 posts
AeroScale: 109 posts
Posted: Wednesday, July 20, 2016 - 02:58 AM UTC
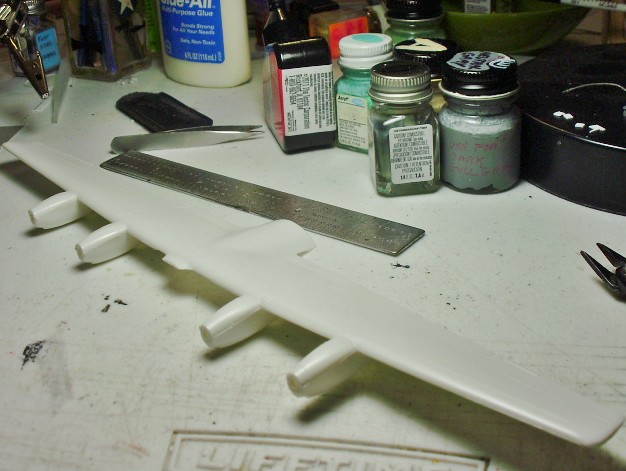
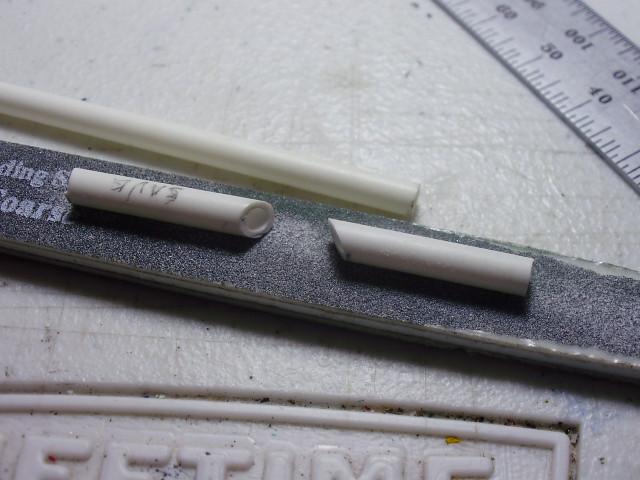
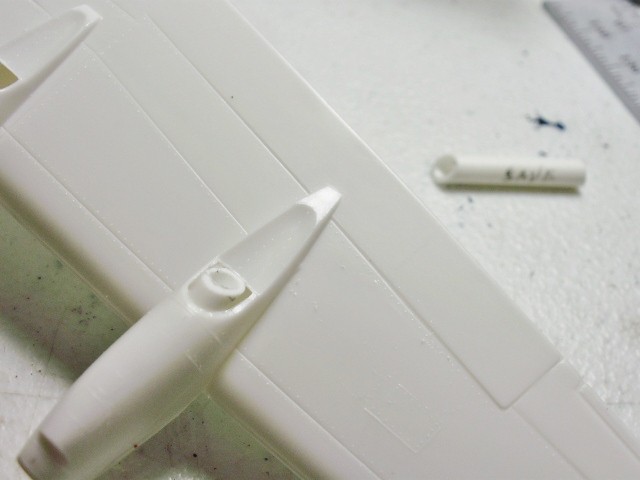
I've made the exhausts from 5/32" diameter Evergreen plastic tube. I had a left over piece from my previous Revell C-130 build so I used it as a template to make these. I cut the angled end at about 45 degrees and left about 2mm from the engine cowling to the short end of the 45 degree cut.---John
 Herk 29
 by
jvandeu53, on Flickr
 Herk 28
 by
jvandeu53, on Flickr
Florida, United States
Joined: October 21, 2005
KitMaker: 78 posts
AeroScale: 18 posts
Posted: Wednesday, August 24, 2016 - 06:53 AM UTC
I finally got around to sanding down the tail door ramp area and scratch built the nose wheel door. The original was two piece with a door on the right and left side of the nose wheel well. This never was, I have no idea where Revell got that bogus idea.---John
 OLYMPUS DIGITAL CAMERA
 by
jvandeu53, on Flickr
Scotland, United Kingdom
Joined: May 11, 2015
KitMaker: 768 posts
AeroScale: 656 posts
Posted: Wednesday, August 24, 2016 - 03:39 PM UTC
This is coming along really well! I must have a go at a small scale plane just so that I can appreciate the subtle differences in techniques.
Pax & Pallets: Revell 1/48 Dakota
Terrible Teens : Revell 1/48 F15E Strike Eagle
Airfix IV : Airfix 1.72 Vulcan
Florida, United States
Joined: October 21, 2005
KitMaker: 78 posts
AeroScale: 18 posts
Posted: Thursday, August 25, 2016 - 12:54 AM UTC
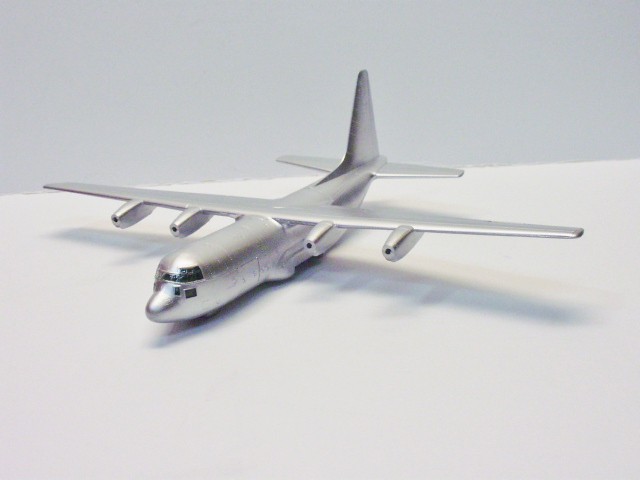
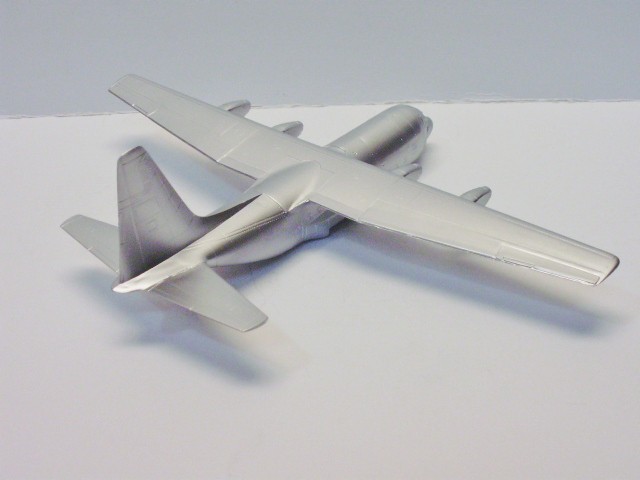
Just unmasked,I used Tamiya spray can lacquer TS-30 Silver Leaf.
Once it's dry I can do the detail painting, nose, window frames,
position lights etc.---John
 Herk25
 by
jvandeu53, on Flickr
 OLYMPUS DIGITAL CAMERA
 by
jvandeu53, on Flickr
Florida, United States
Joined: August 23, 2015
KitMaker: 170 posts
AeroScale: 109 posts
Posted: Thursday, August 25, 2016 - 04:17 AM UTC
The posts by me above somehow got under my armor site name john53. Please excuse the mess as I don't go to the armor site anymore nor do I know what happened.Thanks--jonvan NOT john53---John Confused yet I sure as hell am!!!!
Florida, United States
Joined: August 23, 2015
KitMaker: 170 posts
AeroScale: 109 posts
Posted: Friday, August 26, 2016 - 07:35 PM UTC
I am at a bit of a stand still on this project. The kit props are bad, actually pathetic is more like it. The cone shaped spinners are totally out to lunch for shape and way oversized. The prop blades are almost passable. I have used Aeroclubs aftermarket before but don't think they are in buisiness? I found a shop that sells them, Joe's Models, in NJ but have had no reply to my e mail asking about their availabilty. Is there anywhere else anyone knows of where I can purchase Aeroclub props? I have also thought of putting in ads for 1/144 Minicraft props from persons using spinning blurred props who have these in a spares box. Thanks---John