_GOTOBOTTOM
Pre-Flight Check
Constructive critique of your finished or in-progress photos.
1/48 Eduard Bf 109E-7 Trop. Libya, 1941
kahunaminor
_VISITCOMMUNITY
New South Wales, Australia
Joined: April 06, 2008
KitMaker: 151 posts
AeroScale: 141 posts
Posted: Friday, March 03, 2017 - 03:37 AM UTC
Welcome back,

I was just fiddling around and before I knew it, I had an engine installed:


I still have to do a wash, weather and add some wiring but its in!

Regards,
kahunaminor
_VISITCOMMUNITY
New South Wales, Australia
Joined: April 06, 2008
KitMaker: 151 posts
AeroScale: 141 posts
Posted: Monday, March 13, 2017 - 11:21 AM UTC
Welcome back,

Just to show I haven't totally forgotten this build, here a couple of updates. Here are the exhausts and tropical intake:


New ground for me in that I plan to include at least two figures:


I am still working on a vignette concept, so it is still in its layout phase:


The vehicle is is 1/48 Tamiya Type 82 Kubelwagen Afrika Korps boxing. The pilot figure is also from there and the mechanic is from the Eduard 1/48 Luftwaffe 1944 boxing.

Regards,K
Antilles
_VISITCOMMUNITY
Nordrhein-Westfalen, Germany
Joined: March 22, 2015
KitMaker: 671 posts
AeroScale: 614 posts
Posted: Monday, March 13, 2017 - 08:49 PM UTC
Hallo Kent,

visiting Your build log frequently I can see Your good progress. This will truly be a fantastic model and dio finished! Keep on posting.

Oliver
kahunaminor
_VISITCOMMUNITY
New South Wales, Australia
Joined: April 06, 2008
KitMaker: 151 posts
AeroScale: 141 posts
Posted: Tuesday, March 21, 2017 - 06:34 AM UTC
Thanks Oliver,

I have been a tad distracted with my armour build but as that has hit a small impasse, it was time to get back to this build. I wanted to detail the engine a bit more as it is open for the world to see, so using this book to guide me:


I set about adding some of the smaller bits of wiring that are obvious to the naked eye. This is by no means all encompassing but with some lead wire of various diameters, copper wire stripped from an old electrical cord, some swearing, some plastic rod, some BMF self adhesive foil, a lot more swearing and time, I came up with this:


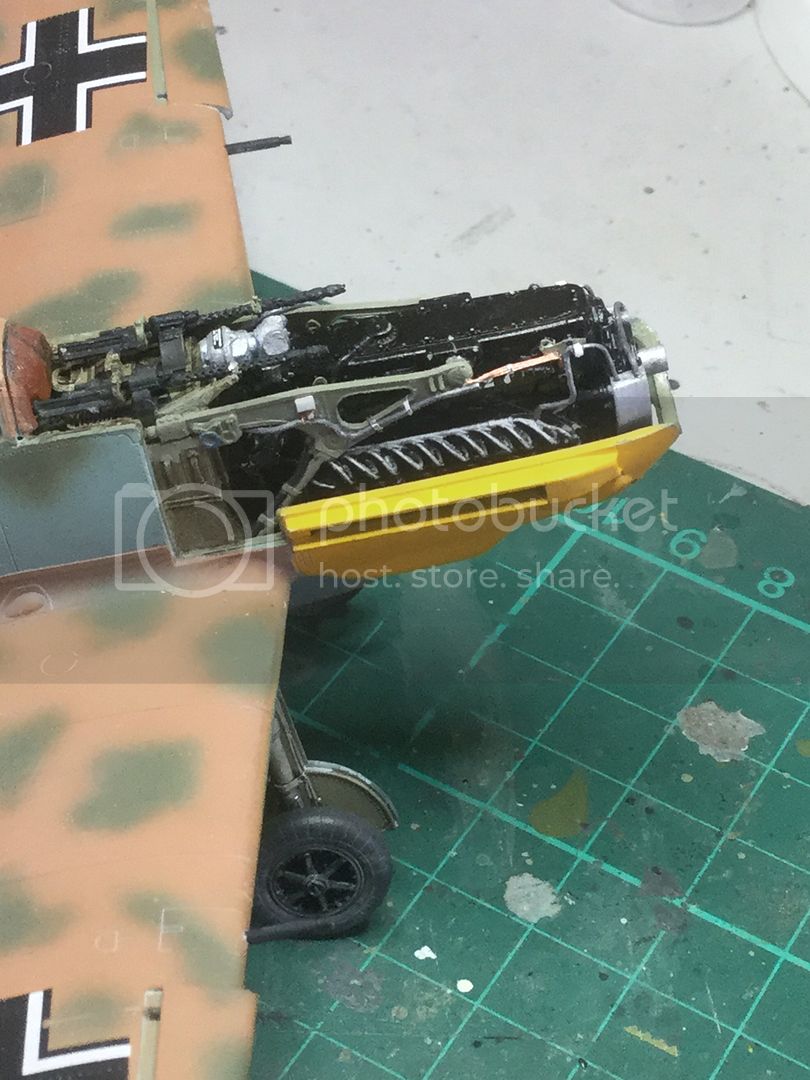
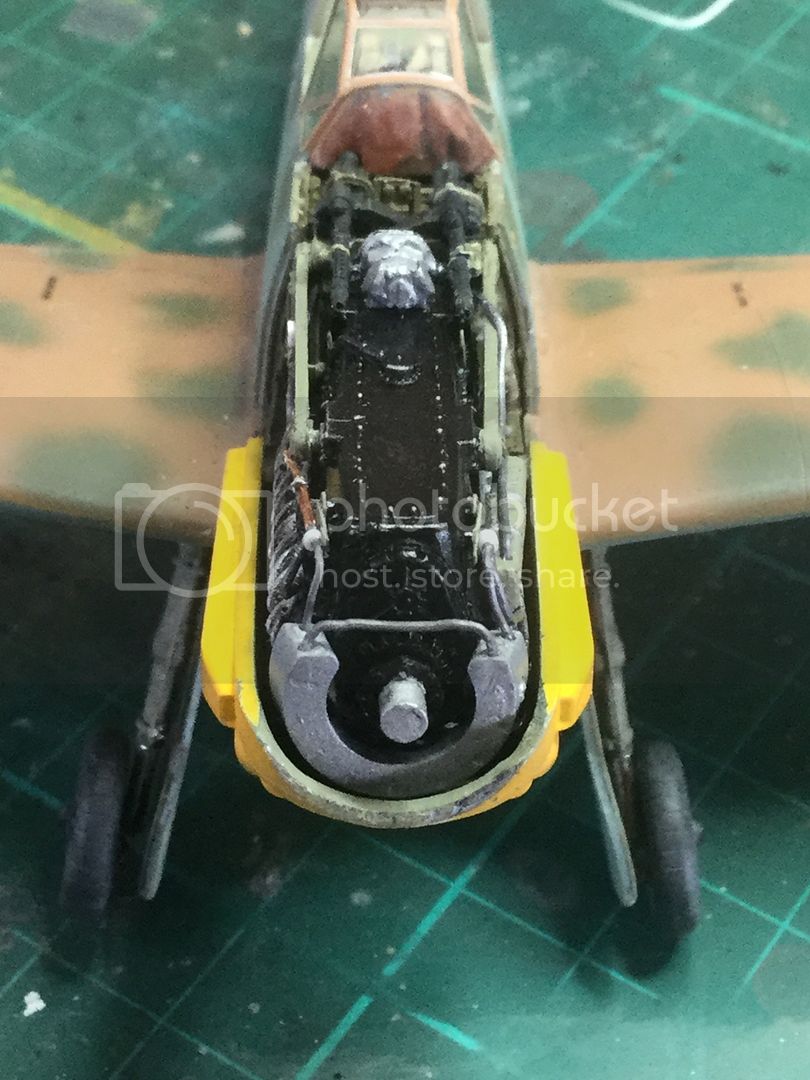
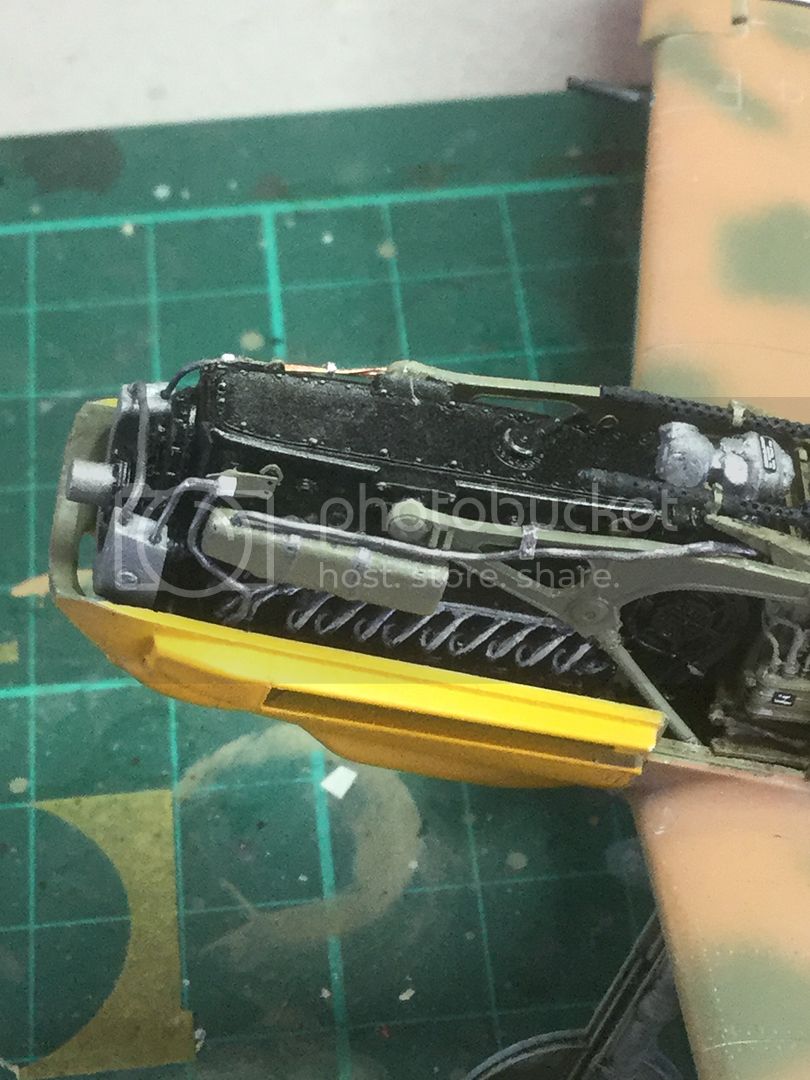
Still to be painted and weathered but a little closer to the photos than before. The steely eyed amongst you will have seen the engine appears out of alignment. It is but the addition of the spinner and its connection point  will true it up enough and hopefully hide some errors!!

Regards,
kahunaminor
_VISITCOMMUNITY
New South Wales, Australia
Joined: April 06, 2008
KitMaker: 151 posts
AeroScale: 141 posts
Posted: Monday, April 03, 2017 - 11:03 AM UTC
Welcome back,
As I plan to have this completed for the NSW Scale Model Show early next month, I realised I had started wasting time on side issues such as the composition of the material for the base and came to a realisation: I can have an incomplete aircraft on a half finished base or if I don't finish the aircraft, I will have nothing to show at all! So, the engine has been completed as far as it will be. There is some more wiring I could do but this is it. Exhausts lined up and inserted through the openings and spark plug covers set in place. AK engine wash has covered a multitude of sins and tied the area together. Having said that, the MG gloves need a wash to tone them down. The tyres have been flattened slightly to show weight bearing and the drop tank has been added, plumbed and fuel spills added. Some minor engine oil leaks on the underside add a used look. A flat coat with AK ultra Matte Varnish is next up followed by final chipping effects then construction with prop and spinner assembly, canopy, mass balances and pitot. The ladder comes from the 1/48 Tamiya tank maintenance set, which has a lot of interesting pieces for any maintenance setting. Still three figures but one is shirtless so no easing into figures for me:


Regards,
kahunaminor
_VISITCOMMUNITY
New South Wales, Australia
Joined: April 06, 2008
KitMaker: 151 posts
AeroScale: 141 posts
Posted: Monday, April 10, 2017 - 11:57 AM UTC
Slowly approaching the end. Canopy, prop and spinner assembly, pitot and mass balance (yes singular because one has gone astray) have been added. There is only the engine cowling latches and some minor metallic weathering to go:


Regards,
GazzaS
#424
_VISITCOMMUNITY
Queensland, Australia
Joined: April 23, 2015
KitMaker: 4,648 posts
AeroScale: 1,938 posts
Posted: Monday, April 10, 2017 - 12:26 PM UTC
Kent,
You've really done a great job with this. I envy your stencil and decal work.

Gaz
kahunaminor
_VISITCOMMUNITY
New South Wales, Australia
Joined: April 06, 2008
KitMaker: 151 posts
AeroScale: 141 posts
Posted: Sunday, April 23, 2017 - 11:13 AM UTC
Welcome back,

With the addition of the cowling locks, some light weathering on the engine and wing root, I am calling the aircraft complete:


I wanted to create a small duckboard work area, so out came the paddle pop sticks, matches and white glue. An hour or so of measuring, cutting, scribing and gluing left me with this:


Some tissue paper soaked in a white glue/paper mixture gives me a rag to cover a non existent hole in the sand filter housing. The match ends will be trimmed, some nail holes added with a pin as required and some ends squared before some paint and weathering.

Regards,
kahunaminor
_VISITCOMMUNITY
New South Wales, Australia
Joined: April 06, 2008
KitMaker: 151 posts
AeroScale: 141 posts
Posted: Sunday, April 23, 2017 - 11:14 AM UTC

Quoted Text

Kent,
You've really done a great job with this. I envy your stencil and decal work.

Gaz


Thanks Gaz,

I think it was a lot of luck with the occasional prayer.

Regards,
Willard79
_VISITCOMMUNITY
Wellington, New Zealand
Joined: June 01, 2014
KitMaker: 189 posts
AeroScale: 179 posts
Posted: Monday, April 24, 2017 - 12:32 PM UTC
Nice work Kent, the Emil Trop scheme has been a personal favorite of mine since I was a kid.

Regards.
kahunaminor
_VISITCOMMUNITY
New South Wales, Australia
Joined: April 06, 2008
KitMaker: 151 posts
AeroScale: 141 posts
Posted: Tuesday, April 25, 2017 - 10:33 AM UTC

Quoted Text

Nice work Kent, the Emil Trop scheme has been a personal favorite of mine since I was a kid.

Regards.


Thanks Spud,

There is something about the scheme isn't there?

Welcome back,

First effort at a base, so probably over engineered a bit. Photo frame with craft sticks around the border to build a flush interior edge. Craft stick supports in each corner. Monte Marte 24 hour air dry clay (terracotta because it's closer to desert colour) rolled to within an inch of its life (with talcum powder to negate sticking) to form a thin covering over the entire insert. Secured with white glue and trapped underneath the photo frame edges. Items placed and tyre marks gently added. The wooden walkway has been gloss coated, oil washed then Promodeller wash followed by Ultra Matte Varnish. I have some sand from the kids sandpit and some commercial stuff for rocks etc. now to leave it for 24 hours plus to dry:


Regards,

 _GOTOTOP