

Hello Marc,
Thanks.
Since Bockscar is an important aircraft in the history of the Atomic age, I want to make sure I've got the bases covered. There are three ways, in my opinion, one can show this aircraft.
First, when Bockscar arrived on Tinian, nice and shiny.
Second, when she was stored at Davis-Monthan.
Third, her current status at Dayton, OH.
In doing research I've found that the "Bockscar" nose art wasn't painted on the aircraft during the Aug. 9 mission. The only aircraft in the 393th, 509th that had name on the nose was the Enola Gay when it was on Tinian. The decal sheet in the kit has the "Bockscar" nose art, and yet the circle with the arrow through it for the tail marking is missing. The circle with the arrow through it was the 509th CG marking. The "N" tail markings were "stolen" from the 444th BG for security reasons. Same with the Enola Gay's "R" tail marking, which belonged to the 6th BG.
So which way am I going with this build, I'm leaning towards the current status. I'd like to give it some respect since the Enola Gay has gotten more attention, and right fully so, then as been given. Bockscar has been all but forgotten, not only here, but in the role she played in history.
See ya in the funnies...........
Hosted by Rowan Baylis
Academy's 1/72nd B-29A Build review.

BigfootV

Joined: December 24, 2005
KitMaker: 1,624 posts
AeroScale: 385 posts
Posted: Sunday, October 23, 2016 - 11:13 PM UTC
Joel_W
Joined: December 04, 2010
KitMaker: 11,666 posts
AeroScale: 7,410 posts
Posted: Sunday, October 23, 2016 - 11:14 PM UTC
Brian,
That's some setup you came up with to prime everything at one time. I'm assuming you used a rattle can for max coverage.
Since the B-29 is housed in the National Air & Space museum, and is mostly polished aluminum panels, following that pattern seems to be a logical conclusion.
Joel
That's some setup you came up with to prime everything at one time. I'm assuming you used a rattle can for max coverage.
Since the B-29 is housed in the National Air & Space museum, and is mostly polished aluminum panels, following that pattern seems to be a logical conclusion.
Joel


Jessie_C


Joined: September 03, 2009
KitMaker: 6,965 posts
AeroScale: 6,247 posts

Posted: Sunday, October 23, 2016 - 11:25 PM UTC
Quoted Text
Looks good Brian. I'm not saying there is anything wrong with this museum photo in particular, but I am always leary about using a museum or airshow bird as a reference.
Unless you're building a model of it as it appears in the muesum

Still, the USAF museum's displays may be approached with a modicum of trust. They're pretty careful to explain whether their display aircraft vary from the operational versions.

Kevlar06
Joined: March 15, 2009
KitMaker: 3,670 posts
AeroScale: 833 posts
Posted: Sunday, October 23, 2016 - 11:44 PM UTC
Quoted Text
Since Bockscar is an important aircraft in the history of the Atomic age, I want to make sure I've got the bases covered...
...So which way am I going with this build, I'm leaning towards the current status. I'd like to give it some respect since the Enola Gay has gotten more attention, and right fully so, then as been given. Bockscar has been all but forgotten, not only here, but in the role she played in history.
Brian,
I think you are right on with a portrayal of "Bockscar" in her current condition- that nose art is impressive, and I agree with you about the history of this "not-as-famous" aircraft. To me, Bockscar is more important to history than the Enola Gay, which is certainly a historical aircraft for dropping the FIRST atomic weapon used in wartime-- but the Bockscar is the aircraft that ENDED the Second World War----no other aircraft and weapon of war has had an impact like that in all of human history. If the roles of the Enola Gay and Bockscar were reversed, It would of course be different. Mark it up as what's on display now-- nice and shiny, with that unique section of RR track and freight car superimposed on that yellow ball and mushroom cloud-- which really makes this aircraft unique.
VR Russ
Kevlar06
Joined: March 15, 2009
KitMaker: 3,670 posts
AeroScale: 833 posts
Posted: Monday, October 24, 2016 - 12:11 AM UTC
Brian,
I noted in your comparison photos that you are using Bare Metal Foil as well as kitchen foil. I do too for certain applications, but you need to be careful with Bare Metal Foil-- it's thinner than kitchen foil, so on compound curves it may tend to tear easier. It's best applied over flatter areas. It also does not "buff" well with buffing sticks, sandpaper or steel wool, or even paper tissue or cloth sometimes. Spraying a clear coat can sometimes cause it to wrinkle or change color too. And applying water to it (as in decaling) can soften and separate it from it' adhesive. It's very useful for detail areas such as canopies, or in places where kitchen foil may be to thick--such as control surfaces or on a bare edge like landing gear doors or panels that might remain open. I also find Bare Metal Foil sometimes "wrinkles" over time. I'm not saying you shouldn't use it -- I have a large supply that I use for lots of applications-- I'm just saying it might not be suitable for all your foiling. One thing I've also found out about Bare Metal Foil is it does not store very well over long periods of time, I had several packages I'vfor ten yeas, and I've recently had to throw them out as they've developed minute cracks in the surface, which makes them very noticeable when applied on a curved surface. I can't even use them for masking canopies, as they tend to fall apart as they are being removed. So, just be aware that Bare Metal Foil, while a great product, is not good for all applications.
VR, Russ

wing_nut
Joined: June 02, 2006
KitMaker: 1,212 posts
AeroScale: 468 posts
Posted: Monday, October 24, 2016 - 03:10 AM UTC
Brian, It's clear you know the history of the aircraft. I had no idea of those details. Since we build models that are essentially a snap shot of it at a point in time, doing as it sits now works well. And it is certainly well documented as to what she looks like now.
BigfootV
Joined: December 24, 2005
KitMaker: 1,624 posts
AeroScale: 385 posts
Posted: Monday, October 24, 2016 - 09:18 PM UTC
Hey gang,
Thanks for the replies everyone, I'll try to address them after this update.
Houston, we have a problem.
Parts E-101/E-102, are warped. This is a dry fit. Also the ailment tabs are not doing there job. This could make foiling this area somewhat challenging.
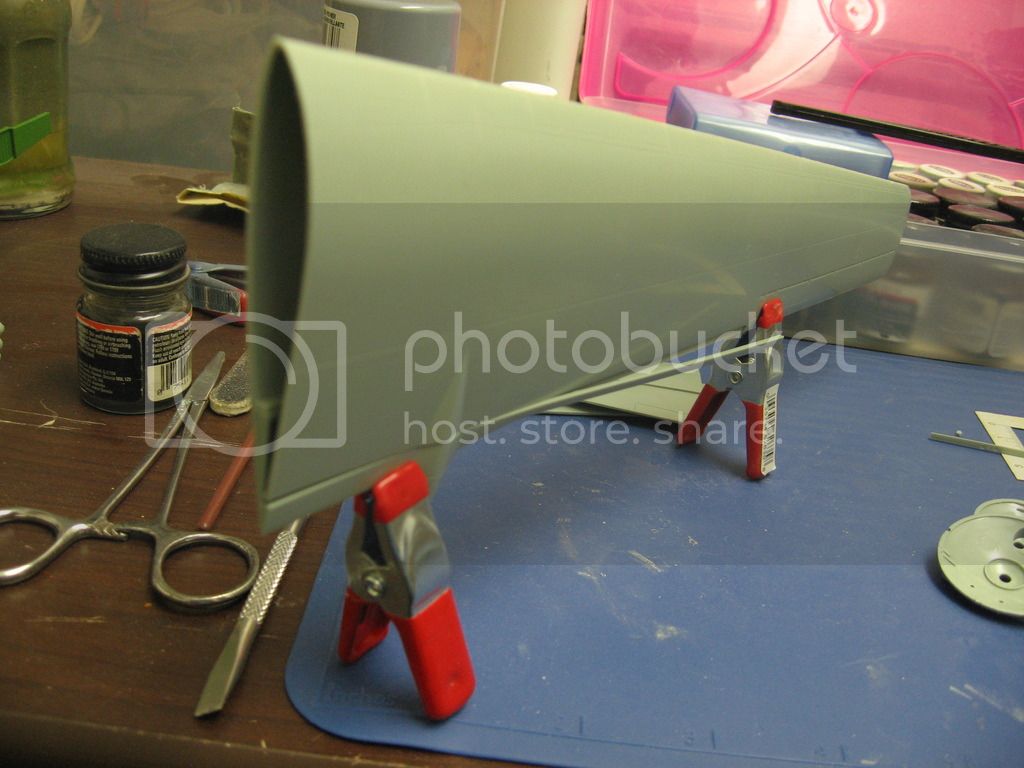
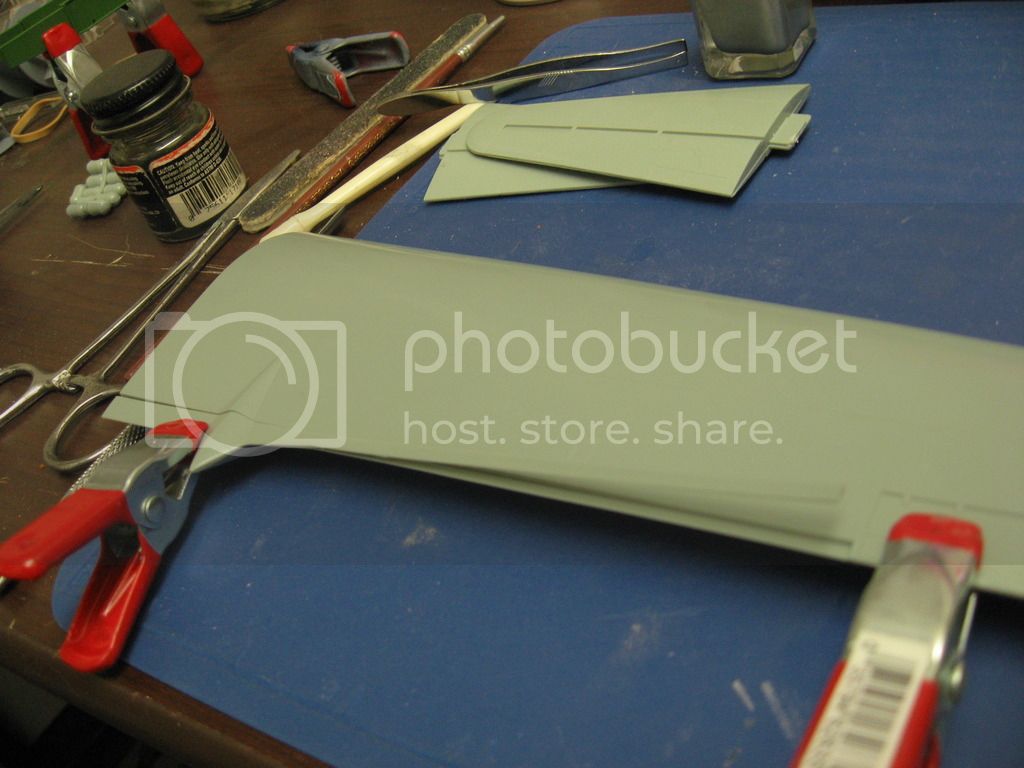
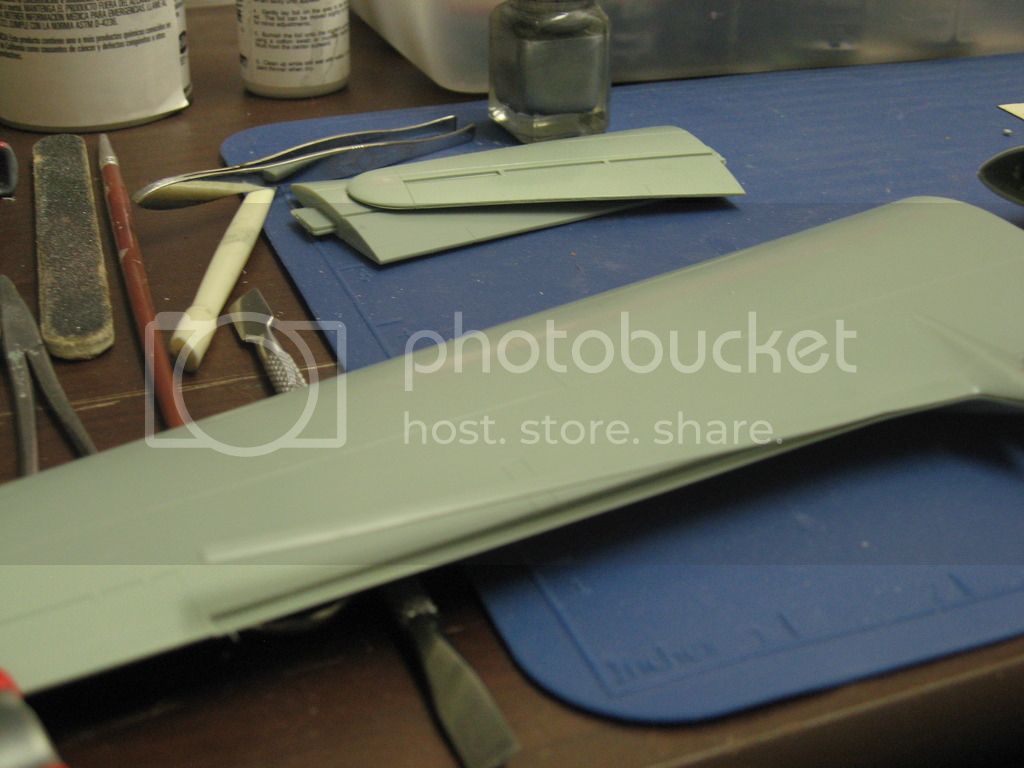
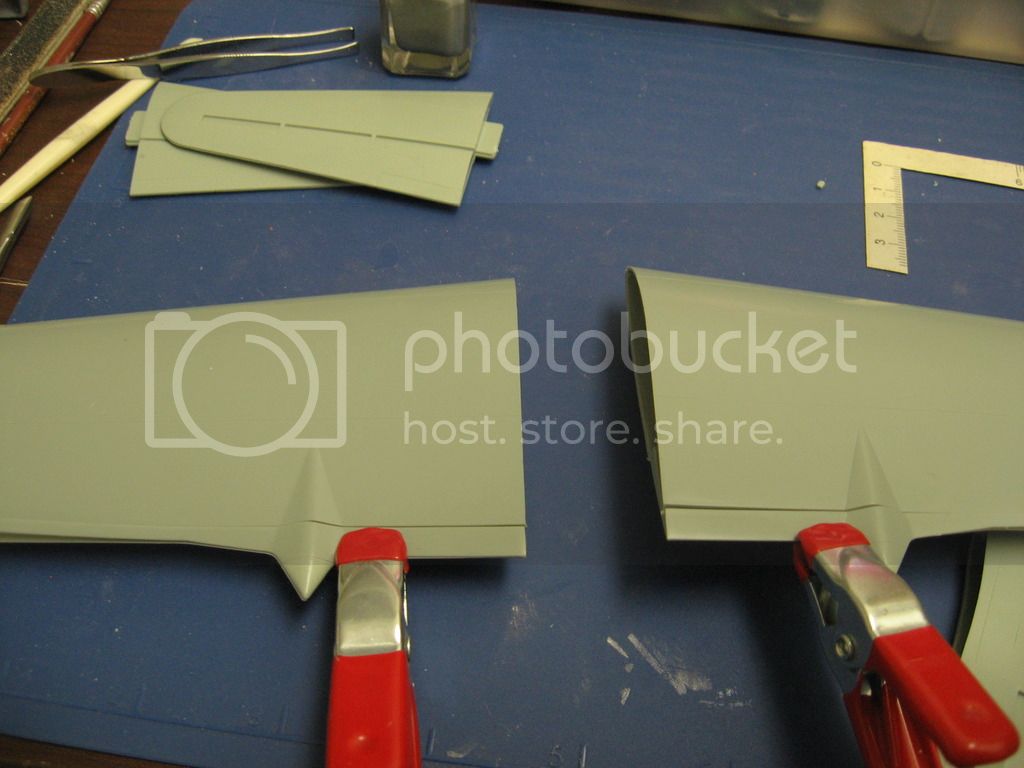
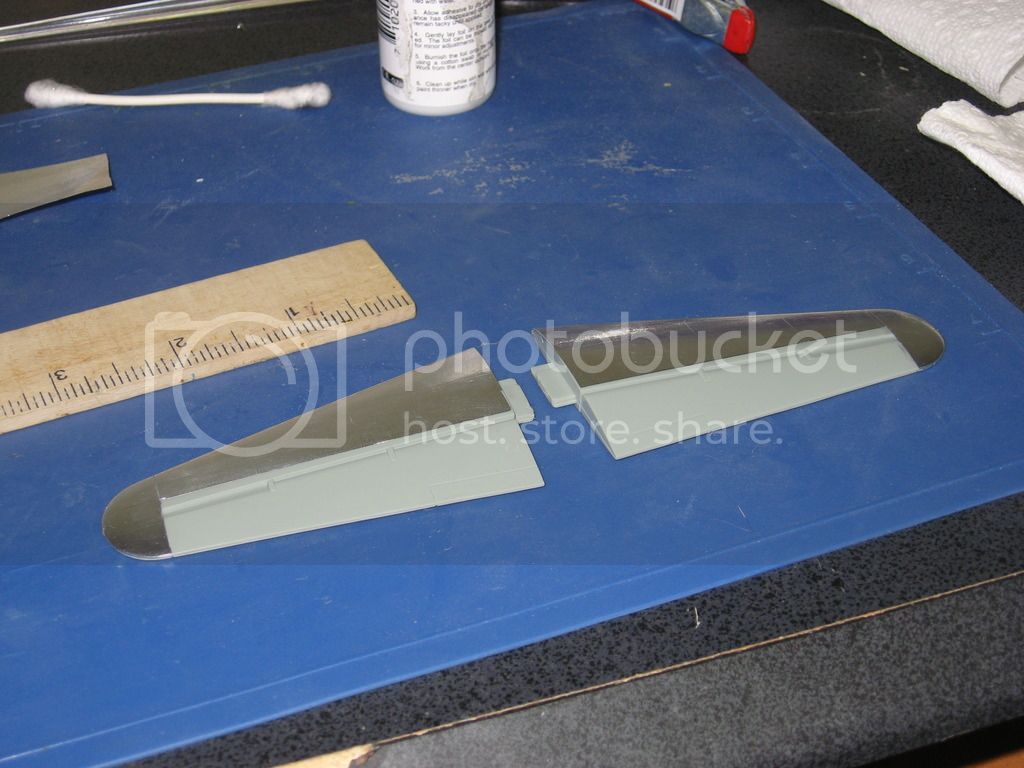
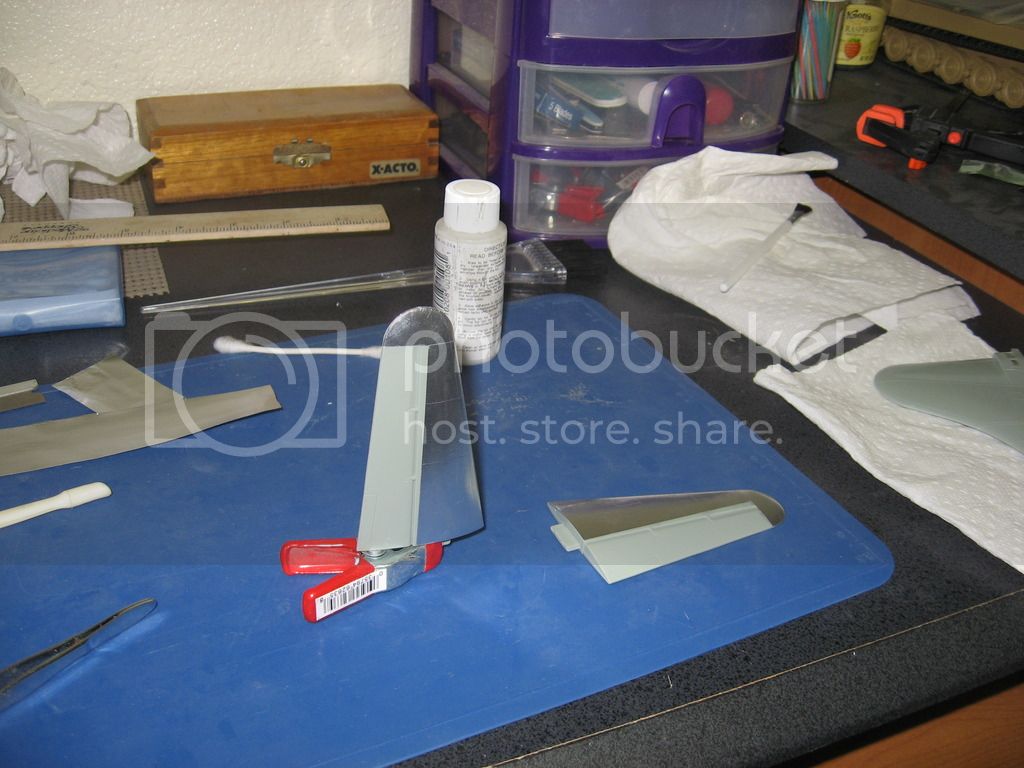
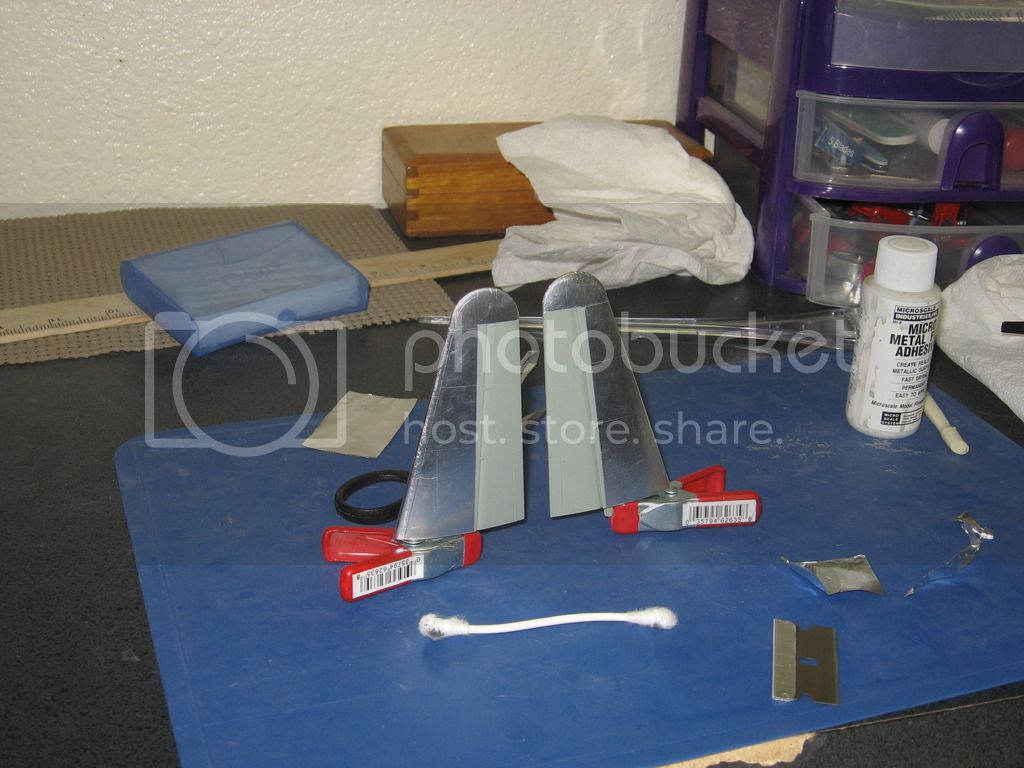
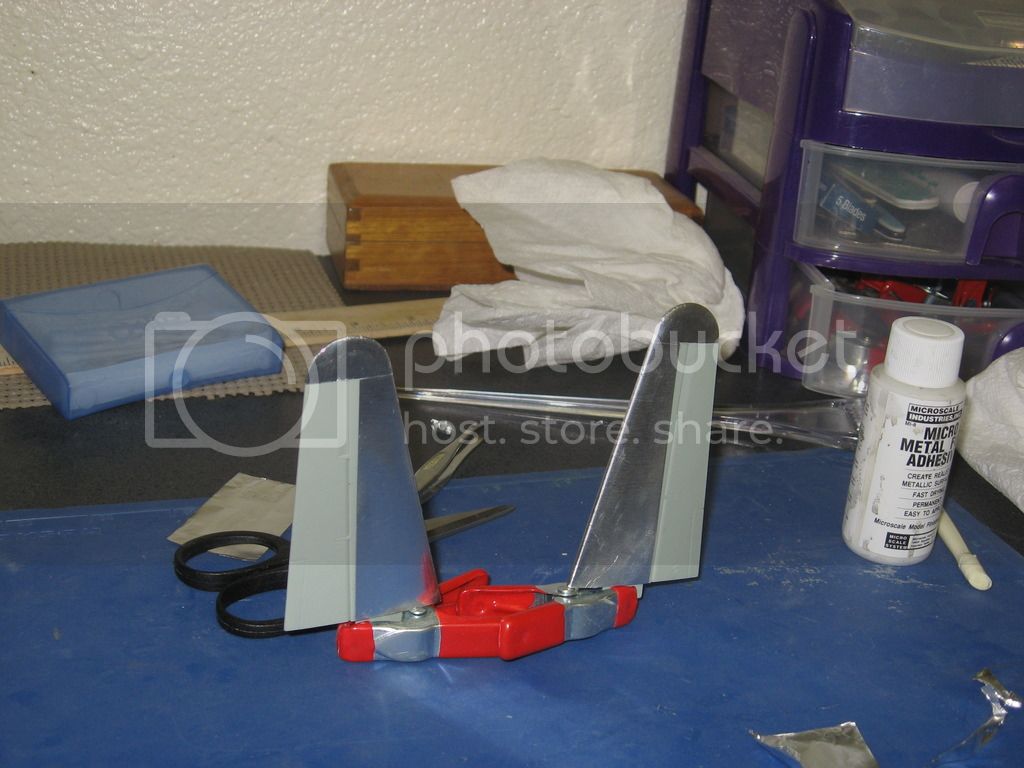
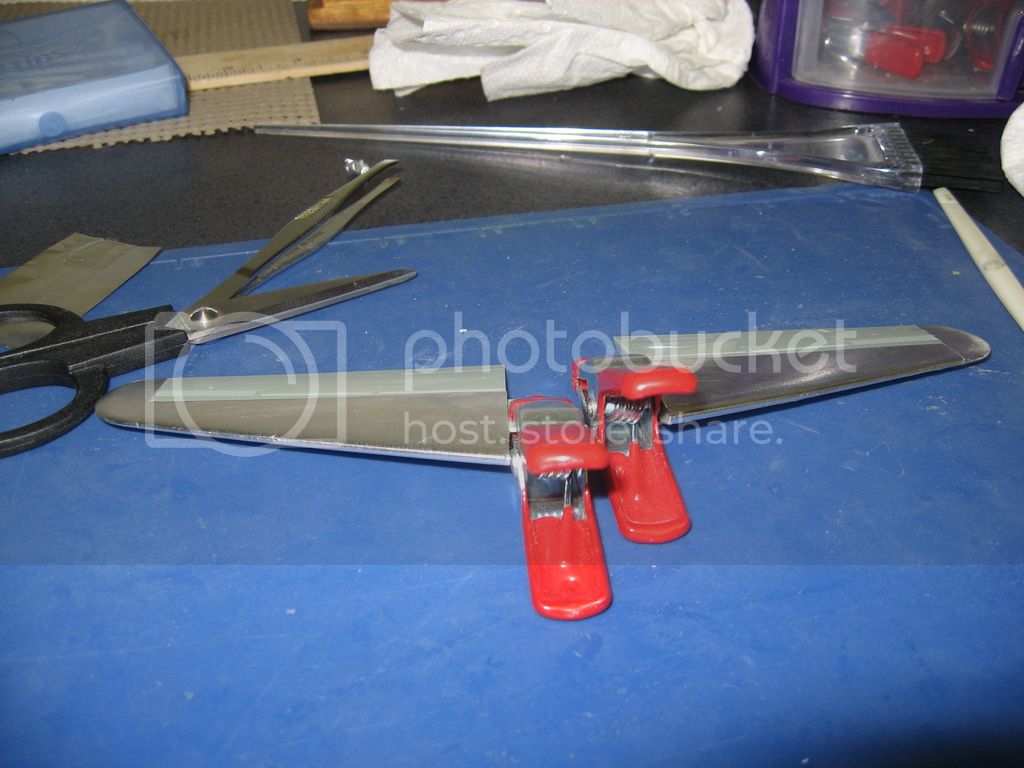
Tail and horizontal stabilizers are done. No issues so for with them to report. I'll be dry fitting the engine nacelles to the wings after I address the warped parts.
See ya in the funnies.................
Thanks for the replies everyone, I'll try to address them after this update.
Houston, we have a problem.
Parts E-101/E-102, are warped. This is a dry fit. Also the ailment tabs are not doing there job. This could make foiling this area somewhat challenging.


Tail and horizontal stabilizers are done. No issues so for with them to report. I'll be dry fitting the engine nacelles to the wings after I address the warped parts.
See ya in the funnies.................
BigfootV
Joined: December 24, 2005
KitMaker: 1,624 posts
AeroScale: 385 posts
Posted: Monday, October 24, 2016 - 11:30 PM UTC
Joel,
They say necessity is the mother of invention. Well, I had to keep going somehow. The "man cave" is the laundry room we have in the apartment, 40 sq. ft. The shelves make for good drying rack. Rattle can primer was used. Testors gray primer.
Jessica,
You're correct. Sometimes our best guess at what the real thing looked like is not always the truth. Armor modeler's know this all too well.
Russ,
I've heard that Bare-Metal foil is easier for the rounded areas then kitchen foil. One's mileage may vary. Also, I heard that Bare-Metal foil has about a one year shelve life at room temp. because of the adhesive backing. Any warmer then it goes hire wire. Since I've not yet done a sample test on rounded areas with both I can't say which is going to be the better of the two. That will come later.
Marc,
I like to know a little about the truck/car/tank/aircraft/ship I'm building, historical backed builds more that normal. Having said that, I tend to shy away from those builds unless the resources match with everything else that is out there. Again, there are areas in every build that one questions the sources used. We can agree most Kit makers have a habit of taking a subject and rolling it into a multi-use kit then making up things as they go a long. Academy did do their homework with this kit, however its not without its faults. Decals/markings seem to the big one with most kits as with this kit.
I'm just an Avg. Joe builder, Jack of all trades, master of none.
Thanks for the comments/replies everyone.
See ya in the funnies............
BigfootV
Joined: December 24, 2005
KitMaker: 1,624 posts
AeroScale: 385 posts
Posted: Thursday, October 27, 2016 - 08:18 PM UTC
Hey gang,
My apologizes for lack of updates. Build is still going, just very slow, painting interior by hand has taken longer then I figured. I hope to have this done within the next week.
Will have progress photo's soon.
See ya in the funnies.............
My apologizes for lack of updates. Build is still going, just very slow, painting interior by hand has taken longer then I figured. I hope to have this done within the next week.
Will have progress photo's soon.
See ya in the funnies.............
BigfootV
Joined: December 24, 2005
KitMaker: 1,624 posts
AeroScale: 385 posts
Posted: Saturday, October 29, 2016 - 09:18 PM UTC
Hello gang,
It's update time.
The last time I updated, I was dealing with some warped parts issues, well I'm happy to report those parts are installed.
My wife has been on vacation from work this last week, so that's the reason for lack of updates until today.
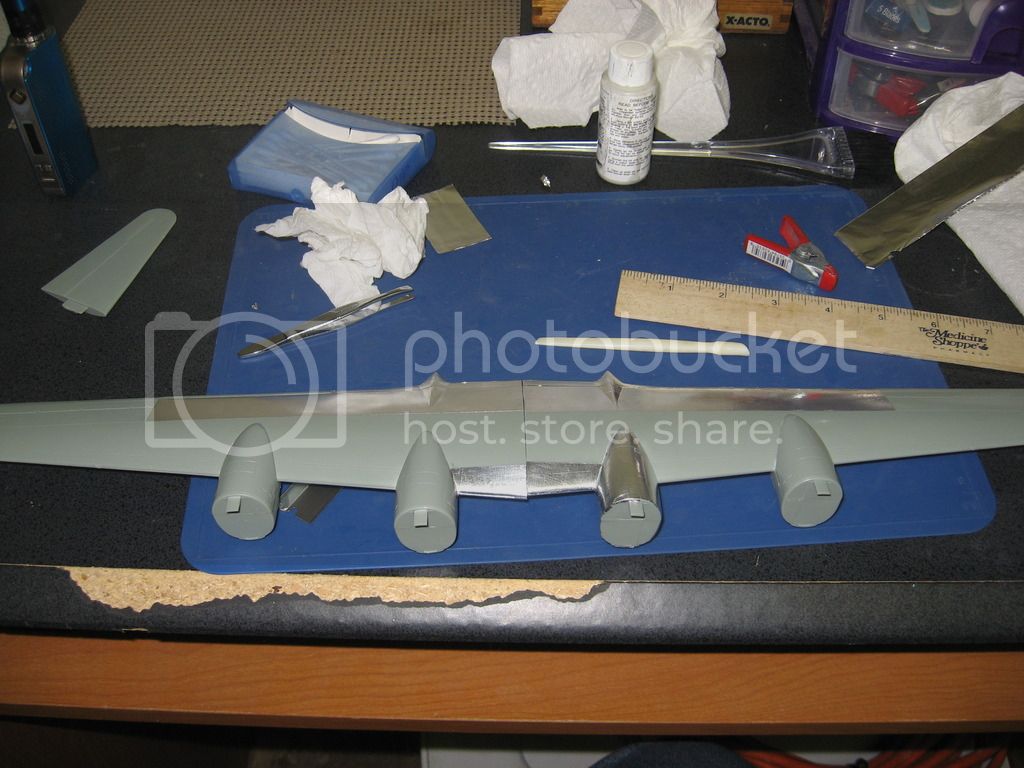
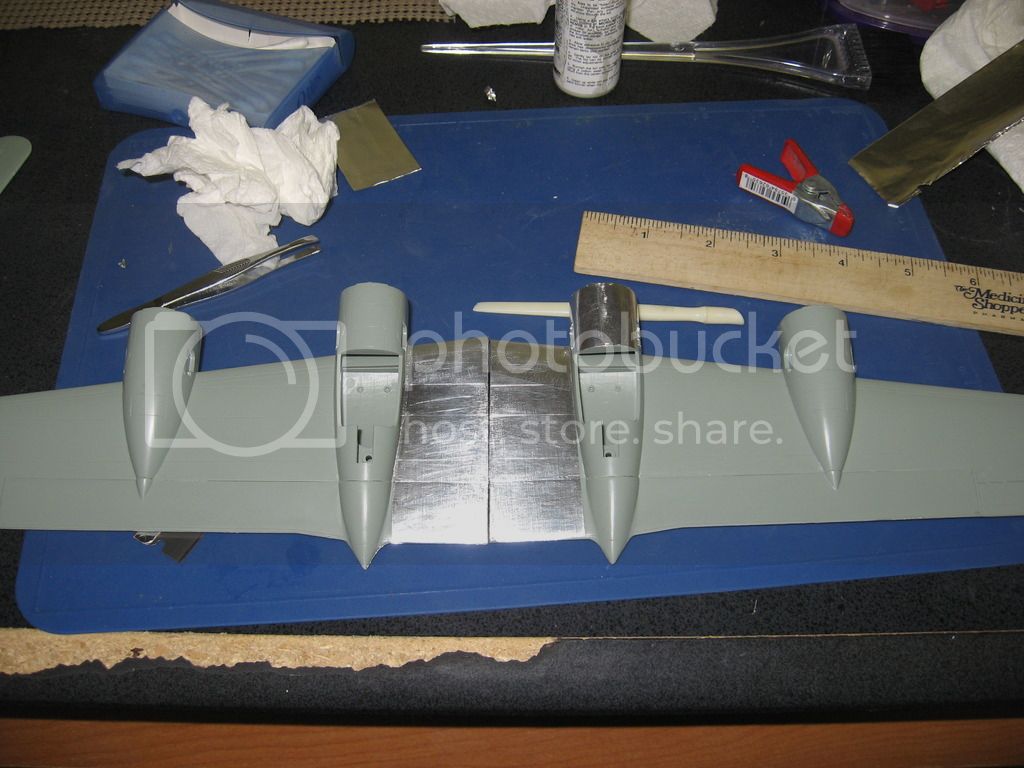
Anyways, here's where I'm at so far.....
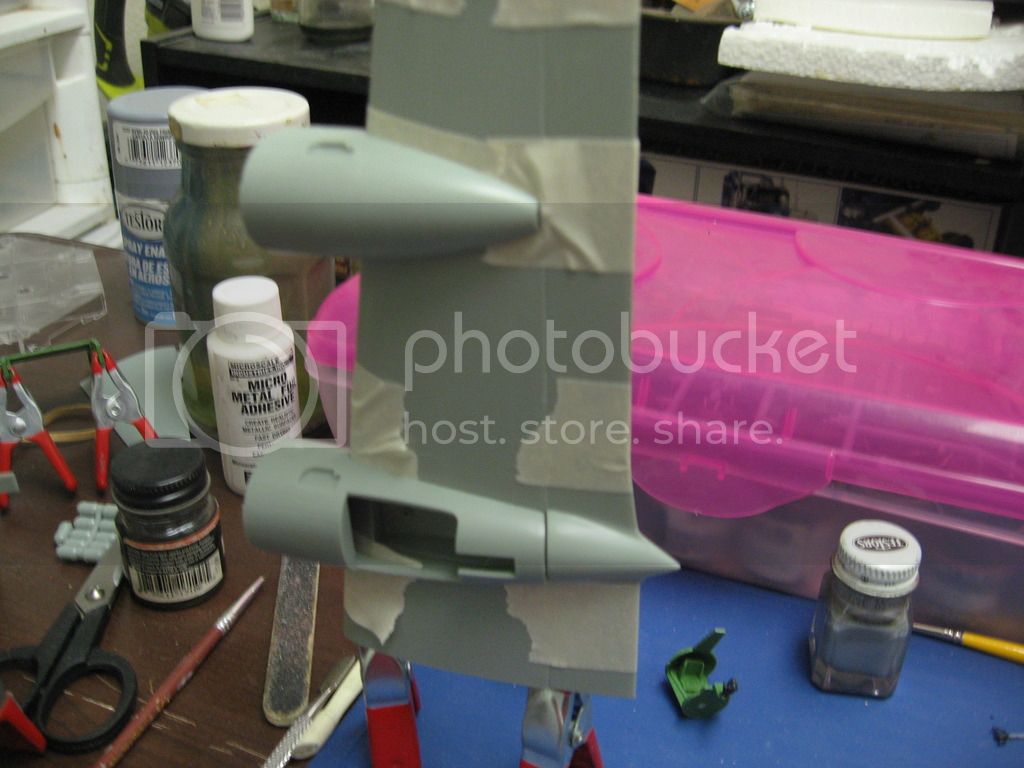
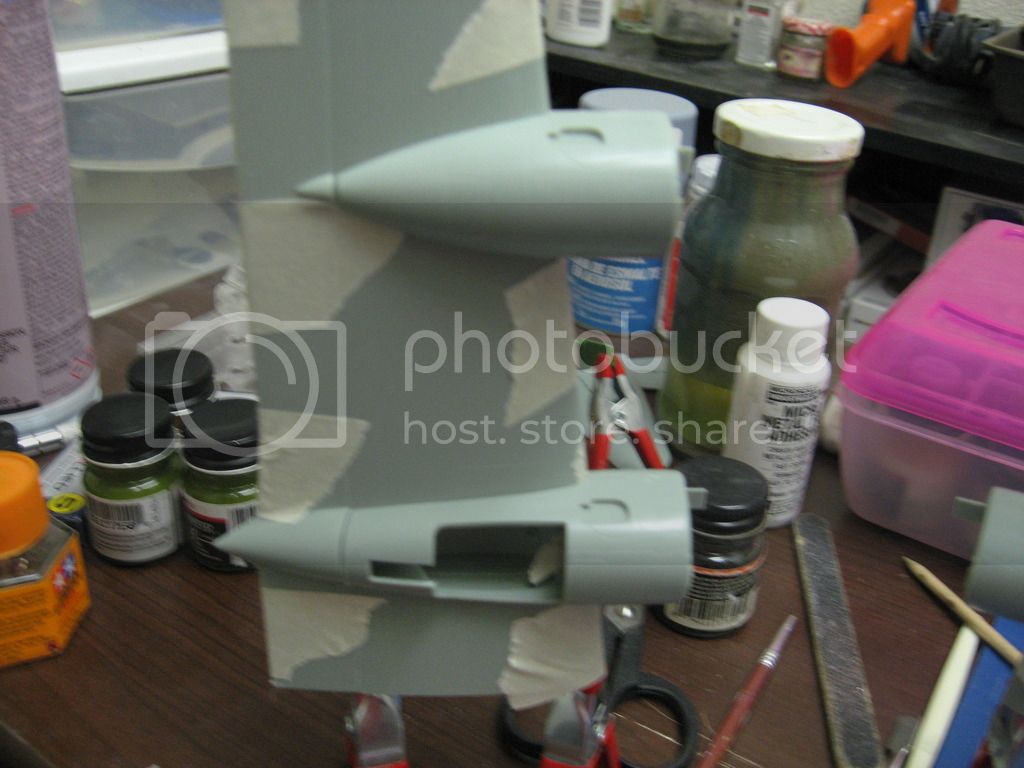
Engine nacelles done, dry fitted. We have some gap issues with them connecting to the wing.
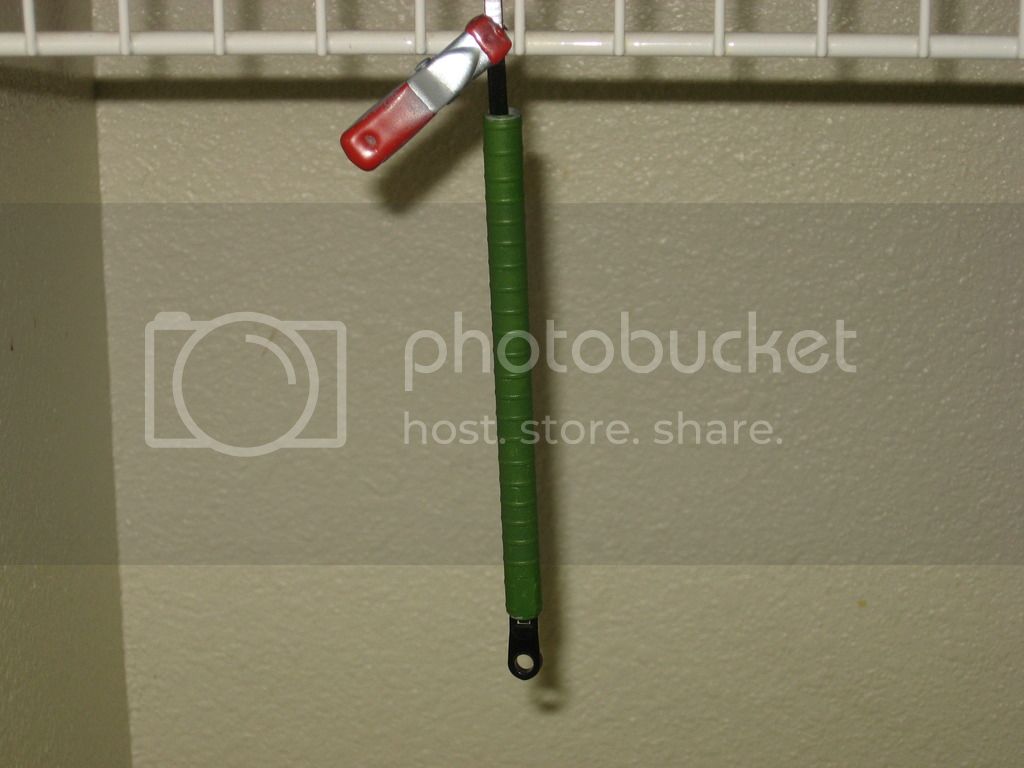
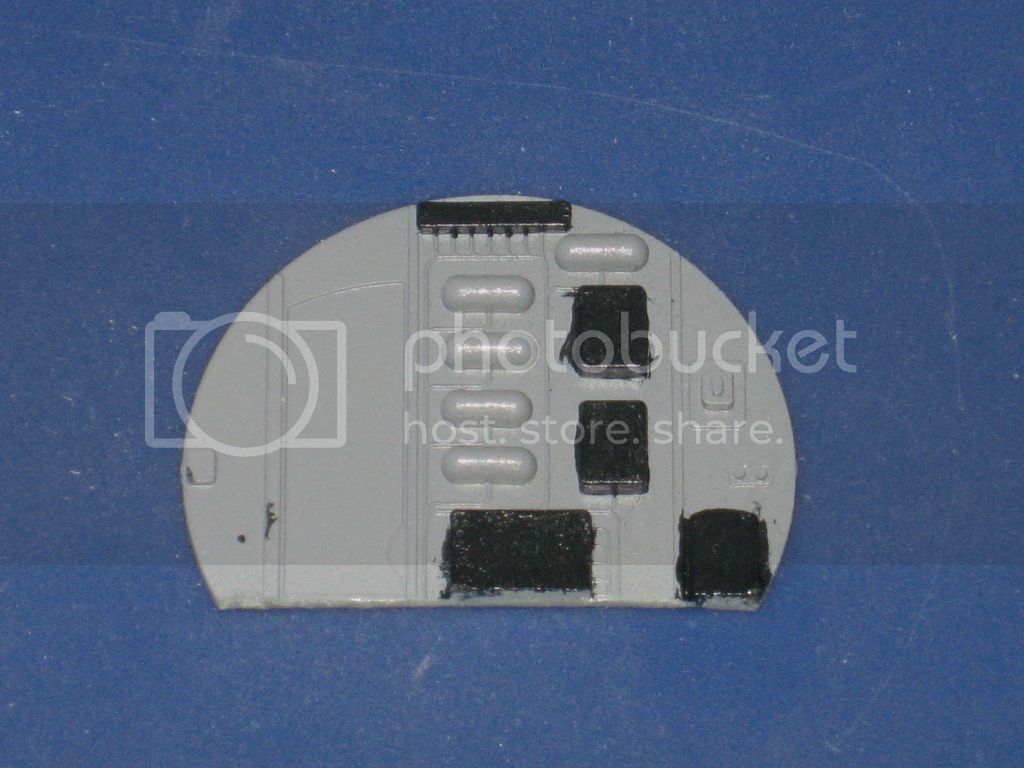
Interior paint going slowly, tunnel, rear gunners area, bomb racks, bomb bay doors, anti-tail strike gear, and all landing gear doors done.
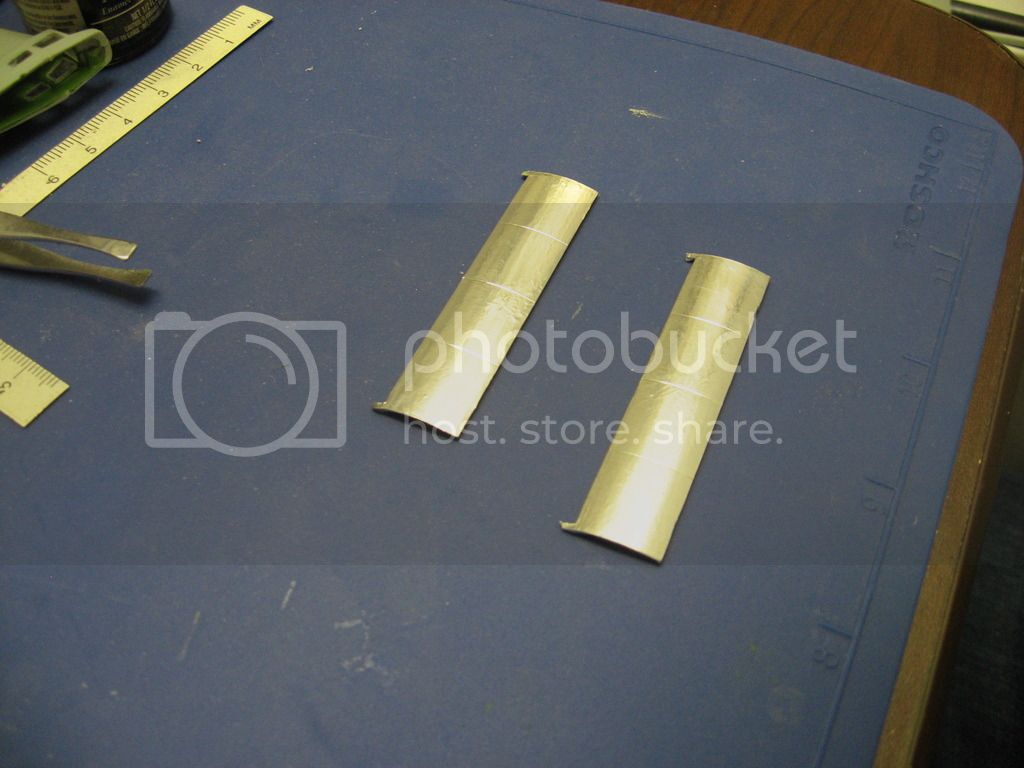
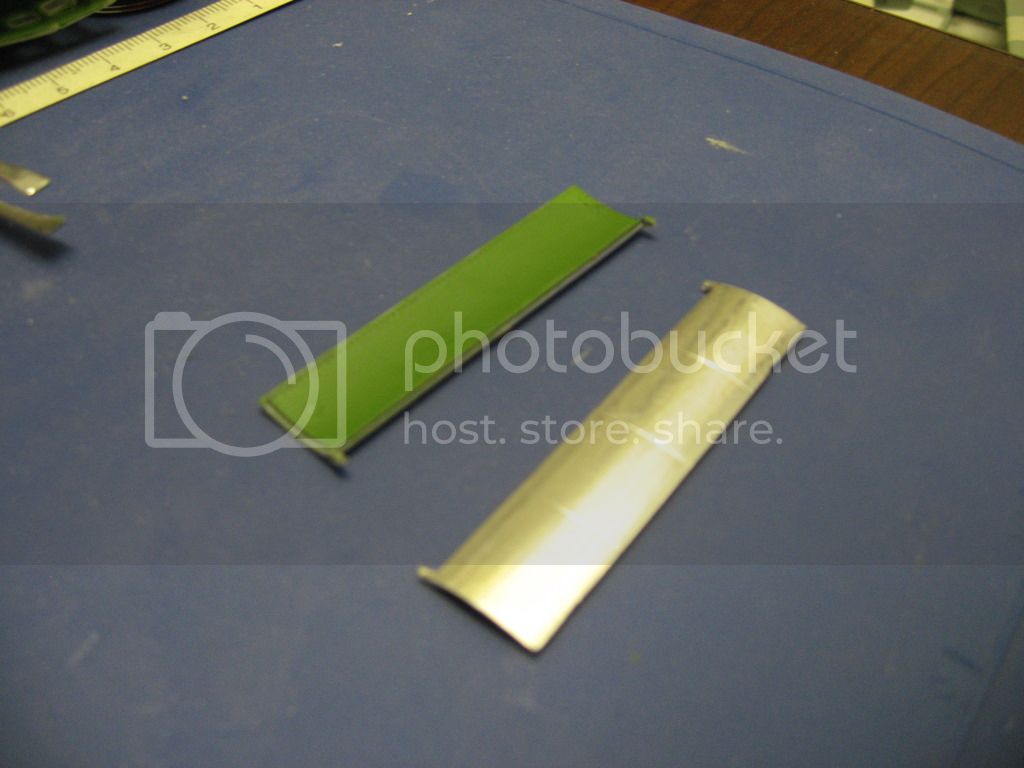
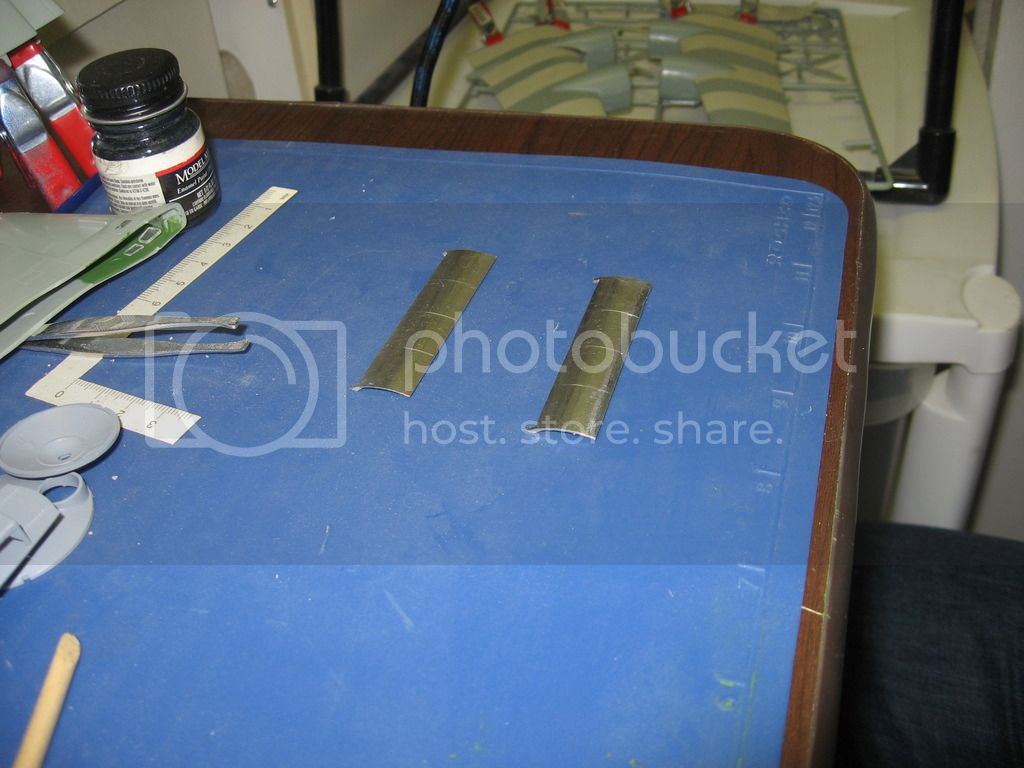
Foiled 2 of the 4 bomb bay doors. Plan to foil landing gear door, and anti-tail strike gear next.
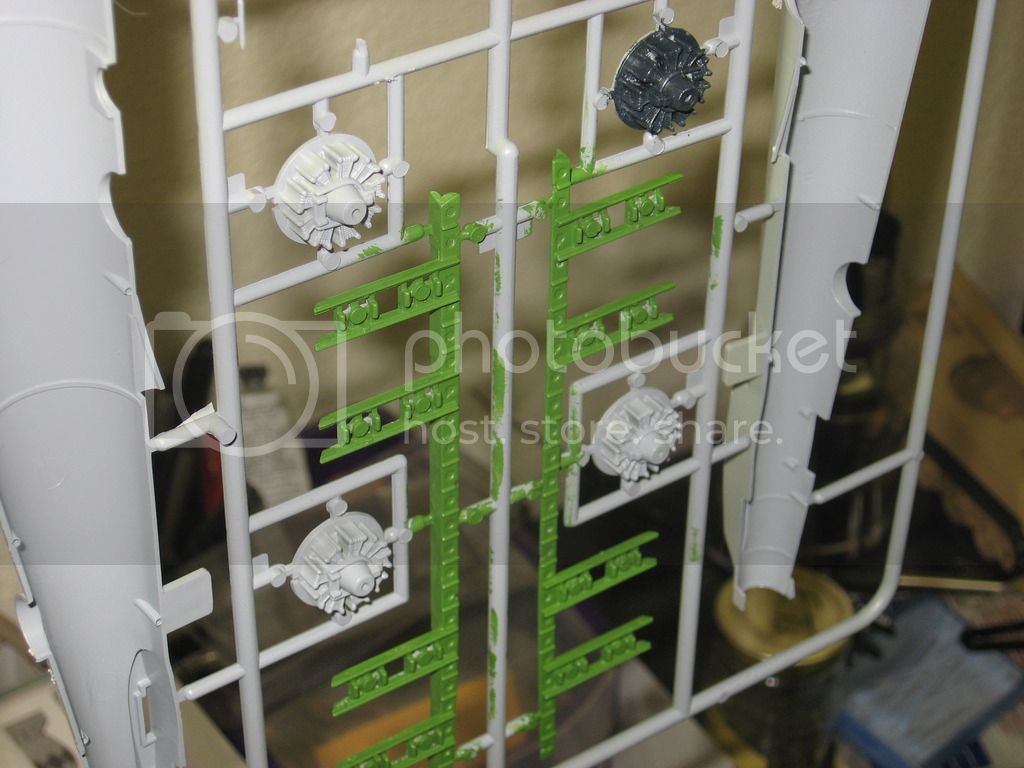
Here's the photo's:
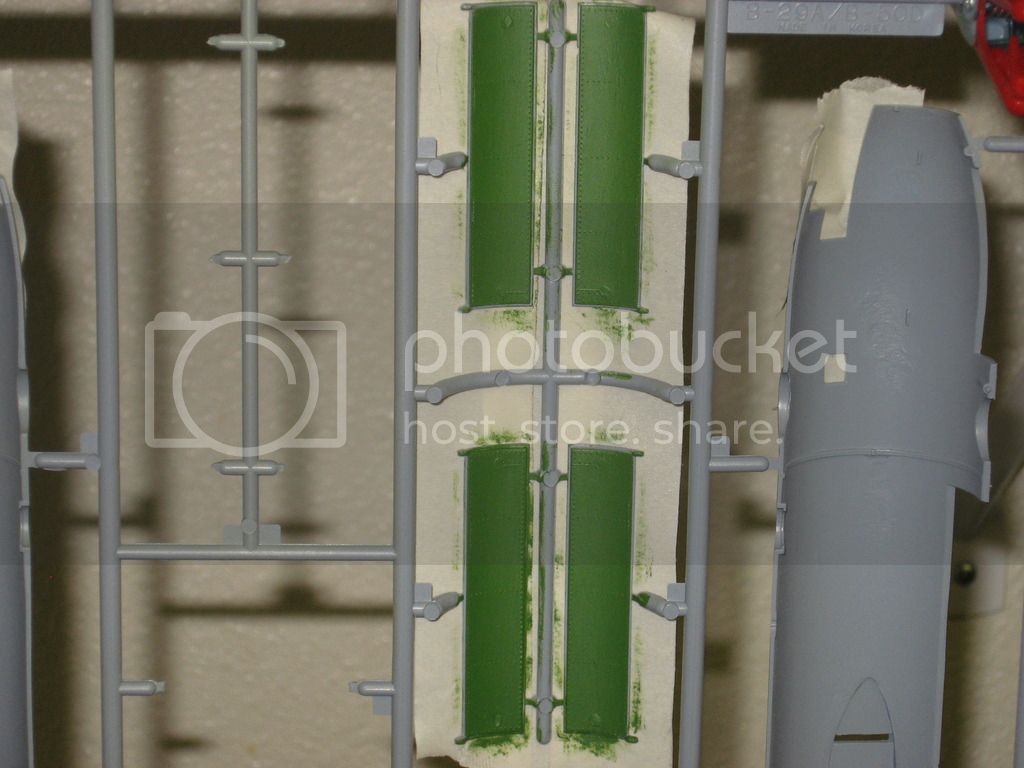
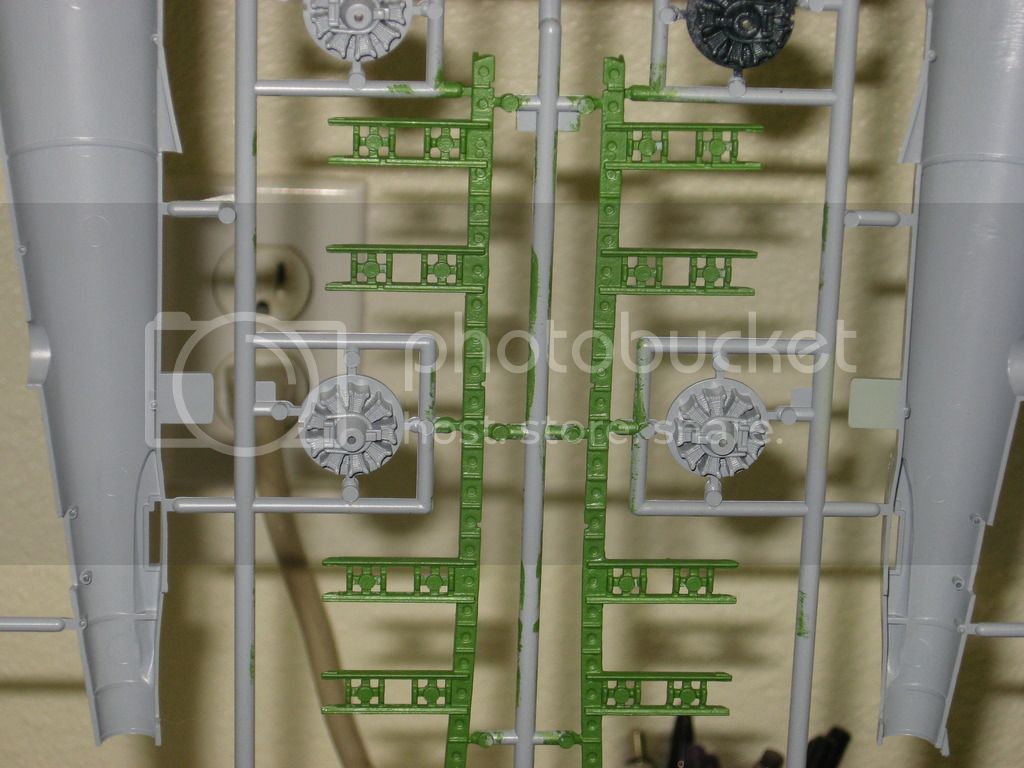
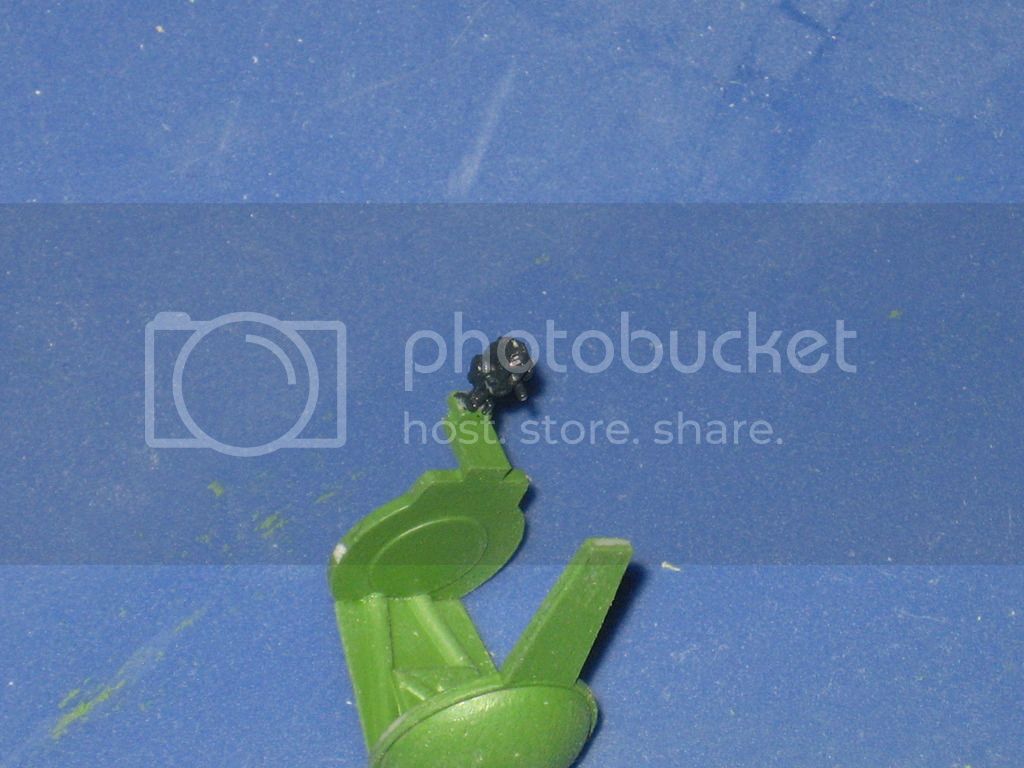

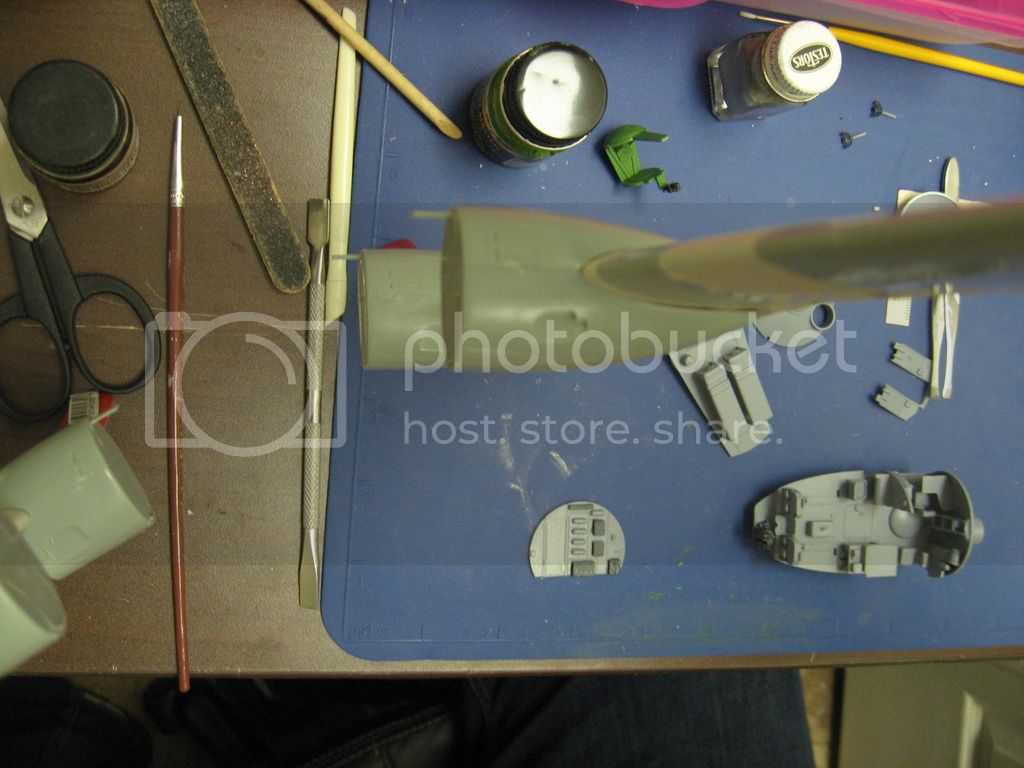


In the process of painting the interior, bomb racks, I was a bit of a noob. 90% of the Green zinc jumped out onto the floor. So I had to do a LHS run yesterday to get some more.
Things left to do:
Finish interior paint, detail.
Paint engines, install.
Remove turret rings from fuselage per instruction sheet. (I'll be posting that process.)
Mate fuselage half's after interior is complete.
Complete kit without pulling my hair out.
See ya in the funnies....................
It's update time.
The last time I updated, I was dealing with some warped parts issues, well I'm happy to report those parts are installed.
My wife has been on vacation from work this last week, so that's the reason for lack of updates until today.
Anyways, here's where I'm at so far.....
Engine nacelles done, dry fitted. We have some gap issues with them connecting to the wing.
Interior paint going slowly, tunnel, rear gunners area, bomb racks, bomb bay doors, anti-tail strike gear, and all landing gear doors done.
Foiled 2 of the 4 bomb bay doors. Plan to foil landing gear door, and anti-tail strike gear next.
Here's the photo's:


In the process of painting the interior, bomb racks, I was a bit of a noob. 90% of the Green zinc jumped out onto the floor.
So I had to do a LHS run yesterday to get some more.Things left to do:
Finish interior paint, detail.
Paint engines, install.
Remove turret rings from fuselage per instruction sheet. (I'll be posting that process.)
Mate fuselage half's after interior is complete.
Complete kit without pulling my hair out.
See ya in the funnies....................
Kevlar06
Joined: March 15, 2009
KitMaker: 3,670 posts
AeroScale: 833 posts
Posted: Saturday, October 29, 2016 - 11:53 PM UTC
Brian,
Looking good so far-- I applaud your perseverance with a paint brush. While I was stationed in Korea back in 2000, I too used the laundry room as a workshop. 0ne of the things I did was to create a workbench that fit over the laundry room sink, and could be stored along side the sink when not in use. Surprisingly this gave me a 3x2 ft work space. I had my local craft shop cut the base, and two sides and a back that would just clear the faucet. I take it from the photos that you don't use an airbrush for painting-- not sure if you use rattle cans or not. One trick I've used when foiling is one I forgot to mention earlier. If you do have an airbrush, or even a rattle can with a good metallic paint, you can spray a clear decal sheet with a metallic finish and apply the decal just like foil-- it works for difficult to reach areas and for hard to foil compound curves. You can do the same with virtually any color of paint. I've even done most of a model with decals rather than paint with this method. If you use this method for a metallic finish and have an airbrush, I recommend Alclad finishes.
VR, Russ
BigfootV
Joined: December 24, 2005
KitMaker: 1,624 posts
AeroScale: 385 posts
Posted: Sunday, October 30, 2016 - 10:14 PM UTC
Hello Russ,
Thanks for the tip.
I've used brushes for over 30 years on all my builds. (The early years were the OMG era, brush strokes, runs,, paint build up. Learning curve was steep.) That's all I have to work with. Yes, I have an airbrush, but I've never owned a compressor.(Hopefully that will change here soon.) I've used it when I can pick up a can of propellant. (Hmmm, canned air.) I just starting using rattle cans for priming and large areas with my '57 Chevy build over at the Auto modeler site.
As far as my work area goes, I've got an old computer desk I use and two old book cases for storage. My main work area is a hospital room meal tray that was left here when we were taking care of my Father-in-law, R.I.P. Donald Fitch, before he went into hospice care at the V.A. in Denver.
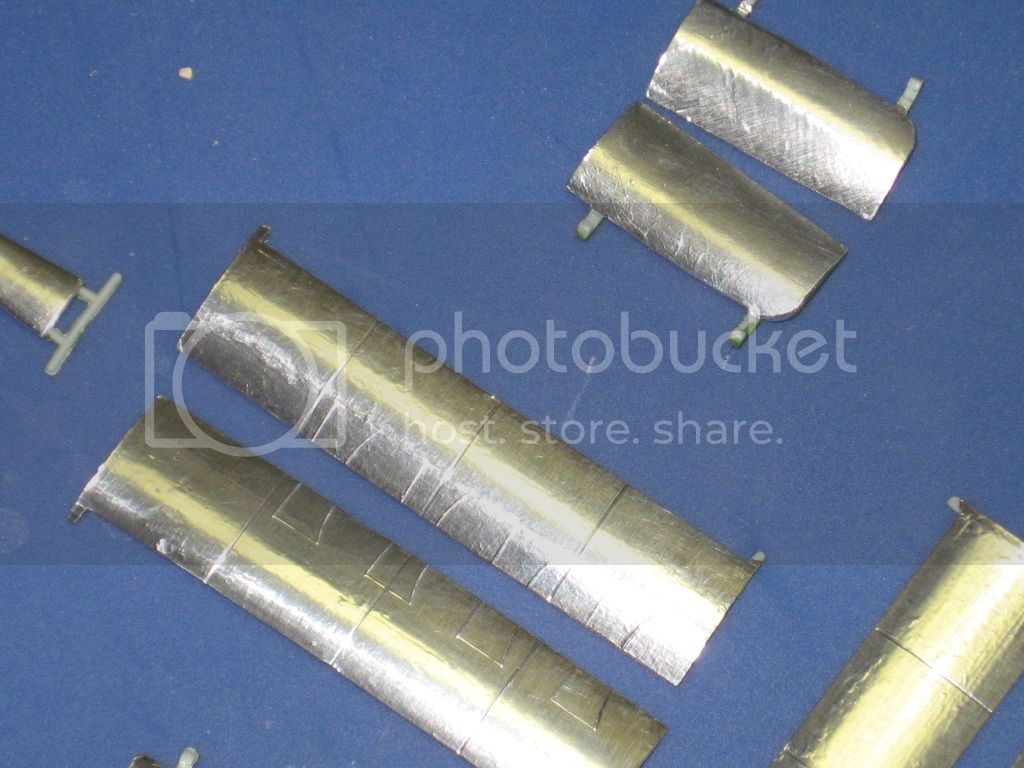
Anyways, back to the build. Bomb bays, landing gear doors, anti-tail strike gear are foiled.
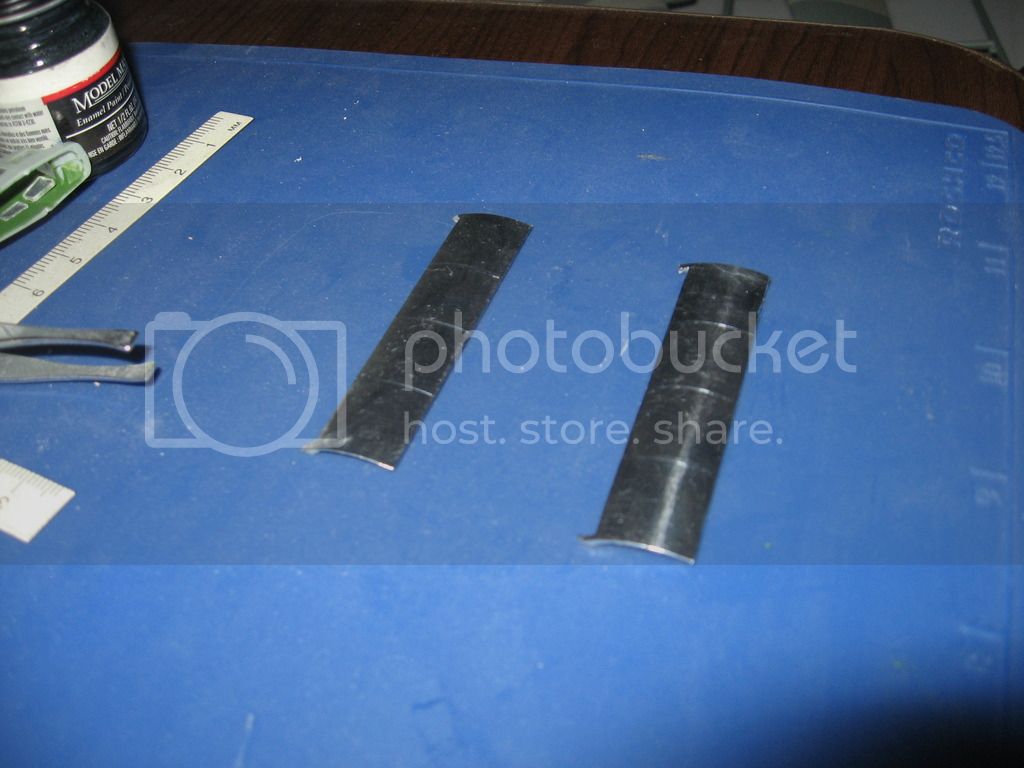
Here's somethings I've kinda picked up through trail/error and by picking others brains who done it before, I hope it doesn't sound repetitive. Everyone has a different way of foiling, your mileage may vary.
1. Practice, practice, practice. Get a donor kit and use that first. Start with the flat areas to get a grip with the application process, then move to curved areas. Here's a another trick if you don't want to use a donor kit, grab a flat baking sheet, using a sponge with water, wipe the baking sheet surface down, lay the foil down onto the baking sheet, using your hands or a tea towel, start from the middle of the baking sheet working your way out to the sides, try to get about 65% of the surface area wrinkle free.
Here's what it should look like.
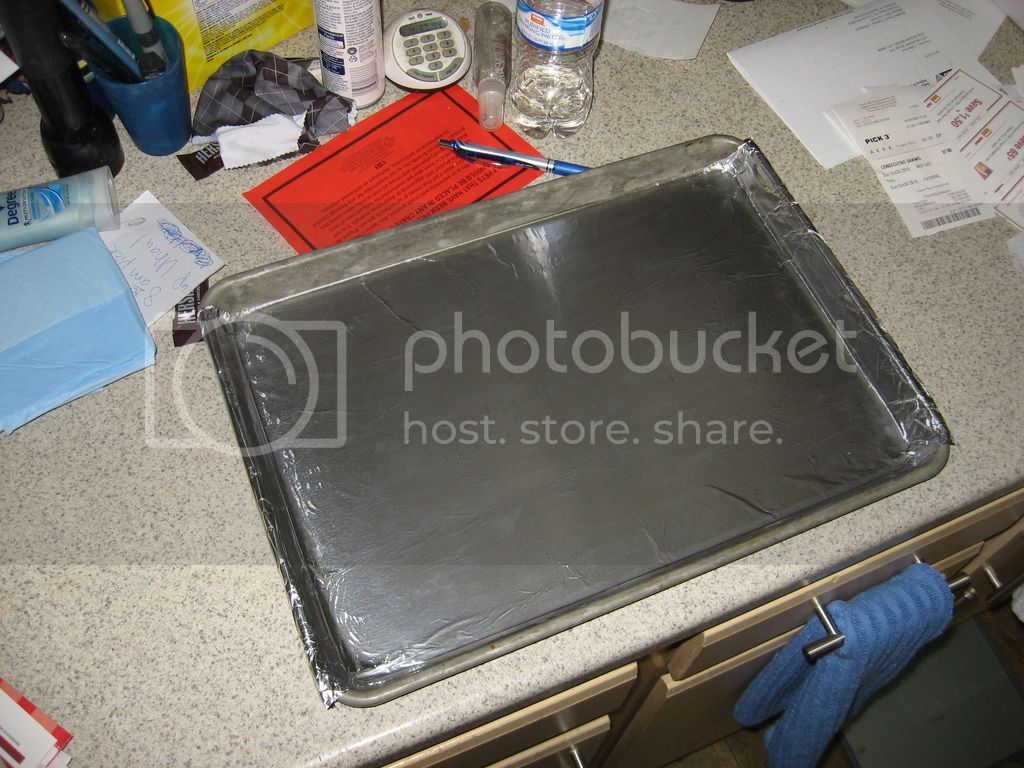
You can flap the sheet over and practice that way also. This will give you an idea on how the foil stretches before you get into wasting adhesive. If you bake or cook, then you know what I'm talking about. For curved areas try the same technique on a glass.
2. Keep the application brush clean. Use a nylon brush. I've been cleaning the brush after every application. The Micro-scale adhesive will ball-up on you if you don't keep the brush clean.
3. If your type-A about your builds and everything must be "perfect" or you have a short fuss, walk away. It's time consuming, labor intensive, and will test even the most patient builders. Your always battling dust and pet hair from getting onto the adhesive side of the foil, it will show up.
So if you have a "clean room" set up, use it. Steady hands, a comfy chair("Put her the comfy chair!!!" Sorry, Python moment.) and a truck load of patience are needed. On the flip side, if you like a challenge...
4. Make sure you stock up on #11 X-acto blades and straight edge razor blades. These are your friends for cutting the foil into panels and you'll go through a lot of them. Culinary bone scissors work also.
5. Cut out panels larger then what you need. Kitchen foil is cheap, but Bare Metal foil isn't, $7.95 at LHS per sheet vs. $2.95 for a roll of kitchen foil. Micro-scale adhesive, $4.00 at LHS or online. You can order from Micro-scale direct.
So far it's been a rather fun build, with a few minor hiccups here and there. Still have a lot of work left.
See ya in the funnies................
Thanks for the tip.
I've used brushes for over 30 years on all my builds. (The early years were the OMG era, brush strokes, runs,, paint build up. Learning curve was steep.) That's all I have to work with. Yes, I have an airbrush, but I've never owned a compressor.(Hopefully that will change here soon.) I've used it when I can pick up a can of propellant. (Hmmm, canned air.) I just starting using rattle cans for priming and large areas with my '57 Chevy build over at the Auto modeler site.
As far as my work area goes, I've got an old computer desk I use and two old book cases for storage. My main work area is a hospital room meal tray that was left here when we were taking care of my Father-in-law, R.I.P. Donald Fitch, before he went into hospice care at the V.A. in Denver.
Anyways, back to the build. Bomb bays, landing gear doors, anti-tail strike gear are foiled.

Here's somethings I've kinda picked up through trail/error and by picking others brains who done it before, I hope it doesn't sound repetitive. Everyone has a different way of foiling, your mileage may vary.
1. Practice, practice, practice. Get a donor kit and use that first. Start with the flat areas to get a grip with the application process, then move to curved areas. Here's a another trick if you don't want to use a donor kit, grab a flat baking sheet, using a sponge with water, wipe the baking sheet surface down, lay the foil down onto the baking sheet, using your hands or a tea towel, start from the middle of the baking sheet working your way out to the sides, try to get about 65% of the surface area wrinkle free.
Here's what it should look like.

You can flap the sheet over and practice that way also. This will give you an idea on how the foil stretches before you get into wasting adhesive. If you bake or cook, then you know what I'm talking about.
For curved areas try the same technique on a glass. 2. Keep the application brush clean. Use a nylon brush. I've been cleaning the brush after every application. The Micro-scale adhesive will ball-up on you if you don't keep the brush clean.
3. If your type-A about your builds and everything must be "perfect" or you have a short fuss, walk away. It's time consuming, labor intensive, and will test even the most patient builders. Your always battling dust and pet hair from getting onto the adhesive side of the foil, it will show up.
So if you have a "clean room" set up, use it. Steady hands, a comfy chair("Put her the comfy chair!!!" Sorry, Python moment.) and a truck load of patience are needed. On the flip side, if you like a challenge...
4. Make sure you stock up on #11 X-acto blades and straight edge razor blades. These are your friends for cutting the foil into panels and you'll go through a lot of them. Culinary bone scissors work also.
5. Cut out panels larger then what you need. Kitchen foil is cheap, but Bare Metal foil isn't, $7.95 at LHS per sheet vs. $2.95 for a roll of kitchen foil. Micro-scale adhesive, $4.00 at LHS or online. You can order from Micro-scale direct.
So far it's been a rather fun build, with a few minor hiccups here and there. Still have a lot of work left.
See ya in the funnies................
BigfootV
Joined: December 24, 2005
KitMaker: 1,624 posts
AeroScale: 385 posts
Posted: Tuesday, November 01, 2016 - 07:58 PM UTC
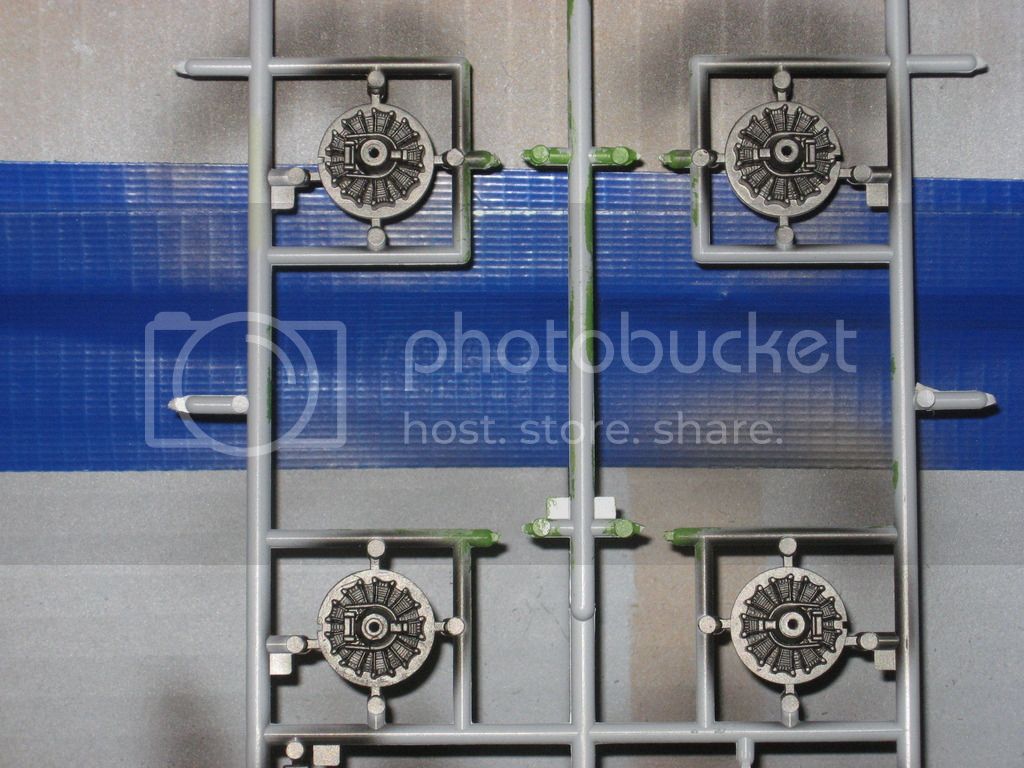
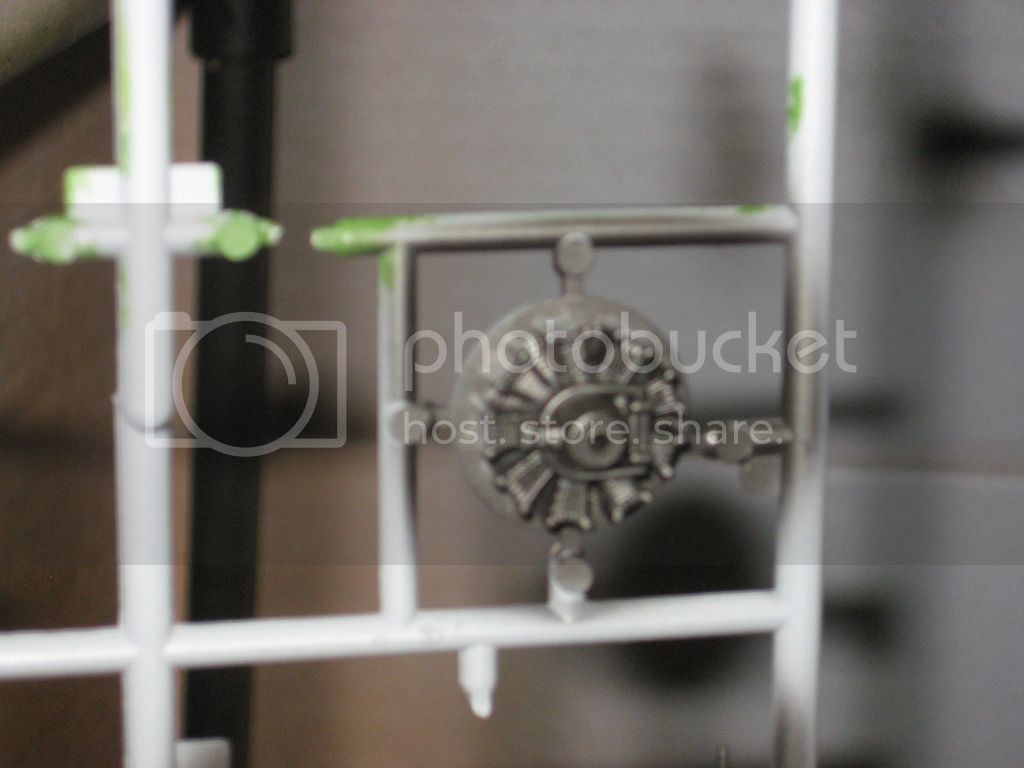
Dear Academy,
Why? Why the injection pin mold holes here? On the front side.. Why?
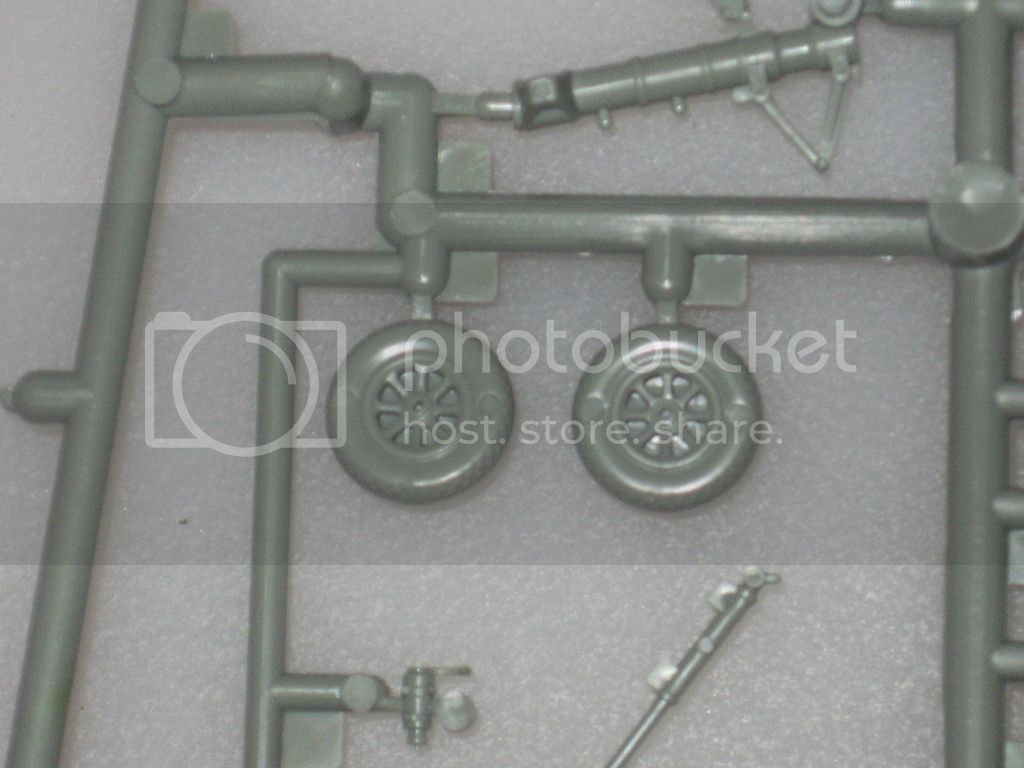
And you couldn't use gray for this part, you had to do clear.....

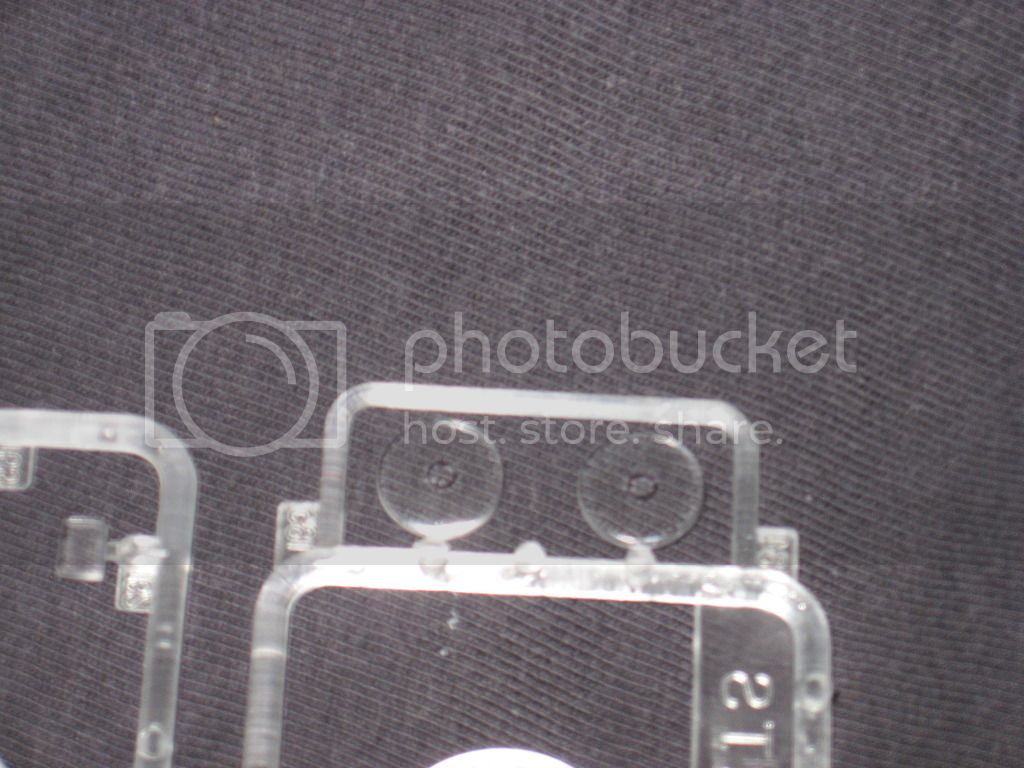
I'm foiling here!!!
Rant over.
See ya in the funnies.............
Why? Why the injection pin mold holes here? On the front side.. Why?

And you couldn't use gray for this part, you had to do clear.....


I'm foiling here!!!
Rant over.
See ya in the funnies.............
Kevlar06
Joined: March 15, 2009
KitMaker: 3,670 posts
AeroScale: 833 posts
Posted: Wednesday, November 02, 2016 - 05:26 AM UTC
Brian,
Its been several years since I built the original Academy "Bockscar", but I think the clear disks are the fared over covers for the remote gunners position "blisters" in the side of the aircraft that were removed for the Atomic missions-- but I think there might have been a small porthole window left in their place for photography-- might want to check references here-- and I could be wrong (probably am) That's what I think Academy was trying to do here. If it were me, I'd drill out the center porthole, foil the part with the rest of the fuselage, then either plug the hole with clear plastic sprue or use some Micro-scale window material that you paint on-- I forget what it's called.
VR, Russ
Kevlar06
Joined: March 15, 2009
KitMaker: 3,670 posts
AeroScale: 833 posts
Posted: Wednesday, November 02, 2016 - 07:41 PM UTC
Brian,
You may find this in depth article on foiling by Ken Freind over on Large Scale Planes very helpful for foiling your B-29. Ken is an accomplished "foiler" and works in many scales, as pictured at the bottom of his article:
http://www.largescaleplanes.com/articles/article.php?aid=2604
VR, Russ
You may find this in depth article on foiling by Ken Freind over on Large Scale Planes very helpful for foiling your B-29. Ken is an accomplished "foiler" and works in many scales, as pictured at the bottom of his article:
http://www.largescaleplanes.com/articles/article.php?aid=2604
VR, Russ
BigfootV
Joined: December 24, 2005
KitMaker: 1,624 posts
AeroScale: 385 posts
Posted: Friday, November 04, 2016 - 10:01 PM UTC
Hello Russ,
Just read your posts, thanks for the link. As far as the post about the gunner blisters, those are the correct blisters for "Bockscar."
In my research I've found that the Enola Gay had the same blisters as seen here.............
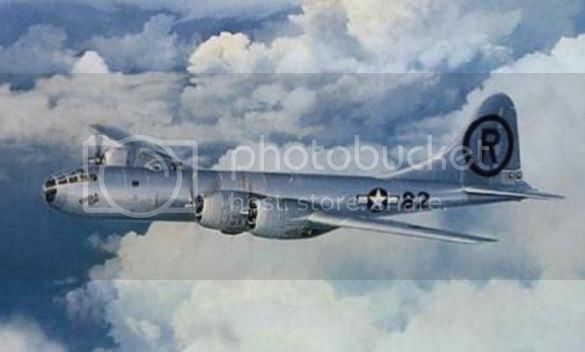
It should be noted that I've run acrossed color photos of the Enola Gay with a red tip mark in her tail. Sadly, I can't post them because Photobucket is having issues with the uploads. One can do a Google search to find them.
The above photo shows her after markings were changed. Now, did Bockscar have the red tip tail also? Since I'm not doing Bockscar on Tinian, this doesn't matter. However, it does raise questions for those who have or are going to show both aircraft on Tinian with pre-atom bomb markings in a diorama setting.
I've also found this website..............
http://www.atomicheritage.org/location/tinian-island
Watch the video at the bottom of the page, very rare color footage of both Enola Gay and Bockscar, no sound. At 20:47 in the video you'll see Bockscar in flight. Video is grainy, but you can see the blisters and that there is no nose art on Bockscar.
Back to the build side. Foiling the nacelles has been proving to be a challenge if not a down right PITA. After several failed attempts, I had to shift focus to other parts of the build.
Photos further coming.
See ya in the funnies......................
Kevlar06
Joined: March 15, 2009
KitMaker: 3,670 posts
AeroScale: 833 posts
Posted: Saturday, November 05, 2016 - 12:31 AM UTC
Brian,
Very interesting link. As far as the nacelles go, I feel your pain. But nobody said foiling was easy! It does have its advantages though-- I prefer foiling in the winter time-- as my workshop is in my un-heated garage, and that's where I have to do my airbrushing. But I can do foiling inside on the kitchen table or at my desk during the winter (unless I use spray adhesive, then it's back outside to get the adhesive down). Oh well, if model building was easy everybody would do it right?!!
VR, Russ
BigfootV
Joined: December 24, 2005
KitMaker: 1,624 posts
AeroScale: 385 posts
Posted: Saturday, November 05, 2016 - 07:35 PM UTC
Update time.
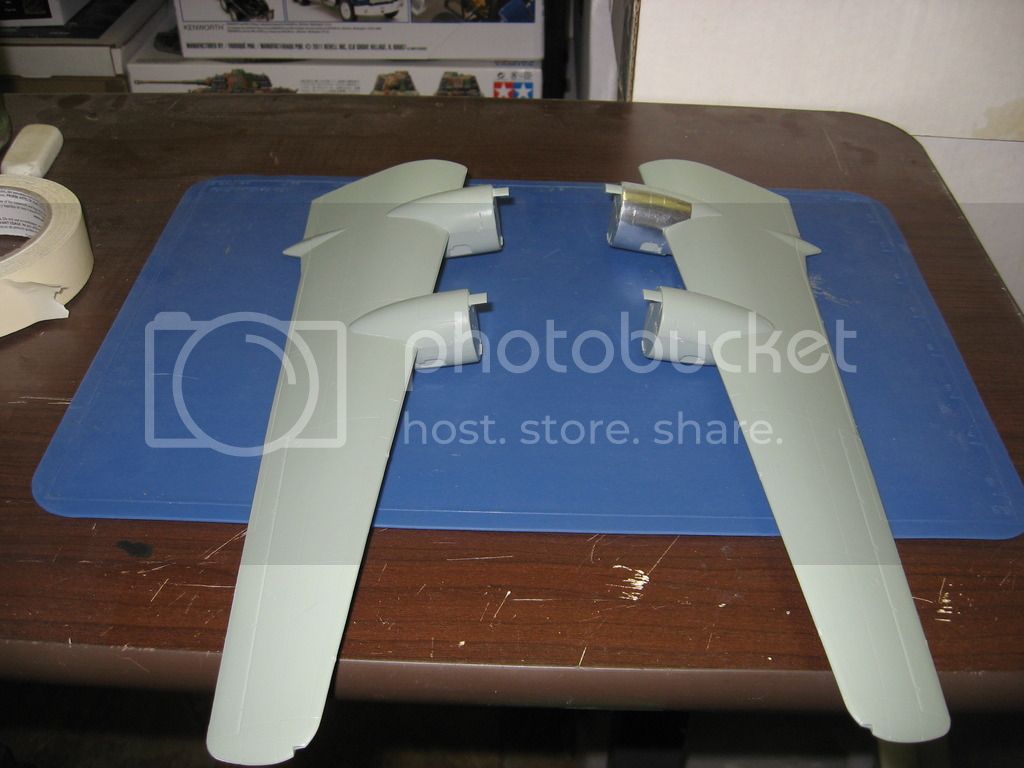
Engine nacelles mounted.
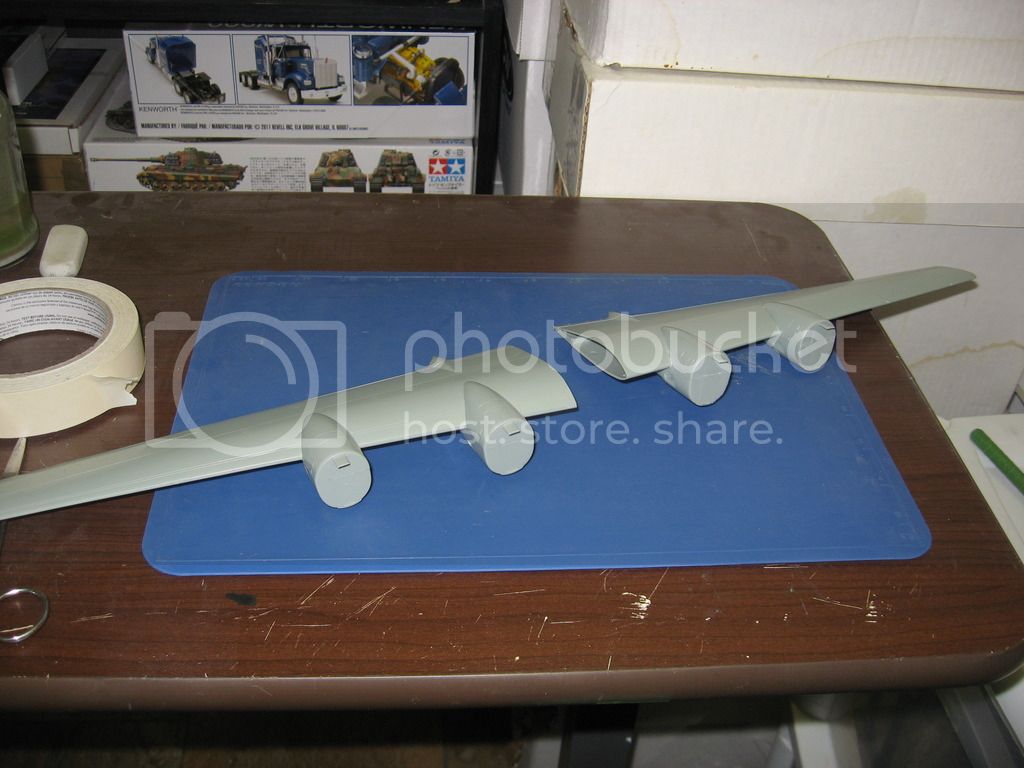
Wright R-3350's painted. Install forth coming.
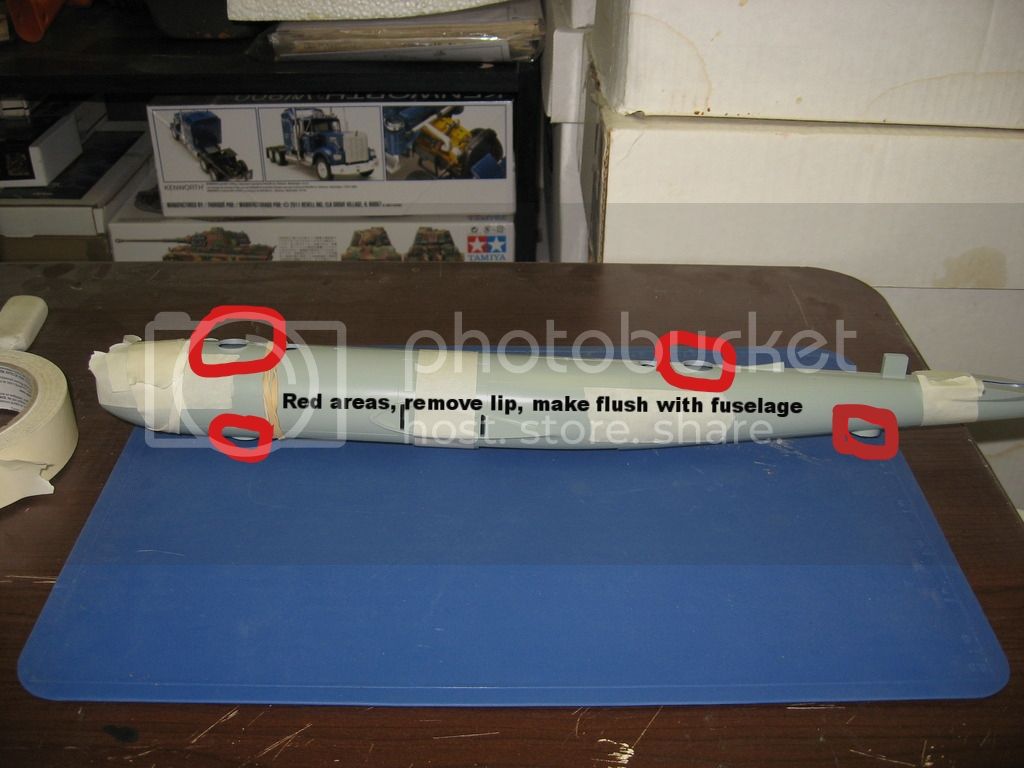
Dry fitting fuselage and removing these areas......
See ya in the funnies.......................
Engine nacelles mounted.


Wright R-3350's painted. Install forth coming.


Dry fitting fuselage and removing these areas......


See ya in the funnies.......................
BigfootV
Joined: December 24, 2005
KitMaker: 1,624 posts
AeroScale: 385 posts
Posted: Tuesday, November 08, 2016 - 09:26 PM UTC


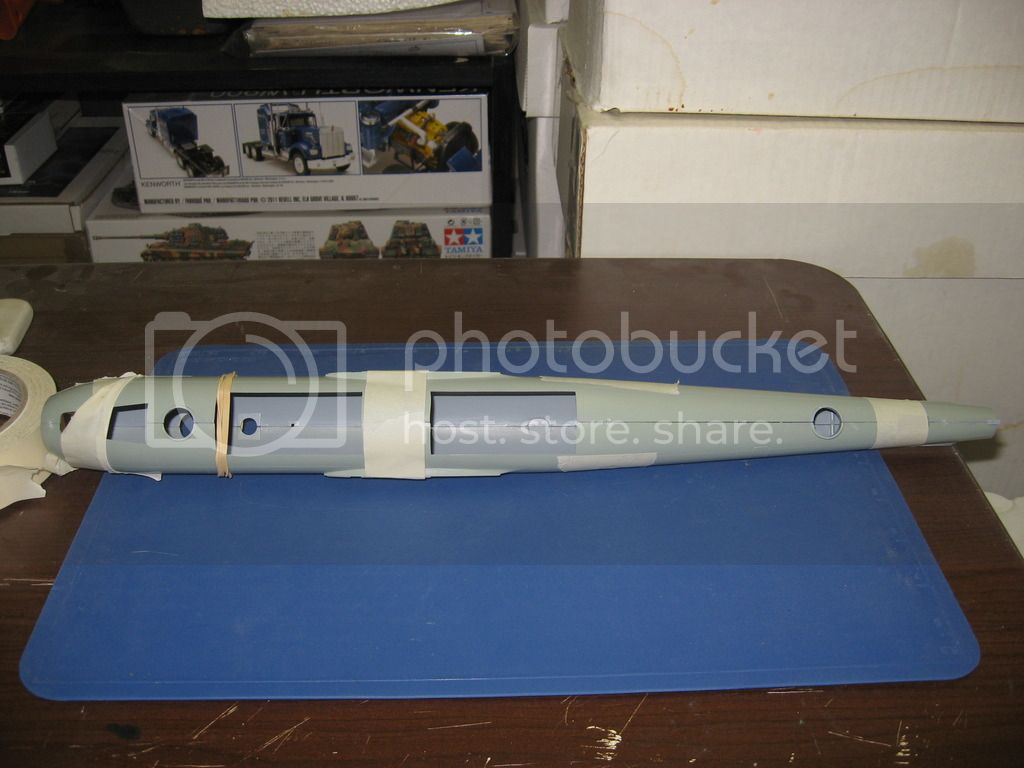
Remember the red circled areas, gone.


Needs a bit of clean up.
One nacelle done, three to go.


Yes, there are some seam lines that need to be worked out on the nacelle, but overall, I think I did a pretty good job. Almost like I knew what I was doing.........


I'll have to go back and redo the wing root area, damn end of the roll.......

Finally today, Daddy's new toy, which arrived yesterday........and at a steal....3 airbrushes and compressor for under $100 bucks.


The compressor is very quiet.......perfect for the apartment.
See ya in the funnies....................
Kevlar06
Joined: March 15, 2009
KitMaker: 3,670 posts
AeroScale: 833 posts
Posted: Tuesday, November 08, 2016 - 09:49 PM UTC
Brian-- it's looking really good-- and I think you are doing a great job! Foiling is a challenge, and sometimes tedious, but it can also be very rewarding-- enjoy the ride!
VR Russ
VR Russ
BigfootV
Joined: December 24, 2005
KitMaker: 1,624 posts
AeroScale: 385 posts
Posted: Saturday, November 12, 2016 - 09:02 PM UTC
Hey gang,
Sorry for the lack of updates. Life strikes again. We've had to clear out our storage unit last week and I've been re-boxing all of my wife's comic book collection (18 boxes later........ ) a long with dumpster runs and filing/sorting/shredding of important papers. Basically, we've been down-sizing.
So, what's that mean? Comics have invaded the work space.
I hope to have this issue solved by the end of this weekend.
See ya in the funnies........
Sorry for the lack of updates. Life strikes again. We've had to clear out our storage unit last week and I've been re-boxing all of my wife's comic book collection (18 boxes later........
) a long with dumpster runs and filing/sorting/shredding of important papers. Basically, we've been down-sizing. So, what's that mean? Comics have invaded the work space.
I hope to have this issue solved by the end of this weekend.
See ya in the funnies........
BigfootV
Joined: December 24, 2005
KitMaker: 1,624 posts
AeroScale: 385 posts
Posted: Monday, November 14, 2016 - 09:01 PM UTC
Hey Gang,
Major progress, I did about 3 hours of work last night on the kit.


Now, some of you are sitting there saying, "It took you 3 hours, to do that?" Yes, but what I didn't show in the photos is that the nacelle I was foiling earlier in the build snapped off. So, I had to re-glue the nacelle and repair the areas effected.
Also, when I was foiling the flap area on the right wing, the damn thing moved on me. Thus, causing a bubble effect to form, so I had to go back and remove the effected area.
I also went back and removed and re-foiled the left wing area that wrinkled up on me earlier in the build.
Note: The area that was wrinkled was a combination of two things.
First was the foil, I was at the end of the roll, which makes foiling it out smooth more of a challenge.
Second, there was an area that was scratched up, which caused the foil to catch and wrinkle more than it should. So, sanding and filling were needed to make it disappear.
See ya in the funnies..................
Kevlar06
Joined: March 15, 2009
KitMaker: 3,670 posts
AeroScale: 833 posts
Posted: Monday, November 14, 2016 - 11:25 PM UTC
Brian,
I feel your pain-- I'm working on an Atlas Booster in 110th scale, and I've re- started the project three times now-- just can't seem to get the foil right-- it's a small model, and I've found the smaller the model the more problem areas seem to show up. But hang in there, you've got a great start, and I have no doubt you'll be pleased with the overall result. Foiling is slow, but also fun and rewarding-- you can also do it inside where it's warm and cozy rather than having to clean up after messy painting.
VR Russ
Joel_W
Joined: December 04, 2010
KitMaker: 11,666 posts
AeroScale: 7,410 posts
Posted: Tuesday, November 15, 2016 - 03:55 AM UTC
Brian,
I've got to give you credit for tackling such a complex aircraft when it comes to foiling. And so far you're doing a excellent job of it.
Joel
I've got to give you credit for tackling such a complex aircraft when it comes to foiling. And so far you're doing a excellent job of it.
Joel
BigfootV
Joined: December 24, 2005
KitMaker: 1,624 posts
AeroScale: 385 posts
Posted: Friday, November 18, 2016 - 03:39 AM UTC
Russ,
Thanks. Foil has a way of going were it wants to, which I've been noticing as I go with this kit. With the compressor now in the "Man cave", I don't have to worry about the weather any more.
Joel,
Just saw your reply. Thank you so much for that comment!
Complex, yes. It has tested my skill level. I must admit, I have to be in "foiling frame of mind" when I sit down to tackle it. No distraction. The only thing I've found to be a PITA is try to get the edges to line up and not seriously over lap.
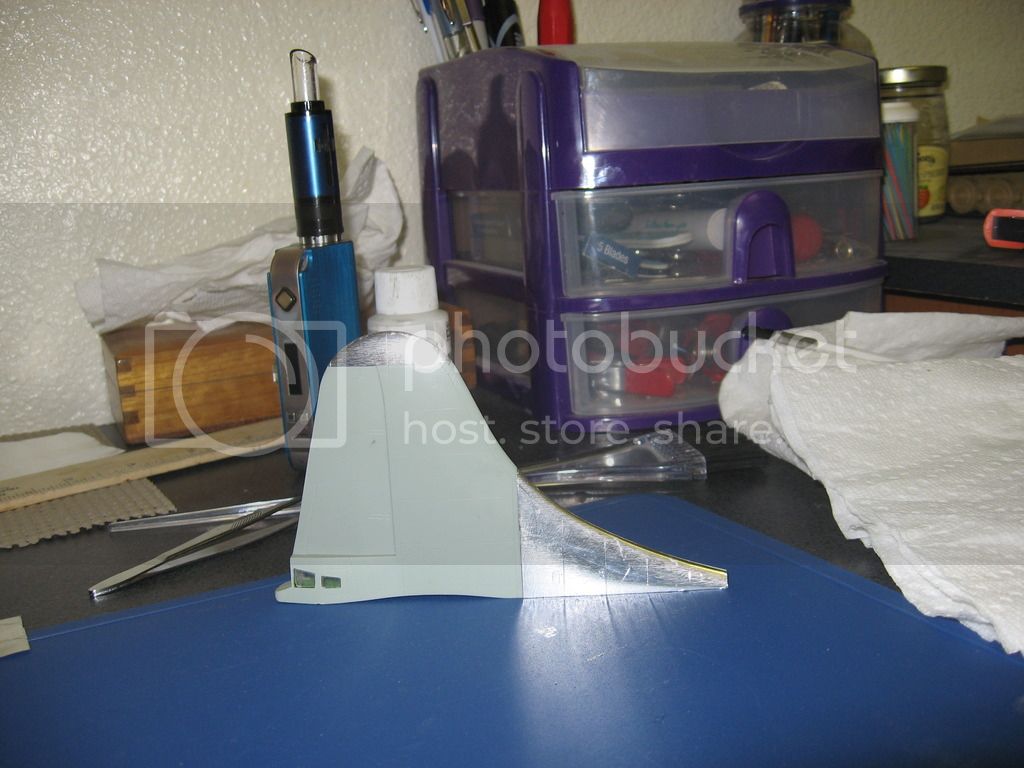
More photos: Flap area that was damaged was repaired.
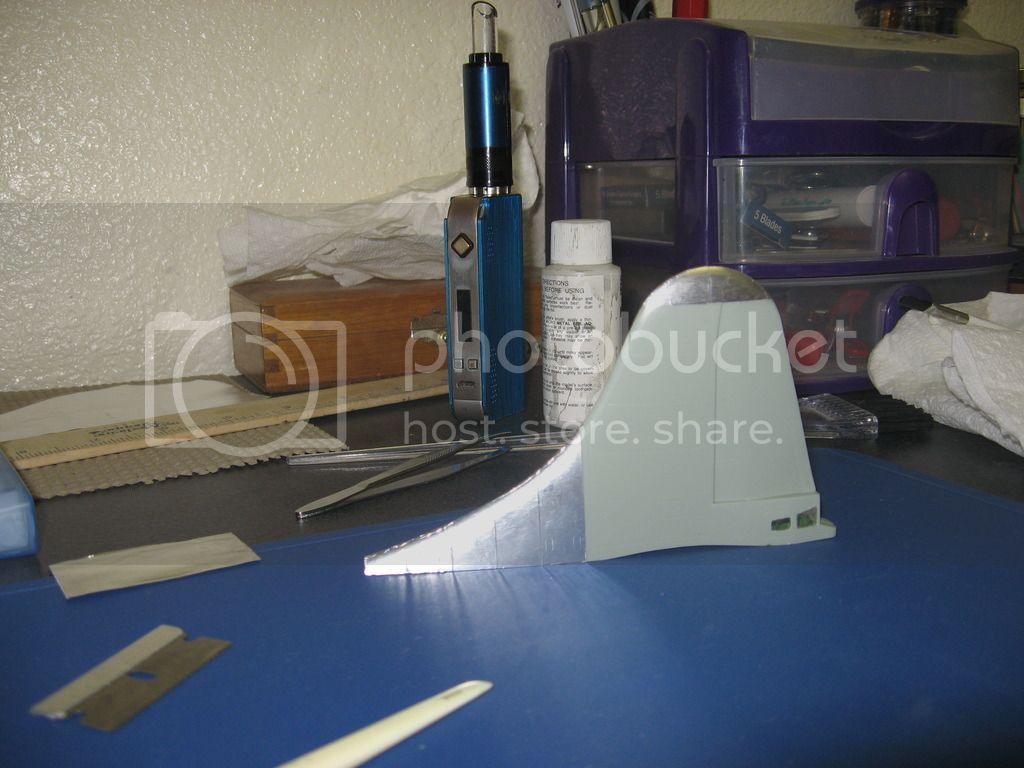
Tail section completed. Left wing upper surface almost done.
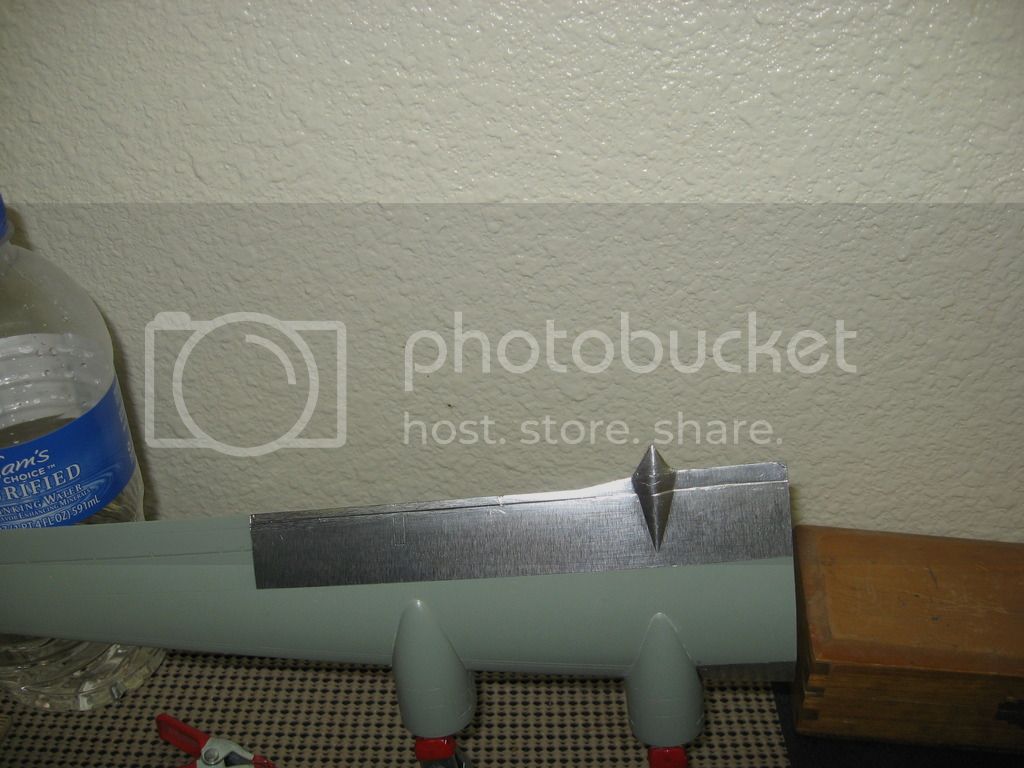
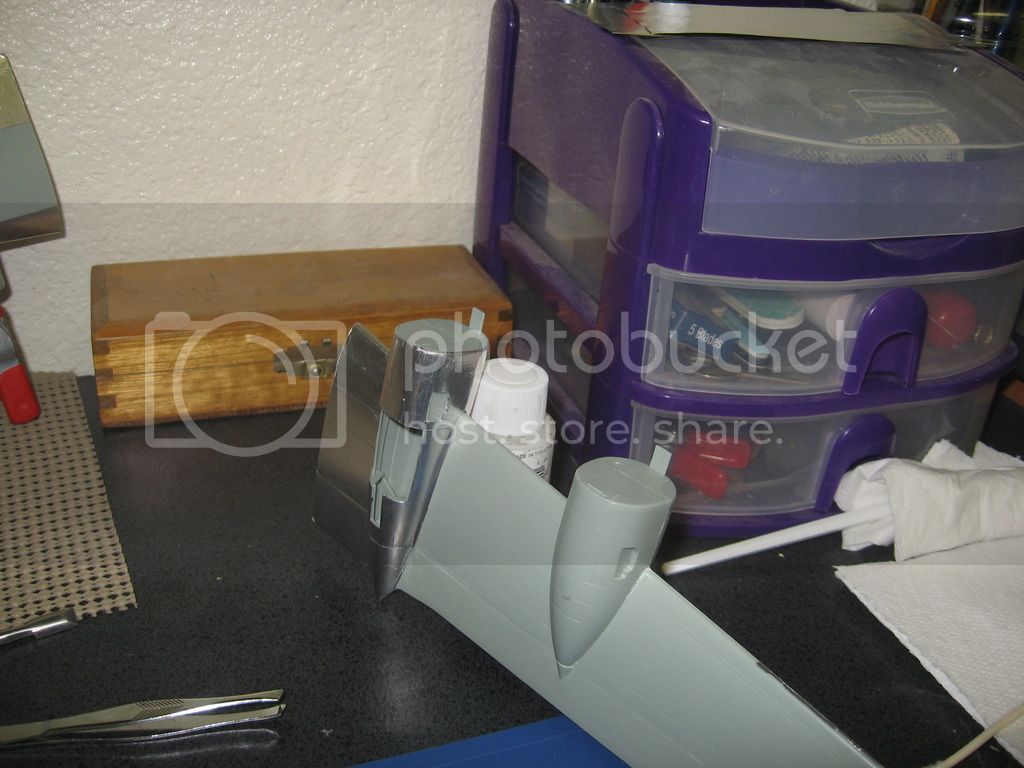
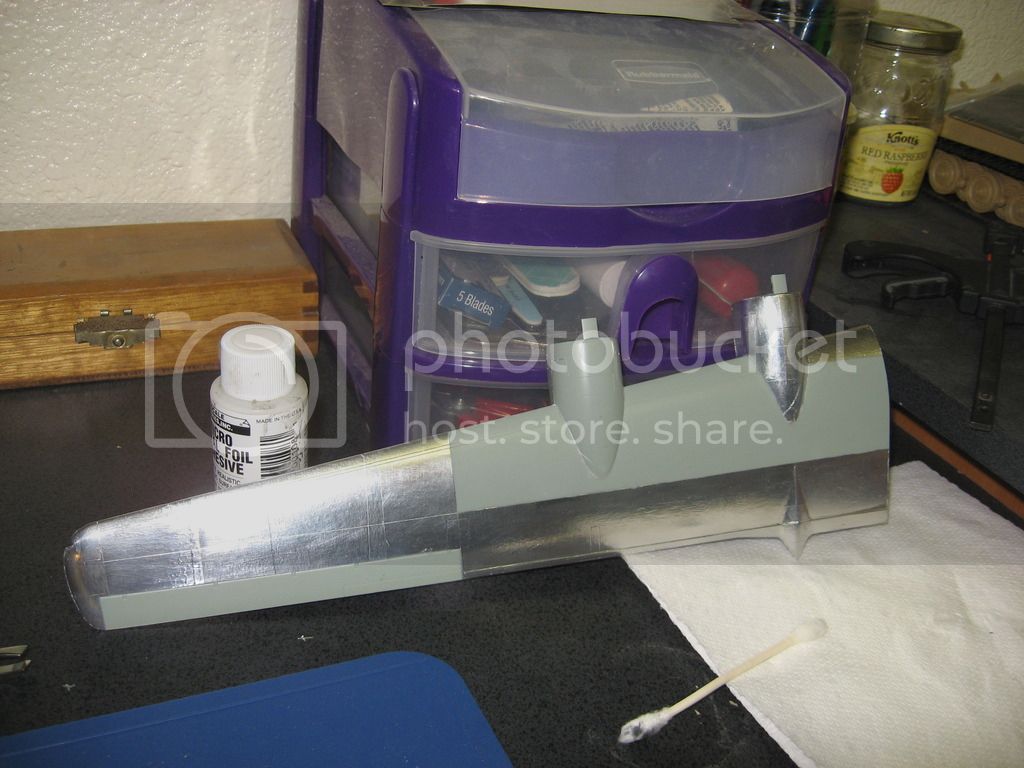
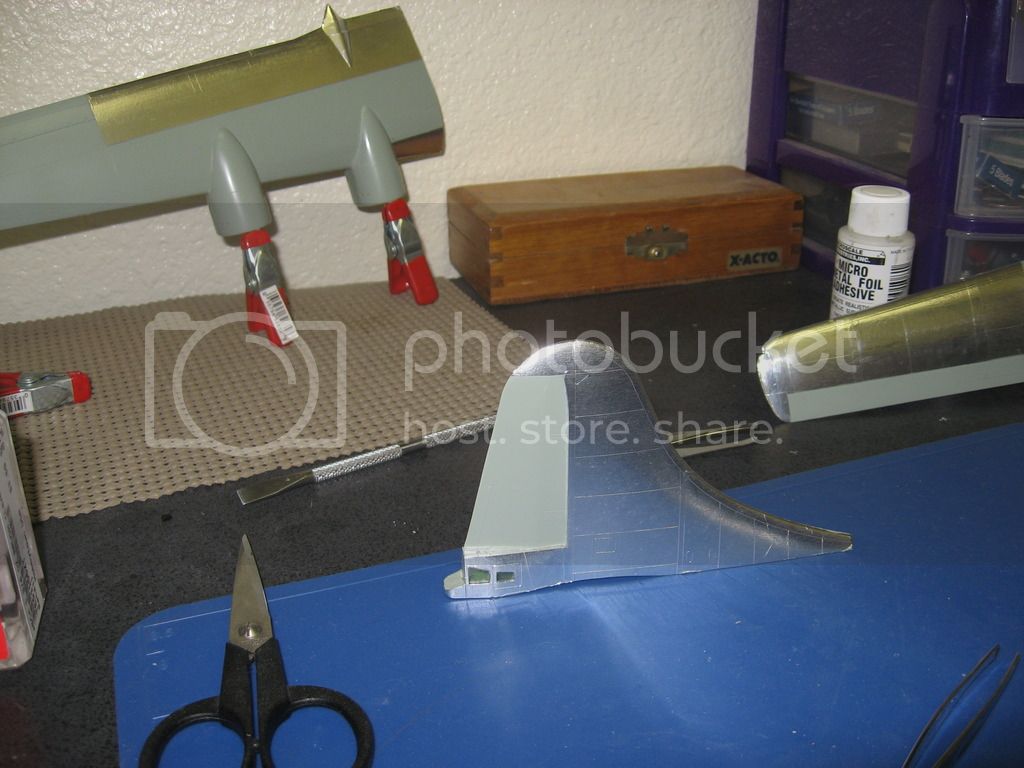
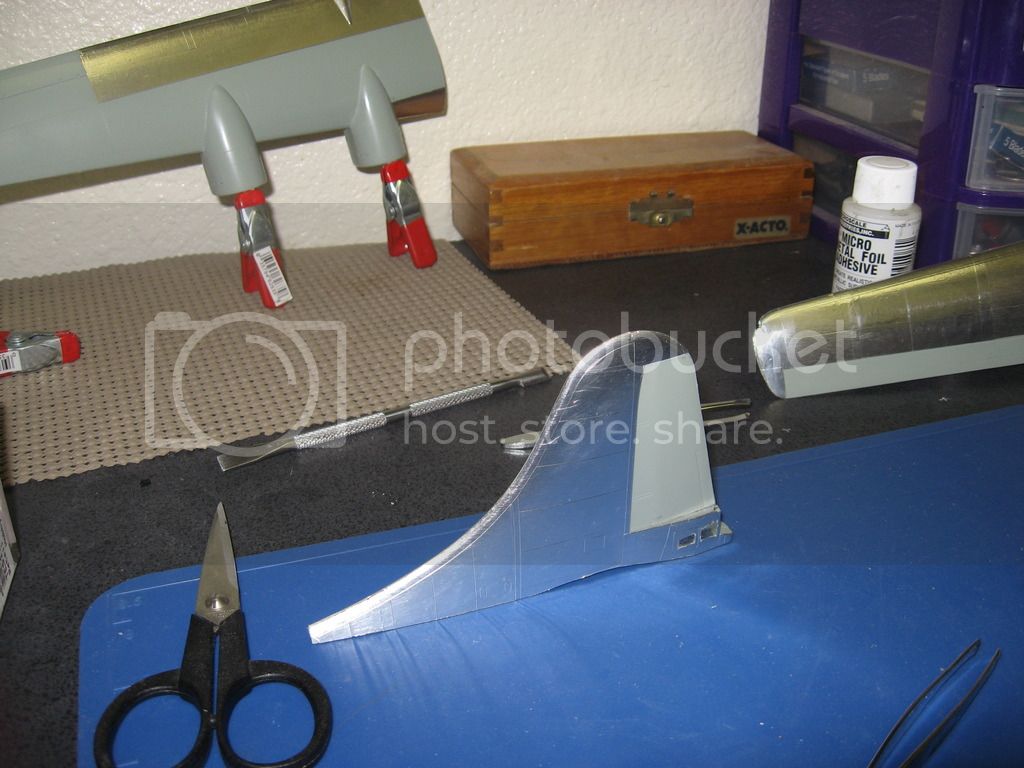
See ya in the funnies...............
Thanks. Foil has a way of going were it wants to, which I've been noticing as I go with this kit. With the compressor now in the "Man cave", I don't have to worry about the weather any more.
Joel,
Just saw your reply. Thank you so much for that comment!
Complex, yes. It has tested my skill level. I must admit, I have to be in "foiling frame of mind" when I sit down to tackle it. No distraction. The only thing I've found to be a PITA is try to get the edges to line up and not seriously over lap. More photos: Flap area that was damaged was repaired.
Tail section completed. Left wing upper surface almost done.


See ya in the funnies...............
 |

WEB HOSTING BY


Copyright ©2021 AeroScale and Kitmaker Network, a subsidiary of Silver Star Enterprises
All Rights Reserved. Please read our Conditions of Use and Privacy Policy.
All Rights Reserved. Please read our Conditions of Use and Privacy Policy.