_GOTOBOTTOM
Cold War (1950-1974)
Discuss the aircraft modeling subjects during the Cold War period.
Hosted by Tim Hatton
Dassault Mirage III/5BA Heller 1/72
goodn8
_VISITCOMMUNITY
Berlin, Germany
Joined: October 12, 2008
KitMaker: 709 posts
AeroScale: 651 posts
Posted: Monday, August 21, 2017 - 11:17 PM UTC
Hi guys!
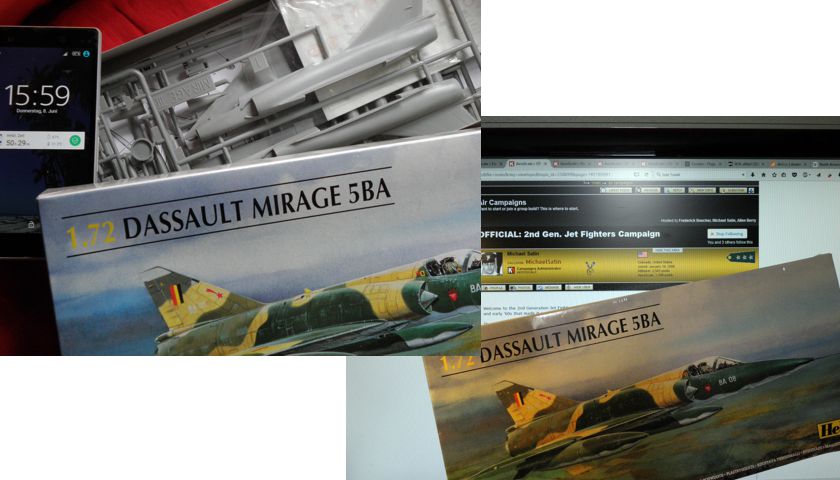
Decided to show a seperate build log for my recent job.
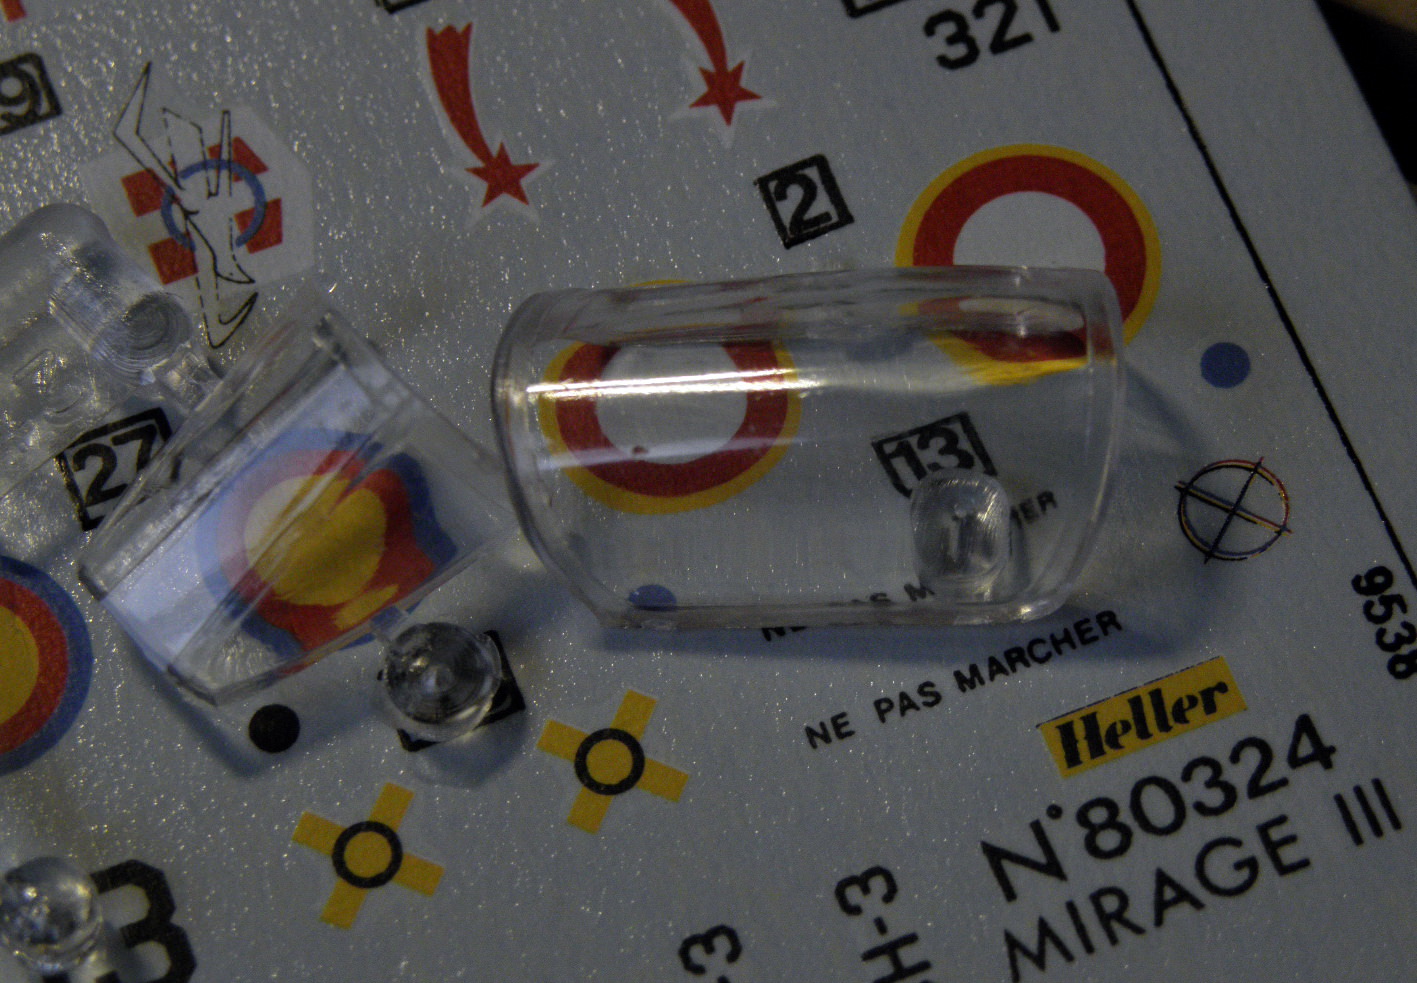
HELLER'S 1/72 Dassault Mirage III / 5 BA

It's part of the "2nd Gen. Jet Fighters" campaign and will be shown there partially as well.
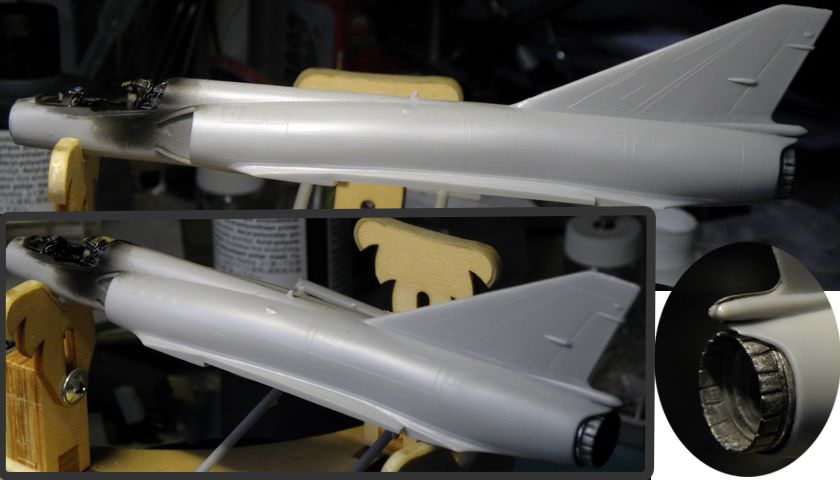
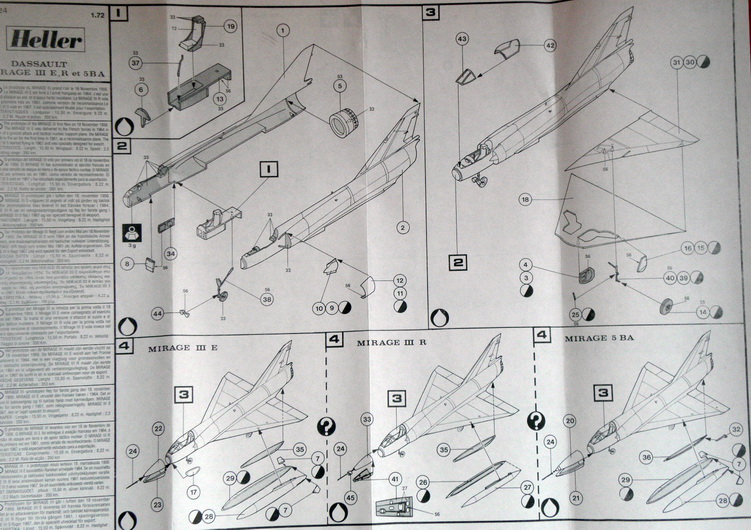
Since it is a very basic and old/well known kit I try to improve something and practise myself in doing that.

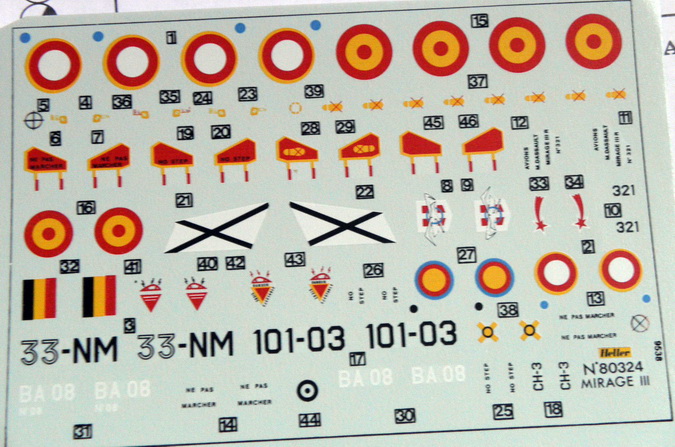
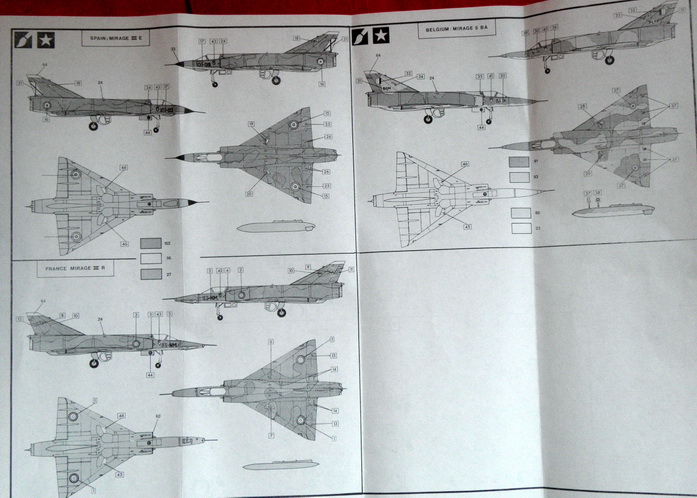
The kit offers 3 options with differen parts to use:
III E - Spain
III R - France
5 BA - Belgium

Not yet sure which one I'll go for...


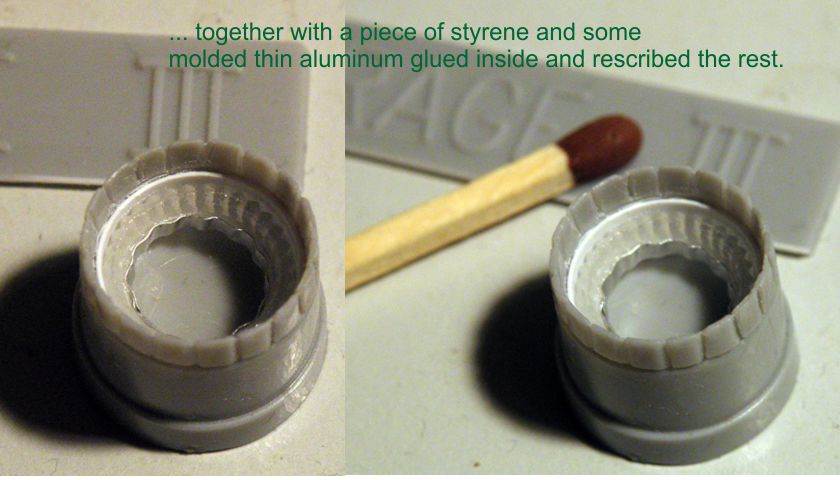
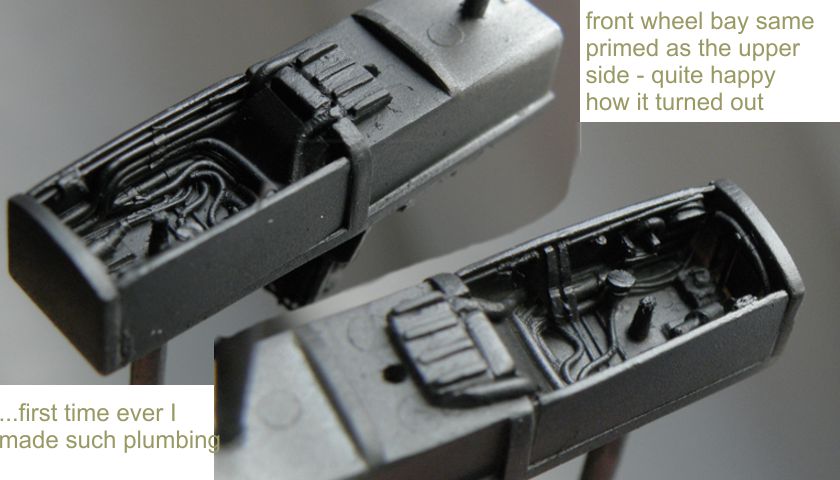
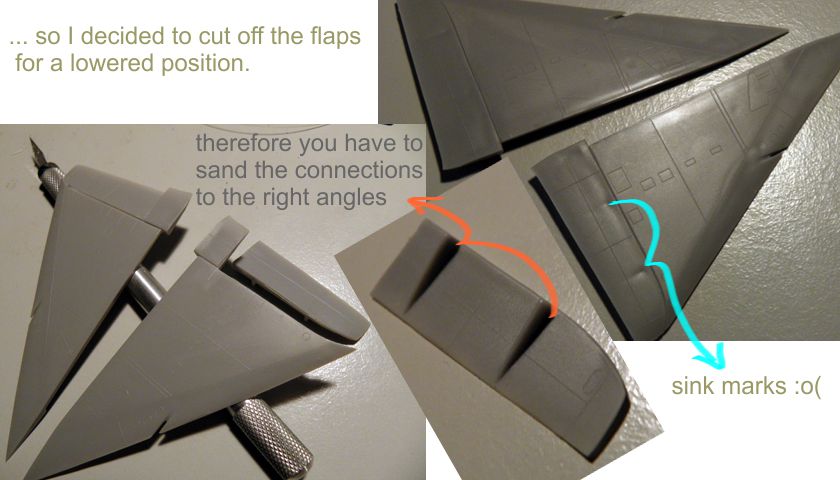
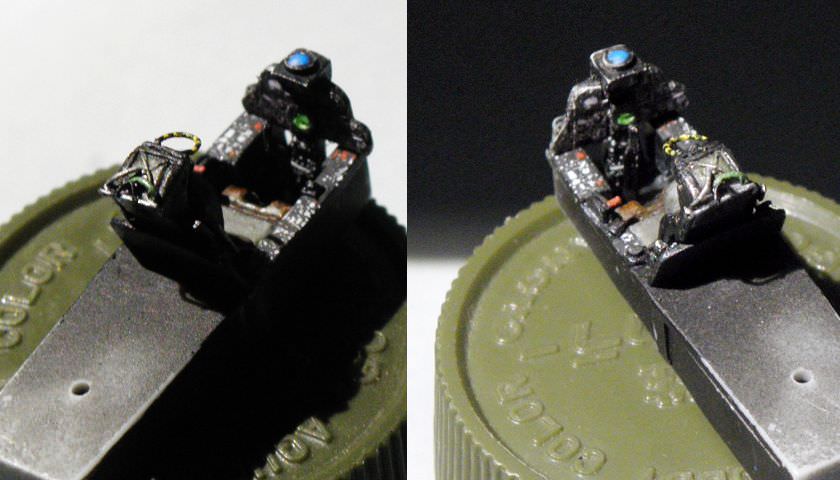
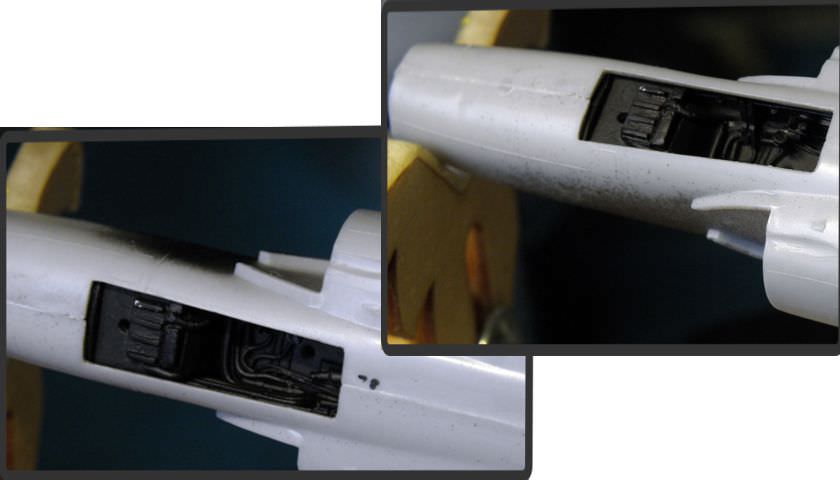
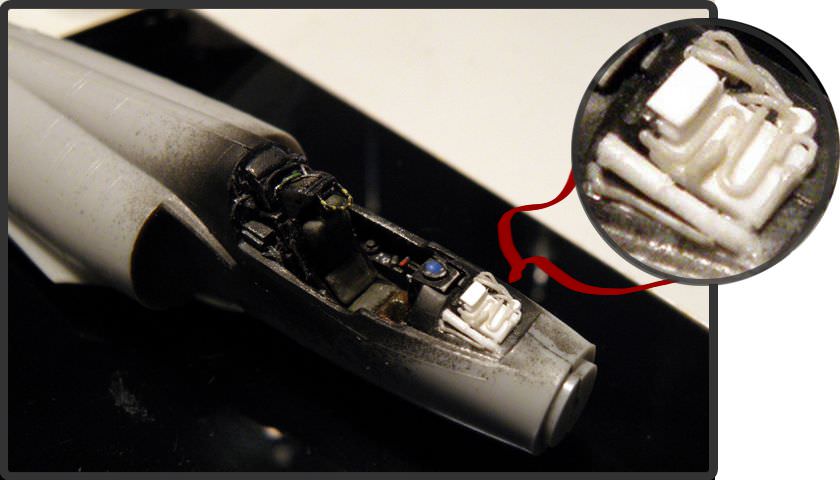
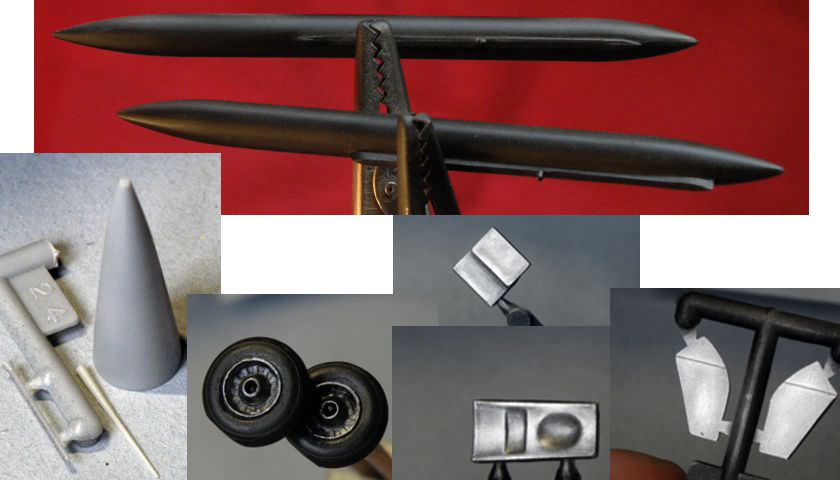
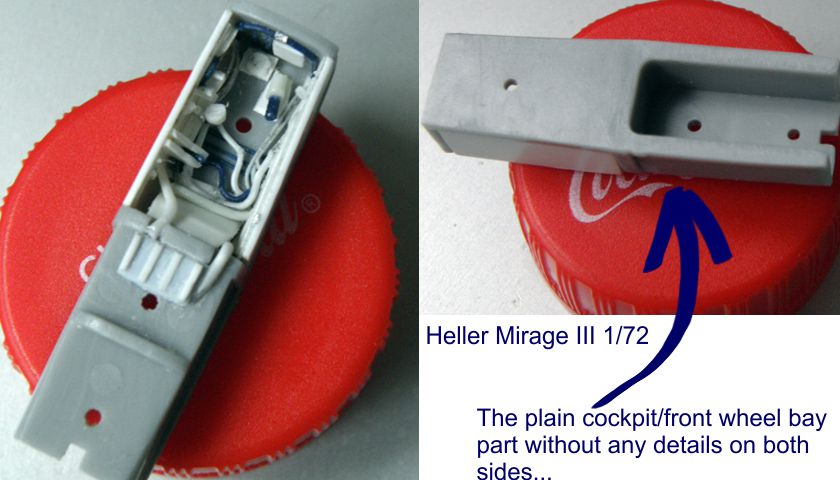
First started with the cockpit/front gear bay part...
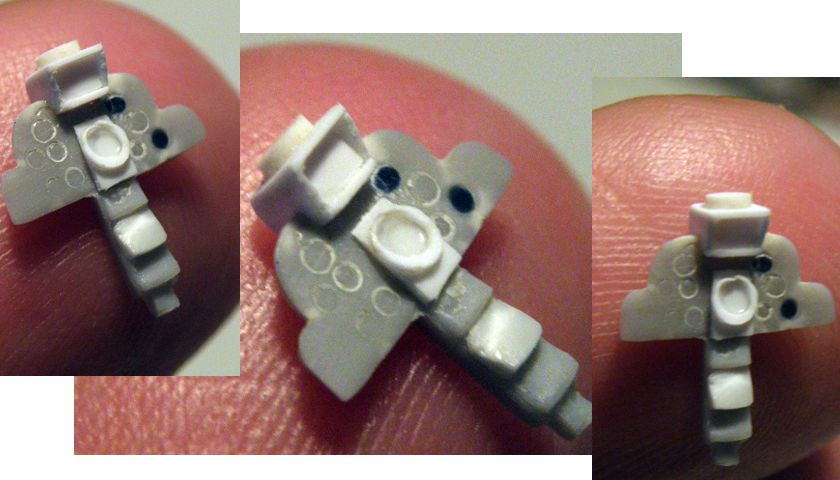
The part offers nothing! So I went for some addional parts.
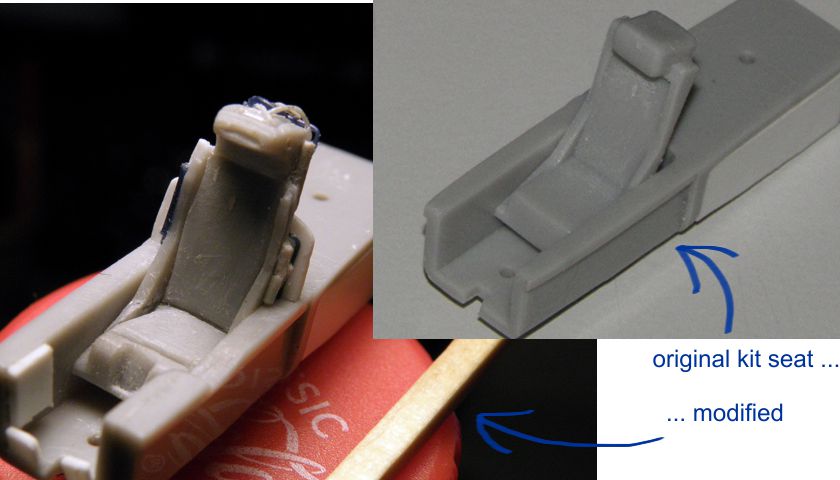
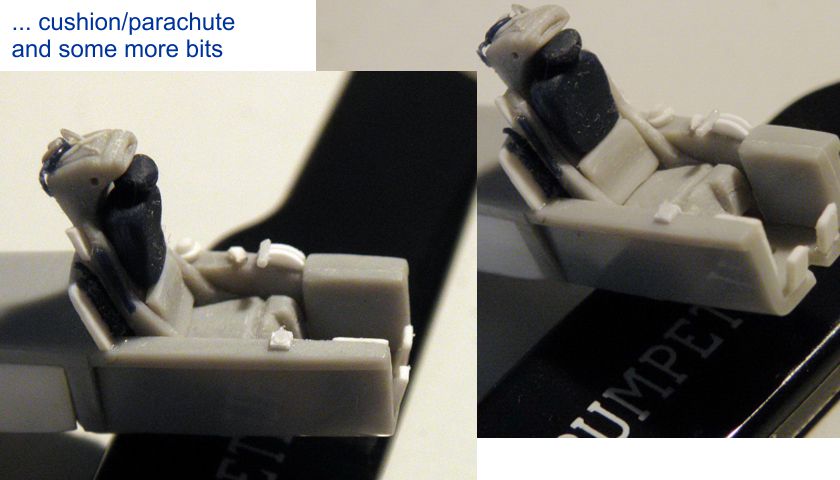
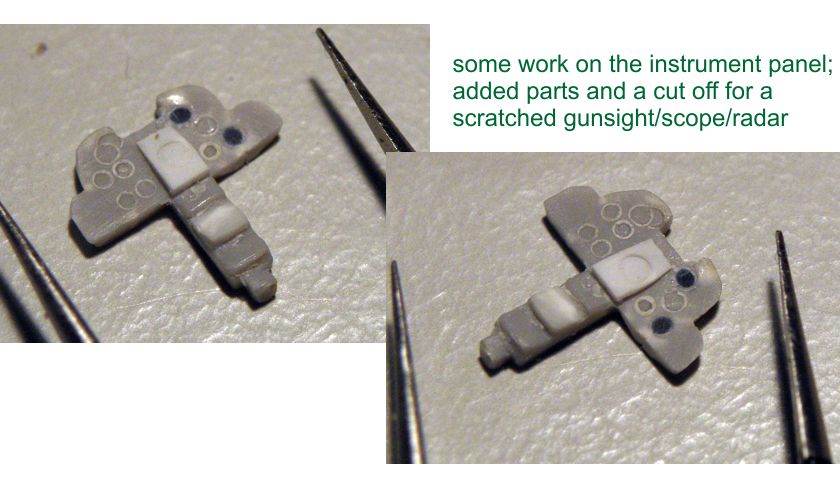
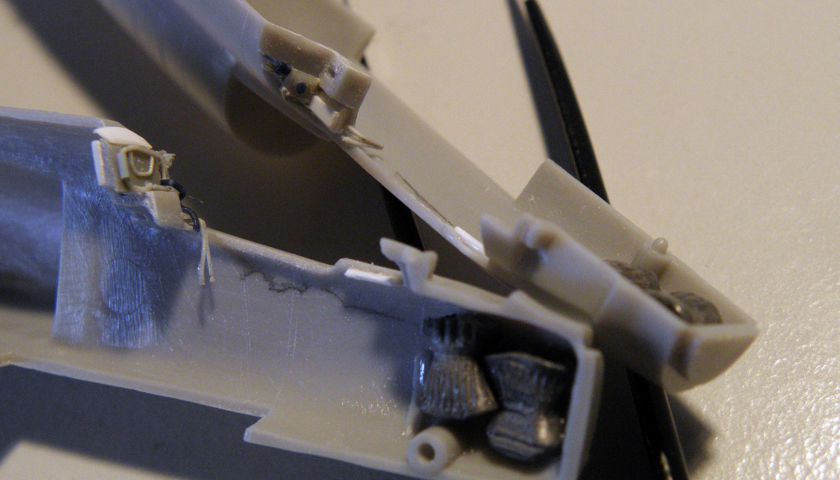
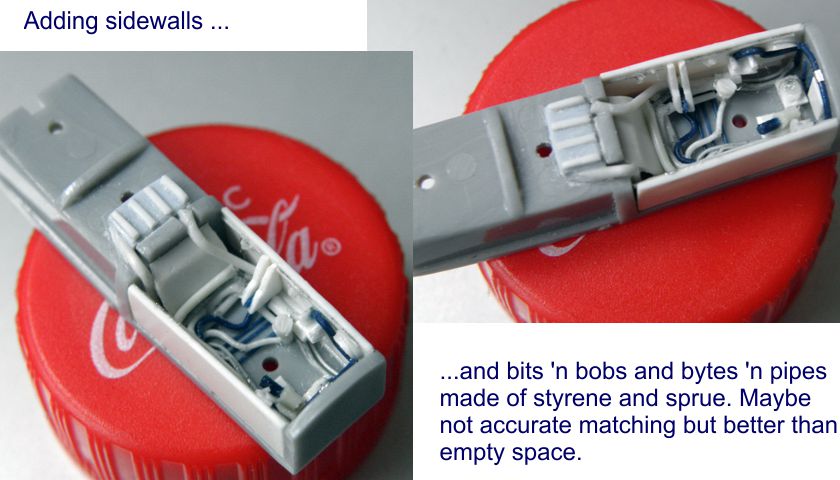
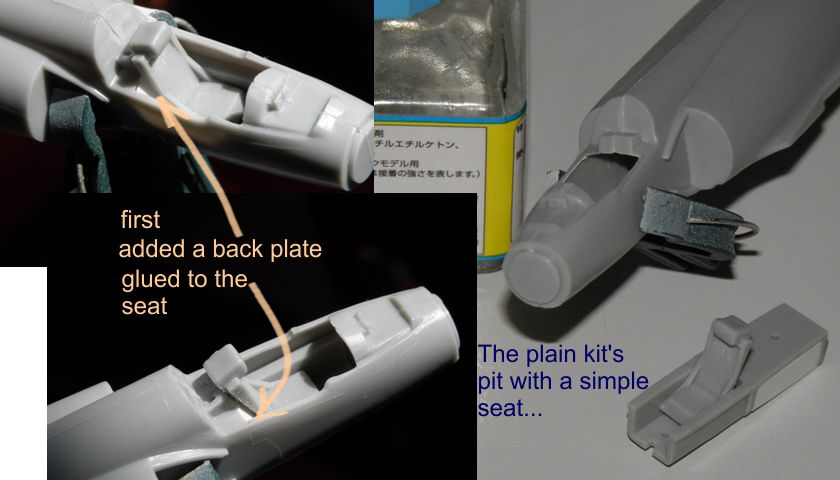
After the bay I'll try to improve the pit a bit as well. There is only a basic seat, a simple joystick and a plain instrument panel. No engravings, no decals.


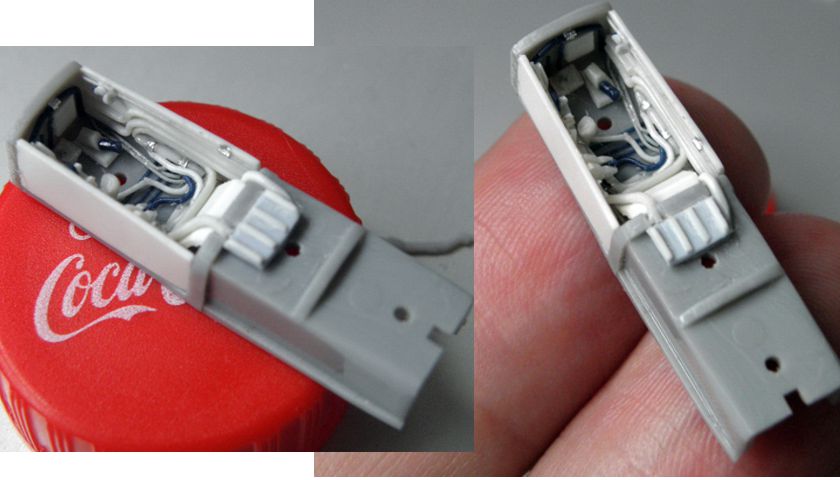
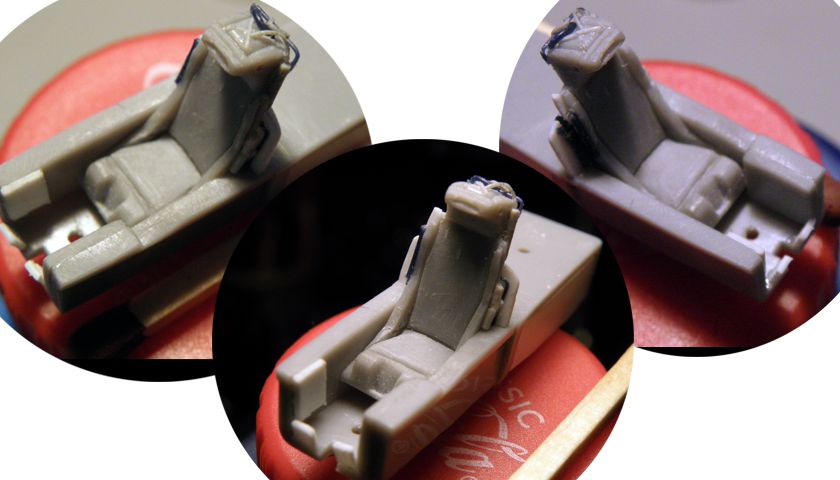
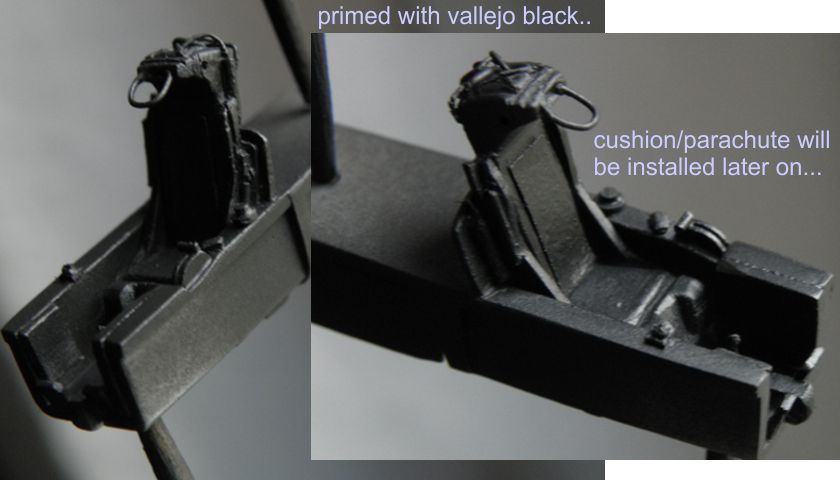
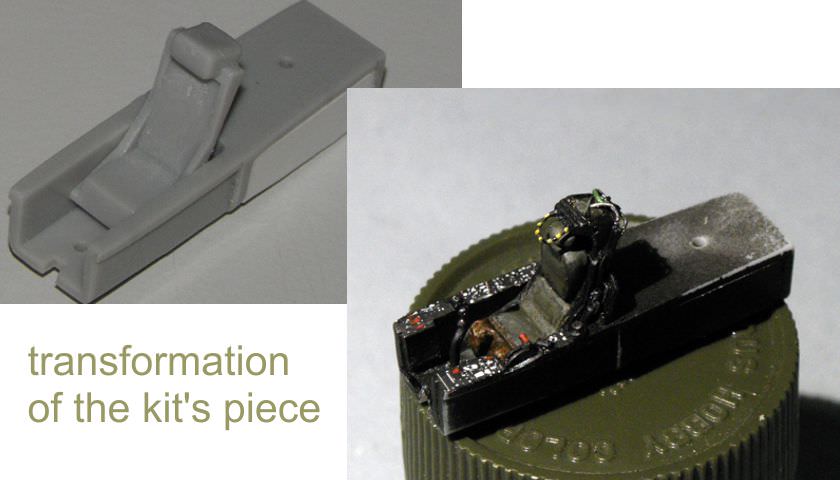
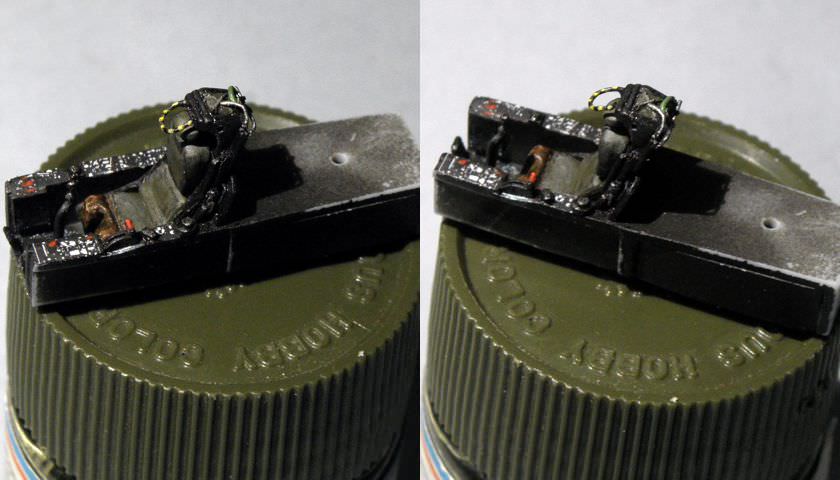
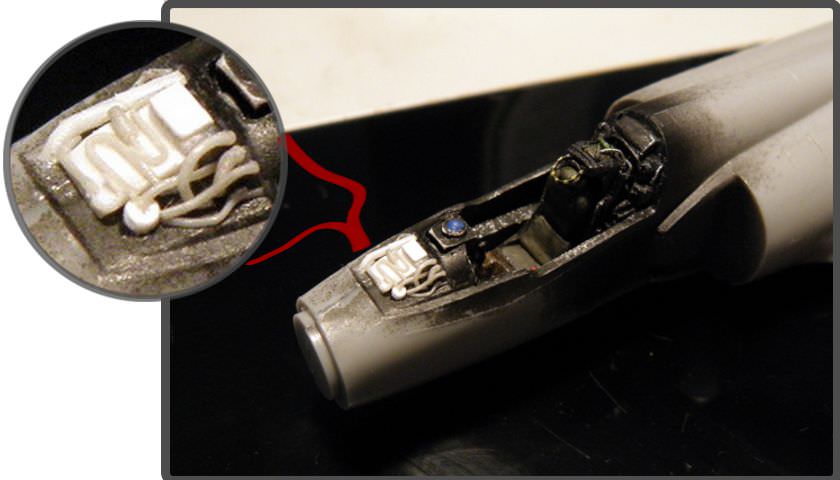
Now went for he upper side...
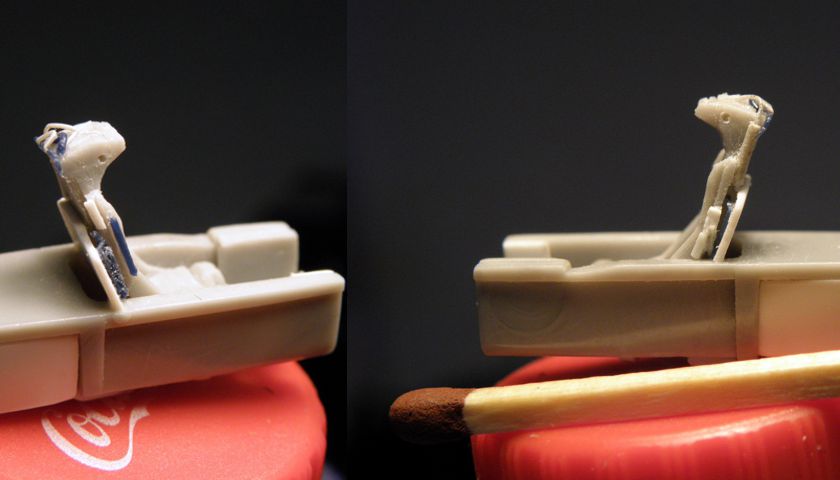
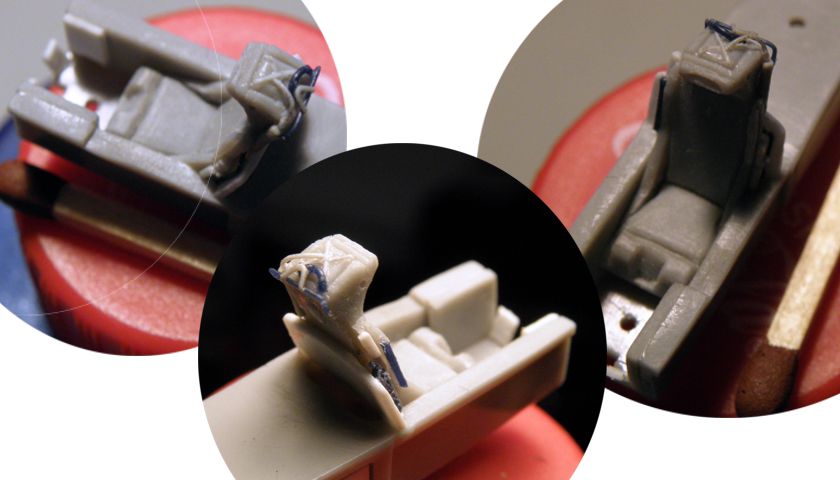
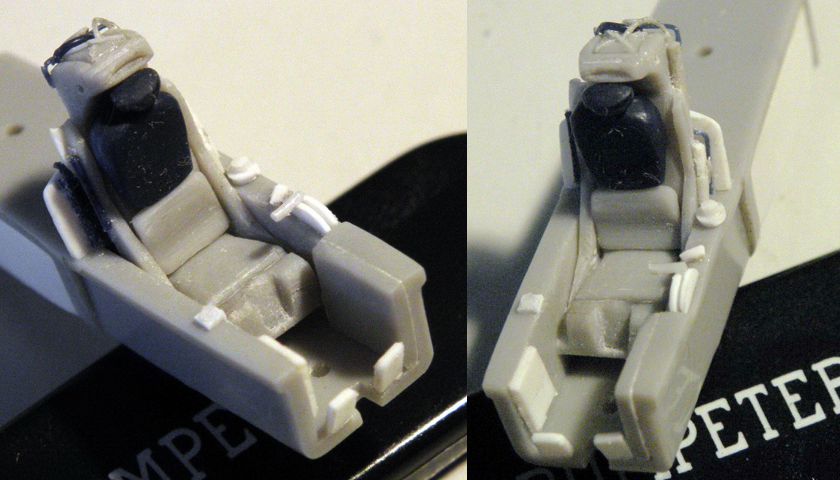
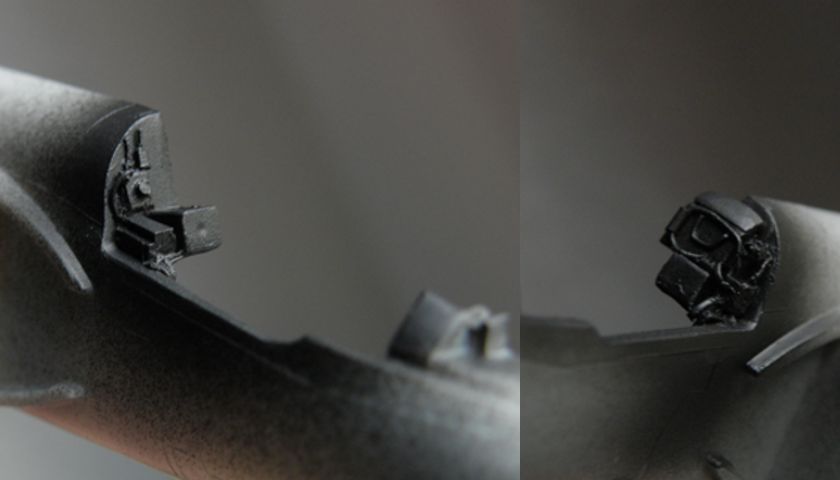
Adding a plate glued to the back of the seat to close up the side openings. Than some scratched parts on the rear wall of the pit.


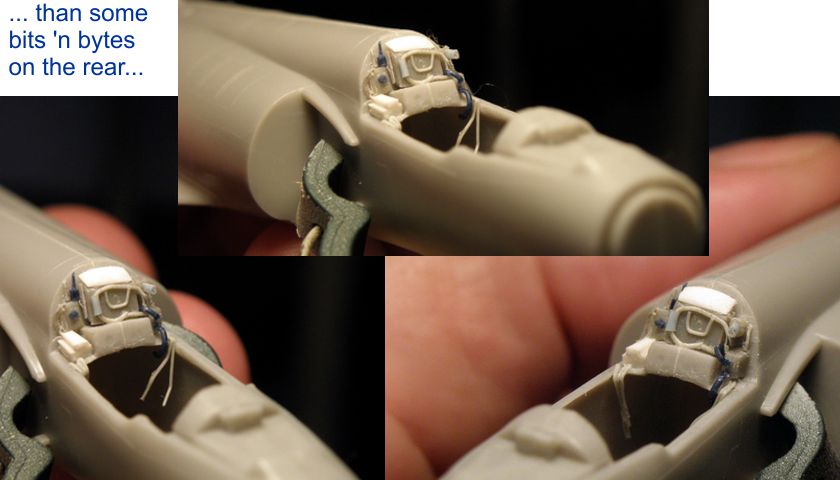
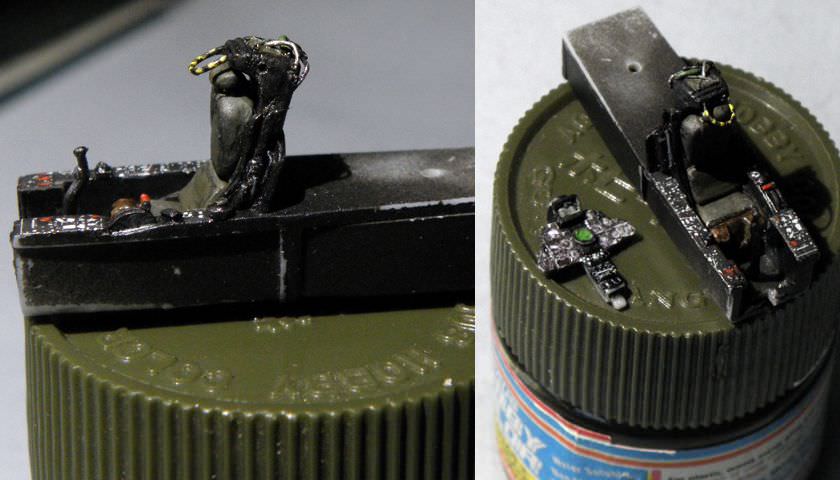
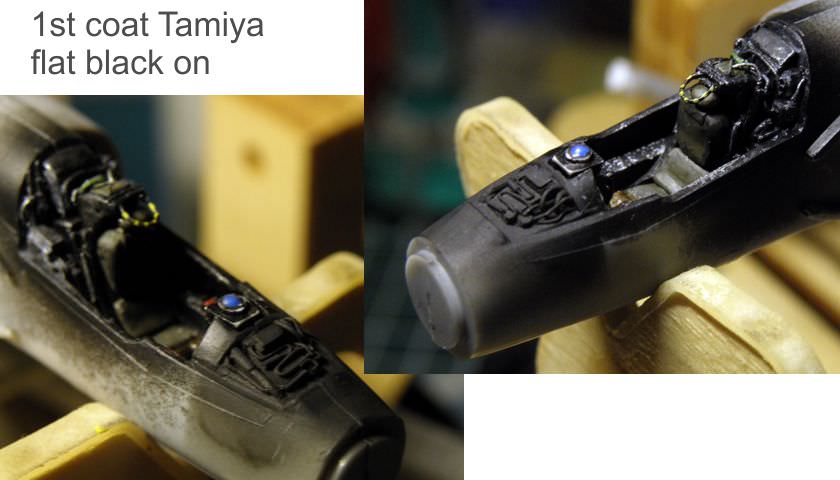
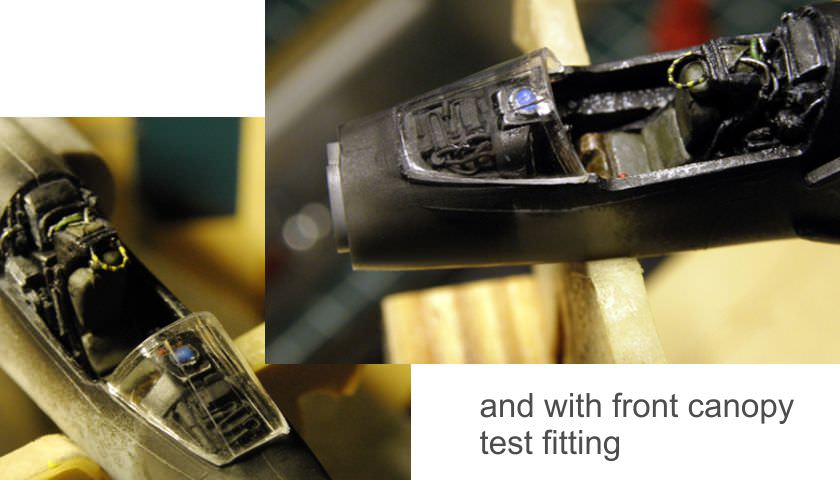
Next will be the seat itself, dials, dashboard, interior etc. ...

Thomas
Szmann
_VISITCOMMUNITY
Netherlands Antilles
Joined: September 02, 2014
KitMaker: 1,977 posts
AeroScale: 295 posts
Posted: Tuesday, August 22, 2017 - 01:20 AM UTC
Nicely done, Thomas. Following with interest this build.

Cheers!
Gabriel
Antilles
_VISITCOMMUNITY
Nordrhein-Westfalen, Germany
Joined: March 22, 2015
KitMaker: 671 posts
AeroScale: 614 posts
Posted: Tuesday, August 22, 2017 - 07:45 PM UTC
Thomas,

very nice work on plumbing the landing gear bay and cockpit. Good You chose to make a seperate blog of Your build. It really deserves one.

Oliver
goodn8
_VISITCOMMUNITY
Berlin, Germany
Joined: October 12, 2008
KitMaker: 709 posts
AeroScale: 651 posts
Posted: Friday, September 15, 2017 - 09:53 PM UTC
Hi guys!
Thanks for the kind comments, Gabriel and Oliver!

Slow but steady little progress. I'm still working on the pit and modified the kit's seat. Gave another shape, scribed some lines and added some styrene. Didn't finally glued the back cushion/parachute for better painting later on and still some touch up's to do. Although I think that's all I can manage to do with the seat.


Thanks for looking, cheers Thomas
goodn8
_VISITCOMMUNITY
Berlin, Germany
Joined: October 12, 2008
KitMaker: 709 posts
AeroScale: 651 posts
Posted: Sunday, October 08, 2017 - 11:52 PM UTC
Hi there!

Not very much to show, wish I were few steps ahead.

Went little on with the instrument panel of the kit, no details at all - just plain styrene. Yet to be finished.
Than had a look at the nozzle that needs attention and went on with it.


Thomas

Antilles
_VISITCOMMUNITY
Nordrhein-Westfalen, Germany
Joined: March 22, 2015
KitMaker: 671 posts
AeroScale: 614 posts
Posted: Tuesday, October 10, 2017 - 07:14 PM UTC
Wow, great and inspiring work on the nozzle! This one will be very nice. Keep on posting.

Oliver
Szmann
_VISITCOMMUNITY
Netherlands Antilles
Joined: September 02, 2014
KitMaker: 1,977 posts
AeroScale: 295 posts
Posted: Wednesday, October 11, 2017 - 01:31 AM UTC
Thomas, you're overcoming beautifully the kit's shortages. Following. Learning. Thank you!

Gabriel
goodn8
_VISITCOMMUNITY
Berlin, Germany
Joined: October 12, 2008
KitMaker: 709 posts
AeroScale: 651 posts
Posted: Monday, October 16, 2017 - 11:31 PM UTC
Hi folks!
Again thank you, Gabriel and Oliver for your words.
And thanks guys for looking, hope it's quite enjoyable .

Some more progress on the above shown parts.

The instrument panel gets an update from styrene parts.


While detailing the cockpit's rear I had to leave the fuselage halves unglued, otherwise it's impossible to attach finally the pit/bay-part inside. So that made it all a bit tricky for the tiny parts and dryfitting procedures.

Now took again the halves, inserted some nose weight (care:tailsitter!) and gave a first shot of primer.
Also primed the pit and the front wheel bay. For all I'm using Vallejo Black Primer (for some depth/preshade-reasons).

I must say, that I'm quite happy how it turned out and think that should be enough scratching there without looking overdone.


Have a good time; Thomas
Antilles
_VISITCOMMUNITY
Nordrhein-Westfalen, Germany
Joined: March 22, 2015
KitMaker: 671 posts
AeroScale: 614 posts
Posted: Tuesday, October 17, 2017 - 12:55 AM UTC

Quoted Text

Hi folks!
Again thank you, Gabriel and Oliver for your words.
And thanks guys for looking, hope it's quite enjoyable .


Thomas, yes this build thread is really enjoyable. Got chair and beer ready.
Very nive progress. Love the tubing!

Oliver
goodn8
_VISITCOMMUNITY
Berlin, Germany
Joined: October 12, 2008
KitMaker: 709 posts
AeroScale: 651 posts
Posted: Sunday, October 22, 2017 - 10:44 PM UTC
Thanks Oliver, a will surely help much.

Done the nozzle and call it "okay":


After comparing the wing parts to pics of the real a/c I wanted the flaps down. So they have to be cutted off from the one-piece-molded upper part. Then aligning the connections for the right angle for glueing on. The sink marks on the flaps are another problem

... and the plain undetailed wheel wells need some additional work as well.


Thomas
goodn8
_VISITCOMMUNITY
Berlin, Germany
Joined: October 12, 2008
KitMaker: 709 posts
AeroScale: 651 posts
Posted: Saturday, October 28, 2017 - 10:29 PM UTC
Hi everybody and thanks for stopping by!

Finished the kit's seat/cockpit part transformation, so let me show it before it went inside the fuselage.
Bashed with decals the details were painted and flat coated. Maybe some touchups; the colors pop a bit more out in the pics than in real.

I'm not going to do a harness as it could only worsen that already really time consuming tiny and fiddling piece.
Besides the fun, I tell you this is true hard practising for me. Just to see what is possible and suitable in enhacing/editing the given parts.


Cheers, Thomas
Szmann
_VISITCOMMUNITY
Netherlands Antilles
Joined: September 02, 2014
KitMaker: 1,977 posts
AeroScale: 295 posts
Posted: Sunday, October 29, 2017 - 09:04 PM UTC
Great job, Thomas!

After all that work you should display the cockpit separately!

Waiting for the continuation,
Gabriel
goodn8
_VISITCOMMUNITY
Berlin, Germany
Joined: October 12, 2008
KitMaker: 709 posts
AeroScale: 651 posts
Posted: Tuesday, November 07, 2017 - 11:04 PM UTC
Hi Guys, thanks for passing by!

Thanks a lot for your kind words, Gabriel!
But when displaying it separately you wouldn't even recognise it is there.

So it went finally into the fuselage ...

Apart from some sink marks and seams/gaps to be managed and filled,the fit of the two halves is o.k.

Now there was a big empty space on the pit's front needing some add-on's. Again I used some stretched sprue and styrene parts to inmprove a bit.
It's nearly impossible to add much more since the clear parts are quite nice but a little thick. If the canopy had been competely trash, I wouldn't had done that plus detailing.


THomas
goodn8
_VISITCOMMUNITY
Berlin, Germany
Joined: October 12, 2008
KitMaker: 709 posts
AeroScale: 651 posts
Posted: Thursday, November 09, 2017 - 09:41 PM UTC
Hi all!

a small update ...


Thomas
Antilles
_VISITCOMMUNITY
Nordrhein-Westfalen, Germany
Joined: March 22, 2015
KitMaker: 671 posts
AeroScale: 614 posts
Posted: Friday, November 10, 2017 - 03:20 AM UTC
Thomas:
Fantastic improvement of the cockpit area! I am really impressed and eagerly waiting for more!

Oliver
GazzaS
#424
_VISITCOMMUNITY
Queensland, Australia
Joined: April 23, 2015
KitMaker: 4,648 posts
AeroScale: 1,938 posts
Posted: Friday, November 10, 2017 - 04:20 AM UTC
Thomas,
That is some great scratch building you're doing on a tiny kit.

Gaz
goodn8
_VISITCOMMUNITY
Berlin, Germany
Joined: October 12, 2008
KitMaker: 709 posts
AeroScale: 651 posts
Posted: Saturday, November 11, 2017 - 11:53 AM UTC
Thanks a lot for your comments, Gary and Oliver - much appreciated!

Aside the fiddling work I touched up some of the smaller parts.
The nose cone needs a different antenna since the original doesn't look nice to me (see pic). So I'll go with a piece of streched sprue again.
Also rescribed the outer line of the wheel rim a bit as it wasn't well molded too and little flattend the tyres.


Thanks for stopping by, Thomas
magnusf
_VISITCOMMUNITY
Stockholm, Sweden
Joined: May 02, 2006
KitMaker: 1,953 posts
AeroScale: 1,902 posts
Posted: Saturday, November 11, 2017 - 01:04 PM UTC
Thomas! That's some serious cockpit detailing, beautifully done! I remember those Heller kits with fondness but realise that they were pretty basic really !

Markings: may I suggest a Belgian one? That's what I would go for at least !


Magnus
goodn8
_VISITCOMMUNITY
Berlin, Germany
Joined: October 12, 2008
KitMaker: 709 posts
AeroScale: 651 posts
Posted: Saturday, November 11, 2017 - 02:01 PM UTC
Thank you very much, Magnus!
I especially appreciate your stop over

And I agree with the marking option. Not only the whole shape looks best to me (although the bigger pylons disturbed it a bit - so I prepared the small ones instead. Suggestions about that?)
Another reason is, I always wanted to try painting a 3-colour camo scheme. Awaiting quite a challenge in managing that.

Thomas
Szmann
_VISITCOMMUNITY
Netherlands Antilles
Joined: September 02, 2014
KitMaker: 1,977 posts
AeroScale: 295 posts
Posted: Monday, November 13, 2017 - 12:24 AM UTC
Thomas, you're doing great, mate!
In art they call it horror vacui - fear if empty spaces.
I keep following this build with maximum interest.

Gabriel
magnusf
_VISITCOMMUNITY
Stockholm, Sweden
Joined: May 02, 2006
KitMaker: 1,953 posts
AeroScale: 1,902 posts
Posted: Friday, November 17, 2017 - 02:41 PM UTC
Thomas! Sorry for my tardiness in answering, I've had a quite busy week !

With pylons, do you mean the pylons or the tanks? If you're thinking about the tanks, both the 500 litre supersonic ones and the huge 1700 litre tanks were used on the BAs in Belgian service. The supersonic ones looks a lot better !

When it comes to the camo, a Mirage is the perfect object to practice on: a delta has very little stuff that can be broken off and is a lot easier to mask than a WWII fighter for instance where there is lots of stuff sticking out! And the Mirage is a real looker in that camo!

Keep up the good work!


Magnus
chuteok
_VISITCOMMUNITY
Australia
Joined: October 21, 2016
KitMaker: 18 posts
AeroScale: 2 posts
Posted: Friday, November 17, 2017 - 04:59 PM UTC
Looks great mate, I also will follow your build as I am soon going retro and building the OLD Heller Ourougan and SAAB Tunnan.
nice work in the cockpit
goodn8
_VISITCOMMUNITY
Berlin, Germany
Joined: October 12, 2008
KitMaker: 709 posts
AeroScale: 651 posts
Posted: Saturday, November 18, 2017 - 06:43 PM UTC
Hi there!
Well, actual I took a close look and try to enhance the plain wheel wells...
Still matching tiny parts , yet not much of any progress to show.


Thanks a lot Magnus, for the response!
Really no matter how long it takes as I know we all have our real life and I'm mainly busy too.
Very glad, you found a way to pass by and pushing me foreward. As for the tanks, I apologize my misleading term - and yes, thats what I would prefer. The Infos about the used sizes is very useful. Does it need different paint/camo?


Thank you Chris, for stopping by!
Those kits are far from modern standard but not bad at all. Good luck with your builds - showing a log here on Aeroscale would be fun...

Regards
Thomas
magnusf
_VISITCOMMUNITY
Stockholm, Sweden
Joined: May 02, 2006
KitMaker: 1,953 posts
AeroScale: 1,902 posts
Posted: Saturday, November 18, 2017 - 07:16 PM UTC
Thomas! It's your lucky day today: the tanks seem to have been either dark green only or dark green with white on the lower surfaces (or a very light grey). Check your messages!


Magnus
goodn8
_VISITCOMMUNITY
Berlin, Germany
Joined: October 12, 2008
KitMaker: 709 posts
AeroScale: 651 posts
Posted: Saturday, November 18, 2017 - 07:54 PM UTC

Quoted Text

Thomas! It's your lucky day today: the tanks seem to have been either dark green only or dark green with white on the lower surfaces (or a very light grey). Check your messages!


Magnus


Great! Very much appreciated - thanks again for that, Magnus!

Th mas
 _GOTOTOP