Air Campaigns
Want to start or join a group build? This is where to start.
Want to start or join a group build? This is where to start.
Hosted by Frederick Boucher, Michael Satin
Hot Out of the Molds 2018
Posted: Thursday, December 06, 2018 - 04:49 PM UTC
If you're using an infinity Radek you'll be fine! Mine sprays lacquers without any issue and does it exceedingly well as I'm sure yours will too!

RadekZ

Joined: March 12, 2013
KitMaker: 125 posts
AeroScale: 85 posts

Posted: Thursday, December 06, 2018 - 07:35 PM UTC
Quoted Text
If you're using an infinity Radek you'll be fine! Mine sprays lacquers without any issue and does it exceedingly well as I'm sure yours will too!
Thanks Chris, hopefully this weekend I'll find out myself how it's like to use "smelly" paints
 as I'm almost done with fiddly interior of "cockroach"
Posted: Sunday, December 09, 2018 - 03:15 AM UTC
Hi mates,
made a little progress with my build, some problem with the resin seat. Unfortunately it broke when I was sawing it off the block
Well, that means probably the hood will be mounted in the closed position...
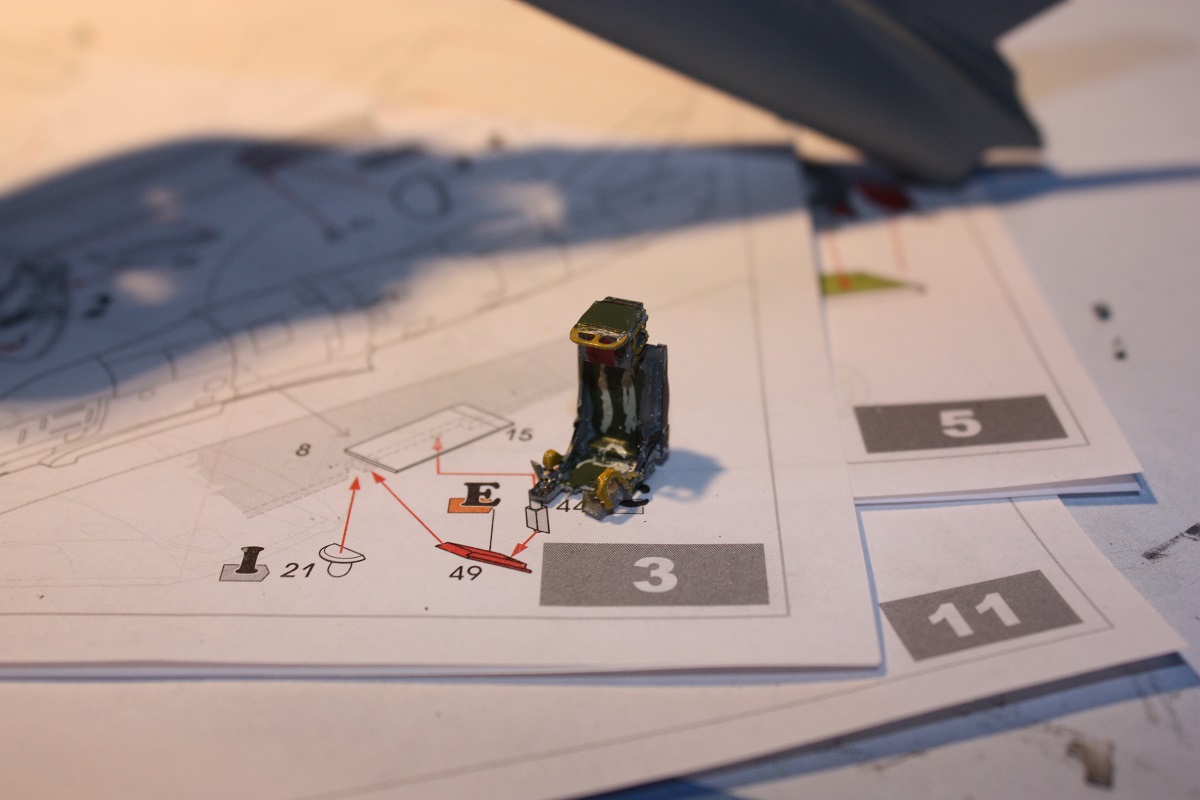
..the seat and what I could save of it....

I started to glue the fuselage halves and painted a few minor parts already
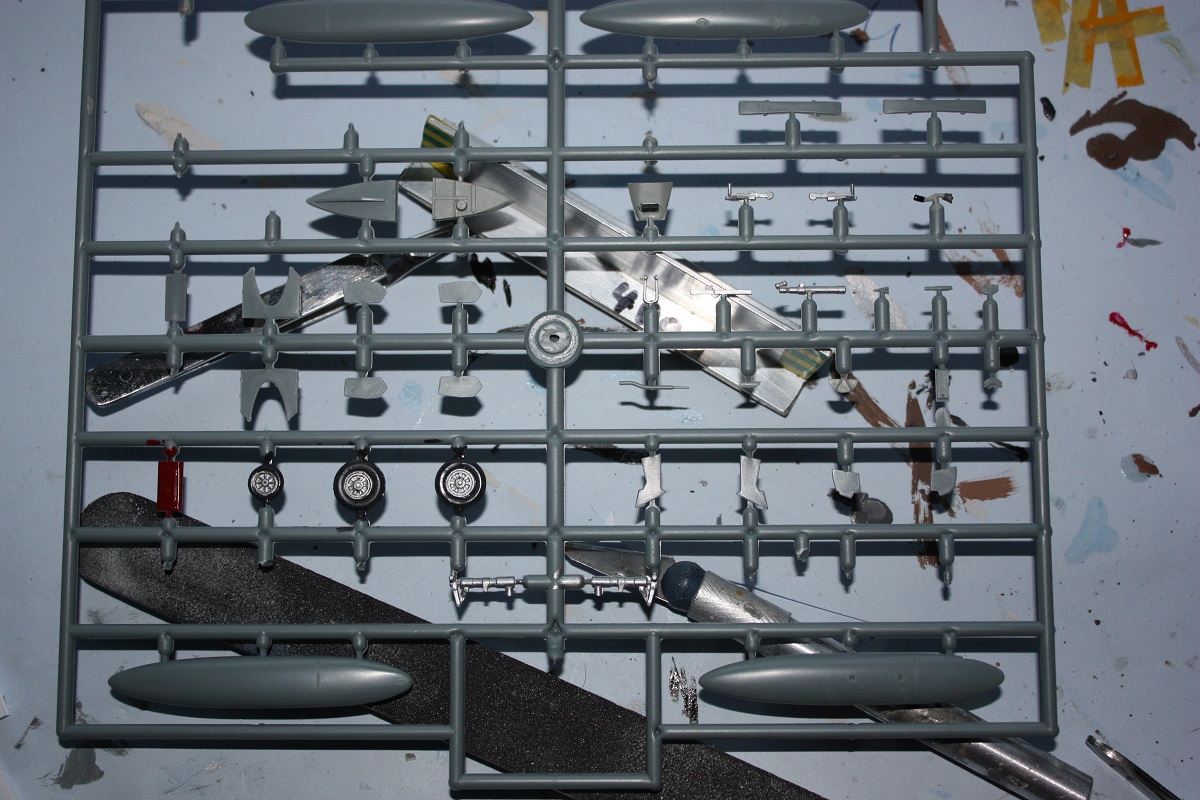
of course it is a shortrun kit, but anyway I like it still more than my other project, the Mirage III of R.V.Aircraft
made a little progress with my build, some problem with the resin seat. Unfortunately it broke when I was sawing it off the block

Well, that means probably the hood will be mounted in the closed position...
..the seat and what I could save of it....
I started to glue the fuselage halves and painted a few minor parts already
of course it is a shortrun kit, but anyway I like it still more than my other project, the Mirage III of R.V.Aircraft

Removed by original poster on 12/09/18 - 15:18:49 (GMT).
Removed by original poster on 12/09/18 - 15:20:34 (GMT).
Posted: Sunday, December 09, 2018 - 03:21 AM UTC

RadekZ

Joined: March 12, 2013
KitMaker: 125 posts
AeroScale: 85 posts

Posted: Sunday, December 09, 2018 - 10:02 AM UTC
It took longer than expected, but here it is:
Update #1
I'll start with advice - this kit is amazing in detail, but if you want to keep yourself sane buy version with fully moulded suspension (with tracks), I'm currently halfway to the bin after assemblying those tiny tracks .
.
Ok, back to the build - as said, kit has amazing details, but plastic is very "cracky". Parts (which are thin and softly looking) have tendency to break or bend, so no cutting tools for small parts, just hobby knife or fine razor.
Overall fitting is also very good, with two major flaws - frontal and rear sloped plates (those with hatches) are too wide and don't fit (do not attempt to glue them before installing hatch doors), there's not much room to correct them, so there's a challenge.
Also one major issue for "rivet counters". The 20mm version has apparently only ammo stowage for machine gun version (stowage boxes behind commander/gunner seat). I couldn't find anything to replace, so I left it as is.

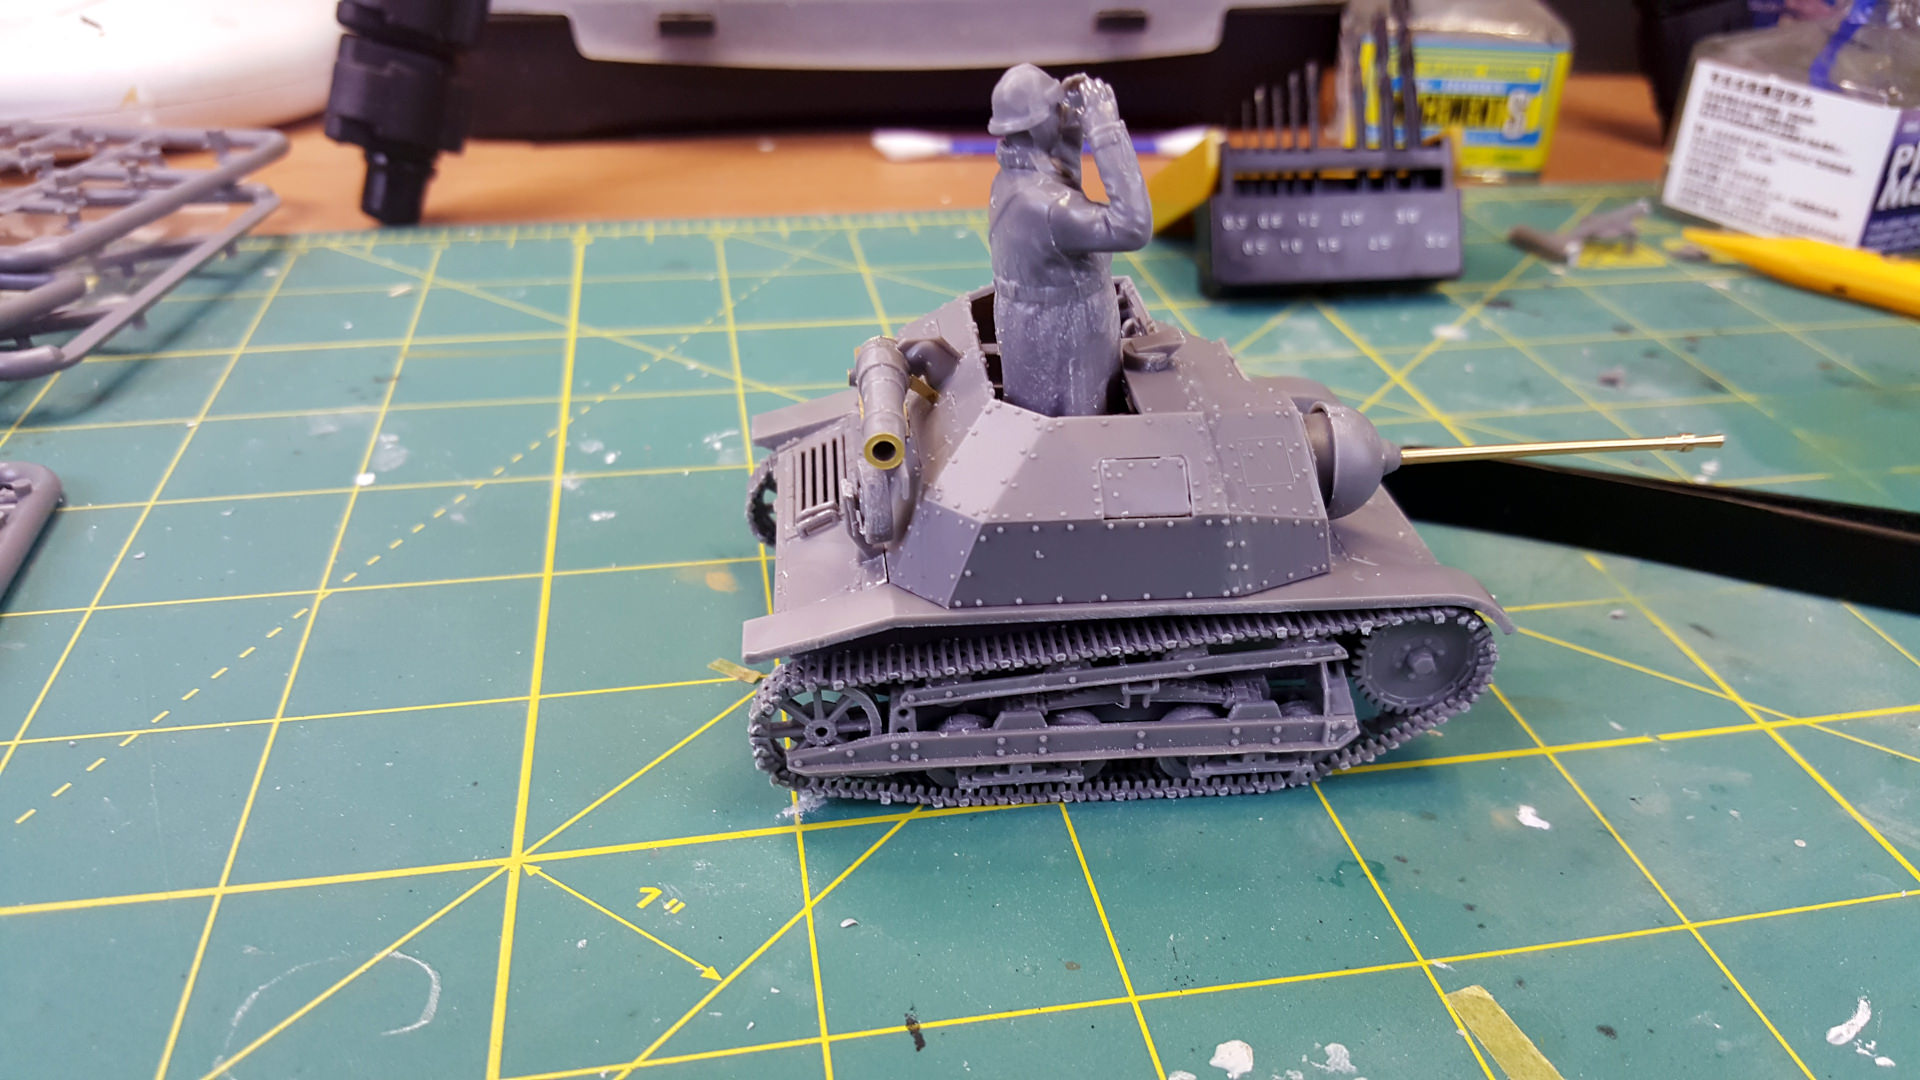

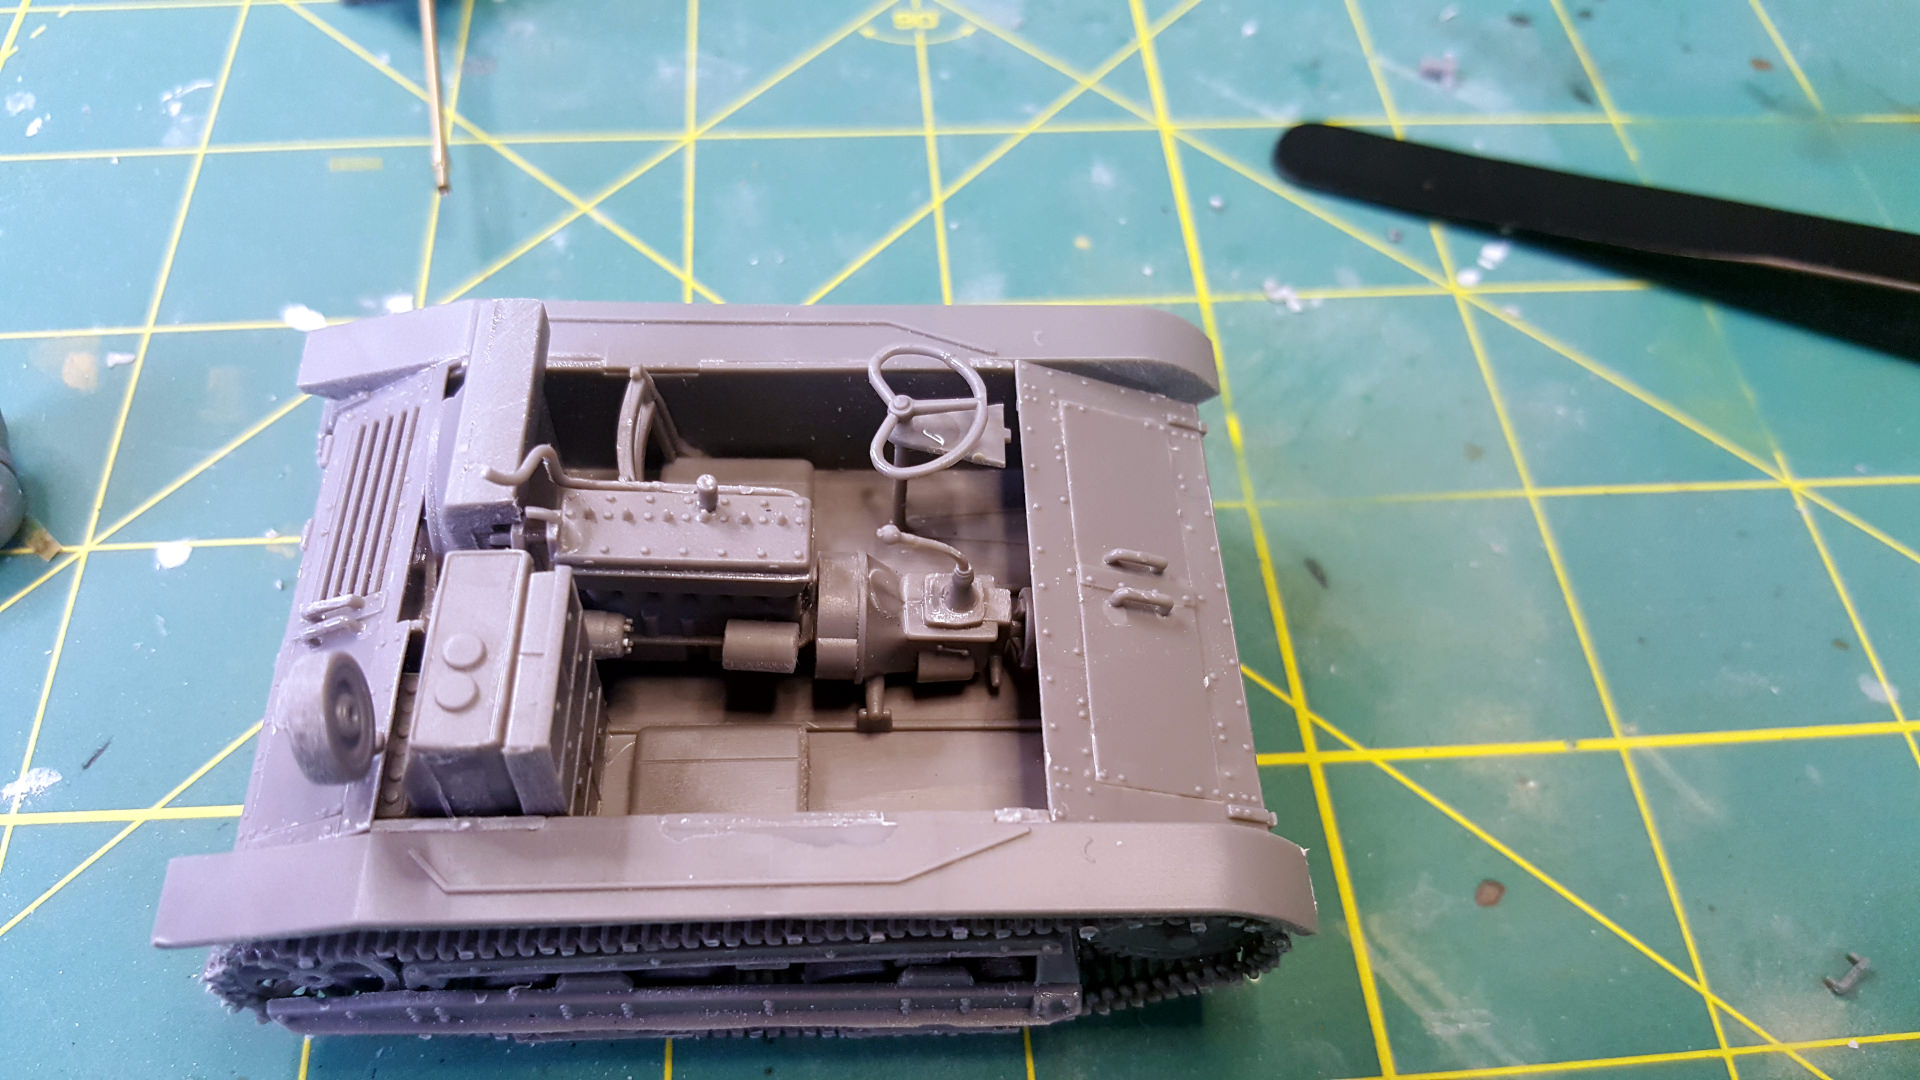
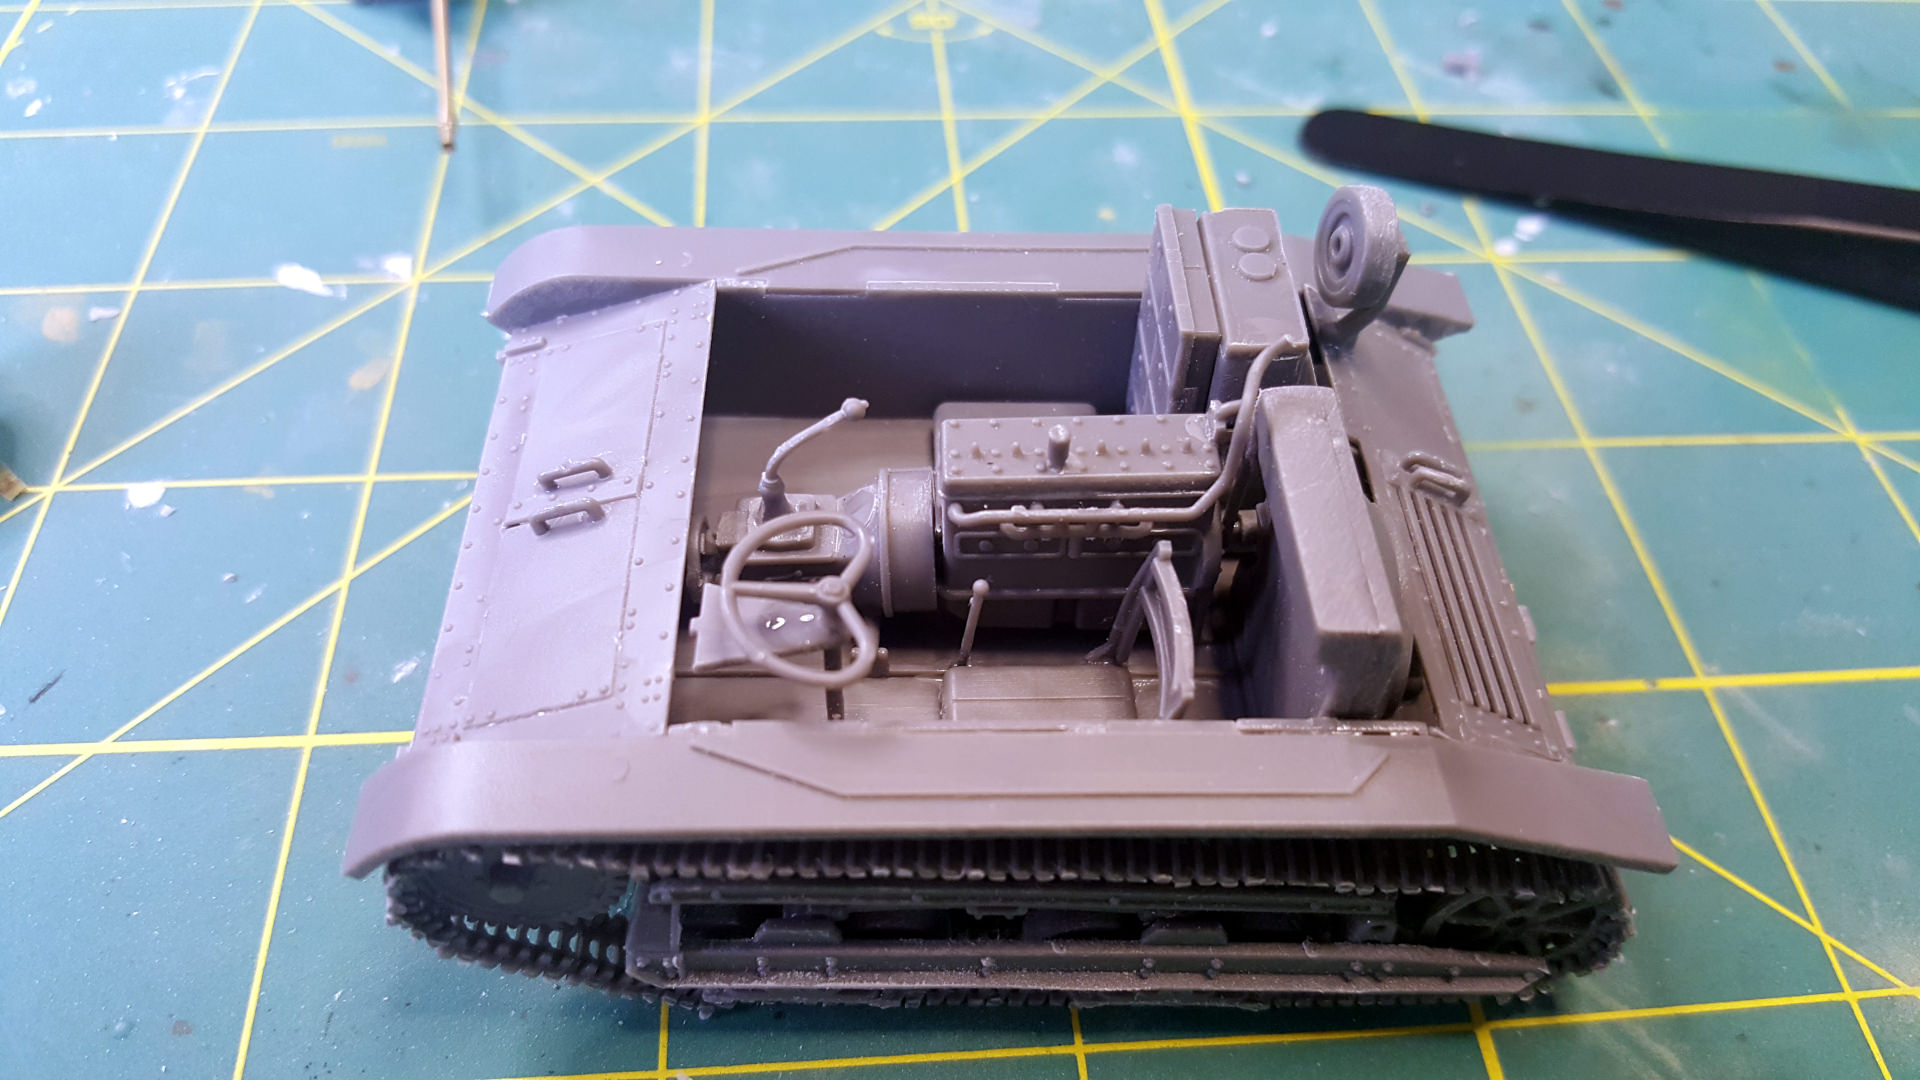
Next priming and painting.
Cheers,
Radek
Update #1
I'll start with advice - this kit is amazing in detail, but if you want to keep yourself sane buy version with fully moulded suspension (with tracks), I'm currently halfway to the bin after assemblying those tiny tracks
 .
. Ok, back to the build - as said, kit has amazing details, but plastic is very "cracky". Parts (which are thin and softly looking) have tendency to break or bend, so no cutting tools for small parts, just hobby knife or fine razor.
Overall fitting is also very good, with two major flaws - frontal and rear sloped plates (those with hatches) are too wide and don't fit (do not attempt to glue them before installing hatch doors), there's not much room to correct them, so there's a challenge.
Also one major issue for "rivet counters". The 20mm version has apparently only ammo stowage for machine gun version (stowage boxes behind commander/gunner seat). I couldn't find anything to replace, so I left it as is.


Next priming and painting.
Cheers,
Radek
Klaus-Adler

Joined: June 08, 2015
KitMaker: 1,505 posts
AeroScale: 193 posts

Posted: Sunday, December 16, 2018 - 08:51 AM UTC
Hi all, well i've been struck down with the dreaded lurgy at the moment and along with the higher work load this has reduced my modelling time.
However i'm call this one done, so without further ado, i present for your viewing pleasure JPG Production's 1/12 scale Imperial Probe Droid:
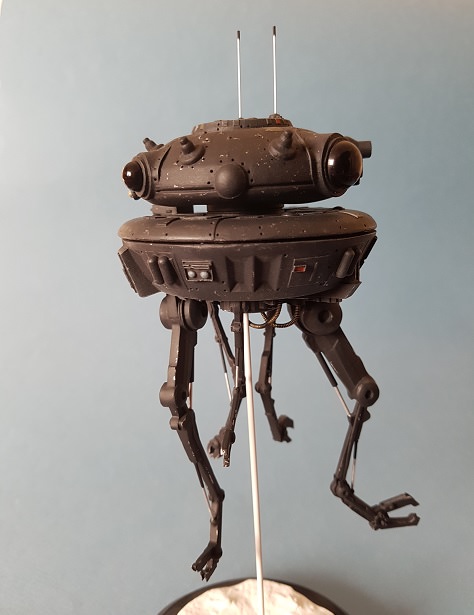
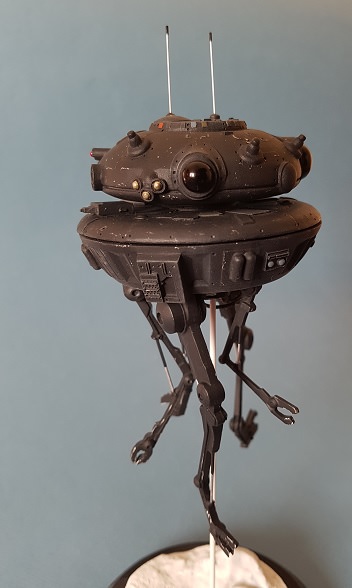
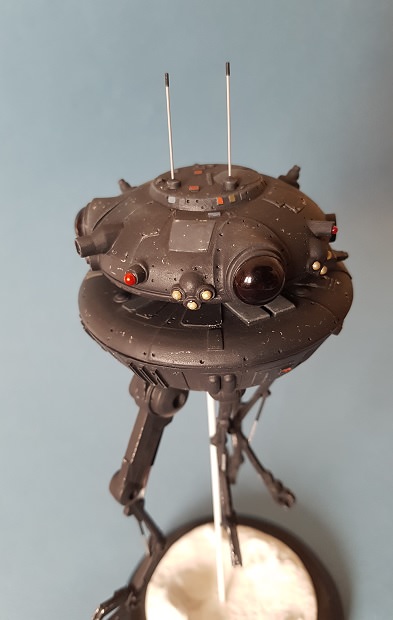

However i'm call this one done, so without further ado, i present for your viewing pleasure JPG Production's 1/12 scale Imperial Probe Droid:


RadekZ

Joined: March 12, 2013
KitMaker: 125 posts
AeroScale: 85 posts

Posted: Monday, December 17, 2018 - 10:43 AM UTC
Ok, so I've put Hataka Orange series into use, still stench of lacquer wounds around mancave, but here comes...
Update #2
Ok. Those Hataka Orange... if they just smelled like Tamiya's acrylics...
Apart of that they are great. First time I ever used lacquers (not only Hataka, but in general) and I'm impressed. Thinned them 1:2 paint:thinner ratio (people suggest 1:3 but that seems too much) and tried them directly over plastic. Thin layers, low pressure (~1bar/15PIS). Worth it. I need some practice, but coverage and quality is superb. Fun fact - this sandy colour seems to have better pigmentation than darker shades.
Here's exterior after painting:

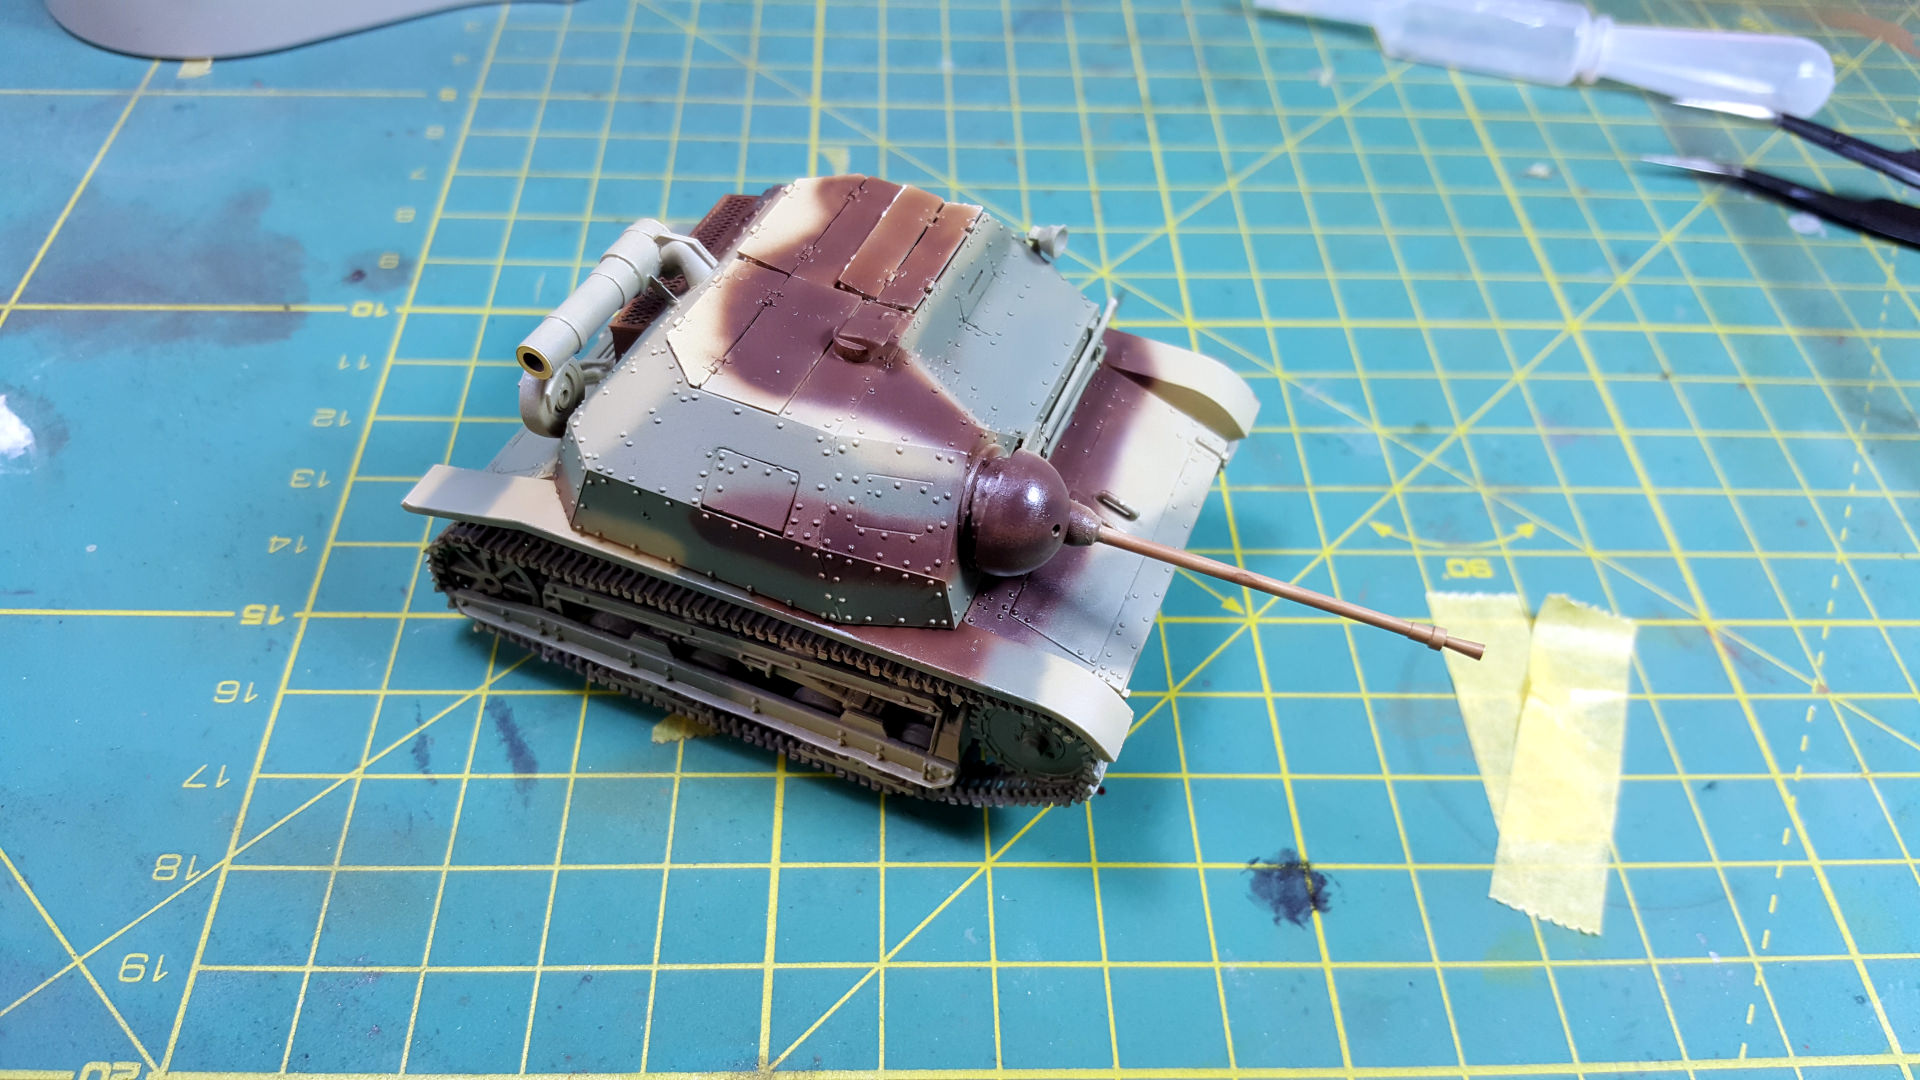
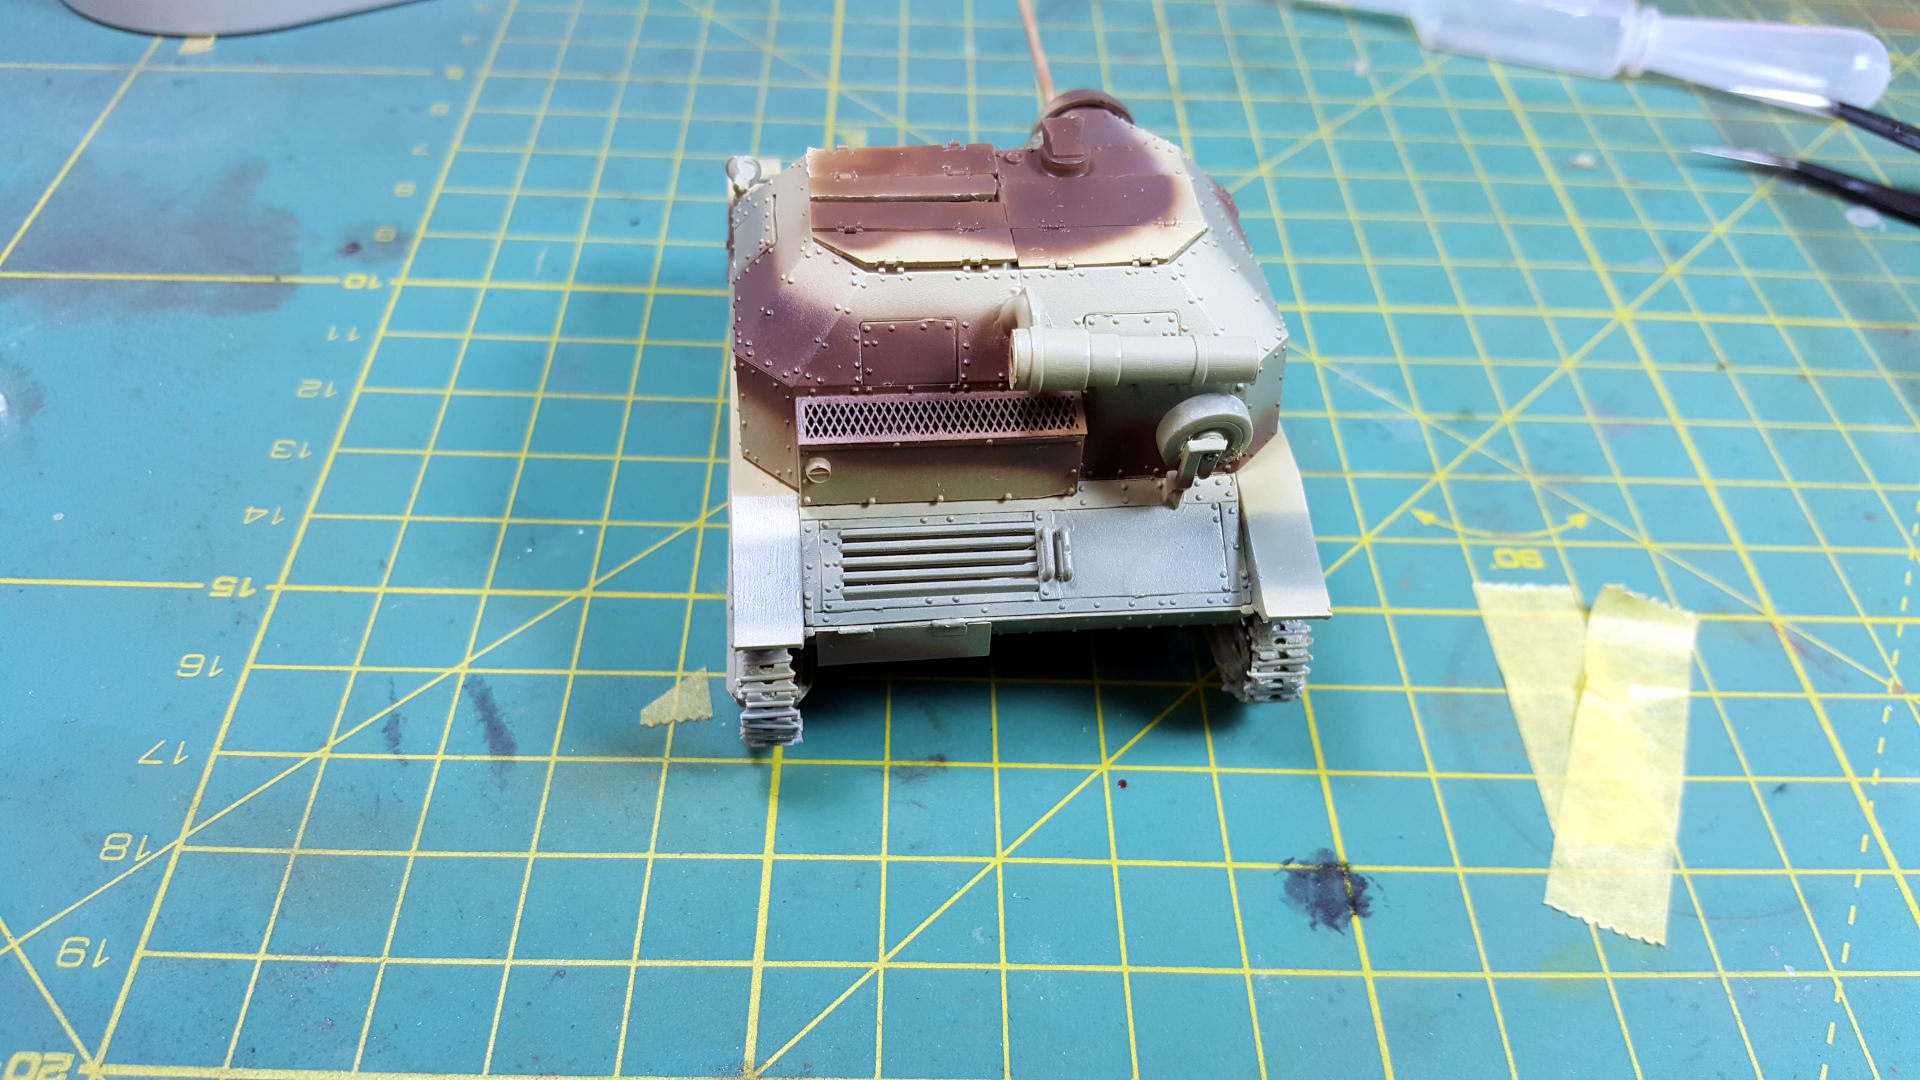
And a sneak peak inside "fighting compartment" - it's been painted with Gunze H21 and detailed with Vallejo Acrylics. Weathering with various oil paints, chipping with acrylics again.

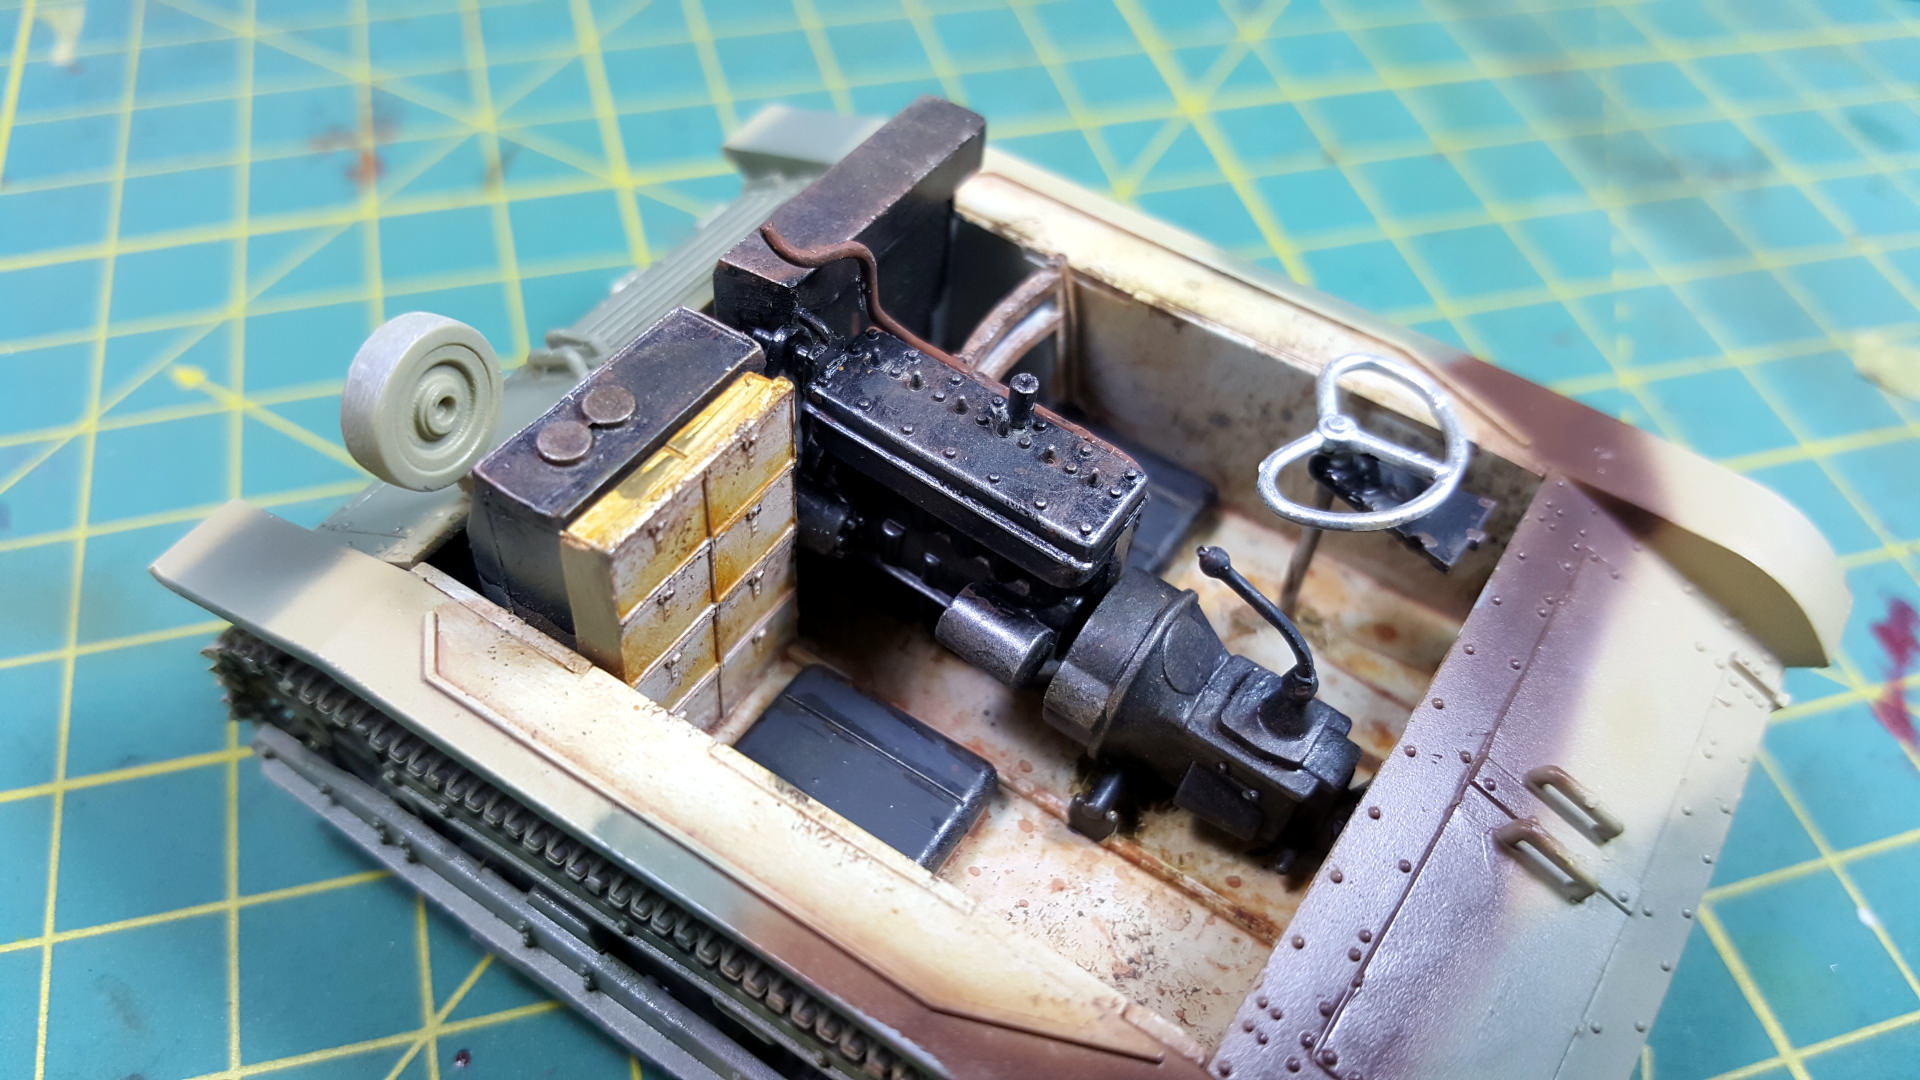
Next: finishing details and weathering... And I need to fix these stupid tracks that crack on joints all the time... bugger..
Cheers,
Radek
Update #2
Ok. Those Hataka Orange... if they just smelled like Tamiya's acrylics...

Apart of that they are great. First time I ever used lacquers (not only Hataka, but in general) and I'm impressed. Thinned them 1:2 paint:thinner ratio (people suggest 1:3 but that seems too much) and tried them directly over plastic. Thin layers, low pressure (~1bar/15PIS). Worth it. I need some practice, but coverage and quality is superb. Fun fact - this sandy colour seems to have better pigmentation than darker shades.
Here's exterior after painting:


And a sneak peak inside "fighting compartment" - it's been painted with Gunze H21 and detailed with Vallejo Acrylics. Weathering with various oil paints, chipping with acrylics again.


Next: finishing details and weathering... And I need to fix these stupid tracks that crack on joints all the time... bugger..
Cheers,
Radek
Posted: Monday, December 17, 2018 - 08:37 PM UTC
Awesome build, David. I feel the empire is on to me.... 
Radek, great the lacquers worked out well. Nice interior. Looking forward to see more.

Radek, great the lacquers worked out well. Nice interior. Looking forward to see more.
Posted: Wednesday, December 19, 2018 - 07:06 PM UTC
VF-4 progress update. 


Posted: Thursday, December 20, 2018 - 10:59 PM UTC
@Lap Man: Looks definitely cool 
What scale is it?

What scale is it?
terminators

Joined: February 20, 2012
KitMaker: 1,932 posts
AeroScale: 10 posts

Posted: Saturday, December 22, 2018 - 05:16 AM UTC
Hello all,
New pics of my model and I call it done for this nice campaign !
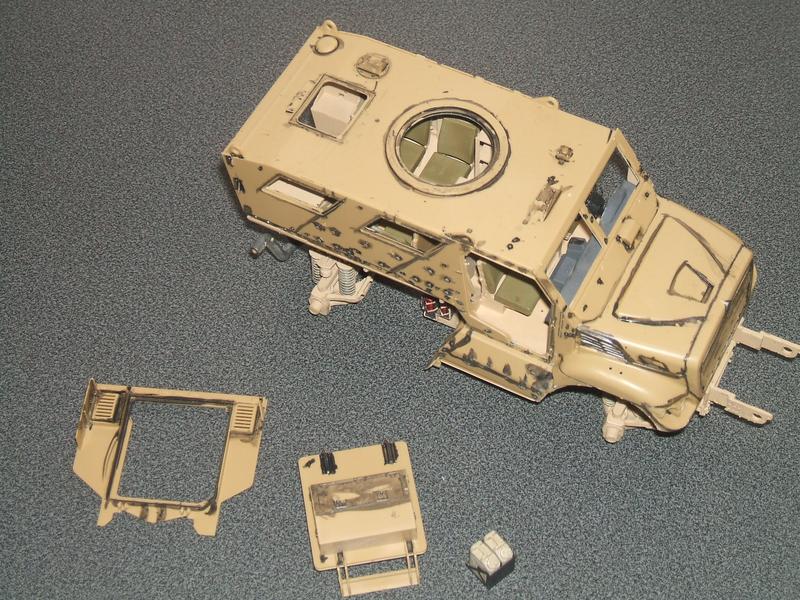
Details added on the turret walls

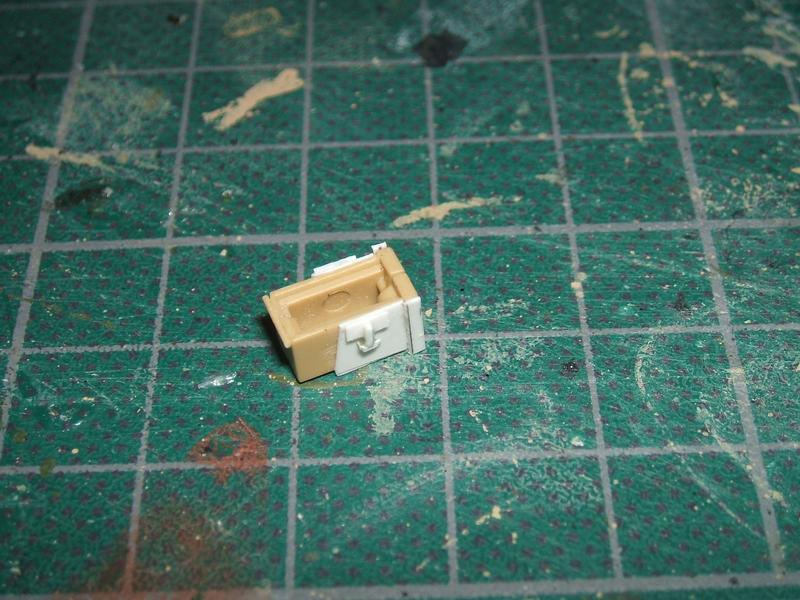
Reworked ammunition box and its holder
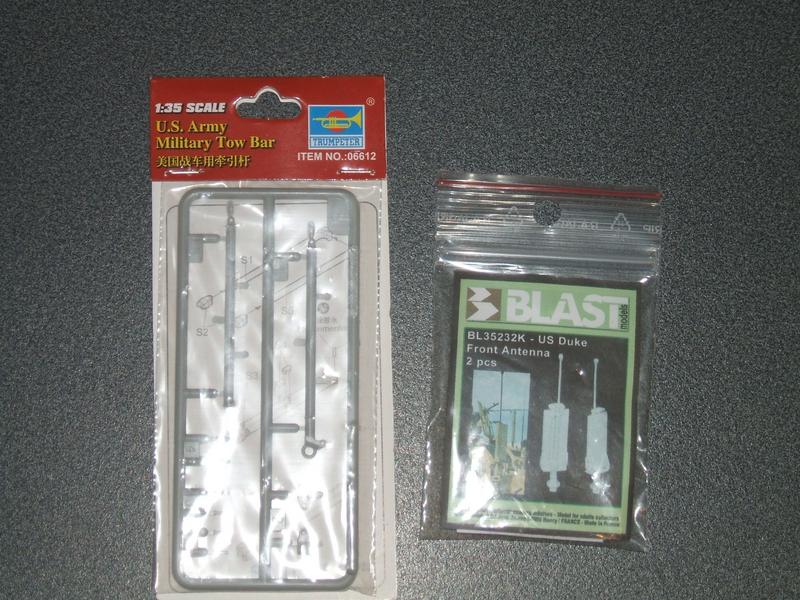
I add a TOW bar from Trumpeter on the front rack and replace the Duke antenna with a Blast Models item.
Added parts on side running boards

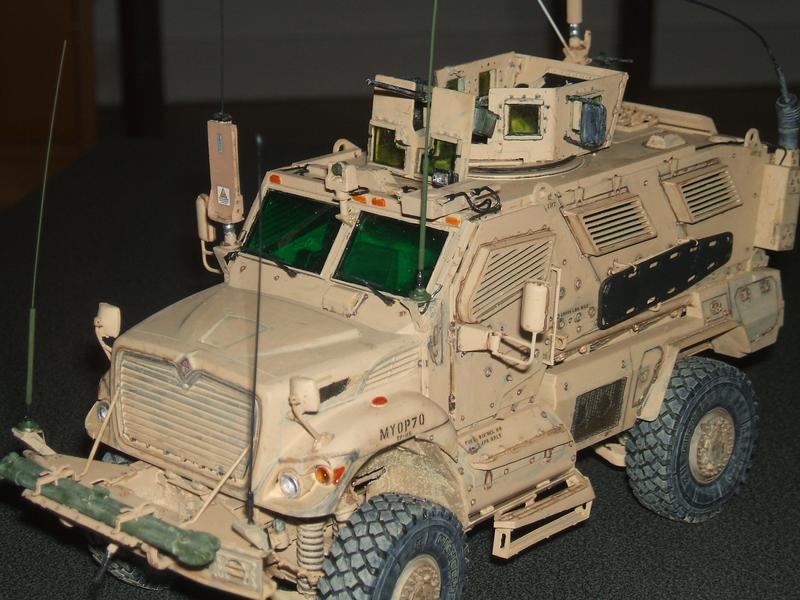

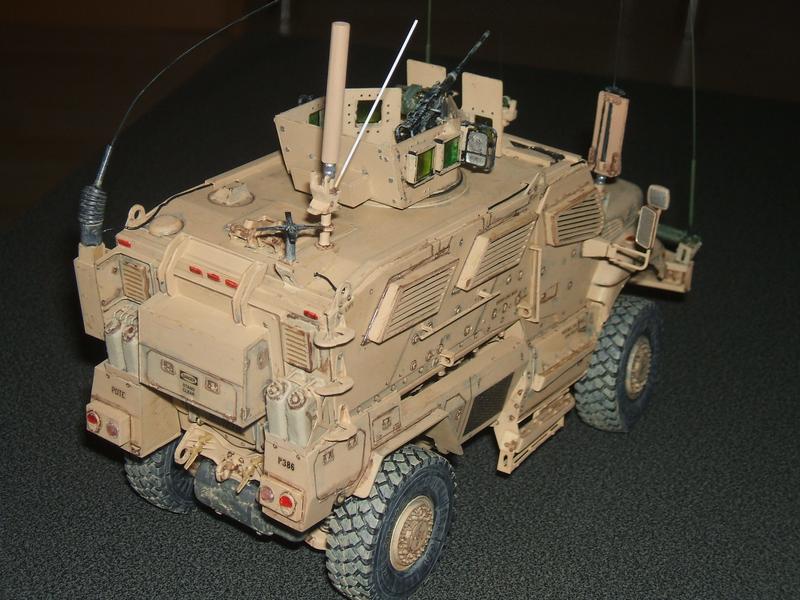
Winch extremity added
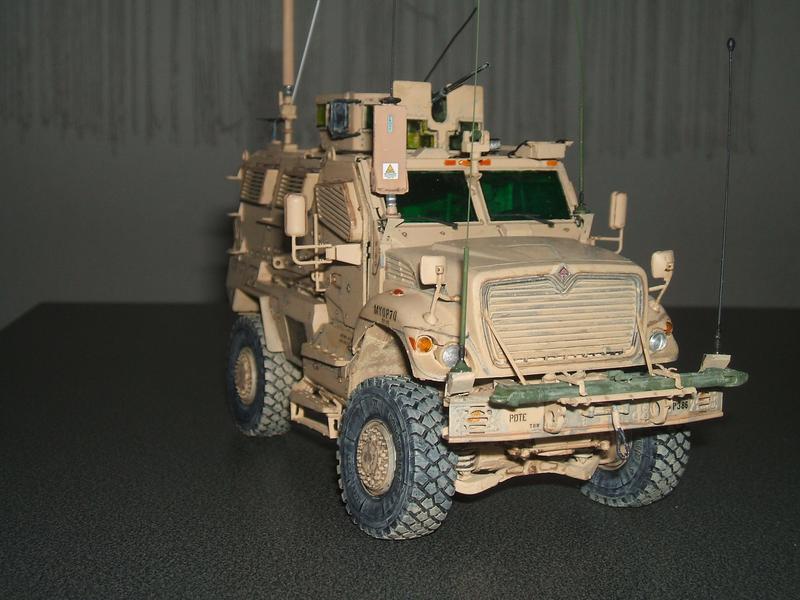
New pics of my model and I call it done for this nice campaign !

Details added on the turret walls

Reworked ammunition box and its holder

I add a TOW bar from Trumpeter on the front rack and replace the Duke antenna with a Blast Models item.

Added parts on side running boards


Winch extremity added

Posted: Sunday, December 23, 2018 - 06:49 AM UTC
@Alex - Very impressive, looks real business! 
I got a little further with my own build
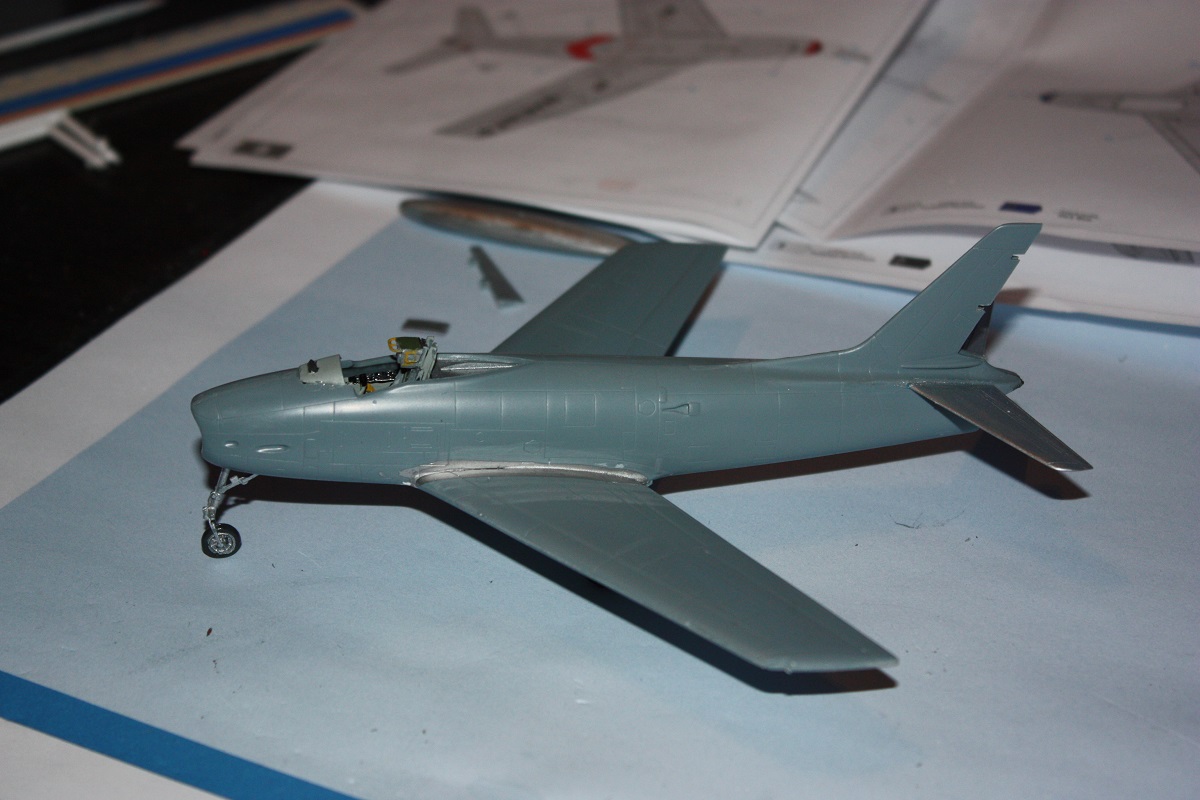
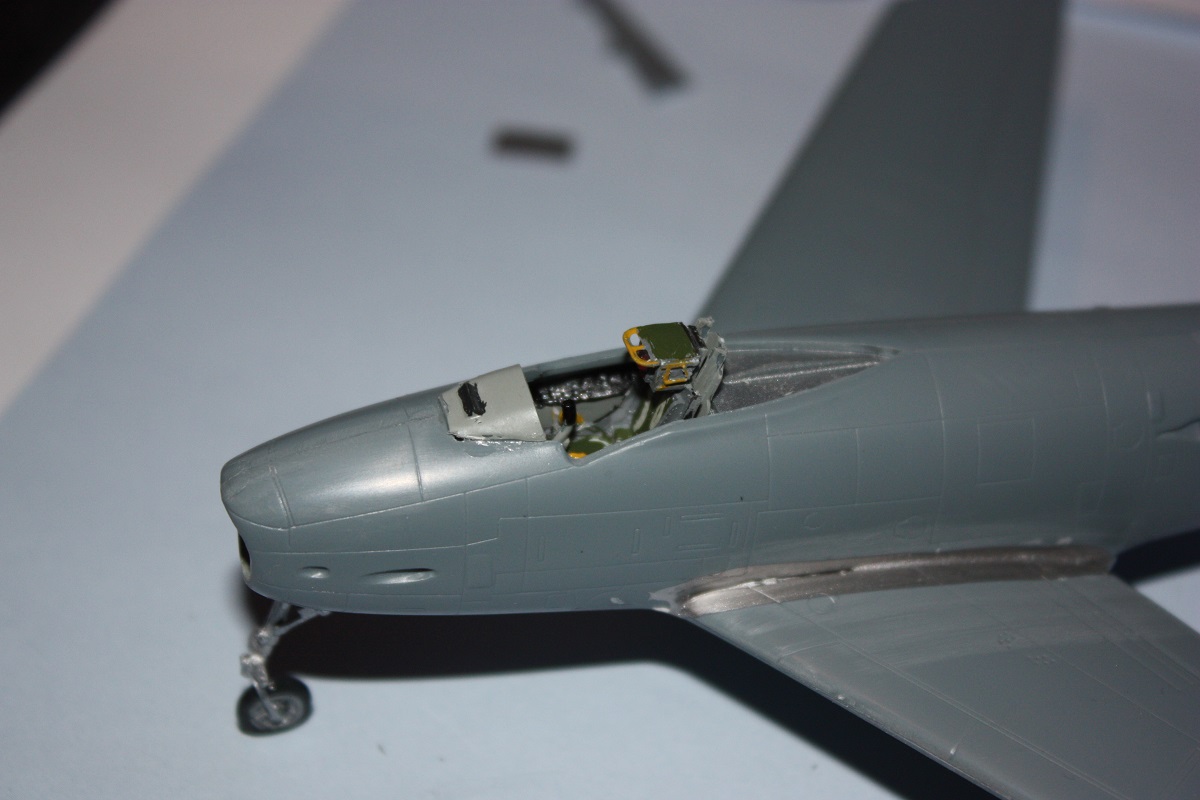
First "milestone", it's no tailsitter
Seasons greetings to all of you
Cheers Pete

I got a little further with my own build
First "milestone", it's no tailsitter

Seasons greetings to all of you

Cheers Pete
Posted: Sunday, December 23, 2018 - 07:55 PM UTC
Nice progress, Peter!
Alex, beautiful build! Looks ready to start prowling the Afghan countryside.
Alex, beautiful build! Looks ready to start prowling the Afghan countryside.

RadekZ

Joined: March 12, 2013
KitMaker: 125 posts
AeroScale: 85 posts

Posted: Tuesday, December 25, 2018 - 11:07 AM UTC
Ho, ho, ho everyone 
@Jesper - thank you for comment.
@Lap Man, Peter - great updates your kits
@Alex, congrats on finishing your kit.
Final update
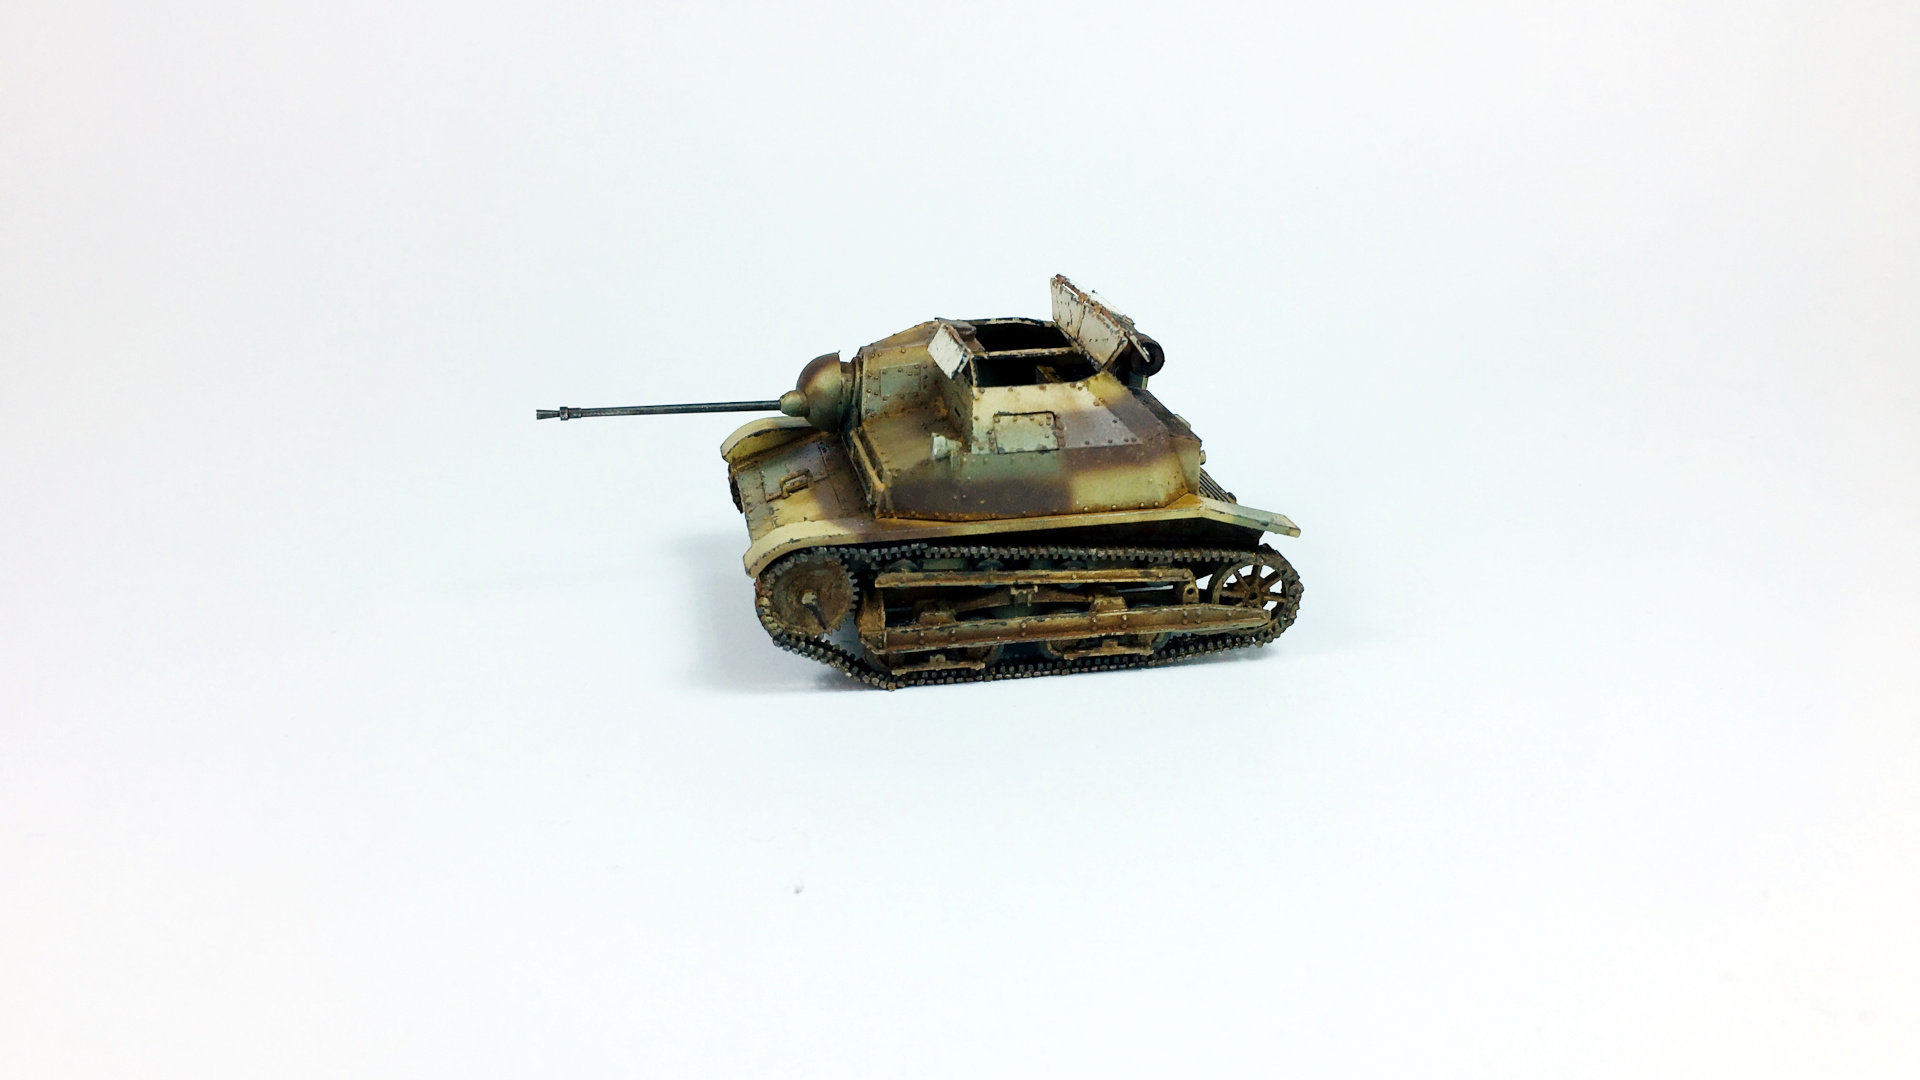
Ok, so it's 'mid' Christmas, my stomach has already surrendered, so I decided to finish the TKS between bites of a home made cold cuts and cakes .
.
I decided to be a little bit conservative with weathering as the vehicles weren't that much combat worn due to short campaign. So only some dust, scratches near hatches and a little bit of dirt here and there.
Here are the pics of finsished kit:
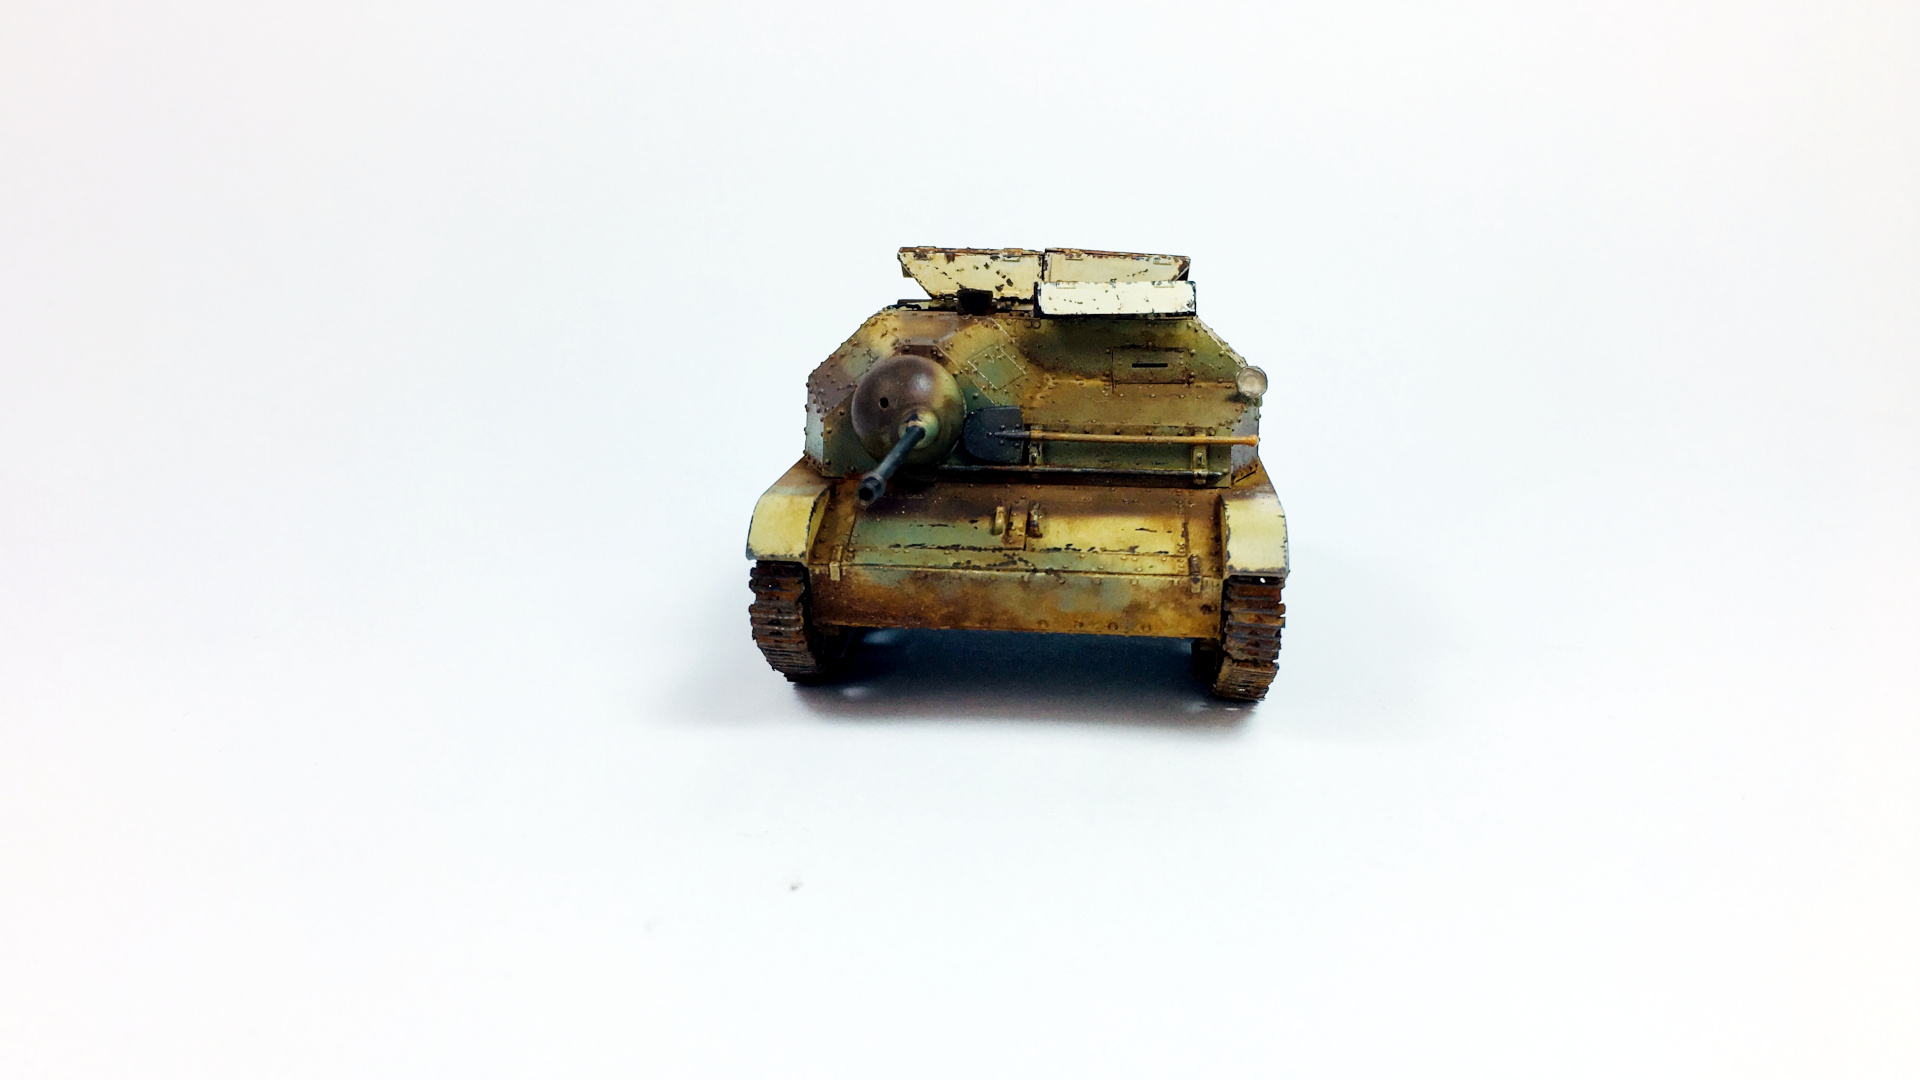

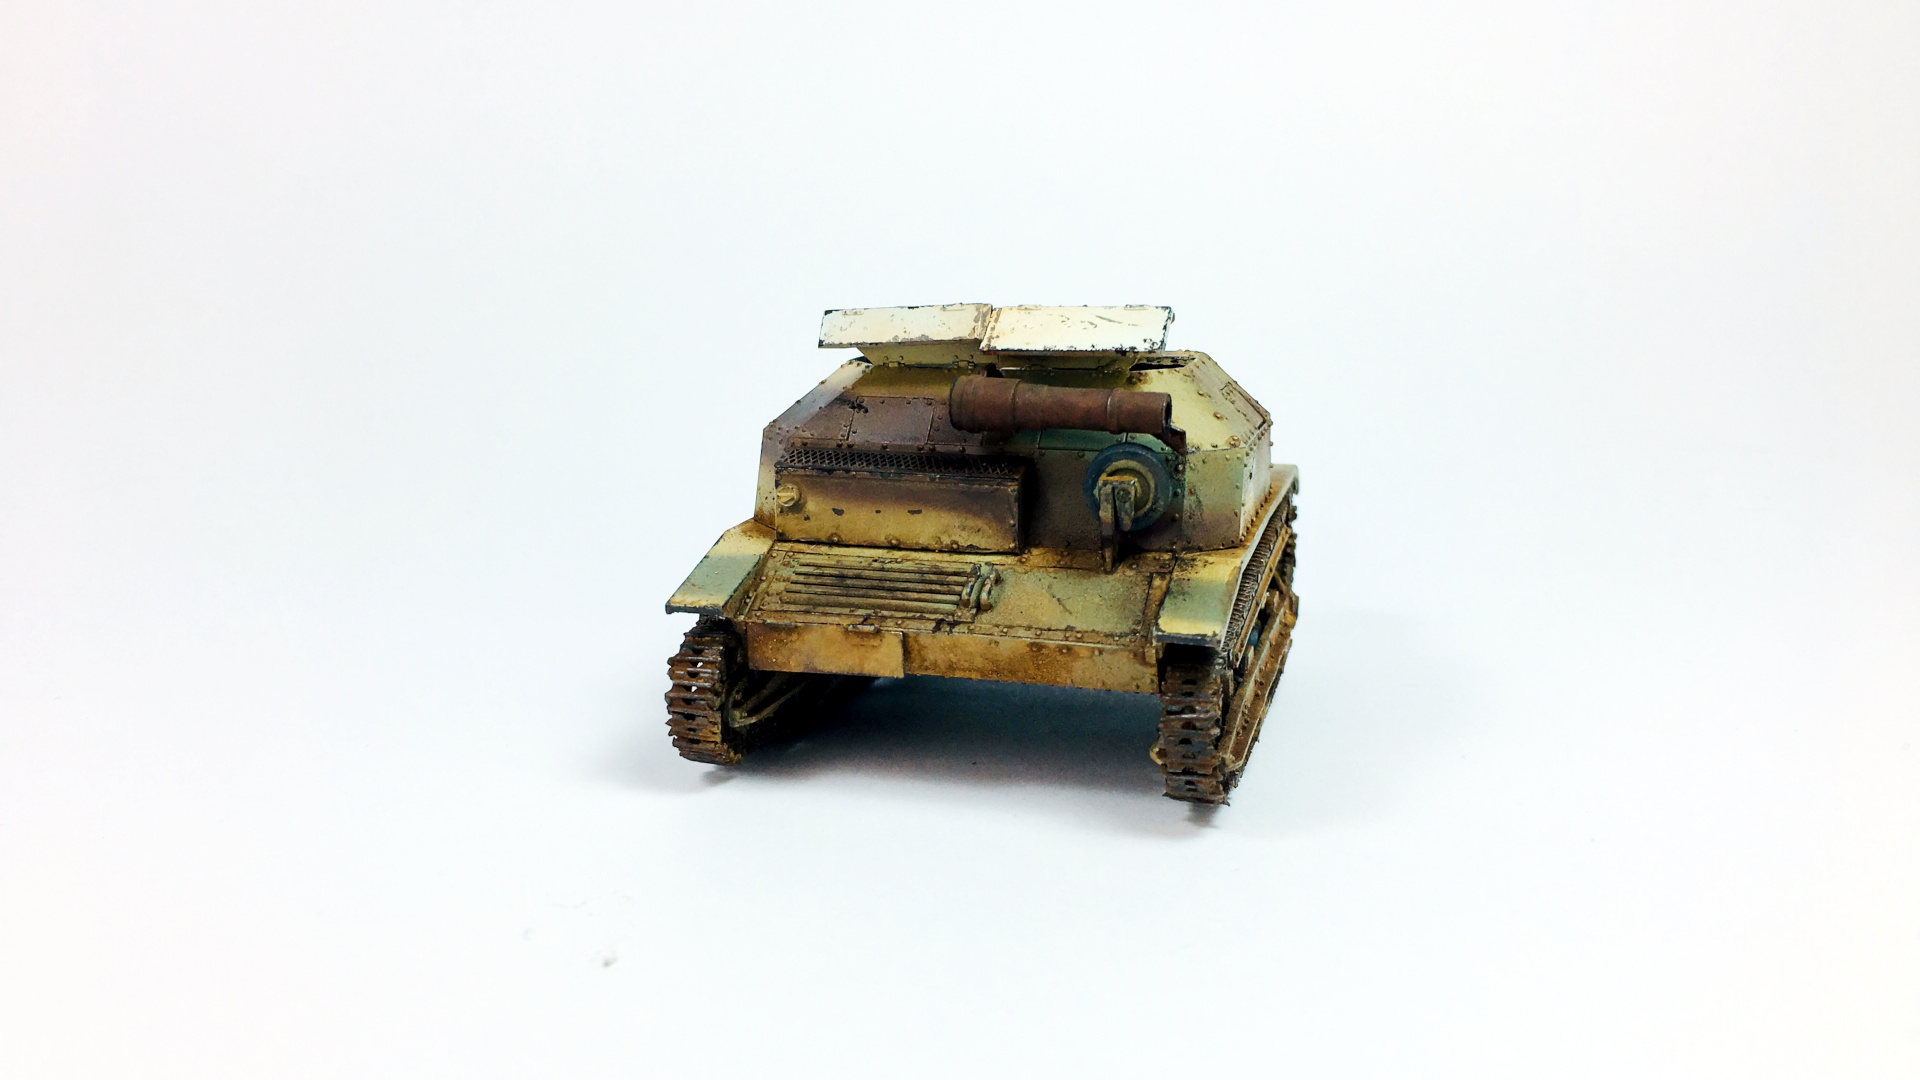
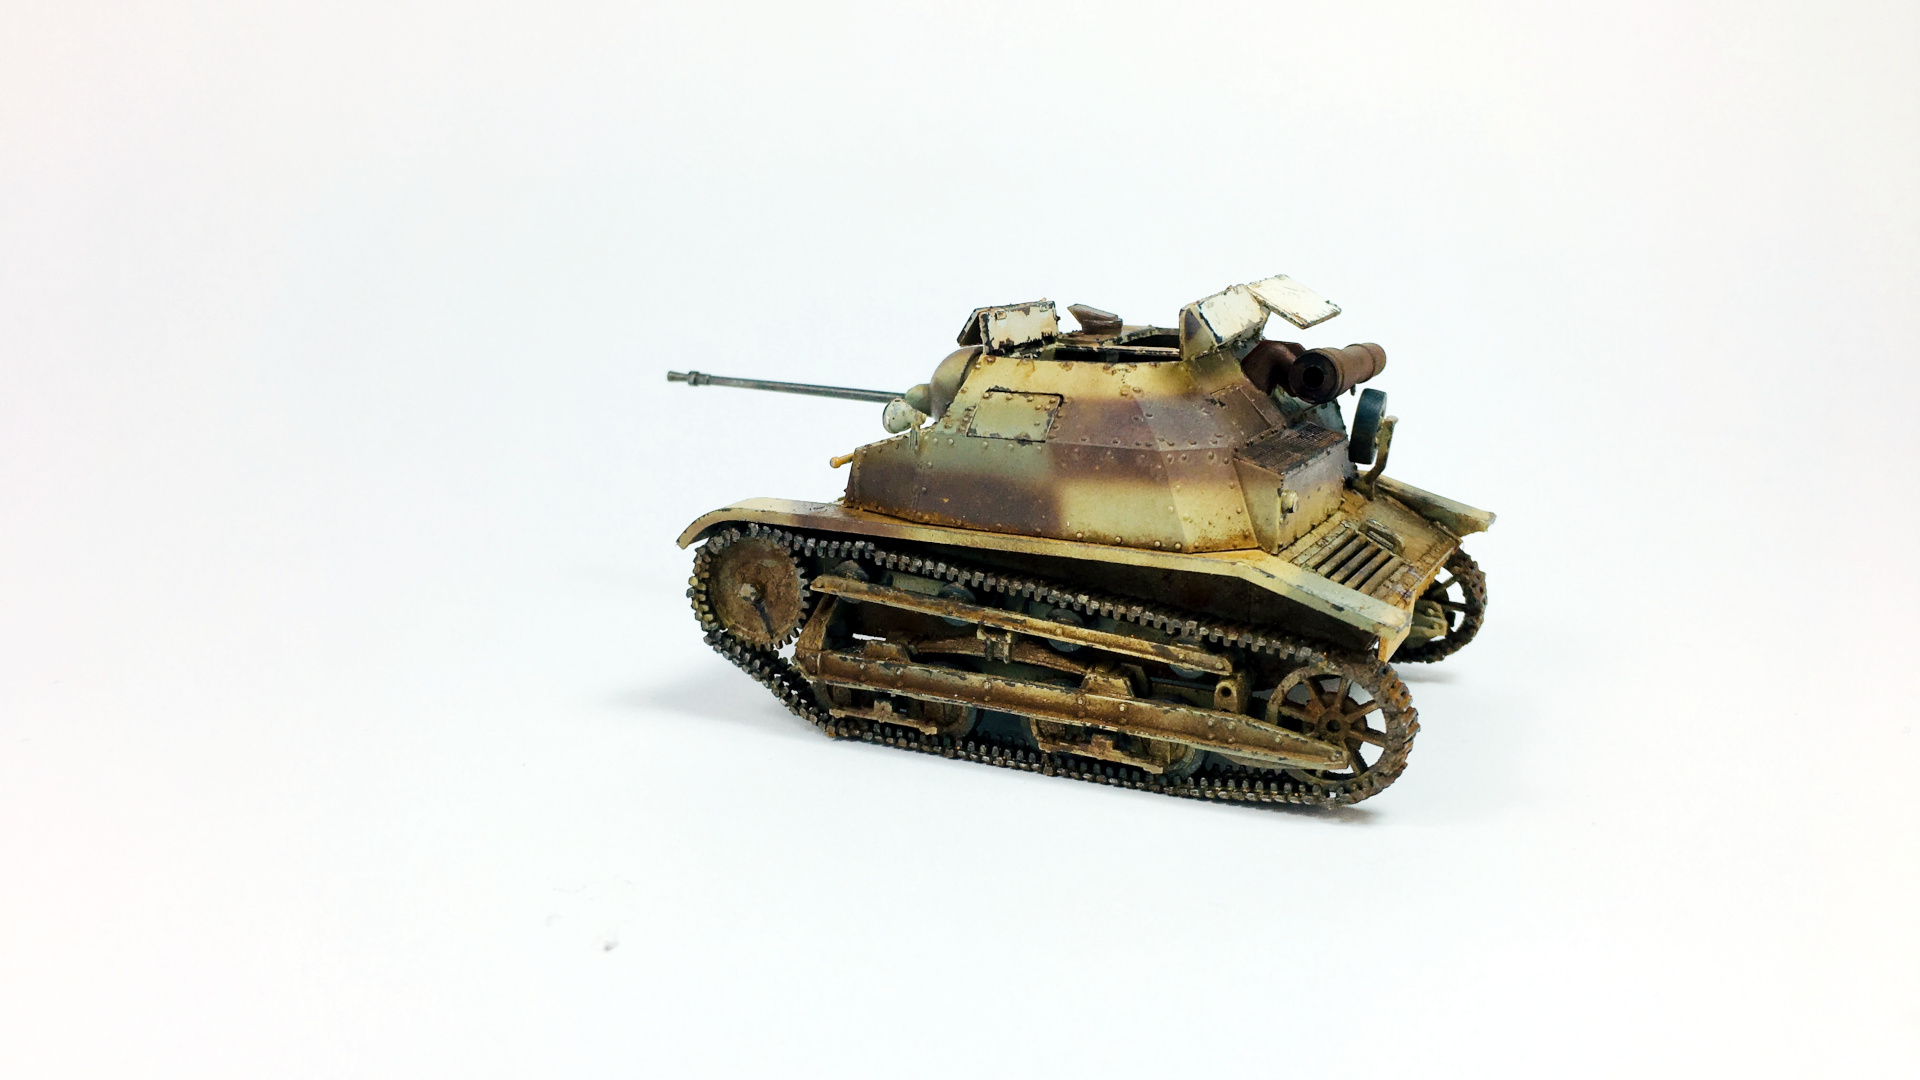
And at the end 'In your face' photo against TKS's main adversary:

It was a great build and despite fact the tracks look like if TKS hit a mine or two, I really enjoyed these tiny details and the I like what came out of my clumsy hands
(Pics downoladed to gallery)
I keep my fingers crossed for all you guys who are still finishing your kits. Thanks for great campaign and see you next year
Cheers,
Radek

@Jesper - thank you for comment.
@Lap Man, Peter - great updates your kits
@Alex, congrats on finishing your kit.
Final update
Ok, so it's 'mid' Christmas, my stomach has already surrendered, so I decided to finish the TKS between bites of a home made cold cuts and cakes
 .
. I decided to be a little bit conservative with weathering as the vehicles weren't that much combat worn due to short campaign. So only some dust, scratches near hatches and a little bit of dirt here and there.
Here are the pics of finsished kit:


And at the end 'In your face' photo against TKS's main adversary:

It was a great build and despite fact the tracks look like if TKS hit a mine or two, I really enjoyed these tiny details and the I like what came out of my clumsy hands

(Pics downoladed to gallery)
I keep my fingers crossed for all you guys who are still finishing your kits. Thanks for great campaign and see you next year

Cheers,
Radek
Posted: Tuesday, December 25, 2018 - 11:38 AM UTC
@Radek - Great job on that "cute little thing" 
I'm making good progress at the end, as I have the last days of the year off, I'll start with the decals tomorrow
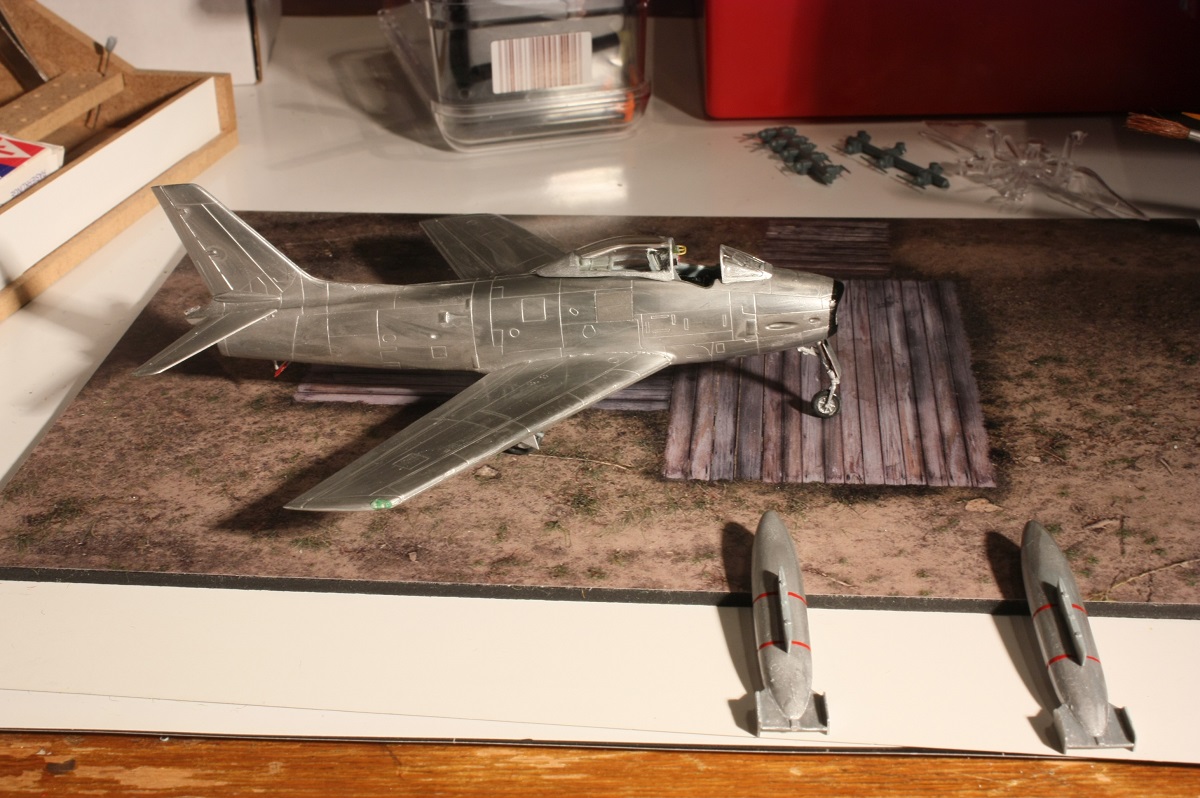
Let's go for the finish line!

I'm making good progress at the end, as I have the last days of the year off, I'll start with the decals tomorrow

Let's go for the finish line!


RadekZ

Joined: March 12, 2013
KitMaker: 125 posts
AeroScale: 85 posts

Posted: Tuesday, December 25, 2018 - 11:42 AM UTC
Quoted Text
@Radek - Great job on that "cute little thing"
I'm making good progress at the end [...]
Thanks, Peter. Which metalics you used on the model? it looks great!
Good luck with finishing.
Posted: Tuesday, December 25, 2018 - 10:02 PM UTC
@ Radek - Thanks!
For natural metal finish I mostly use Gunze's No. 211 and to get some other shades, 212, 213 etc. For small parts like landing gear, antennas etc. normally Humbrol 27001 (matt Aluminium) and 27002 (polished Aluminium), too.
For natural metal finish I mostly use Gunze's No. 211 and to get some other shades, 212, 213 etc. For small parts like landing gear, antennas etc. normally Humbrol 27001 (matt Aluminium) and 27002 (polished Aluminium), too.
terminators

Joined: February 20, 2012
KitMaker: 1,932 posts
AeroScale: 10 posts

Posted: Tuesday, December 25, 2018 - 10:42 PM UTC
Peter, Jesper, Radek, thank you.
Peter, it seems your plane is almost ready for the take-off.
Peter, it seems your plane is almost ready for the take-off.


RadekZ

Joined: March 12, 2013
KitMaker: 125 posts
AeroScale: 85 posts

Posted: Tuesday, December 25, 2018 - 10:56 PM UTC
Quoted Text
@ Radek - Thanks!
For natural metal finish I mostly use Gunze's No. 211 and to get some other shades, 212, 213 etc. For small parts like landing gear, antennas etc. normally Humbrol 27001 (matt Aluminium) and 27002 (polished Aluminium), too.
Hmm seems I'll have to give those "smelly" stuff a try next year finally as it looks fantastic.

RhinoSpit

Joined: September 22, 2016
KitMaker: 224 posts
AeroScale: 191 posts

Posted: Wednesday, December 26, 2018 - 07:09 AM UTC
And my last plane for this buzzy year:
An A-36 Apache who served with the 311th Fighter Bomber Group on the CBI Theater.
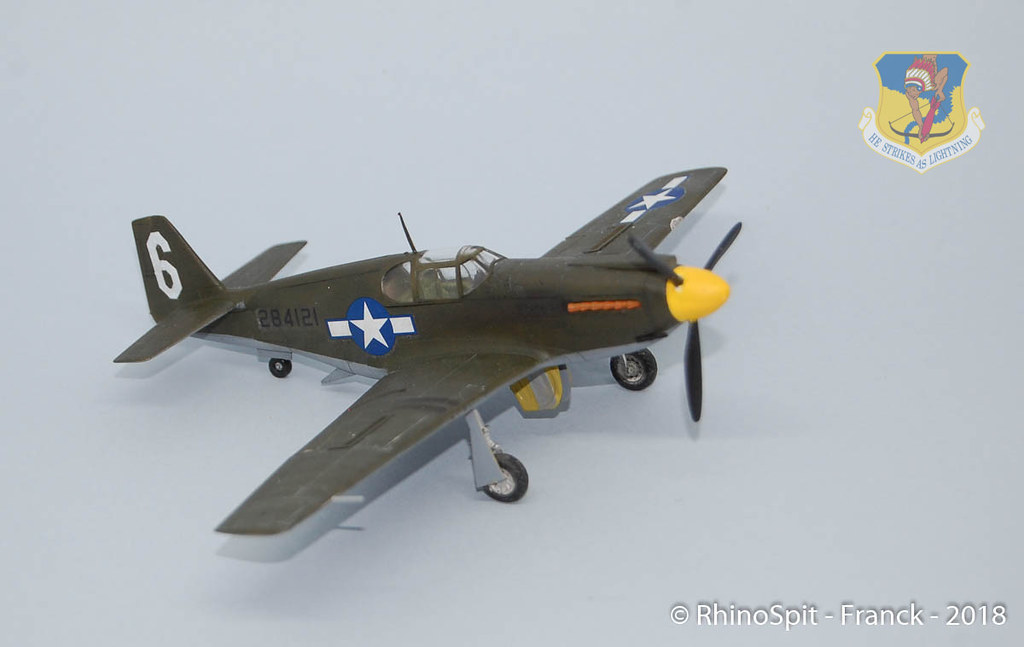

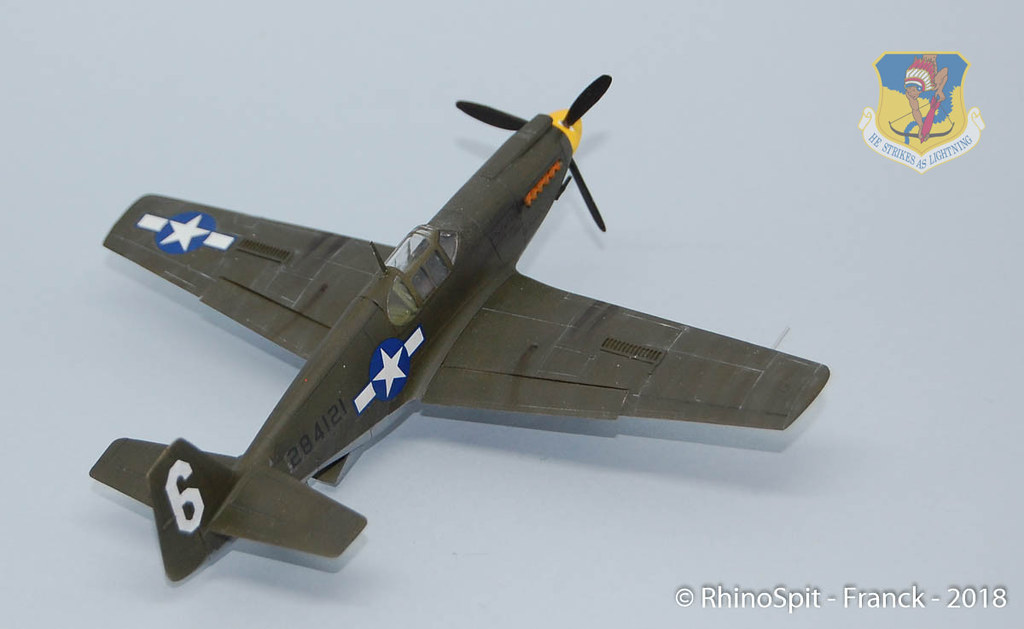
An A-36 Apache who served with the 311th Fighter Bomber Group on the CBI Theater.


terminators

Joined: February 20, 2012
KitMaker: 1,932 posts
AeroScale: 10 posts

Posted: Wednesday, December 26, 2018 - 01:13 PM UTC
Nice plane, the finishing is very cool !
Posted: Friday, December 28, 2018 - 12:00 AM UTC
Done!

Pictures go into the gallery next.
Hope all campaigners can finish in time, happy new year for everyone


Cheers Peter
terminators

Joined: February 20, 2012
KitMaker: 1,932 posts
AeroScale: 10 posts

Posted: Friday, December 28, 2018 - 10:48 PM UTC
Congrats Peter for your nice plane. I like checkerboards who give an original look.
 |


