Air Campaigns
Want to start or join a group build? This is where to start.
Want to start or join a group build? This is where to start.
Hosted by Frederick Boucher, Michael Satin
OFFICAL: RAF 100 Campaign
Sleepwalker71

Joined: August 30, 2012
KitMaker: 265 posts
AeroScale: 72 posts

Posted: Sunday, March 24, 2019 - 05:19 PM UTC
Though I almost finished my Spitfire, "almost" makes sometimes a big difference. Thanks for an extension.
Posted: Sunday, March 24, 2019 - 06:29 PM UTC
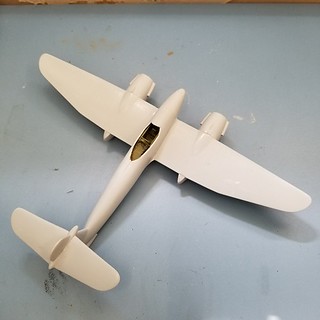
Thanks for the extension, here is my update, Westland Whirlwind ready to paint. 



Posted: Sunday, March 31, 2019 - 11:37 AM UTC
Fuselage has been glued back together and attached to the top wing:-

Next up detail painting and finish rigging.


Next up detail painting and finish rigging.

Posted: Monday, April 01, 2019 - 08:56 PM UTC
More update pics. 


Posted: Tuesday, April 02, 2019 - 07:18 PM UTC
Westland Whirlwind finished. 


bomber14

Joined: February 02, 2015
KitMaker: 330 posts
AeroScale: 286 posts

Posted: Wednesday, April 03, 2019 - 04:41 PM UTC
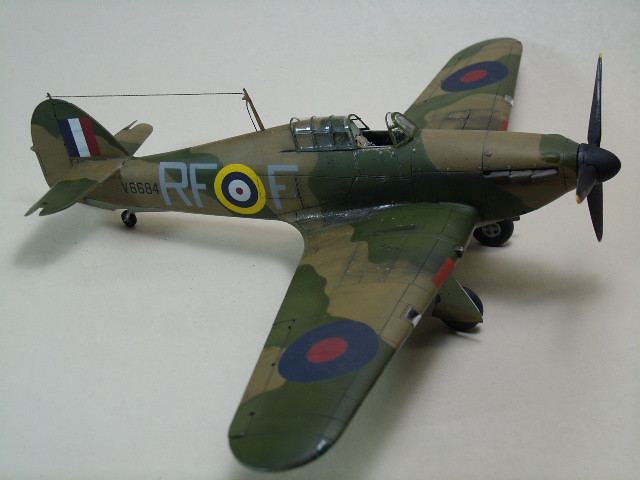
wow time flies. i just realized i forgot to post photos of my finished build. sorry everyone, i got two work benches so i can build two projects at once but i sometimes get tunnel vision on one and forget the other.
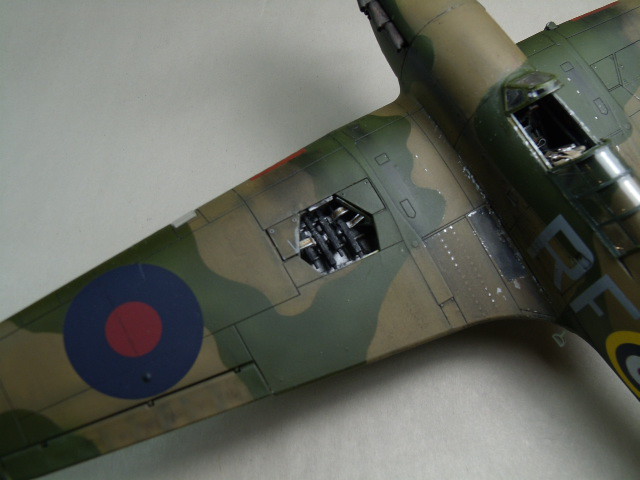
so here's mt hurricane- airfix 1/48 Witold Urbanowicz leading polish ace-BOB. i messed up the canopy masking so bad that i had to make a vacuum formed replacement and use painted decal for the framing.

 " BORDER="0">
[ ][/img]

 " BORDER="0">

 " BORDER="0">
so here's mt hurricane- airfix 1/48 Witold Urbanowicz leading polish ace-BOB. i messed up the canopy masking so bad that i had to make a vacuum formed replacement and use painted decal for the framing.
 " BORDER="0">
 [
 ][/img]
  " BORDER="0">
  " BORDER="0">
 Posted: Tuesday, April 09, 2019 - 05:15 AM UTC
Fantastic work guys.
Joe, I would never have guessed that you had to make a replacement canopy. Looks great.
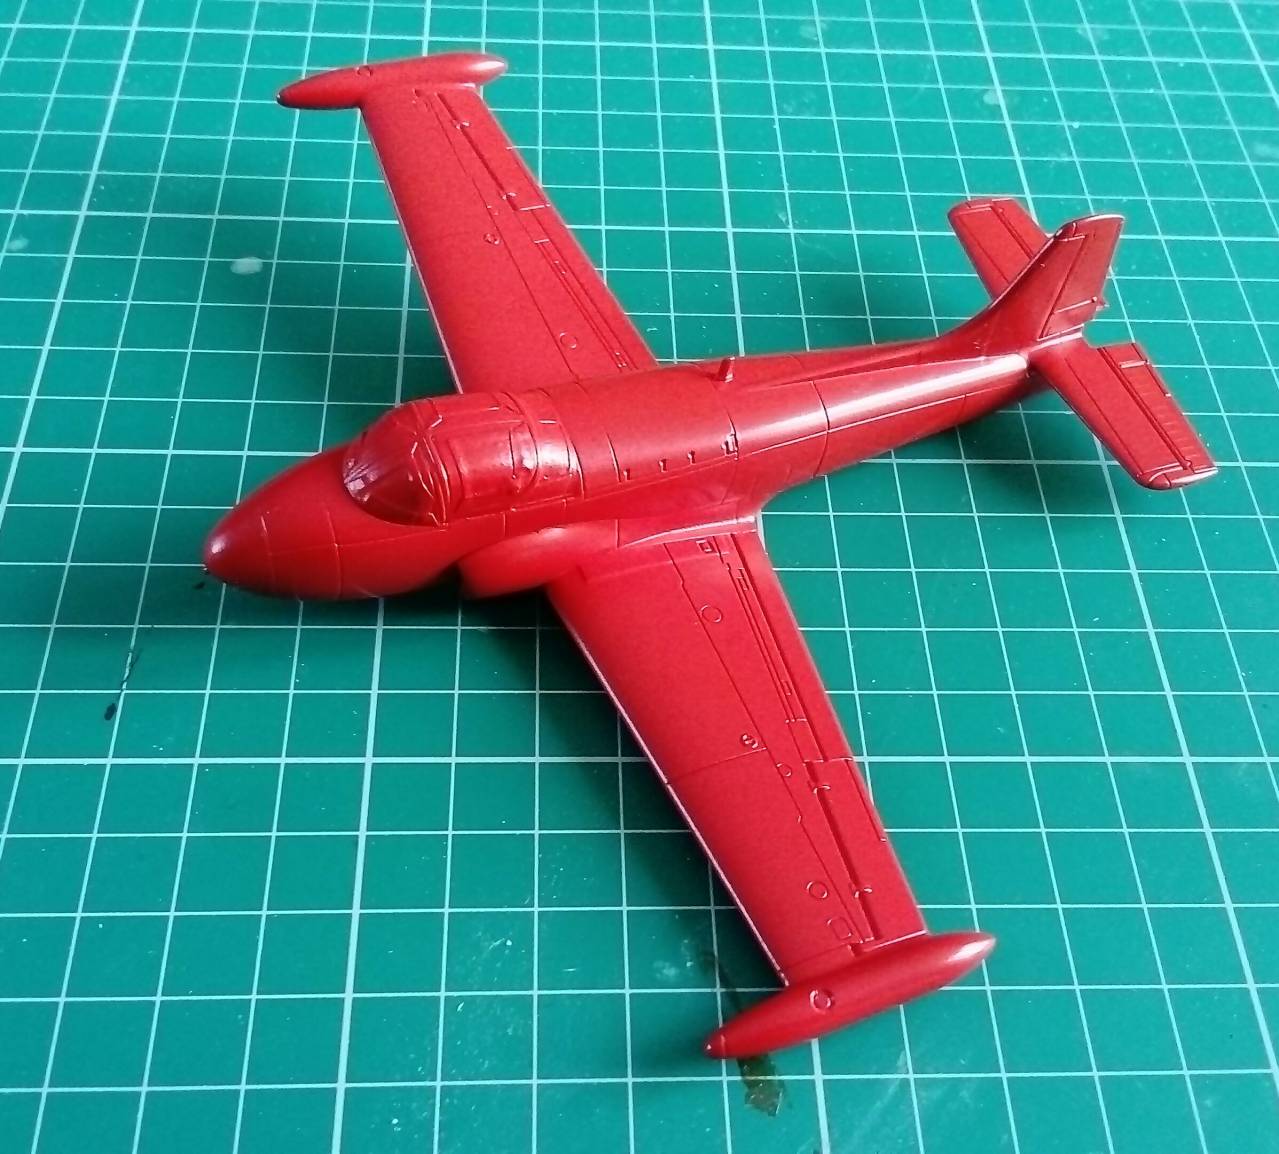
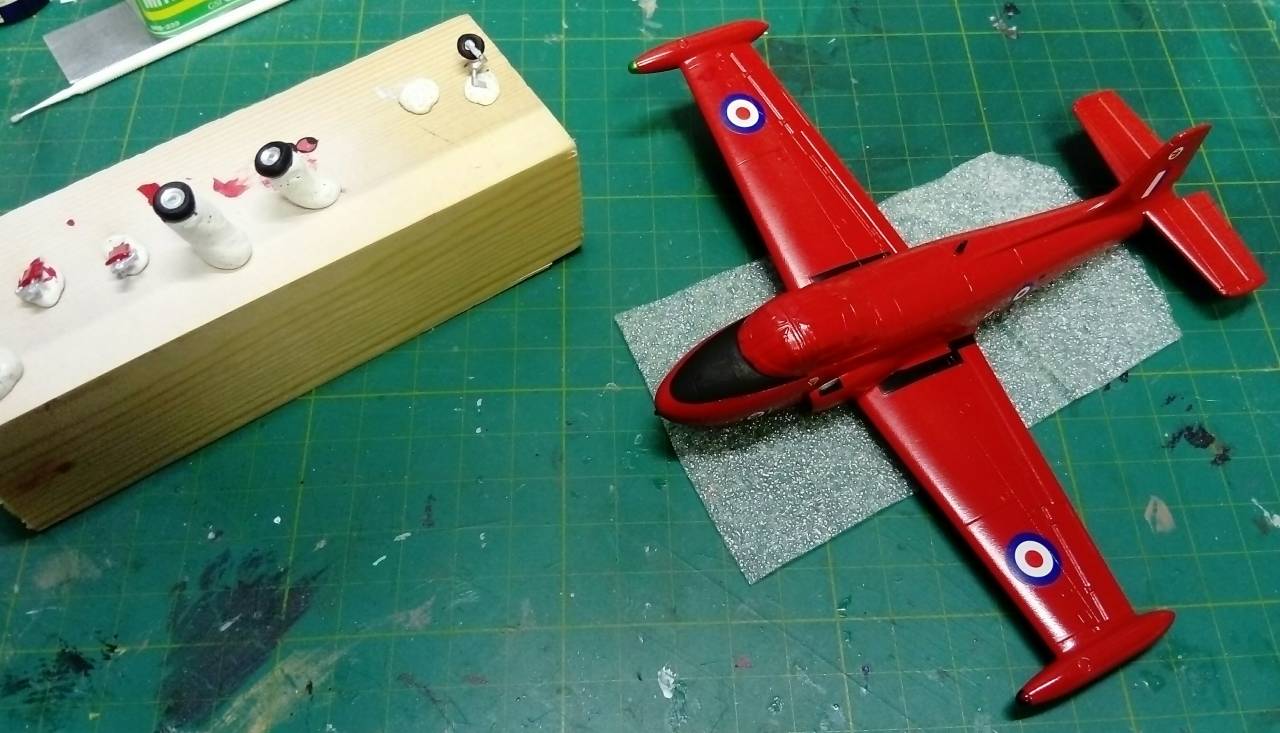
My JP finally has some paint and is nearing the finishing line. I gave it a good coat of Tamiya white primer and then a couple of coats of Humbrol 19 Gloss Red spray can paint. The Humbrol sprayed beautifully and dried with a nice smooth finish. Just need to mask out the anti-glare panel, tip lights and other details and she'll be ready for some decals.
The primer did reveal that I needed to do some more work around the intakes to blend them into the fuselage. I used Gunze Mr Surfacer for that, first time I've used it and I was surprised at how easy it was to use. How I've managed without it before I shall never know.

Kanguroo

Joined: May 07, 2006
KitMaker: 416 posts
AeroScale: 89 posts

Posted: Wednesday, April 10, 2019 - 01:53 AM UTC
Hi all,
My Gr-3 is continued.
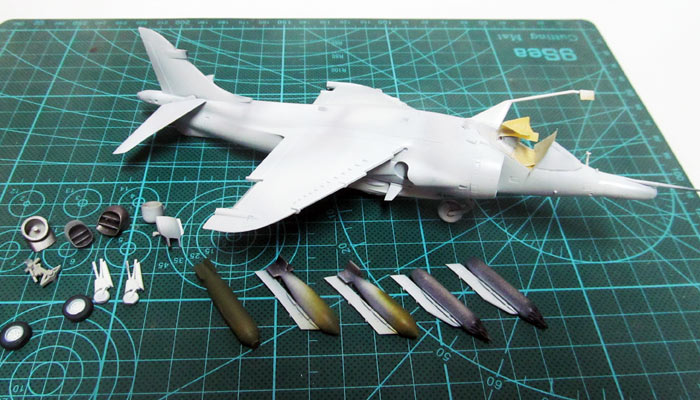
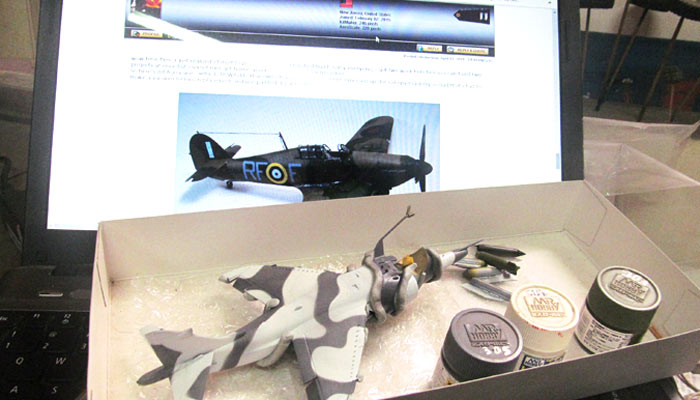
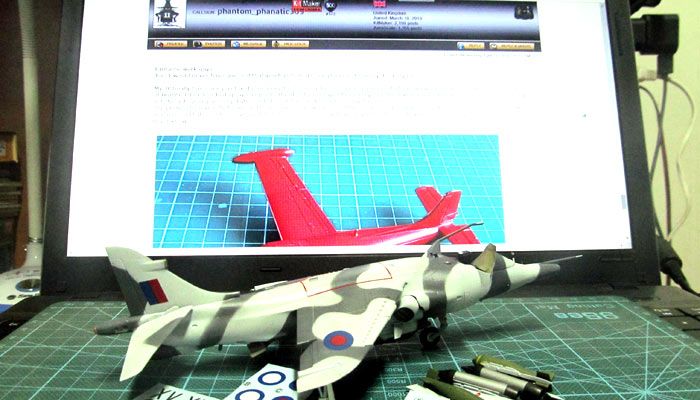

K.
My Gr-3 is continued.


K.

bomber14

Joined: February 02, 2015
KitMaker: 330 posts
AeroScale: 286 posts

Posted: Thursday, April 11, 2019 - 12:57 AM UTC
thanks steven. i may do my canopies with decal strips from now on. i can't seem to get the masking right. it did take second place at mosquitocon this past wknd though so i am happy with it.
your paint job looks nice and smooth. what grade mr surfacer did you use? past i assume
k- nice camo job. i like the colors, looking forward to seeing it done.
joe
your paint job looks nice and smooth. what grade mr surfacer did you use? past i assume
k- nice camo job. i like the colors, looking forward to seeing it done.
joe
Posted: Sunday, April 14, 2019 - 03:46 AM UTC
Quoted Text
thanks steven. i may do my canopies with decal strips from now on. i can't seem to get the masking right. it did take second place at mosquitocon this past wknd though so i am happy with it.
your paint job looks nice and smooth. what grade mr surfacer did you use? past i assume
k- nice camo job. i like the colors, looking forward to seeing it done.
joe
Oh cool, great news that it came second.
I used Mr Surfacer 1000 in the jar. Bit like thick paint. I left it overnight and then gave it a rub down with some almost worn out fine grade wet and dry. Smoothed it over really nicely. It also sorted out a problem gap on the wing to fuselage join on Eduards Pfalz D.III. My usual method of Squadron green putty and sanding would have meant a lot more work and risk of sanding off some surface detail. So I've become a convert to Mr Surfacer!

WIggus


Joined: July 07, 2017
KitMaker: 78 posts
AeroScale: 74 posts

Posted: Wednesday, April 17, 2019 - 06:13 AM UTC

bomber14

Joined: February 02, 2015
KitMaker: 330 posts
AeroScale: 286 posts

Posted: Thursday, April 18, 2019 - 07:38 AM UTC
Quoted Text
Quoted Textthanks steven. i may do my canopies with decal strips from now on. i can't seem to get the masking right. it did take second place at mosquitocon this past wknd though so i am happy with it.
your paint job looks nice and smooth. what grade mr surfacer did you use? past i assume
k- nice camo job. i like the colors, looking forward to seeing it done.
joe
Oh cool, great news that it came second.
I used Mr Surfacer 1000 in the jar. Bit like thick paint. I left it overnight and then gave it a rub down with some almost worn out fine grade wet and dry. Smoothed it over really nicely. It also sorted out a problem gap on the wing to fuselage join on Eduards Pfalz D.III. My usual method of Squadron green putty and sanding would have meant a lot more work and risk of sanding off some surface detail. So I've become a convert to Mr Surfacer!
i use bondo red glaze myself. it sands smooth and quickly but soetimes cracks as it dries and shrinks. i am looking for something else myself. should give mr surfacer a try.
joe

bomber14

Joined: February 02, 2015
KitMaker: 330 posts
AeroScale: 286 posts

Posted: Thursday, April 18, 2019 - 07:39 AM UTC

WIggus


Joined: July 07, 2017
KitMaker: 78 posts
AeroScale: 74 posts

Posted: Friday, April 19, 2019 - 01:41 AM UTC
Thanks Joe.
I don't remember now why I wanted to put a replaced panel on it. But I was hell-bent on it at the time. :-)
I don't remember now why I wanted to put a replaced panel on it. But I was hell-bent on it at the time. :-)
Posted: Friday, April 19, 2019 - 03:27 AM UTC
Wiggus, nice work on your Spitfire. The wingtip extensions make for a very unusual version.
My JP is just about ready for some decals. I painted the navigation lights silver and then over painted with a couple of coats of gloss clear green and red. Worked pretty well I think. Airfix really should have made those in clear plastic and I think in future I might chop them off and replace them with coloured lenses.
The anti-glare panel was a bit tricky to mask and I'm not completely happy with it, but it will do. Given that this particular boxing is one of those Starter Kit gift sets, I do think Airfix should have made that as an optional decal. The wing walkways are, so why not that? It would make the life of a novice modeller much easier.
Anyway I'm away over the weekend so I'll get the decals on next week and call her done.
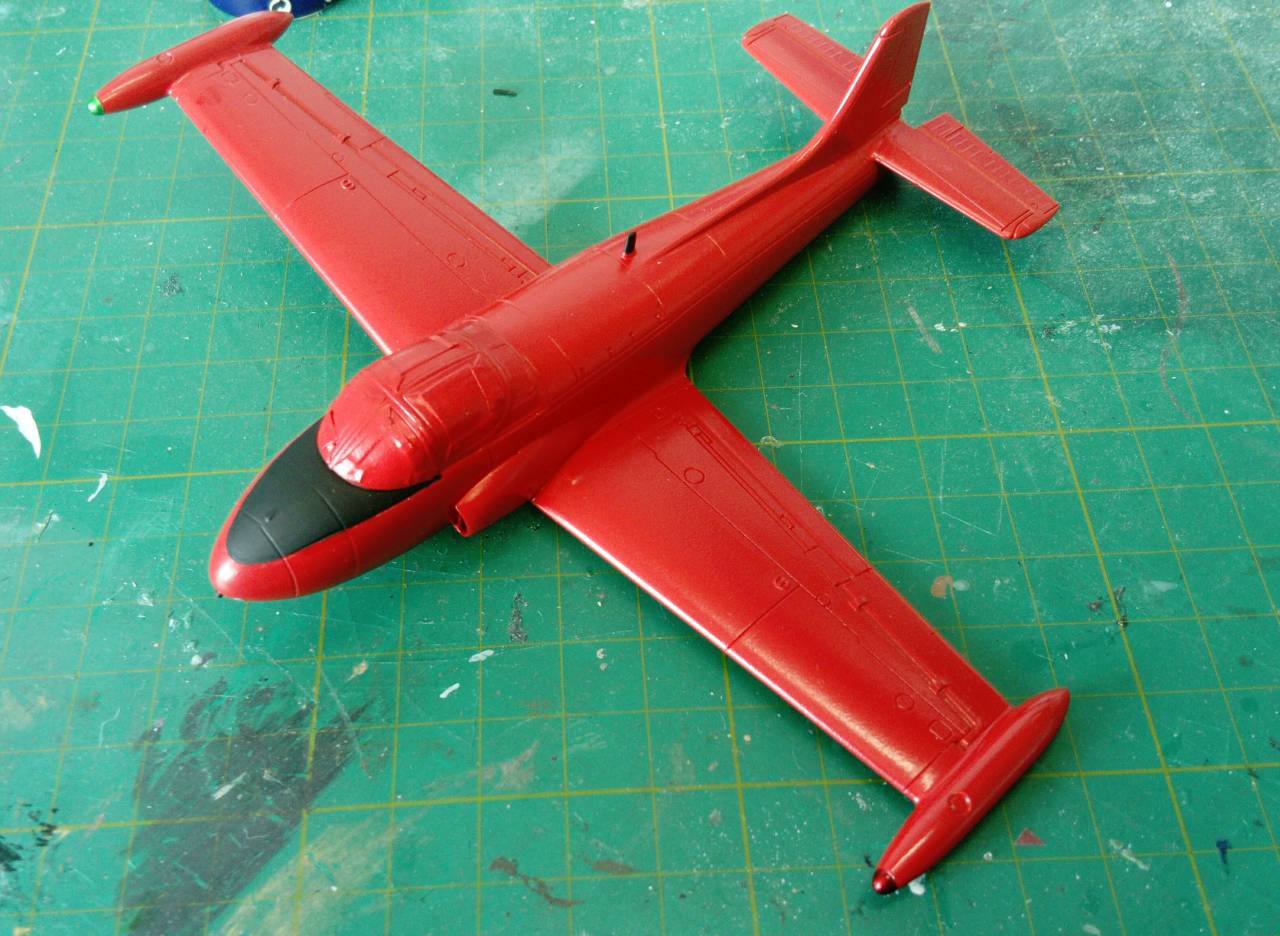

Kanguroo

Joined: May 07, 2006
KitMaker: 416 posts
AeroScale: 89 posts

Posted: Wednesday, April 24, 2019 - 11:53 PM UTC
Thanks Joe Bombace.
Hi all,
I finished my bird with the artic camo.
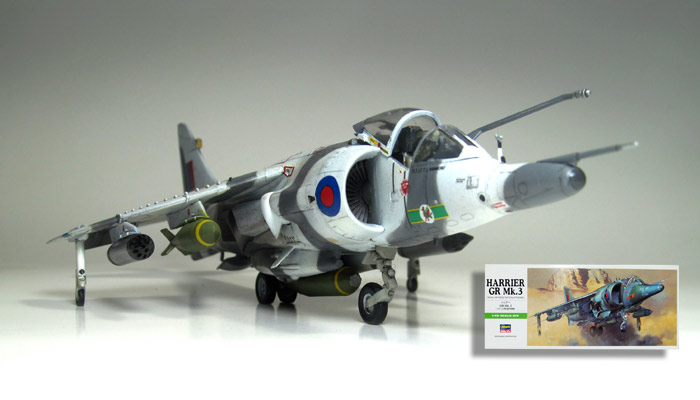


I have collected four Harrier kits in 1/72 scale.
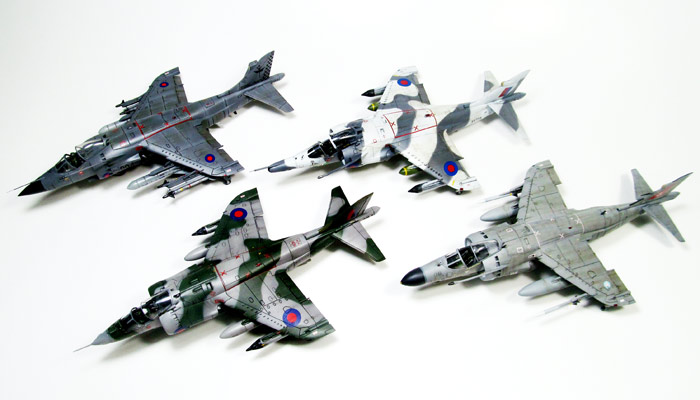
Cheers,

Hi all,
I finished my bird with the artic camo.


I have collected four Harrier kits in 1/72 scale.

Cheers,

Posted: Sunday, April 28, 2019 - 08:38 AM UTC
Really nice work MrK. Harrier looks really good in the arctic cammouflage. Really must do one myself one day.
Spent the weekend putting the decals on my JP. No pics yet but all went well. Last couple of jobs and she'll be finished.
Spent the weekend putting the decals on my JP. No pics yet but all went well. Last couple of jobs and she'll be finished.
Posted: Monday, April 29, 2019 - 08:47 AM UTC
On the final stretch.
Posted: Monday, April 29, 2019 - 06:52 PM UTC
I might could just finish this one up on time.

Matchbox 1/72 Blackburn Buccaneer. Painted, Futured and decaled. Just got to add the fiddly bits.

Matchbox 1/72 Blackburn Buccaneer. Painted, Futured and decaled. Just got to add the fiddly bits.

Posted: Tuesday, April 30, 2019 - 09:44 AM UTC
Keep going Mark, you can get her done.
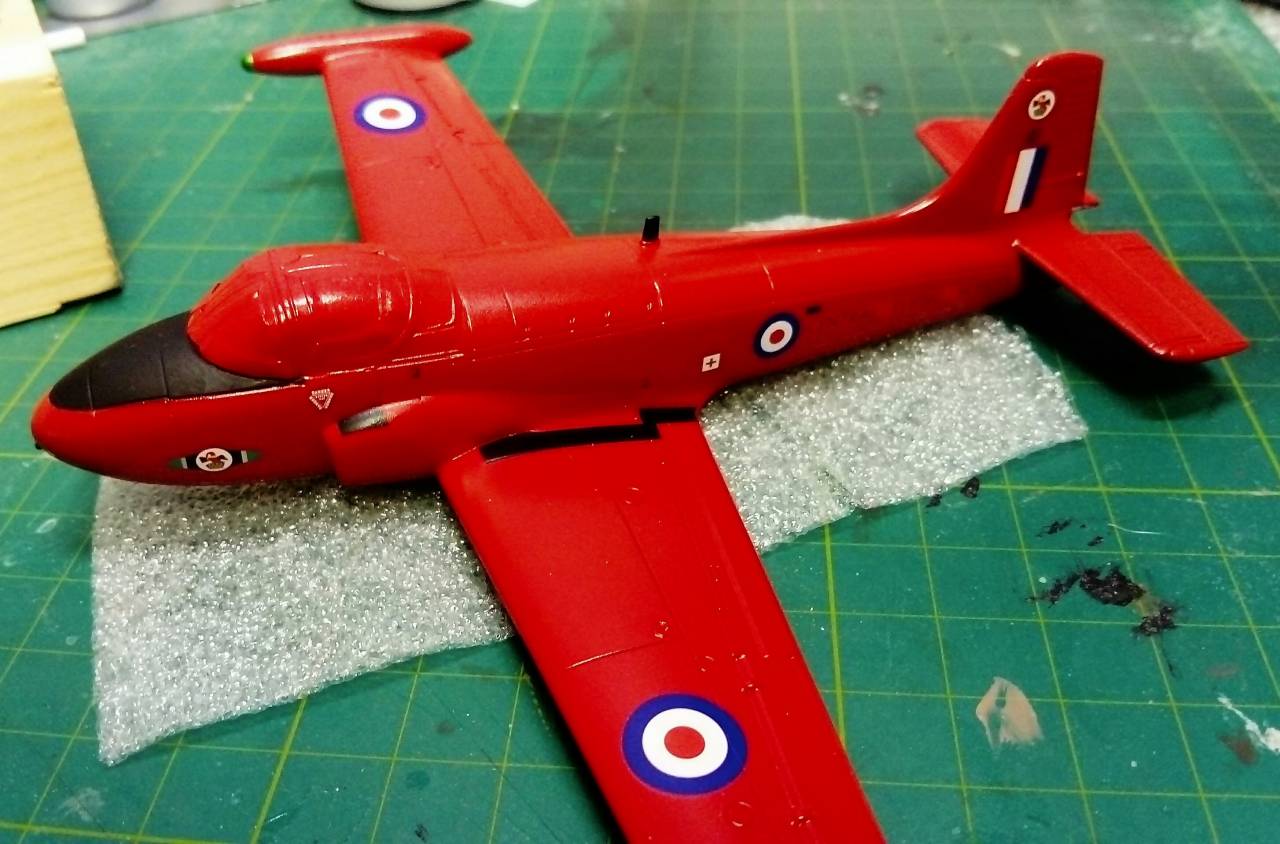
So here's my completed build representing the valuable work of the aircraft of the training squadrons and forgotten display teams.
The Hunting-Percival Jet Provost T.4, The Red Pelicans, Central Flying School RAF Little Rissington 1966.
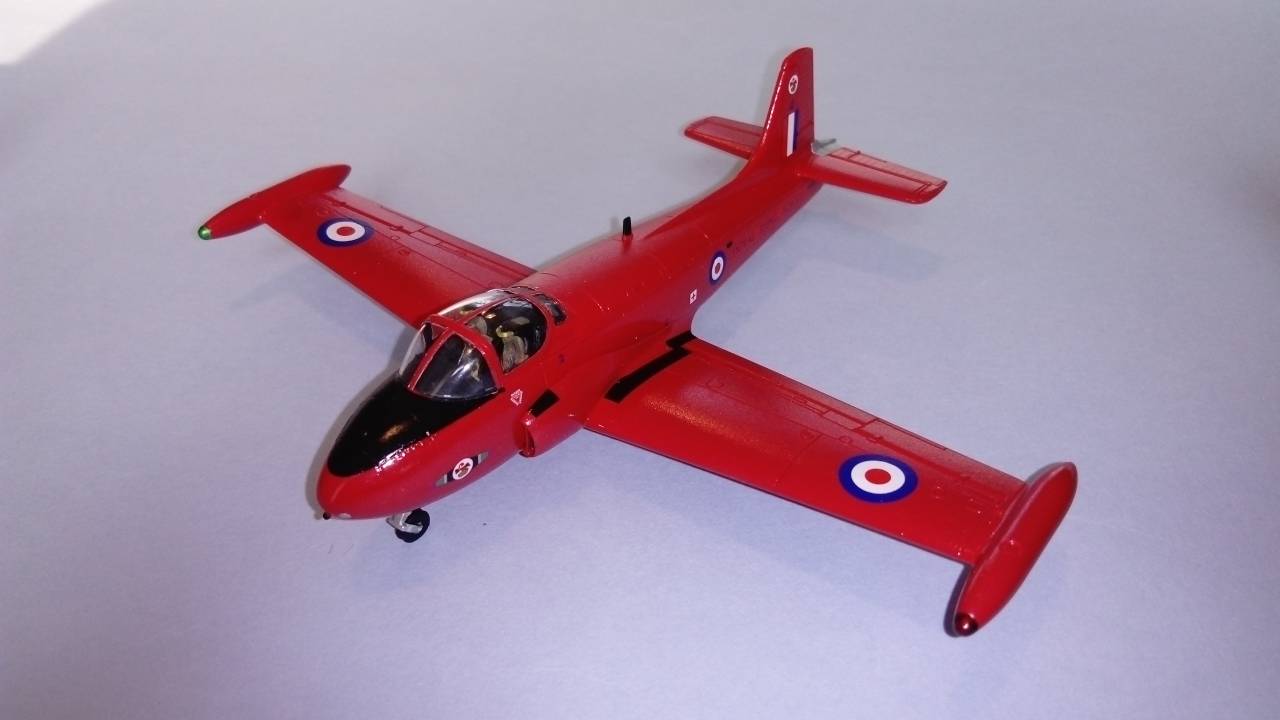
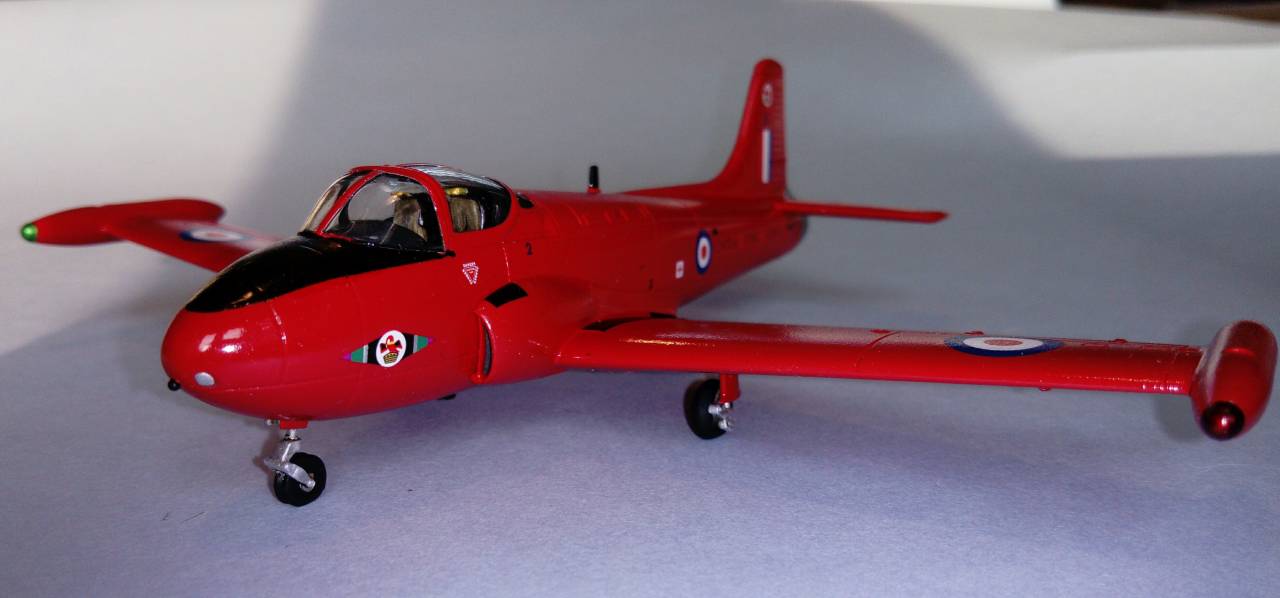
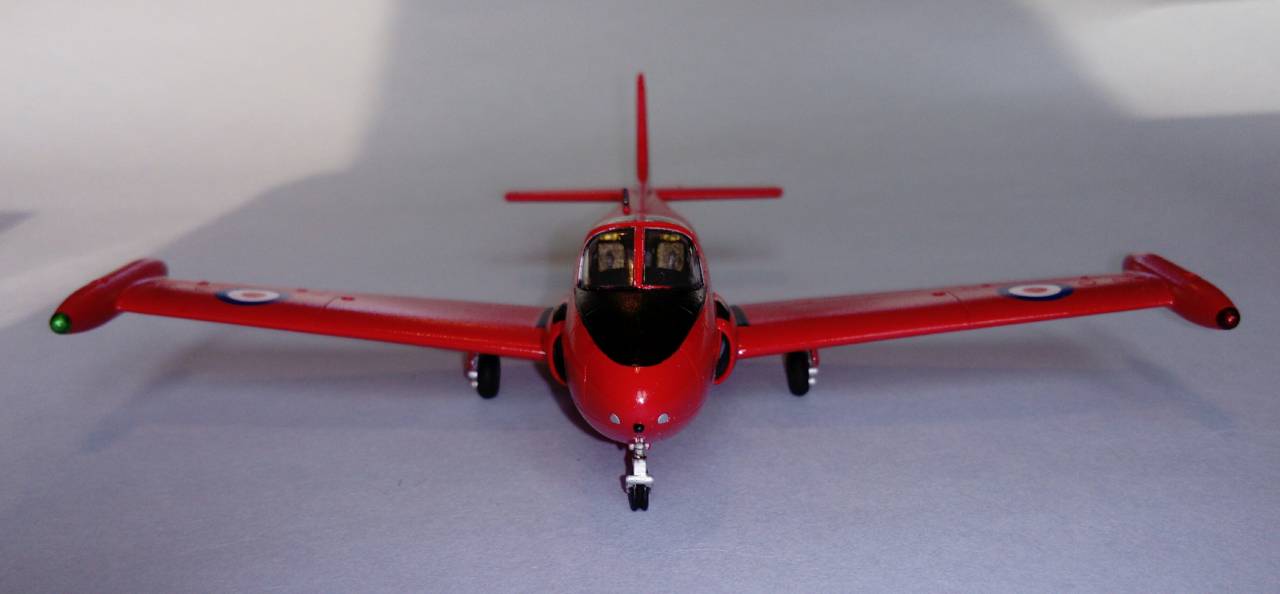
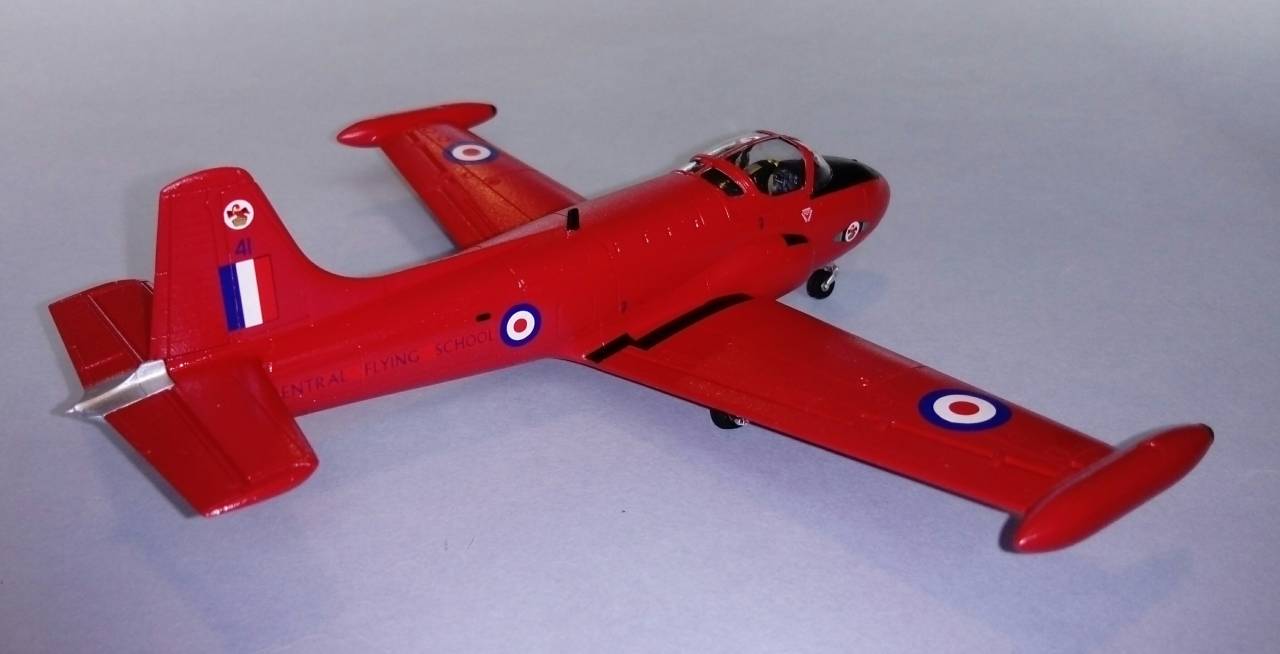
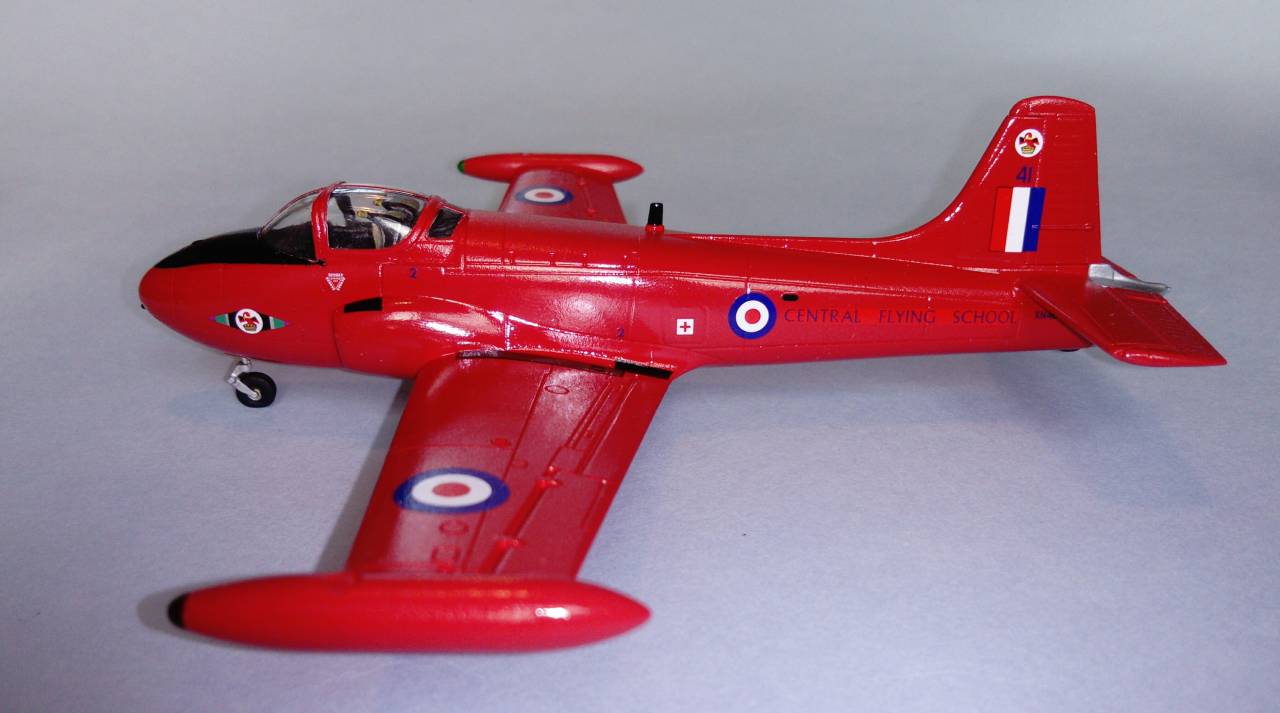
I can see a few spots on the canopy that could do with a touch up looking at the photos. Always the same when you're rushing to meet a deadline. I'll see if I can get that done and upload some better photos in the campaign gallery over the next couple of days.
The Airfix JP is a really lovely little kit and thoroughly recommended.
Great campaign and thanks for hosting Michael.
So here's my completed build representing the valuable work of the aircraft of the training squadrons and forgotten display teams.
The Hunting-Percival Jet Provost T.4, The Red Pelicans, Central Flying School RAF Little Rissington 1966.
I can see a few spots on the canopy that could do with a touch up looking at the photos. Always the same when you're rushing to meet a deadline. I'll see if I can get that done and upload some better photos in the campaign gallery over the next couple of days.
The Airfix JP is a really lovely little kit and thoroughly recommended.
Great campaign and thanks for hosting Michael.
Posted: Tuesday, April 30, 2019 - 05:57 PM UTC
I'm calling it DONE!! 
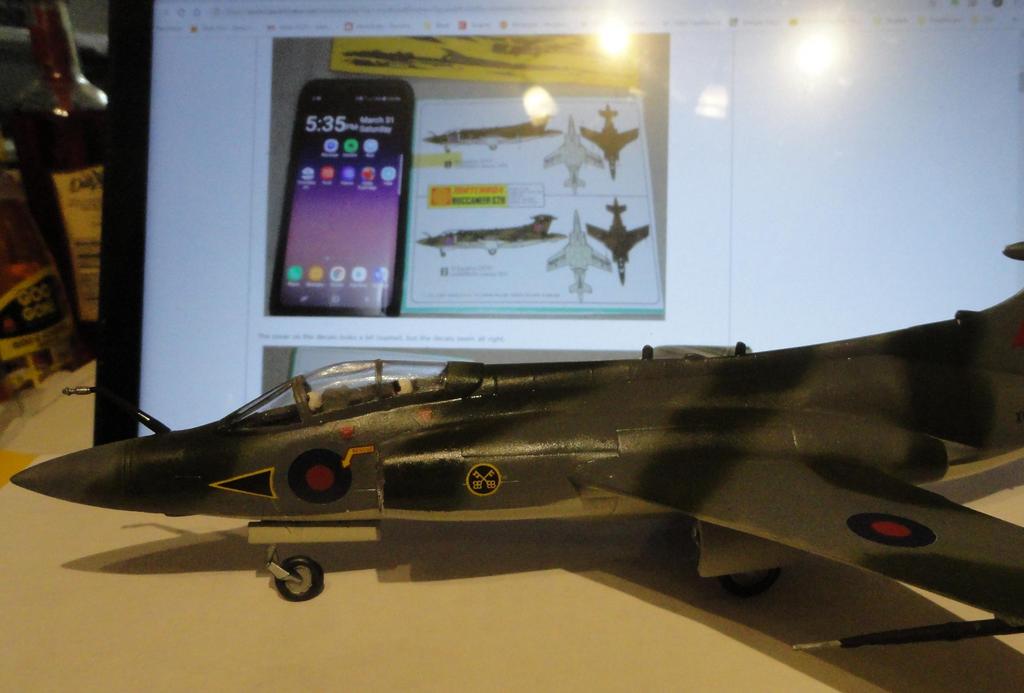
I've never done a Modern RAF so in some cases I'm stuck with what little the instructions and a scrap of the original box showed.

Even found my start photos, did I really finish this kit in a Month?
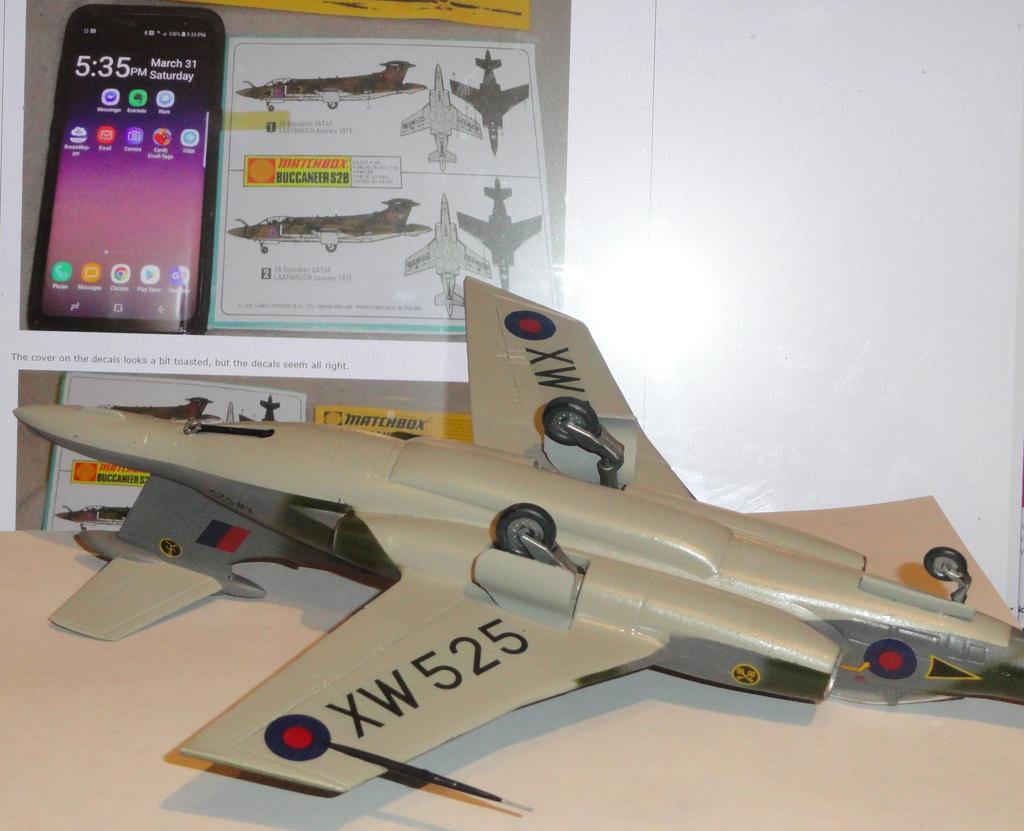


I've never done a Modern RAF so in some cases I'm stuck with what little the instructions and a scrap of the original box showed.

Even found my start photos, did I really finish this kit in a Month?


Sleepwalker71

Joined: August 30, 2012
KitMaker: 265 posts
AeroScale: 72 posts

Posted: Wednesday, May 01, 2019 - 01:34 AM UTC
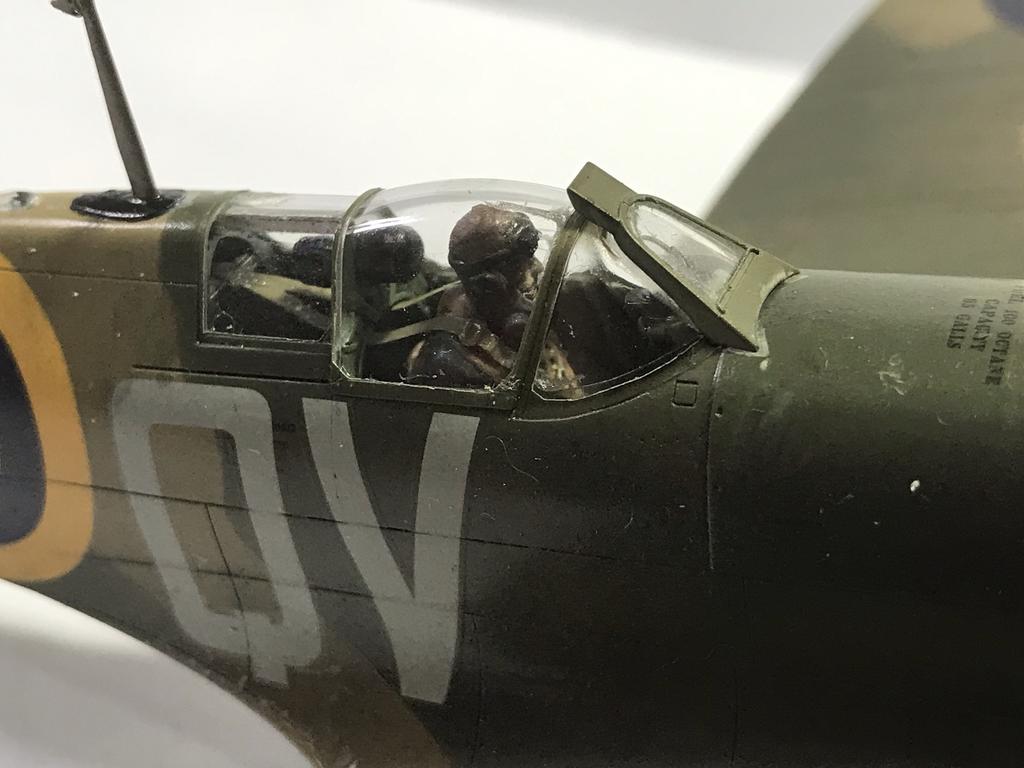
I consider it done. As I experimented with new weathering materials, in some parts may be a visible learning curve, but viewed in live most of them are unnoticeable. For the first time, I used Procon Boy LWA for a final satin coat. Amazing, just amazing... More photos in the gallery.
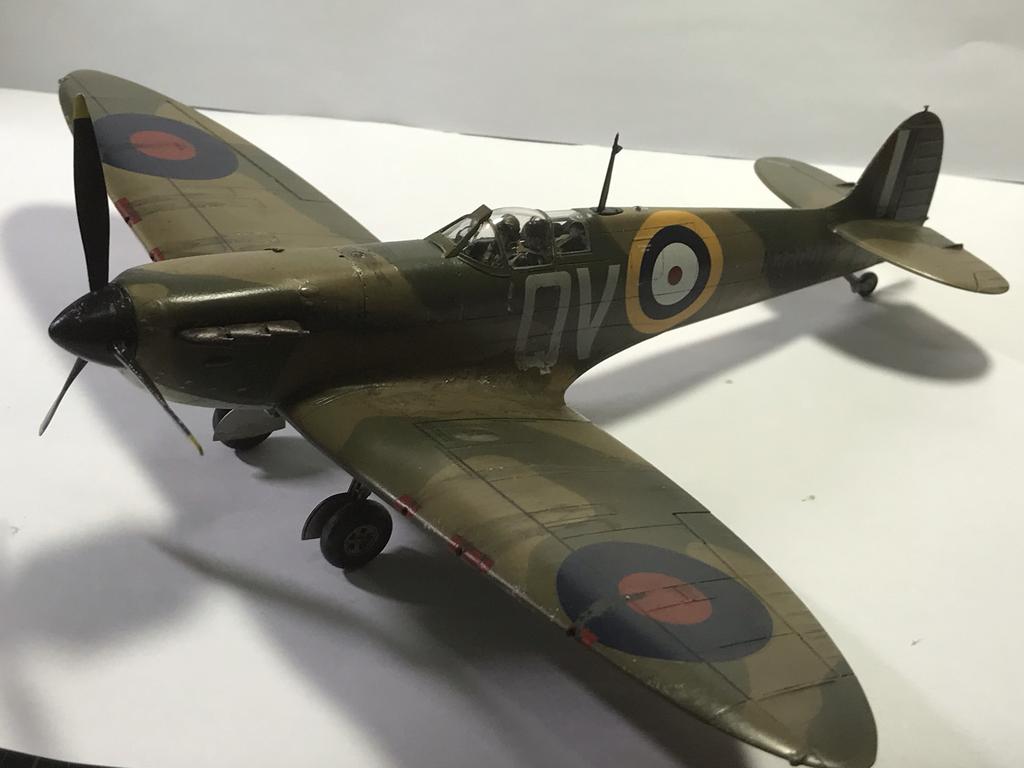

Thanks you all for this campaign


Thanks you all for this campaign

MichaelSatin


Joined: January 19, 2008
KitMaker: 3,909 posts
AeroScale: 2,904 posts

Posted: Thursday, May 02, 2019 - 01:17 AM UTC
And with a last salute we say goodbye to the RAF 100 Campaign. Congrats to all who finished and thanks to all who participated! Ribbons have been awarded, so if you didn't get one and think you should have, let me know.
See you all around the site!
Michael
See you all around the site!
Michael

Posted: Thursday, May 02, 2019 - 07:18 AM UTC
Michael, have added my photos to the gallery. Thanks again for hosting.
Markk, have to compliment you on your fantastic Buccaneer build. I'm a huge fan of Matchbox so always great to see one done. Really neat build and paint work. Looks nice in the early colour scheme. May have to finish one in that scheme myself one day.
Damiam, great work on your Spitfire. The weathering is nicely done.
Posted: Thursday, May 02, 2019 - 07:44 AM UTC
Well Stephen, thank you,  but photos are deceiving. I did a horrible job of blending the trailing edges of the wing together at the bond line and I may not have completely filled some of the seams, a decal is hiding one on the port intake. Not an expert on RAF colors, went with the FS 595 'equivalents' to the Humbrol colors in the instructions. So I don't really know early from late. Not sure I got the proper roundels on the wing bottom. Used the same size as the top, but the smaller ones on the fuselage might have fit better. At least I'm sure I got them right side up.
  The pilot might be too far forward in the cockpit and the 'GIB' might be too low. Plenty of other imperfections.
All that said, of course there's always the joy for finishing the kit, and not being too embarrassed by it. I do like the older kits, they challenge my still developing skills and they do return a certain childhood joy to the effort. I'm signed up for the Memories of Matchbox campaign with an old 3 color F3D, so there's more of where this one came from.
Thanks everyone, I had fun and do appreciate the chance as a Yank, to join in on the RAF 100 celebrations. Great Campaign, see ya next time.
 but photos are deceiving. I did a horrible job of blending the trailing edges of the wing together at the bond line and I may not have completely filled some of the seams, a decal is hiding one on the port intake. Not an expert on RAF colors, went with the FS 595 'equivalents' to the Humbrol colors in the instructions. So I don't really know early from late. Not sure I got the proper roundels on the wing bottom. Used the same size as the top, but the smaller ones on the fuselage might have fit better. At least I'm sure I got them right side up.
  The pilot might be too far forward in the cockpit and the 'GIB' might be too low. Plenty of other imperfections.
All that said, of course there's always the joy for finishing the kit, and not being too embarrassed by it. I do like the older kits, they challenge my still developing skills and they do return a certain childhood joy to the effort. I'm signed up for the Memories of Matchbox campaign with an old 3 color F3D, so there's more of where this one came from.
Thanks everyone, I had fun and do appreciate the chance as a Yank, to join in on the RAF 100 celebrations. Great Campaign, see ya next time.

 |


