@Carlos
Very nice work on that Mirage, I like the camo.
@Pasi
Too bad about the Foxbat.
You will do a great job with that Eduard kit.
I like the Finnish camo.
@Mr.K
That Mig-23 is a very poor kit.
Go for the Saab.
@Michael
Good work on the AMK.
I've been having some back pain for the last weeks, so hard for me to sit, sleep,and being at the bench is very painful
Great to see all these cool kits getting build !!!
Air Campaigns
Want to start or join a group build? This is where to start.
Want to start or join a group build? This is where to start.
Hosted by Frederick Boucher, Michael Satin
OFFICIAL: 3rd Generation Combat Jets Campaign
Nito74

Joined: March 04, 2008
KitMaker: 5,386 posts
AeroScale: 635 posts

Posted: Monday, August 13, 2018 - 10:30 PM UTC
MichaelSatin


Joined: January 19, 2008
KitMaker: 3,909 posts
AeroScale: 2,904 posts

Posted: Monday, August 13, 2018 - 10:55 PM UTC
John,
Sorry to hear about your back, hope you're better soon!
Michael
Sorry to hear about your back, hope you're better soon!
Michael


Buckeye198

Joined: May 02, 2010
KitMaker: 596 posts
AeroScale: 197 posts

Posted: Monday, August 13, 2018 - 11:16 PM UTC
I'm only two months behind schedule for posting these pics, but that's okay  I'll be building Airfix's 1/72 AV-8A Harrier, my first Airfix kit actually.

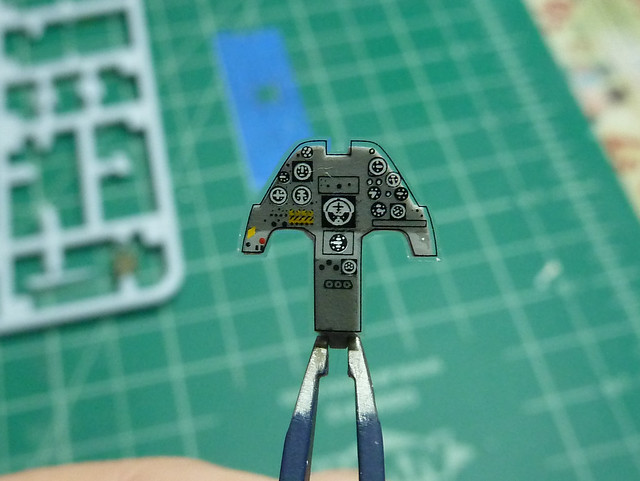
Cockpit tub and control panel have decal details. Fine for this scale, but unfortunately the decals aren't sized correctly.

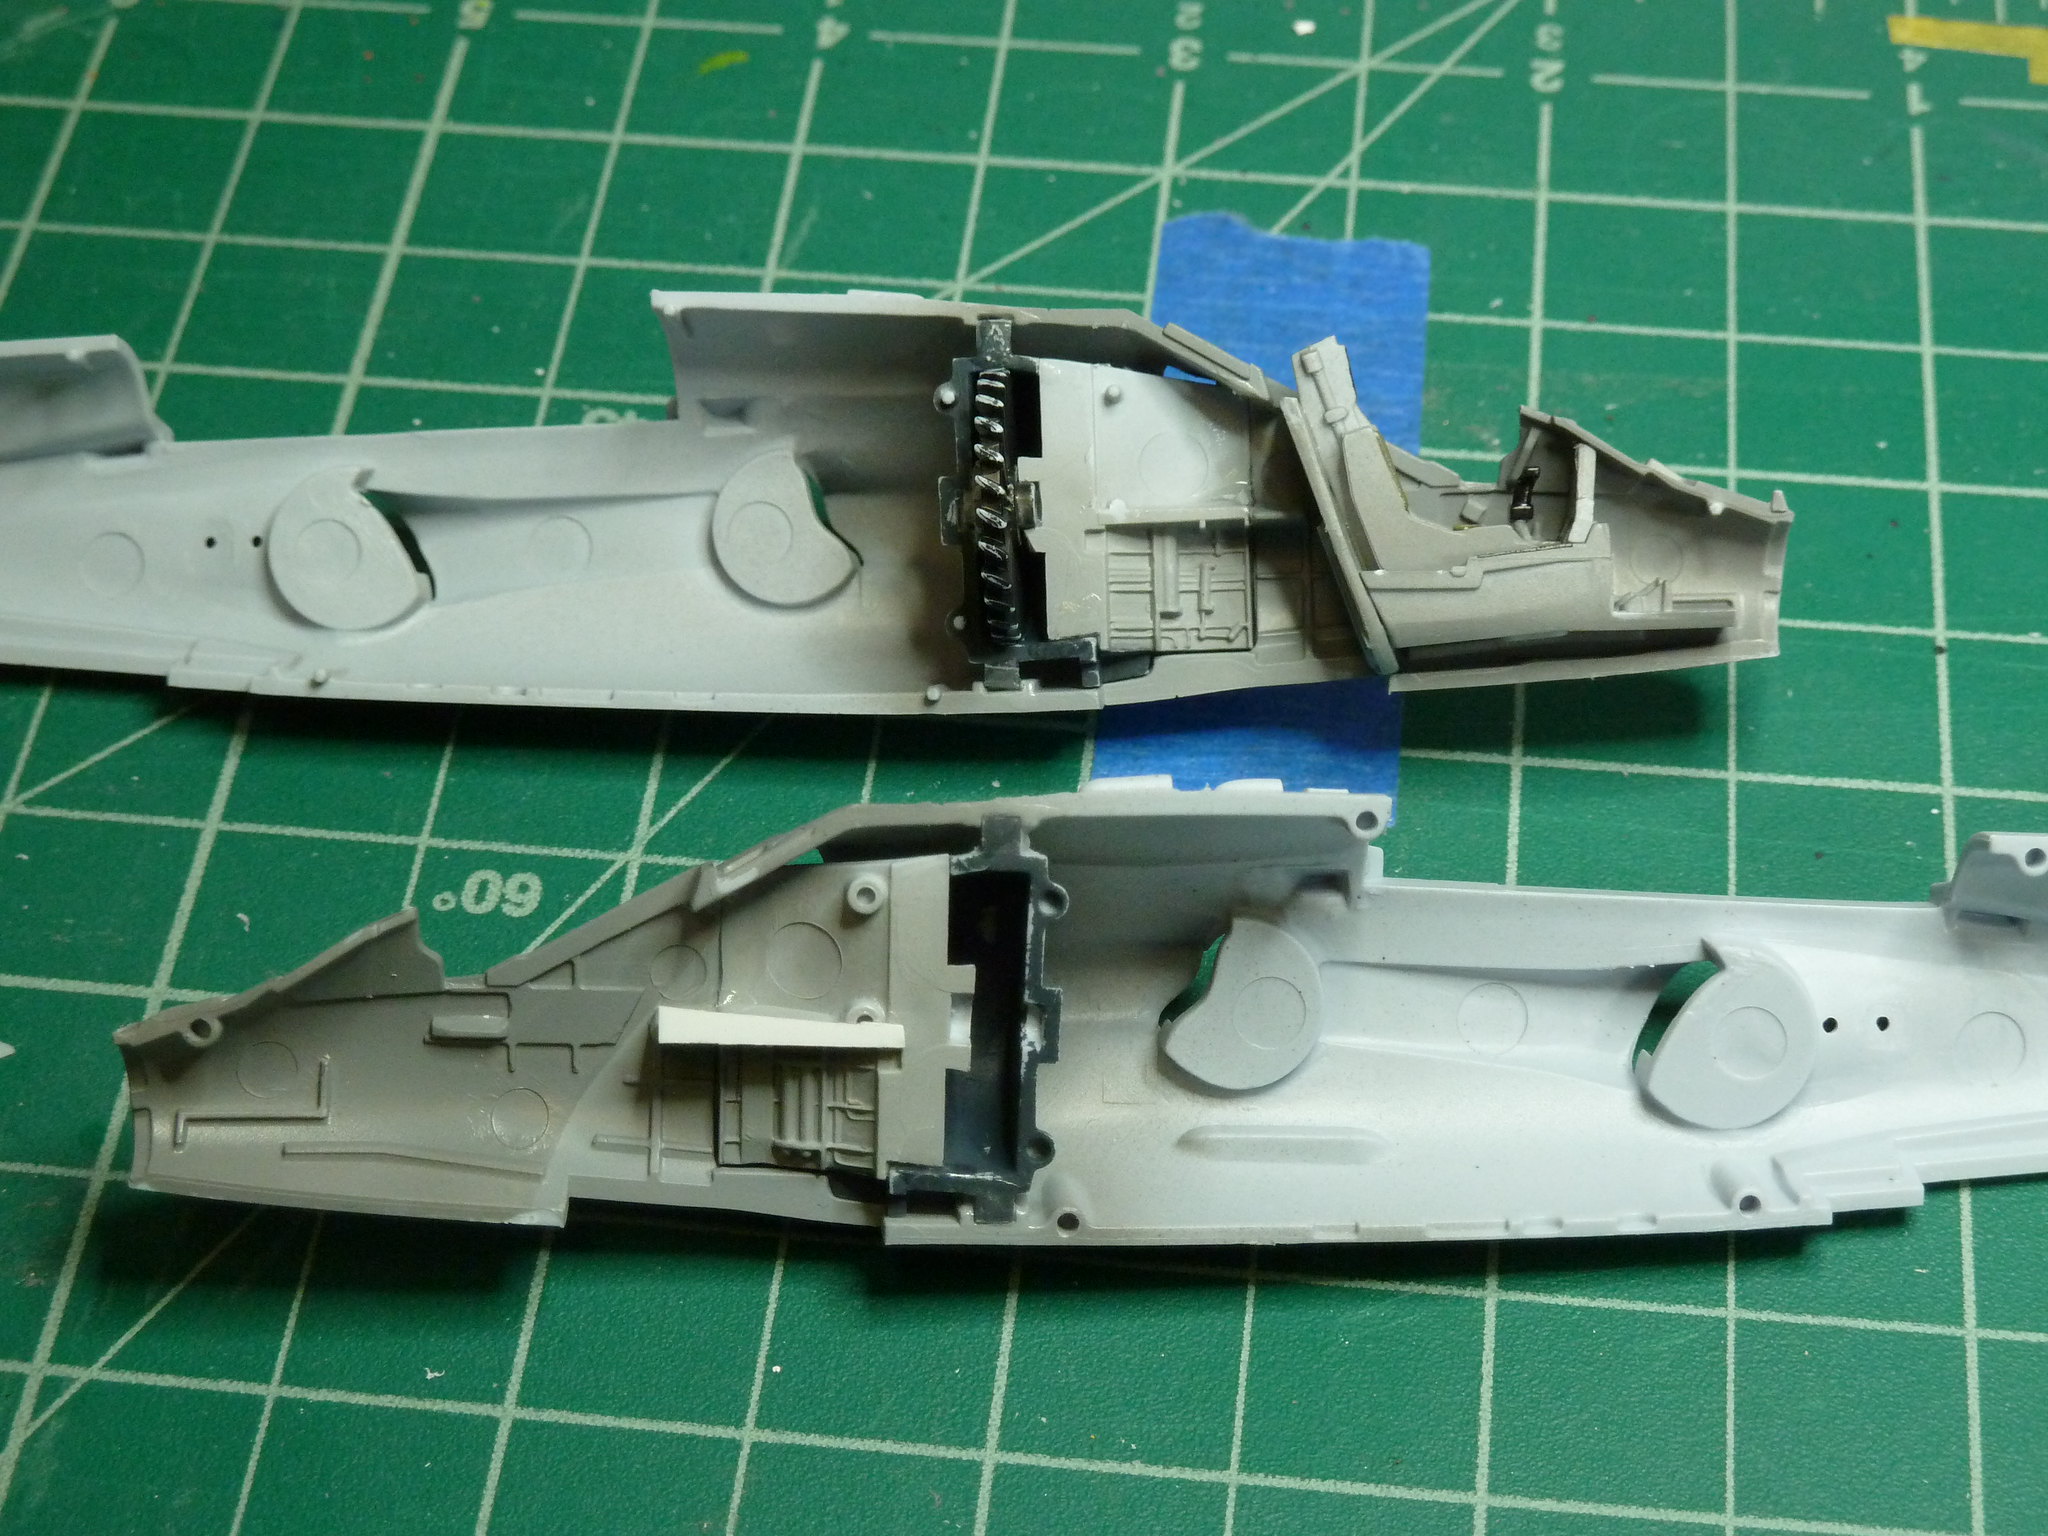
Fuselage halves clamp the engine and tub in place, though again the fit is a little off. Mostly pretty good, but it takes some extra fiddling to get it all together just right.

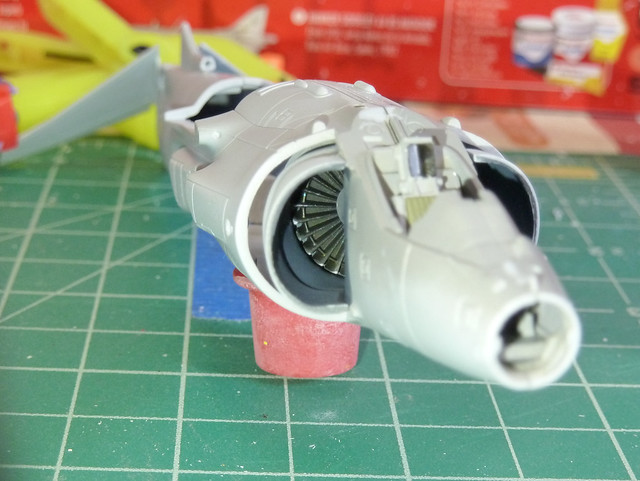
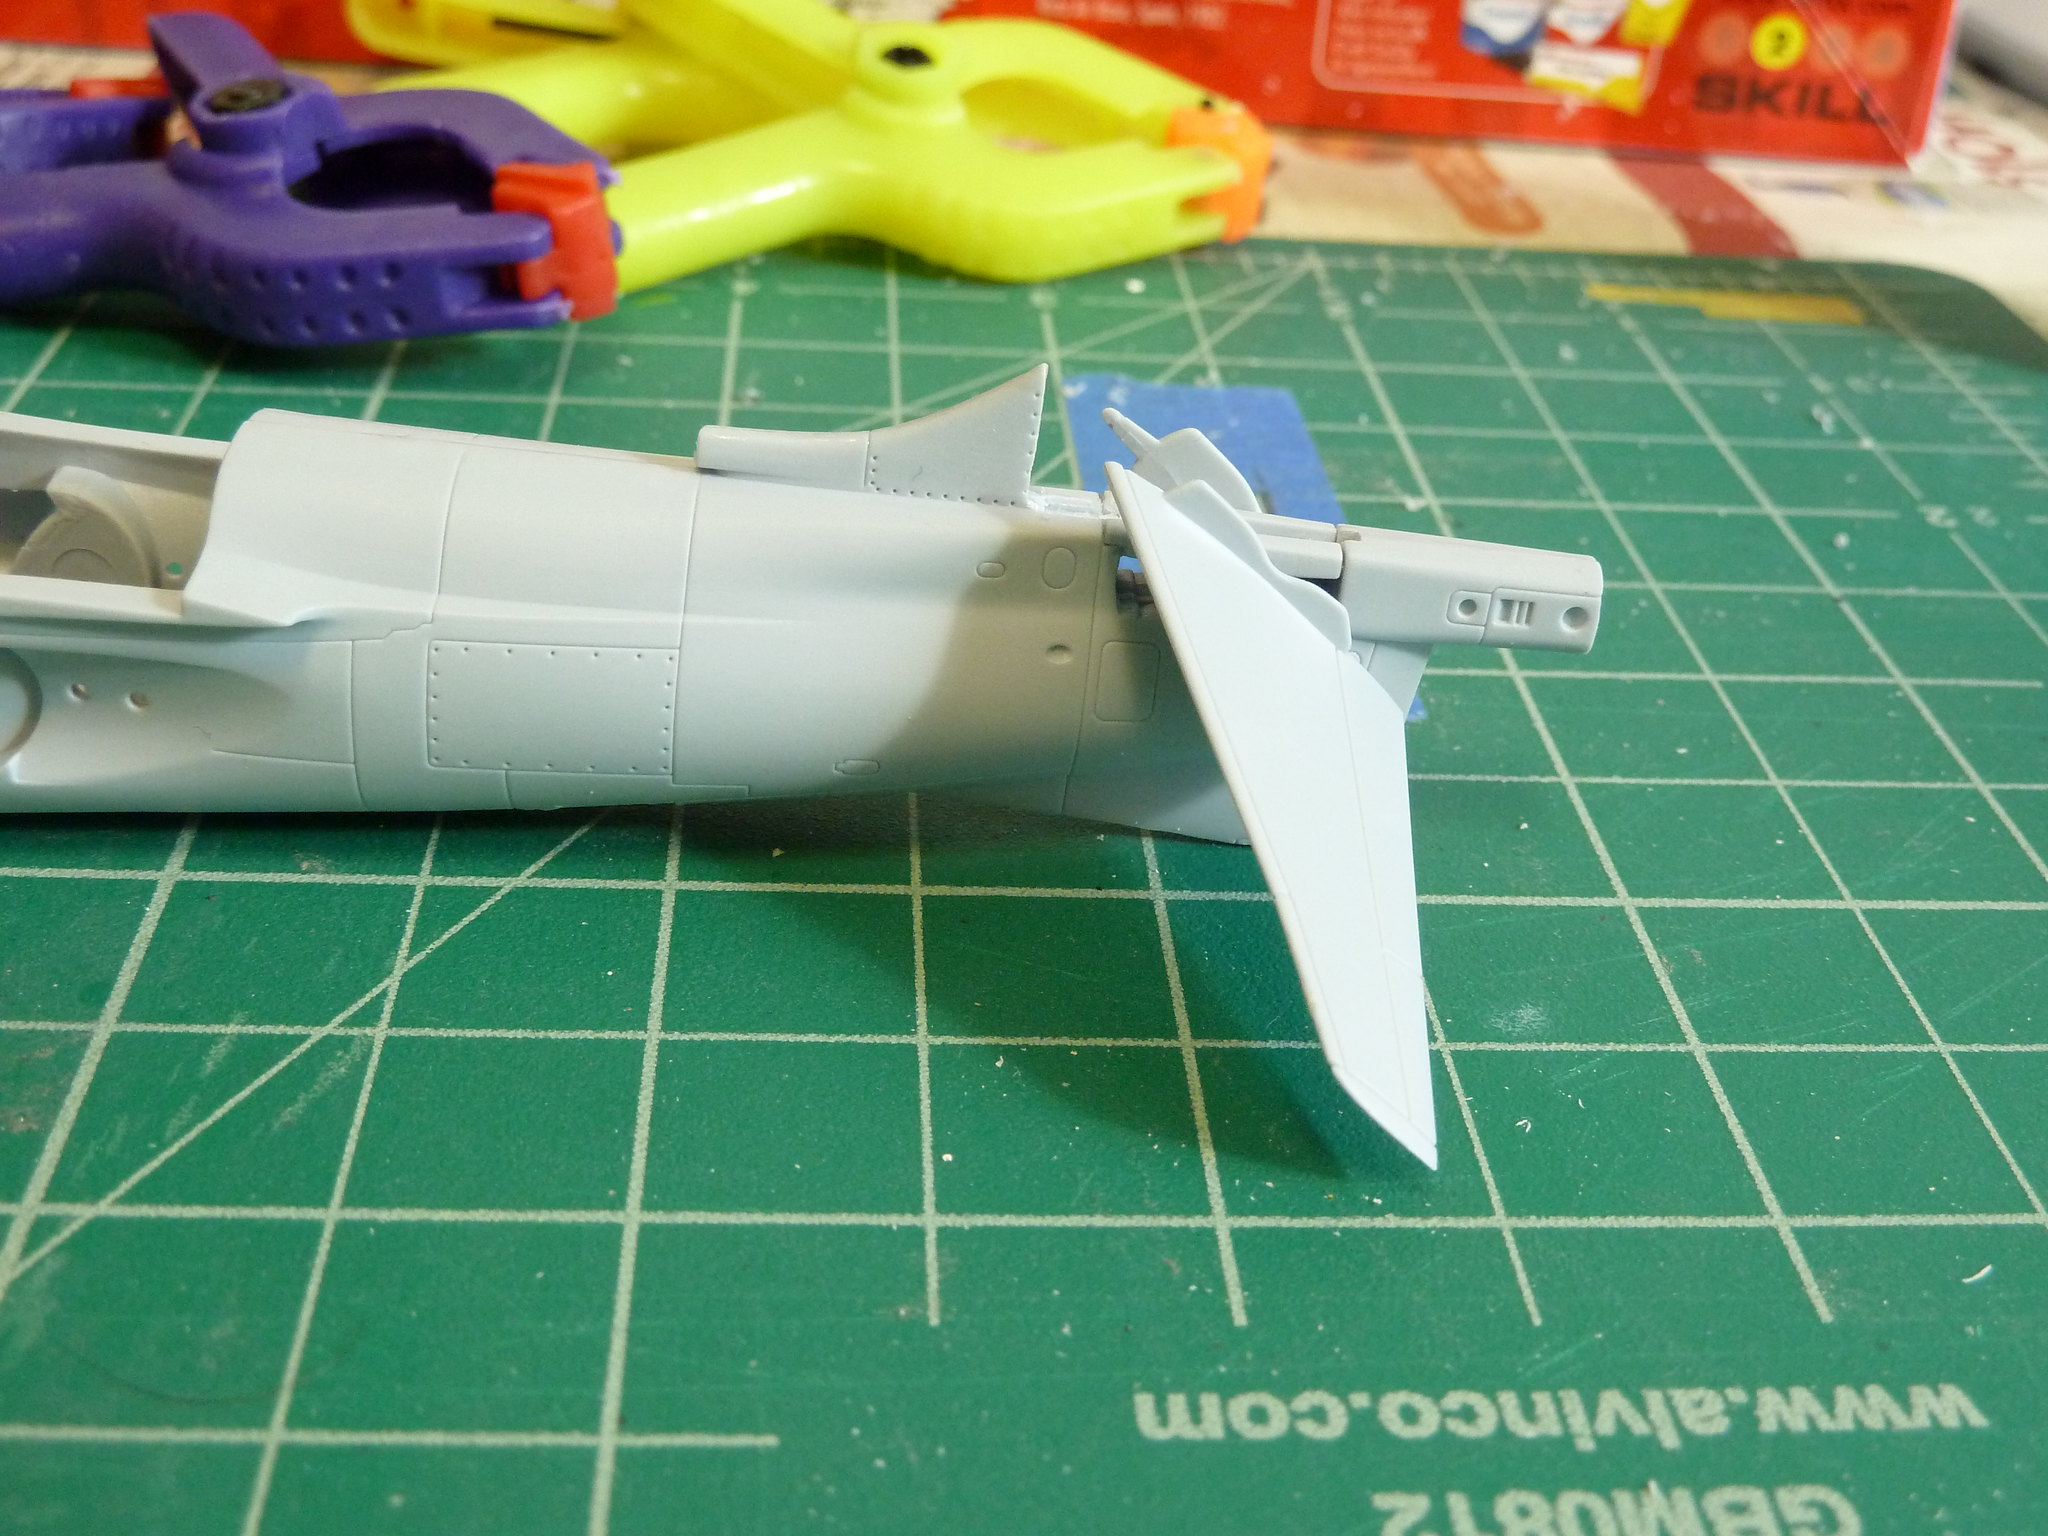
Control surfaces were molded as a single piece that got clamped into the tail section. A little loose, but freely positionable. Nice compromise, I guess.
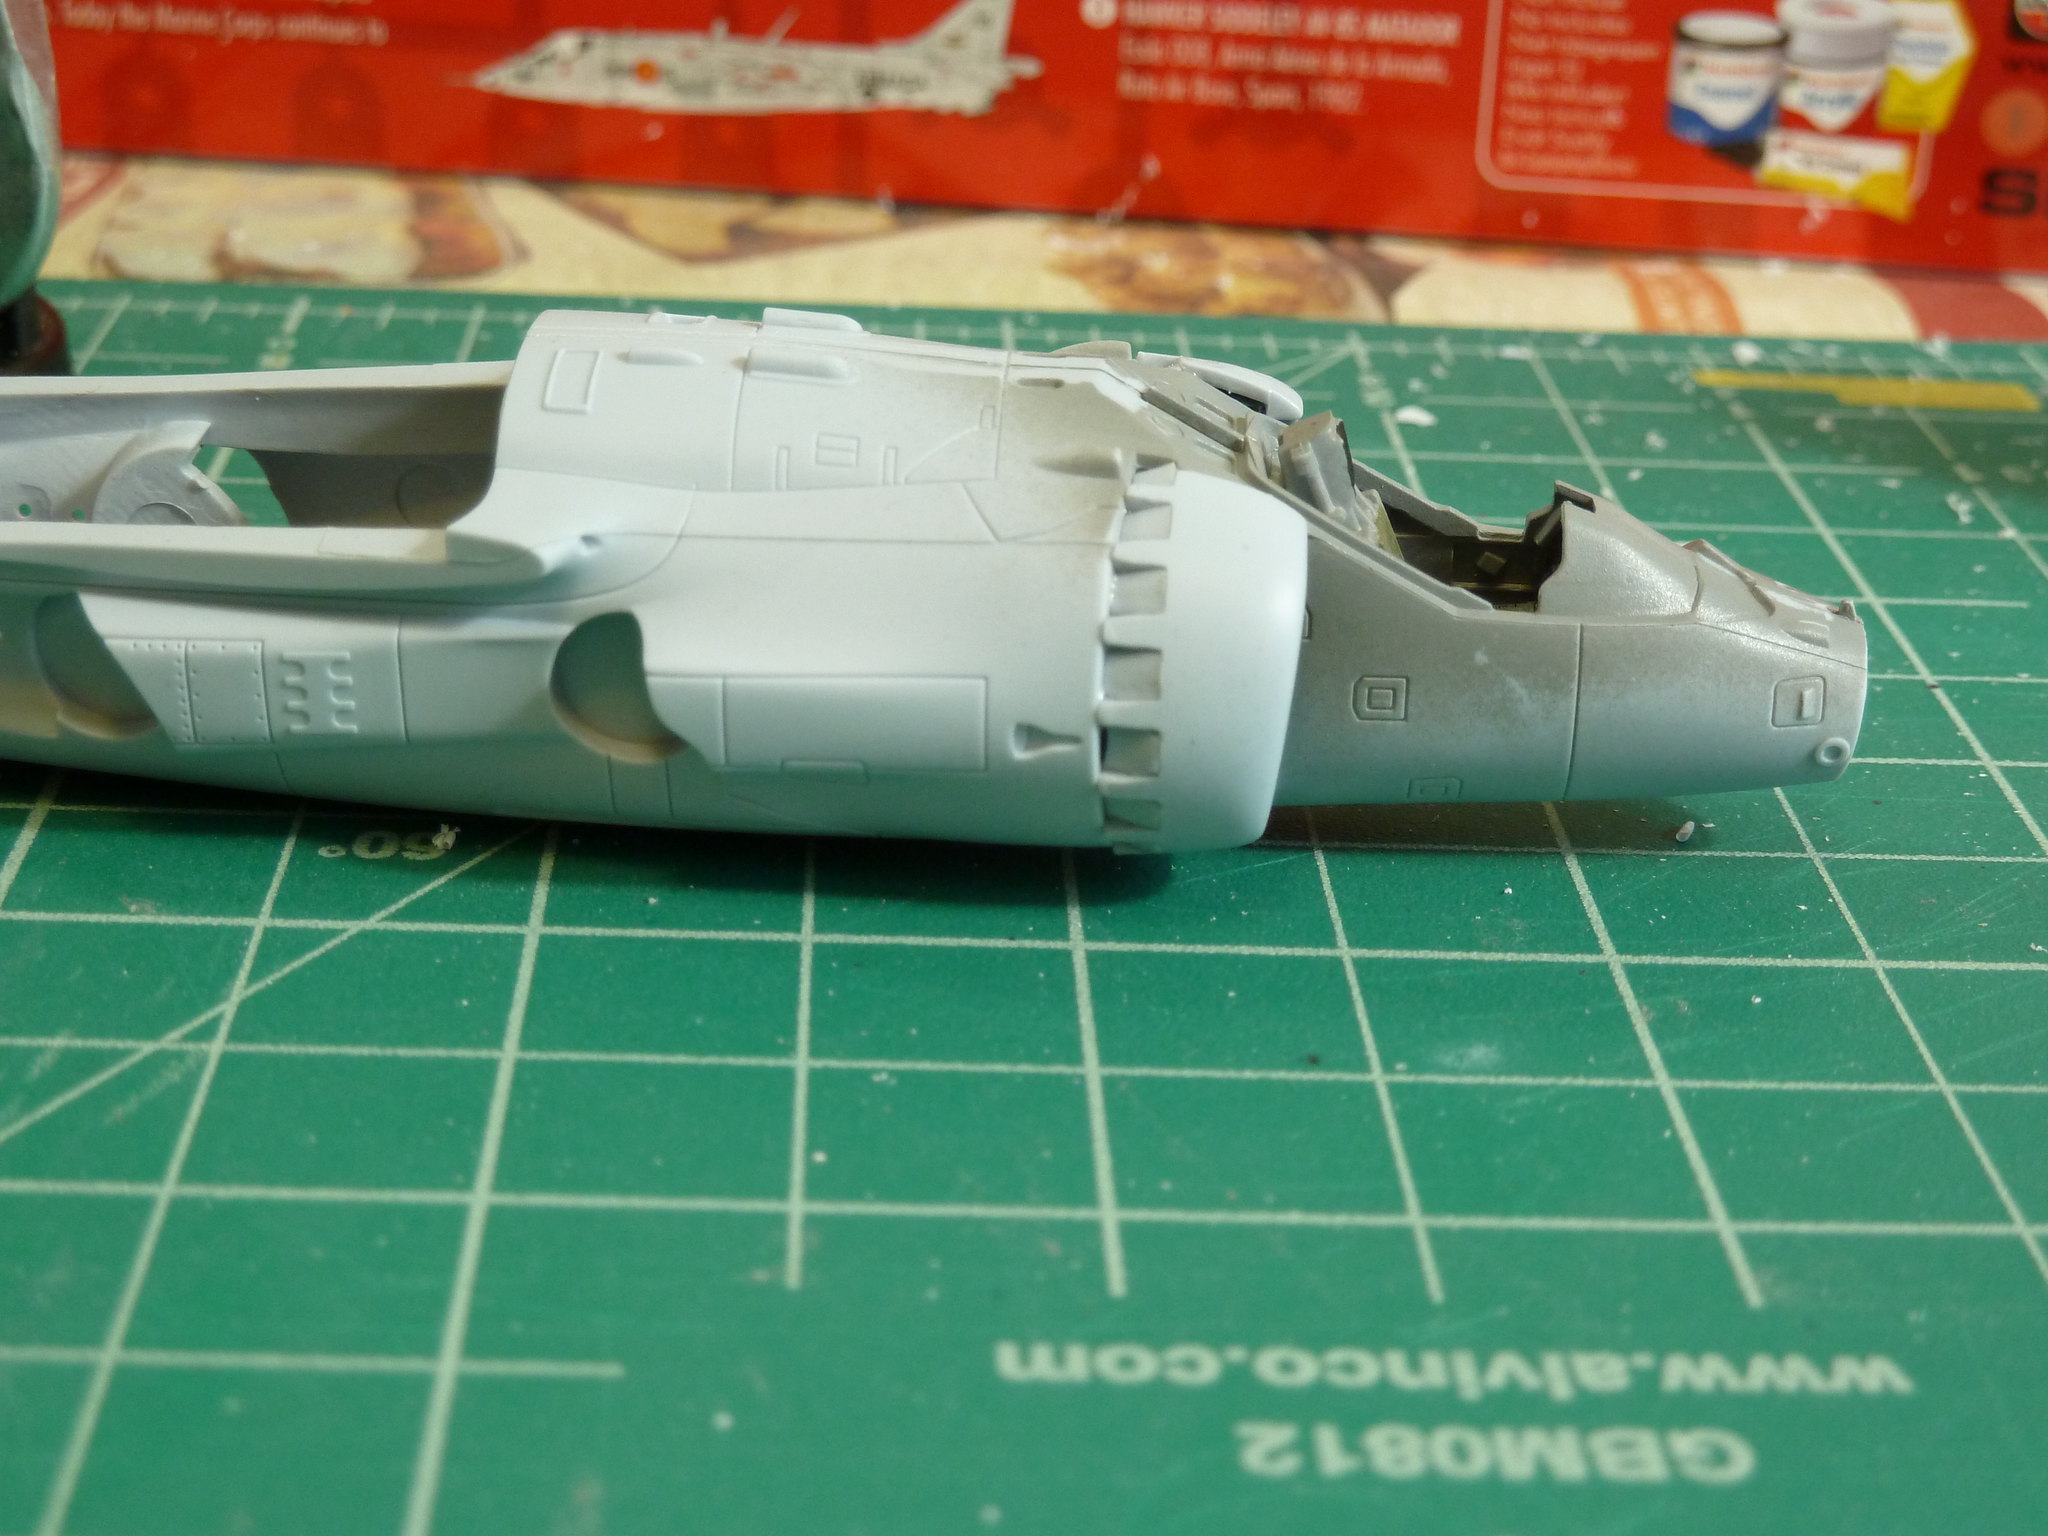
Engine cowilngs didn't sit flush with the fuselage without a fair deal of sanding.
I added details to the gun pods with a pin vise. I drilled out exhaust holes, barrels, and the opening for spent casings. Pin vise was easily the best $20 I spent

 I'll be building Airfix's 1/72 AV-8A Harrier, my first Airfix kit actually.
Cockpit tub and control panel have decal details. Fine for this scale, but unfortunately the decals aren't sized correctly.


Fuselage halves clamp the engine and tub in place, though again the fit is a little off. Mostly pretty good, but it takes some extra fiddling to get it all together just right.


Control surfaces were molded as a single piece that got clamped into the tail section. A little loose, but freely positionable. Nice compromise, I guess.

Engine cowilngs didn't sit flush with the fuselage without a fair deal of sanding.

I added details to the gun pods with a pin vise. I drilled out exhaust holes, barrels, and the opening for spent casings. Pin vise was easily the best $20 I spent


Posted: Sunday, August 19, 2018 - 07:57 AM UTC
Good evening Gentlemen!
Some fine work so far! Really like those 3rd gen jets!
I have only two jets in my stash, one being an F-14, the other being a Phantom II. And as it seems you haven't got a Phantom yet, mind if I join you?
As disclaimer, this will be my first jet in 1/72 since I was a young lad, so bear with me here...
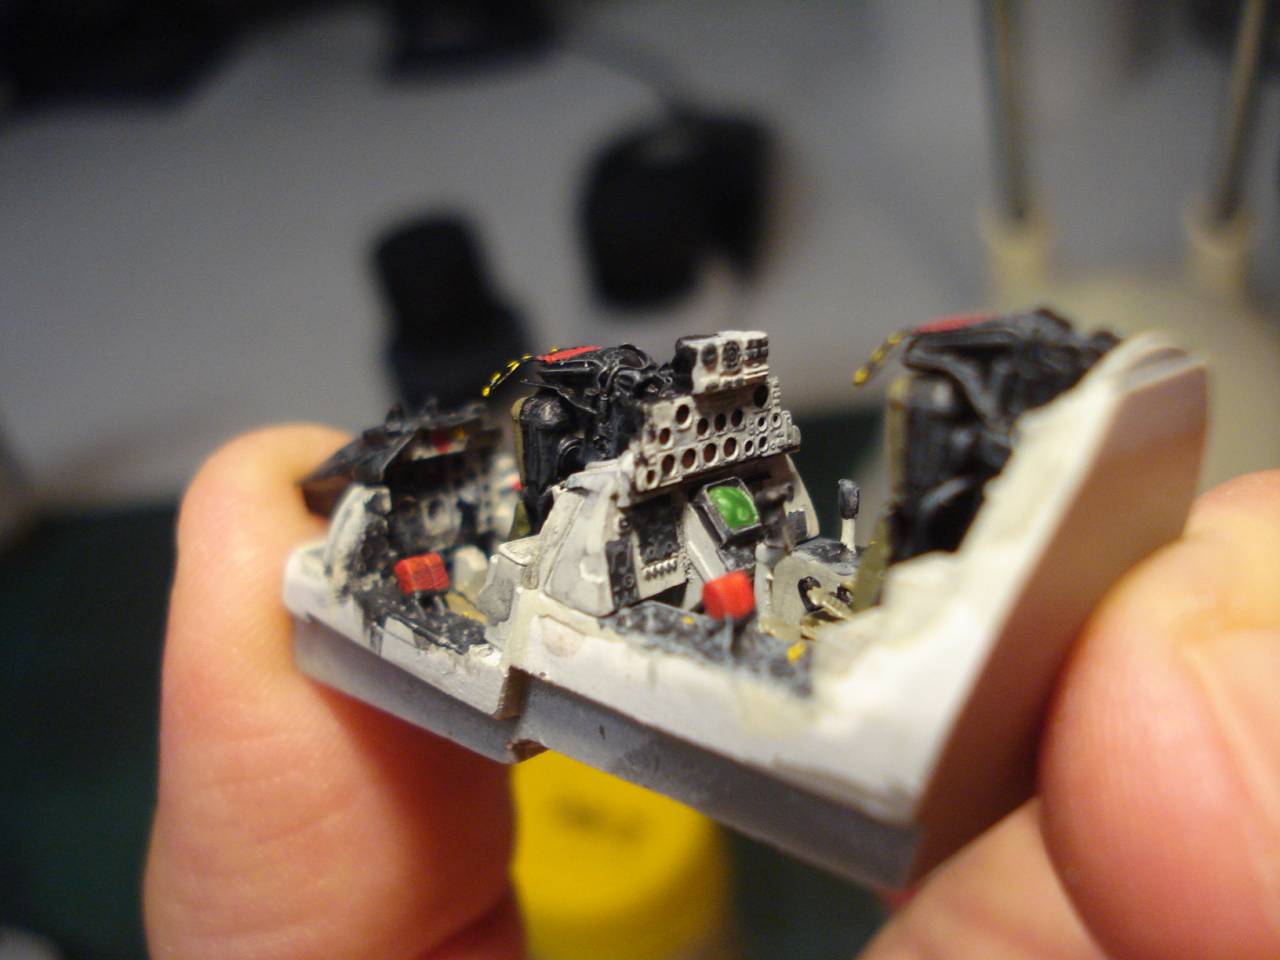
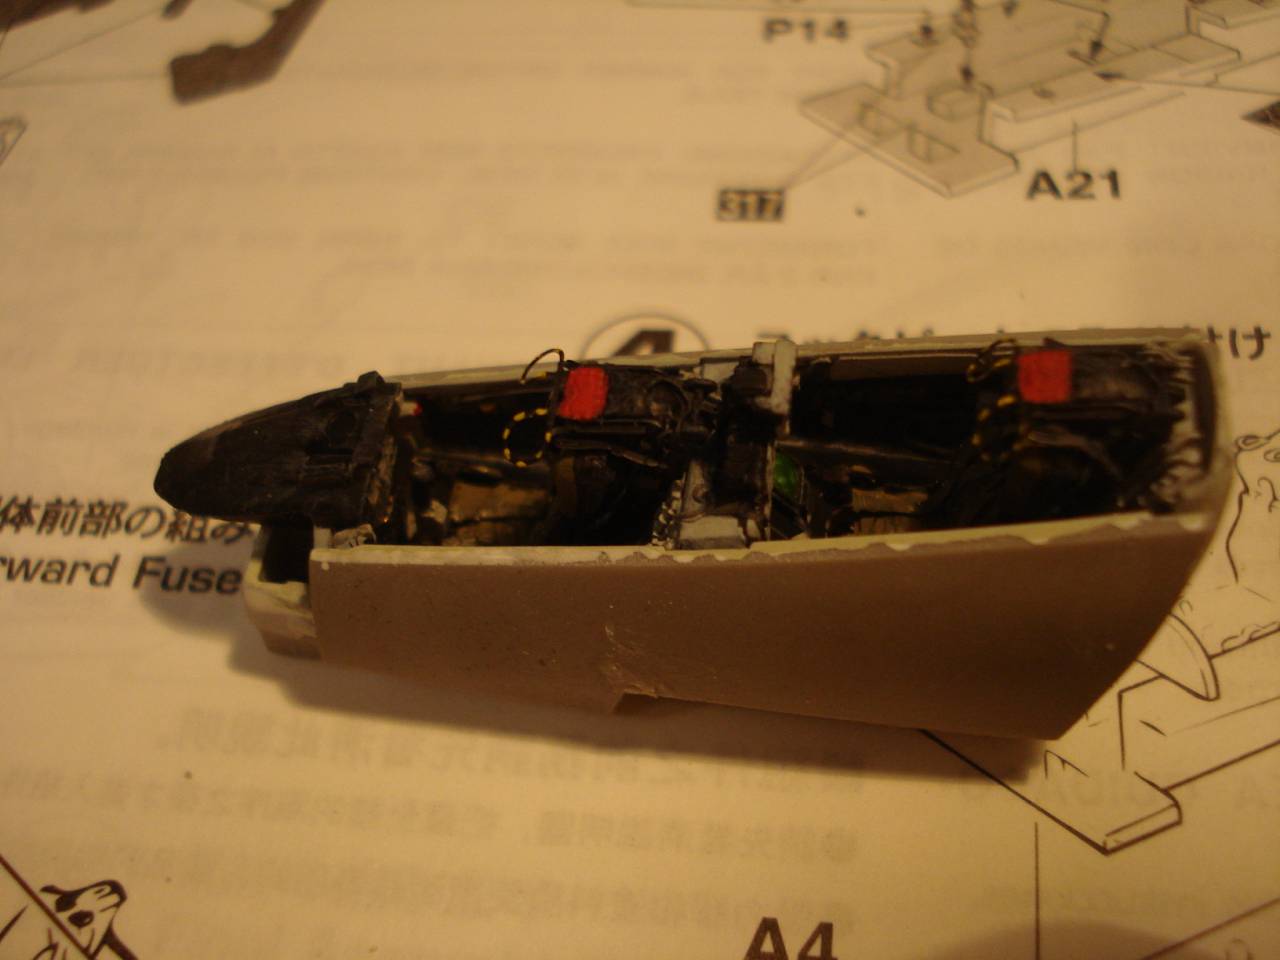
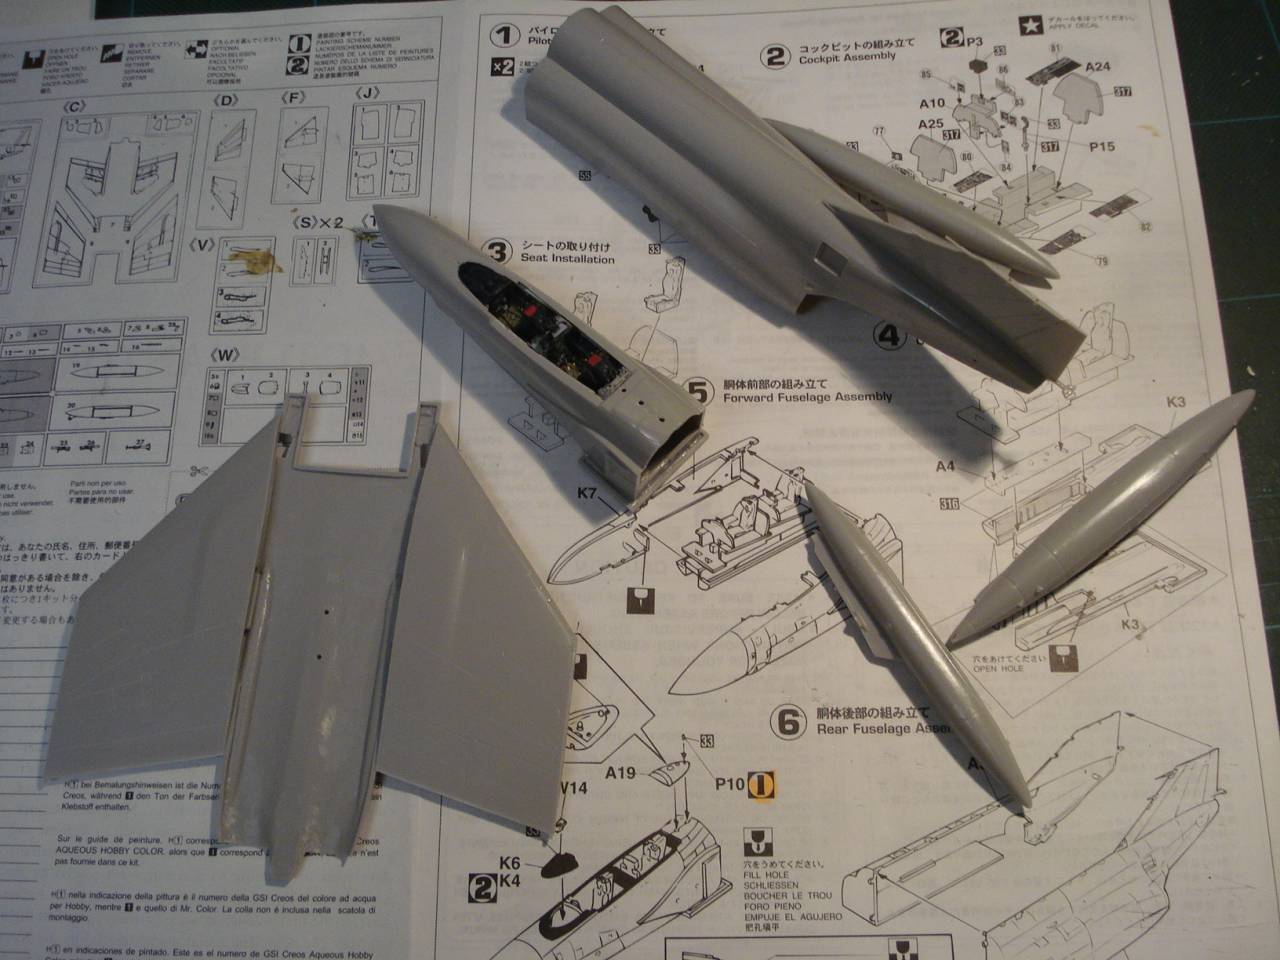
Starting Photo:

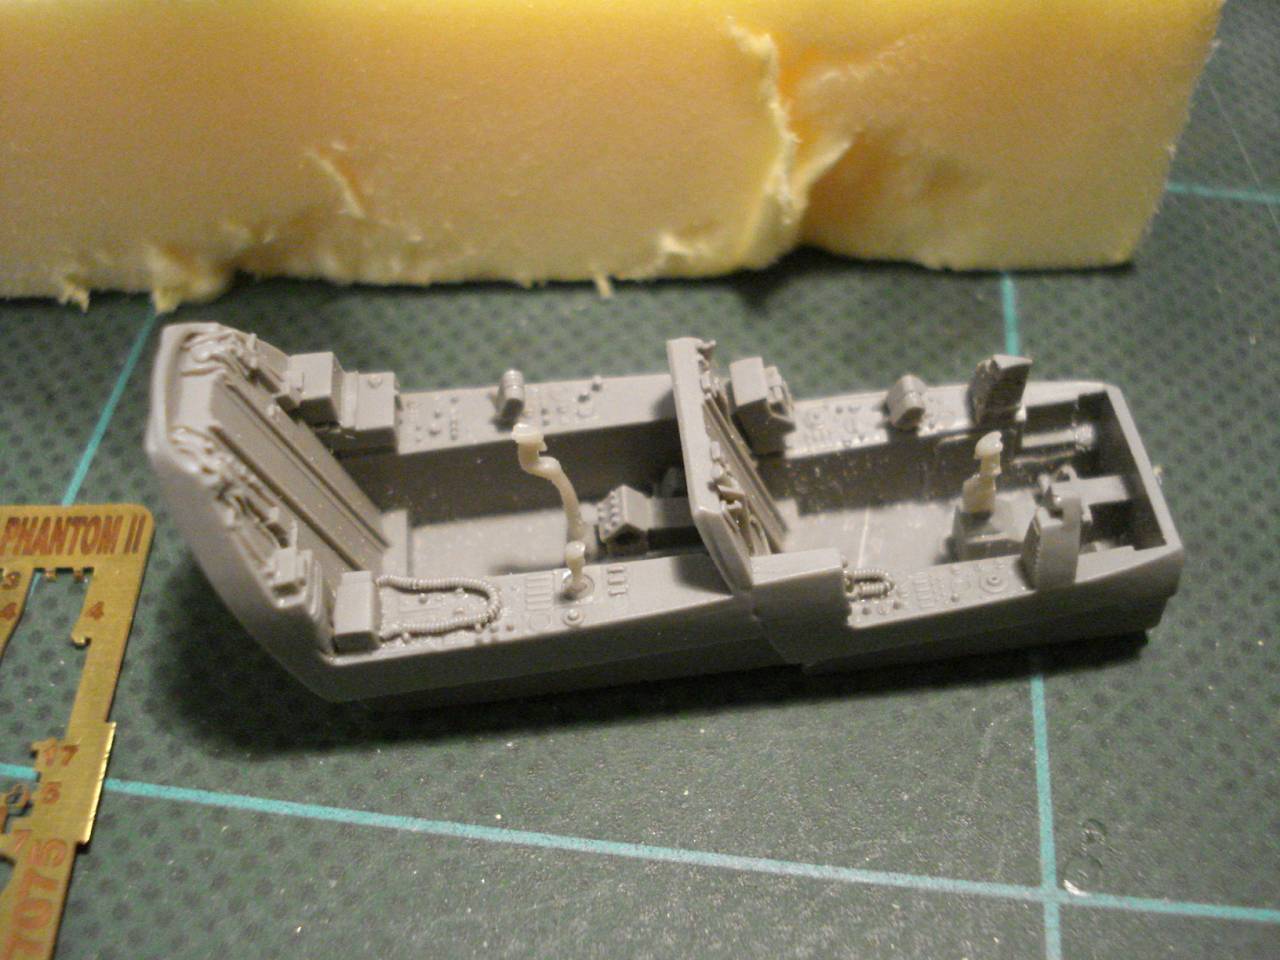
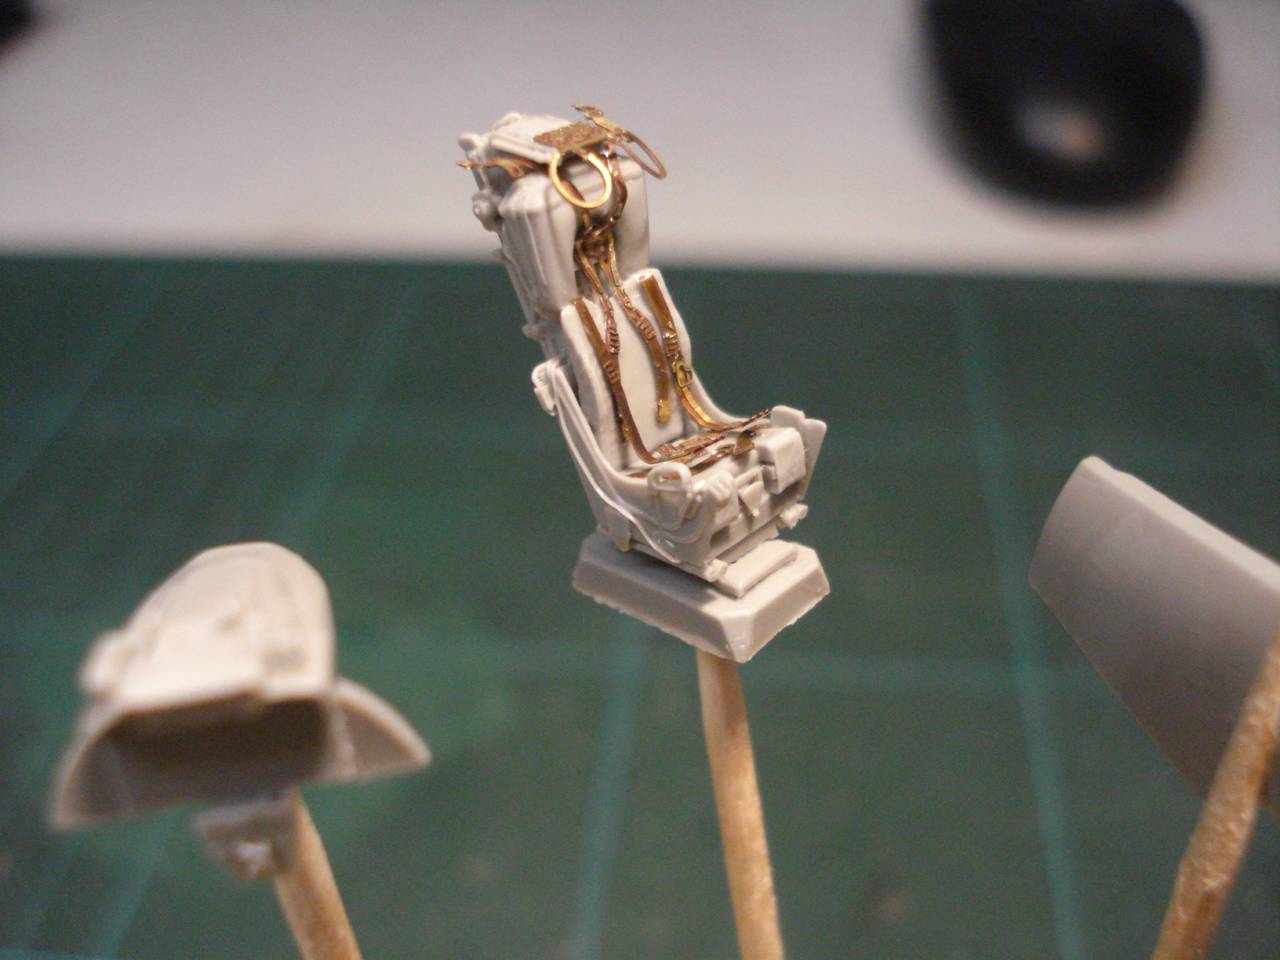
As you can see, I'm using an Aires Cockpit, also a first. It's not really for this version, but I'm hoping the difference will not be too noticeable once everything is fitted...
So for now, the pit is ready and started with the major components. Took quite some effort to make this fit into the Hasegawa kit (it was meant for a Revell kit), bit I finally made it.
Cheers!
Stefan
Some fine work so far! Really like those 3rd gen jets!
I have only two jets in my stash, one being an F-14, the other being a Phantom II. And as it seems you haven't got a Phantom yet, mind if I join you?
As disclaimer, this will be my first jet in 1/72 since I was a young lad, so bear with me here...
Starting Photo:
As you can see, I'm using an Aires Cockpit, also a first. It's not really for this version, but I'm hoping the difference will not be too noticeable once everything is fitted...
So for now, the pit is ready and started with the major components. Took quite some effort to make this fit into the Hasegawa kit (it was meant for a Revell kit), bit I finally made it.
Cheers!
Stefan
MichaelSatin


Joined: January 19, 2008
KitMaker: 3,909 posts
AeroScale: 2,904 posts

Posted: Sunday, August 19, 2018 - 10:22 AM UTC
Some progress on the AMK 1/48 Kfir this weekend:
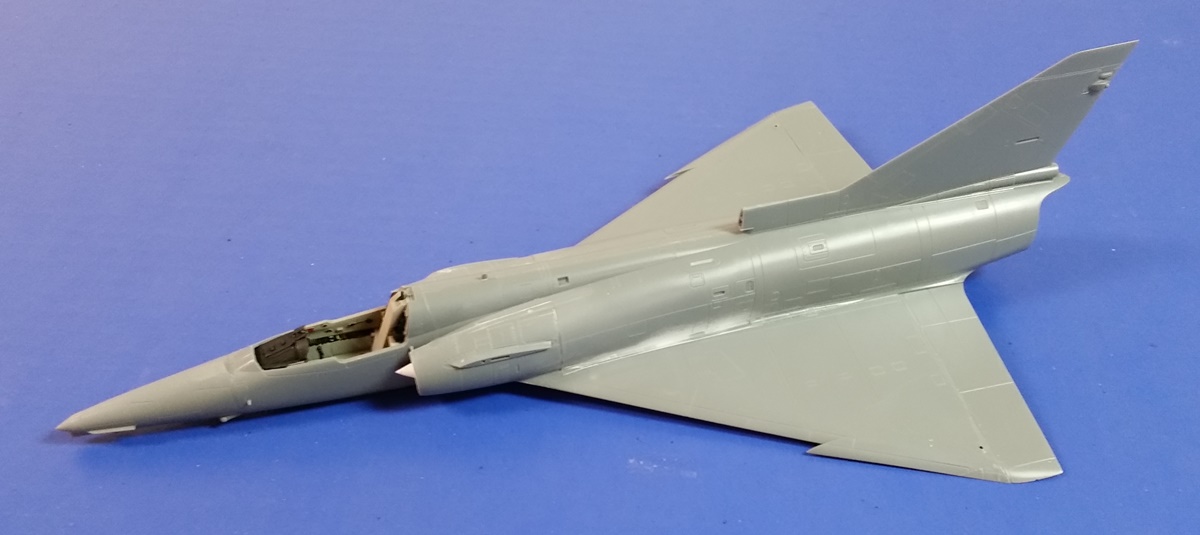
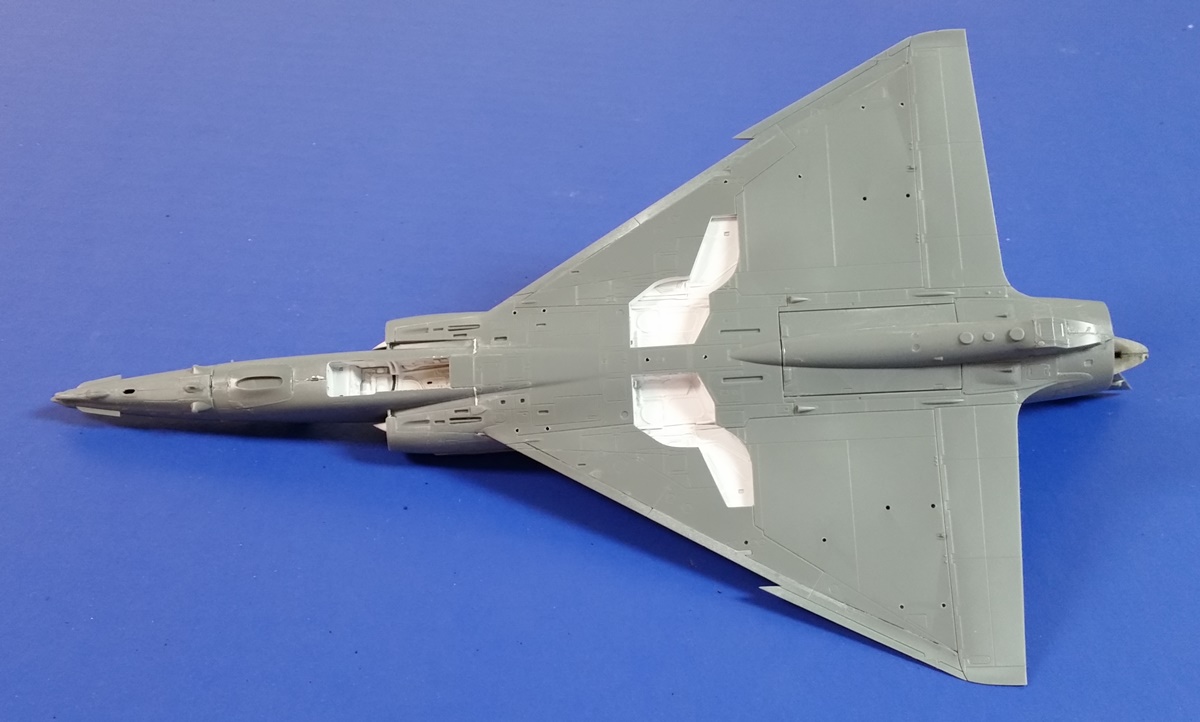
Not bad so far, but some effort required. Fit of the intakes isn't stellar, especially underneath; and the instructions are lacking. They don't tell you to open the holes for the pylons nor to add that big keel panel towards the rear. But hey, we're modelers, right?
Michael


Not bad so far, but some effort required. Fit of the intakes isn't stellar, especially underneath; and the instructions are lacking. They don't tell you to open the holes for the pylons nor to add that big keel panel towards the rear. But hey, we're modelers, right?
Michael


PasiAhopelto

Joined: October 01, 2016
KitMaker: 514 posts
AeroScale: 239 posts

Posted: Sunday, August 26, 2018 - 04:11 AM UTC
Started MiG-21Bis by building and painting exhaust:
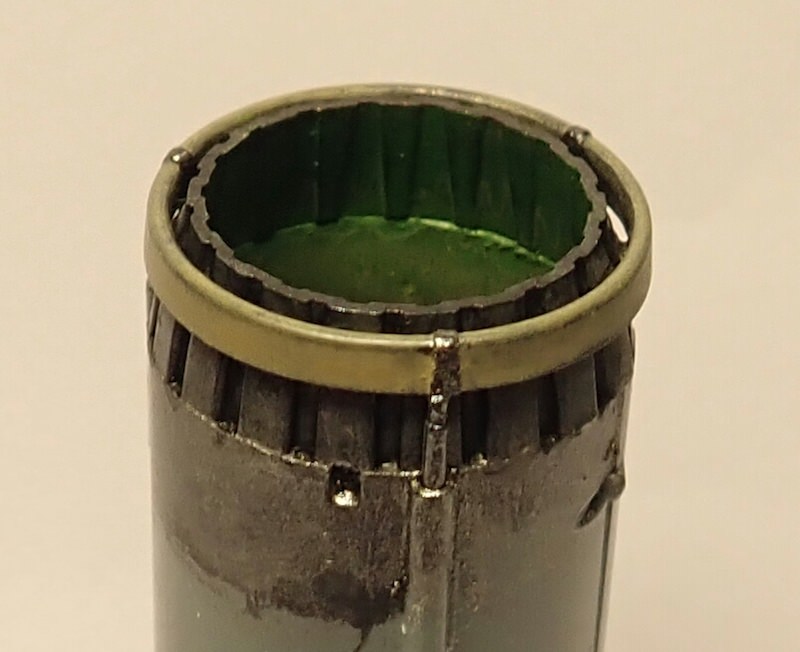
I think the tube right before exhaust nozzle is bit simplified: it should have lengthwise ribs and be divided into rings, and edge of the nozzle is too flat. Eduard's Brassin set seems to get it right, but I'm building this almost OOB.

I think the tube right before exhaust nozzle is bit simplified: it should have lengthwise ribs and be divided into rings, and edge of the nozzle is too flat. Eduard's Brassin set seems to get it right, but I'm building this almost OOB.
Posted: Thursday, August 30, 2018 - 12:15 AM UTC
Would a Vietnam era MiG-21 be eligible for this GB? I have the Eduard Vietnam special edition in my stash. Even though the box doesn’t say so, I think it’s either a PF or a PFM. Thanks 


PasiAhopelto

Joined: October 01, 2016
KitMaker: 514 posts
AeroScale: 239 posts

Posted: Sunday, September 09, 2018 - 12:05 AM UTC
Getting ready to glue fuselage halves:


Nito74

Joined: March 04, 2008
KitMaker: 5,386 posts
AeroScale: 635 posts

Posted: Sunday, September 09, 2018 - 09:59 PM UTC
Quoted Text
Would a Vietnam era MiG-21 be eligible for this GB? I have the Eduard Vietnam special edition in my stash. Even though the box doesn’t say so, I think it’s either a PF or a PFM. Thanks
Yes, no problem.

SHAKY962

Joined: May 21, 2012
KitMaker: 765 posts
AeroScale: 316 posts

Posted: Monday, September 10, 2018 - 10:16 AM UTC
@Michael,
I see a beatiful Delta!!!!!
I see a beatiful Delta!!!!!
LowFiveJoe_2

Joined: December 28, 2017
KitMaker: 47 posts
AeroScale: 43 posts

Posted: Tuesday, September 11, 2018 - 12:05 AM UTC
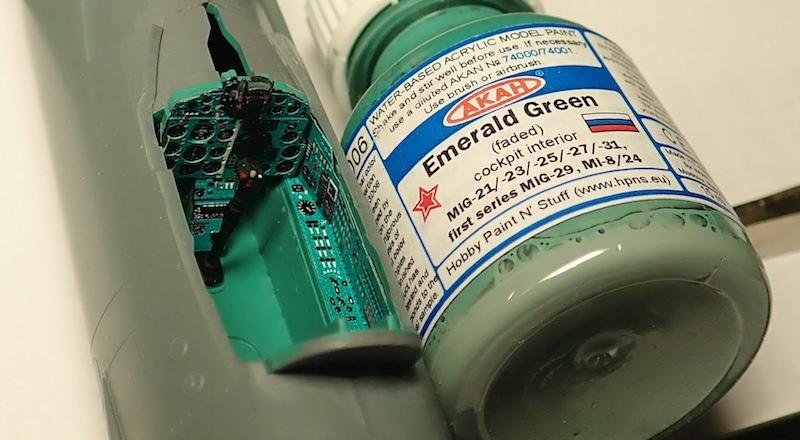
Pasi, I'm following your MiG-21 since I have the 1/72 MF from Eduard. Did yours come with the pre-colored instrument panels? If so, how did you go about matching the interior color?

PasiAhopelto

Joined: October 01, 2016
KitMaker: 514 posts
AeroScale: 239 posts

Posted: Tuesday, September 11, 2018 - 05:46 AM UTC
Joe, I'm using Akan's Emerald Green (faded) for the cockpit, and it's close match but not perfect. Non-faded could be closer. Took a photo to illustrate this:

Posted: Sunday, October 07, 2018 - 09:53 AM UTC
Quoted Text
Yes, no problem.
Thanks for the green light John. I finally managed to get the time to post here as I was swamped at work

The Kit
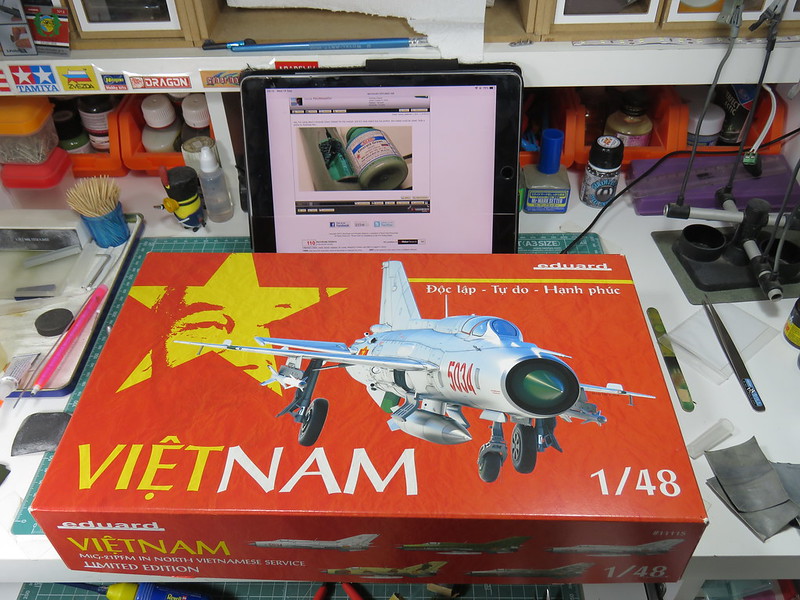
My build is the Eduard Vietnam special edition

The contents of the box
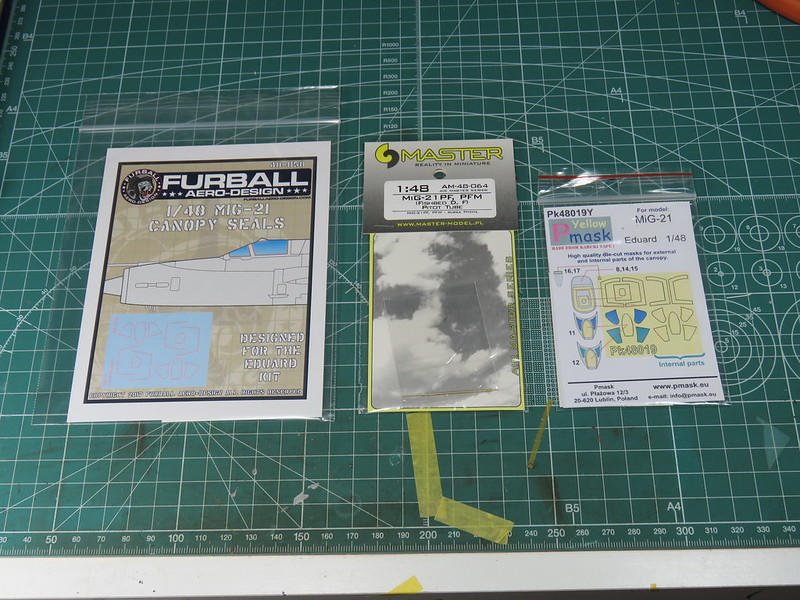
The AM that I'll be using for the build.
The Marking
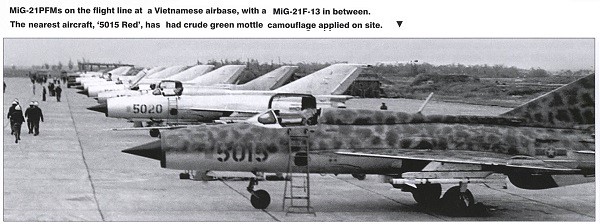
I plan to paint the kit as "5015" of the VPAF's 921st Fighter Regiment. This particular aircraft was allegedly flown by Nguyen Van Coc, the highest scorer of the VPAF in the Vietnam War. There are some debate whether the camo was green on NMF or green top with dark green mottles with an NMF underside. As it's not easy to distinguish the same from the B&W photo, I'm going to use a bit of an artistic liberty and make it green on green with an NMF underside. It looks way too cooler (IMHO
 )
)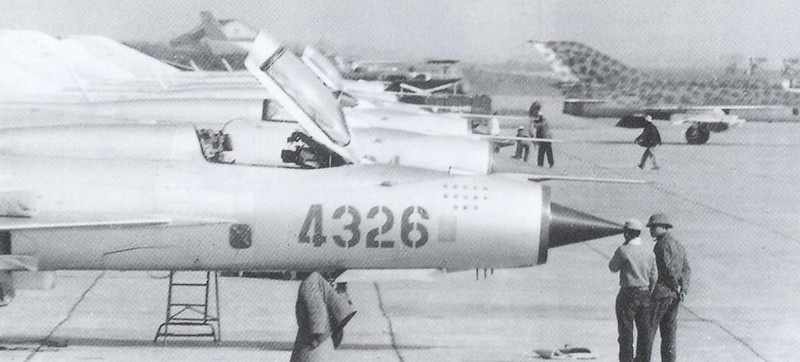

Using the same liberty, I plan to paint the rudder NMF with just the dark green mottles

The Build
I started with the cockpit working in various sub assemblies. Unfortunately I was enjoying the build so much, I forgot to take enough pictures.

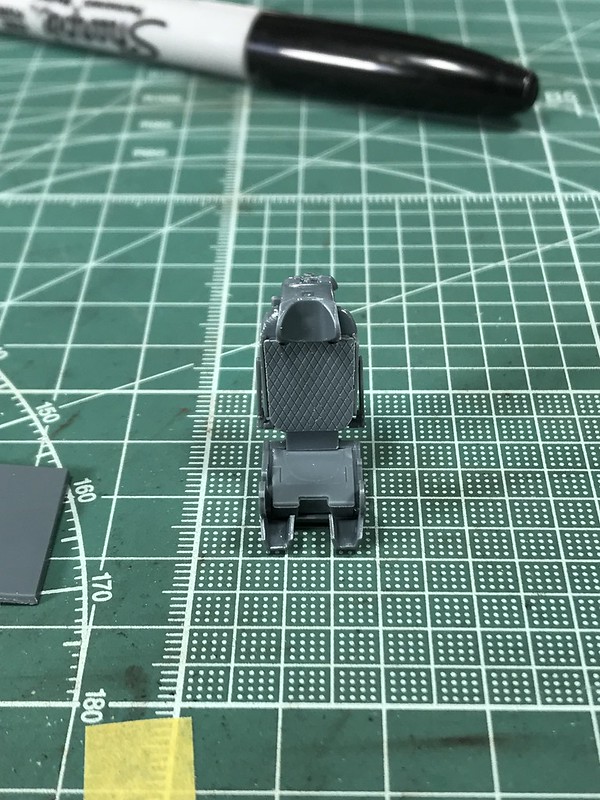
The KM-1 seat assembled....
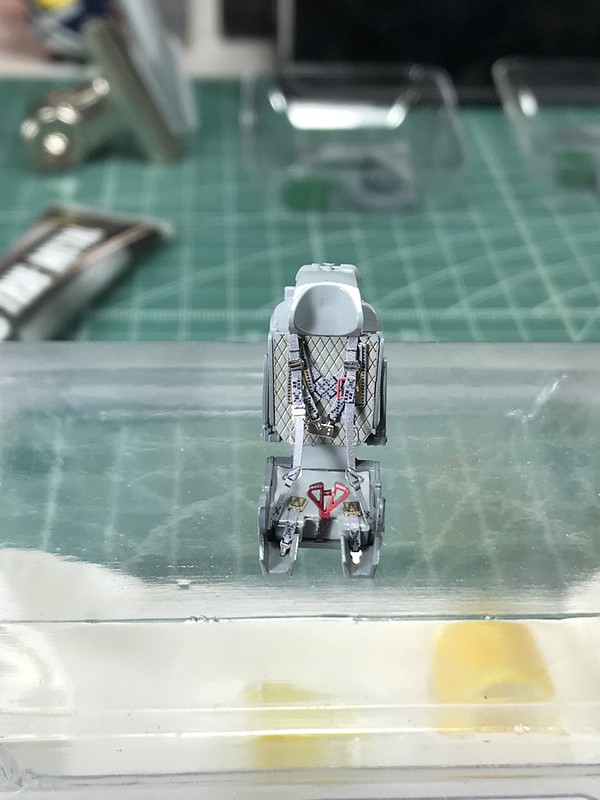
...and painted. The pre-painted PE seatbelts made life so much easier.

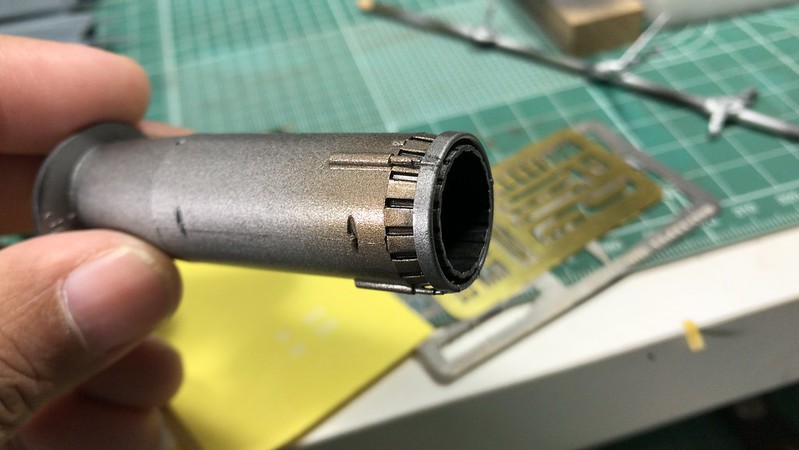
Painted the exhaust tube.
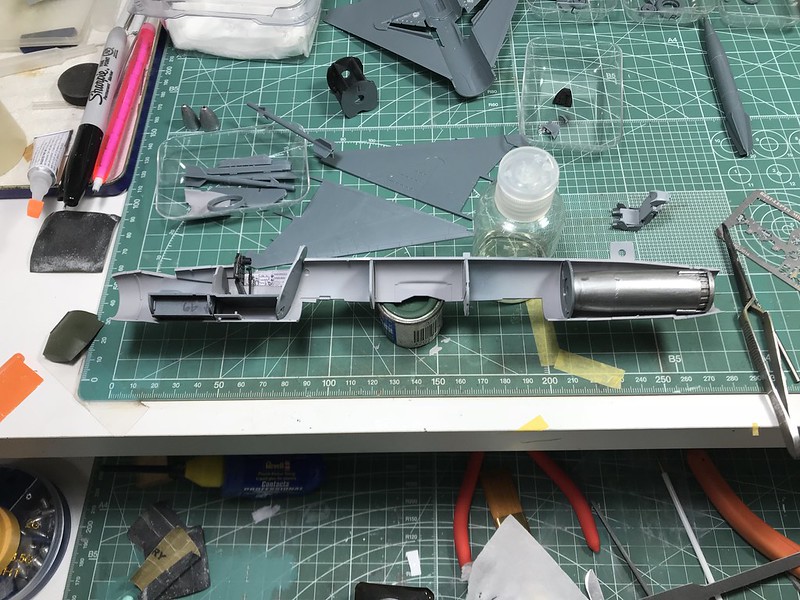
Test fit of the various interior sub assemblies

I painted the mach cone before closing up the fuselage.
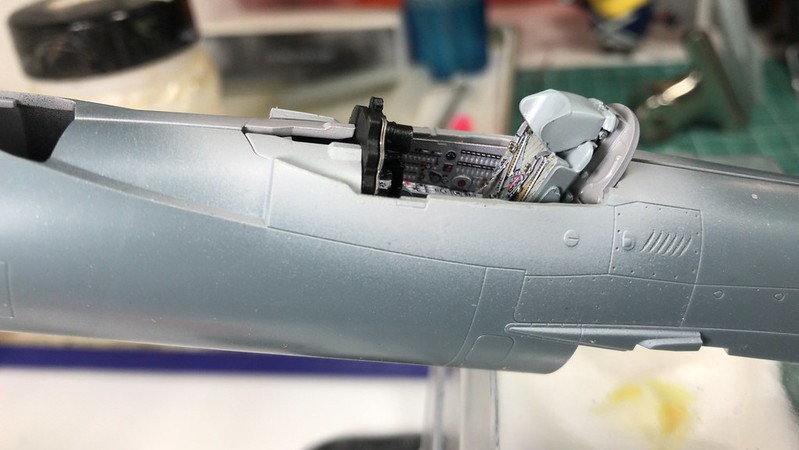
I sealed the fuselage....
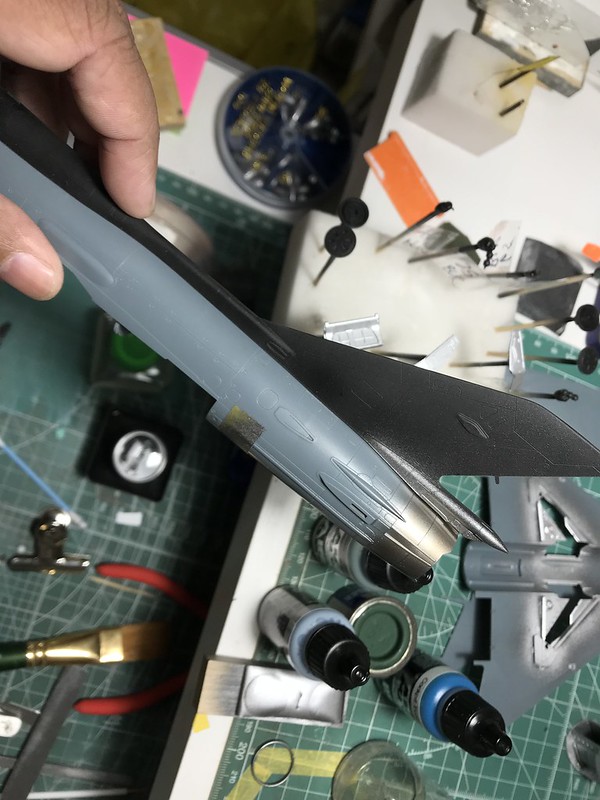
...and painted the exhaust.
I wanted to improve the kit landing lights.

So I bought one of these...

....glued it to the back of the lens using clear part cement...
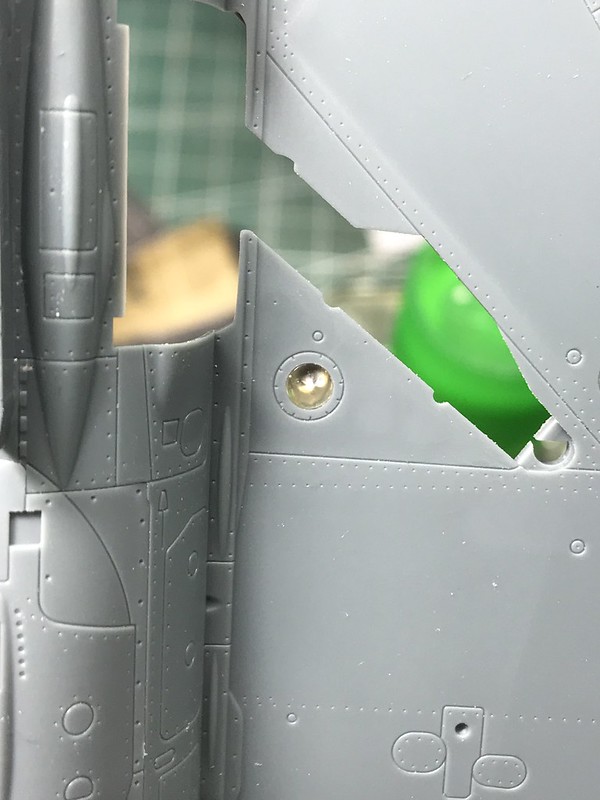
...and this was the final result.

The main gear leg assembly almost made me rage quit


Dryfitting the wings...
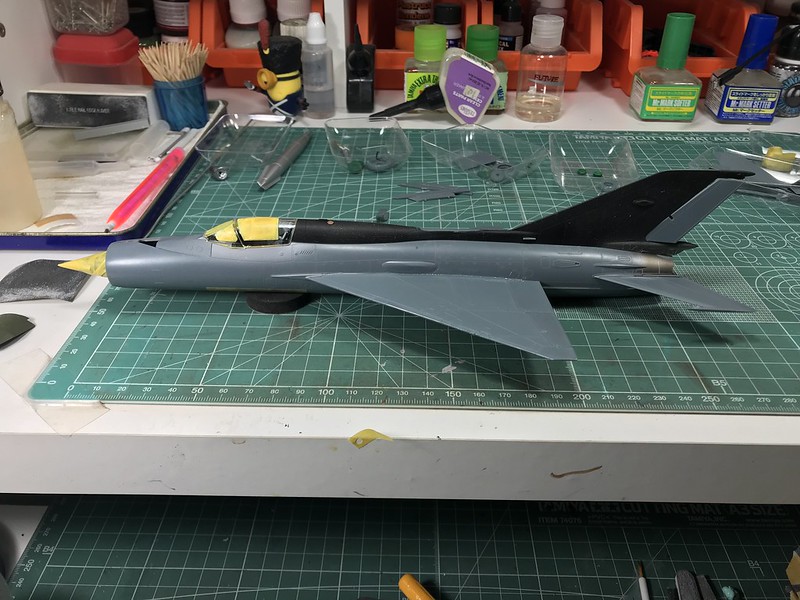
...which were soon glued to the fuselage. I also masked the canopy clear parts in preparation for the painting stage.
Painting
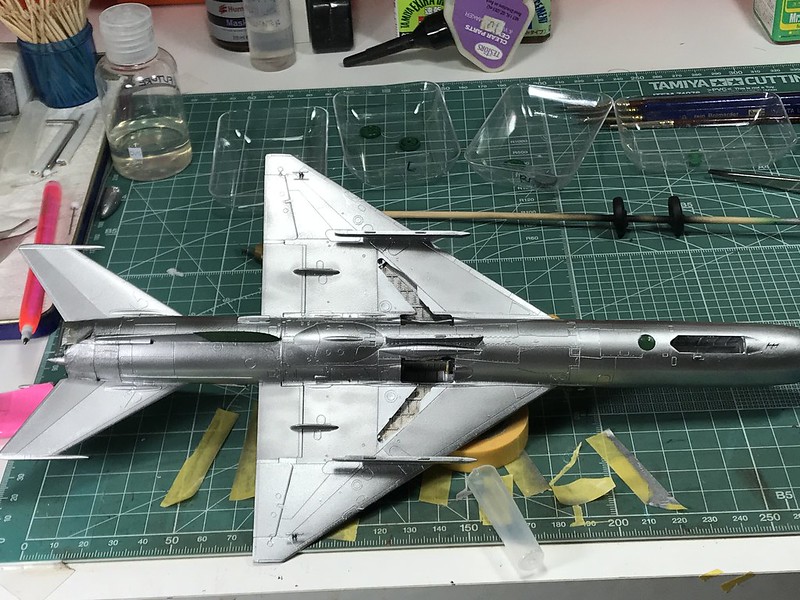
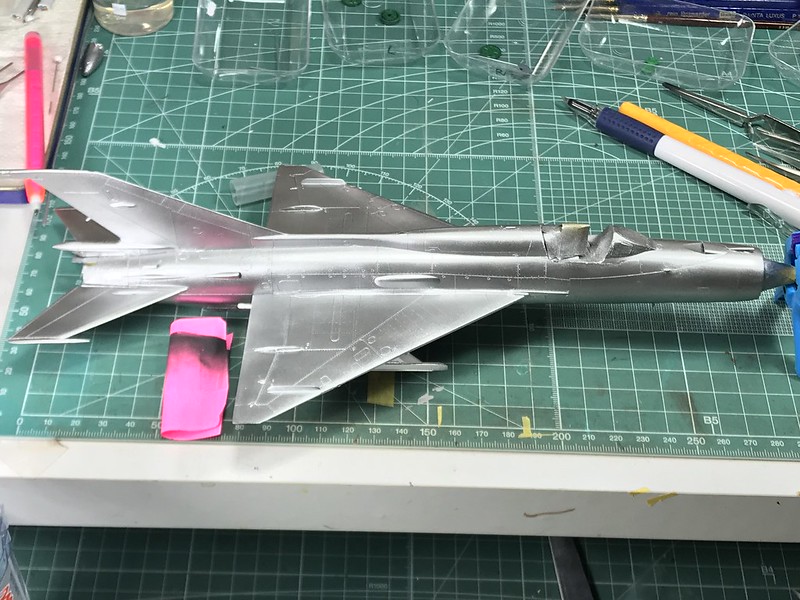
I used AK Interactive Xtreme Metal paints and boy am I in love with them
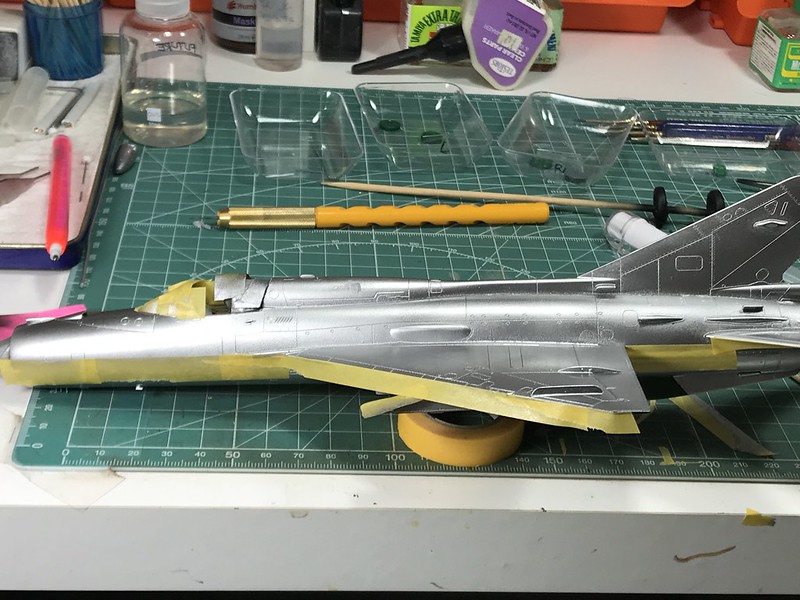
Masked the NMF in preparation for the green top coat
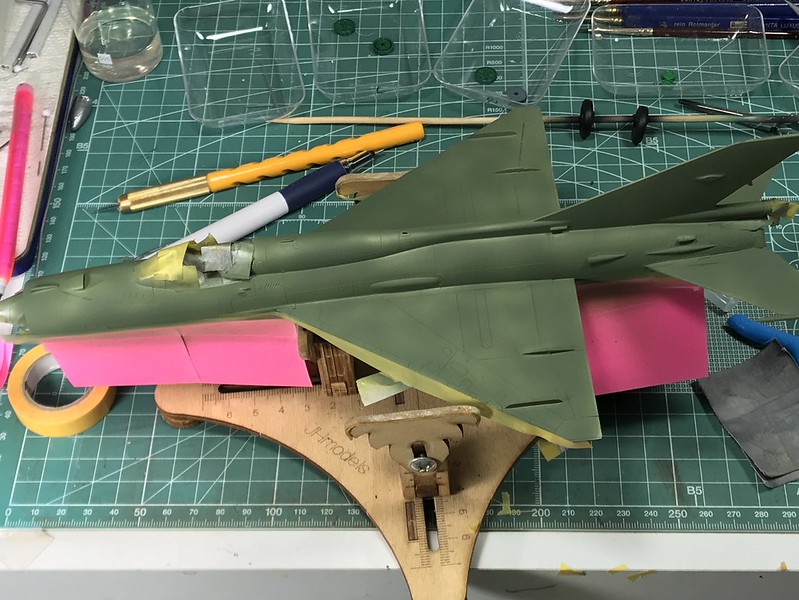
Base coat in on, time for.....
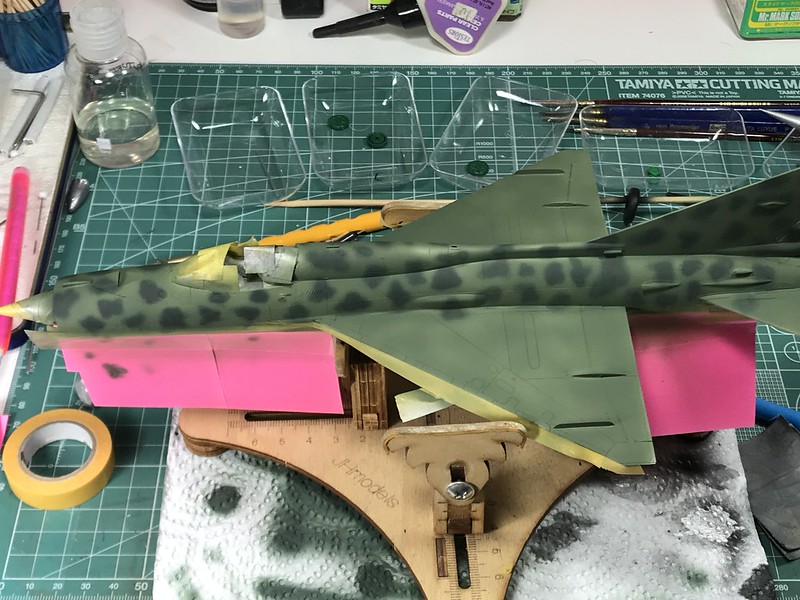


...the mottle camo.
Next up is the decals. The kit comes with "5017" markings, but I wanted to make it "5015" as per the photo.
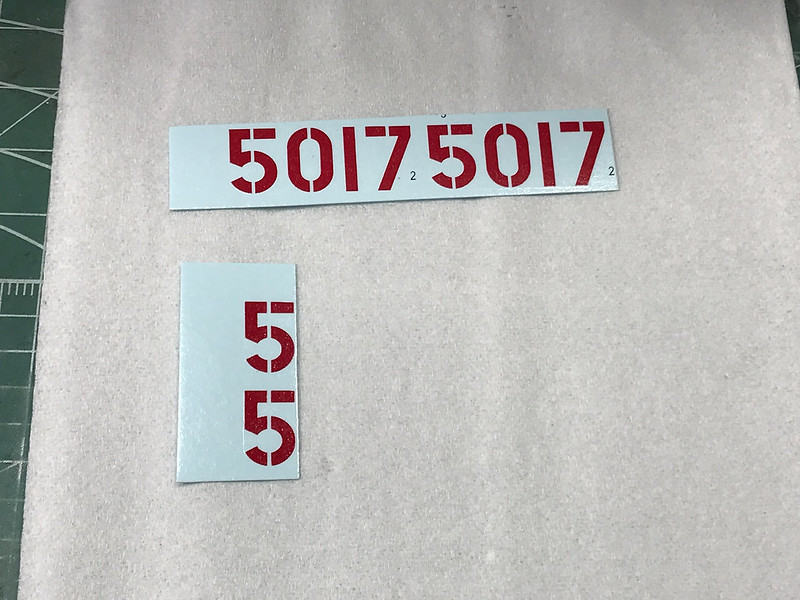
Thankfully the decal sheet has enough spares for "5". Looks like some minor surgery will be needed to make the markings. All that in the next update.
Thanks for watching

Posted: Sunday, October 07, 2018 - 12:22 PM UTC
Due to a change in the Carpet Monster's diet, it ate the DECALS!!??!!. I'm changing my entry tot he Hasegawa 1/72 F-20 Tigershark. With a month and a half to go, it's going to be tight. Fortunately a couple of detail parts are already painted, so that'll speed things up. 
Here it goes.


Here it goes.

MichaelSatin


Joined: January 19, 2008
KitMaker: 3,909 posts
AeroScale: 2,904 posts

Posted: Monday, October 08, 2018 - 02:40 AM UTC
Quoted Text
With a month and a half to go, it's going to be tight. Fortunately a couple of detail parts are already painted, so that'll speed things up.
Here it goes.
You actually have until the end of December, Mark. You can do it!
Michael

MichaelSatin


Joined: January 19, 2008
KitMaker: 3,909 posts
AeroScale: 2,904 posts

Posted: Saturday, October 13, 2018 - 11:53 AM UTC
Looking good so far everyone!
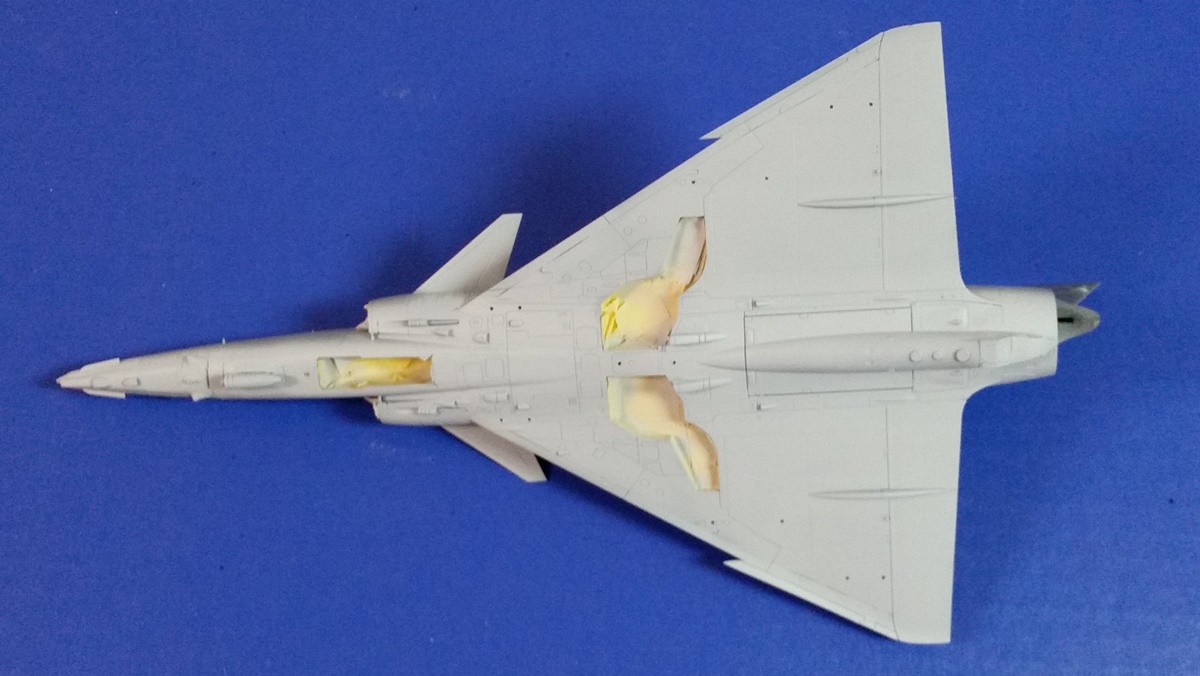
Some progress on the AMK 1/48 Kfir. Bottom is now the correct shade of gray for the C7 courtesy of Vallejo:
Michael
Some progress on the AMK 1/48 Kfir. Bottom is now the correct shade of gray for the C7 courtesy of Vallejo:

Michael

Posted: Monday, October 15, 2018 - 05:17 AM UTC
Wow, disaster almost struck twice on this one campaign.  I've been staring at the instructions for a couple of days, disbelieving that I need to paint both the headrest and the padding on the bang seat gloss red. Internet picture search turned up almost nothing except one artist's cutaway with both pads red. Well, OK, I'm going with a green pad and a red headrest. But wait.... Where's the seat? It's no longer on the sprue, nowhere in the box, ah crap another hanger queen on the same campaign?


A mad scrounge among all of the stray bits of collected parts is turning up nothing. Finally in a canister of parts marked F-105G, there's a lone bang seat already painted with a green pad and a red headrest. But wait, the Thud is already closed up waiting on the paint shop for an SEA camo. This can't be the seat for that plane, it must be the missing F-20 one. Hmm, I guess I already dealt with the color question. Oh well a couple of lost days and I just need to paint the one handed pilot to finish the cockpit.
 I've been staring at the instructions for a couple of days, disbelieving that I need to paint both the headrest and the padding on the bang seat gloss red. Internet picture search turned up almost nothing except one artist's cutaway with both pads red. Well, OK, I'm going with a green pad and a red headrest. But wait.... Where's the seat? It's no longer on the sprue, nowhere in the box, ah crap another hanger queen on the same campaign?


A mad scrounge among all of the stray bits of collected parts is turning up nothing. Finally in a canister of parts marked F-105G, there's a lone bang seat already painted with a green pad and a red headrest. But wait, the Thud is already closed up waiting on the paint shop for an SEA camo. This can't be the seat for that plane, it must be the missing F-20 one. Hmm, I guess I already dealt with the color question.
 Oh well a couple of lost days and I just need to paint the one handed pilot to finish the cockpit.

Buckeye198

Joined: May 02, 2010
KitMaker: 596 posts
AeroScale: 197 posts

Posted: Friday, October 19, 2018 - 01:56 AM UTC
As usual, it's been a while since I've given an update, so this is gonna be a long one...kinda like Raj's update, but WAY less impressive than his build! 
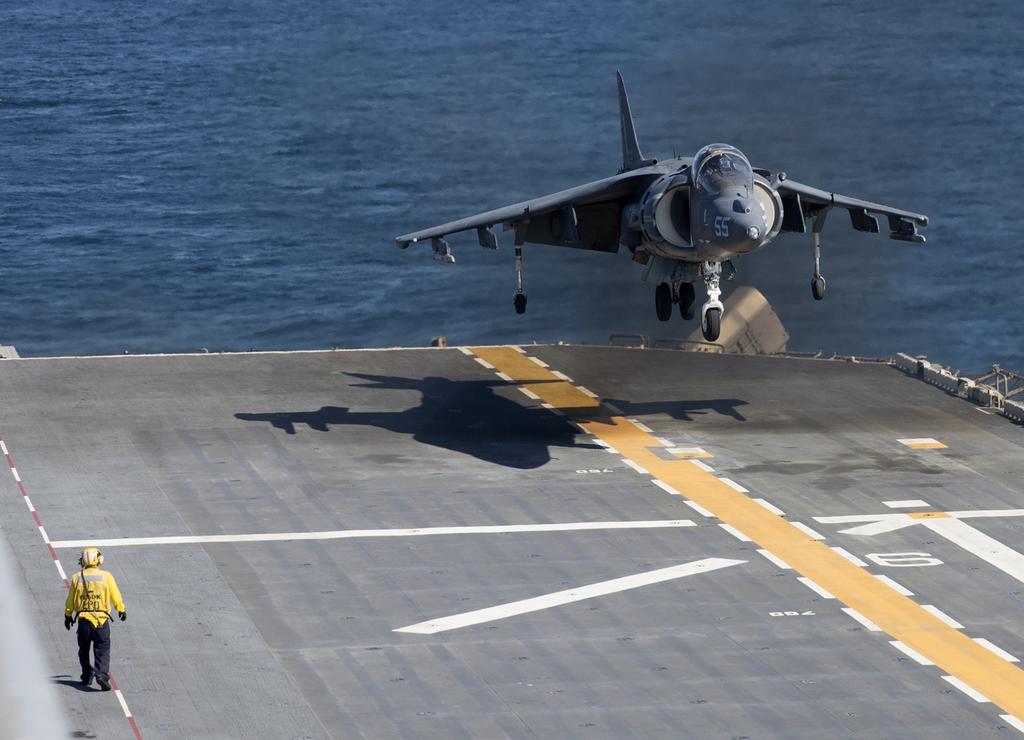
This is my goal for the build. I'm aiming for a dio of the Harrier landing on an LHA/LHD. I'm planning out the deck now, the deck crew is complete, and I think I have a good strategy for suspending the Harrier mid-air.
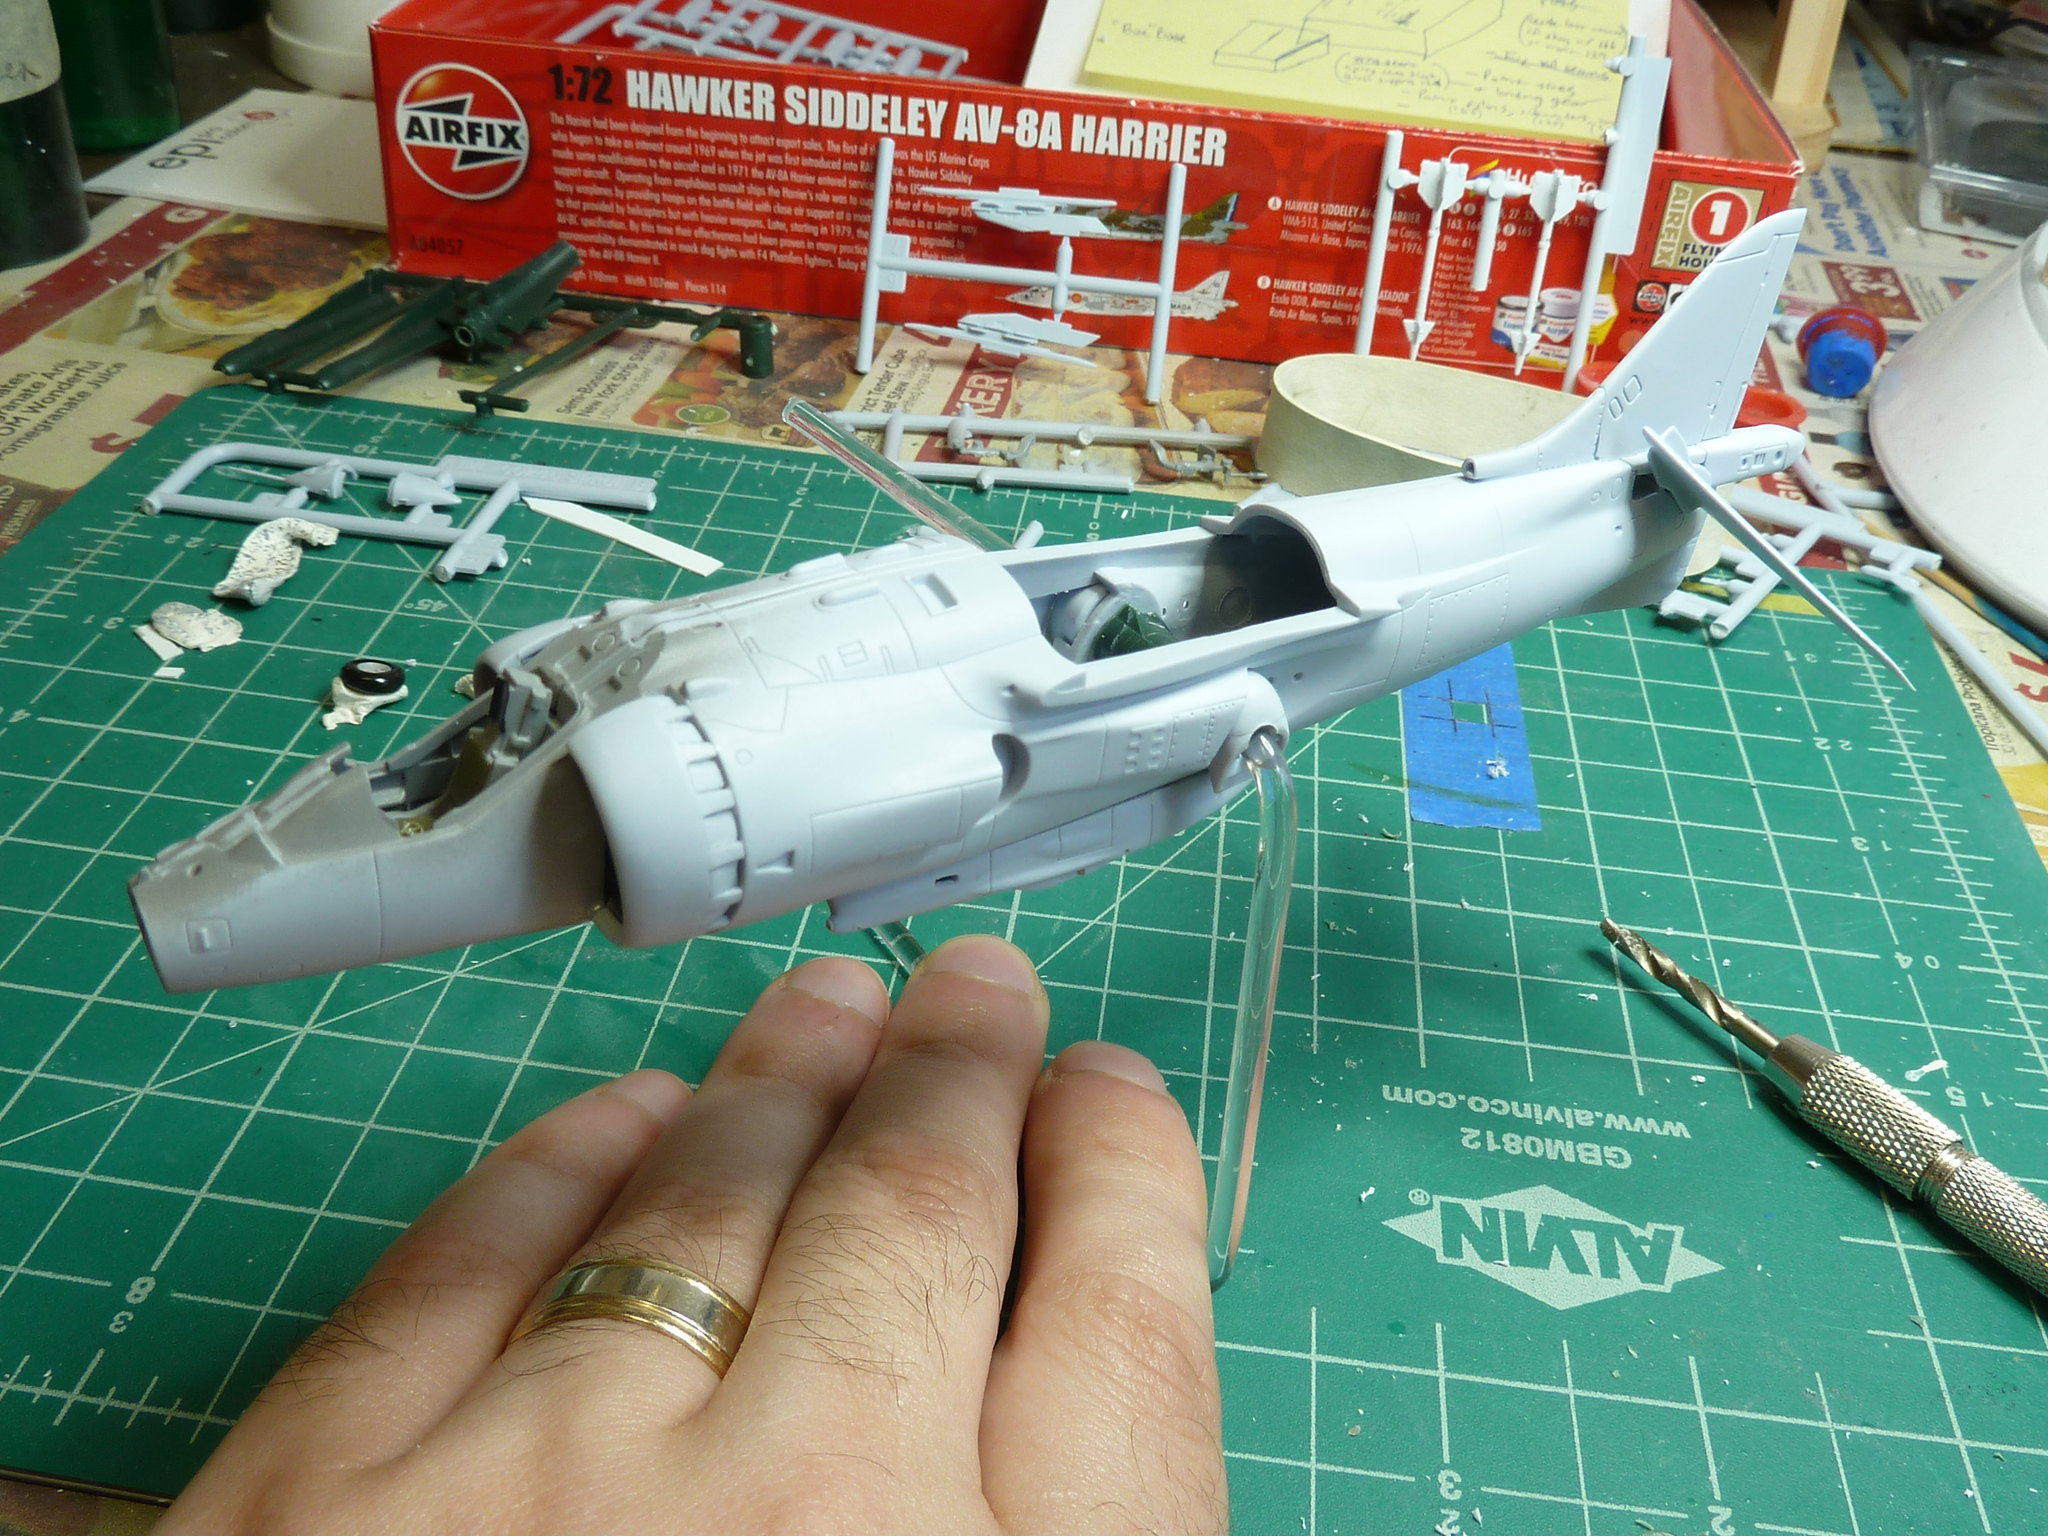
I took clear acrylic rod, softened it over a flame, then bent it around a Testors paint jar. Given the Harrier's unique exhaust ports, there wasn't really a central option to install the rod. Instead I planned to stick the rod through the rear exhausts, which ideally will be concealed pretty well by the pylons and armament. To add some structural support, I dug through the spares box for a thick missile which I trimmed to fit between the exhausts internally.
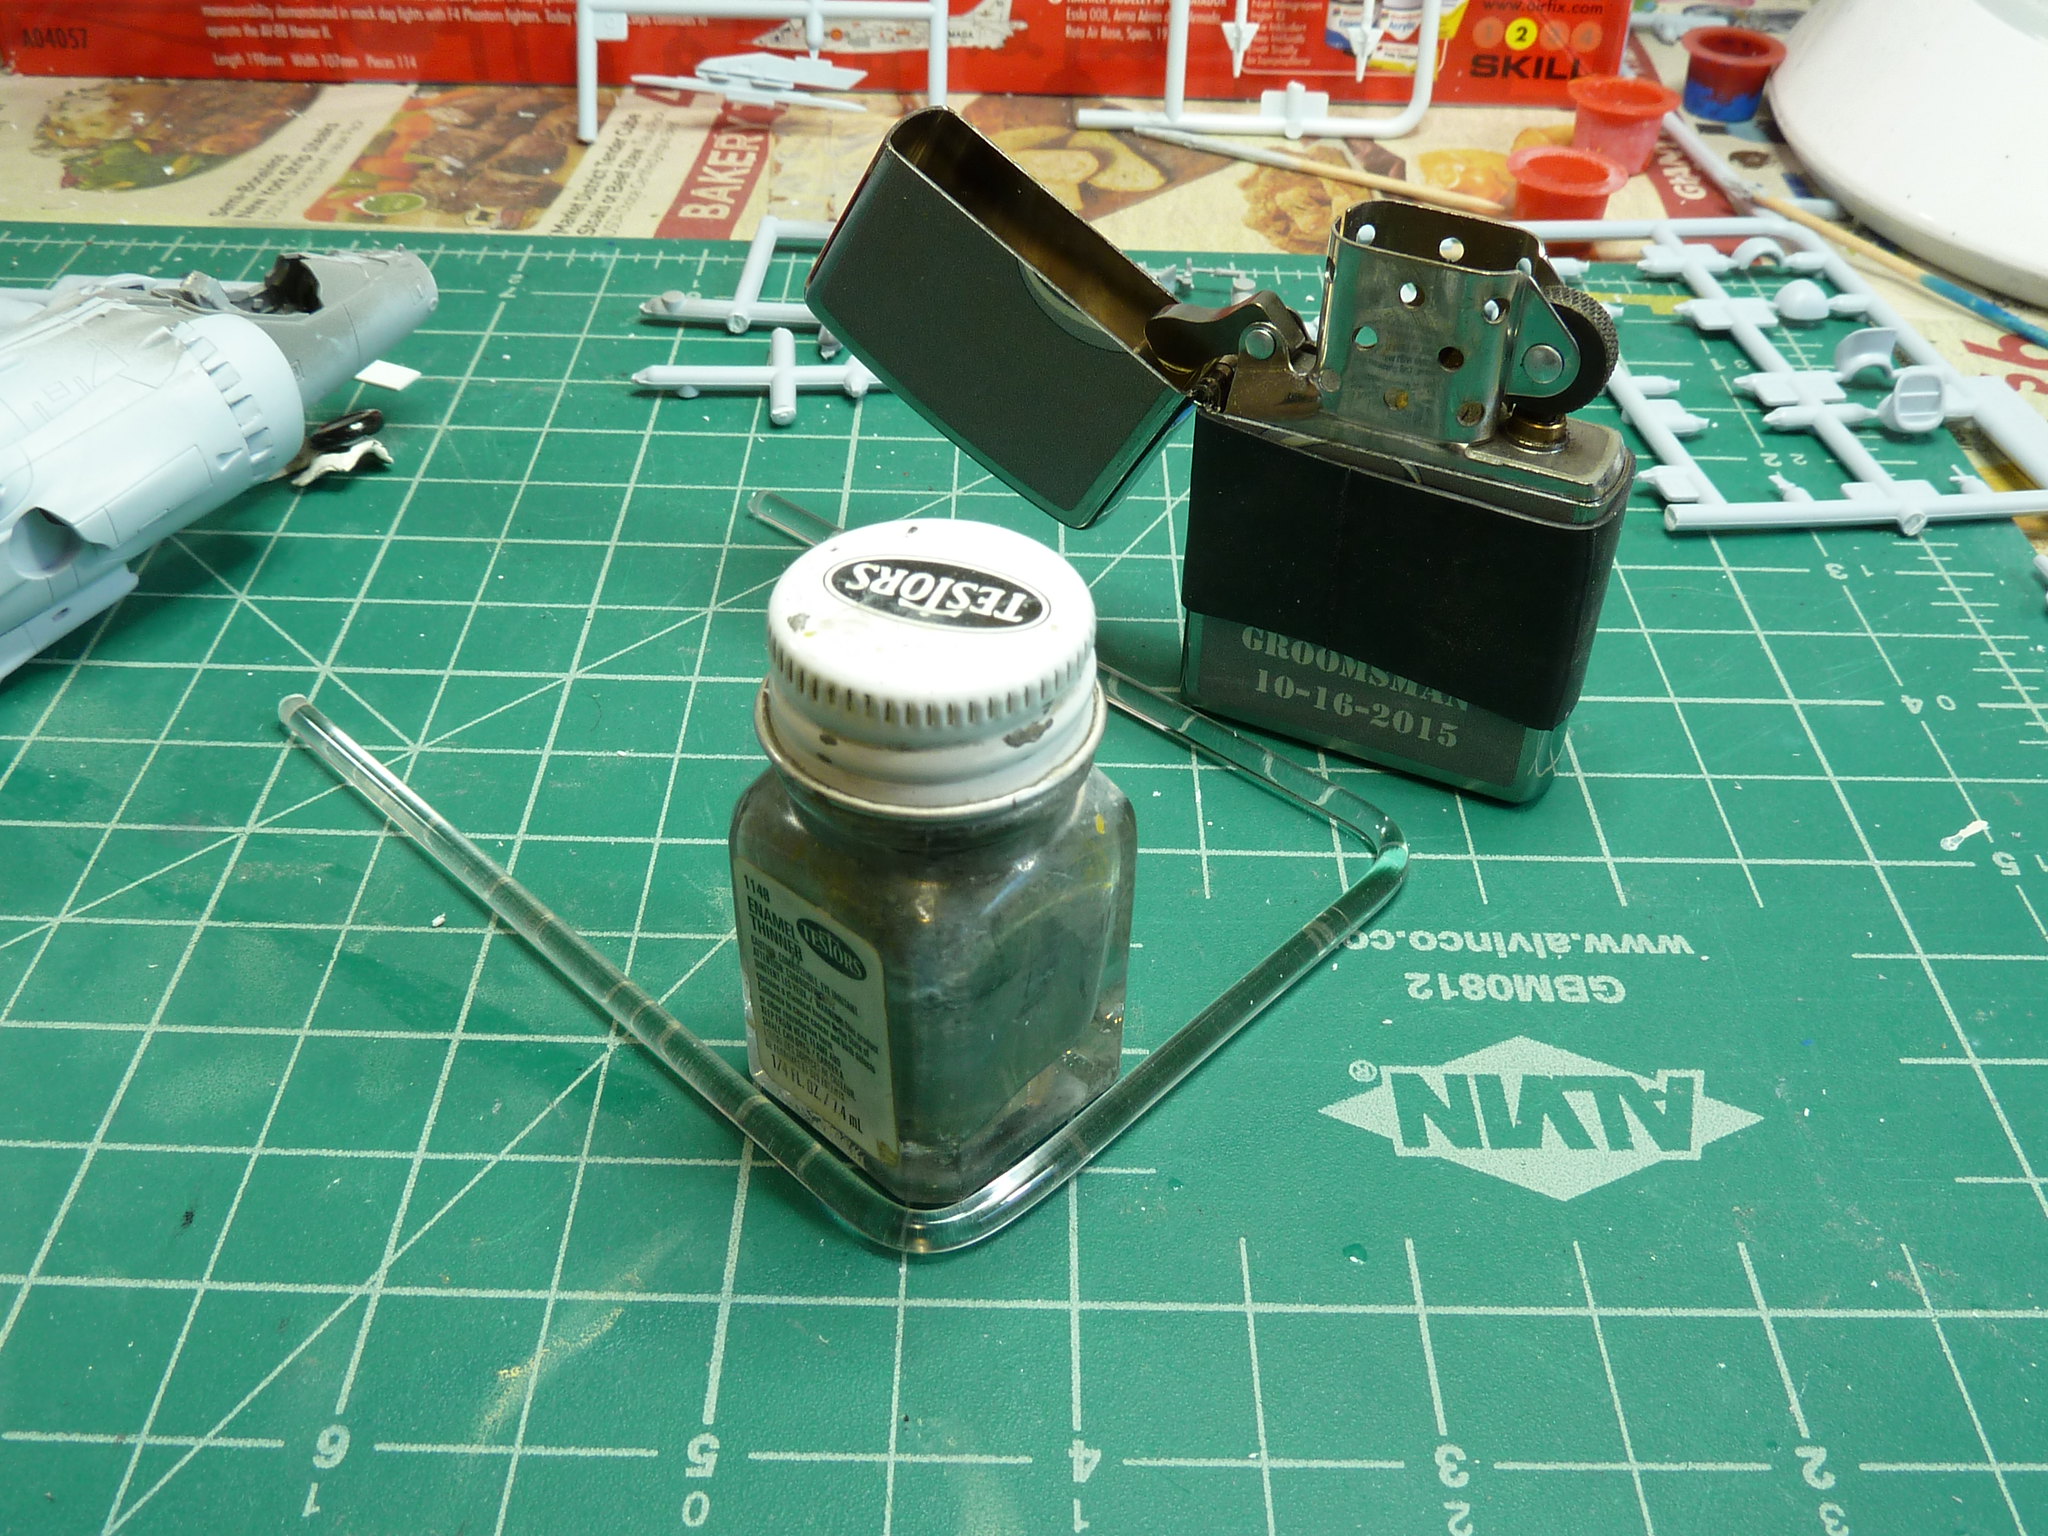
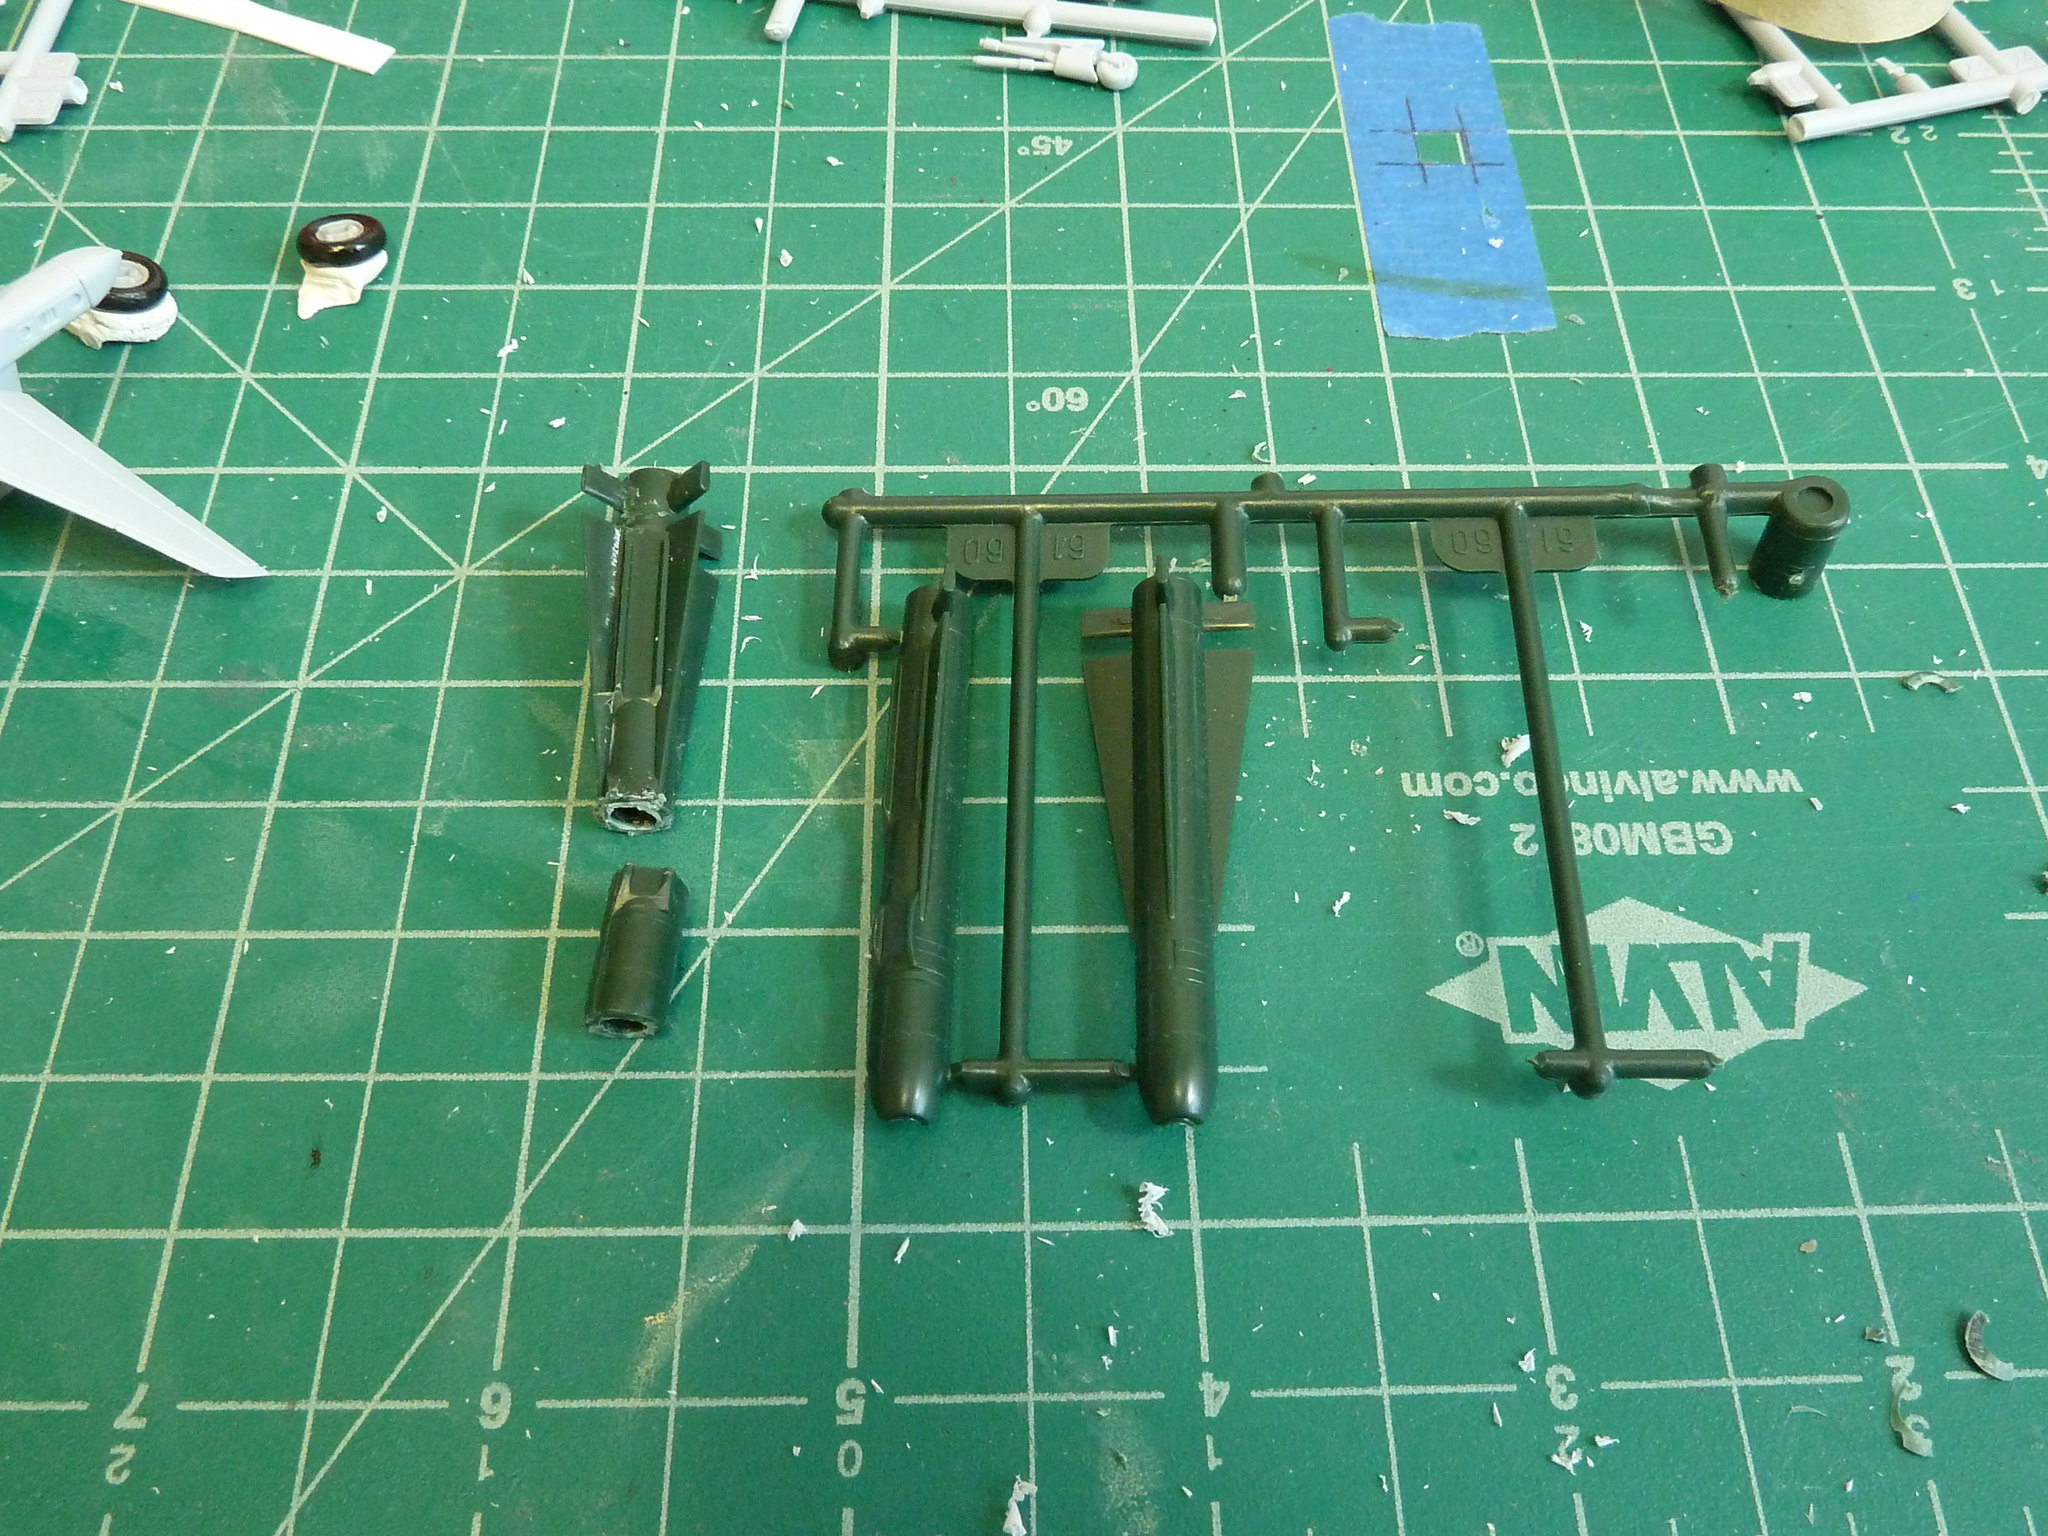
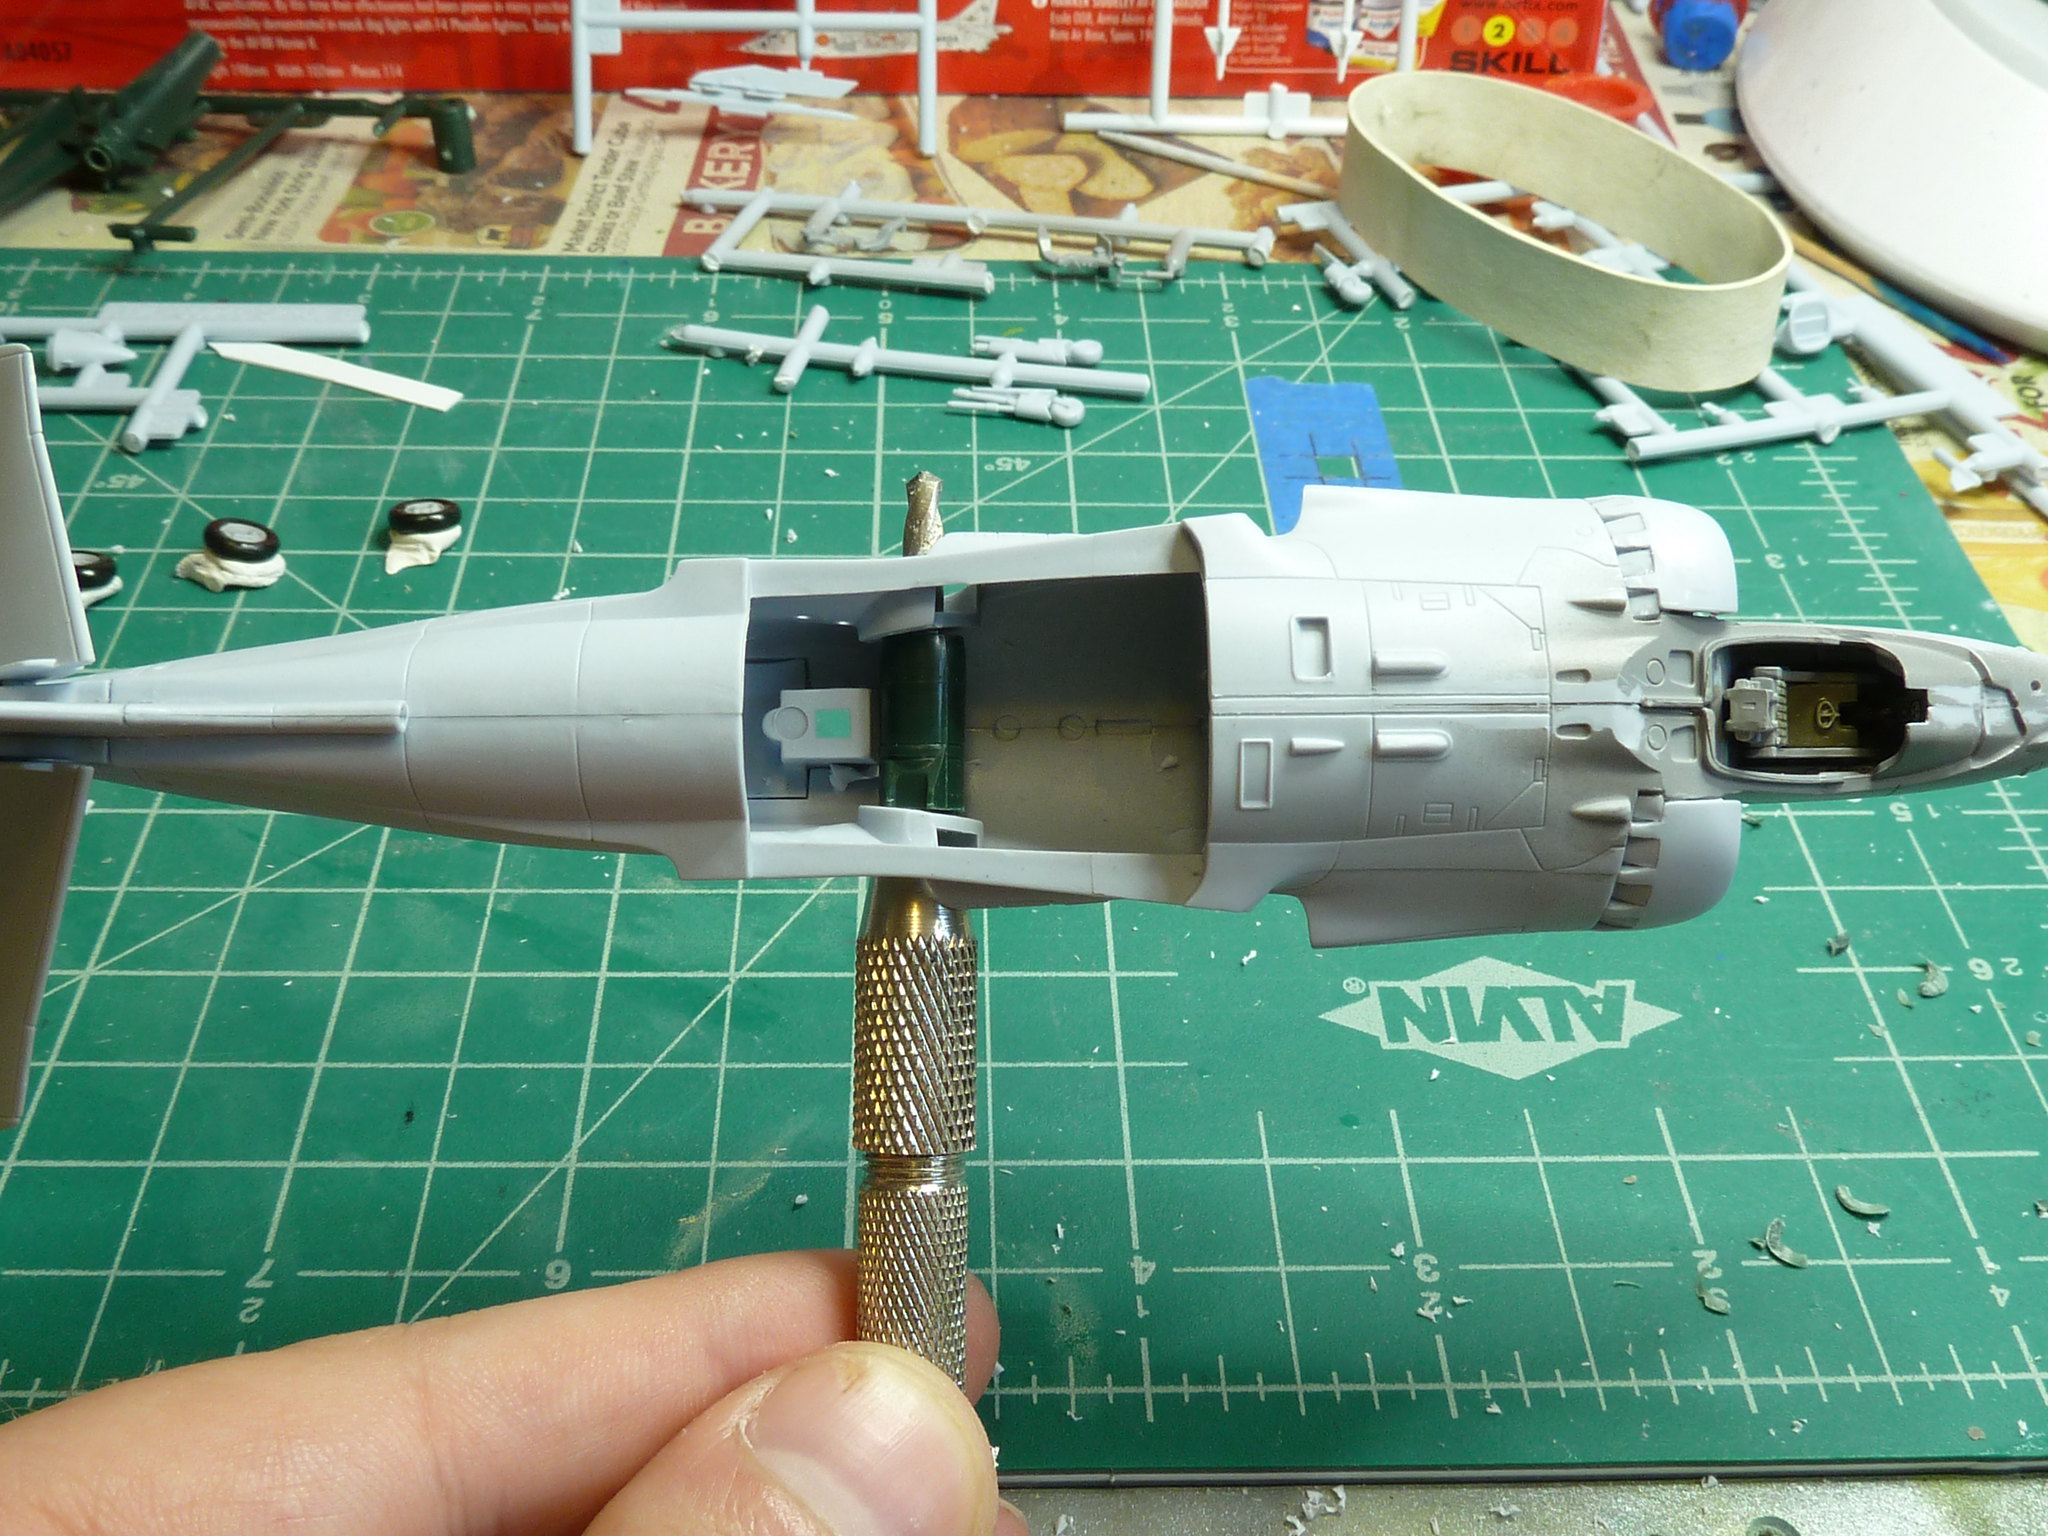
Initially I wasn't sure if I'd need one or two support rods, but it actually seemed very stable with just the one! That should make the display a bit more impressive
I found some good reviews for this, "Canopy Survival Kit". Basically it's like a free-form Eduard mask set...three sheets of precut shapes that you can modify to fit pretty much any canopy shape you come across. They come in that familiar yellow tape material as well as a clear vinyl. I got the latter for a better price, but I'm not sure it adheres as well as the yellow tape. I guess we'll see in a bit... At any rate, I masked with the Survival Kit and MicroMask.

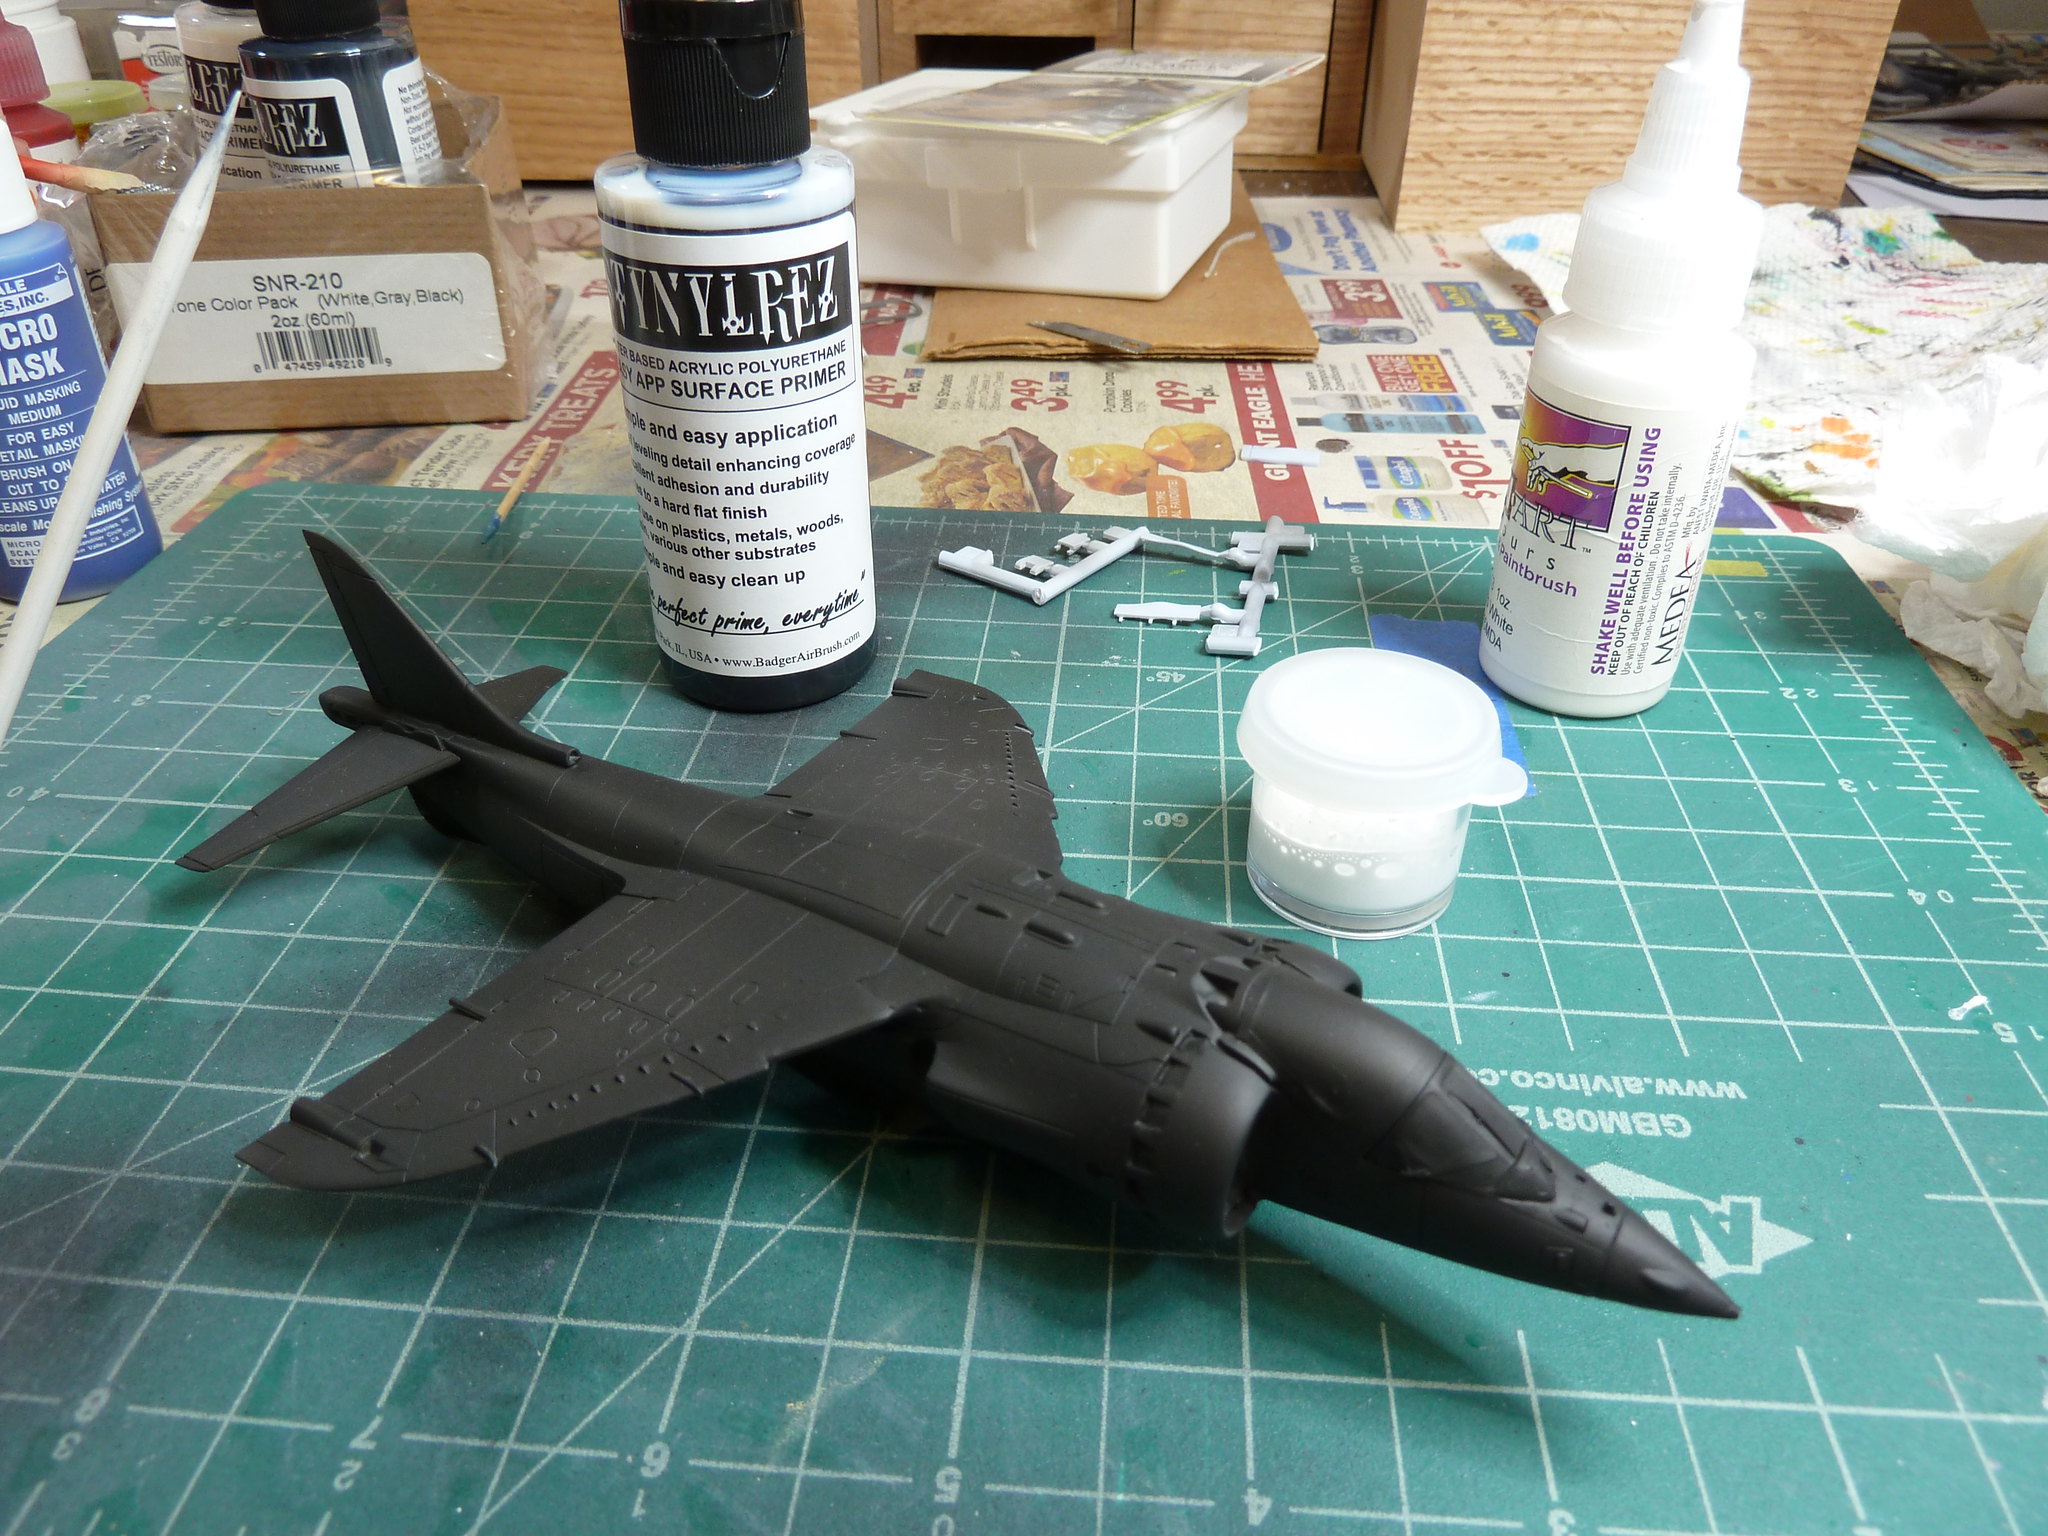
I also splurged on a good primer. Stynylrez...stupid name, great paint. This time around I'm trying the black-basing technique. Basically, instead of priming light and darkening panel lines, you prime dark and lighten the panels between the lines. I think in 1/72 scale, it's easier to mottle solid panels rather than trace the panel lines. I didn't get the best picture, but I think it still gets the point across.
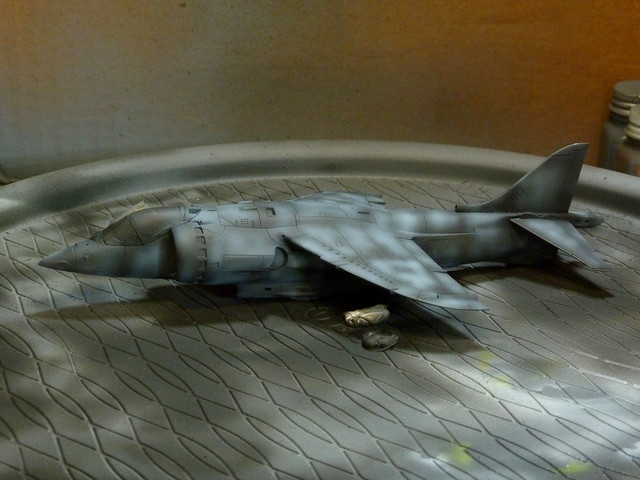
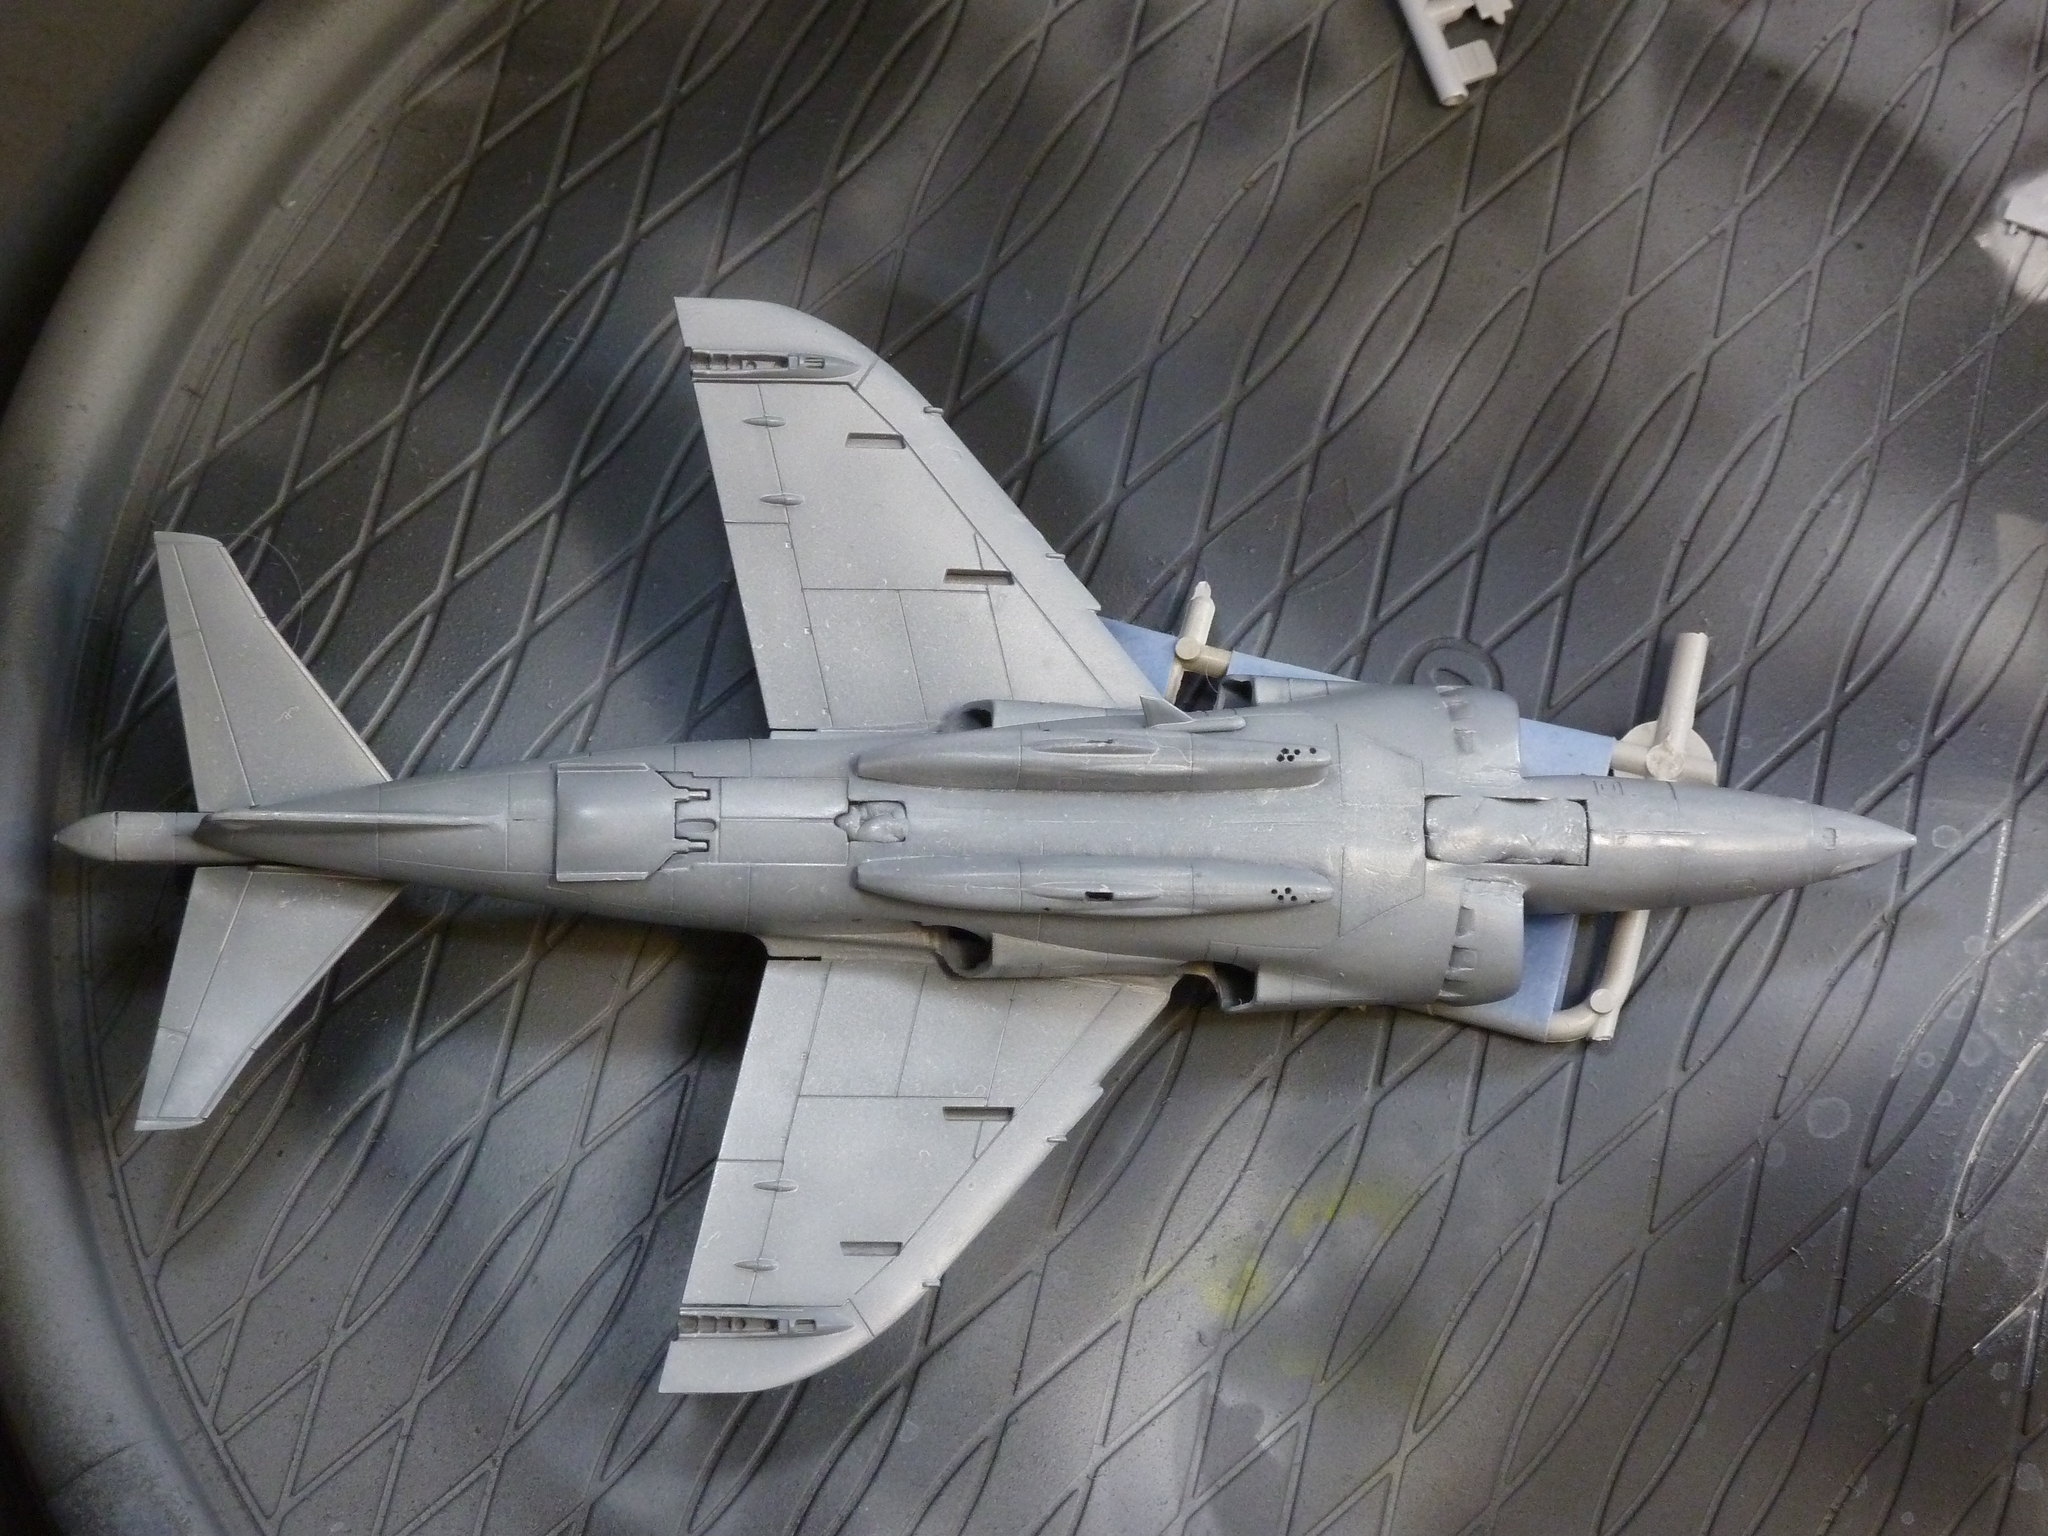
And finally we get to the problems...painting the underside. USMC Harriers in the '80s wore the RAF's camo pattern, which used an anti-flash white on the underside. In order to maintain the preshading, I treated the paint almost as a blending/dusting: highly thinned, super-thin layers, stop painting just before you really think you should stop. However, the coverage isn't going down so smooth. I have four theories, take a look at the pictures (not the best quality, sorry) and see what you think.
1. I sprayed too heavy-handed -- I know this is a tendency of mine that I really tried to resist this time around, but I'm sure that some of you would not be pleased with my technique
2. Paint isn't uniformly smooth (Iwata Com-Art...most convenient paint at my local art supplies store), though I did mix thoroughly with a paint mixer beforehand
3. Wrong air pressure -- I tried low pressure at first (15-20psi), then tried high pressure (30-40psi), but no noticeable difference in coverage
4. I didn't cover the model while it dried


This is my goal for the build. I'm aiming for a dio of the Harrier landing on an LHA/LHD. I'm planning out the deck now, the deck crew is complete, and I think I have a good strategy for suspending the Harrier mid-air.

I took clear acrylic rod, softened it over a flame, then bent it around a Testors paint jar. Given the Harrier's unique exhaust ports, there wasn't really a central option to install the rod. Instead I planned to stick the rod through the rear exhausts, which ideally will be concealed pretty well by the pylons and armament. To add some structural support, I dug through the spares box for a thick missile which I trimmed to fit between the exhausts internally.


Initially I wasn't sure if I'd need one or two support rods, but it actually seemed very stable with just the one! That should make the display a bit more impressive


I found some good reviews for this, "Canopy Survival Kit". Basically it's like a free-form Eduard mask set...three sheets of precut shapes that you can modify to fit pretty much any canopy shape you come across. They come in that familiar yellow tape material as well as a clear vinyl. I got the latter for a better price, but I'm not sure it adheres as well as the yellow tape. I guess we'll see in a bit... At any rate, I masked with the Survival Kit and MicroMask.

I also splurged on a good primer. Stynylrez...stupid name, great paint. This time around I'm trying the black-basing technique. Basically, instead of priming light and darkening panel lines, you prime dark and lighten the panels between the lines. I think in 1/72 scale, it's easier to mottle solid panels rather than trace the panel lines. I didn't get the best picture, but I think it still gets the point across.


And finally we get to the problems...painting the underside. USMC Harriers in the '80s wore the RAF's camo pattern, which used an anti-flash white on the underside. In order to maintain the preshading, I treated the paint almost as a blending/dusting: highly thinned, super-thin layers, stop painting just before you really think you should stop. However, the coverage isn't going down so smooth. I have four theories, take a look at the pictures (not the best quality, sorry) and see what you think.
1. I sprayed too heavy-handed -- I know this is a tendency of mine that I really tried to resist this time around, but I'm sure that some of you would not be pleased with my technique
2. Paint isn't uniformly smooth (Iwata Com-Art...most convenient paint at my local art supplies store), though I did mix thoroughly with a paint mixer beforehand
3. Wrong air pressure -- I tried low pressure at first (15-20psi), then tried high pressure (30-40psi), but no noticeable difference in coverage
4. I didn't cover the model while it dried


Posted: Monday, October 22, 2018 - 08:45 AM UTC
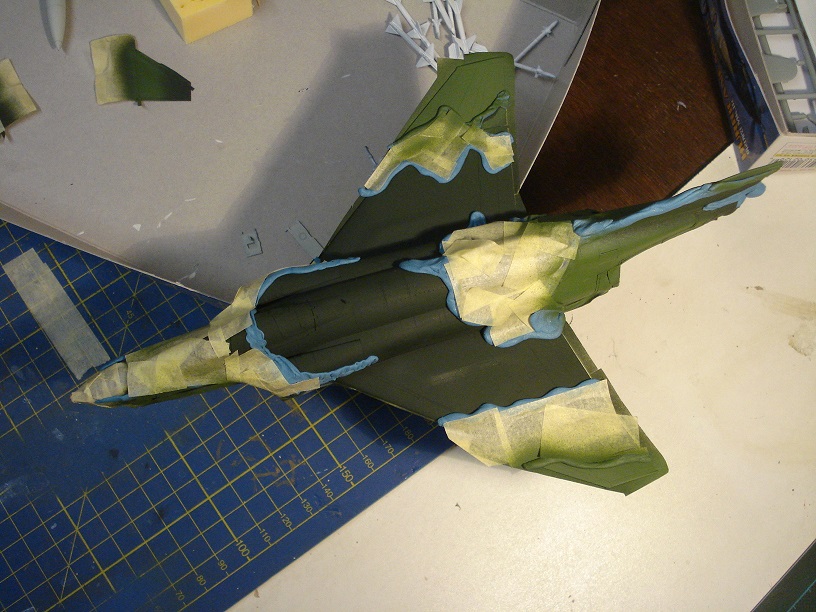
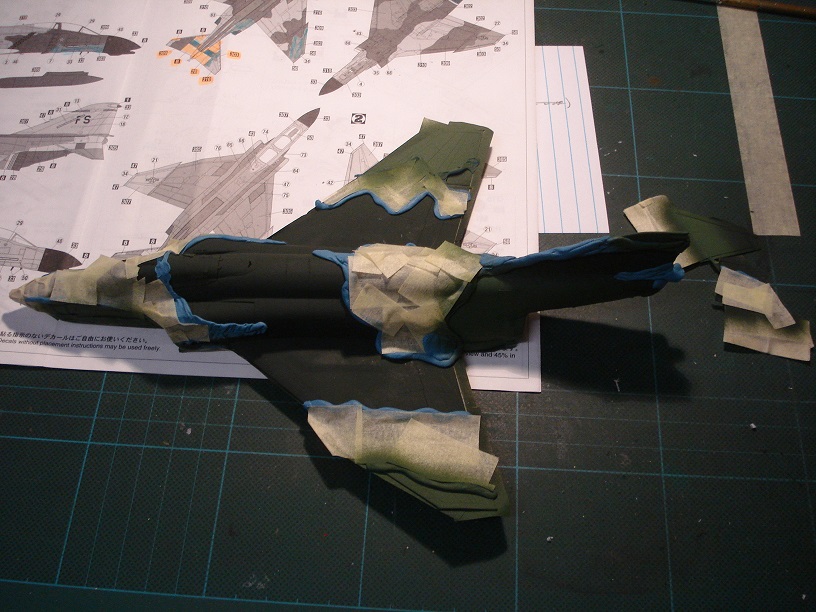
Some impressive work here guys! Pasi and Raj, your MiGs look great!
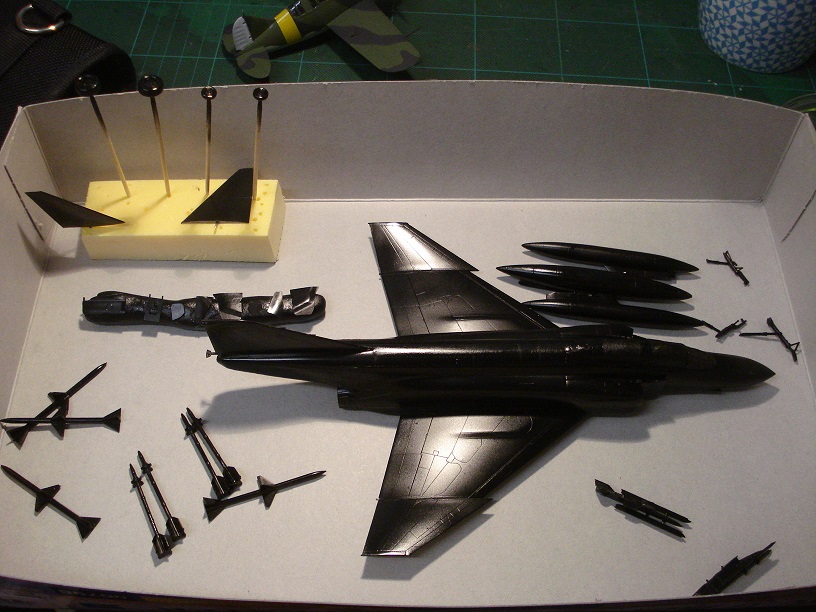
Well, here's my Progress. Unfortunately I forgot to take pics before primer, but here's the painting process:
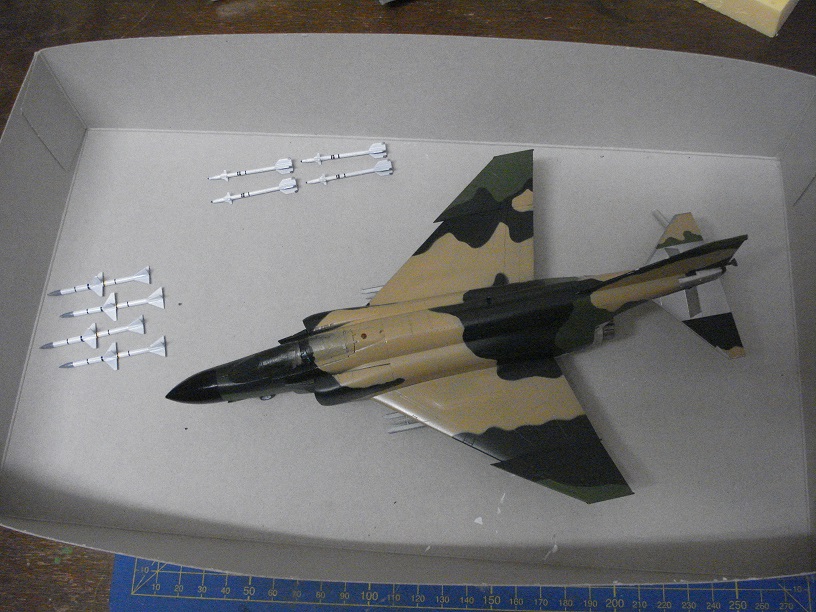
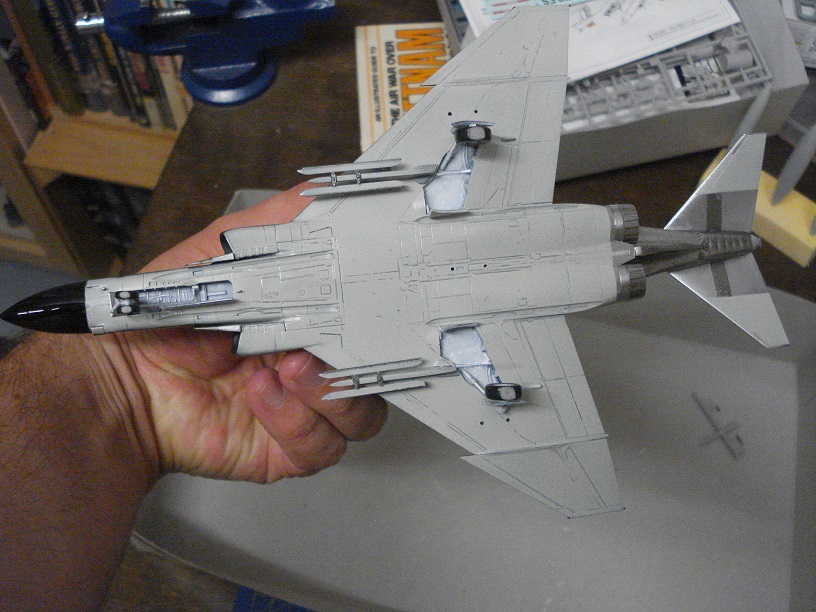
And current state: Details painted, final Assembly (almost) done and Ready for decals:
Cheers!
Stefan
Well, here's my Progress. Unfortunately I forgot to take pics before primer, but here's the painting process:
And current state: Details painted, final Assembly (almost) done and Ready for decals:
Cheers!
Stefan

RhinoSpit

Joined: September 22, 2016
KitMaker: 224 posts
AeroScale: 191 posts

Posted: Sunday, November 04, 2018 - 03:45 AM UTC
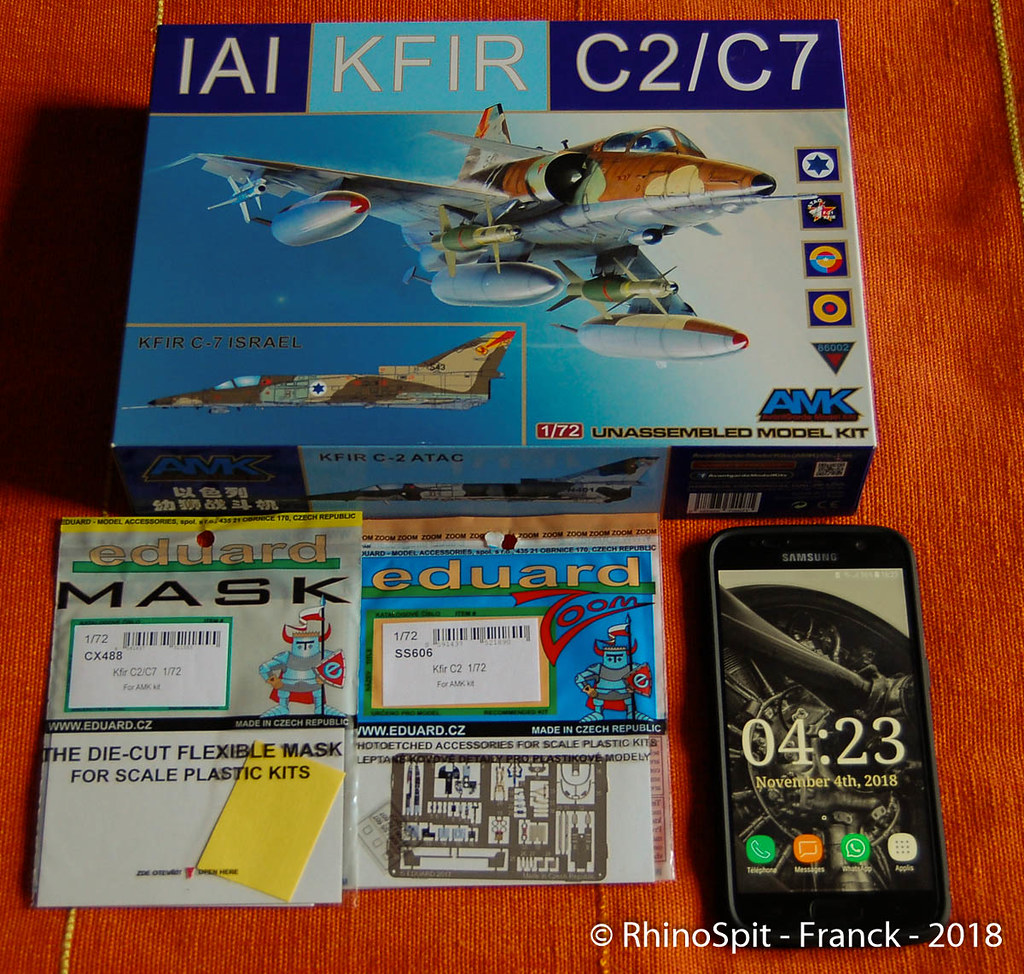
After 6 week in China, time to start this campaign !

Posted: Monday, November 05, 2018 - 12:19 AM UTC
@Robby
Your scratch built display stand is way awesomer (See I had a make a new word to describe it)
I got some bench time and decalled the monster.
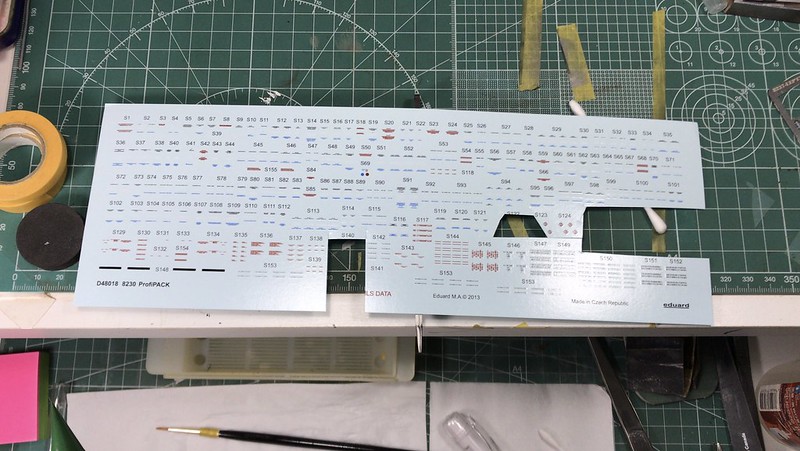
That's a lot of decals
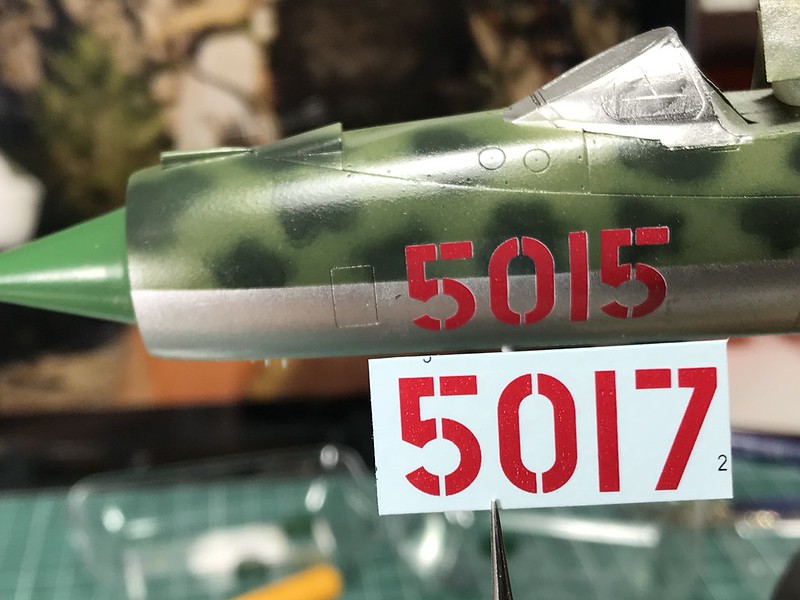
The surgery went well
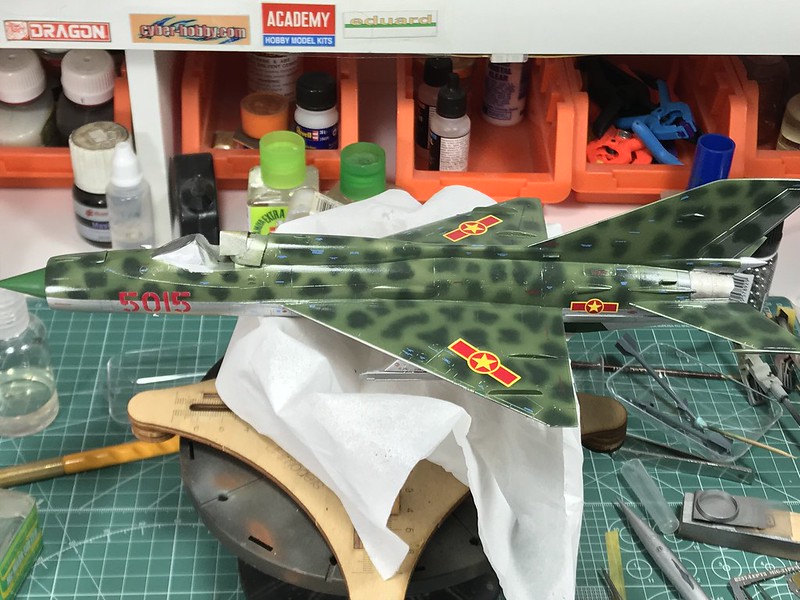
End in sight...

...and done. Next up, I attached all the fiddly bits. This was followed by another gloss coat and a matt top coat. And the end result is....... (drumroll)......
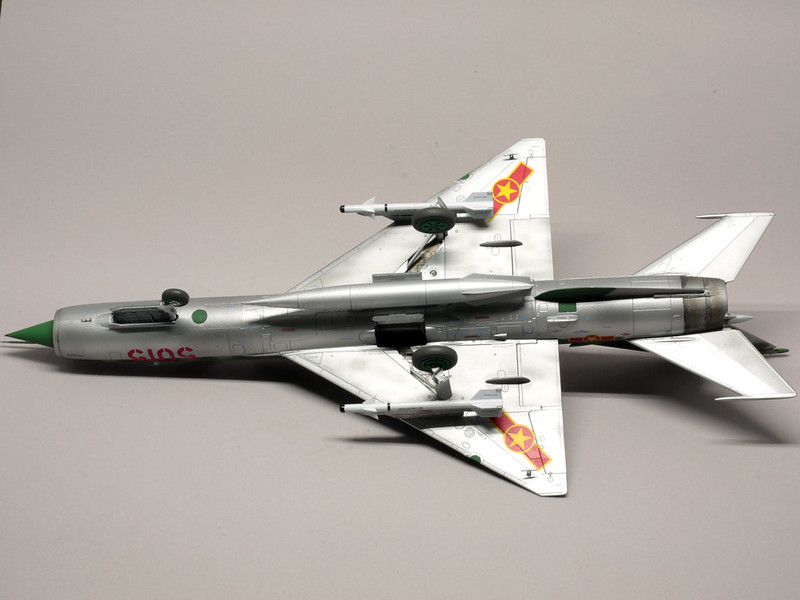
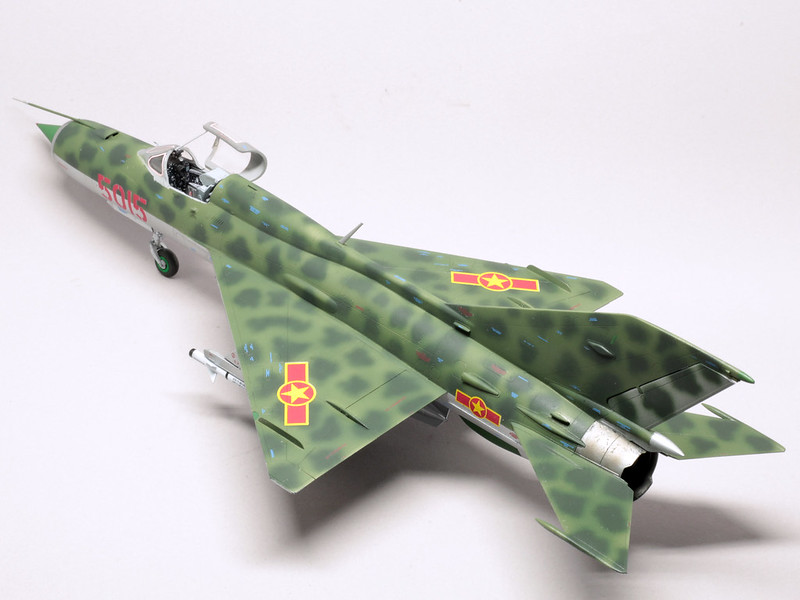
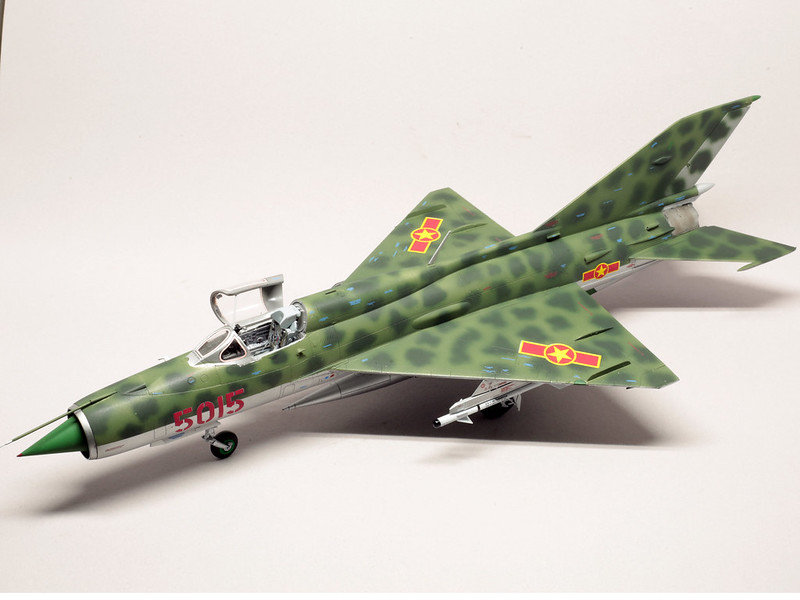
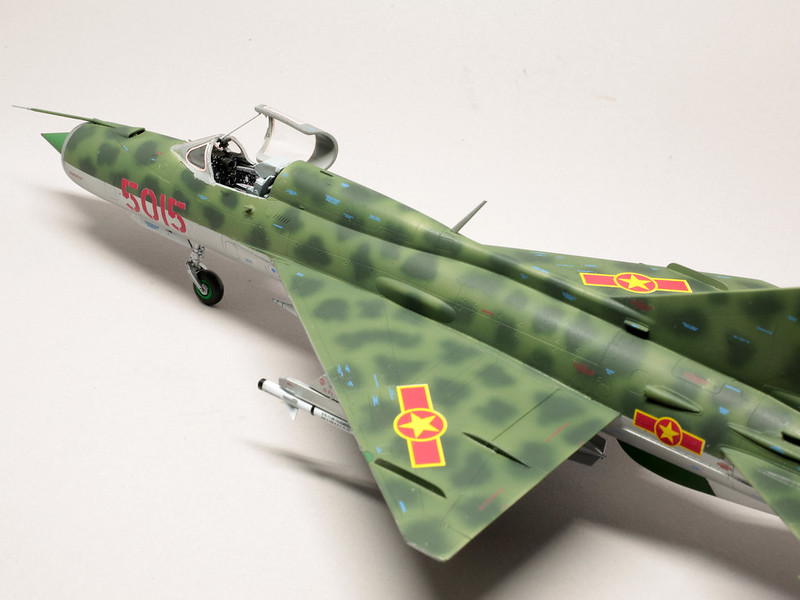
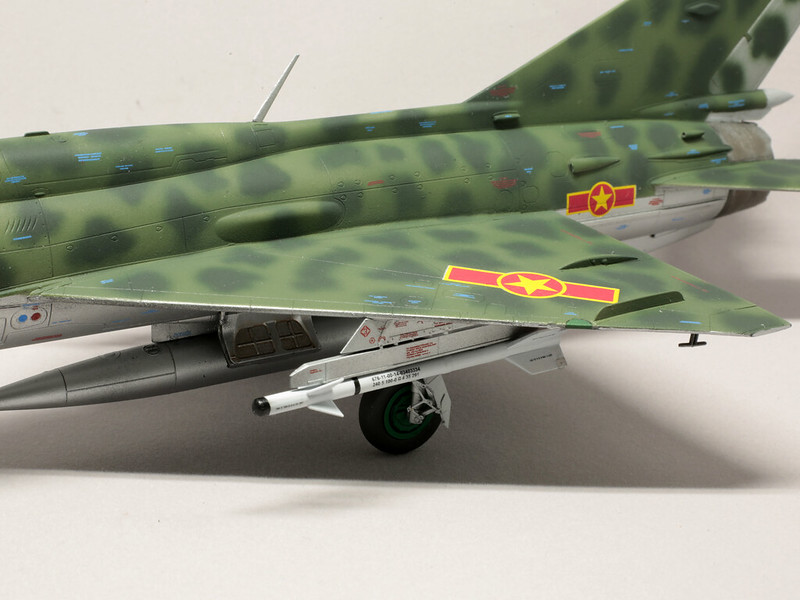
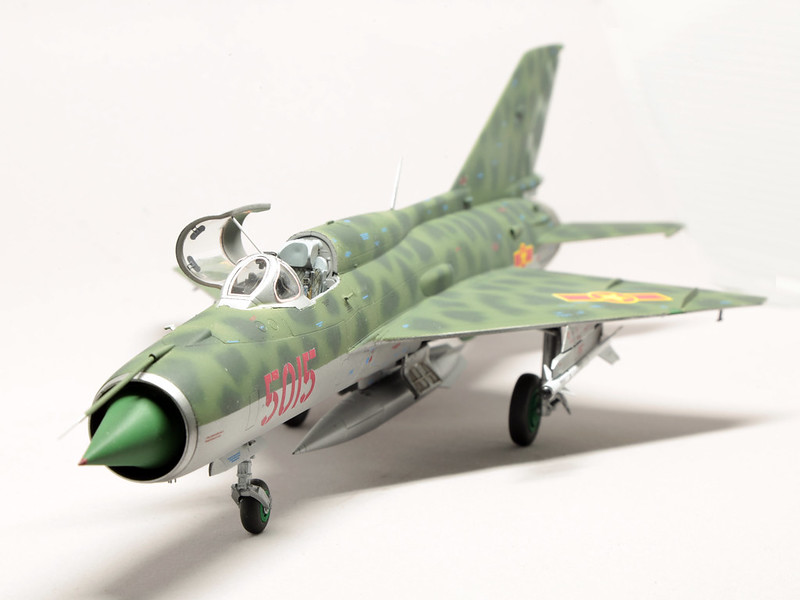
Thankyou for letting me be a part of the GB. This was my first ever post WW2 aircraft and I enjoyed building it. I might even build a few more in the future.
Thanks for looking
Cheers
Your scratch built display stand is way awesomer (See I had a make a new word to describe it)
I got some bench time and decalled the monster.

That's a lot of decals


The surgery went well

End in sight...

...and done. Next up, I attached all the fiddly bits. This was followed by another gloss coat and a matt top coat. And the end result is....... (drumroll)......


Thankyou for letting me be a part of the GB. This was my first ever post WW2 aircraft and I enjoyed building it. I might even build a few more in the future.
Thanks for looking
Cheers


PasiAhopelto

Joined: October 01, 2016
KitMaker: 514 posts
AeroScale: 239 posts

Posted: Monday, November 05, 2018 - 04:47 AM UTC
Nice work with the 21, Raj. I like how it turned out.
Meanwhile I've checked what would be proper missile combination for FAF MiG-21 Bis. All five pylons are almost always attached, quite often inner pylons have rails for R-13 missiles and often outer pylons are "clean". I think this is safe combination:

Not sure if I'll attach extra tanks and missiles, both should be valid options.
Meanwhile I've checked what would be proper missile combination for FAF MiG-21 Bis. All five pylons are almost always attached, quite often inner pylons have rails for R-13 missiles and often outer pylons are "clean". I think this is safe combination:

Not sure if I'll attach extra tanks and missiles, both should be valid options.
Posted: Saturday, November 10, 2018 - 09:12 PM UTC
So, all those great MiGs Need some adversaries. Here's my F-4 finished, first ever jet since my "serious" modelling days:
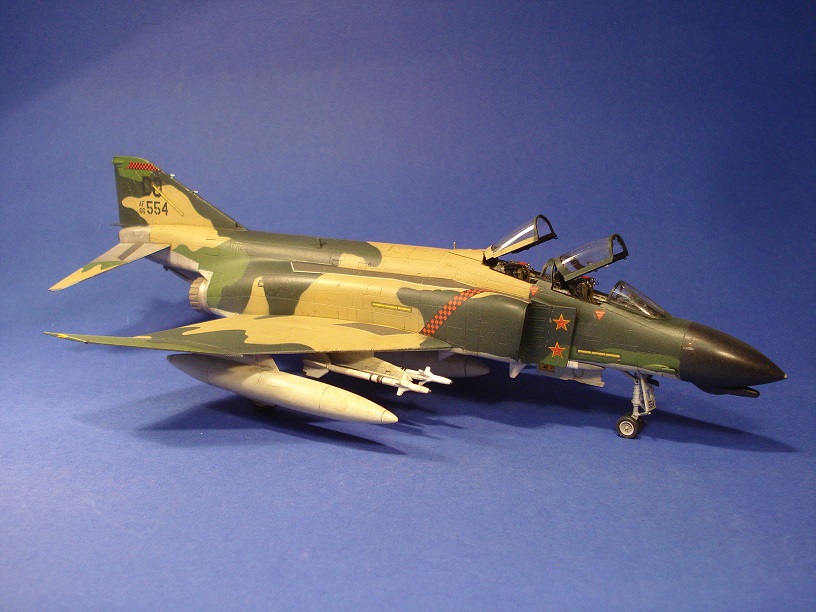
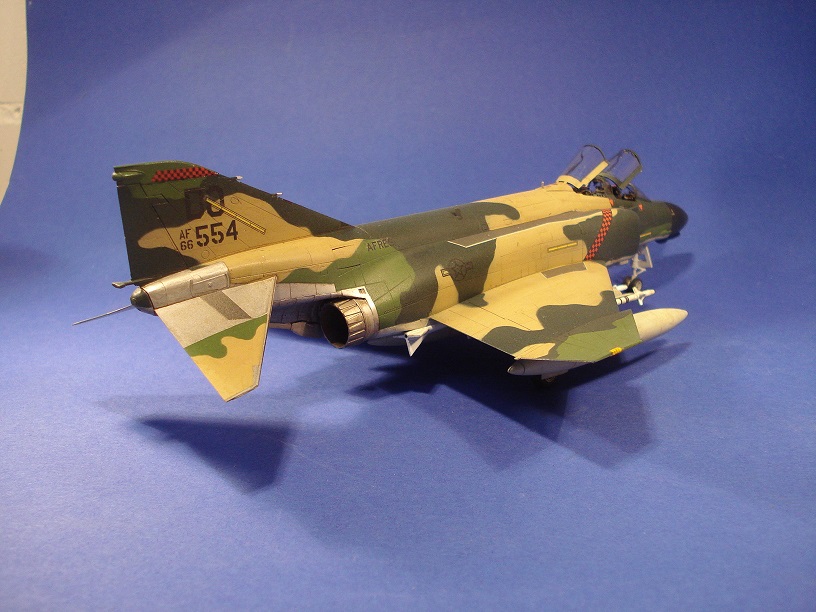
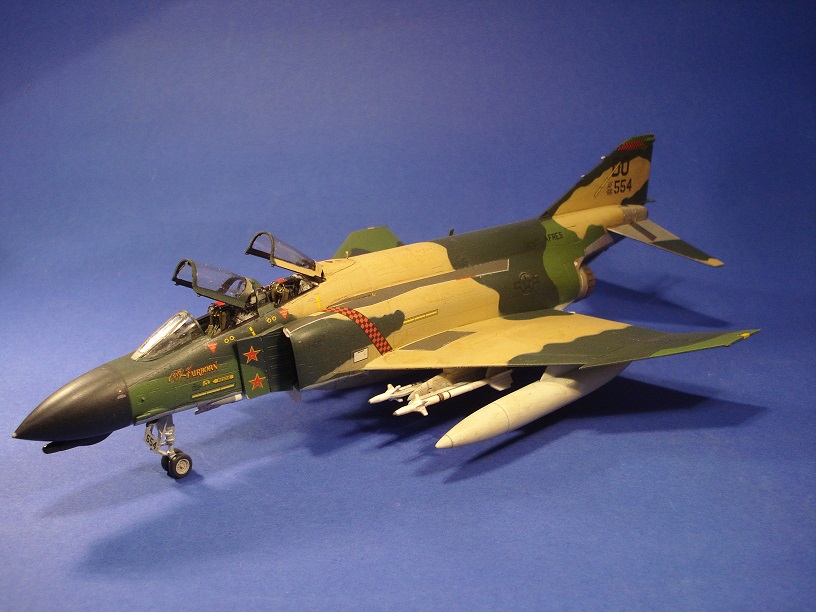

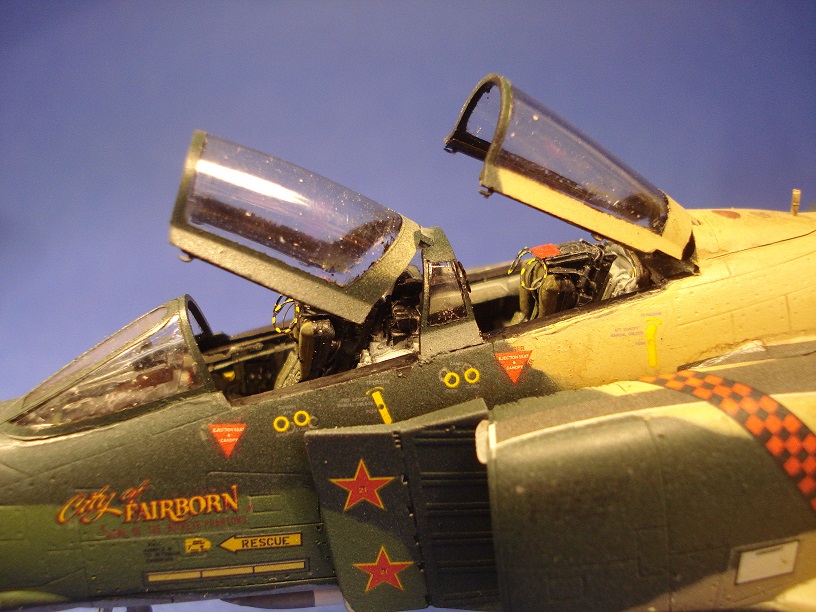
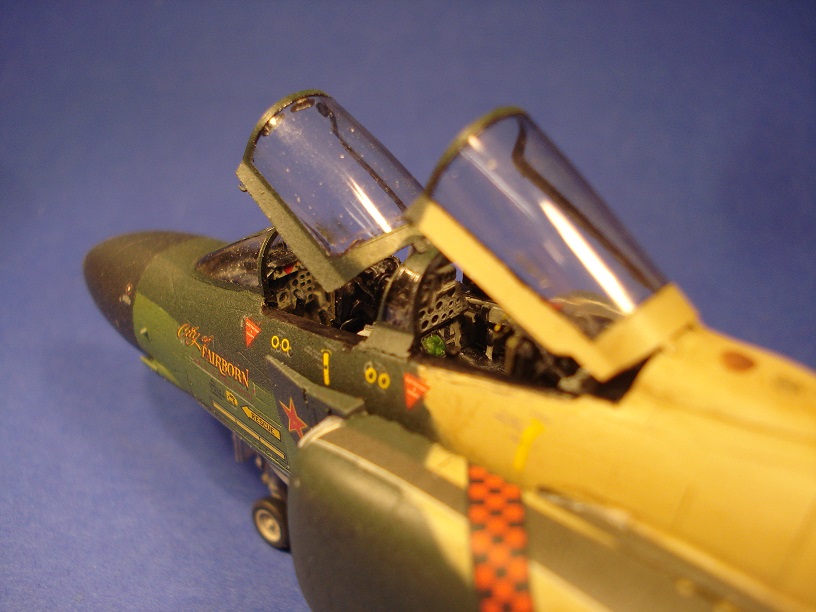
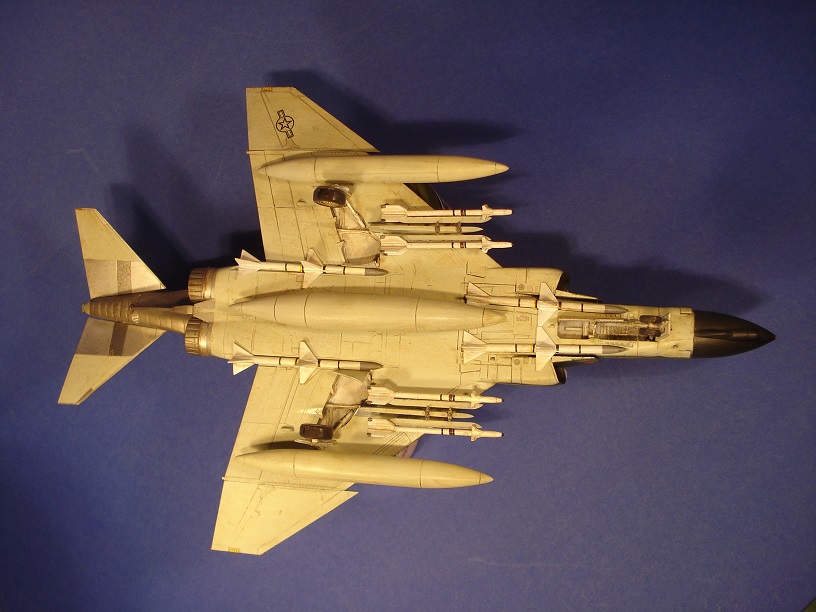
Been a great Campaign, thanks!
Cheers!
Stefan
Been a great Campaign, thanks!
Cheers!
Stefan
MichaelSatin


Joined: January 19, 2008
KitMaker: 3,909 posts
AeroScale: 2,904 posts

Posted: Monday, November 19, 2018 - 10:58 AM UTC
Great work all!
My initial go-round with paint on the 1/48 AMK Kfir C7. This is my first time using Vallejo for the whole paint job as I have their IAF set. Not too bad, though for some reason I had some trouble with the brown. User error, I'm guessing.
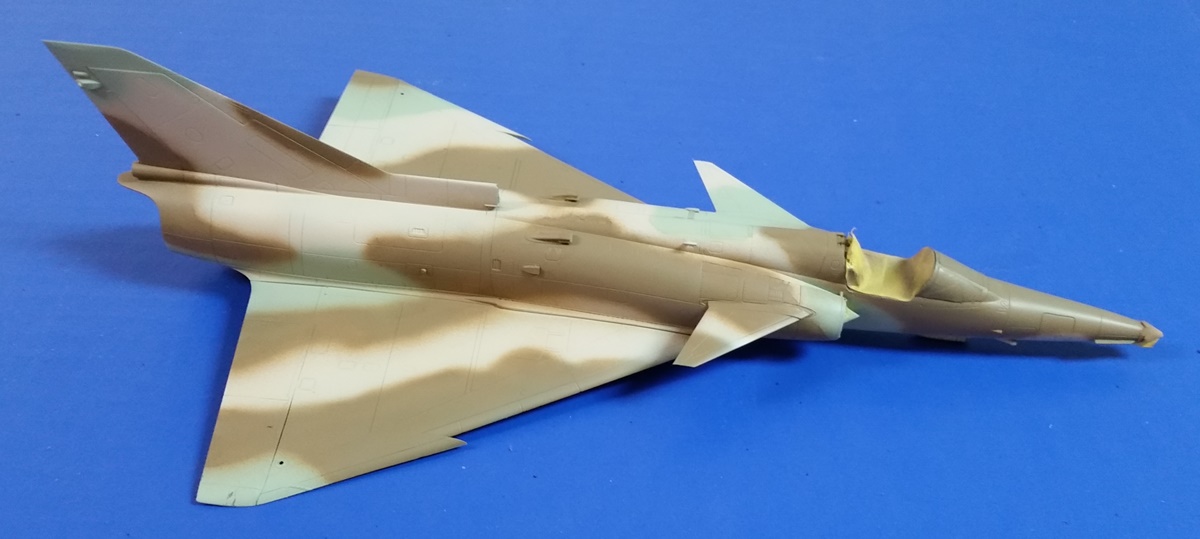
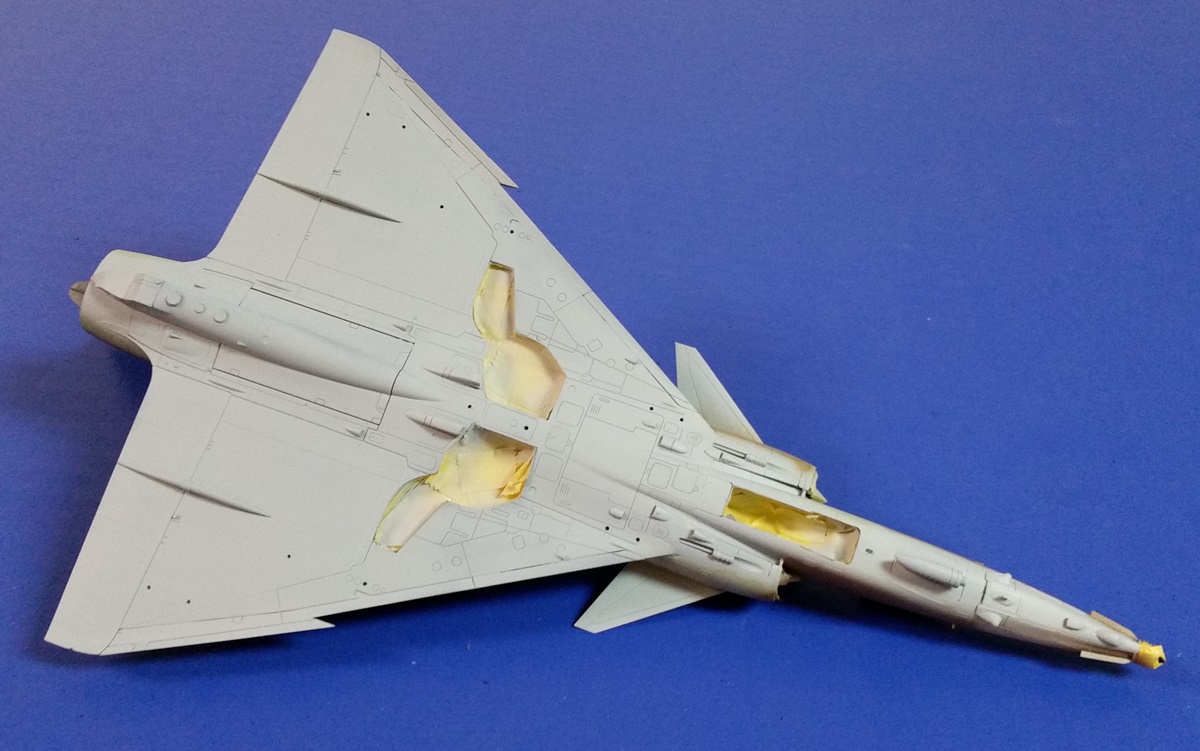
Will need touch up with the sand and the light gray, but getting there!
Michael
My initial go-round with paint on the 1/48 AMK Kfir C7. This is my first time using Vallejo for the whole paint job as I have their IAF set. Not too bad, though for some reason I had some trouble with the brown. User error, I'm guessing.


Will need touch up with the sand and the light gray, but getting there!
Michael


PasiAhopelto

Joined: October 01, 2016
KitMaker: 514 posts
AeroScale: 239 posts

Posted: Tuesday, November 20, 2018 - 07:13 AM UTC
More colour:
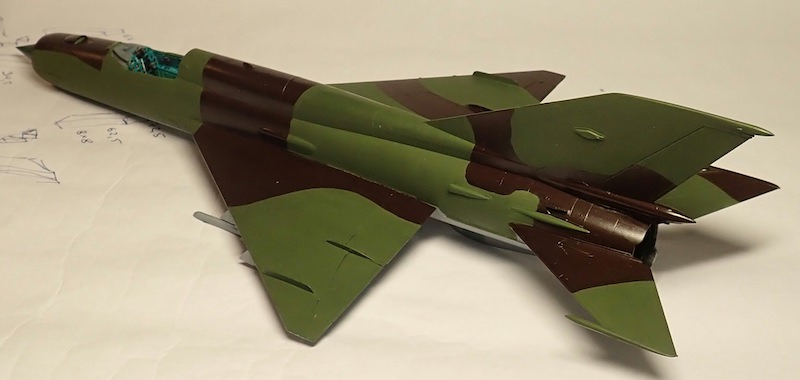
Have to touch up some areas, and there will be small NMF area around exhaust and black green fairings, but so far trouble free build.

Have to touch up some areas, and there will be small NMF area around exhaust and black green fairings, but so far trouble free build.
 |


