OFFICIAL: Hot 1950s in the Cold War Campaign
TimReynaga
 Associate Editor
California, United States
Joined: May 03, 2006
KitMaker: 2,500 posts
AeroScale: 318 posts
Posted: Wednesday, May 15, 2019 - 04:09 PM UTC
To me, nothing says “Hot 1950s in the Cold War” like one of the hottest planes of the time, the North American
F-86 Sabre jet!
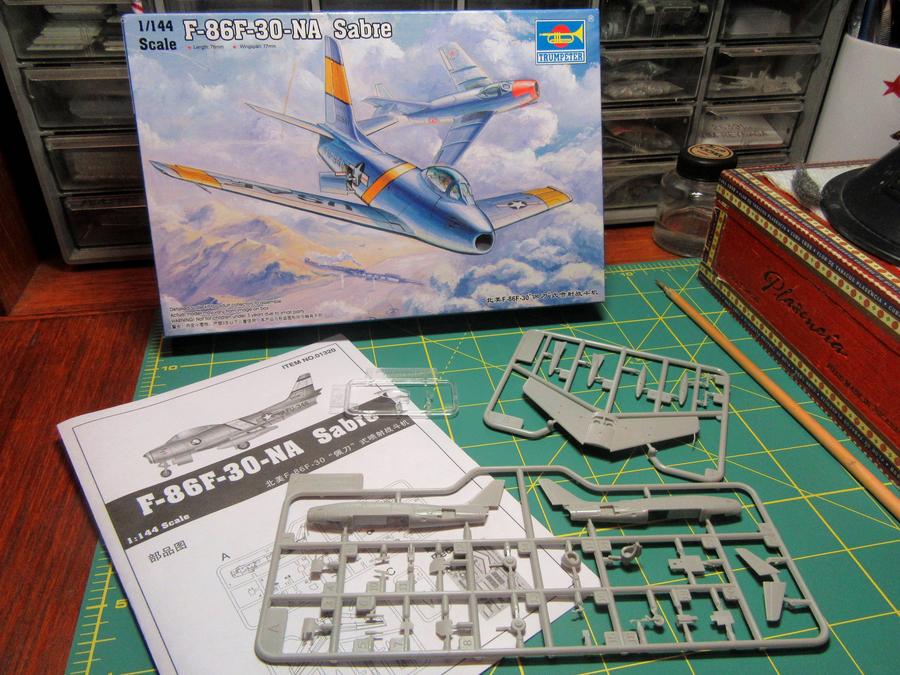
Trumpeter’s little rendition looks to be a quick build.

The 1/144 model is covered in engraved detail – all of it a little heavy, but it should look ok under paint.
Bas-Rhin, France
Joined: September 22, 2016
KitMaker: 224 posts
AeroScale: 191 posts
Posted: Thursday, May 16, 2019 - 03:05 AM UTC
Queensland, Australia
Joined: August 06, 2005
KitMaker: 3,353 posts
AeroScale: 93 posts
Posted: Thursday, May 16, 2019 - 10:23 PM UTC
That Sabre sure is small Tim.
Good to see you back into it FrancK
On the Bench:
Dust, styrene scraps, paint splotches and tears.
Queensland, Australia
Joined: August 06, 2005
KitMaker: 3,353 posts
AeroScale: 93 posts
Posted: Thursday, May 16, 2019 - 10:33 PM UTC
Some updates on the Gaz.
Added the missing and very noticeable shock absorber assembly to the front and added the tarp, rolled up canvas doors and folded canvas roof
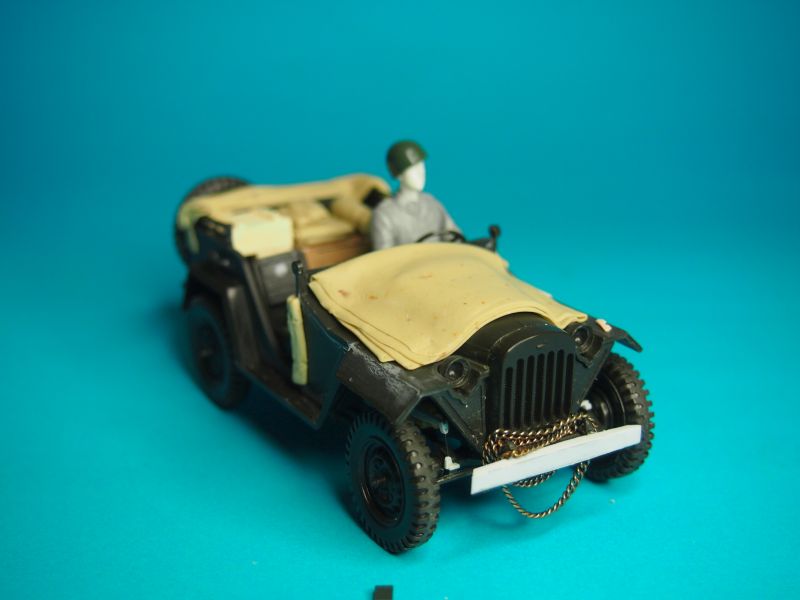
On the fender is the start of the driver's sun glasses.

Detail of the shock absorber system and steering linkages added.
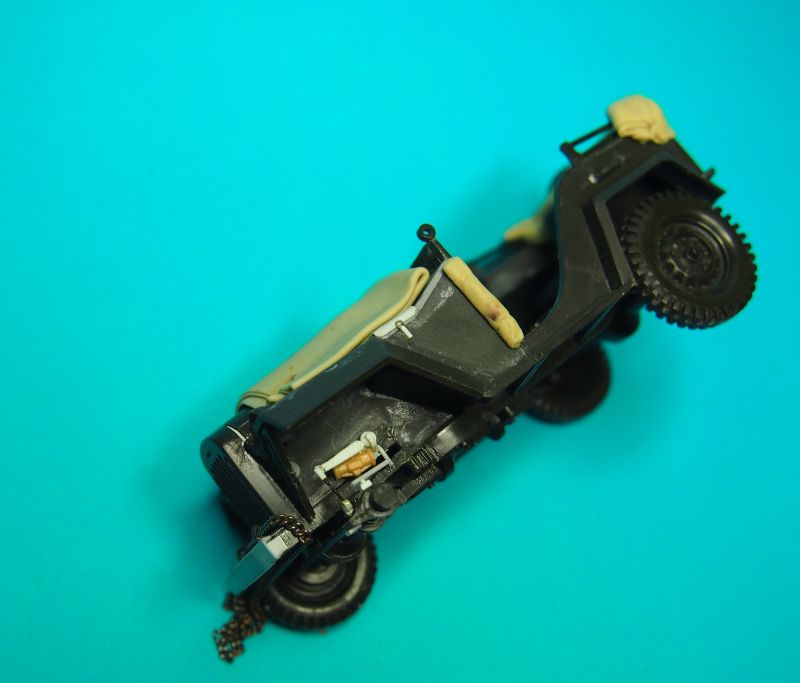
and trying out a layout for stowage
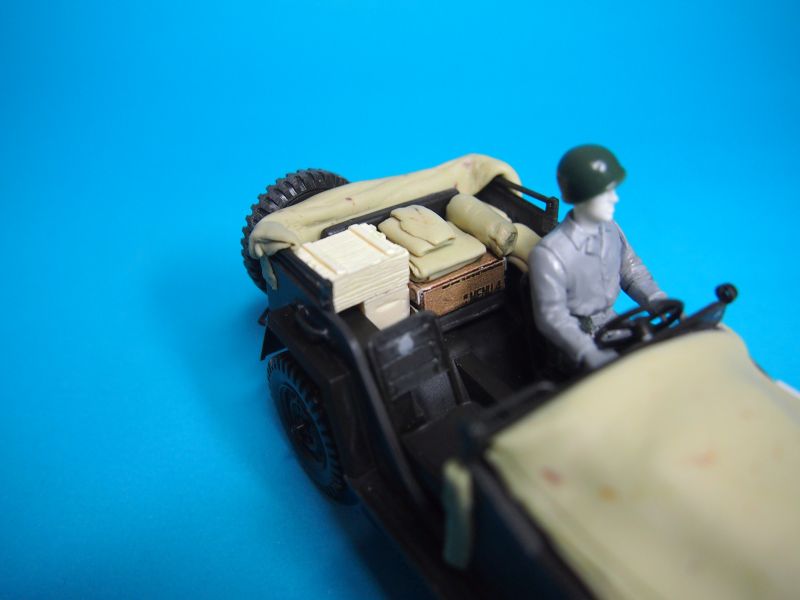
On the Bench:
Dust, styrene scraps, paint splotches and tears.

#392
Hessen, Germany
Joined: January 09, 2013
KitMaker: 696 posts
AeroScale: 608 posts
Posted: Friday, May 17, 2019 - 08:53 AM UTC
Very cool, Peter! Will follow your build

Franck, good start on your Beaufighter! How is the fitting?
On the bench:
EE(BAC) Lightning F.2A (Airfix 1:72)
Slovakia
Joined: October 15, 2010
KitMaker: 825 posts
AeroScale: 476 posts
Posted: Sunday, May 19, 2019 - 08:53 AM UTC
Tim. Is there anything left from the original GAZ under all those updates ? Great to see so many people still in the game. I have managed to breat a rotor blade on the poor Dragonfly so will have ti figure out how to fix it.
Queensland, Australia
Joined: August 06, 2005
KitMaker: 3,353 posts
AeroScale: 93 posts
Posted: Sunday, May 19, 2019 - 07:55 PM UTC
Quoted Text
Tim. Is there anything left from the original GAZ under all those updates ? Great to see so many people still in the game. I have managed to breat a rotor blade on the poor Dragonfly so will have ti figure out how to fix it.
Most of the original Tamiya kit is still there, just the front bumper removed. I wanted to make this a project to add instead of replace, but the square profile bumper just had to go. I could have bought a shiny new Trumpeter kit, but nostalgia took over.

I hope you remedy the rotor issue. One of the reasons I don't do helicopters any more... broke too many in my time.
On the Bench:
Dust, styrene scraps, paint splotches and tears.
TimReynaga
 Associate Editor
California, United States
Joined: May 03, 2006
KitMaker: 2,500 posts
AeroScale: 318 posts
Posted: Monday, May 20, 2019 - 02:30 PM UTC
Quoted Text
That Sabre sure is small Tim.
It sure is!
Trumpeter’s little F-86 goes together well except for the fit of the windscreen – which is terrible! However, with some miniscule shimming, trimming, and polishing it is still useable.
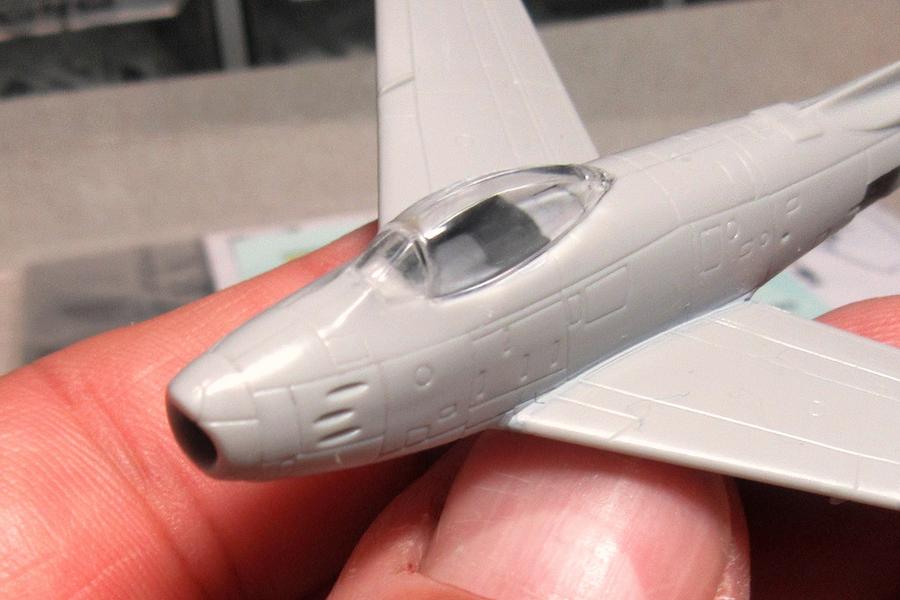
I’ll have to trim it yet more to get the sliding canopy to fit properly against it...
Slovakia
Joined: October 15, 2010
KitMaker: 825 posts
AeroScale: 476 posts
Posted: Wednesday, May 22, 2019 - 07:12 AM UTC
Don't You want to leave the canopy open ?

#123
New Mexico, United States
Joined: November 17, 2008
KitMaker: 1,202 posts
AeroScale: 292 posts
Posted: Wednesday, May 22, 2019 - 12:31 PM UTC
Quoted Text
Don't You want to leave the canopy open ?
I think Tim doesn't want to show off the super detailed cockpit for the Sabre. LOL Seriously, I bet there isn't much of a cockpit to see if you left the canopy open. I had a similar problem with the old Dragon Mig-15.
You should take a look at Tim's awesome Italian aircraft carrier in the Italy campaign.
Take care,
Don "Lakota"

Working on Campaigns:
1/72 Hasegawa Ki-84 Frank
1/144 Dragon Armor
TimReynaga
 Associate Editor
California, United States
Joined: May 03, 2006
KitMaker: 2,500 posts
AeroScale: 318 posts
Posted: Saturday, May 25, 2019 - 08:26 AM UTC
Quoted Text
Quoted Text
Don't You want to leave the canopy open ?
I think Tim doesn't want to show off the super detailed cockpit for the Sabre. LOL Seriously, I bet there isn't much of a cockpit to see if you left the canopy open. I had a similar problem with the old Dragon Mig-15.
You should take a look at Tim's awesome Italian aircraft carrier in the Italy campaign.
Take care,
Don "Lakota" 
Thanks, Don! That little carrier has been giving me fits, so a switch to the Sabre is a welcome break!
Trumpeter’s F-86 kit interior is actually surprisingly nice with a stick, seat, and instrument panel. Unfortunately, the ADF antenna that sits behind the cockpit is attached to the fuselage; on the real aircraft this is part of the canopy assembly, so it pretty much forces the modeler to do the kit with the canopy closed unless you want to do some scratchbuilding. Trumpeter also omitted the cockpit side consoles. With only a few days left in the campaign I decided to go conservative on this one and just leave it closed up!
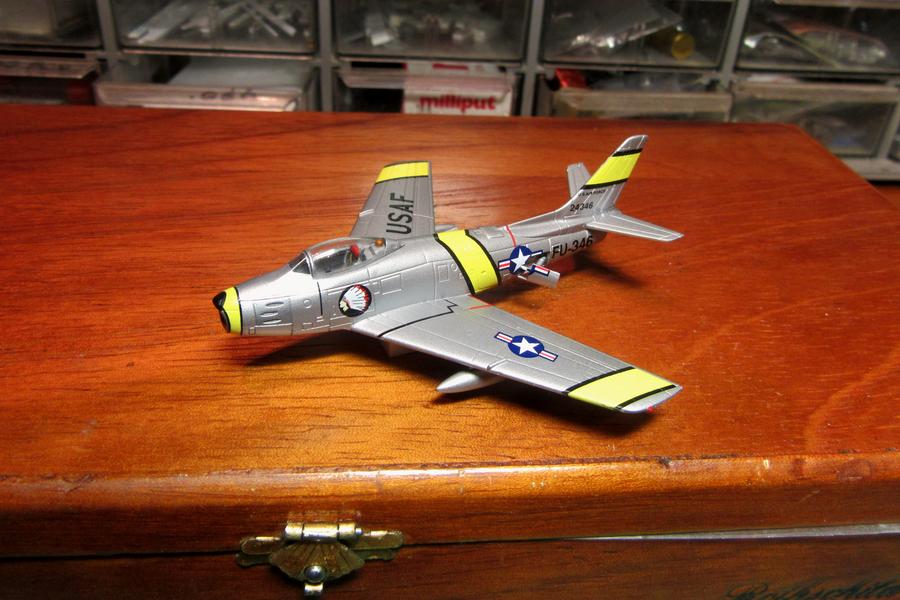
The Sabre is a simple paint job: bare metal silver overall, for which I used Tamiya Bare-Metal Silver (AS-12) rattle-can spray.

The only variations were the panels around the gun openings, which I masked off and sprayed with darker Model Master Stainless Steel Buffing Metalizer spray.
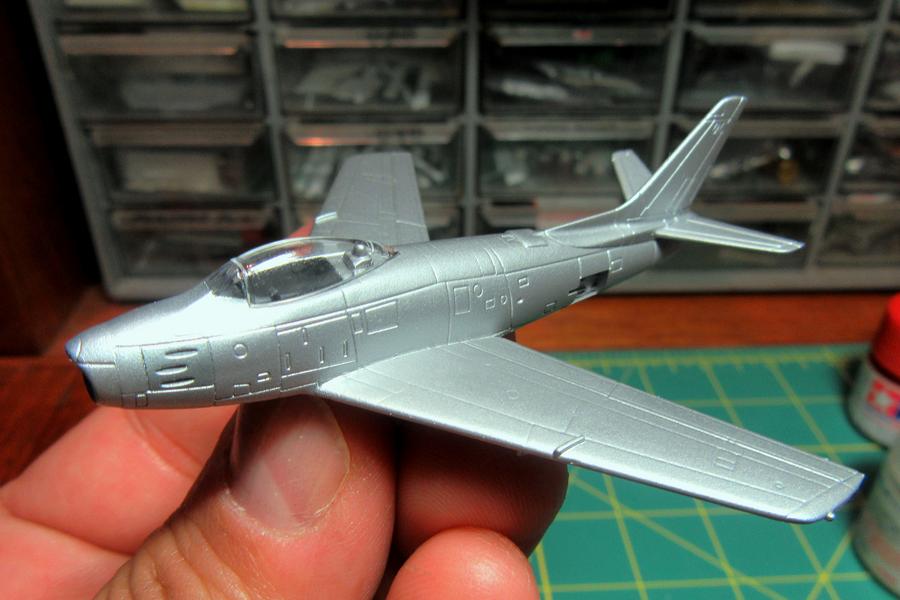
Maybe I should have been a little bolder – the bare metal looks good, but with the masks removed the contrast between the two shades is barely noticeable!
TimReynaga
 Associate Editor
California, United States
Joined: May 03, 2006
KitMaker: 2,500 posts
AeroScale: 318 posts
Posted: Sunday, May 26, 2019 - 07:47 AM UTC
Quoted Text
...I think Tim doesn't want to show off the super detailed cockpit for the Sabre...

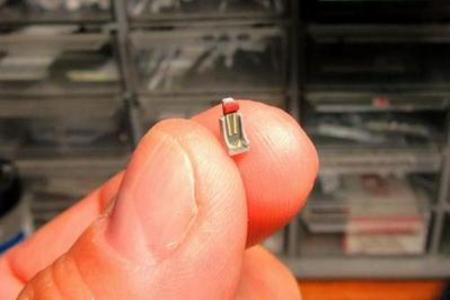
I did add seatbelts, though!


#123
New Mexico, United States
Joined: November 17, 2008
KitMaker: 1,202 posts
AeroScale: 292 posts
Posted: Sunday, May 26, 2019 - 11:32 AM UTC
Working on Campaigns:
1/72 Hasegawa Ki-84 Frank
1/144 Dragon Armor
Slovakia
Joined: October 15, 2010
KitMaker: 825 posts
AeroScale: 476 posts
Posted: Sunday, May 26, 2019 - 06:05 PM UTC
Your sure its not actualy 1/72 and you just dont have a massive hand ?

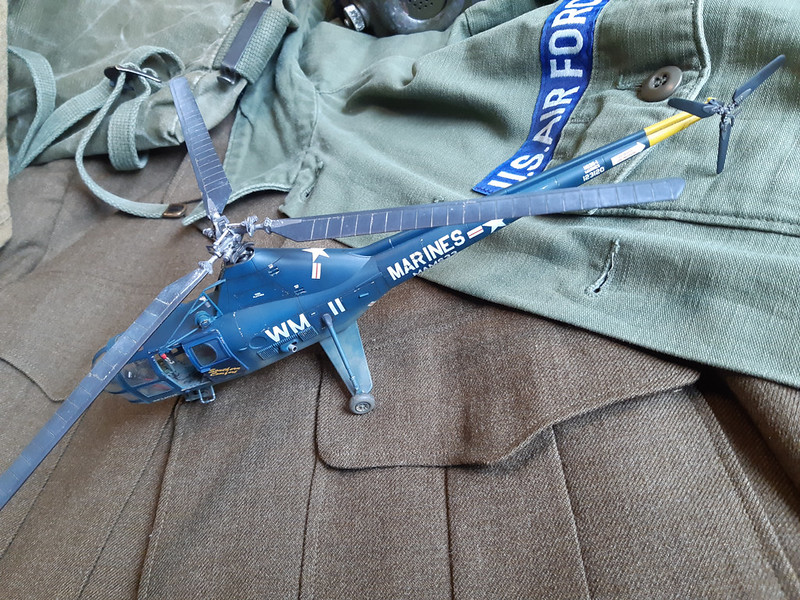
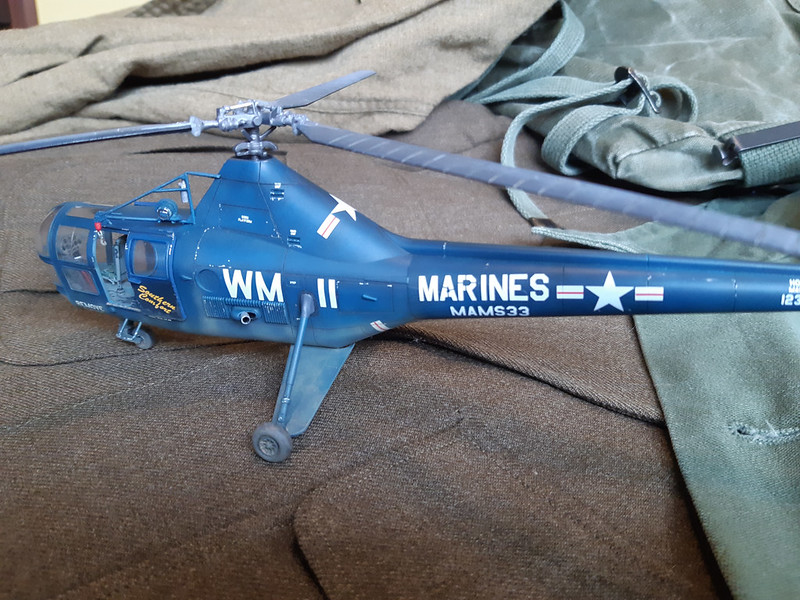
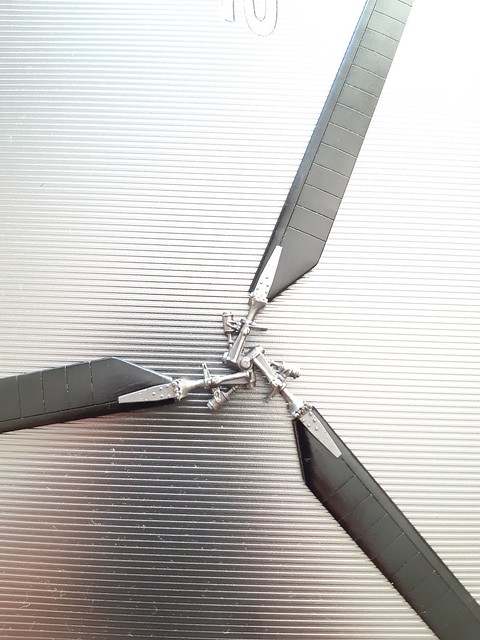
On a sidenote the rotor was fixed. It had snapped in the weakest place and I had to do some drilling and rod-insertion to make it more stiff. So there is hope that the Dragonfly will be finished by the deadline.
Edit: excuse the pics quality, my phone was all I had at that moment.
TimReynaga
 Associate Editor
California, United States
Joined: May 03, 2006
KitMaker: 2,500 posts
AeroScale: 318 posts
Posted: Monday, May 27, 2019 - 05:51 AM UTC
Quoted Text
Your sure its not actualy 1/72 and you just dont have a massive hand ? 
Hi Jacob - I do sometimes feel like I have oversized hands working in small scales!
Nice repair on the rotor head - it is tedious to do repairs, but in this case I can't even tell there was a problem!

TimReynaga
 Associate Editor
California, United States
Joined: May 03, 2006
KitMaker: 2,500 posts
AeroScale: 318 posts
Posted: Monday, May 27, 2019 - 05:52 AM UTC
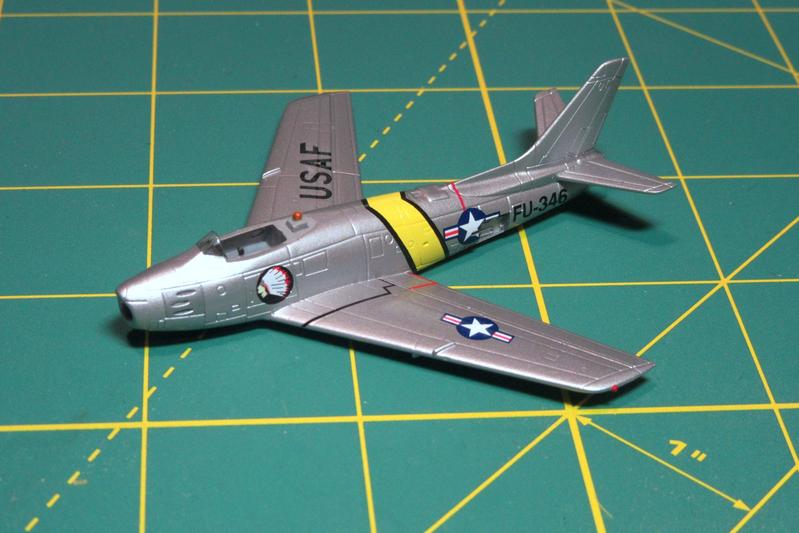
One of the better aspects of Trumpeter’s F-86F is the extensive markings sheet provided.

As always, Trumpeter’s decals performed flawlessly!
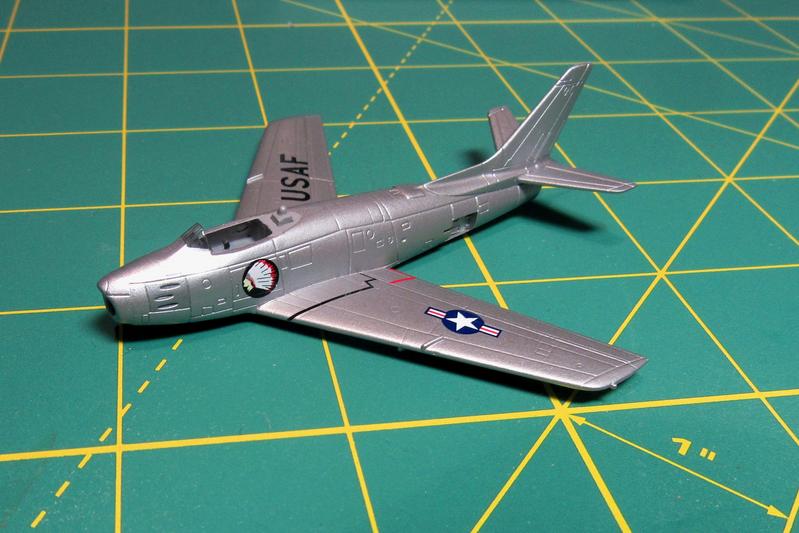
The one reservation I had about them was the color of the yellow bands. Though reasonable, they seem more lemon-yellow than the orange-yellow seen in most contemporary photographs. Still, I found a few pics that appear to show a yellower shade, so who knows... perhaps there was some variation?
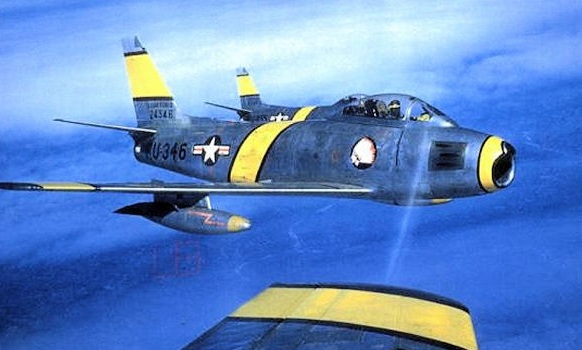

Anyway, I thought Trumpeter’s bands matched these pretty well.

Queensland, Australia
Joined: August 06, 2005
KitMaker: 3,353 posts
AeroScale: 93 posts
Posted: Monday, May 27, 2019 - 08:03 AM UTC
Nice save Jacob
Tim looking fine.
My Gaz is on the home run. Pics soon.
On the Bench:
Dust, styrene scraps, paint splotches and tears.
TimReynaga
 Associate Editor
California, United States
Joined: May 03, 2006
KitMaker: 2,500 posts
AeroScale: 318 posts
Posted: Tuesday, May 28, 2019 - 12:47 PM UTC
Speed brakes.


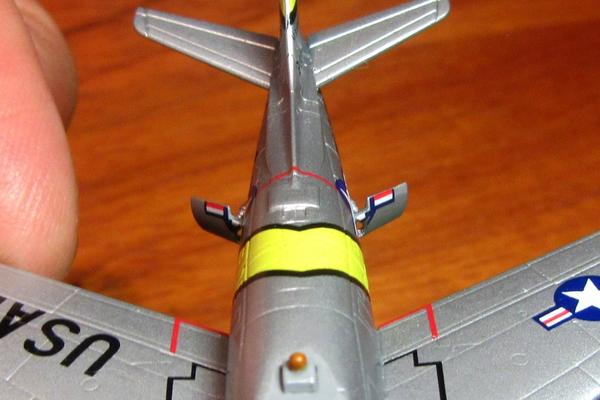
I appreciate how Trumpeter provided pre-cut national markings with perfect fit to the fuselage and brakes.
Queensland, Australia
Joined: August 06, 2005
KitMaker: 3,353 posts
AeroScale: 93 posts
Posted: Tuesday, May 28, 2019 - 08:03 PM UTC
Cool little details Tim. Quite impressive in an 'itty bitty' scale.
On the Bench:
Dust, styrene scraps, paint splotches and tears.
Slovakia
Joined: October 15, 2010
KitMaker: 825 posts
AeroScale: 476 posts
Posted: Wednesday, May 29, 2019 - 07:48 AM UTC
speed brakes in 1/144 you must be joking. I still remember the old Heller 1/72 Sabre and its speed brakes. In those times that was something!
https://www.scalemates.com/products/img/7/7/4/127774-10189-pristine.jpgon a sidenote I have finished the Dragonfly today and took some pictures unfortunately only with the phone. If I cant do better pictures tomorrow, I will upload them as they are.
TimReynaga
 Associate Editor
California, United States
Joined: May 03, 2006
KitMaker: 2,500 posts
AeroScale: 318 posts
Posted: Wednesday, May 29, 2019 - 12:31 PM UTC
Quoted Text
speed brakes in 1/144 you must be joking. I still remember the old Heller 1/72 Sabre and its speed brakes. In those times that was something!
https://www.scalemates.com/products/img/7/7/4/127774-10189-pristine.jpg
on a sidenote I have finished the Dragonfly today and took some pictures unfortunately only with the phone. If I cant do better pictures tomorrow, I will upload them as they are.

Great kit, that - especially for the 1970s!
Removed by original poster on 05/30/19 - 06:33:17 (GMT).
Slovakia
Joined: October 15, 2010
KitMaker: 825 posts
AeroScale: 476 posts
Posted: Wednesday, May 29, 2019 - 06:55 PM UTC
TimReynaga
 Associate Editor
California, United States
Joined: May 03, 2006
KitMaker: 2,500 posts
AeroScale: 318 posts
Posted: Thursday, May 30, 2019 - 12:31 AM UTC
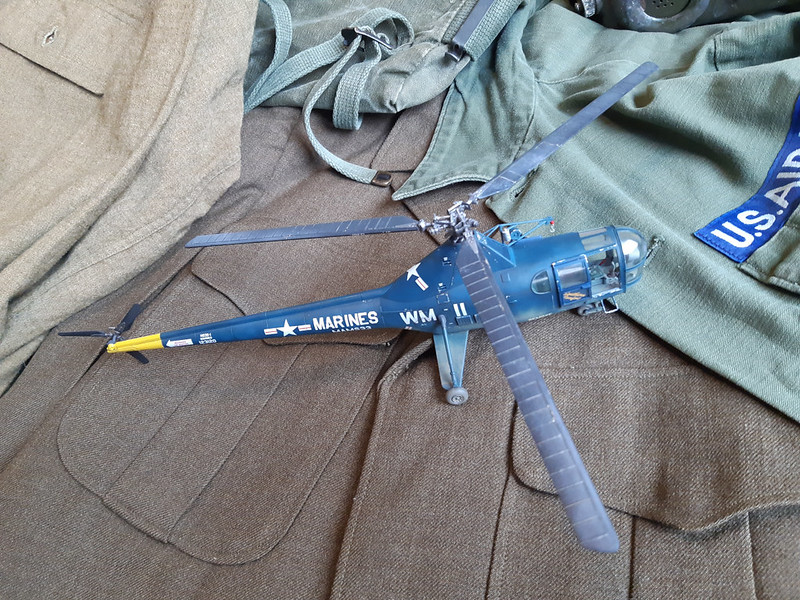
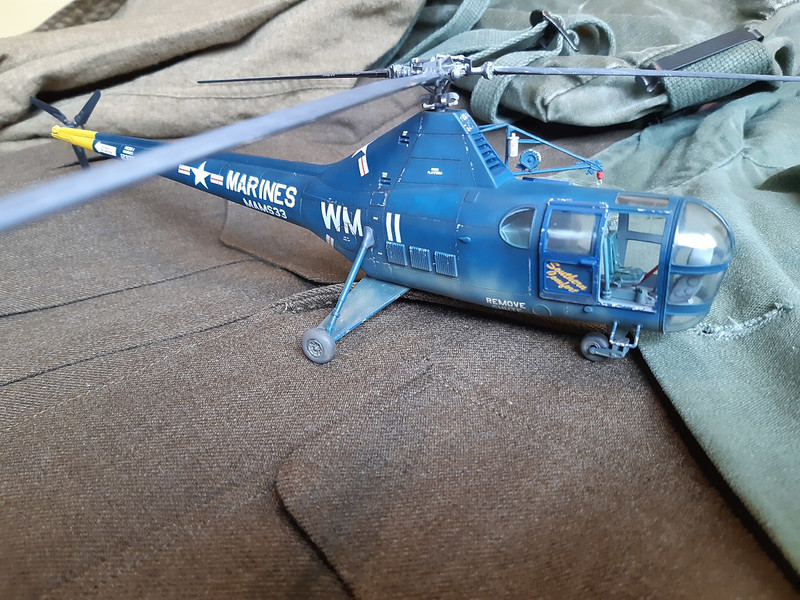
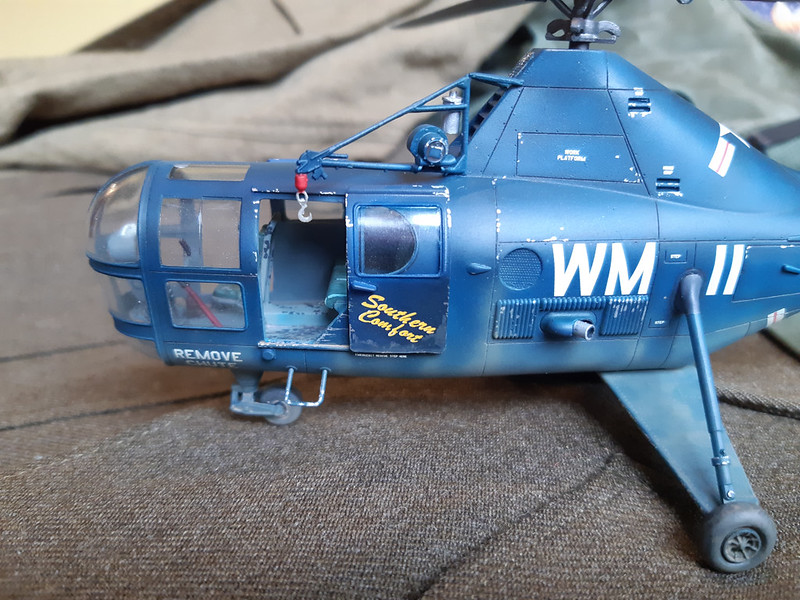
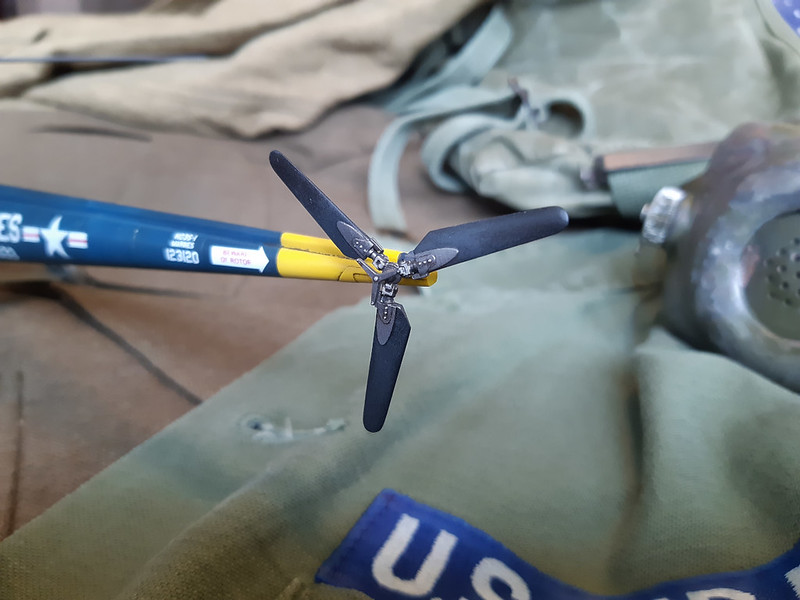
Wow, Jacob, I think you hit the hard-used Marine look dead on! My compliments - your Dragonfly is one beautiful build of a challenging kit!


TimReynaga
 Associate Editor
California, United States
Joined: May 03, 2006
KitMaker: 2,500 posts
AeroScale: 318 posts
Posted: Thursday, May 30, 2019 - 02:58 PM UTC
Ejection seat, canopy, and 200 gallon Misawa wing tanks added.
