Air Campaigns
Want to start or join a group build? This is where to start.
Want to start or join a group build? This is where to start.
Hosted by Frederick Boucher, Michael Satin
OFFICIAL: Hot 1950s in the Cold War Campaign

Naseby

Joined: October 15, 2010
KitMaker: 825 posts
AeroScale: 476 posts

Posted: Thursday, May 30, 2019 - 05:18 PM UTC
Looking good Tim.
Posted: Thursday, May 30, 2019 - 06:27 PM UTC
Not that I didn't give it a good try, but I'm not gonna get there in the next 2 days. 


Great time doing the paint on it tonight, a good coat of Old School Floquil Old Silver. Looks pretty good so far.


Great time doing the paint on it tonight, a good coat of Old School Floquil Old Silver. Looks pretty good so far.

Antilles

Joined: March 22, 2015
KitMaker: 671 posts
AeroScale: 614 posts

Posted: Friday, May 31, 2019 - 02:22 AM UTC
Jacob:
Congratulation . The Dragonfly looks really cool. I really like the shading You have applied onto the blue fuselage!
Tim:
Wow! This will truly be a tiny litte gem! The opened speed brakes look fantastic in this scale!
Peter:
Outstanding modifications on Your GAZ. What a plenty of fine details! Great.
Mark:
Go for it. I always liked the look of the Shooting-Star.
Oliver
Congratulation
 . The Dragonfly looks really cool. I really like the shading You have applied onto the blue fuselage!
 Tim:
Wow! This will truly be a tiny litte gem! The opened speed brakes look fantastic in this scale!
Peter:
Outstanding modifications on Your GAZ. What a plenty of fine details! Great.
Mark:
Go for it. I always liked the look of the Shooting-Star.
Oliver

petbat

Joined: August 06, 2005
KitMaker: 3,353 posts
AeroScale: 93 posts

Posted: Friday, May 31, 2019 - 08:58 AM UTC
Jacob the Dragonfly is a work of art. Just beautiful.
Mark - Tick, tick, tick ……
Thanks for the kind words Jacob
Mark - Tick, tick, tick ……

Thanks for the kind words Jacob
petbat

Joined: August 06, 2005
KitMaker: 3,353 posts
AeroScale: 93 posts

Posted: Friday, May 31, 2019 - 09:03 AM UTC
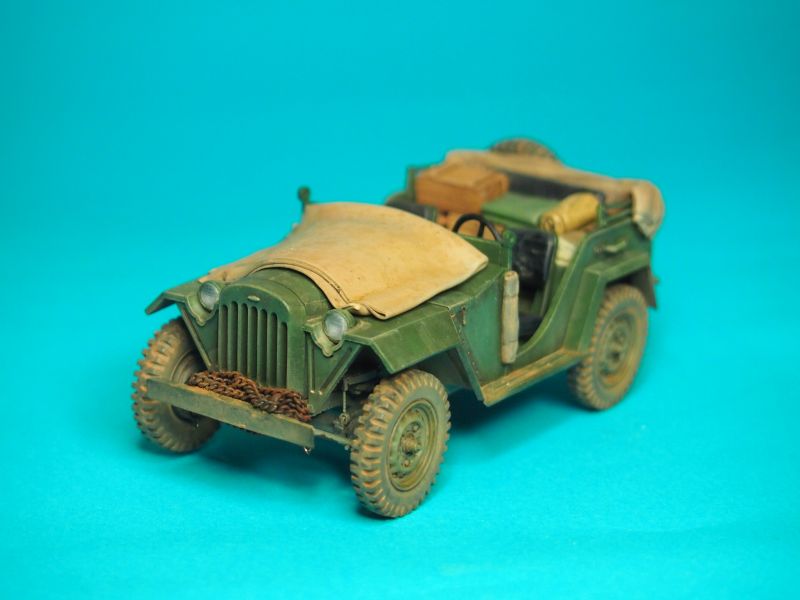
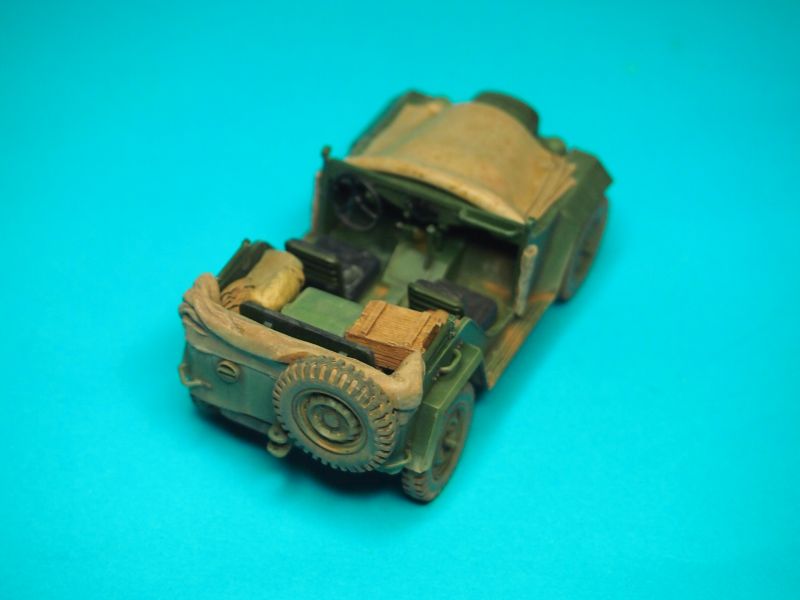
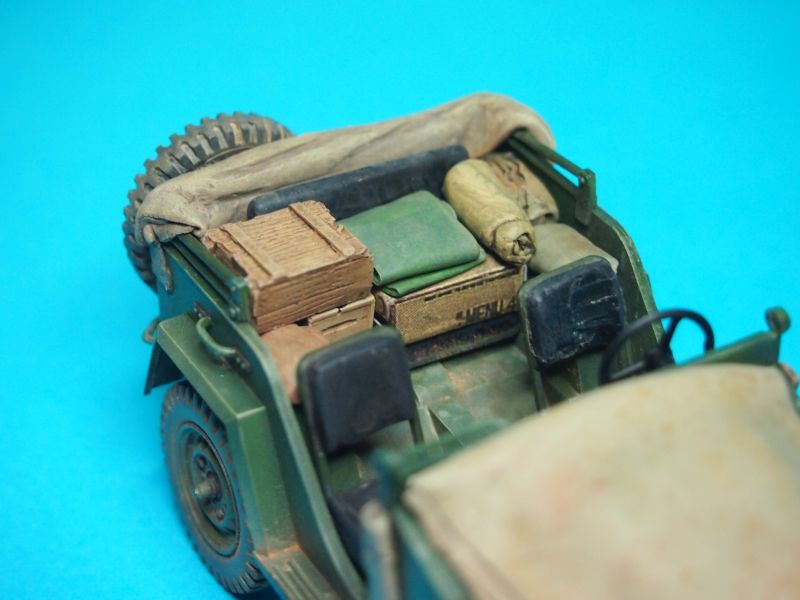
Okay, time will beat me for finishing the figure - had to modify it a bit more. But here is the GAZ 67B done - the gouging in the driver seat is for the figure to fit! .. and yes, the steering wheel is supposed to be offset like that. The shaft funs diagonally from front central down to past the driver's right foot.
You can see in the first pic what I meant about the missing in kit steering arm and Suspension damper arrangement being needed as it is very noticeable.


You can see in the first pic what I meant about the missing in kit steering arm and Suspension damper arrangement being needed as it is very noticeable.


TimReynaga

Joined: May 03, 2006
KitMaker: 2,500 posts
AeroScale: 318 posts

Posted: Friday, May 31, 2019 - 01:57 PM UTC
Peter, your little Commie GAZ looks great!


TimReynaga

Joined: May 03, 2006
KitMaker: 2,500 posts
AeroScale: 318 posts

Posted: Friday, May 31, 2019 - 01:58 PM UTC
With the installation of the landing gear, the little Sabre is done!


petbat

Joined: August 06, 2005
KitMaker: 3,353 posts
AeroScale: 93 posts

Posted: Friday, May 31, 2019 - 09:06 PM UTC
As does your Sabre Tim. 

Posted: Saturday, June 01, 2019 - 05:26 PM UTC
Well clearly I'm not going to finish tonight. But this kit has been a learning experience. 

After I had a great time getting the old silver on, I found a bit of debris on the bottom of the spray booth, the bottom half of the NLG. Tonight I learned how to drill out a gear strut and reinforce it with a piece of wire.


After I had a great time getting the old silver on, I found a bit of debris on the bottom of the spray booth, the bottom half of the NLG. Tonight I learned how to drill out a gear strut and reinforce it with a piece of wire.

petbat

Joined: August 06, 2005
KitMaker: 3,353 posts
AeroScale: 93 posts

Posted: Saturday, June 01, 2019 - 06:26 PM UTC
Quoted Text
Tonight I learned how to drill out a gear strut and reinforce it with a piece of wire.
You haven't really modelled until you have had to do this, no matter what genre you build!

MichaelSatin


Joined: January 19, 2008
KitMaker: 3,909 posts
AeroScale: 2,904 posts

Posted: Sunday, June 02, 2019 - 02:23 AM UTC
Well, time to wrap this one up. Nice job everyone, and congrats to those who finished! Ribbons have been awarded, so if you didn't get one and think you should have, let me know.
Thanks to Jacob for a great campaign, and to everyone who participated! We'll see you around the site!
Michael
Thanks to Jacob for a great campaign, and to everyone who participated! We'll see you around the site!
Michael

petbat

Joined: August 06, 2005
KitMaker: 3,353 posts
AeroScale: 93 posts

Posted: Sunday, June 02, 2019 - 10:16 PM UTC
Thanks Michael. And thanks to everyone who joined in. Some great builds and nice to see them progress through.

Naseby

Joined: October 15, 2010
KitMaker: 825 posts
AeroScale: 476 posts

Posted: Monday, June 03, 2019 - 08:16 AM UTC
Thanks everyone for participating this was a great opportunity to show some of the more obscure stuff that can be seen molded in plastic and great inspiration for future projects !
TimReynaga

Joined: May 03, 2006
KitMaker: 2,500 posts
AeroScale: 318 posts

Posted: Thursday, June 06, 2019 - 02:06 PM UTC
Thank you Jacob for a great campaign, well run!
Antilles

Joined: March 22, 2015
KitMaker: 671 posts
AeroScale: 614 posts

Posted: Friday, June 07, 2019 - 04:28 AM UTC
Peter and Tim: Nice photo finish!
Peter: Outstanding weathering job. I cannot see it clearly in the last picture. Have You simulated a repair of the driver´s seat with an adhesive tape? Great idea!
Tim: This tiny Sabre is just lovely. Congrats.
Jacob: Thank You for this great campaign!
Oliver
Peter: Outstanding weathering job. I cannot see it clearly in the last picture. Have You simulated a repair of the driver´s seat with an adhesive tape? Great idea!
Tim: This tiny Sabre is just lovely. Congrats.
Jacob: Thank You for this great campaign!
Oliver

petbat

Joined: August 06, 2005
KitMaker: 3,353 posts
AeroScale: 93 posts

Posted: Friday, June 07, 2019 - 08:02 AM UTC
Hi Oliver
That is simply the gouging of the kit plastic using a Dremel burr to mould the seat back to fit the figure I am working on. I can see why it may look like tape. I think your imagination was the wonderful idea... I'll keep that one in mind. Cheers
That is simply the gouging of the kit plastic using a Dremel burr to mould the seat back to fit the figure I am working on. I can see why it may look like tape. I think your imagination was the wonderful idea... I'll keep that one in mind. Cheers

 |


