Air Campaigns
Want to start or join a group build? This is where to start.
OFFICIAL: Hangar Queen 9 Campaign
MLD
_VISITCOMMUNITY
Vermont, United States
Joined: July 21, 2002
KitMaker: 3,569 posts
AeroScale: 419 posts
Posted: Monday, September 23, 2019 - 07:24 AM UTC

Quoted Text

Hey All!

Cheering you all on! Mark, I know you've got a few more in there! Mike, looking forward to seeing the Falcon done!

Paul, good strip, and re-prime. I'm cheering you on that this time it goes great!


Still working up the time and motivation for that paint/weathering job.
Teaching 4th grade leaves precious little time this time of the year, but I'll give it the old college try.
At least I'm not scrambling to finish an armor kit for Armorcon this weekend.
Lately, this one (sacrilege I know, a TANK)has had most of my bench time.
PeeJay74
#363
_VISITCOMMUNITY
Pennsylvania, United States
Joined: January 08, 2014
KitMaker: 425 posts
AeroScale: 401 posts
Posted: Friday, October 04, 2019 - 03:59 PM UTC
Tamiya 1/48 F4U-1D Corsair

Repainted with AK Real Colors Dark Sea Blue and added markings with the Montex masks. I am definitely going to use these on other builds, they look much better than decals.


One concern though, anyone familiar with using them to do the national markings? I'm a little worried of messing up the stars and bars. White first, then apply the center parts and add the insignia blue?

eMan
#298
_VISITCOMMUNITY
Hong Kong S.A.R. / 繁體
Joined: August 08, 2002
KitMaker: 1,182 posts
AeroScale: 351 posts
Posted: Tuesday, October 08, 2019 - 01:18 PM UTC
Here is my entry, Sword 1/72 Northrop M-9MA.


john41492
#442
_VISITCOMMUNITY
Malacca, Malaysia
Joined: July 20, 2015
KitMaker: 363 posts
AeroScale: 335 posts
Posted: Thursday, October 17, 2019 - 04:29 PM UTC
Lap Man,

Nice choice! I've almost bought that kit a couple of times. Always get outbid though.

Paul,

That's how I did the insignia on my C-47 for the Pax and Pallets campaign. They turned out ok, though in the end I only kept the one on the underside of the wing. Hope that helps.

John
b17-peter
#392
_VISITCOMMUNITY
Hessen, Germany
Joined: January 09, 2013
KitMaker: 696 posts
AeroScale: 608 posts
Posted: Saturday, November 02, 2019 - 04:45 AM UTC
Hi mates,
I'm late this year, but nevertheless here is my entry:


Made a Re-Start this afternoon and at once encountered fitting issue with the undercarriage-bay fairings. Had quite a lot of plastic to cut and sand away, but in the end it fitted well at last...
Cheers Pete
md72
#439
_VISITCOMMUNITY
Washington, United States
Joined: November 05, 2005
KitMaker: 4,950 posts
AeroScale: 3,192 posts
Posted: Saturday, November 02, 2019 - 05:11 AM UTC
That's quite a challenge for just 2 months. Best of luck with it Peter!
b17-peter
#392
_VISITCOMMUNITY
Hessen, Germany
Joined: January 09, 2013
KitMaker: 696 posts
AeroScale: 608 posts
Posted: Saturday, November 02, 2019 - 10:23 AM UTC
Thanks Mark, I'm in an optimistic mood
eMan
#298
_VISITCOMMUNITY
Hong Kong S.A.R. / 繁體
Joined: August 08, 2002
KitMaker: 1,182 posts
AeroScale: 351 posts
Posted: Tuesday, November 05, 2019 - 07:18 PM UTC
Progress updating, almost done.


eMan
#298
_VISITCOMMUNITY
Hong Kong S.A.R. / 繁體
Joined: August 08, 2002
KitMaker: 1,182 posts
AeroScale: 351 posts
Posted: Wednesday, November 06, 2019 - 08:07 PM UTC
Northrop N-9MA finished.


b17-peter
#392
_VISITCOMMUNITY
Hessen, Germany
Joined: January 09, 2013
KitMaker: 696 posts
AeroScale: 608 posts
Posted: Friday, November 08, 2019 - 10:39 AM UTC
@Lap Man - Very nice, I like it!

Here's a little progress on my build:


There will be a good measure of sanding now, before the mating of wings and fuselage...
Cheers
Pete
md72
#439
_VISITCOMMUNITY
Washington, United States
Joined: November 05, 2005
KitMaker: 4,950 posts
AeroScale: 3,192 posts
Posted: Friday, November 08, 2019 - 03:24 PM UTC
Yea Lap, someone else to join me at the finish line!

Peter, Fantastic progress, you might go all the way!
RhinoSpit
_VISITCOMMUNITY
Bas-Rhin, France
Joined: September 22, 2016
KitMaker: 224 posts
AeroScale: 191 posts
Posted: Saturday, November 16, 2019 - 10:32 PM UTC
I'v finished my beaufighter yeasterday


b17-peter
#392
_VISITCOMMUNITY
Hessen, Germany
Joined: January 09, 2013
KitMaker: 696 posts
AeroScale: 608 posts
Posted: Sunday, November 17, 2019 - 06:55 PM UTC
It's really "Beau"tiful! The color scheme looks absolutely great. Trés bien, Franck!
b17-peter
#392
_VISITCOMMUNITY
Hessen, Germany
Joined: January 09, 2013
KitMaker: 696 posts
AeroScale: 608 posts
Posted: Tuesday, November 19, 2019 - 12:27 AM UTC
Well, I made a little progress over the weekend. Next step is sealing with "Future" or "Glänzer" as it is called over here in Germany and afterwards the decals.

Cheers Peter
b17-peter
#392
_VISITCOMMUNITY
Hessen, Germany
Joined: January 09, 2013
KitMaker: 696 posts
AeroScale: 608 posts
Posted: Tuesday, November 19, 2019 - 06:17 AM UTC

First try to post the picture wasn't successful...
I'm not really content with the fit of the cockpit cover, probably must try a little extra filling at the joints...
md72
#439
_VISITCOMMUNITY
Washington, United States
Joined: November 05, 2005
KitMaker: 4,950 posts
AeroScale: 3,192 posts
Posted: Tuesday, November 19, 2019 - 08:48 AM UTC
Wow, where is the eyes bugging out emoji? That's amazing. You've come a long way in what, 2 weeks? Hell it would have taken me that long on that one seam. Way to go! You can do it!
b17-peter
#392
_VISITCOMMUNITY
Hessen, Germany
Joined: January 09, 2013
KitMaker: 696 posts
AeroScale: 608 posts
Posted: Thursday, November 21, 2019 - 08:45 AM UTC
Thx Mark, but the kit hasn't so many parts anyway
I think I will need most of the time now when it comes to that fit issue of the cockpit..
But I'm still sure to finish in time
john41492
#442
_VISITCOMMUNITY
Malacca, Malaysia
Joined: July 20, 2015
KitMaker: 363 posts
AeroScale: 335 posts
Posted: Wednesday, November 27, 2019 - 05:56 PM UTC
Hi All,

Sorry for the long delay, but I experienced something that can only make me scratch my head and slowly move on. Two airbrush issues (failed O-rings) needing replacement parts that are hard to find here, my phone going on the fritz (replaced), and the largest hurdle, the computer! While I'm fairly certain that the nieces had something to do with the computer, resulting in a complete wipe and re-install, I discovered that right away has different meanings depending on the country in which you reside. Things seem to be sort of back to normal now.

I must admit that we've got a lot of nice work going on here! I'm sure that more will cross the finish line before the end of the year.

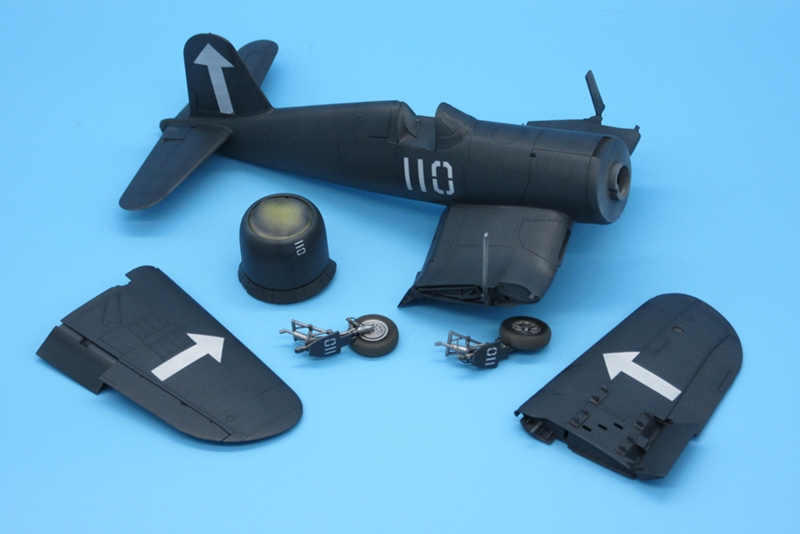
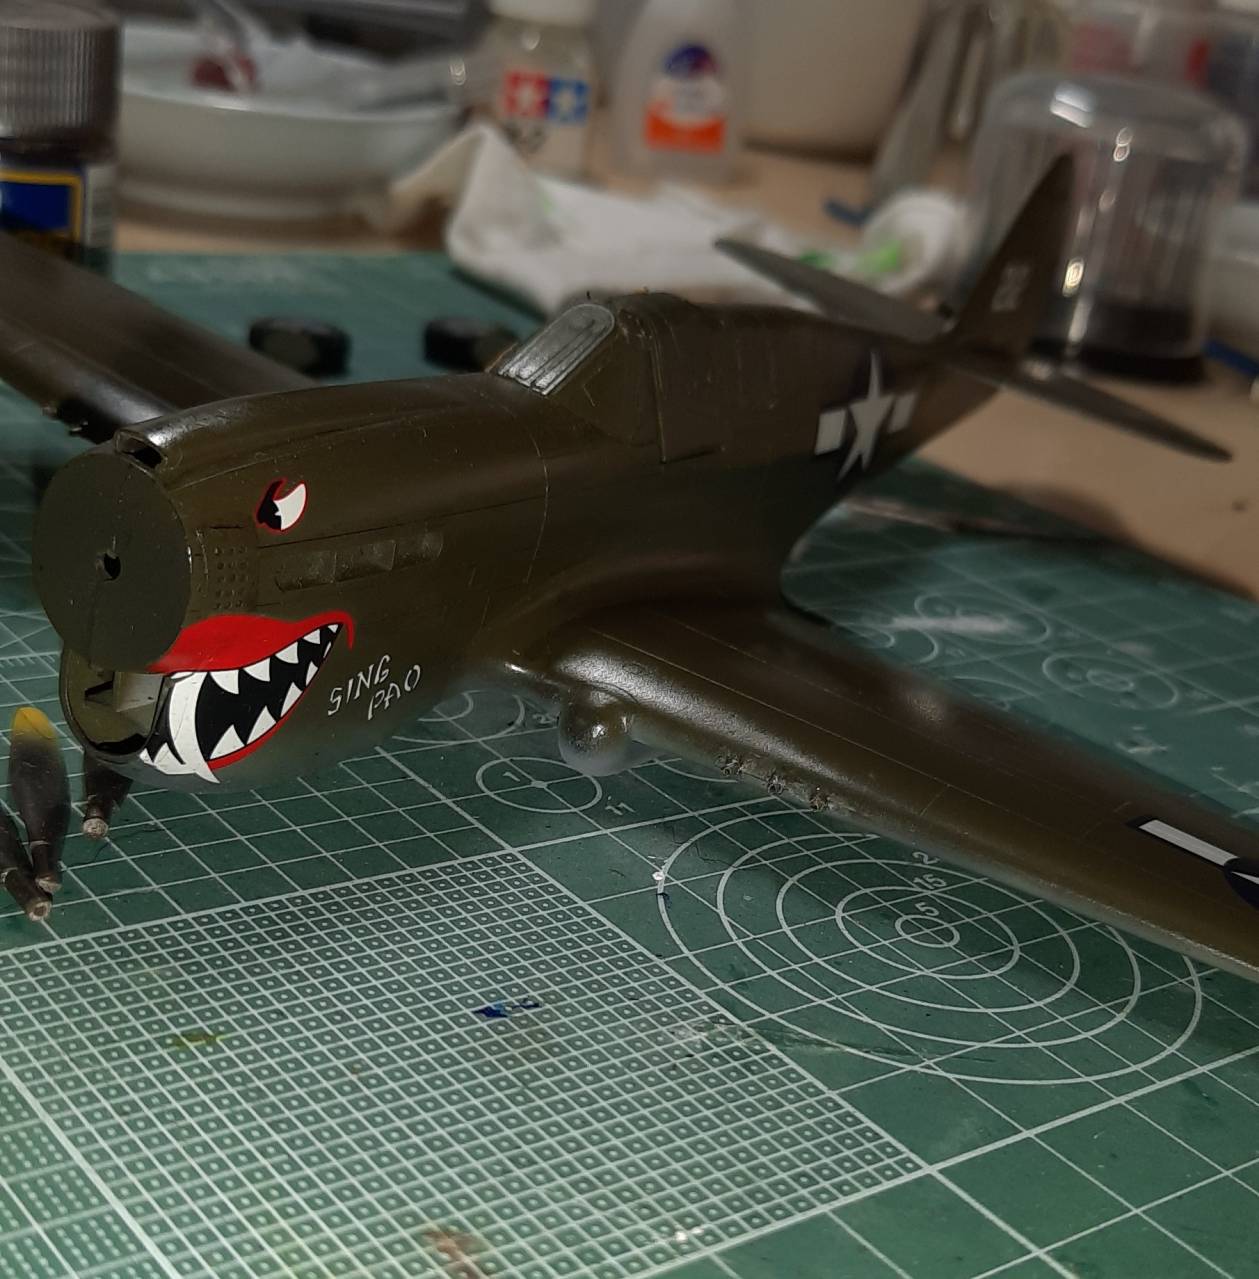
That said, I've been having a fun time with the Mauve P-40N. I very nice kit, that I started to play with!

I replaced the kit's gun barrels (plastic stubs) using Albion brass tubing (0.8mm o.d. x 0.06mm i.d.), which worked nicely, though I do need to practice a bit more on this technique.


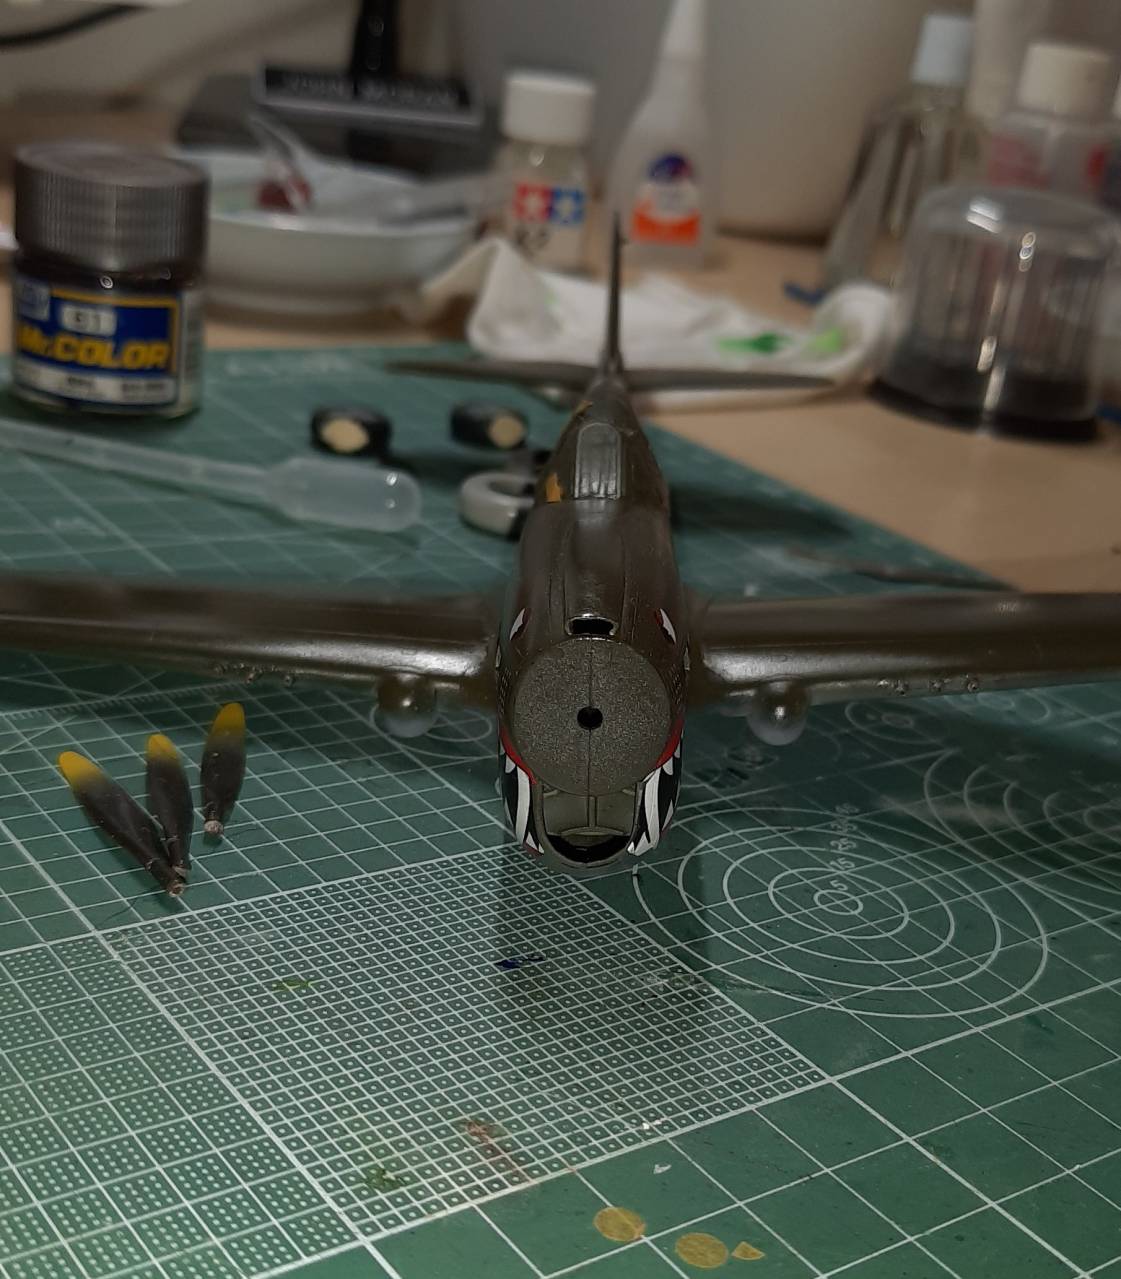
Then I rediscovered a little technique that I'd forgotten about. Wet sanding with 3000 grit, to smooth out the roughed paint finish. This worked really well on the paint. In my zeal, I did mar an insignia, and the water managed to get into the white glue I used for the canopy.


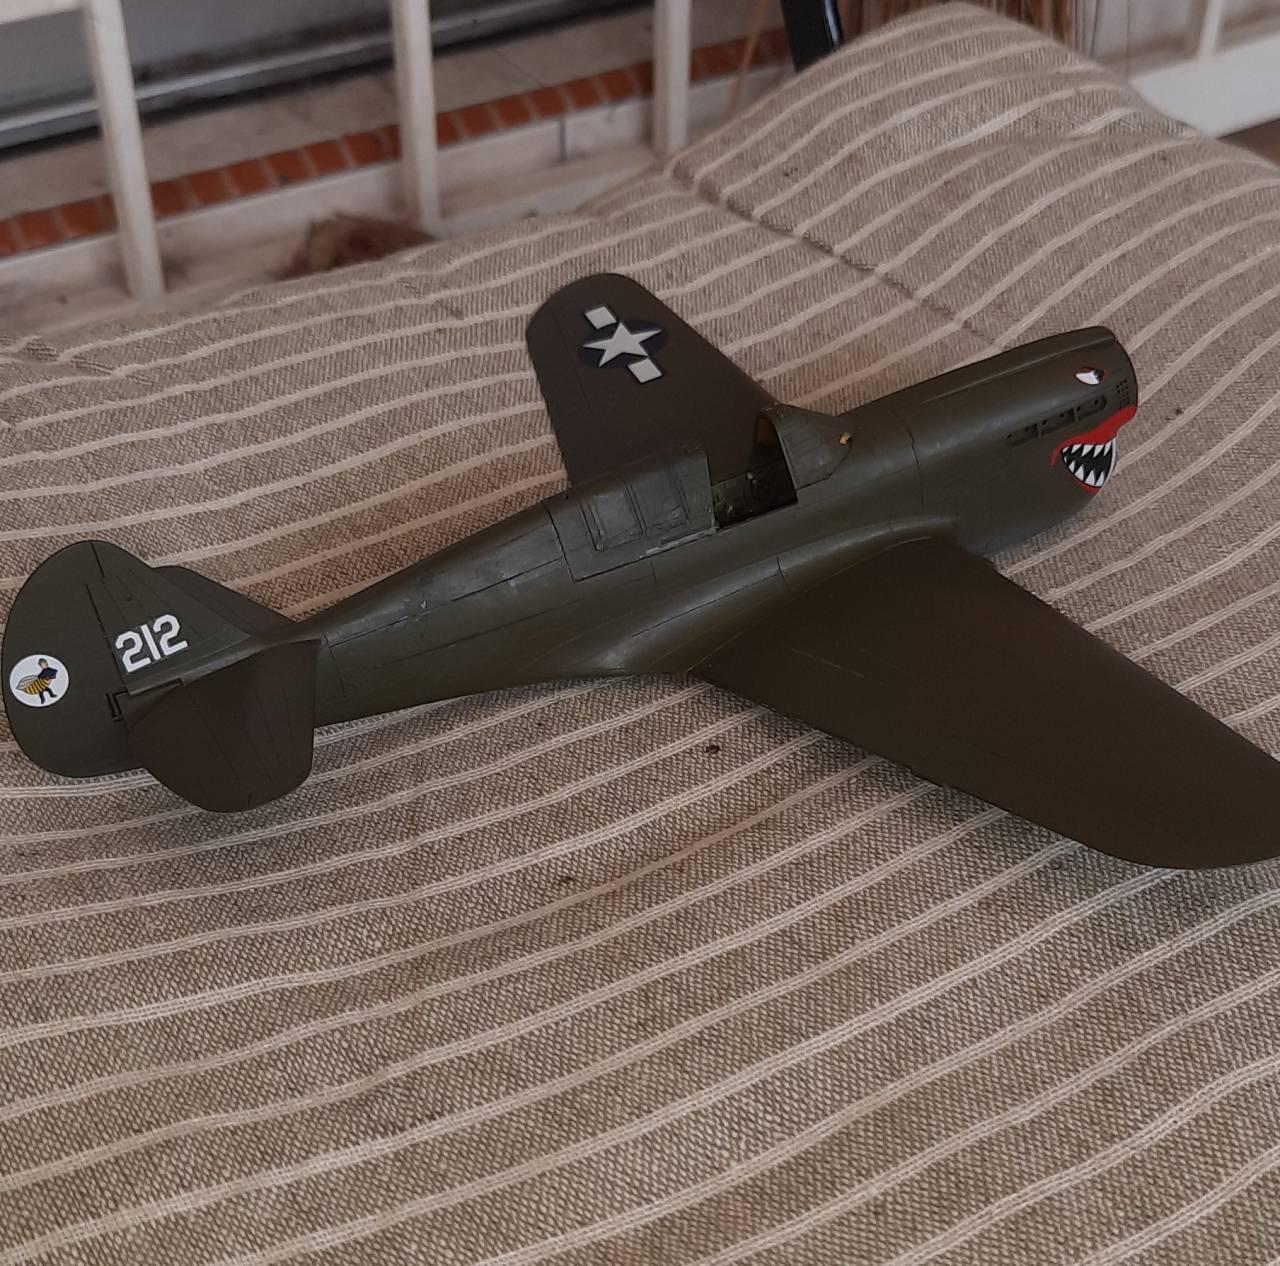
Back I went to the bench to make the minor repairs, where somewhere, somehow the little squadron marking on the rudder (bee-man) simply fell off leaving no trace, and on both sides! I'm still unsure how this happened, though will be keeping an eye on the Nieces things for any added on decals!!

Feeling pretty cocky at this point I went for a dusting of the top to simulate sun fading. Here, I forgot to dilute the white when I did the high fly-by with the airbrush. The result was a rather poor fading attempt.

I did like the effect of the Prisma silver pencil I used to replicate chipped paint from pilot and work areas.


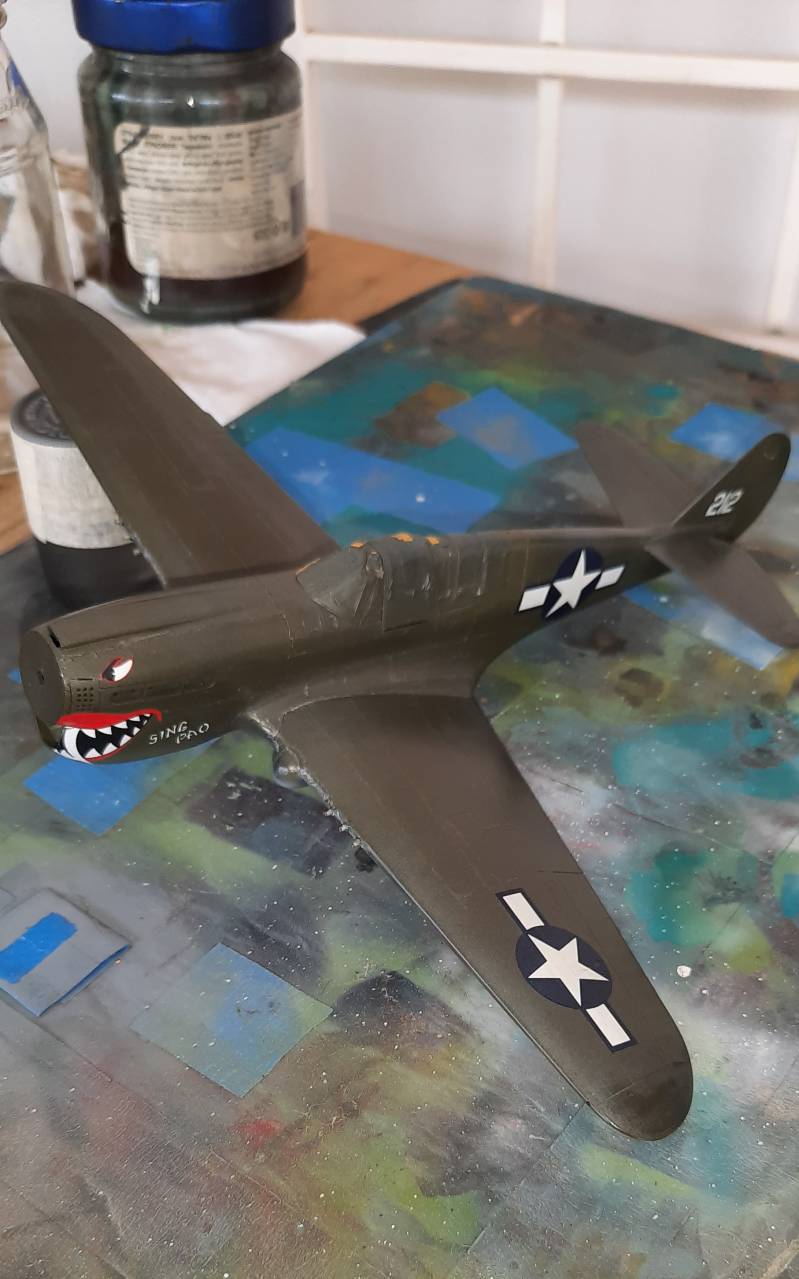
Undaunted, I pulled out the olive drab and lightly went over the areas that didn't look right.


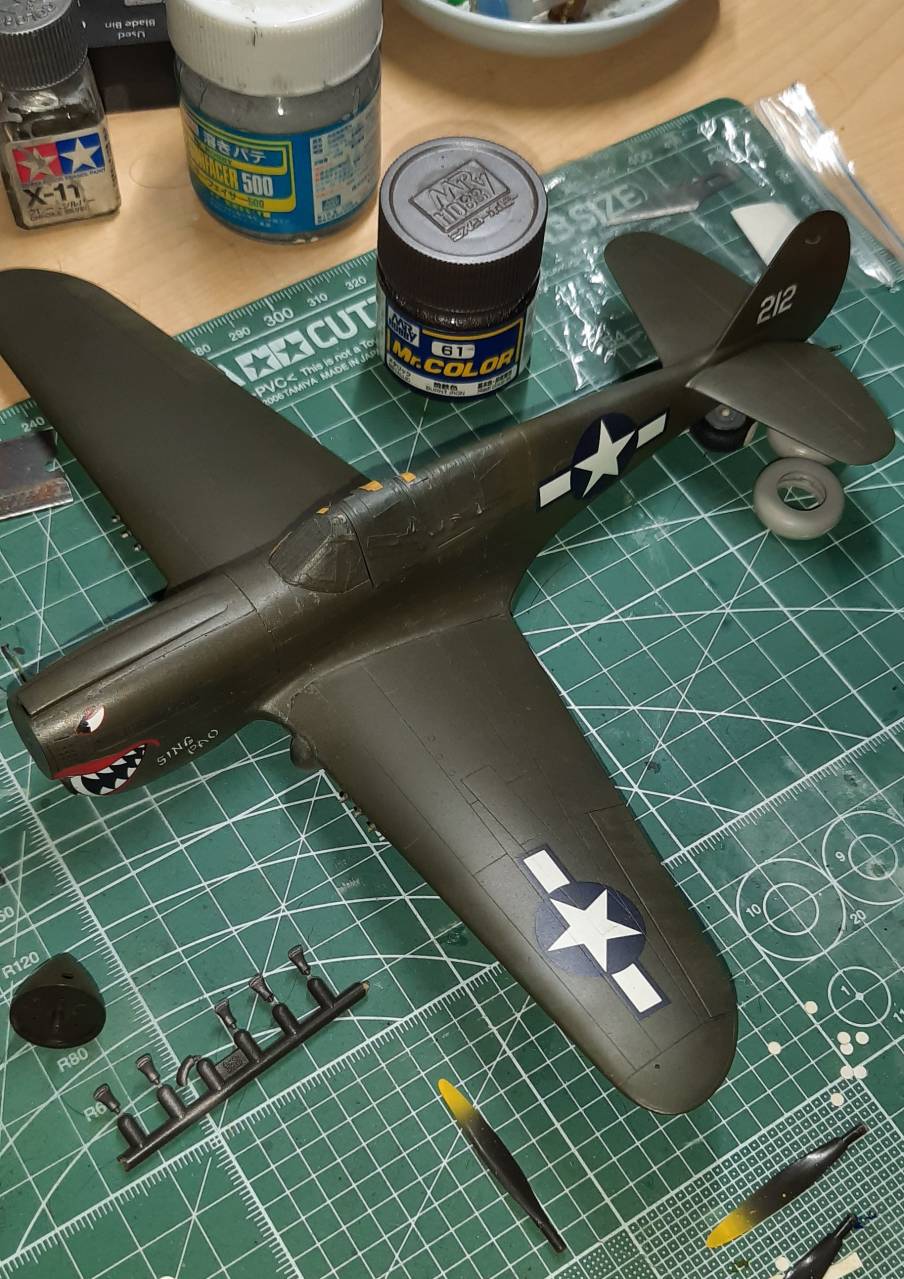
This is the state of affairs currently. I think that I'll do a properly diluted shade of light gull gray to do some minimal fading. The bird is starting to tell me that it's time to wrap it up, so on to finishing the prop and landing gear, installing the seat, and calling her done.

Till next time! Keep up the great work that is going on here, the finish line is quickly approaching!!

John
b17-peter
#392
_VISITCOMMUNITY
Hessen, Germany
Joined: January 09, 2013
KitMaker: 696 posts
AeroScale: 608 posts
Posted: Monday, December 02, 2019 - 04:12 AM UTC
Nearing the finish line steadily...

md72
#439
_VISITCOMMUNITY
Washington, United States
Joined: November 05, 2005
KitMaker: 4,950 posts
AeroScale: 3,192 posts
Posted: Monday, December 02, 2019 - 08:30 AM UTC
Hang in there guys, you can do it!
b17-peter
#392
_VISITCOMMUNITY
Hessen, Germany
Joined: January 09, 2013
KitMaker: 696 posts
AeroScale: 608 posts
Posted: Saturday, December 14, 2019 - 10:51 PM UTC
Well, well, I consider my Herc completed. Some last checks and then pictures for and into the gallery


Cheers Pete
md72
#439
_VISITCOMMUNITY
Washington, United States
Joined: November 05, 2005
KitMaker: 4,950 posts
AeroScale: 3,192 posts
Posted: Sunday, December 15, 2019 - 04:21 AM UTC
Wow, color me impressed. You knocked off an entire C-130 in 1/144 in a month and a half. I've spent nearly the same amount of time on a 1/144 F-14 and I'm still chasing seams.
b17-peter
#392
_VISITCOMMUNITY
Hessen, Germany
Joined: January 09, 2013
KitMaker: 696 posts
AeroScale: 608 posts
Posted: Monday, December 16, 2019 - 10:01 PM UTC
Thanks for your kind words, Mark! I appreciate it, but as I wrote earlier, the kit hasn't too many parts and the fitting gives no big problems. I can definitely recommend it.
b17-peter
#392
_VISITCOMMUNITY
Hessen, Germany
Joined: January 09, 2013
KitMaker: 696 posts
AeroScale: 608 posts
Posted: Thursday, December 19, 2019 - 08:39 AM UTC
Well, the photos are in the gallery, I say thank you, Michael, for another fine campaign!
Good luck for the others to cross the finish line in time and Merry Christmas and a Happy New Year for you
Cheers Peter
PeeJay74
#363
_VISITCOMMUNITY
Pennsylvania, United States
Joined: January 08, 2014
KitMaker: 425 posts
AeroScale: 401 posts
Posted: Friday, December 20, 2019 - 01:07 PM UTC
Tamiya1:48 F4U-1D Corsair

I have decided to abandon my Corsair build. Somehow I got some dust and lint into the clear coat while it was being sprayed and the finish is ruined, again. I tried using some micro mesh but it didn’t clean it up. It just made it worse as I wore through the paint in a couple of spots trying to polish out the blemishes. To top it all off I also managed to break the wingfold spar off the left wing while doing all of this, and it has made the joint so weak the wing droops badly.

Long story short, I wrecked the kit by my own mistakes. I am going to keep the sub assemblies and build another one sooner or later, I’ll make use of them. I am really happy with the improvements I made to some of the smaller ones like the landing gear.

For now though, this one is dead to me.