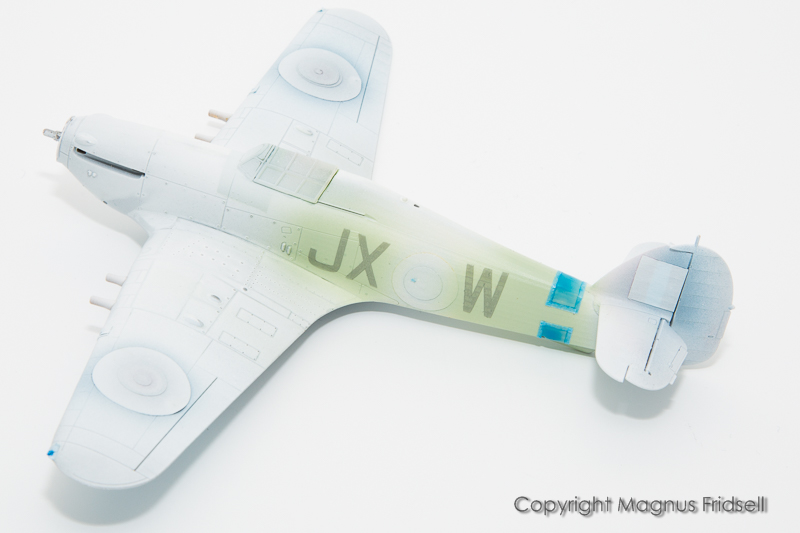
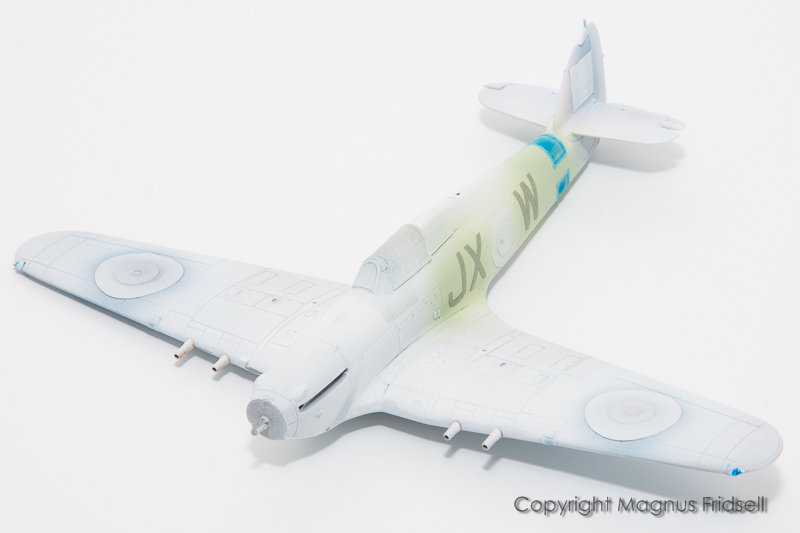
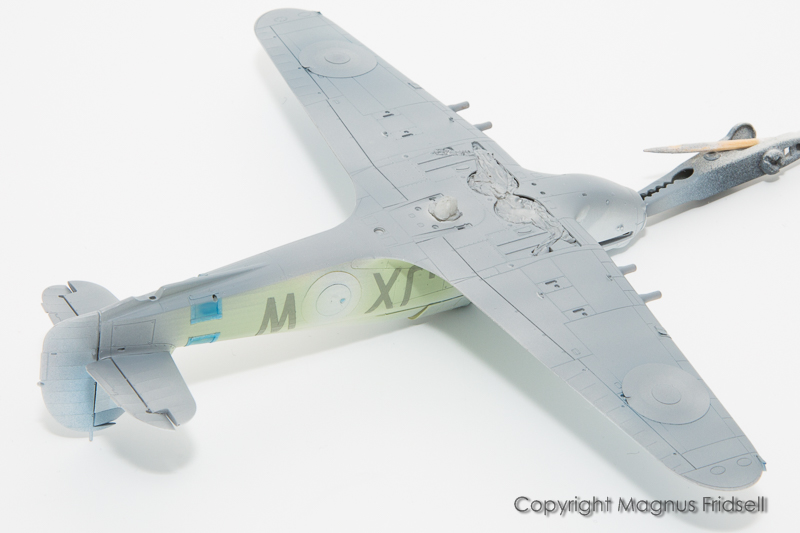
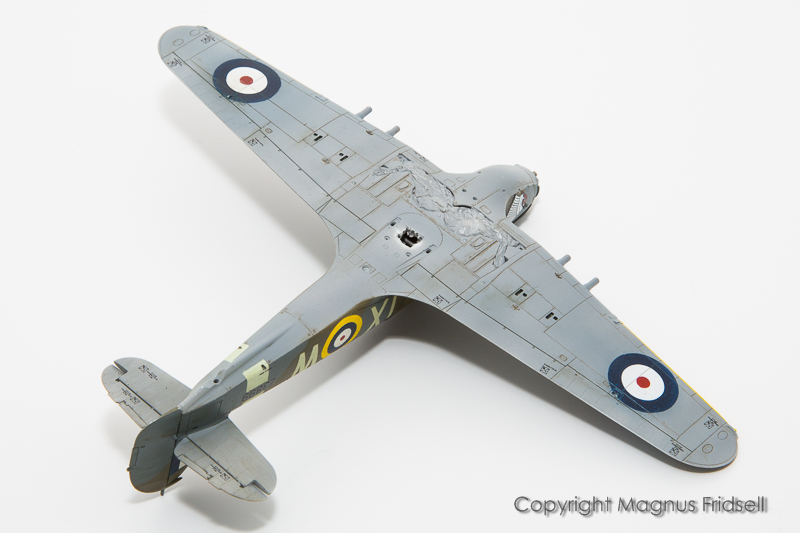
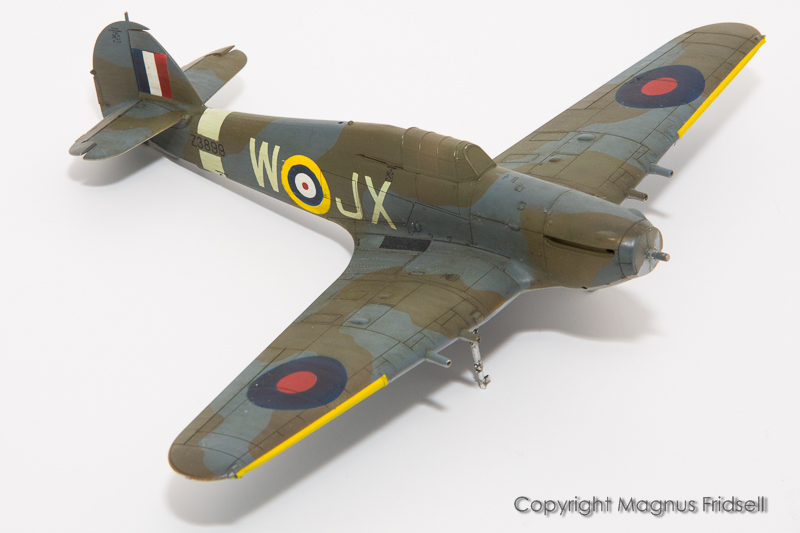
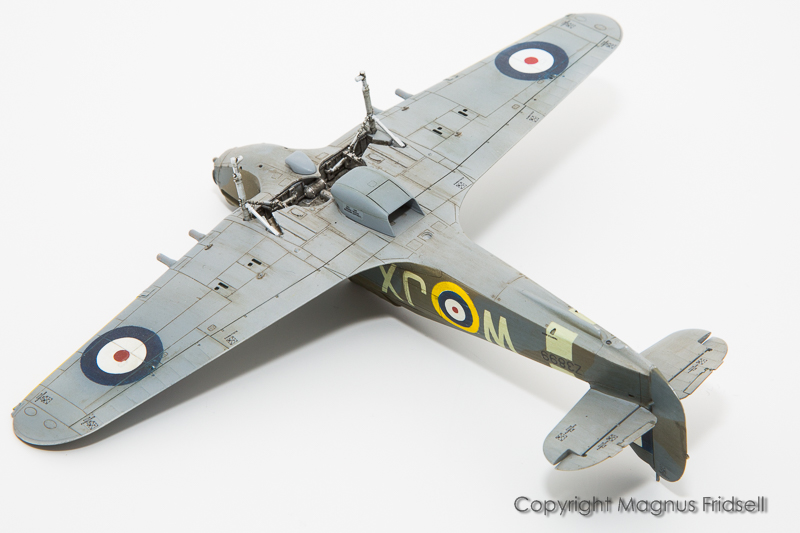
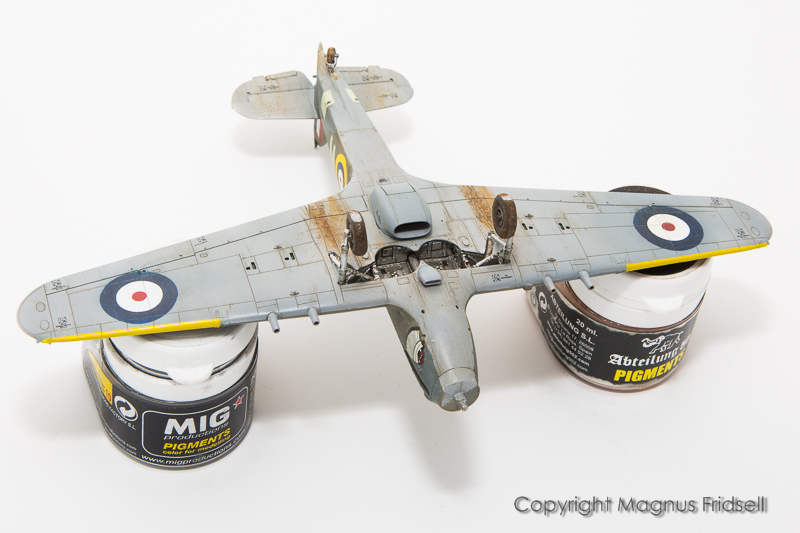
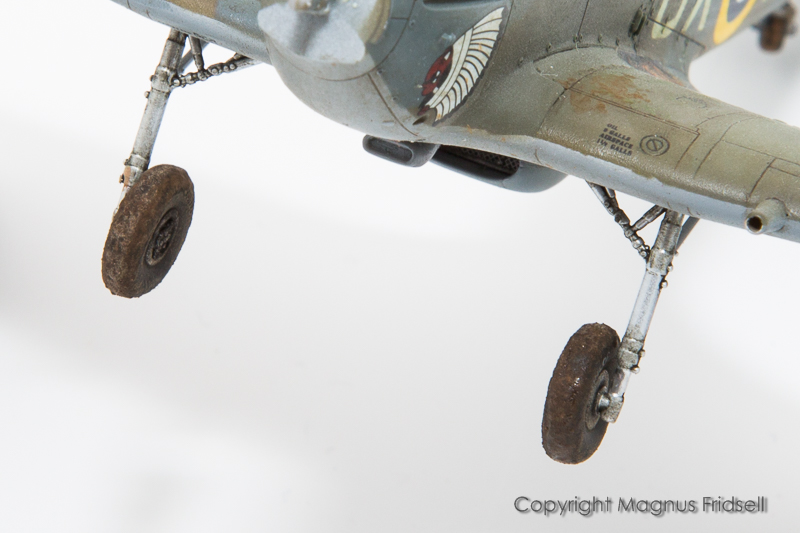
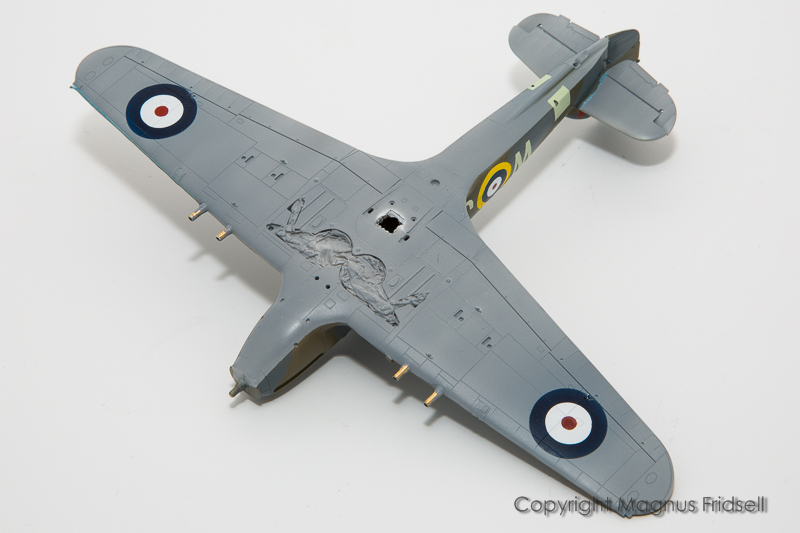
Stubs epoxied, carefully!
Note to self (and other interested parties): don't push stuff too far because they will end up inside the rather hermetically closed airframe... I had to drill out a hole in the belly (thanks to the Plastic Gods that I hadn't glued the radiator scoop in place yet ) to get out a wayward stub...
Anyway, now they're glued and will stay in place hopefully !
Magnus
Hosted by Rowan Baylis
1/72 Hurricane Mk IIc from Arma Hobby
magnusf
Stockholm, Sweden
Joined: May 02, 2006
KitMaker: 1,953 posts
AeroScale: 1,902 posts
Joined: May 02, 2006
KitMaker: 1,953 posts
AeroScale: 1,902 posts
Posted: Saturday, January 25, 2020 - 07:20 PM UTC
Posted: Tuesday, January 28, 2020 - 08:54 AM UTC
Magnus, the fact you've painted on the Roundels takes this build to the next level!
Posted: Tuesday, January 28, 2020 - 09:40 PM UTC
Always a pleasure to watch your builds, Magnus. A real masterclass.
Cheers
Karl.
Cheers
Karl.
magnusf
Stockholm, Sweden
Joined: May 02, 2006
KitMaker: 1,953 posts
AeroScale: 1,902 posts
Joined: May 02, 2006
KitMaker: 1,953 posts
AeroScale: 1,902 posts
Posted: Tuesday, February 11, 2020 - 08:37 AM UTC
Russell and Karl! Thanks !
Sorry for being absent, I've been on a very bad armour trip lately but got over it a few days ago. Happens every now and then... Back to the aircraft!
I usually paint the codes last but this time I'll try doing it this way instead by using the cutouts from the masks over a pre-painted sky surface.
Tail band done the same way...
...and finally a quick coat of Medium Sea Grey!
I might get some Dark Green on tomorrow, stay tuned!
Magnus
Posted: Tuesday, February 11, 2020 - 09:30 AM UTC
Quoted Text
I usually paint the codes last but this time I'll try doing it this way instead by using the cutouts from the masks over a pre-painted sky surface.
I've thought about doing this type of "reverse masking" in the past but never actually tried it out, very keen to see how this comes up Magnus! Looking very good so far.
Cheers, D
Posted: Tuesday, February 11, 2020 - 10:03 AM UTC
Quoted Text
Russell and Karl! Thanks !
Sorry for being absent, I've been on a very bad armour trip lately but got over it a few days ago. Happens every now and then... Back to the aircraft!
That's okay Magnus, we forgive you
Quoted Text
I usually paint the codes last but this time I'll try doing it this way instead by using the cutouts from the masks over a pre-painted sky surface.
Magnus
Never seen this kind of reverse painting before. Like Damian I'll be interested to see how it turns out.
Currently working on Airfix's Hurricane for the Sopwith-Hawker-Bae campaign and was inspired by your method of adding wing tip lights, so have tried it for the first time... Fingers crossed it comes out as good as yours
BlackWidow
European Union
Joined: August 09, 2009
KitMaker: 1,732 posts
AeroScale: 1,336 posts
Joined: August 09, 2009
KitMaker: 1,732 posts
AeroScale: 1,336 posts
Posted: Wednesday, February 12, 2020 - 08:49 AM UTC
Quoted Text
Sorry for being absent, I've been on a very bad armour trip lately but got over it a few days ago. Happens every now and then...
Magnus
With your skills it can't be that bad, Magnus! What did you build?
Your Hurri comes out nicely so far. Also have never seen this reverse marking. For me it's always the last thing to do before flat finish.
Torsten
magnusf
Stockholm, Sweden
Joined: May 02, 2006
KitMaker: 1,953 posts
AeroScale: 1,902 posts
Joined: May 02, 2006
KitMaker: 1,953 posts
AeroScale: 1,902 posts
Posted: Saturday, February 15, 2020 - 08:20 AM UTC
Russell, Damian and Torsten! You can get the answer for the reverse masking right here (so you don't have to waste your time scrolling down ): It worked out excellent! I'll use it in the future whenever possible. It also avoids the problem with letters like D and B where one otherwise have to handle several separate parts to mask off one letter.
Russell! Since you did that KGV-rigging, I doubt that a pair of clear wingtip lights would be much of a hurdle !
Torsten! Has more to do with me than with the armour kits. I find it quite a bit different from aircraft and I'm not prepared to invest the time in climbing the learning curve ! Still I do a bit of armour building every now and then but they very seldom get finished. On this latest armour trip I built the ACE Centurion Mk 5 in 1/72 - a really nice kit even if it looks a bit on the coarse side on the sprues!
Be prepared for an update where a lot has happened! Since most of the markings are there already beneath the masks, the whole model transforms very quickly into "almost finished" when peeling them off!
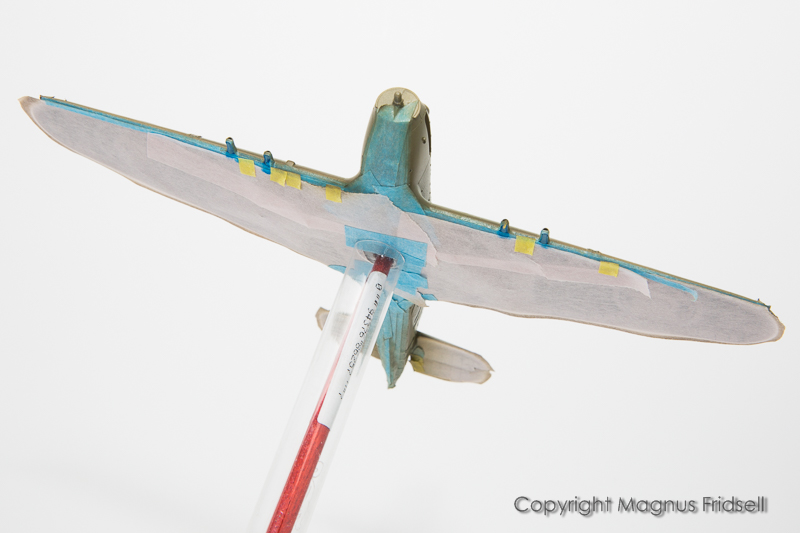
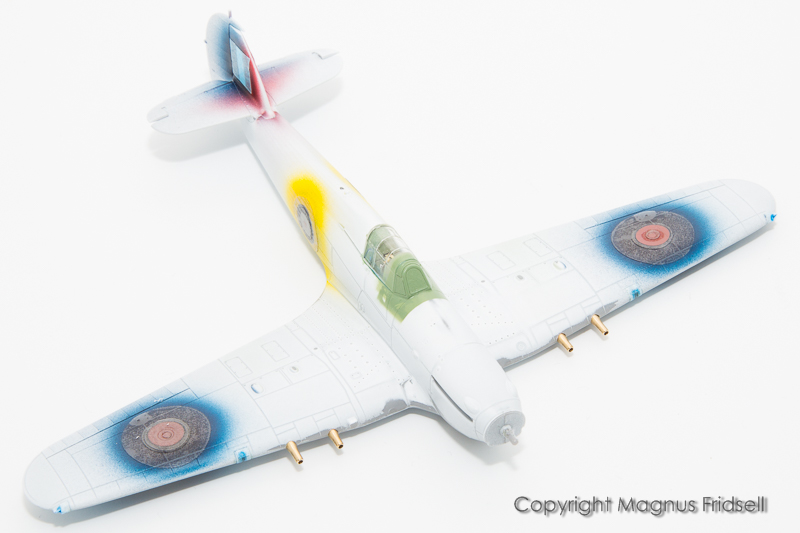
"Detail masking" was finished a week ago but masking off the lower surfaces was a bit of an undertaking as well.
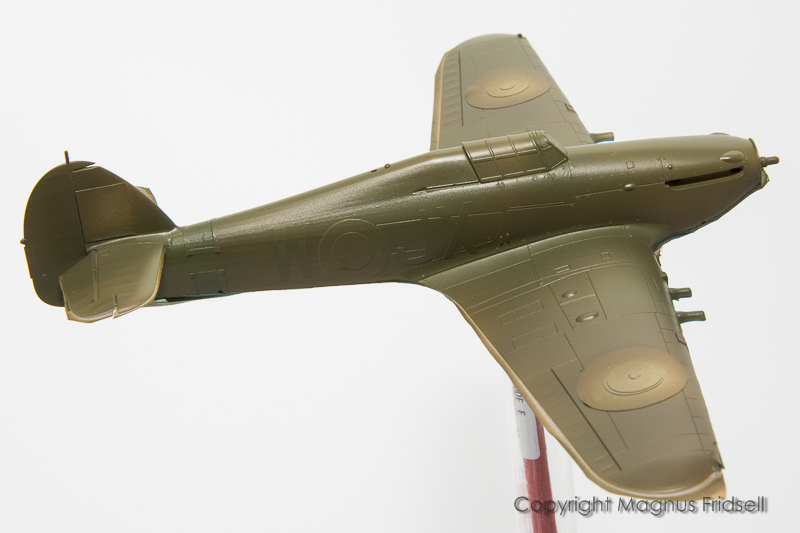
One of the advantages of working from home every now and then is that some of the lunch break can be spent using the airbrush ! The result of a Friday lunch paint session!
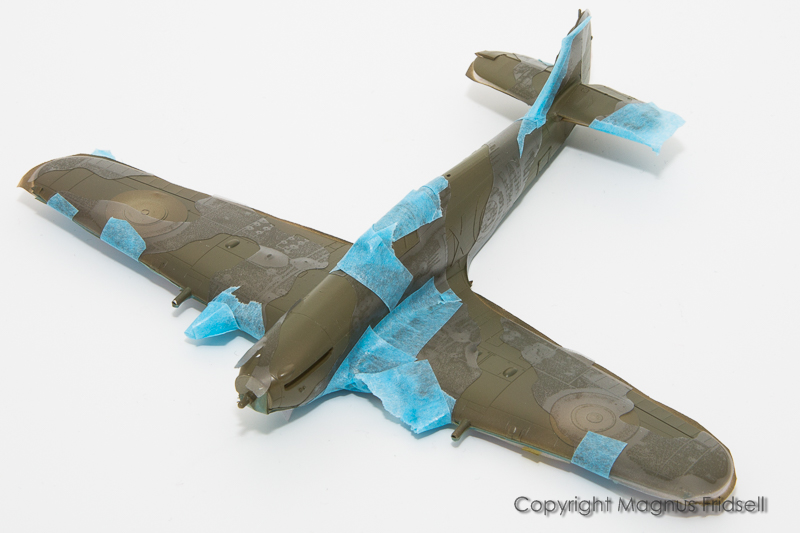
Once again using the camo masks available as a downloadable PDF from Arma here, masking the grey parts of the camo was a breeze!
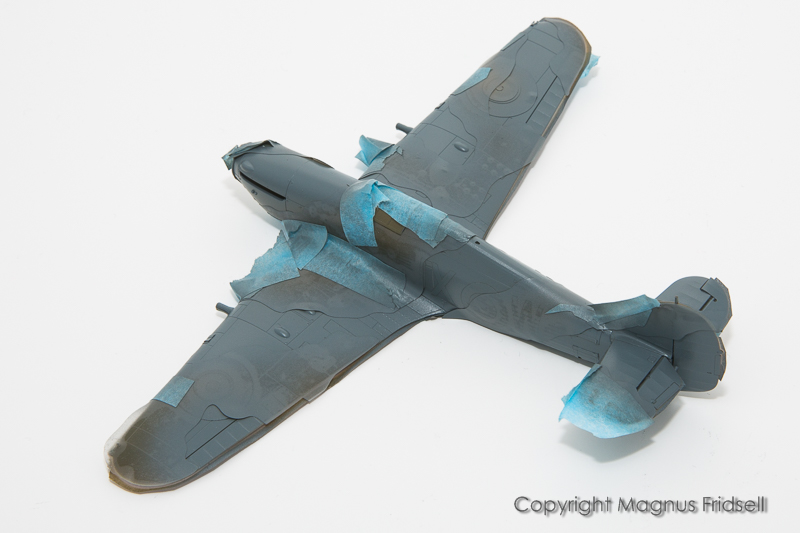
A coat of Medium Sea Grey...
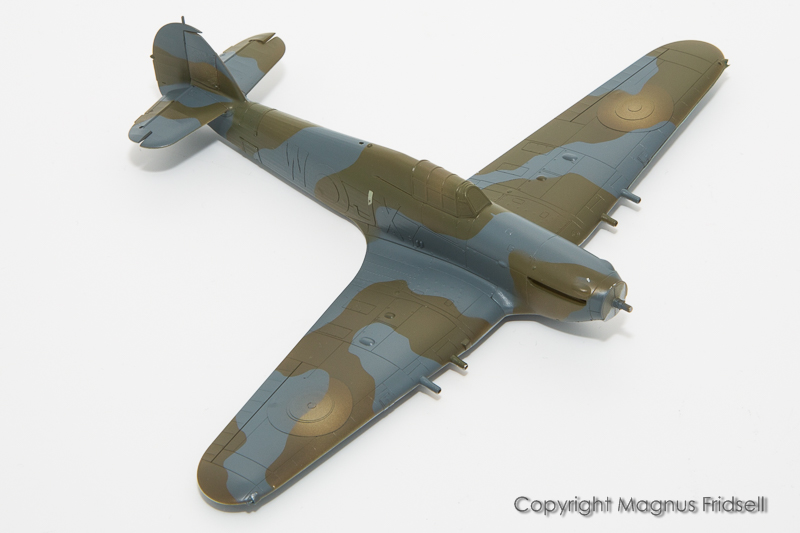
...unmasking the camo...
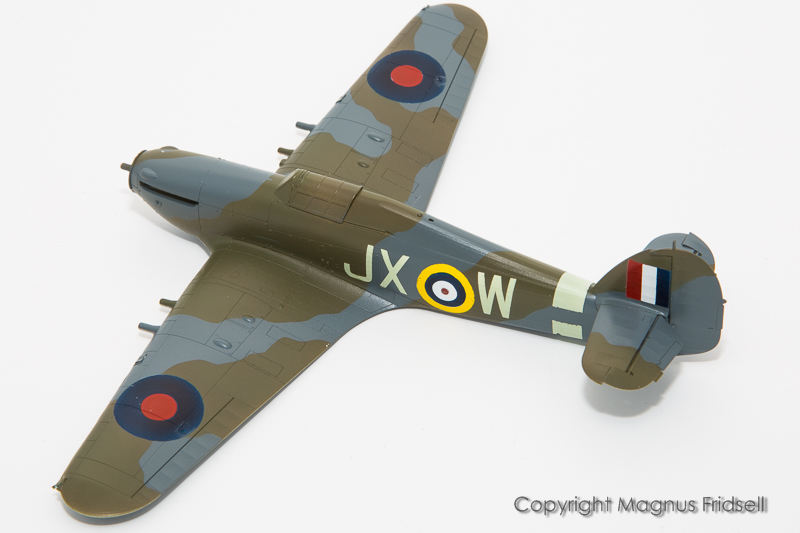
...and then...
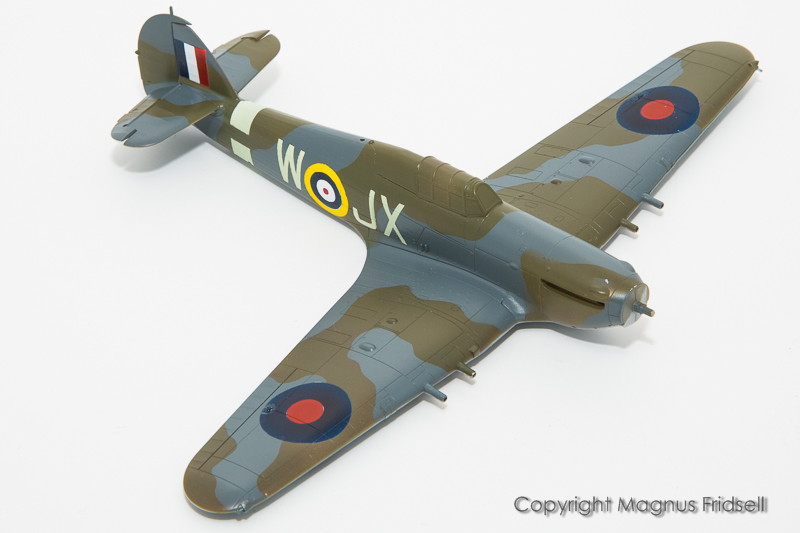
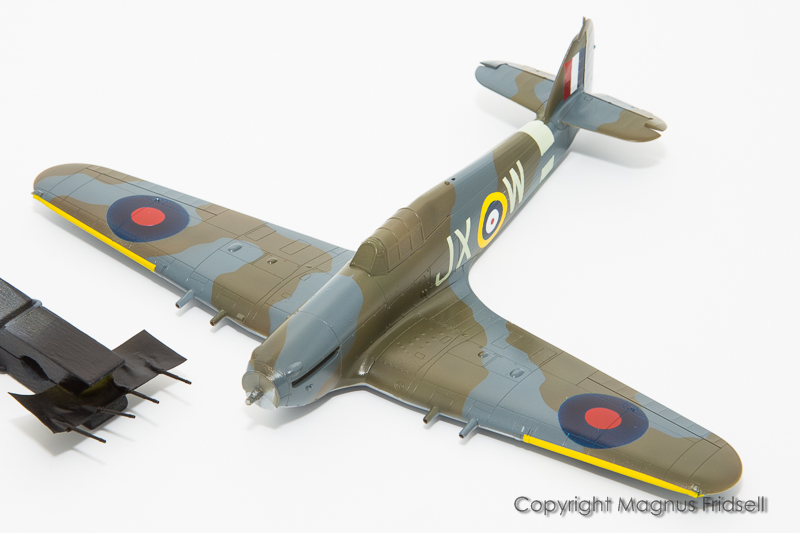
...the rest of the markings!
Apart from the usual minor touch-ups, I so wish I had primed the cannon stubs using Tamiya Fine White. Now I primed them in place using the airbrush and Mr Paint primer. No matter what they write on the bottle, it won't bite into metal the way Tamiya does! Oh well, it's an easy fix!
Magnus
Posted: Saturday, February 15, 2020 - 08:48 AM UTC
Certainly no argument from me Magnus, your plan worked beautifully mate! This build is coming together very nicely.
Cheers, D
Cheers, D
Posted: Saturday, February 15, 2020 - 10:18 PM UTC
Quoted Text
Russell! Since you did that KGV-rigging, I doubt that a pair of clear wingtip lights would be much of a hurdle !
Magnus
Hi Magnus, thank you for the vote of confidence...
Well, I've had a crack at the clear lenses, so we'll see how it turns out; Somehow I don't think it'll be as good as yours though
magnusf
Stockholm, Sweden
Joined: May 02, 2006
KitMaker: 1,953 posts
AeroScale: 1,902 posts
Joined: May 02, 2006
KitMaker: 1,953 posts
AeroScale: 1,902 posts
Posted: Saturday, February 22, 2020 - 08:30 AM UTC
Friends! Thanks!
I've had a busy week so not much done but yellow leading edges are on and I've managed to put on a coat of clear in preparation for stencilling and a few markings that weren't possible to do with the masks!
I've also primed the cannon using Games Workshop Chaos Black.
Next week is school holiday here in Sweden so we will be away skiing, no updates then!
Magnus
Posted: Saturday, February 22, 2020 - 09:38 PM UTC
raising the bar for the rest of us, Magnus
Posted: Monday, February 24, 2020 - 10:28 AM UTC
Hi Magnus
wondering if you can answer a question for me after returning from skiing:
The canopy on my Airfix Hurricane has split down the middle. If I bought the Arma IIc kit, does it have a spare canopy and if so, do you know if it can it fit the Airfix Hurricane?
wondering if you can answer a question for me after returning from skiing:
The canopy on my Airfix Hurricane has split down the middle. If I bought the Arma IIc kit, does it have a spare canopy and if so, do you know if it can it fit the Airfix Hurricane?
magnusf
Stockholm, Sweden
Joined: May 02, 2006
KitMaker: 1,953 posts
AeroScale: 1,902 posts
Joined: May 02, 2006
KitMaker: 1,953 posts
AeroScale: 1,902 posts
Posted: Tuesday, February 25, 2020 - 08:19 PM UTC
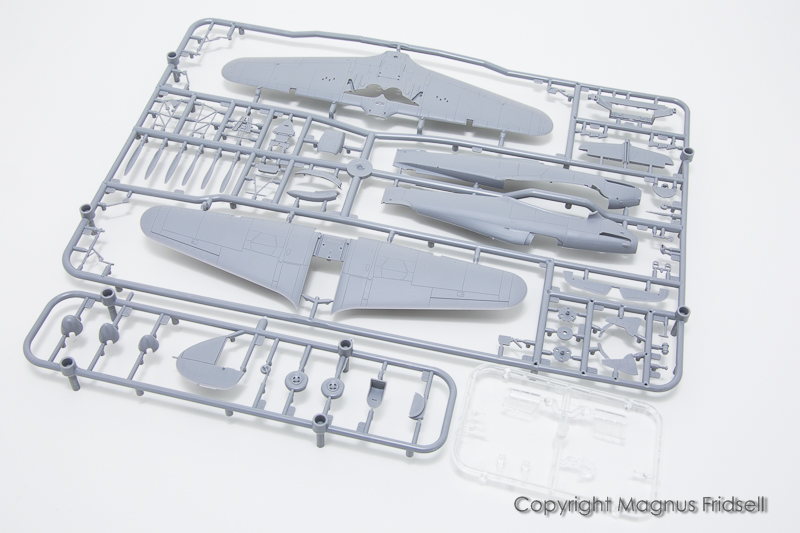
Russell! There are two canopies in the Arma Hurricane kits, one that fits in the closed position and one that is a bit splayed to fit over the spine in the open position. I doubt it will fit an Airfix kit perfectly in the closed position (based mainly on the fact that even if a kit is supposed to be a perfectly scaled down miniature of the real thing they seldom are and no two kits from different manufacturers are perfectly alike even if they ought to be!) but the open one might be worth a try!
Clear sprue with the two canopies on down in the right hand corner...
Magnus
Clear sprue with the two canopies on down in the right hand corner...
Magnus
Posted: Wednesday, February 26, 2020 - 08:29 AM UTC
Hi Magnus
thanks for that info. I suspected as much, but thought I'd try my chances anyway...
magnusf
Stockholm, Sweden
Joined: May 02, 2006
KitMaker: 1,953 posts
AeroScale: 1,902 posts
Joined: May 02, 2006
KitMaker: 1,953 posts
AeroScale: 1,902 posts
Posted: Wednesday, February 26, 2020 - 08:33 AM UTC
Russell! You know that you need the Arma Hurricane anyway so strictly speaking you can't loose ! If it doesn't work out you can get a Falcon canopy as a last resort...
Magnus
Magnus
Posted: Wednesday, February 26, 2020 - 08:42 AM UTC
Quoted Text
Russell! You know that you need the Arma Hurricane anyway so strictly speaking you can't loose ! If it doesn't work out you can get a Falcon canopy as a last resort...
Magnus
that's the truth Magnus
magnusf
Stockholm, Sweden
Joined: May 02, 2006
KitMaker: 1,953 posts
AeroScale: 1,902 posts
Joined: May 02, 2006
KitMaker: 1,953 posts
AeroScale: 1,902 posts
Posted: Wednesday, March 04, 2020 - 06:28 AM UTC
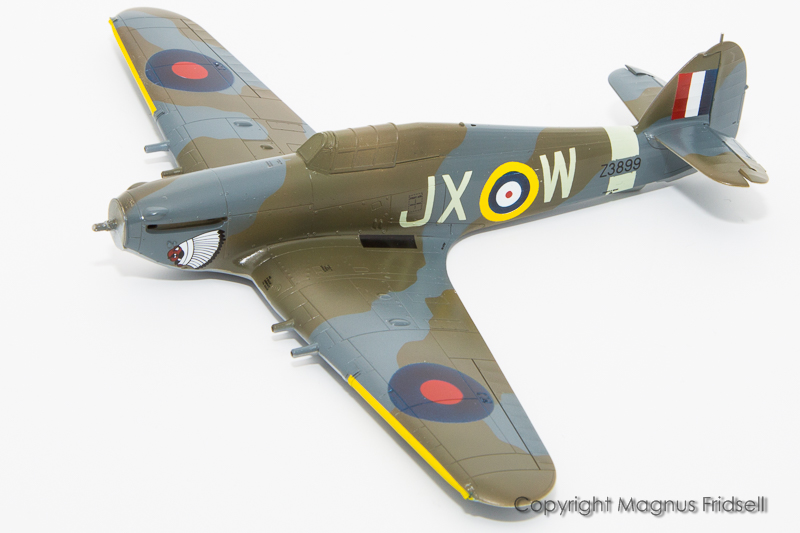
Decals (serial, nose art, walkways and a fair amount of stencilling) are on, now for some satin varnish and then on to the fun part: the weathering !
Magnus
Posted: Thursday, March 05, 2020 - 08:20 AM UTC
Brilliant work Magnus
now, I've probably missed it along the way, so I'll ask here:
What medium do you use to mask the camo pattern? Is is frisket film?
Also, how do you cut the roundel masks so perfectly round?
now, I've probably missed it along the way, so I'll ask here:
What medium do you use to mask the camo pattern? Is is frisket film?
Also, how do you cut the roundel masks so perfectly round?
Posted: Thursday, March 05, 2020 - 10:50 AM UTC
Brilliant work Magnus, I'm really looking forward to the weathering stage now!
Russ, I had a play with one of these a little while back, a brilliant tool and very easy to use.
https://www.bnamodelworld.com/hobby-tools-supplies-hobby-knife-blades-dspiae-dsp-mt-c
Cheers, D
Quoted Text
Also, how do you cut the roundel masks so perfectly round?
Russ, I had a play with one of these a little while back, a brilliant tool and very easy to use.
https://www.bnamodelworld.com/hobby-tools-supplies-hobby-knife-blades-dspiae-dsp-mt-c
Cheers, D
magnusf
Stockholm, Sweden
Joined: May 02, 2006
KitMaker: 1,953 posts
AeroScale: 1,902 posts
Joined: May 02, 2006
KitMaker: 1,953 posts
AeroScale: 1,902 posts
Posted: Friday, March 06, 2020 - 08:45 PM UTC
Russell! I use a masking film called Artool Ultra Mask, on recommendation from Mal who has been cutting masks a lot longer than I have! If I remember correctly the classic Frisket Film is stiffer and intended for flat surfaces, Ultra Mask is a lot more pliable even if it has it's limits when it comes to fit over complicated shapes. In emergency cases I have actually cut masks from ordinary masking tape!
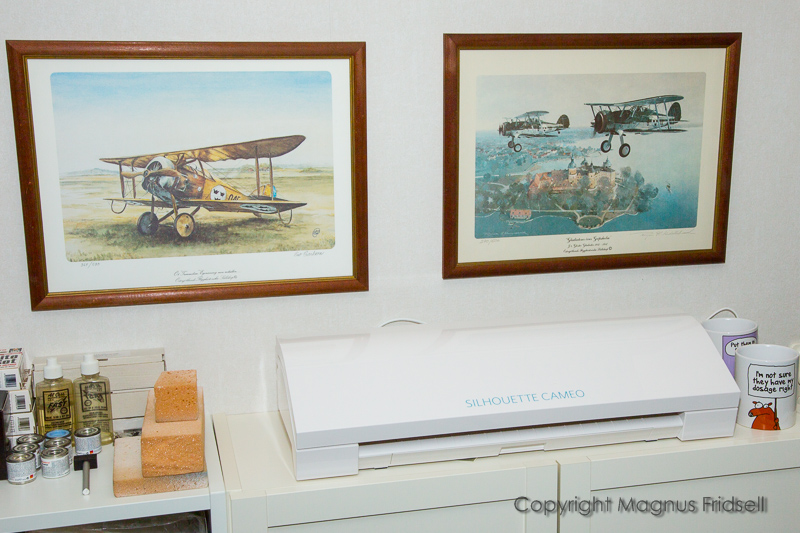
The reason for my very round roundels is that I have a helper (no, it's not a cat ):
A Silhouette Cameo cutting plotter. The tool that Damian links to would do it just as fine and an old fashioned compass cutter was what I started my roundels career with !
And as usual, thanks for your kind comments !
Working on the weathering, there is quite a lot left to do to get a really grimy and wet winter 1941-42-look. At least the detail is showing up a bit already!
Magnus
Posted: Sunday, March 08, 2020 - 10:20 PM UTC
The weathering is starting to take shape nicely, Magnus
Thanks for the info on the masking film. I had a look and I don't think I am going to be able to source the Artcool Ultra Mask here in Australia without paying a fortune in postage fees.
No big deal at this time though as a lot of the kits in the stash don't have camo patterns and the one's that do are either so far off in the future, or maybe there's aftermarket miracle masks available... Maybe Mal can help
I'd try Badger's frisket film, but the amount I'd have to buy means it would need to work, otherwise I'll be left with a roll of film I'd never use... Back to the drawing board.
Nice cutter by the way Now that's a luxury item!
magnusf
Stockholm, Sweden
Joined: May 02, 2006
KitMaker: 1,953 posts
AeroScale: 1,902 posts
Joined: May 02, 2006
KitMaker: 1,953 posts
AeroScale: 1,902 posts
Posted: Tuesday, March 10, 2020 - 02:58 AM UTC
Russell! One further alternative is Oramask 810 that also works well. I have one full roll of both that one and the Artool mask and if I remember correctly they cost something like 30 Euros (about 50 AUSD) each, delivered at my door. You should be able to find something equivalent down under I think! And if you ever get to Sweden, come over and have a and I'll give you a lifetime supply of the stuff since the rolls seem endless !
The cutter is for sure a luxury but, mainly aimed at the scrapbooking market, it is quite reasonably priced. Much like a medium-spec home laser printer but a lot more fun !
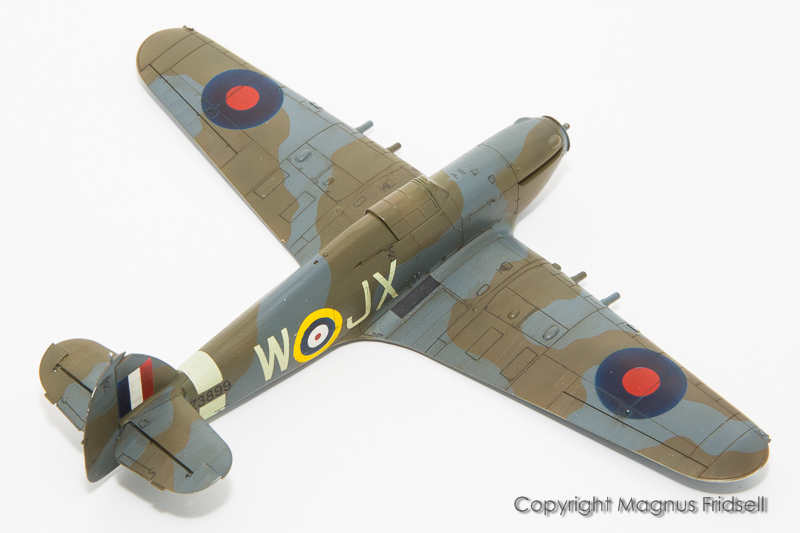
Finally on its own legs! I gave it a coat of matte varnish to seal and even out the weathering effects. Quite a lot of contrast gets lost in the process so I'll probably go back over it again with some pastels and general grime.
Cooler and airscoop in place!
Magnus
magnusf
Stockholm, Sweden
Joined: May 02, 2006
KitMaker: 1,953 posts
AeroScale: 1,902 posts
Joined: May 02, 2006
KitMaker: 1,953 posts
AeroScale: 1,902 posts
Posted: Thursday, March 12, 2020 - 06:55 PM UTC
The notions in the instructions places this one in November 1941 and that means mud to me. Ideally WET mud...
Turned out getting things to look wet was far more difficult than I could imagine! I have done this using MiG's oil brushers (but any oil paint will do fine, it's just that they are very convenient and easy to use due to their consistency and packaging) and they dry quite matte. Applications of MiG's "Wet Effects" hasn't done much difference, it still looks overall dry...
Wheels were treated with pigments and oil paint to get a build-up of mud but they also look dry. After almost deciding upon taking the easy way out (masking off the wheels and repainting the Hurricane in desert colours to quickly get it teleported to North Africa ) I'll try some very diluted Vallejo clear and see if that makes a bit more of a wet effect!
Magnus
Jessie_C
British Columbia, Canada
Joined: September 03, 2009
KitMaker: 6,965 posts
AeroScale: 6,247 posts
Joined: September 03, 2009
KitMaker: 6,965 posts
AeroScale: 6,247 posts
Posted: Friday, March 13, 2020 - 02:20 AM UTC
If you can get the gradient right, showing the mud dried on most of the wheels and wet near the ground will imply that it's been parked for a while.