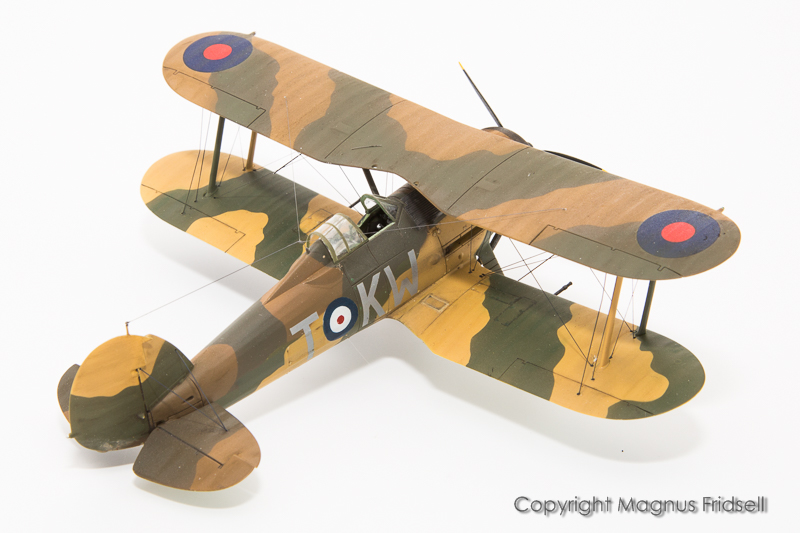
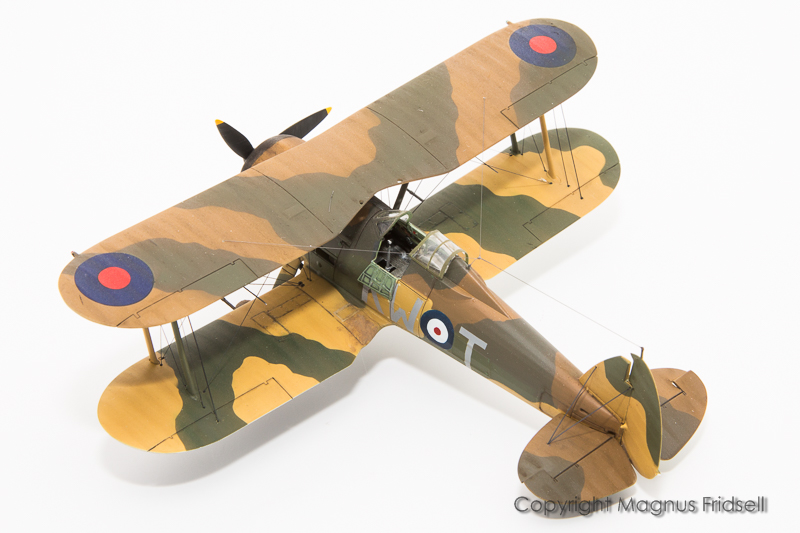
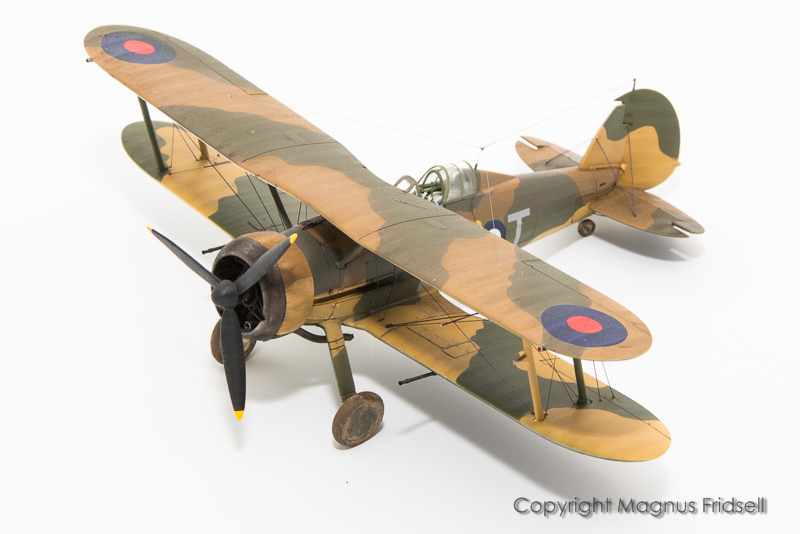
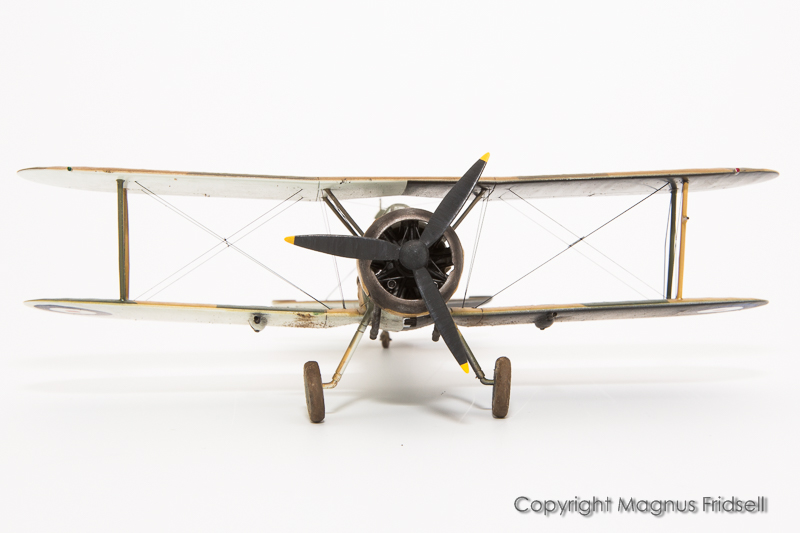
1/72 Airfix Gloster Gladiator
Stockholm, Sweden
Joined: May 02, 2006
KitMaker: 1,953 posts
AeroScale: 1,902 posts
Posted: Tuesday, May 26, 2020 - 06:48 AM UTC
Ends of threads super-glued into their respective holes - more difficult and messier than I had expected! And surplus thread cut off.
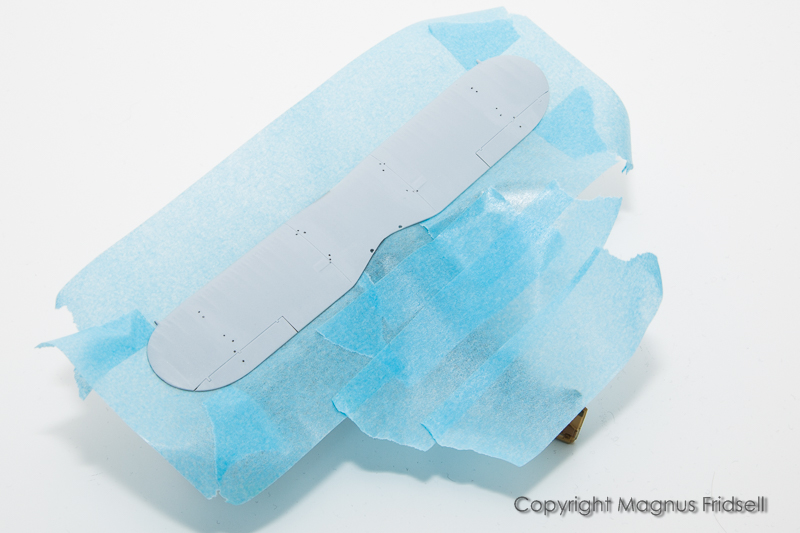
Masking in place before primer...
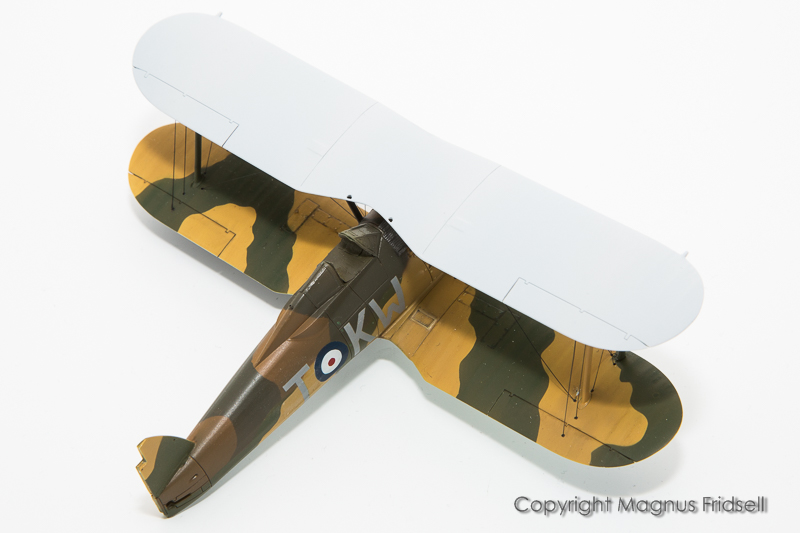
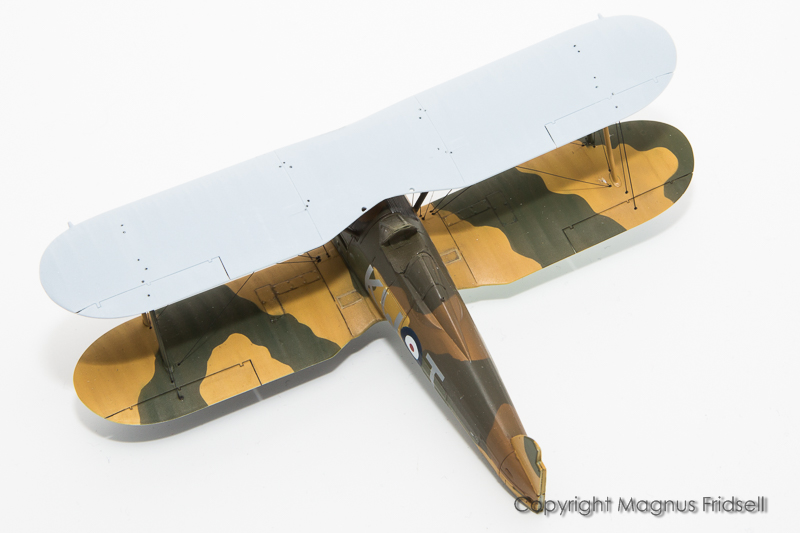
And a primed top wing! As expected, there is a tiny bit more work to do before comitting to camouflage but I think the strategy with drilling the wing worked out well.

Magnus
Press banner to the right to follow my trail to the new forums!

#306
Victoria, Australia
Joined: June 27, 2010
KitMaker: 3,959 posts
AeroScale: 598 posts
Posted: Tuesday, May 26, 2020 - 09:35 AM UTC
Quoted Text
Russell! I did some cheating, that means drilling out the attachment points... See below!
OMG! There is lots of rigging when it all gets glued in place at the same time!
I'm not sure I'd call it "cheating" Magnus

"Putting the odds in your favour", sounds better to me

Oh dear, with all that rigging, what have I let myself into?

With both a Swordfish and a Gladiator planned for the Bi-planes campaign it can't be worse than a Walrus? Can it?

Your Gladiator looks amazing! Careful sanding that top wing, mate
Stay home and build models!
In 1/72
Gloster Gladiator MkII for the Bi-planes Campaign
In 1/350
Airfix 1:350 Type 45 Destroyer
Stockholm, Sweden
Joined: May 02, 2006
KitMaker: 1,953 posts
AeroScale: 1,902 posts
Posted: Wednesday, May 27, 2020 - 03:39 AM UTC
Russell! Due to Airfix design the model is remarkably sturdy but I took great care anyway and was rewarded with a "safety at work"-diploma

! Regarding the rigging, most of it is the same no matter what biplane you build. There probably was a rigging manual for people studying aircraft design in the 1920's... A Walrus probably has the same amount of rigging but it should ideally be a bit roomier to work on, being a much larger aircraft!
Seeing the end of it now! I'm going looking for a pair of roundel decals, I won't mask these if I can avoid it!
Magnus
Press banner to the right to follow my trail to the new forums!
AussieReg
 Associate Editor
#007
Victoria, Australia
Joined: June 09, 2009
KitMaker: 8,156 posts
AeroScale: 3,756 posts
Posted: Wednesday, May 27, 2020 - 11:59 AM UTC
Looking good Magnus, really clean work tidying up the rigging points through the top wing!
Cheers, D
ON the bench
Revell 1/24 '53 Corvette (building as '54)
Revell 1/24 BMW 507 Coupe and Cabrio
Italeri 1/48 Me262 B-1a/U1 Nightfighter
Monogram 1/24 '57 Chevy Nomad
Dragon 1/350 USS Frank Knox DD-742
Stockholm, Sweden
Joined: May 02, 2006
KitMaker: 1,953 posts
AeroScale: 1,902 posts
Posted: Saturday, May 30, 2020 - 08:01 AM UTC
Press banner to the right to follow my trail to the new forums!
European Union
Joined: August 09, 2009
KitMaker: 1,732 posts
AeroScale: 1,336 posts
Posted: Saturday, May 30, 2020 - 08:41 AM UTC
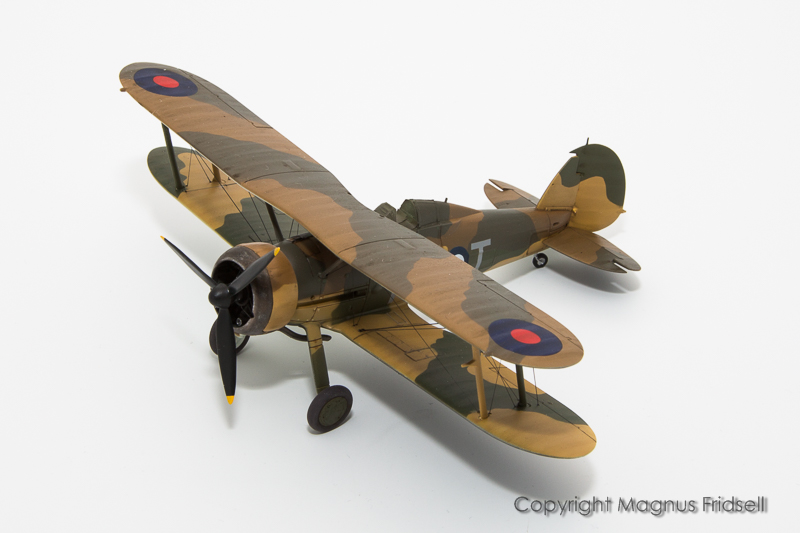
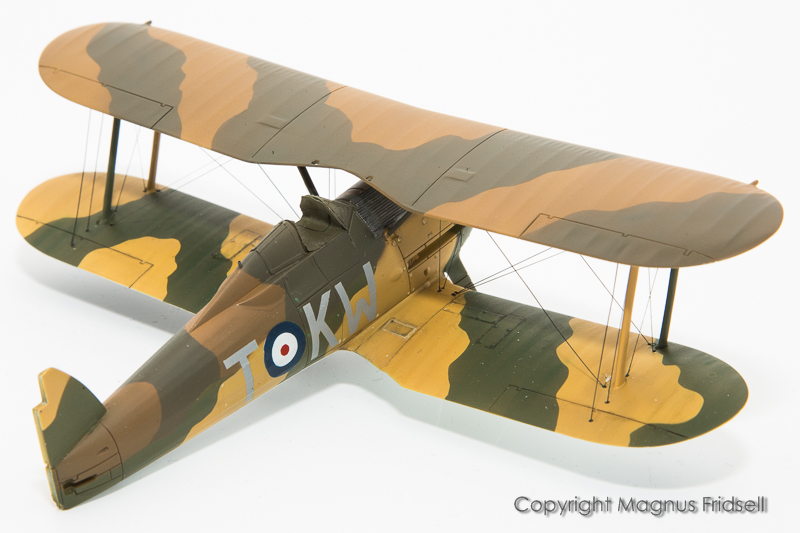
You can already open the hangar doors, Magnus. Your Gladiator looks really fine and colourful
My campaigns for 2020:
MiGs - Done !
The Big Three - Done !
65 years Bundeswehr - Done !
40 years Leopard 2 - Done !
Land Lease - Done !
Buenos Aires, Argentina
Joined: May 21, 2012
KitMaker: 765 posts
AeroScale: 316 posts
Posted: Saturday, May 30, 2020 - 11:21 AM UTC
Excellent work in the Gladiator Magnus!!! Congratulations!!!
Those Radial Fighters Campaign: 1/72 FW 190 A5
Delta 2 Campaign: 1/48 Hobby Boss Mirage IIIC
Navy Boys on those Postage Stamps 1/72 Airfix Sea Harrier FA2
Working: Trumpeter A-5 Vigilante
Waiting: Phantom 60 Campaign
#306
Victoria, Australia
Joined: June 27, 2010
KitMaker: 3,959 posts
AeroScale: 598 posts
Posted: Sunday, May 31, 2020 - 10:27 PM UTC
Excellent work Magnus!

Stay home and build models!
In 1/72
Gloster Gladiator MkII for the Bi-planes Campaign
In 1/350
Airfix 1:350 Type 45 Destroyer
Stockholm, Sweden
Joined: May 02, 2006
KitMaker: 1,953 posts
AeroScale: 1,902 posts
Posted: Friday, June 05, 2020 - 07:04 PM UTC
Friends! As usual, thanks
!
With a bit of luck I might be able to finish this one this weekend!
Magnus
Press banner to the right to follow my trail to the new forums!
British Columbia, Canada
Joined: September 03, 2009
KitMaker: 6,965 posts
AeroScale: 6,247 posts
Posted: Saturday, June 06, 2020 - 03:27 AM UTC
That looks utterly delightful.
When once you have tasted flight you will walk the Earth with your eyes turned skyward.
For there you have been, and there you will always long to return.
-Leonardo Da Vinci
#306
Victoria, Australia
Joined: June 27, 2010
KitMaker: 3,959 posts
AeroScale: 598 posts
Posted: Monday, June 08, 2020 - 11:09 PM UTC
Quoted Text
Friends! As usual, thanks !
With a bit of luck I might be able to finish this one this weekend!
Magnus
Plenty of time left in the Bi-planes campaign yet, Magnus
Stay home and build models!
In 1/72
Gloster Gladiator MkII for the Bi-planes Campaign
In 1/350
Airfix 1:350 Type 45 Destroyer
Stockholm, Sweden
Joined: May 02, 2006
KitMaker: 1,953 posts
AeroScale: 1,902 posts
Posted: Wednesday, June 17, 2020 - 08:11 AM UTC
Press banner to the right to follow my trail to the new forums!
European Union
Joined: August 09, 2009
KitMaker: 1,732 posts
AeroScale: 1,336 posts
Posted: Wednesday, June 17, 2020 - 08:30 AM UTC
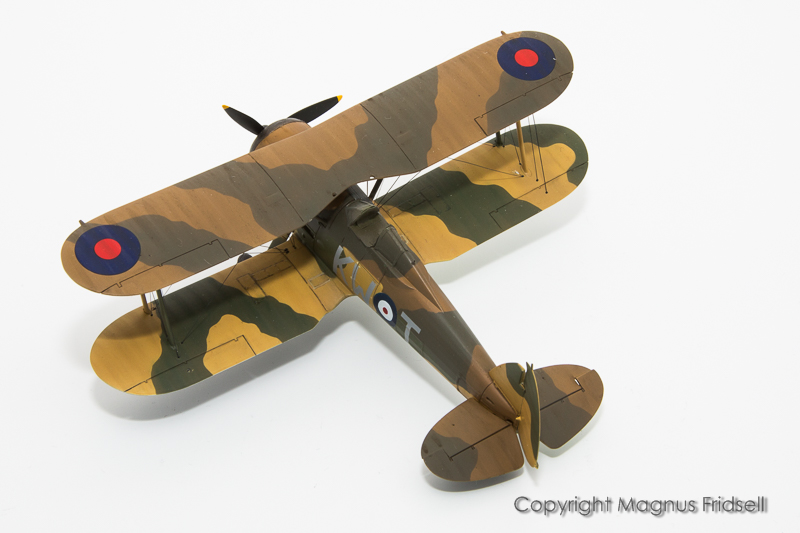
Don't be too hard with yourself, Magnus. I know, we're always our biggest critics but you've done a great job on this build. As I said before, it's very colourful and I like that black/white underside. I'm always amazed how you can build these tiny models (and even tinier) and I sometimes struggle with my quarterscales ....
Again, well done! I wonder what comes next ....
Torsten
My campaigns for 2020:
MiGs - Done !
The Big Three - Done !
65 years Bundeswehr - Done !
40 years Leopard 2 - Done !
Land Lease - Done !
#306
Victoria, Australia
Joined: June 27, 2010
KitMaker: 3,959 posts
AeroScale: 598 posts
Posted: Thursday, June 18, 2020 - 11:26 PM UTC
What Torsten said: don't be too hard on yourself, Magnus!
This is one amazing build!
Stay home and build models!
In 1/72
Gloster Gladiator MkII for the Bi-planes Campaign
In 1/350
Airfix 1:350 Type 45 Destroyer
Stockholm, Sweden
Joined: May 02, 2006
KitMaker: 1,953 posts
AeroScale: 1,902 posts
Posted: Saturday, June 20, 2020 - 07:01 PM UTC
Torsten and Russell! Thanks for you kind comments and consolation, that's what friends are for
!
Now off to something
completely different!
Magnus
Press banner to the right to follow my trail to the new forums!
Baden-Württemberg, Germany
Joined: December 06, 2016
KitMaker: 132 posts
AeroScale: 117 posts
Posted: Friday, July 03, 2020 - 07:17 PM UTC
Absolutely stunning, Magnus !!
I can hardly believe that this is only 1/72.
Wouldn't get it so great!!
With my "drummer sausage fingers" I prefer to stay on the King Kong scale 1/32.
Cheers
Stefan
At the time on my workbench:
B-17 G in 1/32
A-24 "Banshee" in 1/32
England - South East, United Kingdom
Joined: March 07, 2005
KitMaker: 868 posts
AeroScale: 690 posts
Posted: Tuesday, July 14, 2020 - 09:28 AM UTC
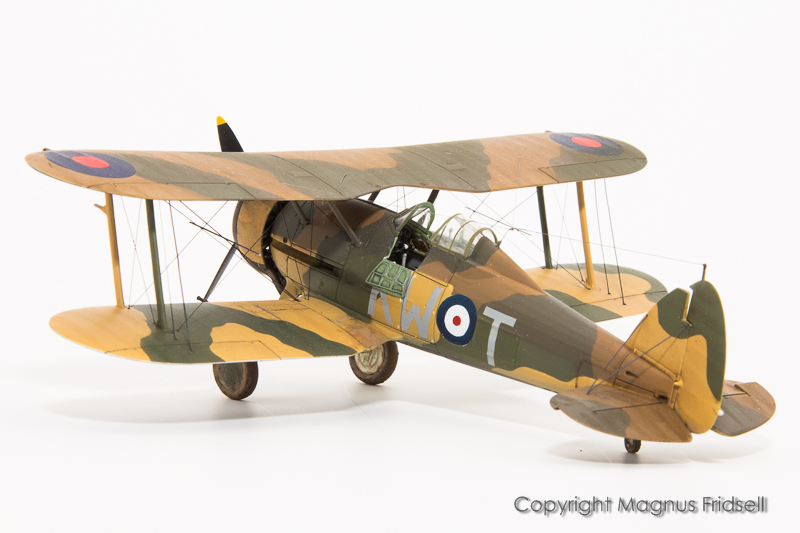
Lovely as usual Magnus. Your rigging looks good!
Stockholm, Sweden
Joined: May 02, 2006
KitMaker: 1,953 posts
AeroScale: 1,902 posts
Posted: Tuesday, July 14, 2020 - 05:44 PM UTC
Stefan! The beauty of modelling - everyone can find a scale and size that suits them
! And after what I have seen of your models, your sausage fingers do seem to work alright anyway
!
Neil! Thanks a lot! Rigging was a lot of fiddly work and I am not sure if I'll do it the same way once again but we'll see!
Magnus
Press banner to the right to follow my trail to the new forums!
#306
Victoria, Australia
Joined: June 27, 2010
KitMaker: 3,959 posts
AeroScale: 598 posts
Posted: Tuesday, August 25, 2020 - 10:01 PM UTC
Hi Magnus
Sorry to drag you back to this build, but I've hit a bit of problem with my own effort...
I'm trying to fit the photoetch floor plate from Eduard into the cockpit.
The Eduard instructions call for the PE floor plate to be slightly bent, but then how is it meant to sit on the plastic part?
Any chance you took some close up photos of yours before closing up the fuselage?
Stay home and build models!
In 1/72
Gloster Gladiator MkII for the Bi-planes Campaign
In 1/350
Airfix 1:350 Type 45 Destroyer
Stockholm, Sweden
Joined: May 02, 2006
KitMaker: 1,953 posts
AeroScale: 1,902 posts
Posted: Tuesday, August 25, 2020 - 11:03 PM UTC
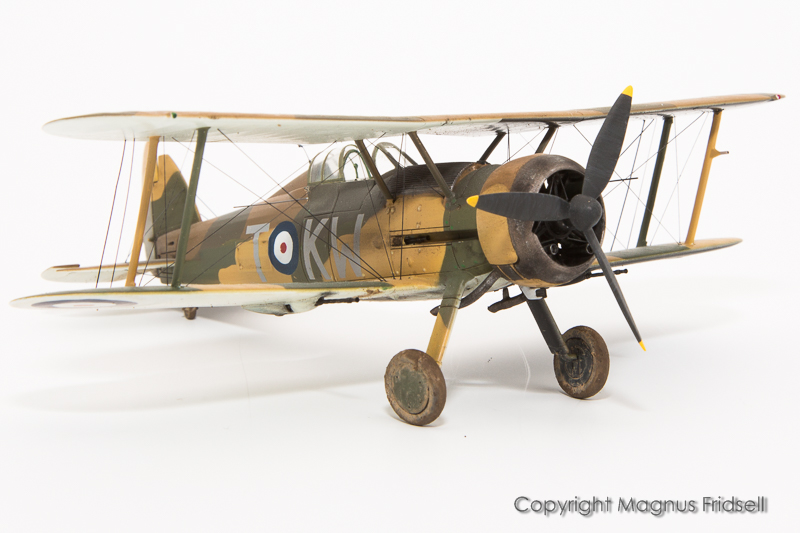
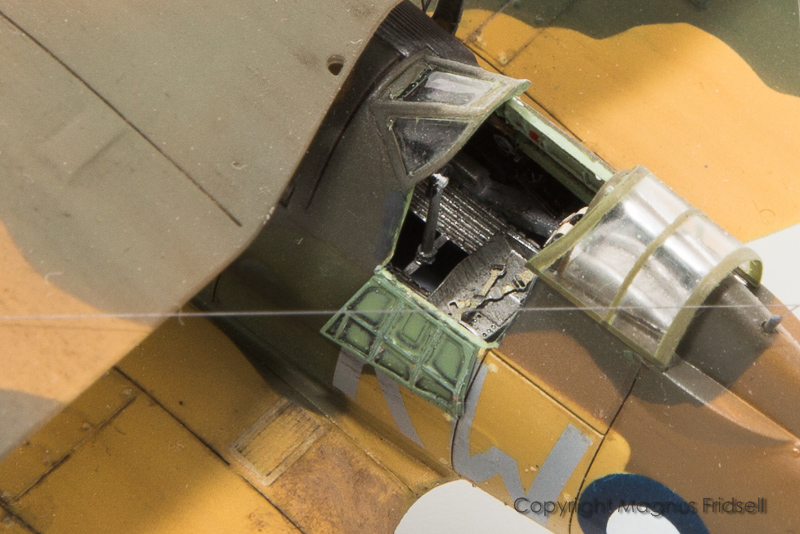
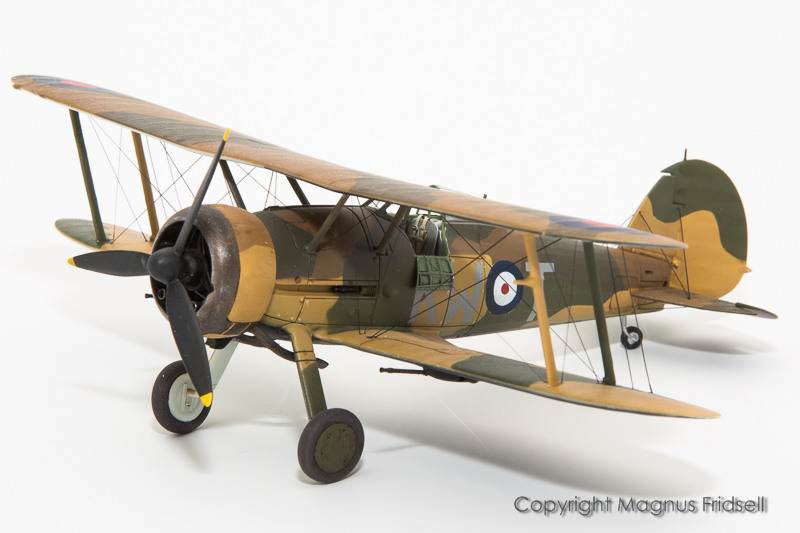
Russell! I hope this helps, these were the four photos that showed anything of value. No shots of it mounted in the fuselage

.
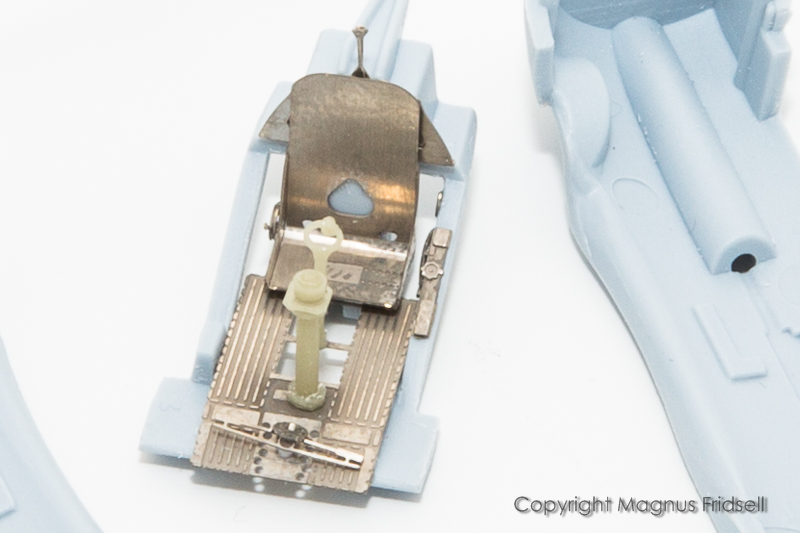

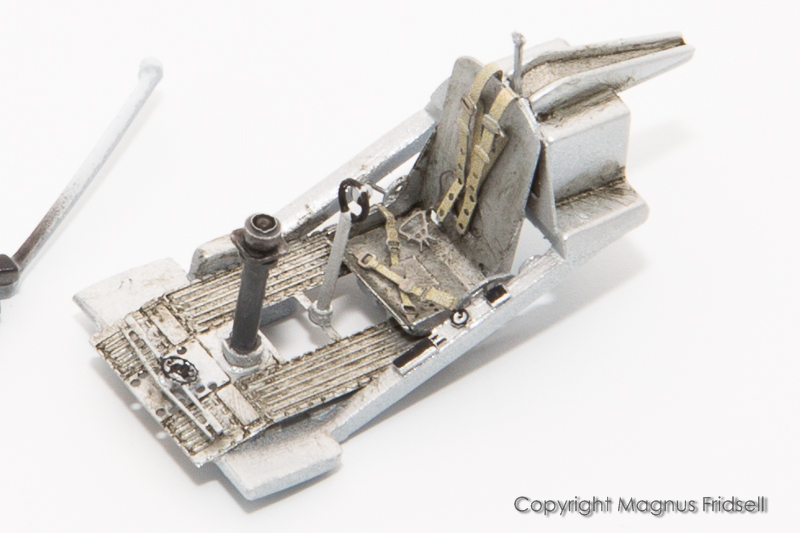
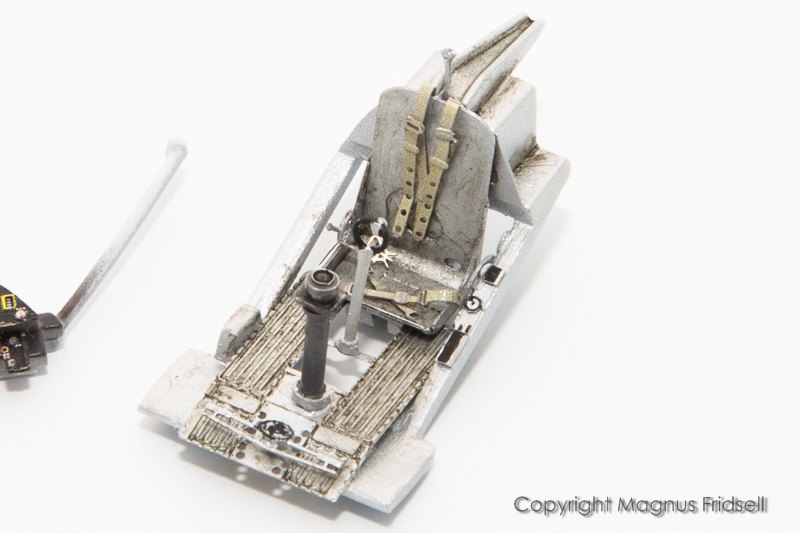
I think I modified the Airfix interior as per the Eduard instructions, you can see the original plastic below the front lip of the seat in the pic above. The back end of the floor boards is glued on top of that and the front end just rests on the plastic in front and was fixated with a drop of glue but there is no positive location or ledge for it.
Magnus
Press banner to the right to follow my trail to the new forums!
#306
Victoria, Australia
Joined: June 27, 2010
KitMaker: 3,959 posts
AeroScale: 598 posts
Posted: Tuesday, August 25, 2020 - 11:33 PM UTC
Thankyou Magnus
Those pics are a great help!
The Eduard instructions aren't really clear on where the floorplate should go-it's almost as if it seems to "float"over the top of the plastic part

Stay home and build models!
In 1/72
Gloster Gladiator MkII for the Bi-planes Campaign
In 1/350
Airfix 1:350 Type 45 Destroyer