Duel - AndyD, Wizard179 and TedMamere
Moselle, France
Joined: May 15, 2005
KitMaker: 5,653 posts
AeroScale: 4,347 posts
Posted: Friday, August 25, 2006 - 12:12 AM UTC
Hi all!
Thanks for your kind words...

Nigel, a feature about tinted Future? As soon a I've finished experimenting with it! :-)
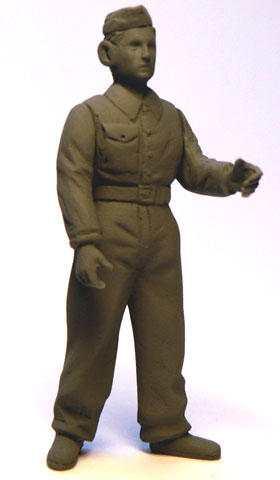
I made little progress on the mechanic figure. I sprayed it with grey paint and noticed I will still have to to some surface work on it (and maybe reduce his ears!)
I also started to do the base. I used a photo frame and already glued some sand on the cardboard backplate.
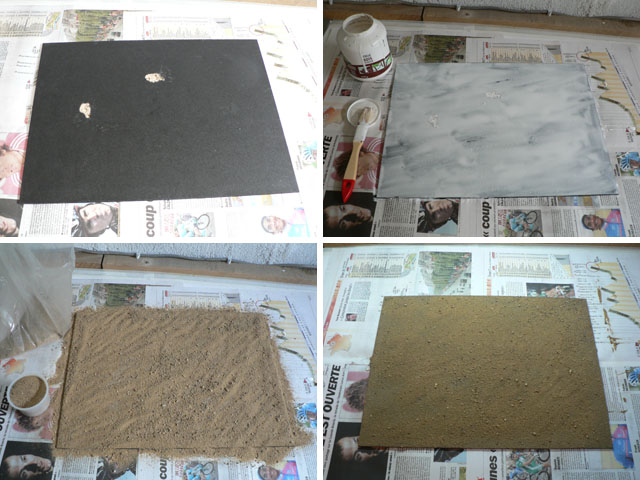
No progress on the plane though...

Jean-Luc

Better think one hour and build five minutes...
Than think five minutes and build an hour!
Moselle, France
Joined: May 15, 2005
KitMaker: 5,653 posts
AeroScale: 4,347 posts
Posted: Saturday, September 02, 2006 - 05:39 PM UTC
Hi all!
With some help from a little friend I managed to finish the base of my project
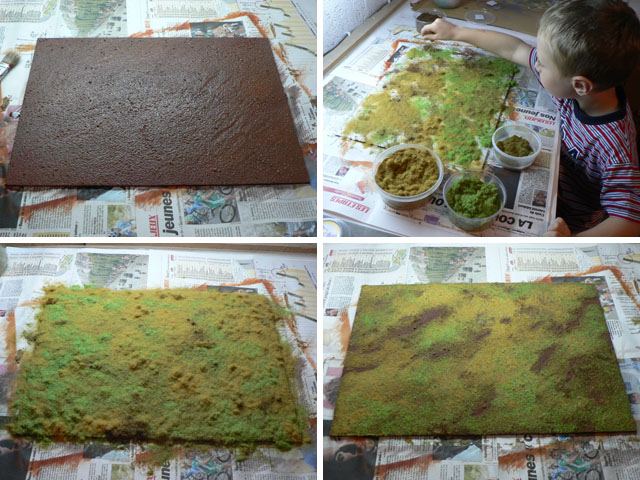
I first painted the sand using acrylics and then applied a coat of tinted future. Once dry I glued various railroad grass (Faller) with PVA glue. I received some help as you can see on the picture.

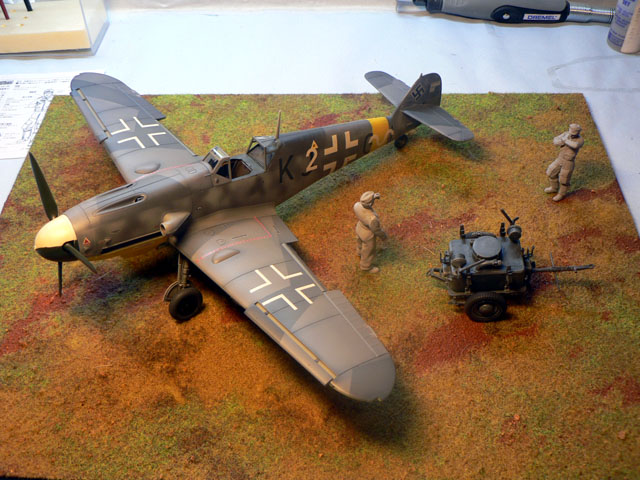
I also worked on the Oil Cart and the Bf 109 is now standing on it's feets. I'll post pictures in the next couple of days.
Jean-luc

Better think one hour and build five minutes...
Than think five minutes and build an hour!
Moselle, France
Joined: May 15, 2005
KitMaker: 5,653 posts
AeroScale: 4,347 posts
Posted: Tuesday, September 05, 2006 - 12:14 AM UTC
Quoted Text
I'll post pictures in the next couple of days.
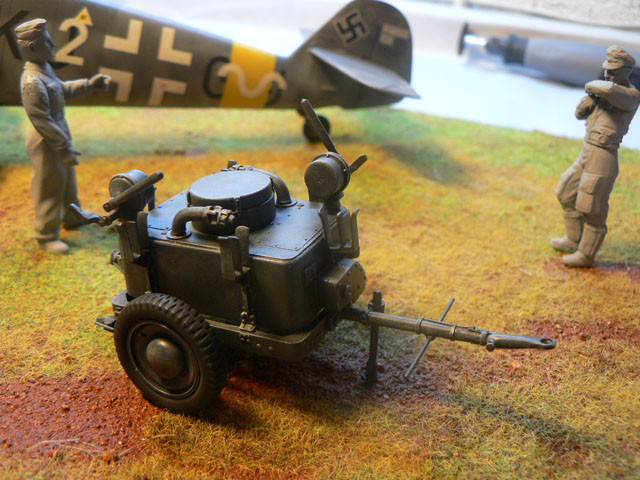
Jean-Luc

Better think one hour and build five minutes...
Than think five minutes and build an hour!
Moselle, France
Joined: May 15, 2005
KitMaker: 5,653 posts
AeroScale: 4,347 posts
Posted: Friday, September 15, 2006 - 04:39 AM UTC
Hi all!
The plane is finished!

It took me almost two month!

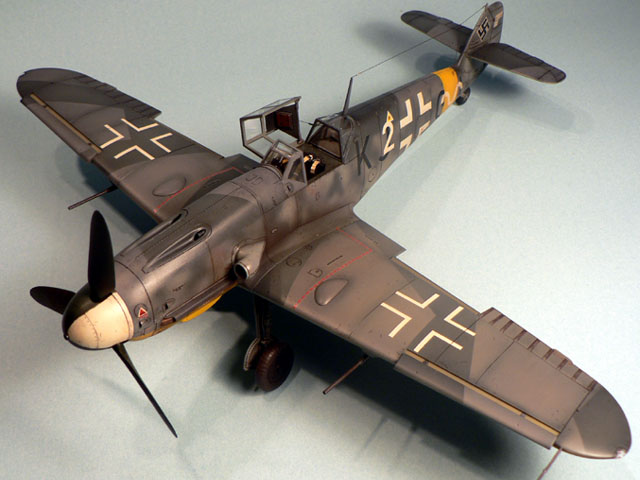

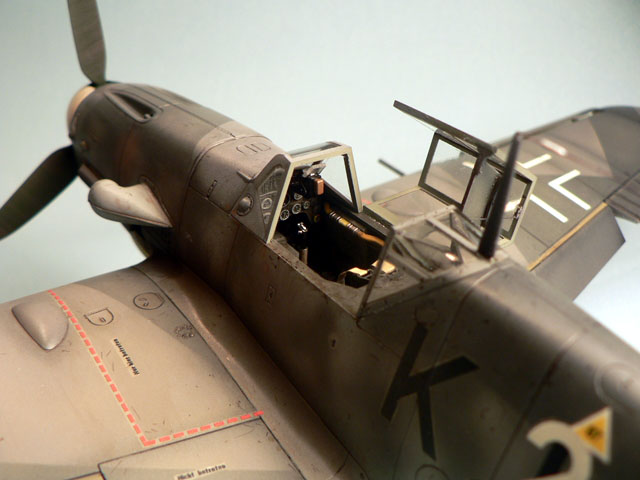
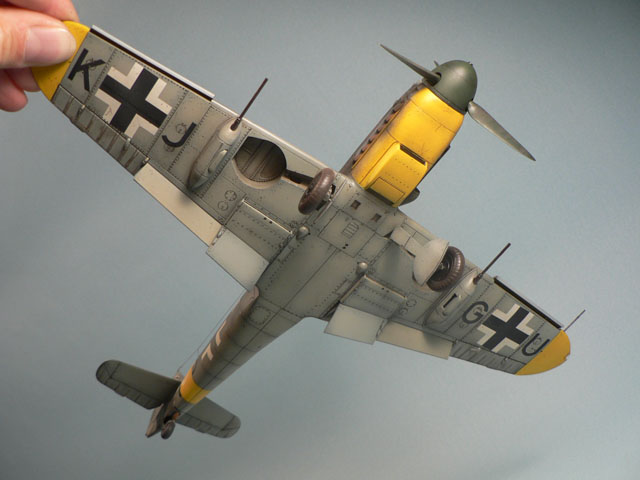
I still have to paint the figures and do some weathering on the Oil Cart...
Jean-Luc

Better think one hour and build five minutes...
Than think five minutes and build an hour!
Scotland, United Kingdom
Joined: June 01, 2006
KitMaker: 1,707 posts
AeroScale: 1,119 posts
Posted: Friday, September 15, 2006 - 04:56 AM UTC
Beautiful Jean-Luc, beautiful!!
"I´m going back to the front to relax"
"THE BLACK CATS FLIES TONIGHT"
"Find your enemy and shoot him down - everything else is unimportant"
"When you're out of F-8's... You're out of fighters!"
Moselle, France
Joined: May 15, 2005
KitMaker: 5,653 posts
AeroScale: 4,347 posts
Posted: Sunday, September 17, 2006 - 12:13 AM UTC
Thanks Jan!

But it's about time we see some of your work!

Better think one hour and build five minutes...
Than think five minutes and build an hour!
Scotland, United Kingdom
Joined: June 01, 2006
KitMaker: 1,707 posts
AeroScale: 1,119 posts
Posted: Sunday, September 17, 2006 - 12:29 AM UTC
Quoted Text
Thanks Jan! 
But it's about time we see some of your work! 
Aaahh.....you will young master Jean-Luc, you will.....
It only seem to take ages to get everything togther again....
errrmmmm....cough...cough....well....hrrmmhrrmmm.....
yeess.....I think that sounds believable.....right...where was I?...
What's that?....Another beer?.....I'll be there....sorry, need to go.


"I´m going back to the front to relax"
"THE BLACK CATS FLIES TONIGHT"
"Find your enemy and shoot him down - everything else is unimportant"
"When you're out of F-8's... You're out of fighters!"
New South Wales, Australia
Joined: January 27, 2006
KitMaker: 251 posts
AeroScale: 179 posts
Posted: Sunday, October 15, 2006 - 03:45 PM UTC
Hi all
I managed to get some building time in, so I've finished painting the cockpit, pilot and the propeller sub-assembly (A quartered Black Green/White spinner). I joined the fuselage halves (some of my best seam joins yet, so have very minimal cleanup -

) I sanded the resin engine cowling to the correct depth (lots of dry-fitting!) and prepainted the RLM74 under the guns so that I can mask this off while I fill and sand and fill and sand. Once I am happy with the fuselage and cowling seams, I will install the cockpit components and then start on the wings.
So far, the fact that my joining of the fuselage halves and my 2 small airbrushing ventures have gone so well has made this a very enjoyable kit. Will post pictures soon.
Cheers
Wiz
"Life is a big canvas. Throw all the paint you can at it."
- Br Mac (Br Vivial Justus Macdonald)
New South Wales, Australia
Joined: January 27, 2006
KitMaker: 251 posts
AeroScale: 179 posts
Posted: Friday, November 03, 2006 - 07:55 AM UTC
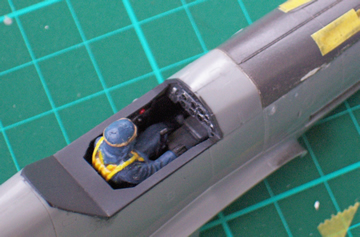
Finally managed to get a photo. The cockpit backplate, behind the pilot wasn't quite the perfect join I had hoped

So took a bit longer to install the cockpit than anticipated.
Here is a progress pic, just to prove I am working on it...

Cheers
Wiz
"Life is a big canvas. Throw all the paint you can at it."
- Br Mac (Br Vivial Justus Macdonald)
Moselle, France
Joined: May 15, 2005
KitMaker: 5,653 posts
AeroScale: 4,347 posts
Posted: Sunday, November 26, 2006 - 08:27 PM UTC
Quoted Text
Here is a progress pic, just to prove I am working on it... 
Hi Wiz!
Nice to see you are making progress! I hope we can fly a "Rotte" soon!

Do you have any news about AndyD's Yak? He seems MIA...

Jean-Luc

Better think one hour and build five minutes...
Than think five minutes and build an hour!
New South Wales, Australia
Joined: January 27, 2006
KitMaker: 251 posts
AeroScale: 179 posts
Posted: Monday, November 27, 2006 - 01:48 PM UTC
Hi Jean-Luc
He is the king of last minute builds.... I know he has started on the cockpit as he was explaining some interesting construction points to me the other day. Maybe you've scared him back into his tank with the quality of your 109...

He was working on a couple of figure campaigns as well which were due first. I am sure he will post something soon.
My progress is going slow, all the seams that I thought were good have turned out ...not so good..

Excellent Potez in your other duel by the way...
Cheers
Wiz
"Life is a big canvas. Throw all the paint you can at it."
- Br Mac (Br Vivial Justus Macdonald)
New South Wales, Australia
Joined: December 01, 2004
KitMaker: 672 posts
AeroScale: 10 posts
Posted: Thursday, November 30, 2006 - 01:49 PM UTC
Firstly I'd just like to say you plane guys are crazy... it's like everypiece is as tricky as P.E parts at this scale!! :-)
Has minor set back through the week - came home to find my modelling desk had exploded (with the yak on it!!)

anyway some replacement glass and a few hours of picking out resin and plastic parts from a mound of shattered glass and I'm ready to go again.

I've got the cockpit 90% done and have started on rest - will get soem hours in over the next weekend.

Moselle, France
Joined: May 15, 2005
KitMaker: 5,653 posts
AeroScale: 4,347 posts
Posted: Thursday, November 30, 2006 - 03:03 PM UTC
Hi Andy!
Wow! What happened!? It seems your desk didn't supported a ground attack by Erich Hartmann's Bf 109 G-4!

I still hope your Yak will manage to take off...
Nice cockpit I must say. But wasn't a woman suppose to pilot that plane?
Jean-Luc

Better think one hour and build five minutes...
Than think five minutes and build an hour!
New South Wales, Australia
Joined: December 01, 2004
KitMaker: 672 posts
AeroScale: 10 posts
Posted: Thursday, November 30, 2006 - 05:05 PM UTC
Quoted Text
Nice cockpit I must say. But wasn't a woman suppose to pilot that plane?
Jean-Luc 
In this case a very, very unattractive woman Jean-Luc :-) :-)
The manufacturer of the desk (who my wife happens who work for) told me that apparently it happens from time to time particulary when the desk is in a place where the temp. changes dramatically and quickly.
(Such as my desk near a window that gets a lot of morning sun and right under the air-con

)
Jean-Luc i must say your plane looks incredible and congrats on your child.
Welcome to the "superglue kept on high shelf only" club
:-)

#041
Kobenhavn, Denmark
Joined: July 20, 2006
KitMaker: 10,069 posts
AeroScale: 3,788 posts
Posted: Thursday, November 30, 2006 - 07:40 PM UTC
@Jean-Luc: fantastic BF-109!! Nothing less, just great!

@AndyD: what happened to your desk??!!! Cool work desk, but looks like a wooden plate would have been better

Campaign'oholic - 252+ campaigns completed
New South Wales, Australia
Joined: December 01, 2004
KitMaker: 672 posts
AeroScale: 10 posts
Posted: Saturday, December 02, 2006 - 10:34 AM UTC
Hi,
@Jesper - the replacement glass was free. But your probarly right a piece of wood or stainless steel would have been a safer bet.
** I have taken inventory of my yak and I am missing a part - B77 **
Anyone ever had dealings with Accurate Minatures for replacement parts?
Cheers,
AndyD
Buenos Aires, Argentina
Joined: December 27, 2002
KitMaker: 1,941 posts
AeroScale: 1,040 posts
Posted: Wednesday, December 06, 2006 - 03:19 AM UTC
Hi Jean Luc:
Your work with that Bf 109 is absolutely fantastic. I love the paint work, the preshading worked very well

Congrats.

"Never in the field of human conflict was so much owed by so many to so few"
Winston Spencer Churchill
New South Wales, Australia
Joined: January 27, 2006
KitMaker: 251 posts
AeroScale: 179 posts
Posted: Wednesday, December 20, 2006 - 02:14 PM UTC
Hi guys
made a bit of progress on my 109
Canopy is masked and the interior colour has been sprayed on.
I pre-shaded the panel lines an have sprayed the light blue on the underneath and the fuselage side. There's a couple of touch-ups required but nothing worth a tarp...
No photos as yet, will try to get some tomorrow.
Cheers
Wiz
"Life is a big canvas. Throw all the paint you can at it."
- Br Mac (Br Vivial Justus Macdonald)
New South Wales, Australia
Joined: January 27, 2006
KitMaker: 251 posts
AeroScale: 179 posts
Posted: Friday, December 22, 2006 - 05:31 AM UTC
Hi guys
Photos as promised.
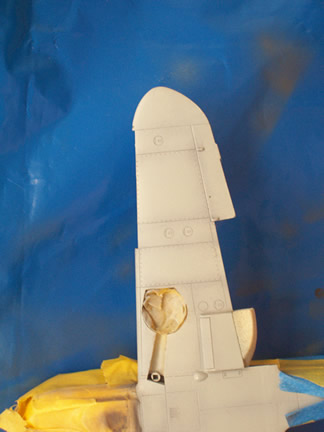
Underside wing, showing pre-shade.
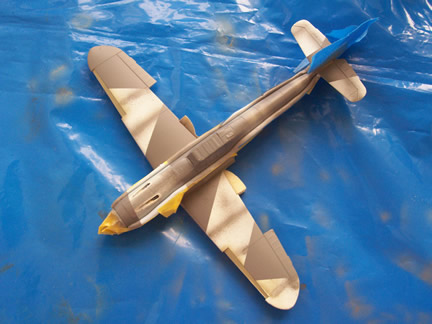
Hard-edged RLM75 from the top - pre-shade was too light and cannot be seen

Hard-edged RLM75 from the side. Sorry its blurry
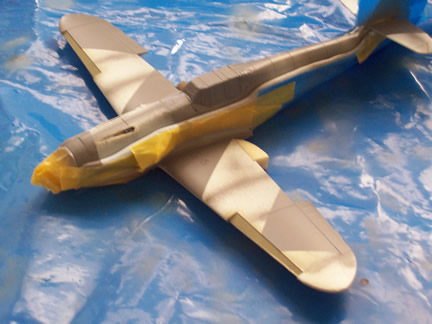
On track for the due date.
Cheers
Wiz
"Life is a big canvas. Throw all the paint you can at it."
- Br Mac (Br Vivial Justus Macdonald)
Moselle, France
Joined: May 15, 2005
KitMaker: 5,653 posts
AeroScale: 4,347 posts
Posted: Friday, December 22, 2006 - 01:15 PM UTC
Quoted Text
On track for the due date.
Hi Wiz!
This is looking very good so far! I just hope the Russians will manage to take-off as well... I'm still waiting for someone to shoot at!

Good luck for the last few remaining days of the Campaign!

Jean-Luc

Better think one hour and build five minutes...
Than think five minutes and build an hour!

#041
Kobenhavn, Denmark
Joined: July 20, 2006
KitMaker: 10,069 posts
AeroScale: 3,788 posts
Posted: Friday, December 22, 2006 - 02:48 PM UTC
@Wizard.
Great looking camo. A nice final sprint to get finished in time.

Looking forward to see the finished result.
Campaign'oholic - 252+ campaigns completed
Santa Catarina, Brazil
Joined: March 05, 2003
KitMaker: 522 posts
AeroScale: 38 posts
Posted: Saturday, December 23, 2006 - 12:17 AM UTC
Bravo Jean-Luc, your model it's fantastic.

New South Wales, Australia
Joined: January 27, 2006
KitMaker: 251 posts
AeroScale: 179 posts
Posted: Wednesday, December 27, 2006 - 05:53 AM UTC
Hi All
Jean-Luc and SGTJKJ thanks for the comments and sorry for the late reply, I haven't been at home much due to Christmas.
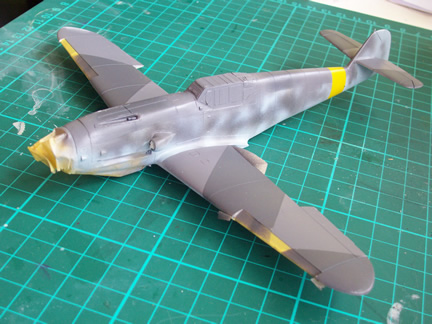
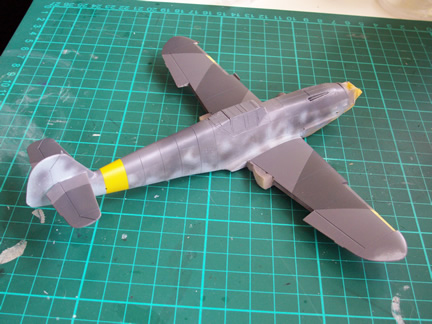
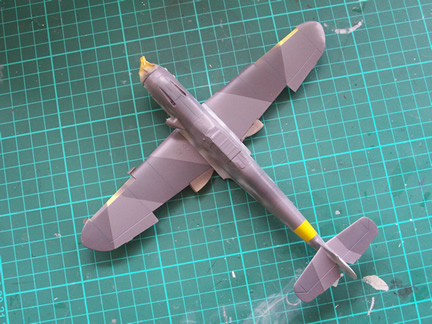
A few more progress pics.
Cheers
Wiz
"Life is a big canvas. Throw all the paint you can at it."
- Br Mac (Br Vivial Justus Macdonald)

#041
Kobenhavn, Denmark
Joined: July 20, 2006
KitMaker: 10,069 posts
AeroScale: 3,788 posts
Posted: Wednesday, December 27, 2006 - 03:27 PM UTC
That 109 is coming along very nicely.

The camouflage looks good. Do you mask the hard edge camouflage on the fuselage when you make all the soft edged spots on the side of the fuselage?
Campaign'oholic - 252+ campaigns completed
New South Wales, Australia
Joined: January 27, 2006
KitMaker: 251 posts
AeroScale: 179 posts
Posted: Thursday, December 28, 2006 - 08:14 PM UTC
@SGTJKJ
I did initially but when I removed the mask I found there was too much of a distinction between the hard edge and the mottle. As I was happy with my control of the spray during my first attempt at the mottle, it gave me a bit more confidence to freehand the touch-up, so I blended the mottle and hard-edged camouflages with no fuselage masking. I had to re-do a bit of the light blue as I had slightly overdone the grays. Overall I am pretty happy with the effect. Especially as this is my first attempt at the mottle and my compressor isn't very precise, or subtle, in its delivery of air.
Cheers
Wiz
"Life is a big canvas. Throw all the paint you can at it."
- Br Mac (Br Vivial Justus Macdonald)


