WWI Development of the original fabrics,
The element of surprise has always been a tactical advantage in warfare. It proved no different in the evolution of aerial combat. During WWI initial efforts to conceal aircraft from the enemy involved painting camouflage patterns by hand on the airframes. But this was time consuming, and the dope paints used added additional weight.
To help streamline aircraft production, the Idflieg (the bureau of the German War Office that oversaw Military Aviation) developed Flugstoff aircraft linen with a dye printed camouflage pattern. This reduced the man-hours and materials otherwise used painting the camouflage patterns. And, because the dyes used to print the fabric weighed less than paint, Flugstoff had the added benefit of reducing weight thereby contributing to improved aircraft performance.
While no official Idflieg report has surfaced detailing the origin of the colors selected, it seems likely that these camouflage patterns were based on the color theories of the Impressionist Art Movement. The concept was that when two different spots of color are placed next to one another, and viewed at a distance, the eye visually mixes them to produce a third color. This optical blending could be influenced by environmental lighting and thereby change the resulting third color. So practically speaking, the camouflage looked different under different lighting and blended with the surroundings. Simple yet effective. It also made the aircraft difficult to view. A pilot had to decide whether an enemy aircraft was coming at him or going away. This indecision made it possible for the German pilot to see his enemy and plot his tactics as well.
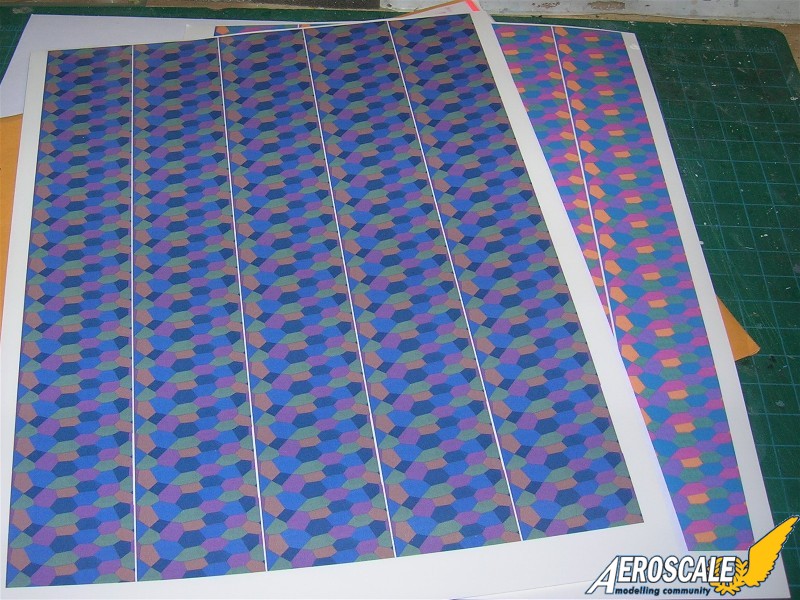
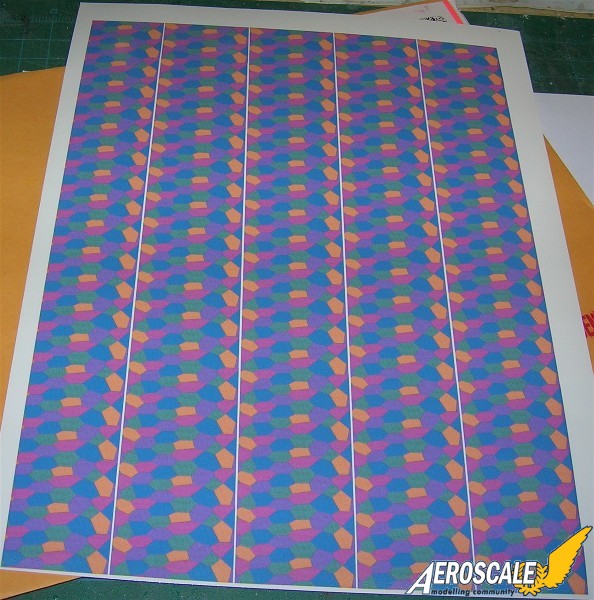
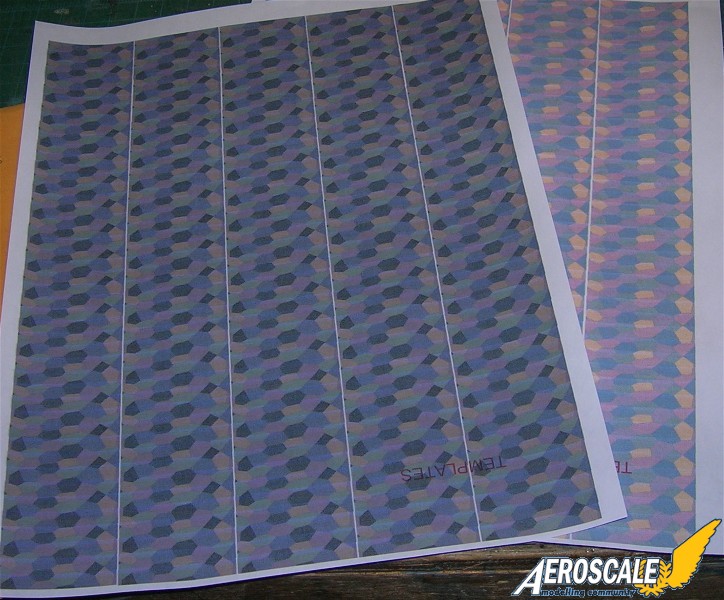
There were several different varieties of Flugzeugstoff patterns printed for use with day and night operations. The most common were the five-color (Fünffarbiger Flugzeugstoff) and the four-color (Vierfarbiger Flugzeugstoff) patterns. Both of these were printed in different color schemes for both the upper and lower surfaces. Additionally, there were different patterns and colors developed for use with Naval operations.
The four color fabric was 1320mm plus or minus 10mm wide and the five color fabric was 1350mm plus or minus 10mm wide. There was some movement inboard with the seams on the four color fabric. Still this amounted to six panels in most cases for a top wing.
a word about Doug Baumann's philosophy,
Doug is a one man show as it were. He wanted to do patterns for everyone to download and use free of charge. After consulting the major experts in this field and some lesser known imps he worked out the colourings and then published his findings. Yet people wanted a ready made set and many kept after him to do these for payment. Doug saw the open door and has flung himself into the lime light. No website yet just an email for contact and PayPal useage.
[email protected]
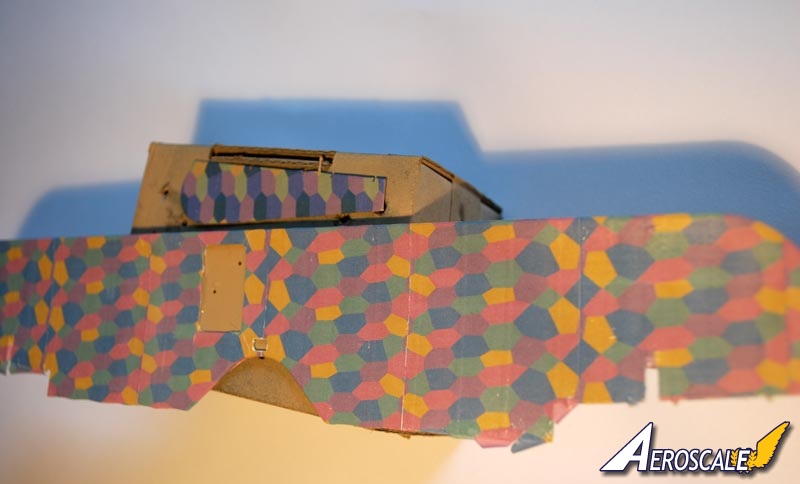
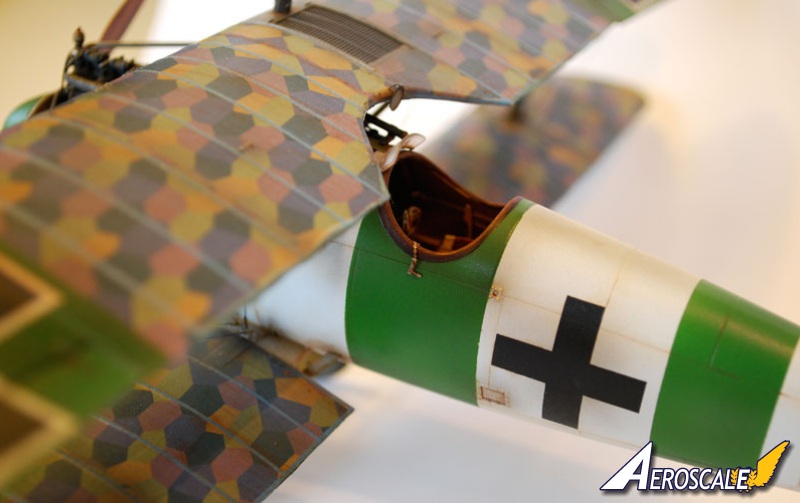
"These decals simulate the camouflage fabric applied to German aircraft during the First World War. While usually referred to as 'lozenge' by modelers today, this term is in fact a misnomer. The repeated shapes in these patterns are not lozenges (having four sides), but rather polygons (having six sides). The German term for the material was 'Flugzeugstoff' or literally aircraft covering stock. However, for our marketing purposes we decided to use the familiar (though inaccurate) term 'lozenge', simply for ease of recognition by the general public.
"The cost for a set of any lozenge in any scale is 15.00 U.S Dollars a set is one sheet of upper and one sheet of lower. sorry but rib tapes is 10.00 dollars extra. PayPal is fine my Pay Pal address is
[email protected]"
"Our first releases depicted five-color patterns. Now we have a wide variety of lozenge day and night versions, Naval Hex and Austro Hungarian Sworl Camouflage. Each of the German lozenge types come in different color schemes for use on the upper and lower surfaces of aircraft."
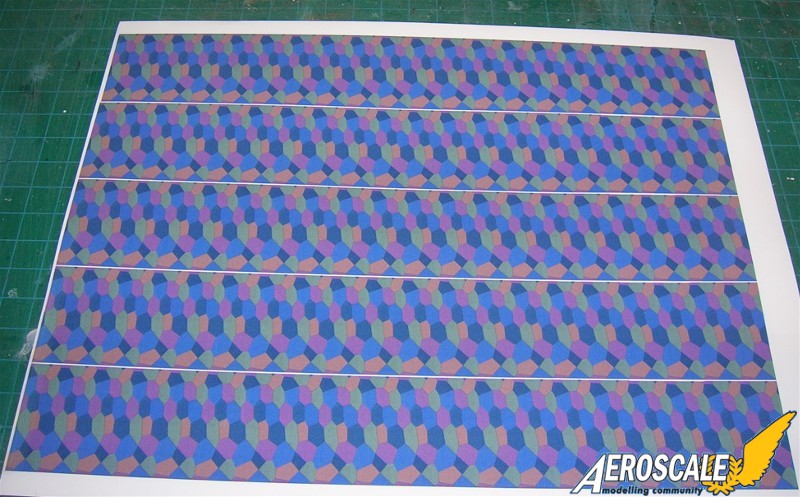
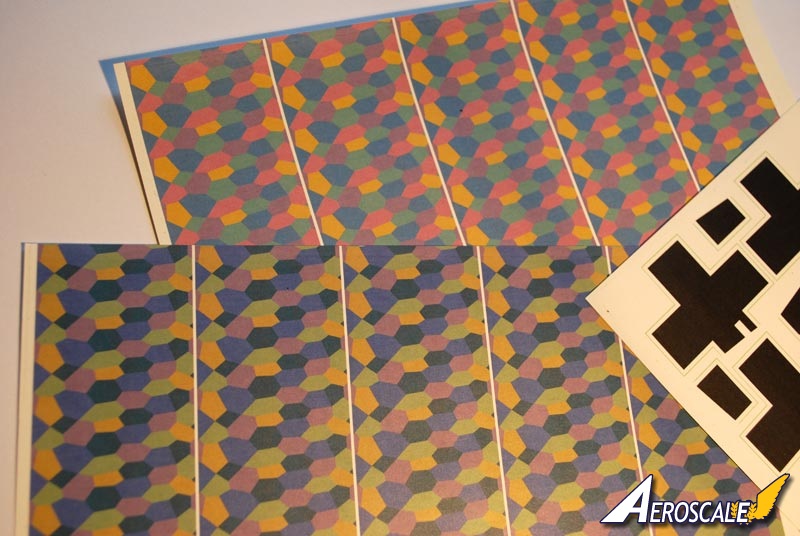
The lozenge decal strips represent bolts of printed polygon fabric as it would appear, ready for application to airframes, with the edges trimmed and sewn. Dimensions are based on generally accepted information provided in Albatros publications and cited by other sources. These finished dimensions are approximately 4' 3 1/4" for the four color pattern and 4' 6" for the five color pattern. Why they are different dimensions is not clear. . ." Possibly different manufacturers had different sized rollers.
Application to the wings & flying surfaces,
These are typical for good quality water slide decals A detailed description of application methods used by the manufacturers is beyond the scope of this article. Put simply, several methods were used to apply the original printed fabric to the airframe. All methods involved the assembly of various pieces of fabric to form a covering large enough to fit the intended area. The pieces were always butt joined and sewn along the selvage edges. These coverings were then attached to the airframe by stitching them to the ribs and edges.
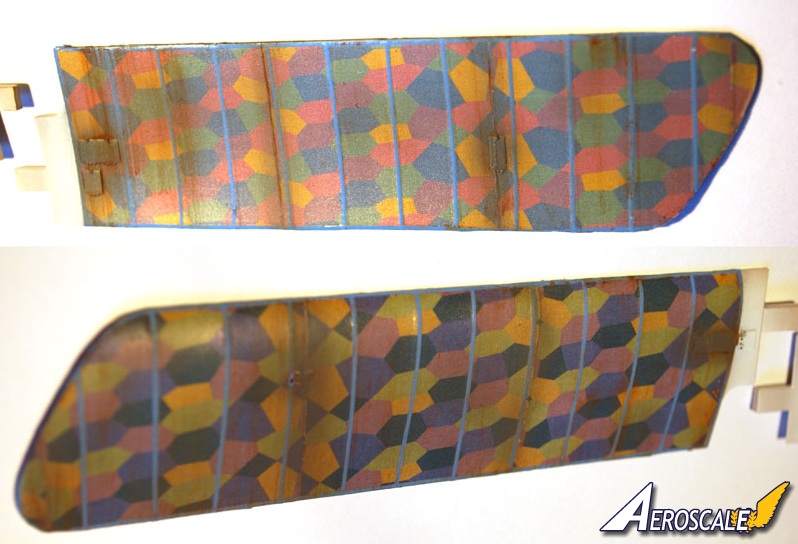
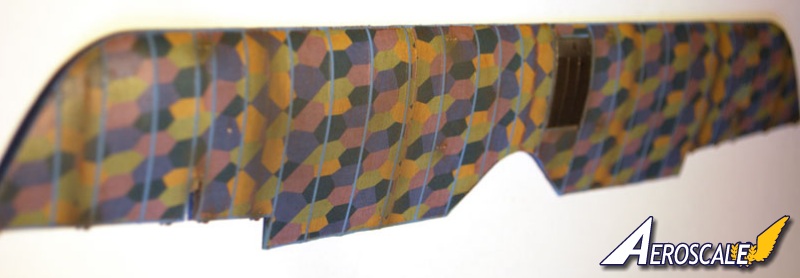
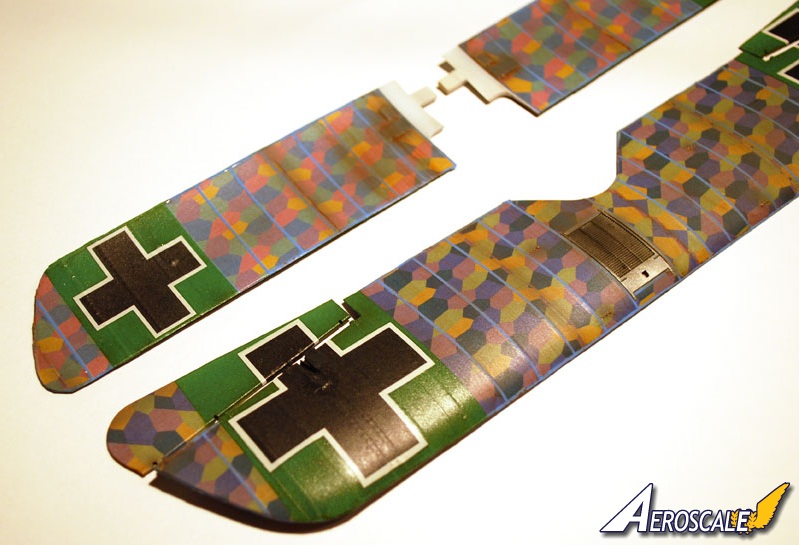
The most common application method by far was Chordwise, with the fabric running parallel to the wing ribs or chord of the wing.
An alternate application method was Spanwise. Here the fabric was applied perpendicular to the ribs, parallel to the leading edge. This was the simplest method since a single run of fabric could cover most of the wing with only a single seam needed to add any additional material. It was seen widely on narrow winged aircraft Like the Seimens Schuckert types. It was also used in some repair work.
The least common method was Diagonal, with the fabric being applied at a 45 degree angle to the line of flight. Again this meant multiple panels to cover the wing. Due to the increased area of the fabric joints this was the strongest method.
Ailerons and elevators were usually covered spanwise. This simplified application by minimizing the number of seams needed.
Application to the fuselage ,
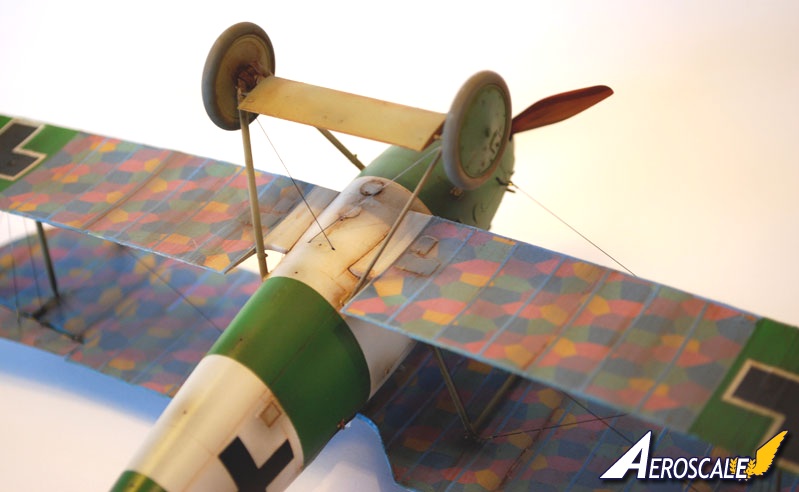
For the fuselage; The application of lozenge panels was done differently between the three licence builders of the Fokker D.VII. That is The factory edges were not applied to the same longerons. Because of their factory assembly lines layout patterns of lozenge were not the same between Fokker Schwerin, Albatros Johannistahl and East Albatros Works Schneidemuhl. Note Longerons are the long corner edges of the fuselage two upper, two lower.
Consult references for the correct pattern and method for your subject. It was not uncommon for airframes to have mixed patterns (i.e. four color fuselage with five color wings, etc.). But these were usually due to "in - the- field" repair situations.
rib tapes,
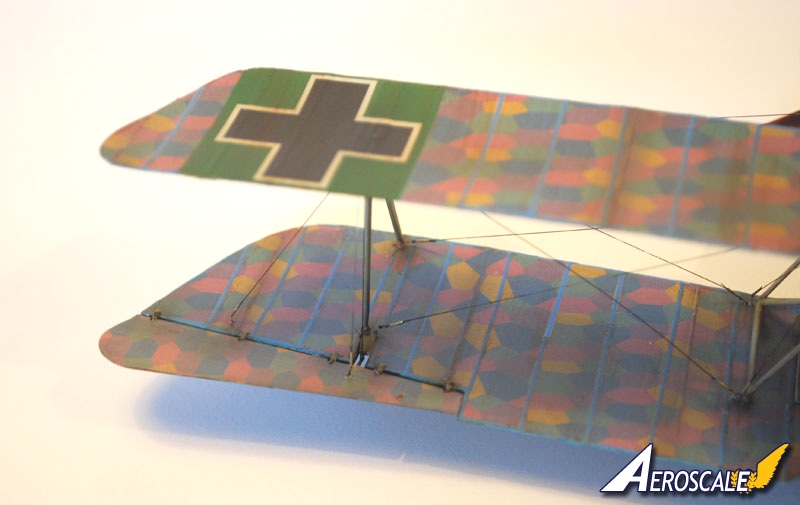
These were strips of fabric generally applied over each full rib and around the edges of the wings to reinforce stitching. They were approximately one inch wide. The tapes could be created from camouflage fabric, or strips of solid blue or salmon pink fabric. Tapes were not applied to elevators or ailerons.
There are different opinions as to whether rib tapes were applied as a single/continous piece wrapped around the entire rib profile (both the upper and lower wing surfaces), or as individual strips for each surface. If they were single/continuous pieces, then in instances where camouflage tape was used, the continuous tape would contrast against one of the wing surface coverings (i.e. Upper scheme tapes would contrast against lower surface coverings and visa versa.). If they were separate camouflage strips for upper and lower surfaces, then they could be matched to the background pattern.
Machines built by Albatros received salmon pink or camouflage rib tapes. OAW machines received light blue or camouflage rib tapes. Fokker-built machines only used camouflage tapes.
texture,
It is my opinion that these sheets will require som "fabric" texturing when completely dry for the best simulation in 1:32. It can be painted on or as a separate sheet from Microsculpt that overlays the
finished lozenge decal. Large areas of solid color, or repeating patterns on models can look a little too pristine or uniform. This can make a scale replica look toy-like. There are many ways to alter the appearance of these areas including pre-shading, glazing, dry brushing and powders. Here is another choice to add to your arsenal. Fabric texture decals. The idea is to make a fabric area look like fabric! The imitation of printed lozenge fabric on WWI models has always been an effect that has tested modeler's skills. The challenge is depicting the colors accurately without making them look too garish on such a small scale. These decals have been developed to add a subtle irregular cloth texture and tone down the lozenge patterns by about 5% without causing a significant shift in colors.
How to use,
1. These decals represent printed bolts of camouflage fabric with edges trimmed and sewn for application to airframes.
2. Study the reference material on your chosen subject. If possible, determine the patterns used for both fuselage and wings (they may differ) and the application method (see Fabric Orientation).
3. A copy of a scale drawing of the aircraft will be helpful to plan the decal layout.
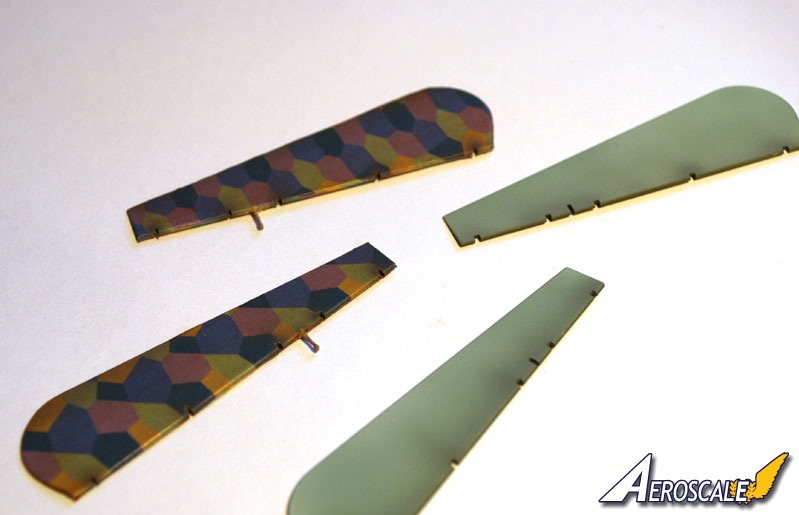
4. It is essential that these decals be applied to a gloss finish. This provides the best surface for the decals to adhere. I recommend khaki or olive as a base color to help conceal any possible gaps.
5. Take your time applying the decals. Allow each piece to set before working on the next. Do one surface at a time.
6. Begin with the lower surfaces. Carefully measure the intended area (dividers are useful for transferring measurements), being sure to add a little extra at the endsthis will be trimmed later. Cut the piece of decal you need from the sheet.
7. Using tweezers dip it in the hot - very warm water for no more than five seconds. Submersing the decal for a longer period of time can dilute the adhesive and interfere with the adhesive qualities. Place it on a nonporous surface and wait for it to loosen from the paper backing.
8. My advice is that you use only warm filtered water. These decals are very thin so don't use Solvaset unless you dillute it. DO not use Micro Sol or Set over the wole surface or it will wrinkle and when dry will not settle down correctly. Many wrinkles will be permanent. You can use a moist finger or a Q-tip.
9. Exact position can be achieved by moving the decal with a Q-tip. Carefully blot up the excess moisture with a soft cloth. Then, gently press the decal to the surface, starting at one corner and working over the entire surface of the decal. Try not to shift its position. Apply a thin film of Microset over the decal and blot up any excess. Difficult areas (compound curves, extremely detailed areas) may require the sparing use of MicroSet.
10. When set repeat the process for the next panel. When the lower surfaces are done and thoroughly dry, clean up the edges with an Xacto, trimming excess material. Repeat this process for the upper surfaces.
11. When all the decal panels have been added to both upper and lower surfaces, the rib tapes can be applied. These cover all full rib (not riblet) locations of the wings. They were not applied to elevators or ailerons. Camouflage tapes can be created by cutting strips (length wise) from the decal material.
It is my opinion that these sheets will require som "fabric" texturing when completely dry for the best simulation in 1:32.
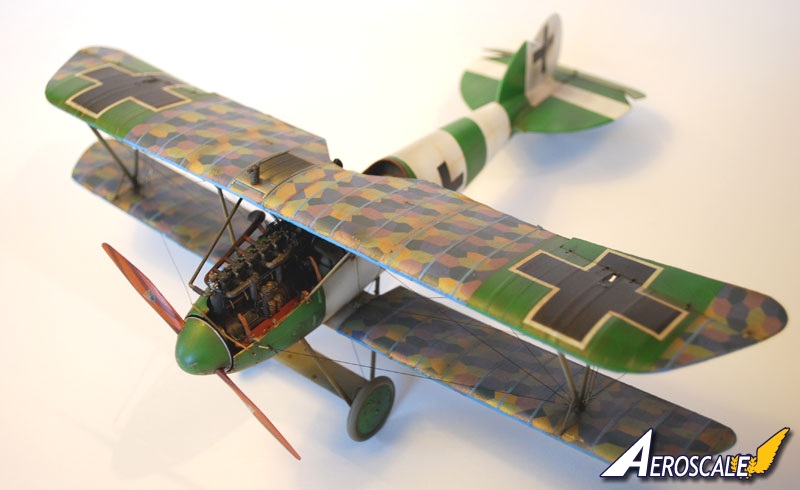
My sincere thanks to Aeroscale member Mikael Terfors for allowing us to use his build images using DBDecals 5 colour 1:32 lozenge.
When contacting manufacturers and publishers PLEASE mention you saw this review at AEROSCALE


Comments