

Air Campaigns
Want to start or join a group build? This is where to start.
Want to start or join a group build? This is where to start.
Hosted by Frederick Boucher, Michael Satin
OFFICIAL Matchbox Flying Nostalgia Campaign

camogirl

Joined: October 20, 2005
KitMaker: 1,045 posts
AeroScale: 622 posts

Posted: Monday, July 23, 2012 - 08:29 AM UTC
Thanks for the comments guys. The decals on the nose were not too bad I did sort of beat them into submission with micro set and sol but Ive had worse decals then these ones


Tomcat31

#042
Joined: November 18, 2006
KitMaker: 2,828 posts
AeroScale: 1,720 posts

Posted: Thursday, July 26, 2012 - 07:46 AM UTC
Finished at the weekend but only just got round to taking the photos
I decided to go old school in the end and not to weather the Lightning


Thanks for the campaign Aussie I really enjoyed taking a trip down memory lane
I decided to go old school in the end and not to weather the Lightning
Thanks for the campaign Aussie I really enjoyed taking a trip down memory lane


AussieReg
#007

Joined: June 09, 2009
KitMaker: 8,156 posts
AeroScale: 3,756 posts
Posted: Thursday, July 26, 2012 - 10:12 AM UTC
Great job Tomcat, your Lightning nailed the Campaign brief and looks very nice indeed.
I'm glad that the Campaign has worked so far. I've really enjoyed watching the progress, and for most of us (me included) it can be really hard to step backwards to basic modelling once you start to work with some more advanced products and techniques. I have managed to resist using any filler or putty on the 109, just knife, cement and sandpaper so far.
Thanks for being part of the fun and sharing your build with us mate, and congrats on getting a great build finished.
Cheers, D
EDIT: That's 7 completed builds with photos up in the Campaign Gallery. I've updated the Roll Call/Build Status list on page 1 for everybody to check out. Carry on . . .
Quoted Text
Thanks for the campaign Aussie I really enjoyed taking a trip down memory lane
I'm glad that the Campaign has worked so far. I've really enjoyed watching the progress, and for most of us (me included) it can be really hard to step backwards to basic modelling once you start to work with some more advanced products and techniques. I have managed to resist using any filler or putty on the 109, just knife, cement and sandpaper so far.
Thanks for being part of the fun and sharing your build with us mate, and congrats on getting a great build finished.
Cheers, D
EDIT: That's 7 completed builds with photos up in the Campaign Gallery. I've updated the Roll Call/Build Status list on page 1 for everybody to check out. Carry on . . .

AussieReg
#007
Joined: June 09, 2009
KitMaker: 8,156 posts
AeroScale: 3,756 posts
Posted: Saturday, July 28, 2012 - 05:41 PM UTC
Hi all. Decalling commenced, and ground to a halt ! I'm using the decals from the Trumpeter Kit (#02288), kindly donated by Bill Cross, and started on the port wing underside to see how they fitted and looked . . . . .

The red stripe on the main wing decal is about 3mm out of allignment. First decal bad, this doesn't bode well for the whole set.
I checked the rest of the decals closely, and all of the rest seem to be fine. You can see a good photo of the decal set in Bill's review of the Trumpeter kit HERE, and you can see the problem on the offending decal in the bottom right corner of the sheet. I have looked at several reviews of the kit on the interweb, all show the same decal issue but none mention it !
Since it's on the underside, I'm not going to fix it. If anybody wants to lie down under the wing and look up at it, they're welcome to !
Ok, that's all, back to it.
The red stripe on the main wing decal is about 3mm out of allignment.
First decal bad, this doesn't bode well for the whole set.I checked the rest of the decals closely, and all of the rest seem to be fine. You can see a good photo of the decal set in Bill's review of the Trumpeter kit HERE, and you can see the problem on the offending decal in the bottom right corner of the sheet. I have looked at several reviews of the kit on the interweb, all show the same decal issue but none mention it !
Since it's on the underside, I'm not going to fix it. If anybody wants to lie down under the wing and look up at it, they're welcome to !
Ok, that's all, back to it.
camogirl
Joined: October 20, 2005
KitMaker: 1,045 posts
AeroScale: 622 posts
Posted: Saturday, July 28, 2012 - 06:29 PM UTC
Thats a shame Aussie but as you say at least it is on the underside Looking forward to seeing it finished
Looking forward to seeing it finished 
amegan

#243
Joined: March 21, 2008
KitMaker: 996 posts
AeroScale: 915 posts

Posted: Monday, July 30, 2012 - 10:35 AM UTC
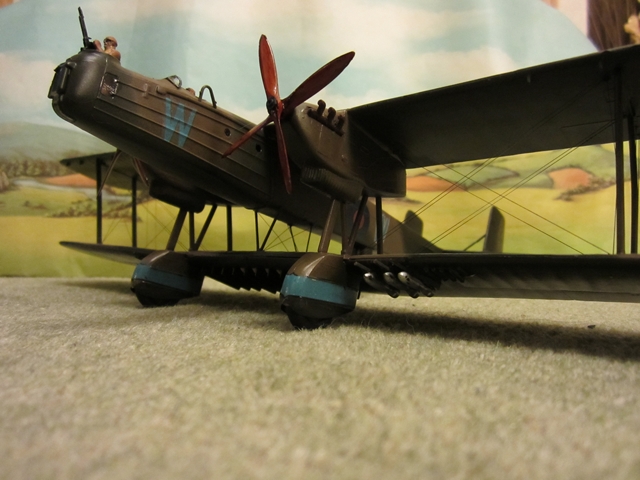
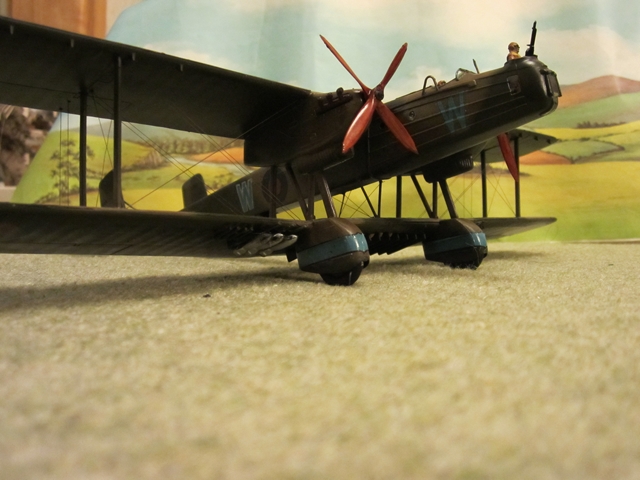
That's not so good, but the ME looks great anyway. Latest progress on the Heyford while I'm waiting for the bomb paint to dry. 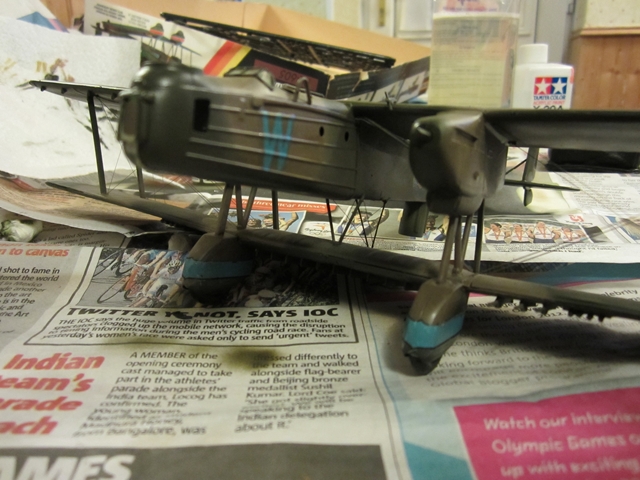

Nearly there now, crew and armament left to fit
Nearly there now, crew and armament left to fit
AussieReg
#007
Joined: June 09, 2009
KitMaker: 8,156 posts
AeroScale: 3,756 posts
Posted: Monday, July 30, 2012 - 11:12 AM UTC
Beautiful work Andrew, your Heyford is looking great.
Cheers, D
Cheers, D
amegan
#243
Joined: March 21, 2008
KitMaker: 996 posts
AeroScale: 915 posts
Posted: Monday, July 30, 2012 - 11:43 AM UTC
Cheers, actually with reference to your 109 I saw something similar on a real aircraft that had a damaged aileron replaced, real aircraft paint jobs are often nowhere near as good as we portray.
Allen, neat Lightning, I don't remember seeing a two seater before. I'll have to dig the Hasegawa F.6 out of the stash.
Allen, neat Lightning, I don't remember seeing a two seater before. I'll have to dig the Hasegawa F.6 out of the stash.

phantom_phanatic309
#372

Joined: March 10, 2010
KitMaker: 2,568 posts
AeroScale: 1,619 posts

Posted: Tuesday, July 31, 2012 - 03:54 AM UTC
Allen, your Lightning is pretty cool looking. Its always good to see familiar types done in different markings.
Andrew, the Heyford is looking great. How is the the fit of the bottom wing to the struts?
Damien, that sucks with the markings. Its unusual for a modern company like Trumpeter to make a mistake like that. Everything else lines up fine but that one stripe. Is there perhaps a chance they based the markings on an actual Swiss 109 with this peculiarity?
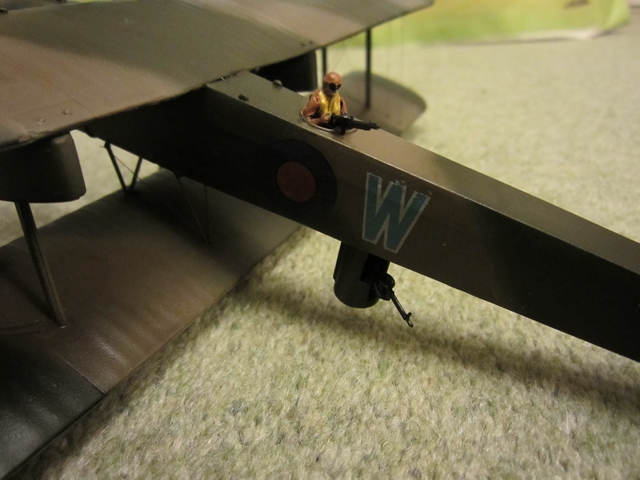
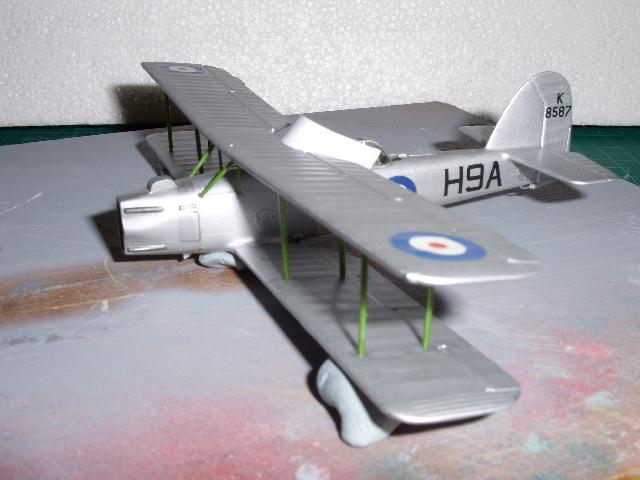
Decals were a little tricky on the Seafox. Some of the larger ones were a little stubborn. Once they were down they wanted to stay down and the wing roundels had a nasty habit of curling. But with a little help form micro sol and set I was able to beat them into submission.

Now comes the tricky bit....
Andrew, the Heyford is looking great. How is the the fit of the bottom wing to the struts?
Damien, that sucks with the markings. Its unusual for a modern company like Trumpeter to make a mistake like that. Everything else lines up fine but that one stripe. Is there perhaps a chance they based the markings on an actual Swiss 109 with this peculiarity?
Decals were a little tricky on the Seafox. Some of the larger ones were a little stubborn. Once they were down they wanted to stay down and the wing roundels had a nasty habit of curling. But with a little help form micro sol and set I was able to beat them into submission.
Now comes the tricky bit....


Jessie_C


Joined: September 03, 2009
KitMaker: 6,965 posts
AeroScale: 6,247 posts

Posted: Tuesday, July 31, 2012 - 04:51 AM UTC
I've finally found the vac canopy for my topless Gladiator. I could likely blitz-build it in the month remaining. Are there objections to that tiny bit of aftermarket?
amegan
#243
Joined: March 21, 2008
KitMaker: 996 posts
AeroScale: 915 posts
Posted: Tuesday, July 31, 2012 - 09:22 AM UTC
Hi Stephen
The Heyford fits were amazing, the only problem in the whole build was broken struts, I had the replace the rear V-cabane strut with brass wire because I broke the plastic one. The basic wing alignment is controlled by the N struts under the engine nacelles and they and the interplane struts aligned the wing perfectly. Quite a few modern manufacturers could learn a lot from the way this kit fits together. The only filler used was in the upper wing panels,where the inner and outer panels join and the centreline joint under the lower wing. Good luck with that Seafox (and if you get stuck needing three hands Lego makes a great jig).
The Heyford fits were amazing, the only problem in the whole build was broken struts, I had the replace the rear V-cabane strut with brass wire because I broke the plastic one. The basic wing alignment is controlled by the N struts under the engine nacelles and they and the interplane struts aligned the wing perfectly. Quite a few modern manufacturers could learn a lot from the way this kit fits together. The only filler used was in the upper wing panels,where the inner and outer panels join and the centreline joint under the lower wing. Good luck with that Seafox (and if you get stuck needing three hands Lego makes a great jig).
AussieReg
#007
Joined: June 09, 2009
KitMaker: 8,156 posts
AeroScale: 3,756 posts
Posted: Tuesday, July 31, 2012 - 09:59 AM UTC
Quoted Text
I've finally found the vac canopy for my topless Gladiator. I could likely blitz-build it in the month remaining. Are there objections to that tiny bit of aftermarket?
No objection here Jessica, go for it !
Jessie_C
Joined: September 03, 2009
KitMaker: 6,965 posts
AeroScale: 6,247 posts
Posted: Friday, August 03, 2012 - 03:16 PM UTC
Day 3 of the blitz build and I have a fuselage
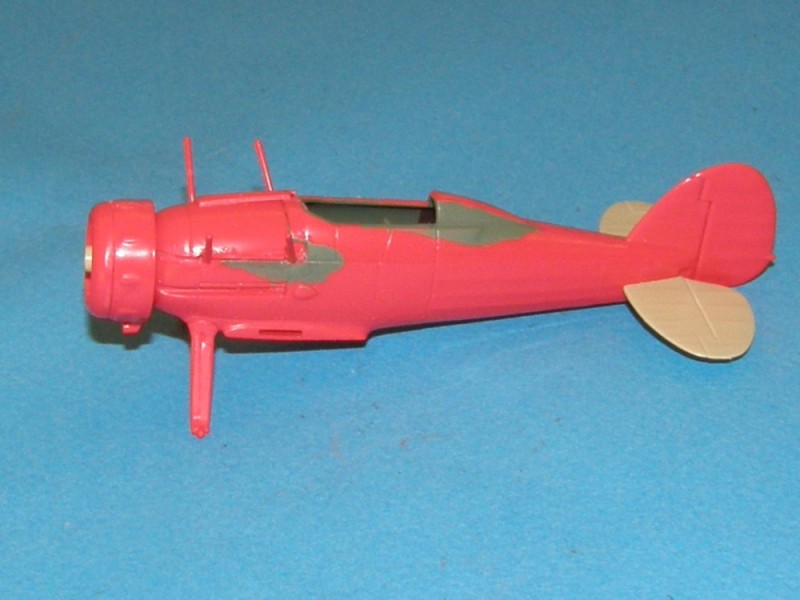
The wings make it look like an airplane
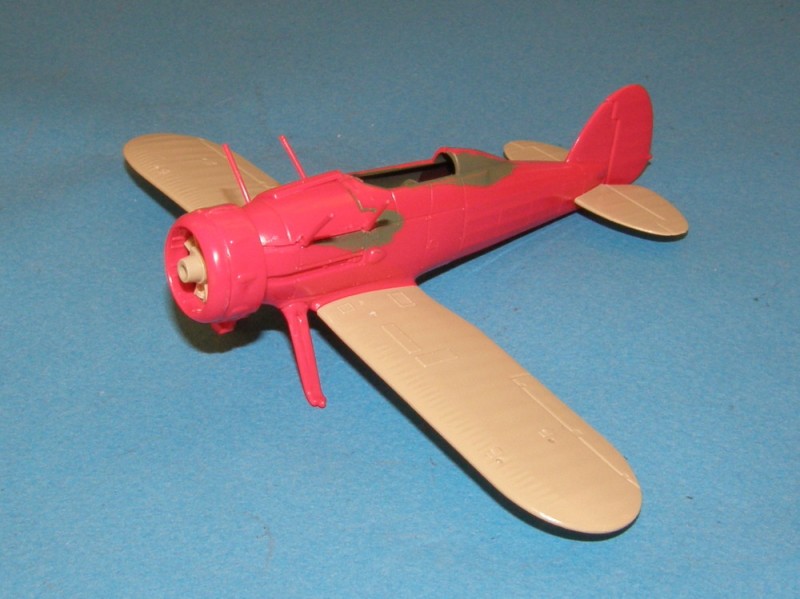
It's going to need plenty of filling before I can do any more work.
The wings make it look like an airplane
It's going to need plenty of filling before I can do any more work.
AussieReg
#007
Joined: June 09, 2009
KitMaker: 8,156 posts
AeroScale: 3,756 posts
Posted: Friday, August 03, 2012 - 05:25 PM UTC
Looking good Jessica, love the colour scheme 
Stephen, great progress on the Seafox, coming along very nicely indeed.
Starboard wing underside decals are much more betterer ! I used a liberal pre-coat of Mr Mark Setter before the decals went on, then gave them a good soak with Mr Mark Softer when they were in place. As you can see they conform to the panel details very nicely.

And I got the topside wing decals in place without much of a fight.

There is a bit of a gap along the leading edge between the two main decals, but if take the finished photo's from a strategic direction nobody will ever know !
Cheers, D
Stephen, great progress on the Seafox, coming along very nicely indeed.
Starboard wing underside decals are much more betterer ! I used a liberal pre-coat of Mr Mark Setter before the decals went on, then gave them a good soak with Mr Mark Softer when they were in place. As you can see they conform to the panel details very nicely.
And I got the topside wing decals in place without much of a fight.
There is a bit of a gap along the leading edge between the two main decals, but if take the finished photo's from a strategic direction nobody will ever know !
Cheers, D
amegan
#243
Joined: March 21, 2008
KitMaker: 996 posts
AeroScale: 915 posts
Posted: Saturday, August 04, 2012 - 09:43 AM UTC
Hey D, that is a great looking 109, fantastic colour scheme and beautifully done. Jessie, watching that Glad, I built 2 of them a few years ago, not the greatest kit, I'm sure they weren't pink.
Jessie_C
Joined: September 03, 2009
KitMaker: 6,965 posts
AeroScale: 6,247 posts
Posted: Saturday, August 04, 2012 - 10:08 AM UTC
Under regular lighting it's more of a red; the flash washes things out. We'll be saying goodbye to that shortly.
phantom_phanatic309
#372
Joined: March 10, 2010
KitMaker: 2,568 posts
AeroScale: 1,619 posts
Posted: Saturday, August 04, 2012 - 10:28 AM UTC
Yikes! I've seen some wierd colours in Matchbox kits but I think that Gladiator has to be the worst by far!
Makes you wonder if Matchbox staff were popping a certain illegal substance.
Makes you wonder if Matchbox staff were popping a certain illegal substance.
amegan
#243
Joined: March 21, 2008
KitMaker: 996 posts
AeroScale: 915 posts
Posted: Monday, August 06, 2012 - 10:37 AM UTC
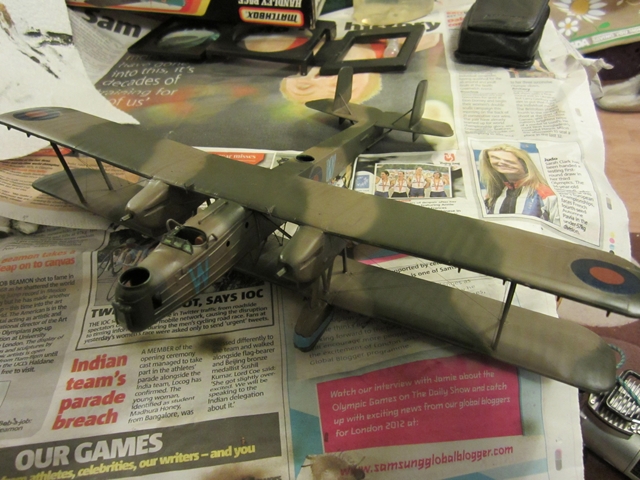
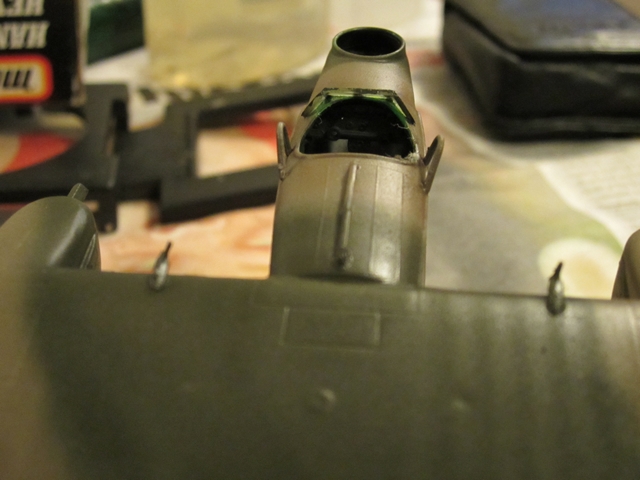
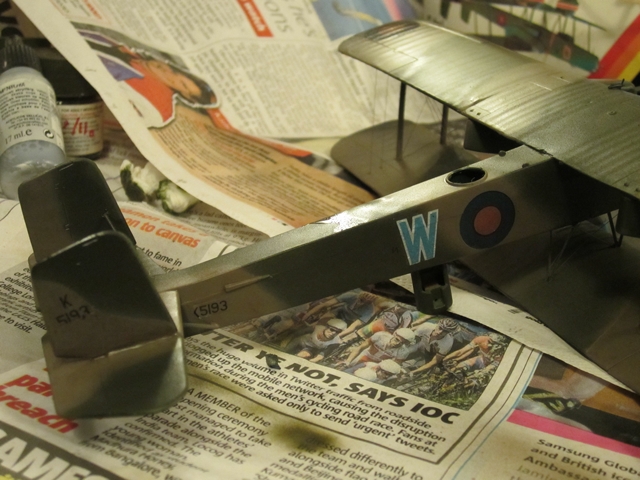
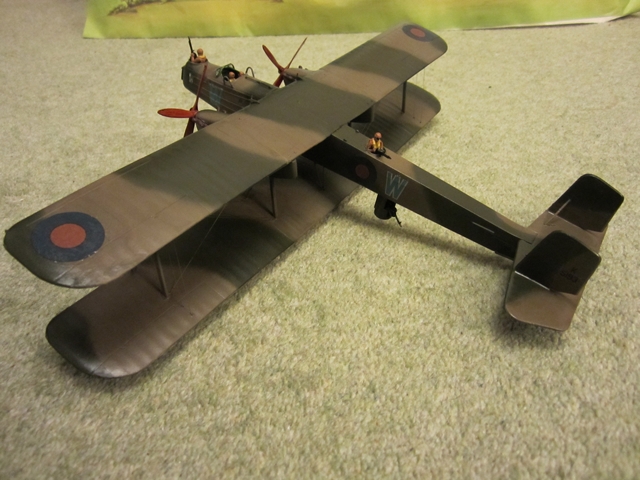
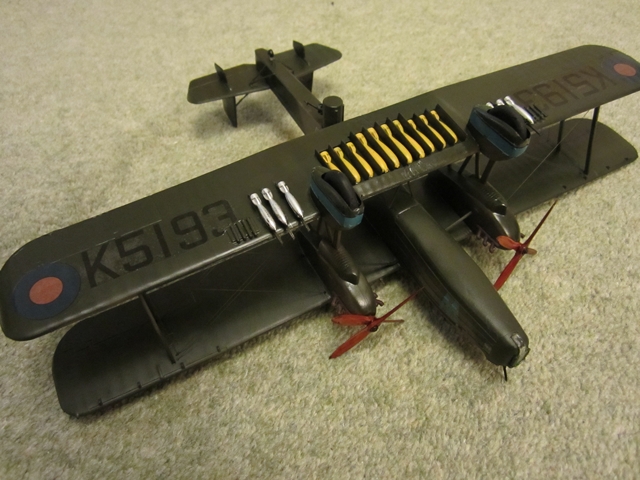
I'm calling the Heyford done, there is at least one error I found tonight on a photo site but I'd probably do more damage than good trying to fix it. I like it, pretty good kit could have more detail but nice fitting
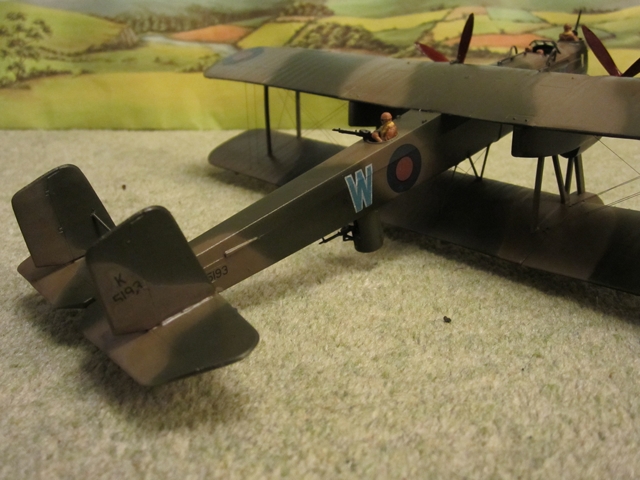
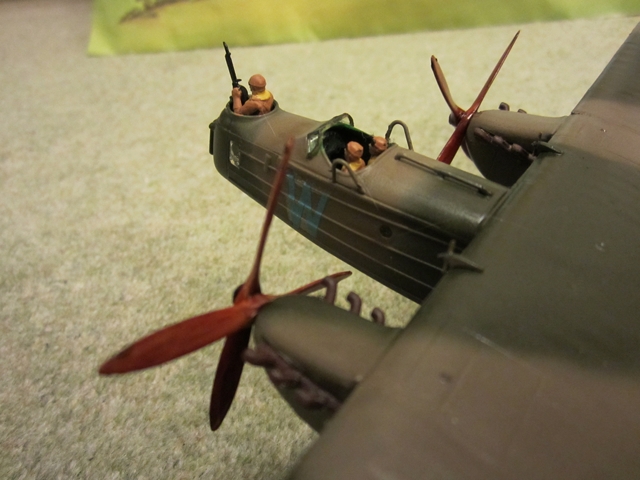
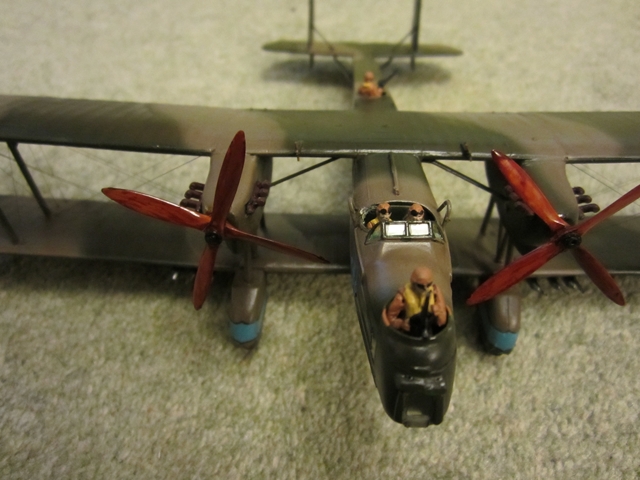 I've also just noticed on the photos that the gunners screen is missing (actually missing from the kit). I'll make one, it appears to be a flat pexiglass screen.
I've also just noticed on the photos that the gunners screen is missing (actually missing from the kit). I'll make one, it appears to be a flat pexiglass screen. phantom_phanatic309
#372
Joined: March 10, 2010
KitMaker: 2,568 posts
AeroScale: 1,619 posts
Posted: Monday, August 06, 2012 - 11:26 AM UTC
Nice work. Its an odd looking plane, the nose gunner is very high up when its on the ground.
I will have to put one of these on my wish list now.
I will have to put one of these on my wish list now.
amegan
#243
Joined: March 21, 2008
KitMaker: 996 posts
AeroScale: 915 posts
Posted: Tuesday, August 07, 2012 - 06:15 AM UTC
Apparently a very efficient design, the pilot's eye line was 16ft above the ground and the view for taxiing must have been terrible. Airfields in 1933 were just that, fields so I guess there wasn't too much to hit. Mine was Matchbox but apparently Revell have reboxed it
AussieReg
#007
Joined: June 09, 2009
KitMaker: 8,156 posts
AeroScale: 3,756 posts
Posted: Tuesday, August 07, 2012 - 12:42 PM UTC
Beautiful work Andrew, congrats on the fine finished build and thanks for sharing your build with us.
Cheers, D
Cheers, D
phantom_phanatic309
#372
Joined: March 10, 2010
KitMaker: 2,568 posts
AeroScale: 1,619 posts
Posted: Wednesday, August 08, 2012 - 08:27 AM UTC
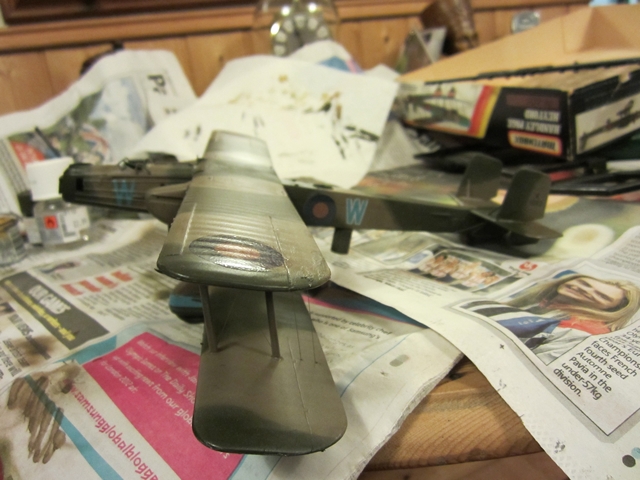
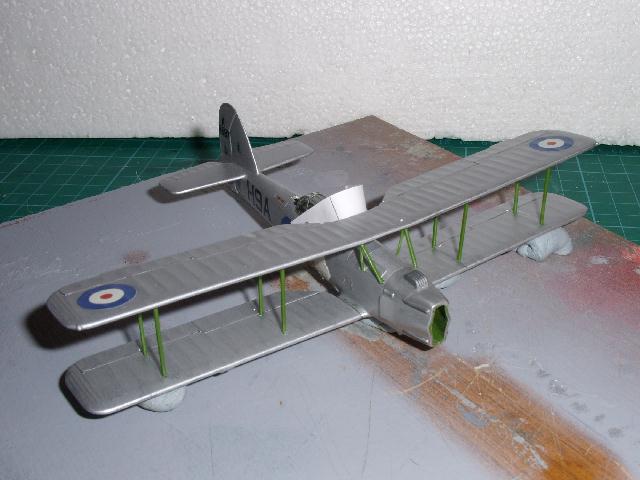
Work continues on the Seafox.
Got the wings and struts together this afternoon. Although I invented several new swear words, it turned out better than expected. I'll leave this all to dry thoroughly before painting the struts and then addind the walkway decals to the lower wing. Then its more fun and games with the float struts.
Got the wings and struts together this afternoon. Although I invented several new swear words, it turned out better than expected. I'll leave this all to dry thoroughly before painting the struts and then addind the walkway decals to the lower wing. Then its more fun and games with the float struts.
amegan
#243
Joined: March 21, 2008
KitMaker: 996 posts
AeroScale: 915 posts
Posted: Wednesday, August 08, 2012 - 08:50 AM UTC
My thanks Damian for running a very entertaining campaign. btw I dug out my last Matchbox build some 13 years ago 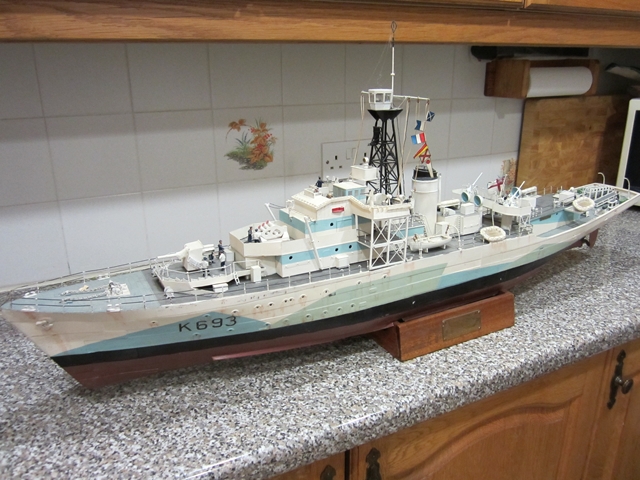
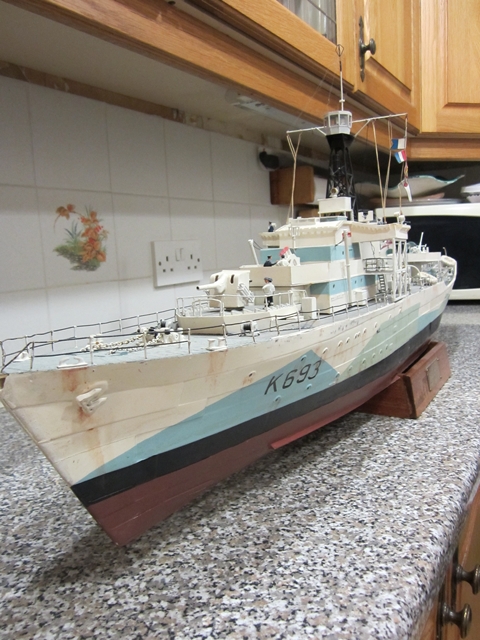
Yes underneath the disguise there is a Matchbox (not Revell) Flower class corvette and it sails well.
Stephen, looks good, keep at it
Yes underneath the disguise there is a Matchbox (not Revell) Flower class corvette and it sails well.
Stephen, looks good, keep at it
SGTJKJ
#041

Joined: July 20, 2006
KitMaker: 10,069 posts
AeroScale: 3,788 posts

Posted: Thursday, August 09, 2012 - 08:43 AM UTC
Beautiful build, Andrew. A great looking Heyford. I especially like the finish on the propellers and the rigging.
Thanks for participating
Nice finish on the Bf 109, Damian. A very colorful scheme!
Thanks for participating
Nice finish on the Bf 109, Damian. A very colorful scheme!


almonkey

Joined: March 23, 2003
KitMaker: 2,124 posts
AeroScale: 788 posts

Posted: Thursday, August 09, 2012 - 09:00 AM UTC
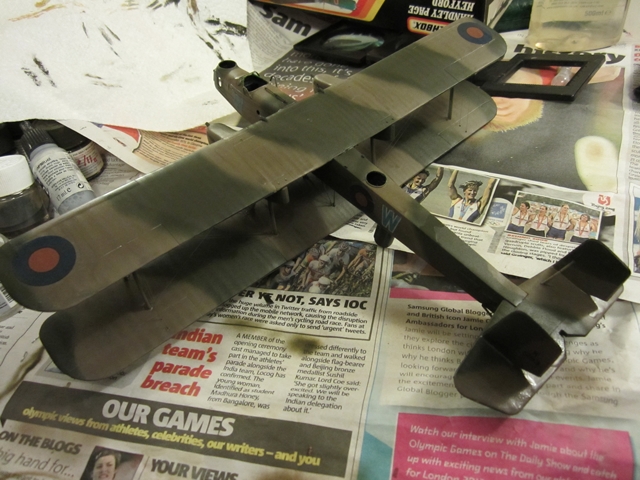
aaaaaaaand i'm done!
got this kit finished last week, which brings my 2012 finished kit tally to a grand total of four!
its turned out nicer than i thought, especially the top glazing,that is moulded in two halves, that leaves you with a seam/join to deal with straight across the upper turret "bubble" however i set to it with various grades of micro mesh and i quite happy with the way it turned out.
on the subject of glazing i've not done anything with the lower solid plastic windows, with them being hidden underneath i feel i can live with them.
anyway pics-


P.S. pics added to gallery too.
got this kit finished last week, which brings my 2012 finished kit tally to a grand total of four!
its turned out nicer than i thought, especially the top glazing,that is moulded in two halves, that leaves you with a seam/join to deal with straight across the upper turret "bubble" however i set to it with various grades of micro mesh and i quite happy with the way it turned out.
on the subject of glazing i've not done anything with the lower solid plastic windows, with them being hidden underneath i feel i can live with them.
anyway pics-
P.S. pics added to gallery too.

 |

WEB HOSTING BY


Copyright ©2021 AeroScale and Kitmaker Network, a subsidiary of Silver Star Enterprises
All Rights Reserved. Please read our Conditions of Use and Privacy Policy.
All Rights Reserved. Please read our Conditions of Use and Privacy Policy.