

1⁄32Silver Wings Fairey Flycatcher Build
4
Comments
Interior Subassemblies
Following the instructions, complete steps 1 through 11 as indicated, notes as follows:■ Step 1: I used a paintbrush handle to bend the PE rudder straps as the PE buckle section did not want to bend as easily as the rest. Attach the completed rudder pedals to the forward floor as it will be easier to do so now than after the floor is installed in the cockpit frame.
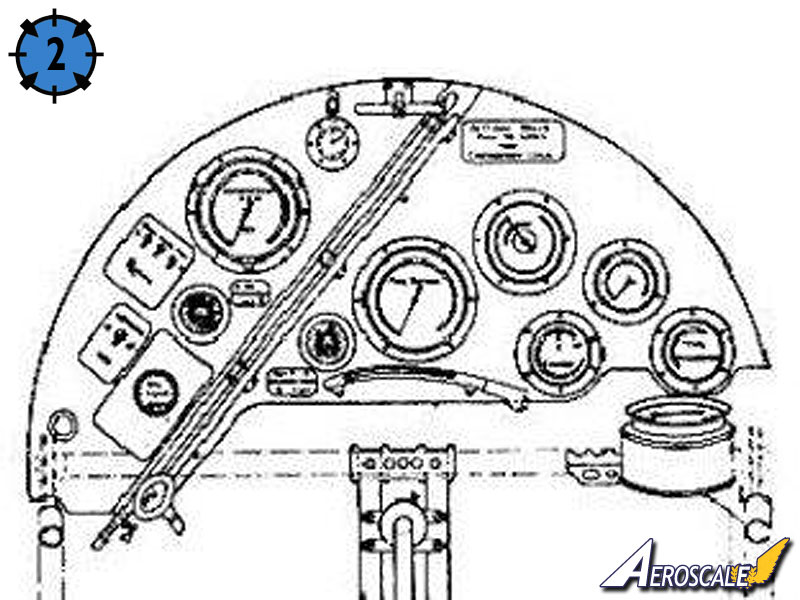
■ Step 3: the instrument panel provided appears to be based on the replica Flycatcher as the "real" IP looks completely different (see photo 2 for a drawing of the actual IP in the event you want to make your own. The diagonal object is a glass tube that acts as a fuel gauge). As you cannot see much of the IP when the cockpit is completed, you may want to use the kit provided IP anyway. If you chose to use the kit provided IP, note that it is about .25mm too wide, so trim to get a good fit.
■ Step 6: Test fit, but do not glue the control column to the rod/bracket, wait to finally attach these parts during cockpit assembly in Step 13. With careful cleanup, I was able to push fit the control column and bell crank to the rod/bracket without needed glue.
■ Step 8: You can wait to attach the seatbelts until after the rear bulkhead is installed if you wish. I also noted that on my kit, during test fitting the rear bulkhead, even though it seemed a little wider than the cockpit frame, seemed to fit well. However, when actually gluing everything together I found it was indeed a little wide, so I recommend sanding it down slightly to match the cockpit frame width.
■ Step 11: It seems to me that the guns are a little far away from the fuselage compared to available photos, so I would recommend drilling out the holes in the fuselage completely so that the attachment pins can be inserted and the distance adjusted after painting. You can also just use the gun brackets if your model will be displayed without guns, a common configuration based on period photos.
Cockpit Assembly
Cockpit assembly starts with step 12. Having built 3 Silver Wings kits thus far, I can say that this is the easiest cockpit to assemble of any of them. The fit of the cockpit assembly into the fuselage is also the best as well.■ I started my assembly by cutting the provided resin cross-braces to the appropriate lengths as indicated in step 12. Once complete, I attached the bell crank and bracket/rod to the rear 22M rod as indicated. I then attached the rods, front floorboard and "cat's cradle" to one side of the framing (see photo 3). Note that I did not attach the 22 mm cross brace that holds the rear of the fuel tank in place (shown in step 13), as this will be fitted later as test fitting showed that it would need to be placed forward of the position indicated in the instructions for the best fit.
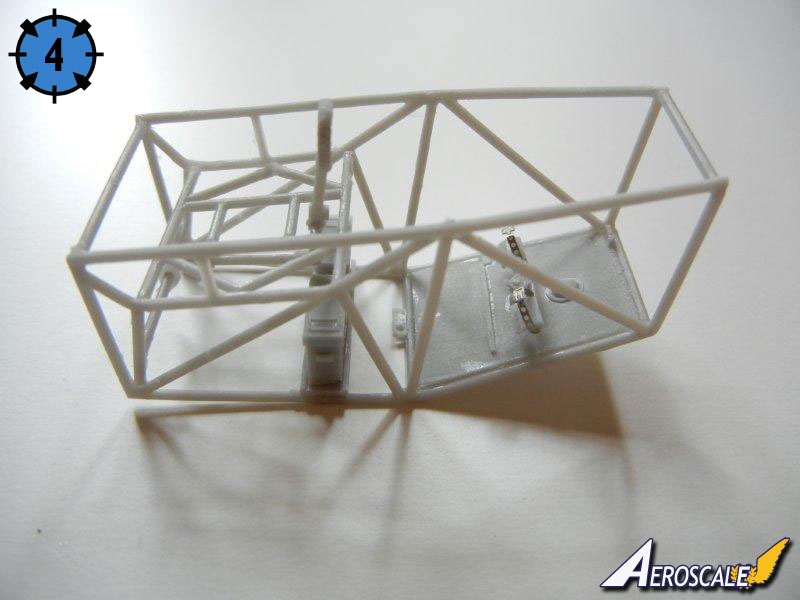
■ I then attached the opposite side framing piece, and the MG ammo tray/box assembly (from step 10) and made sure everything was aligned. I also attached the control column, fitting it into the other end of the bracket/rod that was already attached to the bell crank (see photo 4).
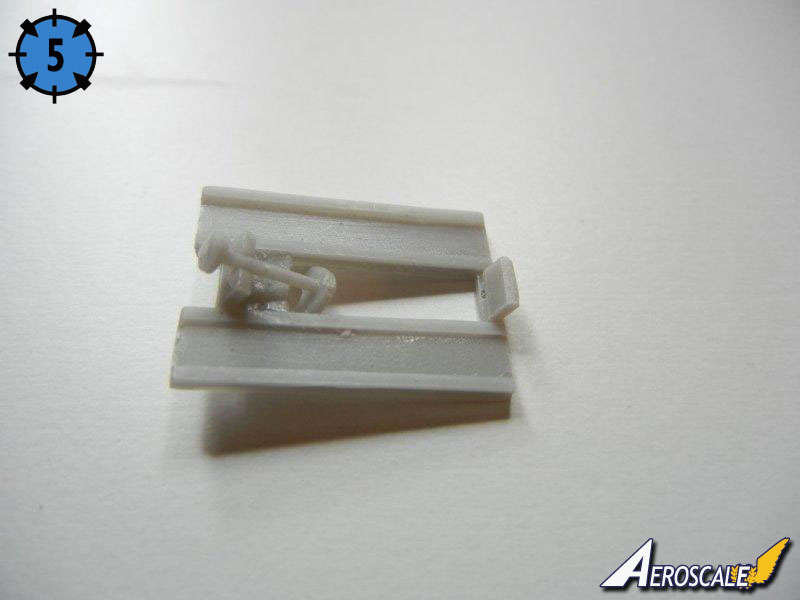
■ I then dry fit the heel boards into position, however the part was too short, so I added a shim at the bottom (see photo 5) and glued the part into position. Due to the small and busy cockpit, the issue (and shim) is unnoticeable on the finished kit.
■ Next, install the part from step 2 (trim control?) and pilot's seat as indicated.
■ Dry fit the fuel tank to the completed cockpit frame assembly. Take note of where the rear 22mm cross brace will need to be placed, remove the fuel tank and attach the cross brace in the appropriate position.
■ Attach the two ammo feed shoots in position using Gator's Grip (or other flexible glue) so that you can bend them into the correct position once the cockpit frame is installed in the fuselage halves.
■ Attach the throttle and other small bits as indicated in step 14, and the throttle control cables as indicated in step 15. Once set, install the fuel tank in the appropriate position.
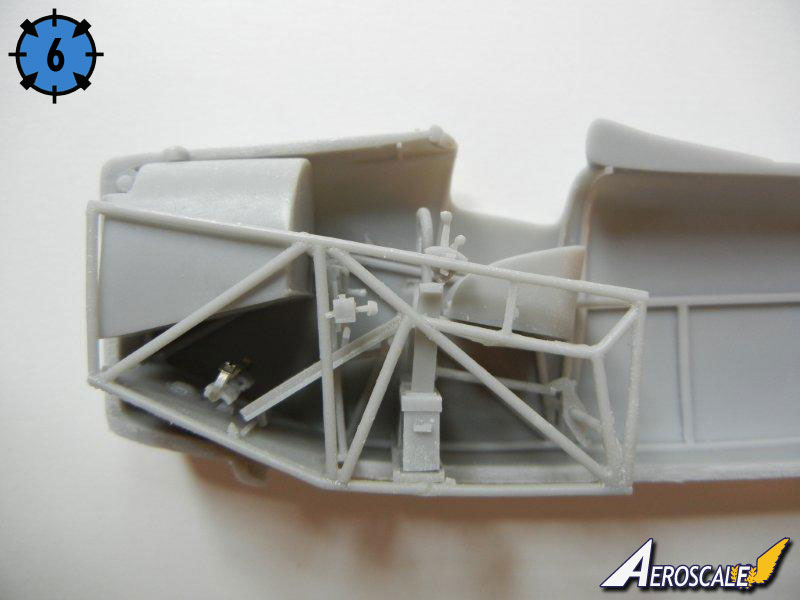
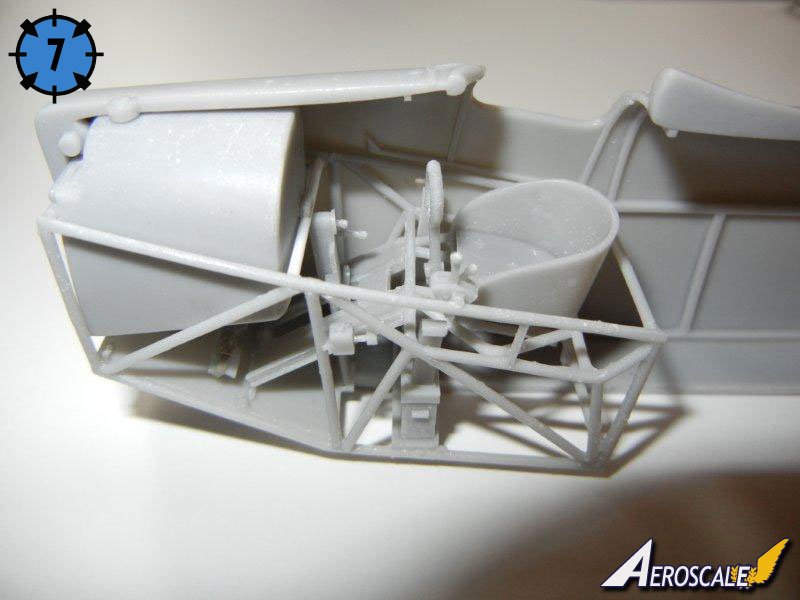
■ Photos 6 and 7 show the completed cockpit assembly dry fit to the fuselage.

About the Author


FROM: GEORGIA, UNITED STATES
I've been modeling on and off for over 40 years. My primary interests are WW1, Interwar and WW2 aircraft, although I do build an occasional WW2 armour kit. I used to build 1/32 kits back in the 80's, but switched to 1/48 in the early 90's when all the nice new kits started showing up. I've sinc...
Comments

Fabulous review Doug and you have just tipped the scales for me in deciding whether or not to buy one of these superb models. The review will be a great reference when it finally gets built.
Off to Paypal we go.....!
Best regards
Gary
FEB 18, 2012 - 05:00 AM


Thank you Doug for this build article, I've been contemplating on this kit and watching Rowan's build. I think my mind is now made up, stop thinking and buy it
FEB 18, 2012 - 04:11 PM
Copyright ©2021 by Doug Nelson. Images also by copyright holder unless otherwise noted. The views and opinions expressed herein are solely the views and opinions of the authors and/or contributors to this Web site and do not necessarily represent the views and/or opinions of AeroScale, KitMaker Network, or Silver Star Enterrpises. Images also by copyright holder unless otherwise noted. Opinions expressed are those of the author(s) and not necessarily those of AeroScale. All rights reserved. Originally published on: 2011-11-12 00:00:00. Unique Reads: 8562

WEB HOSTING BY


Copyright ©2021 AeroScale and Kitmaker Network, a subsidiary of Silver Star Enterprises
All Rights Reserved. Please read our Conditions of Use and Privacy Policy.
All Rights Reserved. Please read our Conditions of Use and Privacy Policy.