

1⁄32Silver Wings Fairey Flycatcher Build
4
Comments
Main Gear
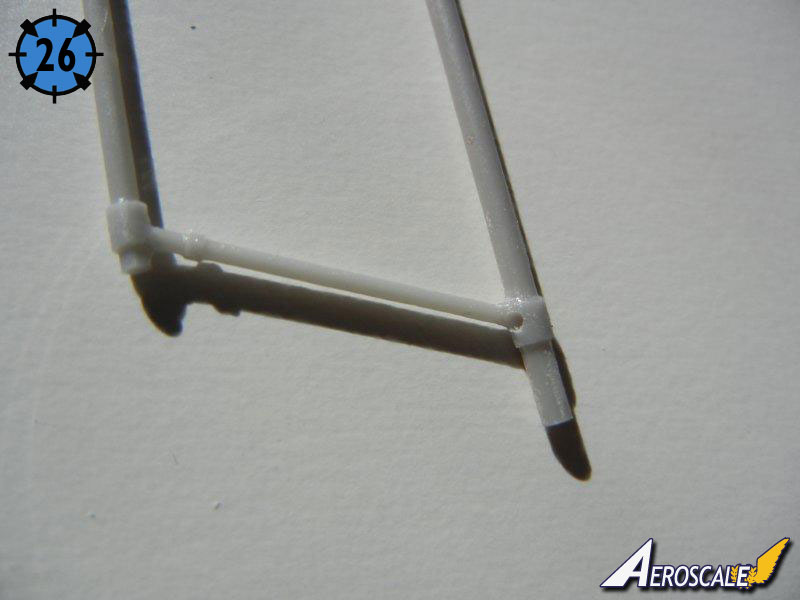
The main gear appears complex, but it is fairly easy to attach correctly. The assembly consists of a main axle and upper support axle (main axle assembly), a main strut (the fat one with the shock absorber) and a rear (longer) and forward (shorter) support strut.■ Begin by drilling holes for the main struts into the main axle (see Photo 26). You can use the drawing on page 6 to make templates to align your holes correctly. You will need to drill two holes for the forward and rear support struts on each side of the upper support axle for the support struts.
■ Drill the corresponding strut attachment holes in the fuselage bottom for the main, forward and rear support struts, again using a template using the pre-sunk holes.
■ Dry fit the main strut to the main axle, trimming the wire core so that it is not visible outside the attachment hole. Dry fit the main axel assembly to the main, rear and forward struts (you might need 3+ hands for this step - so tape is your friend). Check your alignment and adjust as required.
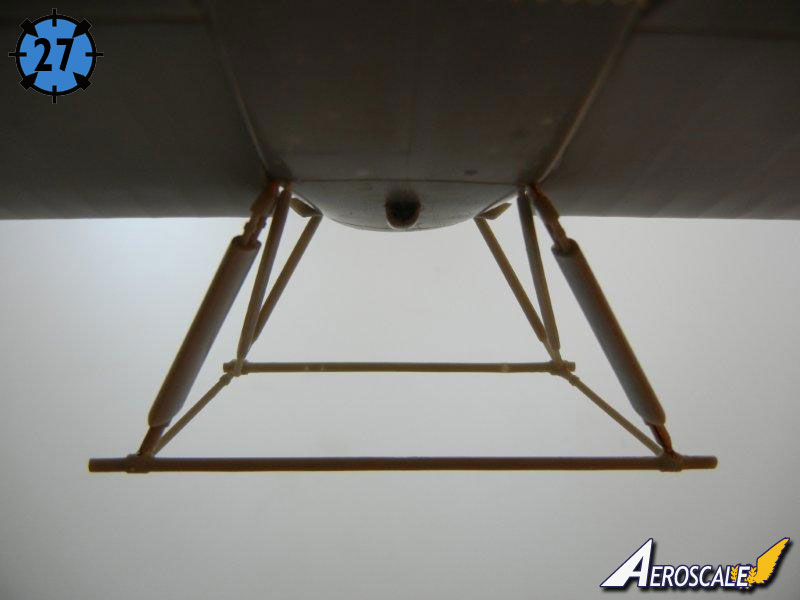
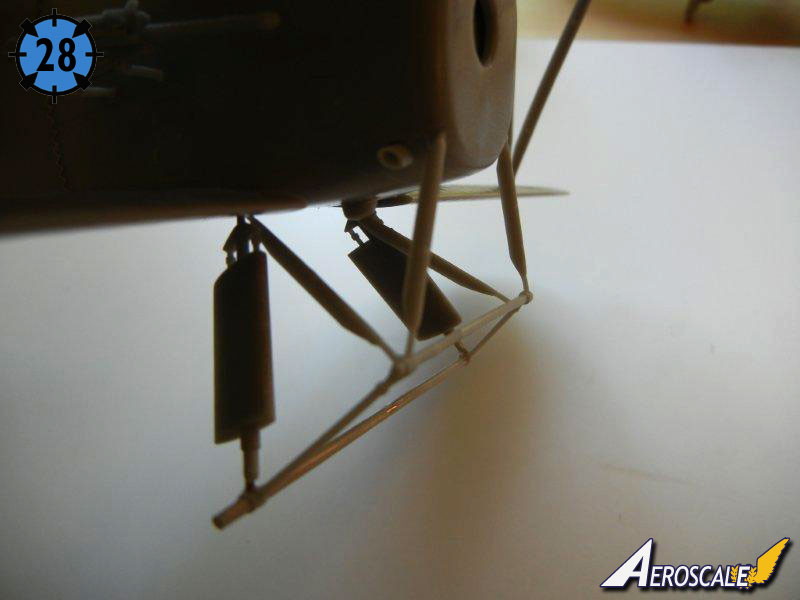
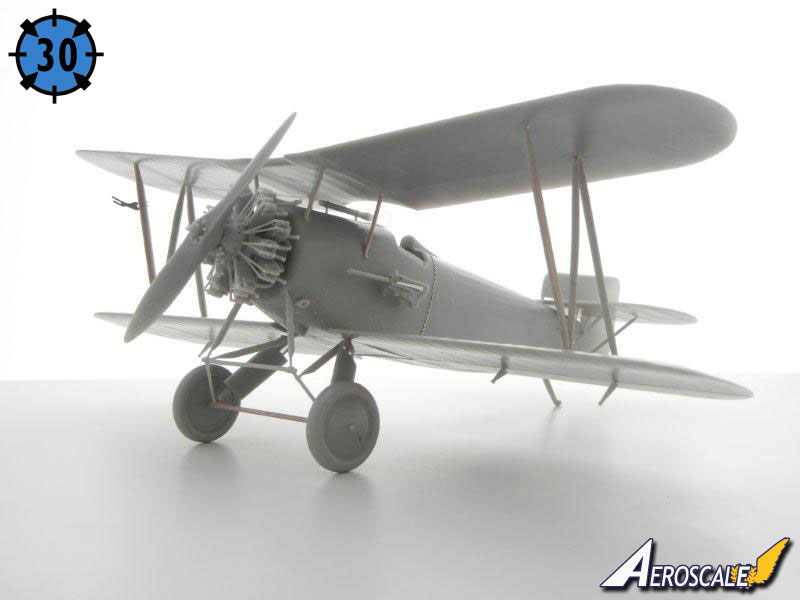
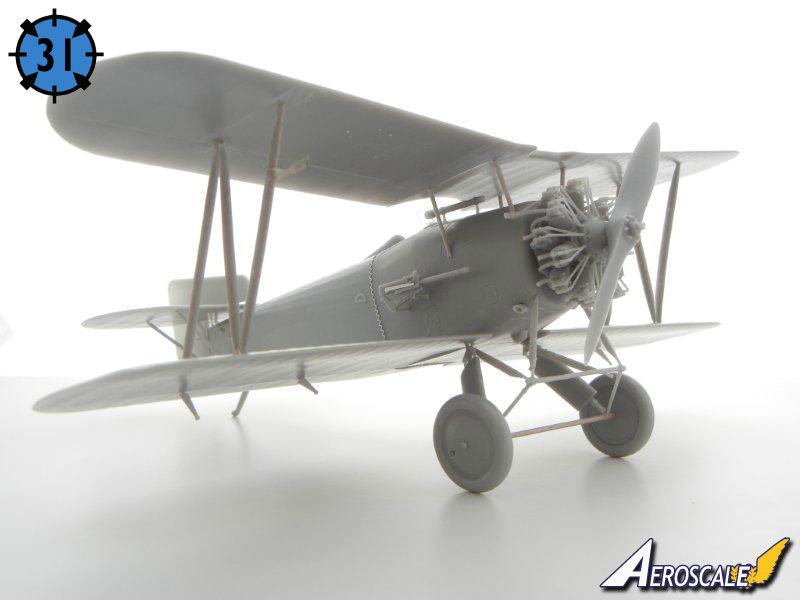
■ Once satisfied, glue the main strut, rear and forward struts to the fuselage. Then attach the main axle assembly to the main, rear and forward struts. Re-check alignment. Photos 27 and 28 show the completed assembly (note the port side rear support strut has become detached from the support axle in the photos - oops!)
■ Glue the main wheels to the axles. Unlike other Silver Wings kits, I did note that the holes in the main wheels were a bit larger than the axle itself, so you'll need to hold them in the correct position until your glue sets.
Final Assembly
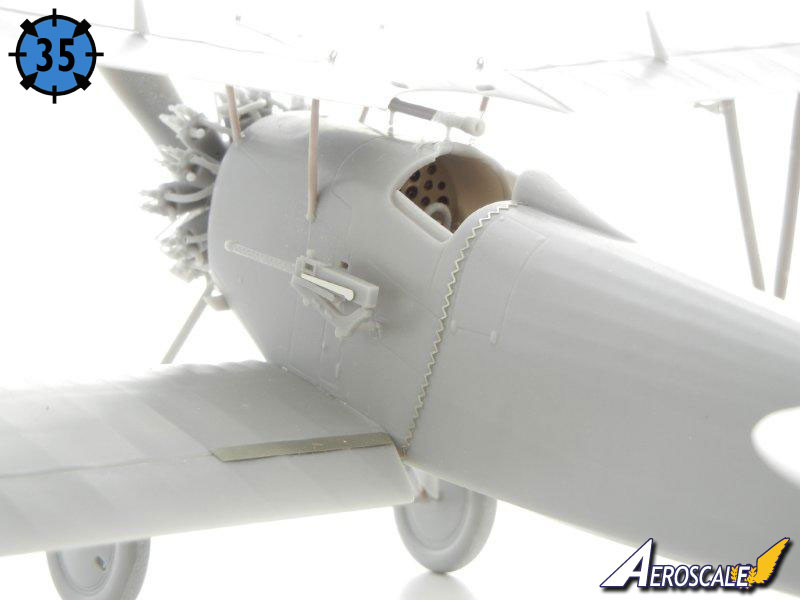
■ Steps 28 and 29 provide the rigging and control cable installation guides.■ Attach the engine (and long exhausts if your model uses them).
■ Attach the guns sight to the fuselage. Cut out and test fit the acetate windscreen bending as needed to fit the molded in framing on the fuselage.
■ Attach the guns or gun brackets into position.
■ Attach the tail skid to the bottom of the rear fuselage using the hole provided (I had to enlarge mine slightly for a good fit).
■ Attach the control cable support guides into position on the ailerons of the top and bottom wings. If you are going to attach the control cables, Silver Wings has molded pre-sunk holes for the cables in the wings and ailerons.
■ Finally, attach the pitot to the forward starboard interplane strut and PE rope holders to the top of the center wing.
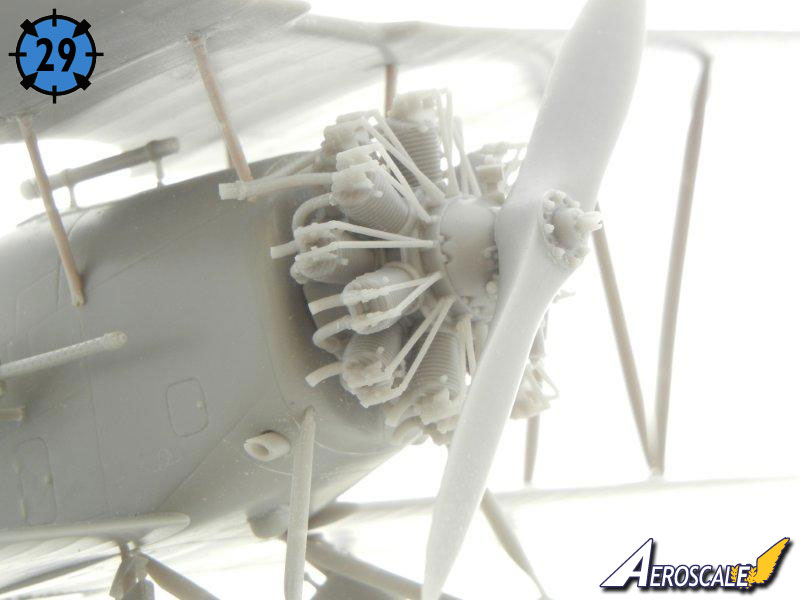
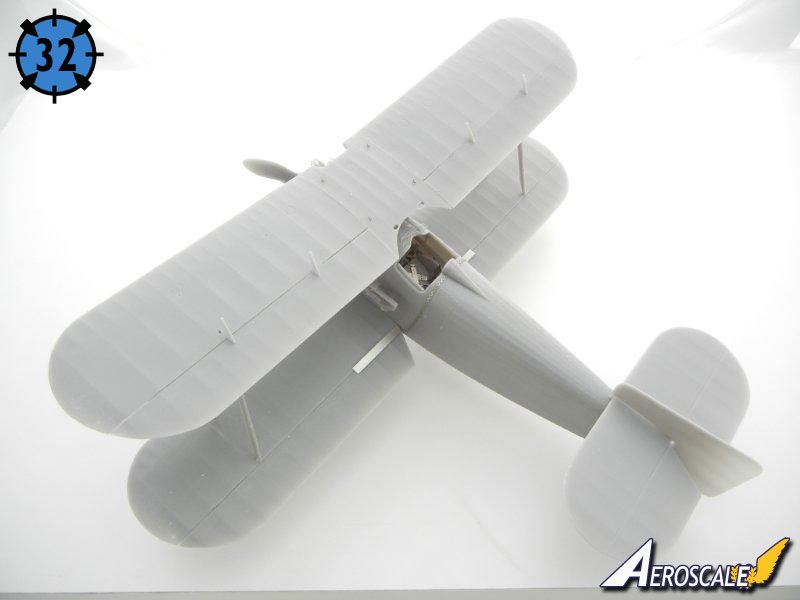
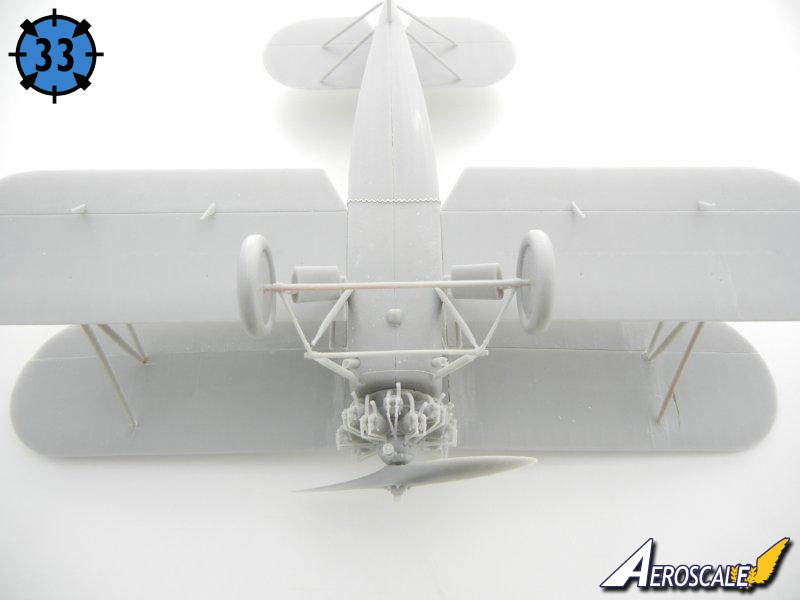
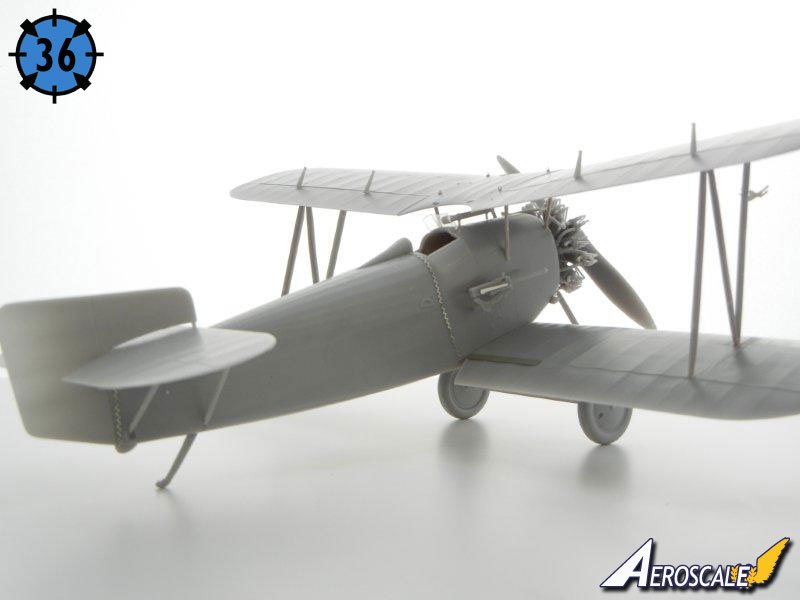
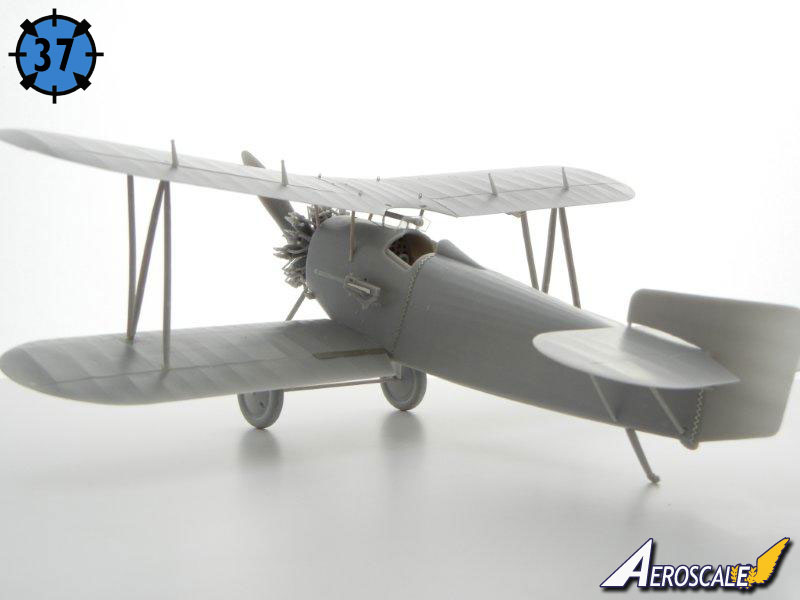
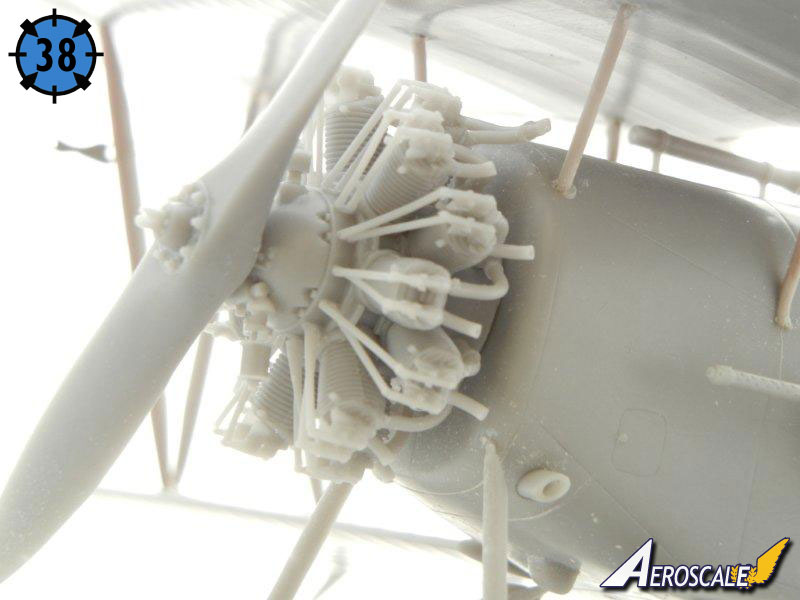
Congratulations on your newly finished model! Photos 29 ~ 38 are of the completed model.
About the Author


FROM: GEORGIA, UNITED STATES
I've been modeling on and off for over 40 years. My primary interests are WW1, Interwar and WW2 aircraft, although I do build an occasional WW2 armour kit. I used to build 1/32 kits back in the 80's, but switched to 1/48 in the early 90's when all the nice new kits started showing up. I've sinc...
Comments

Fabulous review Doug and you have just tipped the scales for me in deciding whether or not to buy one of these superb models. The review will be a great reference when it finally gets built.
Off to Paypal we go.....!
Best regards
Gary
FEB 18, 2012 - 05:00 AM


Thank you Doug for this build article, I've been contemplating on this kit and watching Rowan's build. I think my mind is now made up, stop thinking and buy it
FEB 18, 2012 - 04:11 PM
Copyright ©2021 by Doug Nelson. Images also by copyright holder unless otherwise noted. The views and opinions expressed herein are solely the views and opinions of the authors and/or contributors to this Web site and do not necessarily represent the views and/or opinions of AeroScale, KitMaker Network, or Silver Star Enterrpises. Images also by copyright holder unless otherwise noted. Opinions expressed are those of the author(s) and not necessarily those of AeroScale. All rights reserved. Originally published on: 2011-11-12 00:00:00. Unique Reads: 8562

WEB HOSTING BY


Copyright ©2021 AeroScale and Kitmaker Network, a subsidiary of Silver Star Enterprises
All Rights Reserved. Please read our Conditions of Use and Privacy Policy.
All Rights Reserved. Please read our Conditions of Use and Privacy Policy.