Early Aviation
Discuss World War I and the early years of aviation thru 1934.
1/32 Roden GB 2008 Fok.F.I - Hugh
MerlinV
_VISITCOMMUNITY
Victoria, Australia
Joined: November 26, 2006
KitMaker: 608 posts
AeroScale: 602 posts
Posted: Tuesday, June 10, 2008 - 12:23 AM UTC
Ho-o-o-o-kay then.
Here we have the underside of the fuselage... Note the copious amounts of filler needed to clean it all up (Partly due to one of the fuselage halves being a little out of shape and requiring some bracing to match it with the other half... thus causing some warping of the bottom of that half).

Note also the sections of fine copper wire CA'd along the seam... My half @rsed attempt at replicating the stitching... I probably have the wrong number of stiches...

The Engine Plate has been attached and faired with trusty Tamiya Filler.


People at work look strangely at me every time some one opens a new tin of Instant Coffee... that's because I always siddle up and grab the Foil that was sealing the tin...


Now the cockpit is masked and the whole shebang is ready for priming.


I'll need a couple of free hours to start painting proper...

So, more soon.

Cheers,

Hugh
Repainted
_VISITCOMMUNITY
Östergötland, Sweden
Joined: April 04, 2006
KitMaker: 1,058 posts
AeroScale: 1,004 posts
Posted: Tuesday, June 10, 2008 - 03:08 AM UTC
Looking darn good to me, Hopefully the first coats off primer don´t give you to much flaws to to refill and resand again.
Good progress
Larsa
MerlinV
_VISITCOMMUNITY
Victoria, Australia
Joined: November 26, 2006
KitMaker: 608 posts
AeroScale: 602 posts
Posted: Tuesday, June 10, 2008 - 03:14 PM UTC
Hi Larsa,
Only three spots of any great consequence showed up after priming... Although I think I need to look at the Engine Plate Fit a little bit.
I forgot to fill the mounting holes for the wing tip skids, a glue spot on the leading edge of the Mid mainplane and a small hole in the leading edge of the Upper mainplane.
But, then again, that's why we prime insn't it...

Cheers,

Hugh
Repainted
_VISITCOMMUNITY
Östergötland, Sweden
Joined: April 04, 2006
KitMaker: 1,058 posts
AeroScale: 1,004 posts
Posted: Wednesday, June 11, 2008 - 05:01 AM UTC
There’s always something we forgot in the rush-hour, if it’s only a hole there’s always something. That just happened to me and the Nieuport. I’m looking forward to see this one coming together.


Larsa
thegirl
_VISITCOMMUNITY
Alberta, Canada
Joined: January 19, 2008
KitMaker: 6,743 posts
AeroScale: 6,151 posts
Posted: Wednesday, June 11, 2008 - 01:41 PM UTC
Looking great Hugh ! Can't wait to see it finished !!!!
MerlinV
_VISITCOMMUNITY
Victoria, Australia
Joined: November 26, 2006
KitMaker: 608 posts
AeroScale: 602 posts
Posted: Saturday, June 21, 2008 - 02:38 AM UTC
And, now for the paint.

First, a coat of Tamiya X-2 White on the areas that the markings will be and mask that off to protect it.
Then, A coat of my Bleached Linnen mix; 50-50 Tamiya XF-55 Deck Tan and X-2 White.


And then the undersides with Gunze H417 RLM76 Light Blue.


Now, the "You can't do your streaking like that" moment.


I saw a build by "Trackpad" over on the Aerodrome that used a techinque similar to this. And thought I'd try it.


But instead of being masked as trackpads was, this was airbrushed freehand.


It is a little more regular than I would have liked, but I am happy with the overall effect.

Cheers,

Hugh
Repainted
_VISITCOMMUNITY
Östergötland, Sweden
Joined: April 04, 2006
KitMaker: 1,058 posts
AeroScale: 1,004 posts
Posted: Saturday, June 21, 2008 - 02:44 AM UTC
Hi Hugh
I like the effect, very nice. In my eyes the paint got its´"Factor".
If I ever going back for that streaky cammo agian, I´ll use this method.


Larsa Q
RAGIII
_VISITCOMMUNITY
North Carolina, United States
Joined: June 19, 2007
KitMaker: 604 posts
AeroScale: 600 posts
Posted: Saturday, June 21, 2008 - 11:25 AM UTC
REALLY NICE LOOKING STREAKS!!!! Airbrushed, wow!
RAGIII
thegirl
_VISITCOMMUNITY
Alberta, Canada
Joined: January 19, 2008
KitMaker: 6,743 posts
AeroScale: 6,151 posts
Posted: Saturday, June 21, 2008 - 12:48 PM UTC
Love your streaking , and done with an air brush !
MerlinV
_VISITCOMMUNITY
Victoria, Australia
Joined: November 26, 2006
KitMaker: 608 posts
AeroScale: 602 posts
Posted: Saturday, June 21, 2008 - 01:23 PM UTC
Thanks guys,
I was getting ready for the cries of "Burn the Heretic!" and "Aaaaagh, my eyes"...

Now to cut the masks required to do the markings... I did toy with the idea of using the kit decals... but that would be just too easy.

Cheers,

Hugh
Kalt
_VISITCOMMUNITY
Mendoza, Argentina
Joined: June 14, 2006
KitMaker: 222 posts
AeroScale: 219 posts
Posted: Saturday, June 21, 2008 - 08:44 PM UTC
Wonderful Hugh! I really like the streaked effect.
I will have to find some time to work on my Dr.I. . .
guitarlute101
_VISITCOMMUNITY
West Virginia, United States
Joined: December 18, 2006
KitMaker: 1,121 posts
AeroScale: 1,063 posts
Posted: Sunday, June 22, 2008 - 12:11 PM UTC


Excellent Hugh!!! Looking great, can't wait to see the finished kit!!

Mark
JackFlash
_VISITCOMMUNITY
Colorado, United States
Joined: January 25, 2004
KitMaker: 11,669 posts
AeroScale: 11,011 posts
Posted: Monday, June 23, 2008 - 04:30 PM UTC
Here is an image of F.I 103/17 after some service time.
MerlinV
_VISITCOMMUNITY
Victoria, Australia
Joined: November 26, 2006
KitMaker: 608 posts
AeroScale: 602 posts
Posted: Monday, June 23, 2008 - 08:40 PM UTC
Oh Bugger!

I have the incorrect tail plane prepared!

I will have to paint the other one up now.

I actually had the earlier (curved leading edge) tail plane prepared and ready to start painting when I checked the instructions again and they said that the tail plane with the straight leading edge was the one fitted to Voss' machine.

Good thing that glue did not get applied.

I wonder how I will go about replicating that scuffed appearance... maybe I'll just have factory fresh.

Cheers,

Hugh

MerlinV
_VISITCOMMUNITY
Victoria, Australia
Joined: November 26, 2006
KitMaker: 608 posts
AeroScale: 602 posts
Posted: Monday, June 23, 2008 - 11:17 PM UTC
And while I'm still kicking my self over the Tail Plane Stuff Up,

Here is how I have done the markings.
Now, these days, Roden Decals are not too bad, but I have a personal issue with Decalling itself. I never did achieve the skill of decalling with no silvering, or breaking a decal, or mucking up its position.

So, I prefer to mask and spray.

Tamiya masking tape is my mask of choice, but one of these days, I will invest in some frisket film.

I tried cutting the tape directly over the decal as a pattern, but the masking tape lifted the decal, so stuffing the mask up. And also, rather strangely, the Crosses on the Roden dacal sheet are different sizes, that is, the crosses in each pair are different sizes!!!

So, I was forced to mark the masks out and then cut them.
(Apologies to those who may have been reading this while I discovered that my Kitmaker Network Photo account is full, and I have no idea whatsoever how to delete photos from it to make more room... So all subsequent photos here are in my Flickr).

Sorry, the edit function will not let me add images...

Sigh


MerlinV
_VISITCOMMUNITY
Victoria, Australia
Joined: November 26, 2006
KitMaker: 608 posts
AeroScale: 602 posts
Posted: Tuesday, June 24, 2008 - 12:00 AM UTC
Right!

Here is a mask, marked and ready to cut.


And some masks in place.


And all the masks in place, ready to spray with an 80-20 mix of Black and Red Brown.


And with the masks removed.


Now, you might think that all this is very time consuming, but I did it all in a 1-1/5 hour sitting.
The last 10 minutes of that was spraying.
Keep the paint thin for this technique, and the air pressure low. You don't want to creat ridges of paint at the edges of the mask. The other danger is that the paint may bleed under the mask, so you want the paint to go on almost dry.

Now, I'm off to paint that other Tail Plane.

Cheers,

Hugh
guitarlute101
_VISITCOMMUNITY
West Virginia, United States
Joined: December 18, 2006
KitMaker: 1,121 posts
AeroScale: 1,063 posts
Posted: Tuesday, June 24, 2008 - 12:14 AM UTC
Hugh

Great work. I was wondering how to create the curved parts (lines) of the cross on a mask and you have an excellent solution.

Thanks and keep posting more,
Mark
thegirl
_VISITCOMMUNITY
Alberta, Canada
Joined: January 19, 2008
KitMaker: 6,743 posts
AeroScale: 6,151 posts
Posted: Tuesday, June 24, 2008 - 02:26 AM UTC
nice work done on the cross's Hugh , She's turnning out to be a very lovely bird .
Cheers
Repainted
_VISITCOMMUNITY
Östergötland, Sweden
Joined: April 04, 2006
KitMaker: 1,058 posts
AeroScale: 1,004 posts
Posted: Tuesday, June 24, 2008 - 03:05 AM UTC

Quoted Text

nice work done on the cross's Hugh , She's turnning out to be a very lovely bird .
Cheers


Yep it´s easy to see a real good build, and this one is a real good build.
Cheers Hugh, I´ll just take my hat off.........

Larsa q
JackFlash
_VISITCOMMUNITY
Colorado, United States
Joined: January 25, 2004
KitMaker: 11,669 posts
AeroScale: 11,011 posts
Posted: Tuesday, June 24, 2008 - 09:23 AM UTC

Quoted Text

". . .I tried cutting the tape directly over the decal as a pattern, but the masking tape lifted the decal, so stuffing the mask up. And also, rather strangely, the Crosses on the Roden dacal sheet are different sizes, that is, the crosses in each pair are different sizes!!!
. . .


The two largest are for uppersurfaces the top wing. next size down are for the lower wing undersurfaces.
MerlinV
_VISITCOMMUNITY
Victoria, Australia
Joined: November 26, 2006
KitMaker: 608 posts
AeroScale: 602 posts
Posted: Tuesday, June 24, 2008 - 11:21 AM UTC

Quoted Text

The two largest are for uppersurfaces the top wing. next size down are for the lower wing undersurfaces.


Yes, but the two decals for the upper wing had crosses of different sizes, one was 30mm across and the other was 28mm across... The two for the lower wing were of the same size (28mm).

Cheers,

Hugh
JackFlash
_VISITCOMMUNITY
Colorado, United States
Joined: January 25, 2004
KitMaker: 11,669 posts
AeroScale: 11,011 posts
Posted: Tuesday, June 24, 2008 - 03:14 PM UTC
Wow! No one has ever mentioned that before. Good catch Hugh!
MerlinV
_VISITCOMMUNITY
Victoria, Australia
Joined: November 26, 2006
KitMaker: 608 posts
AeroScale: 602 posts
Posted: Tuesday, June 24, 2008 - 03:35 PM UTC

Quoted Text

Yep it´s easy to see a real good build, and this one is a real good build.
Cheers Hugh, I´ll just take my hat off.........


Lars my man, an "interesting" paint job can hide a multitute if sins

But thanks anyway.

Cheers,

Hugh
Kalt
_VISITCOMMUNITY
Mendoza, Argentina
Joined: June 14, 2006
KitMaker: 222 posts
AeroScale: 219 posts
Posted: Tuesday, June 24, 2008 - 08:24 PM UTC
[quote]
Quoted Text

Yes, but the two decals for the upper wing had crosses of different sizes, one was 30mm across and the other was 28mm across... The two for the lower wing were of the same size (28mm).


I had the same problem with the Roden's 1/48 Fokker D.VII OAW (mid)....
MerlinV
_VISITCOMMUNITY
Victoria, Australia
Joined: November 26, 2006
KitMaker: 608 posts
AeroScale: 602 posts
Posted: Friday, August 01, 2008 - 04:06 PM UTC
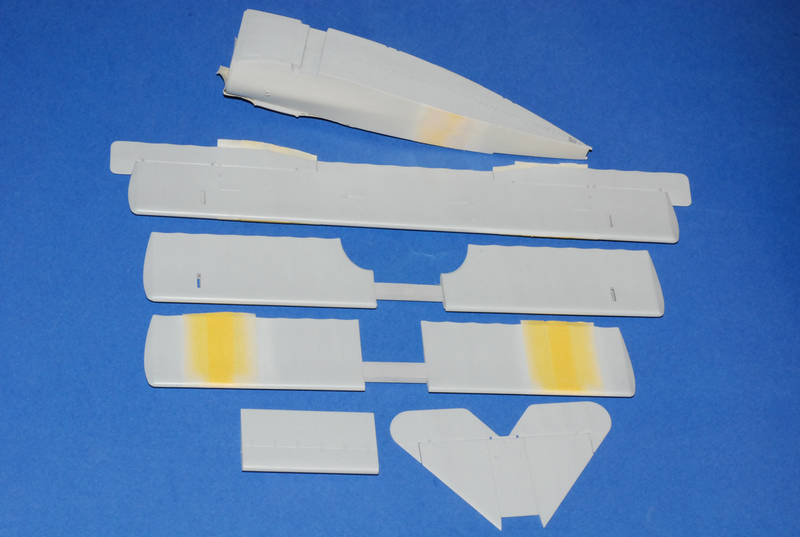
And now folks, for another "Hey, you can't do that" moment... Brought to you by the kind people at Roden, and the Administrators of this Fabulous Site.

After I had finished the masking and spraying of the markings, I pondered how to go about making it look worn, dirty and well used. While pondering, I was fishing around in my bits and bobs drawers for something or other and came across some fine steel wool that had been left over from some other project.

(Hmmm, shame there is no "Light Bulb" Smiley below)...

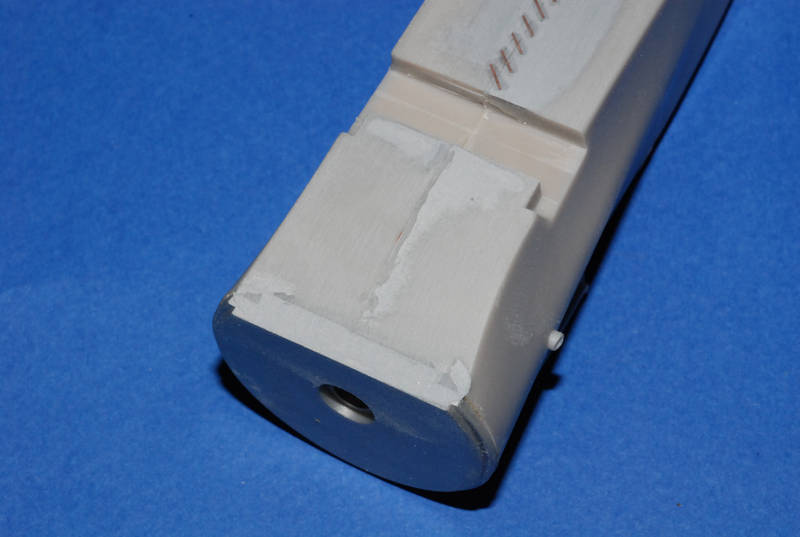
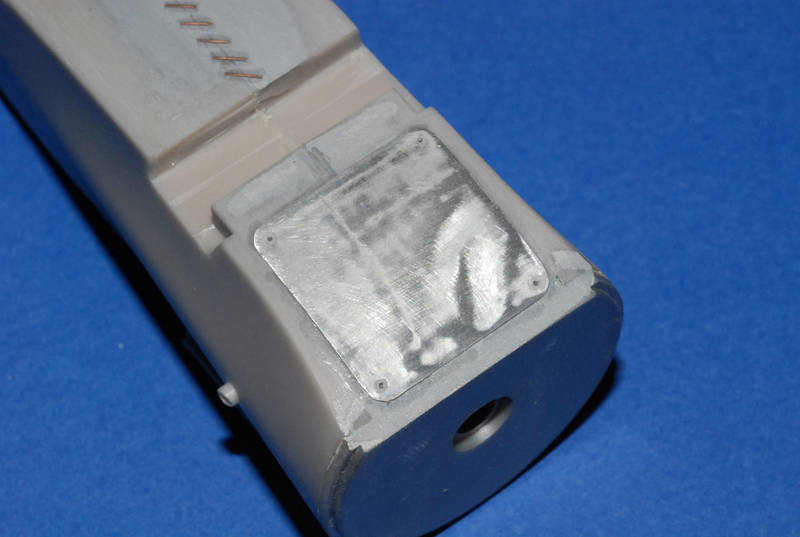
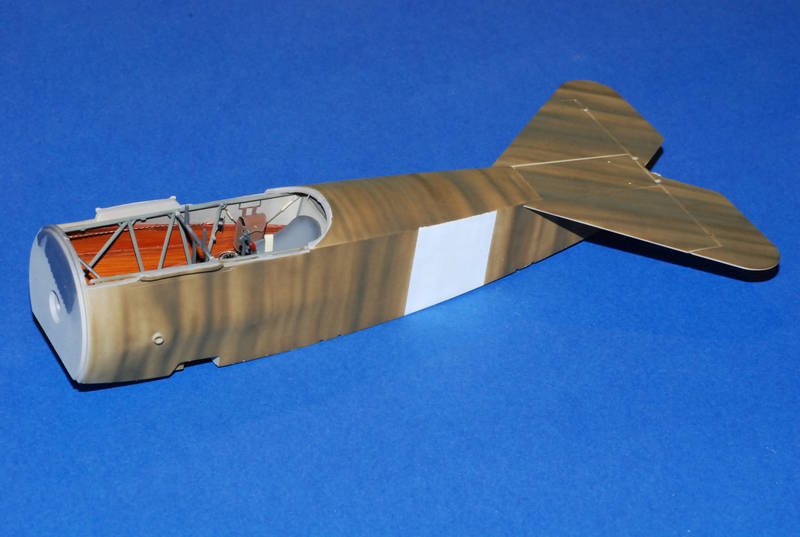
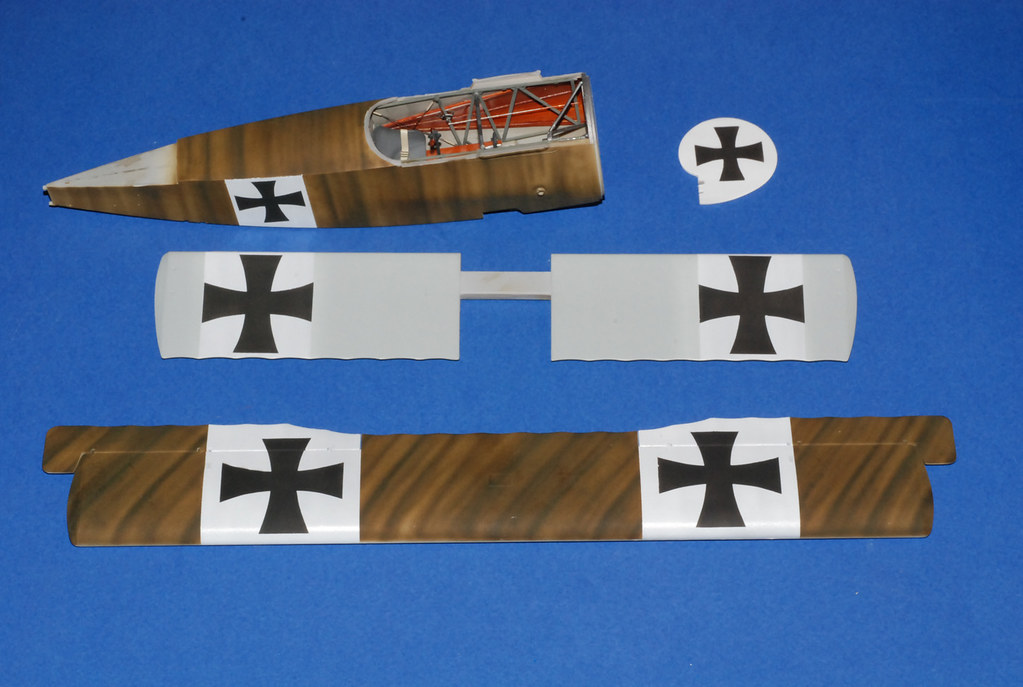
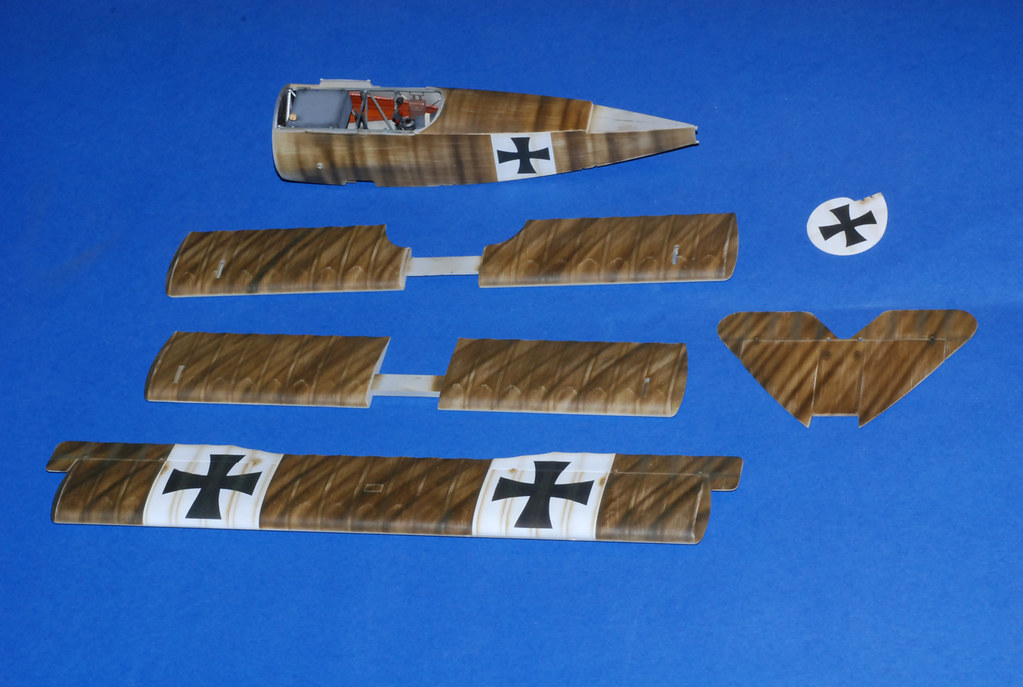
Anyway, I attacked the tail plane that I had prepared in error with the steel wool on the streaked surface. Bingo! A worn and used look!

Then, holding my breath, and hoping desperately that this would not destroy weeks of good work, I attacked the whole build with the steel wool on all the streaked surfaces.
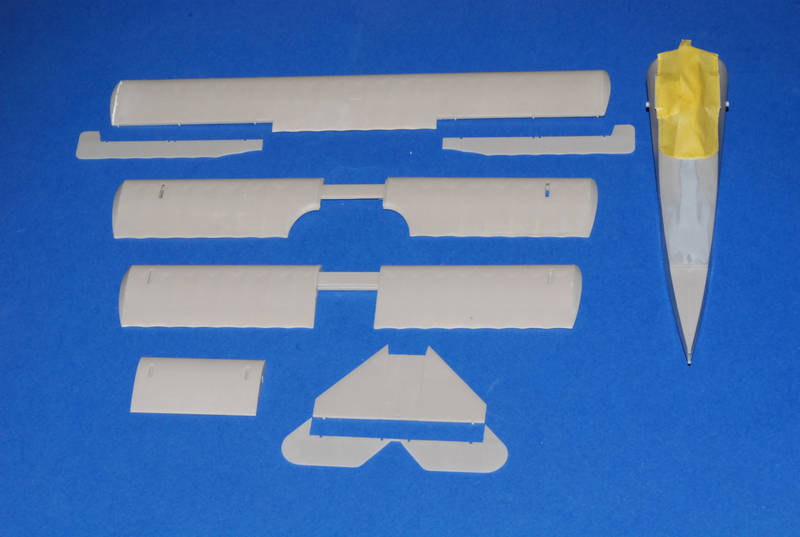
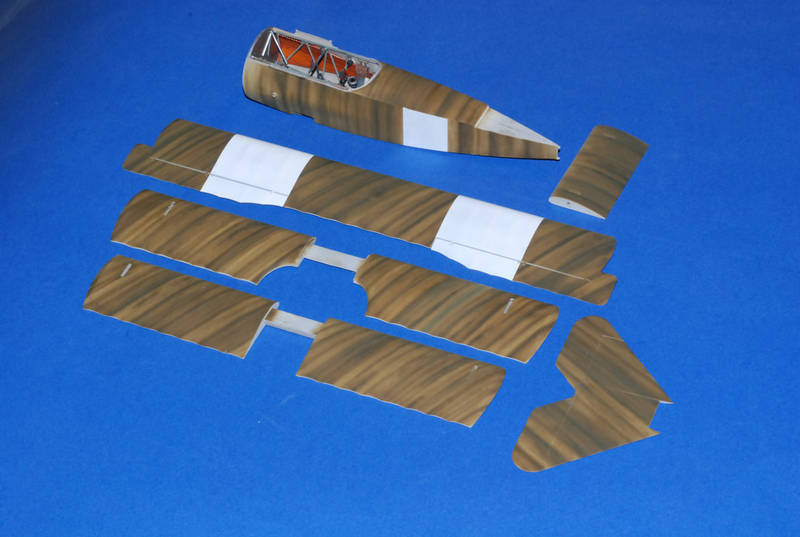
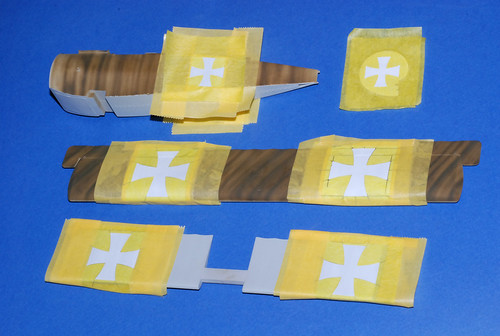
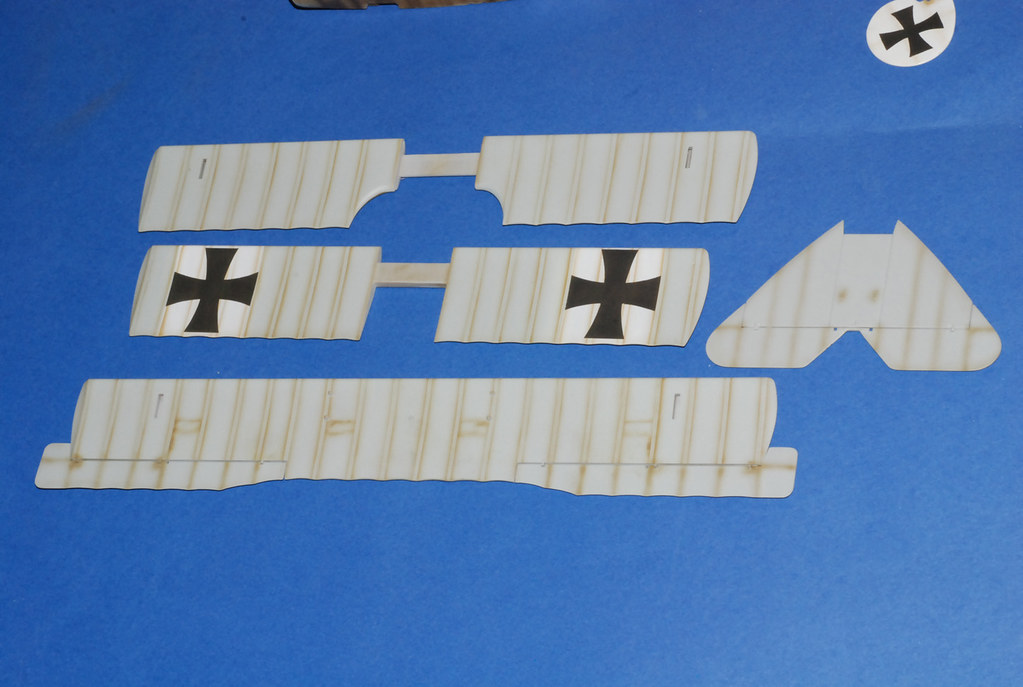
Then I set about cutting a couple of hundred strips of masking tape about 1.2mm wide... Then proceeded to apply these to all the surfaces that would have sported rib-tapes. The 1.2mm Might have been a tad wide, but I am looking for an effect here rather than an accurate represtentation of rib-tapes.

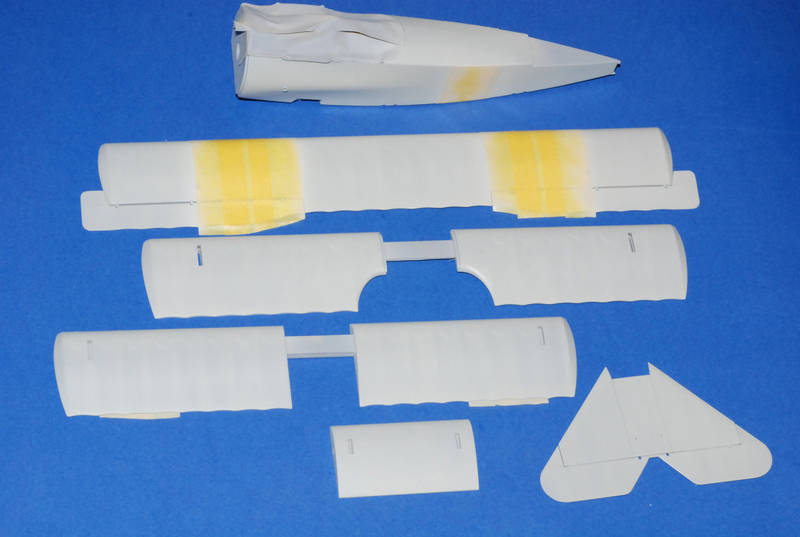
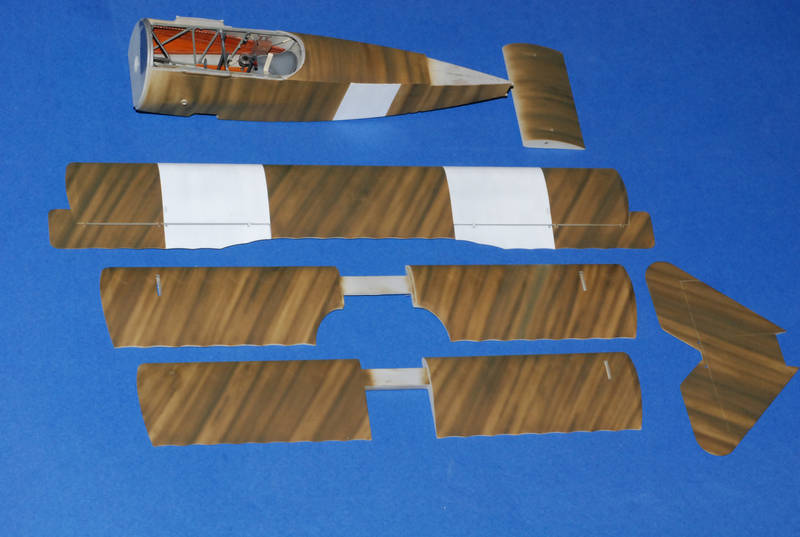
Then, thinning the left over paint that I had used to do the streaking even more, I pushed the pressure up as high as it would go on my compressor, pulled the amount of paint going through the brush back to its absolute minimum, and sprayed aver all the taped surfaces holding the airbrush at a distance of about 10-12mm from the surface of the plastic. I used the same thinned Olive Drab on the under surfaces as well. Then went over all the ridges where rib tapes were not to be found (ie, control surfaces, tail plane).

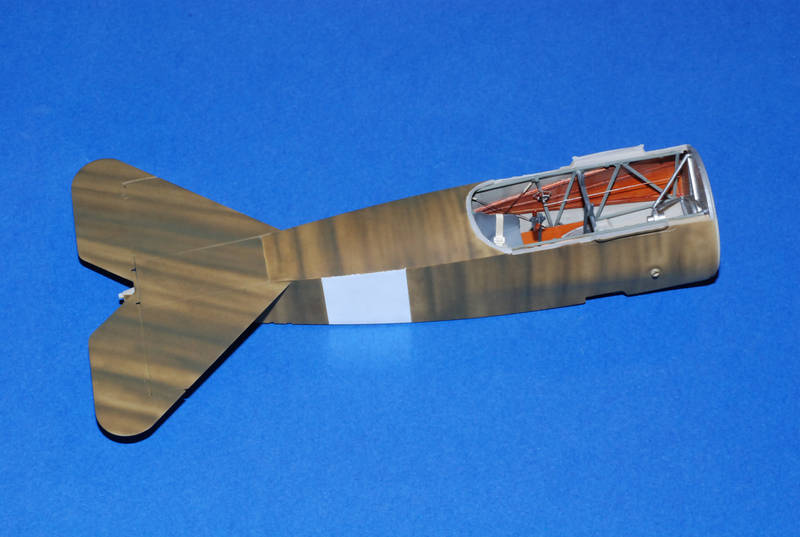
Here's what it looks like.


I think it will look fine under a coat of flat clear.

Hmmm... I take the attitude that if at the end it looks like a dogs breakfast, I can always strip it back and start again... I have used no decals afterall, so I only have to repaint.

Cheers,

Hugh