_GOTOBOTTOM
World War II
Discuss WWII and the era directly before and after the war from 1935-1949.
Hosted by Rowan Baylis
1/72 MPM Bristol Blenheim mk.I
Emeritus
_VISITCOMMUNITY
Uusimaa, Finland
Joined: March 30, 2004
KitMaker: 2,845 posts
AeroScale: 1,564 posts
Posted: Tuesday, March 04, 2008 - 08:03 PM UTC
For the sake of simplicity and keeping official campaign thread clean, I'm starting this for my Blenheim entry.

I'll quote myself from the campaign thread for starters.

//START QUOTE//
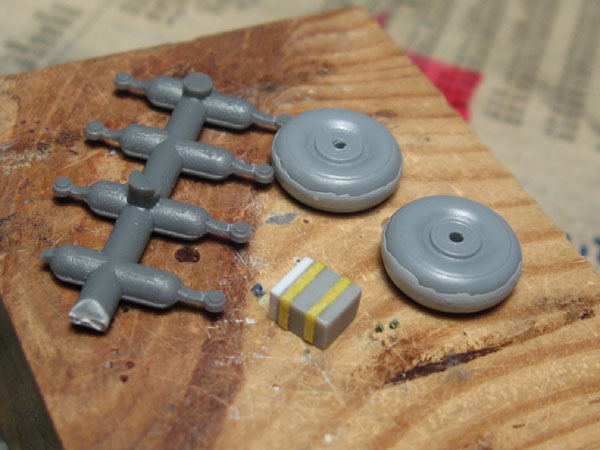
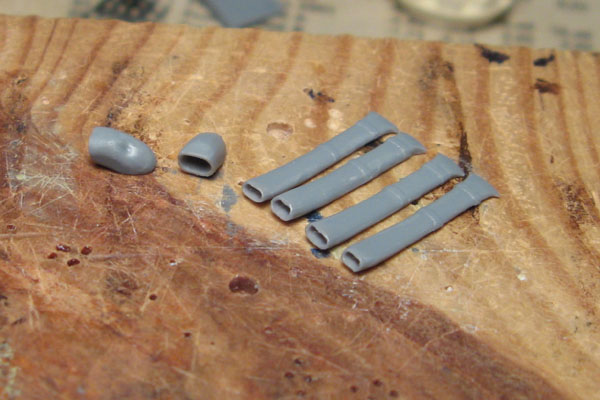
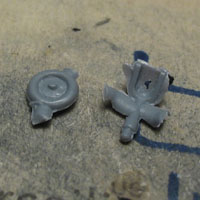
There's not so much flash to take care of, but the old-school style sprue containing smaller parts suffers from some mold mismatch, and of course, according to Murphy's laws, the parts most affected are the landing gears, which should be round even after cleaning... (fortunately, they're not that complicated, even making new ones from scratch doesn't look impossible)
More time will probably go to working with panel lines than flash, on many parts the recessed lines are either very delicate or partially filled with excess plastic (probably caused by worn moulds)

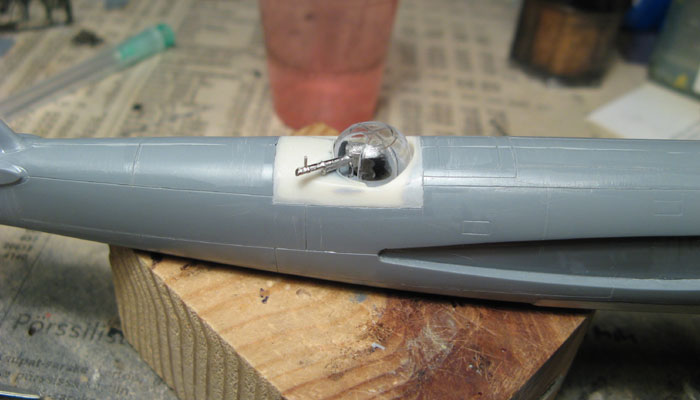
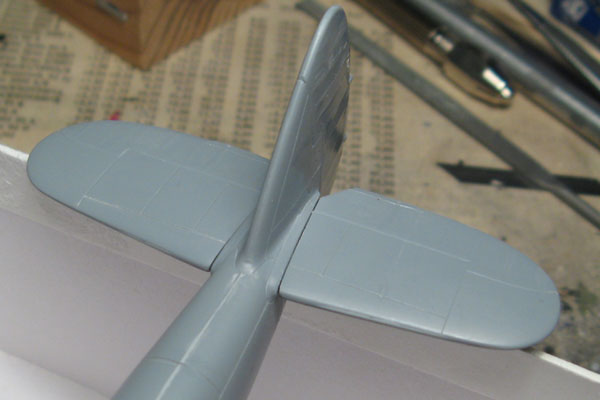
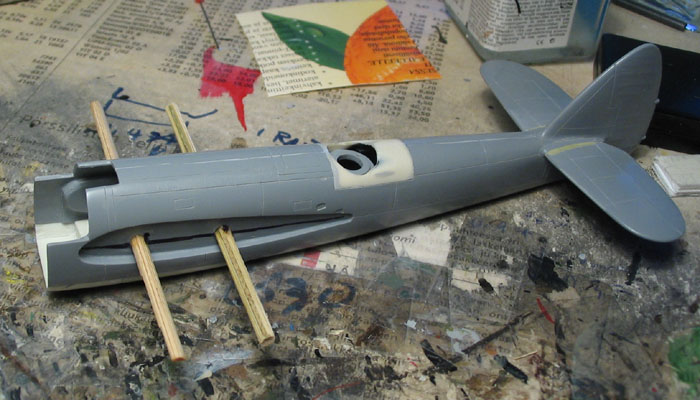
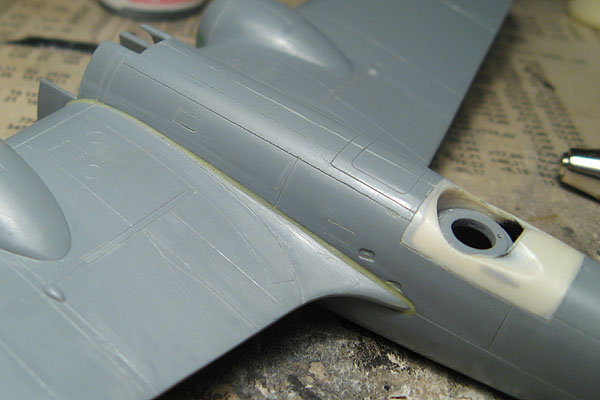
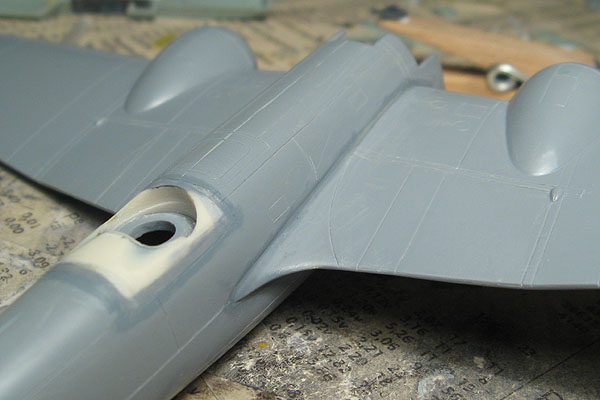
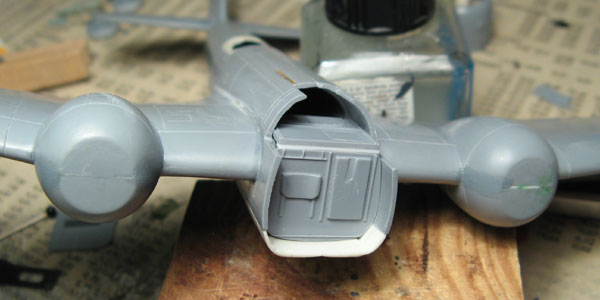
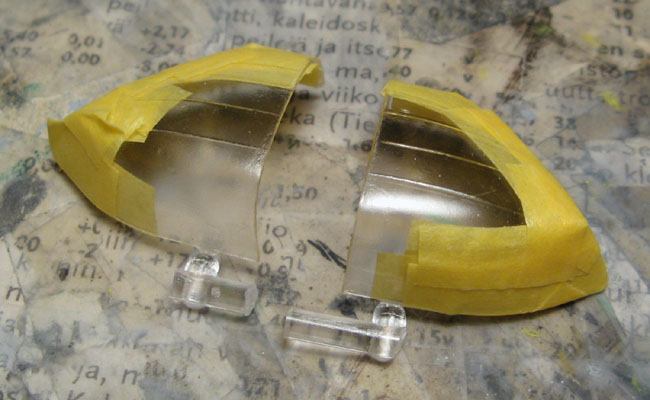
The focal point of the whole plane is the glasshouse canopy, and now I didn't take any chances on it when separating from the sprue.


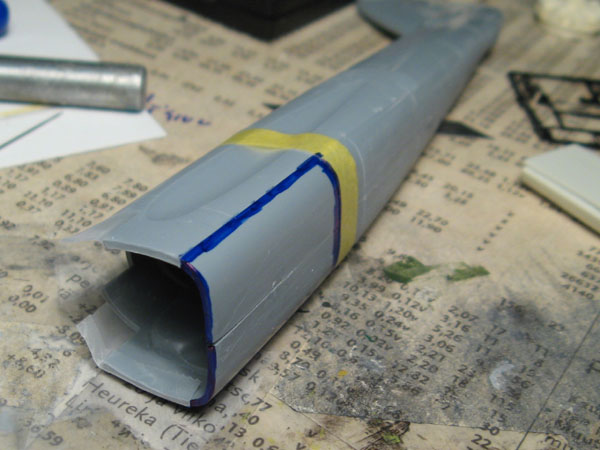
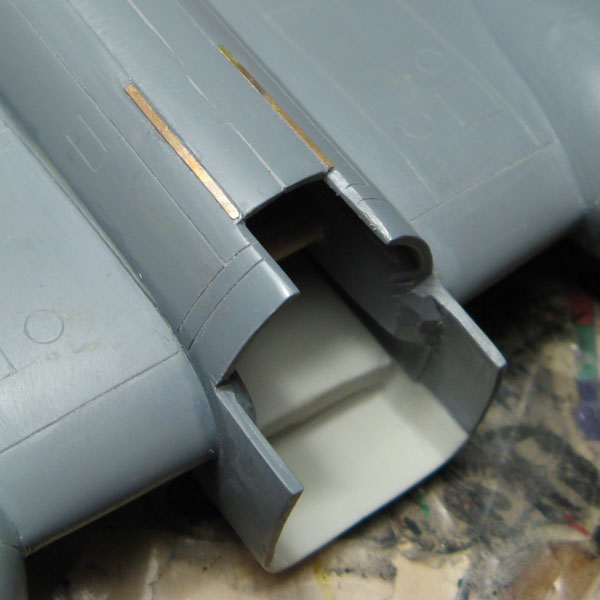
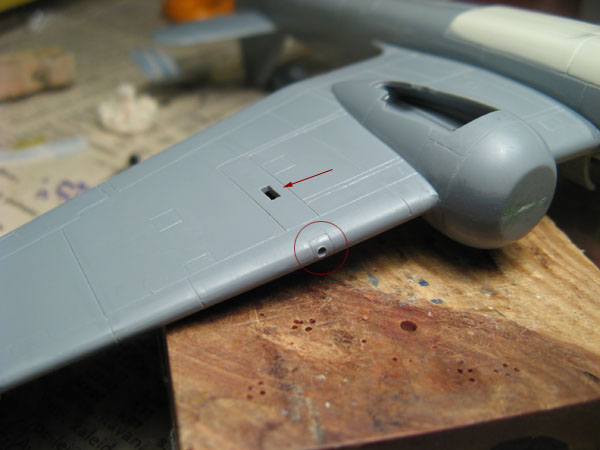
I don't know if it's the clear part or the fuselage (or a bit of both), but there's somehing wrong with the fit here...


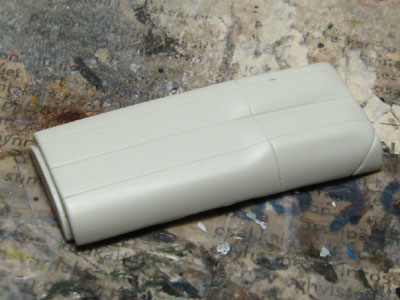
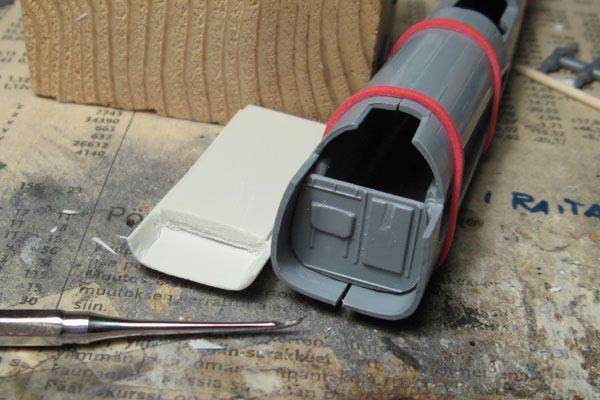
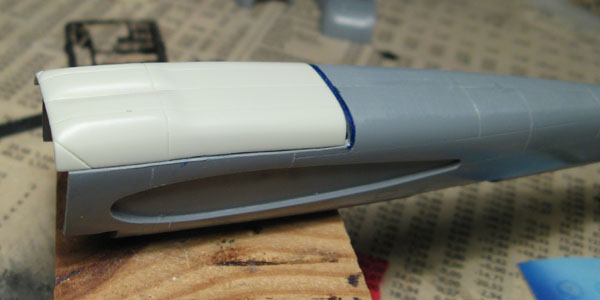
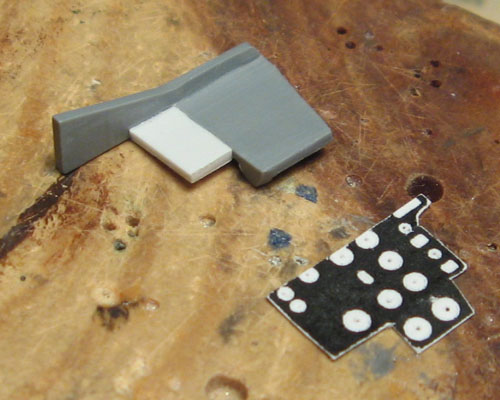
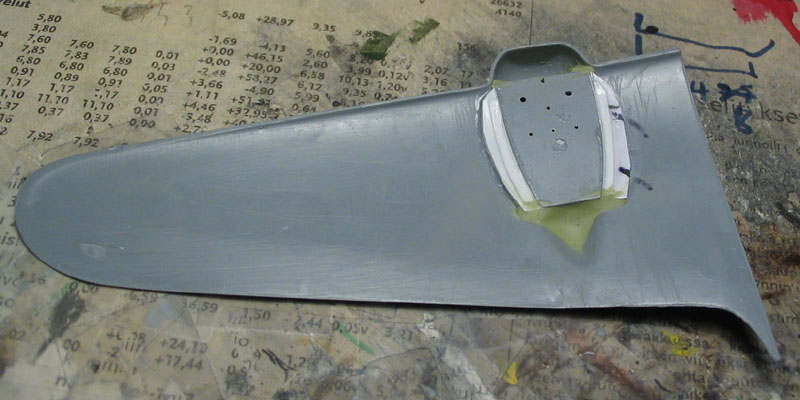
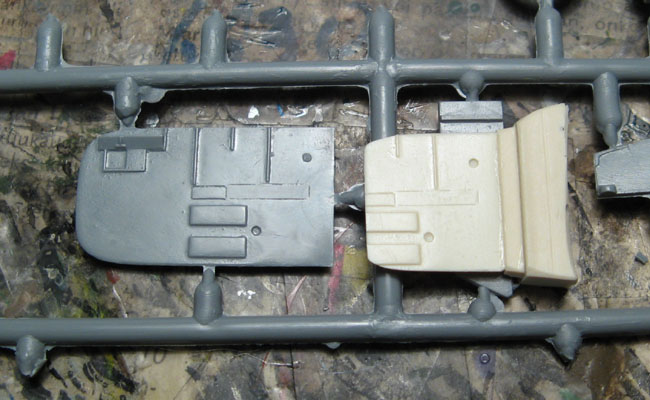
The shorter cockpit floor on mk.I is offered as a resin part, and in addition to the increased difficulty of attaching such a part, it was slightly warped. Comparing the original plastic part and the shorter resin one revealed that the latter is actually a modified copy of the longer mk.IV floor, so I'll be just cutting the styrene part to the proper lenght and using that instead.

//END QUOTE//

Taking off from that, it really looks like I'll either have to take the landing gear from the mk.IV in my stash (that has cleaner mouldings on the gear parts), or scratch-build new ones.
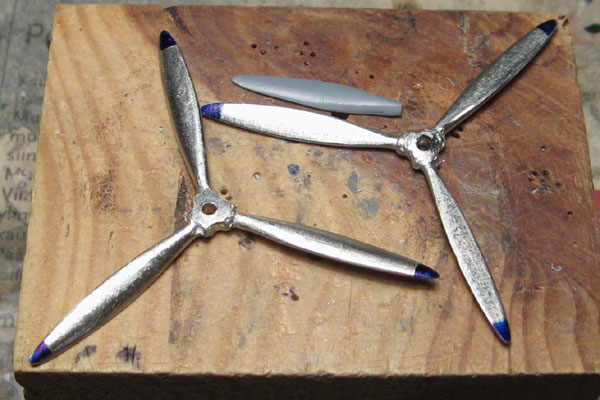
Misaligned moulds are the worst....

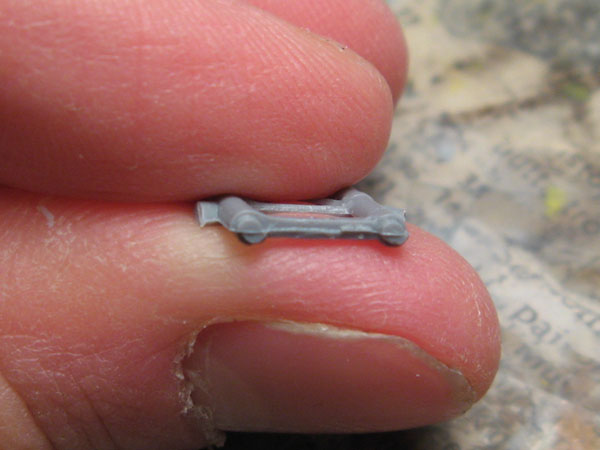
When you got that scraped and filed off, the parts are not that round anymore. Either way, I think I'll have to make new landing gear for either this or the other blenheim.
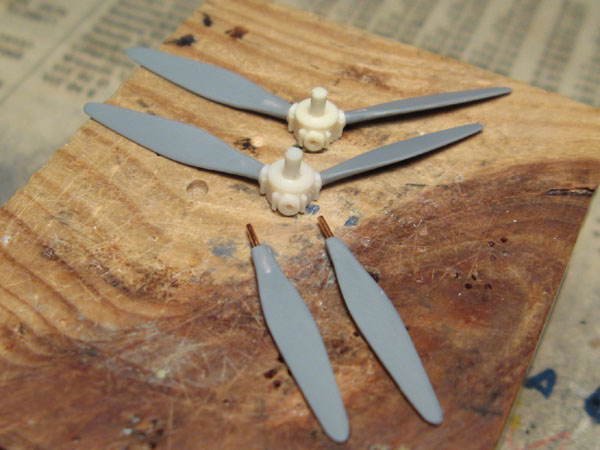
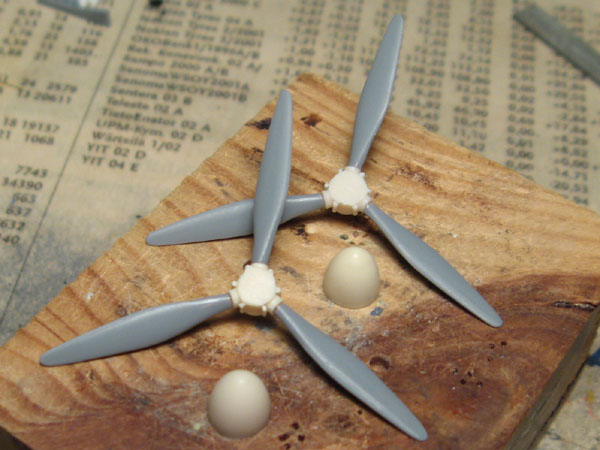
Why did the misalignment have be on the landing gear, instead of the prop blabes which I'll be replacing. Just my luck I guess...

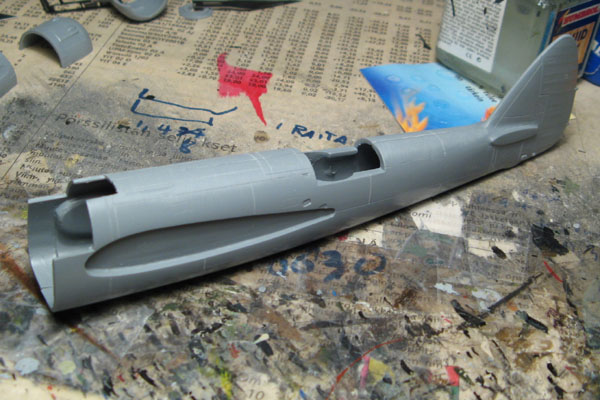
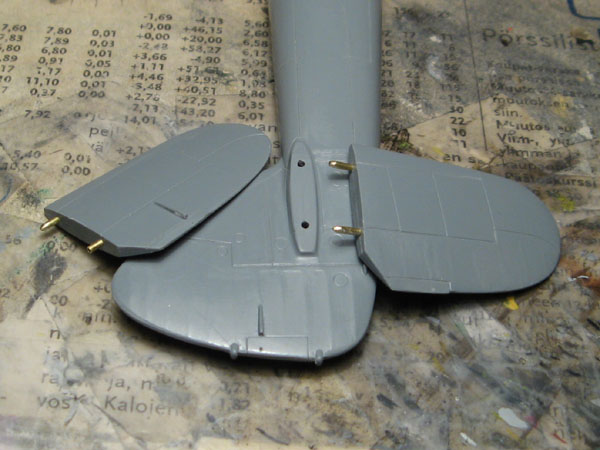
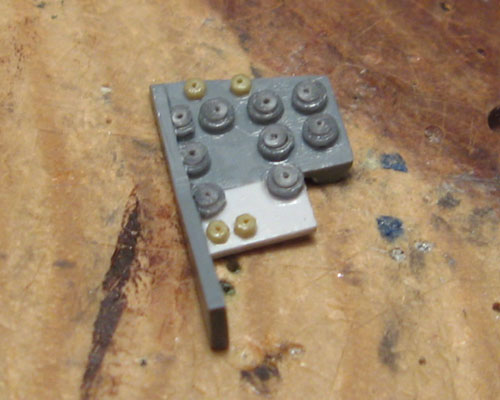
Cockpit components have been going together nicely.

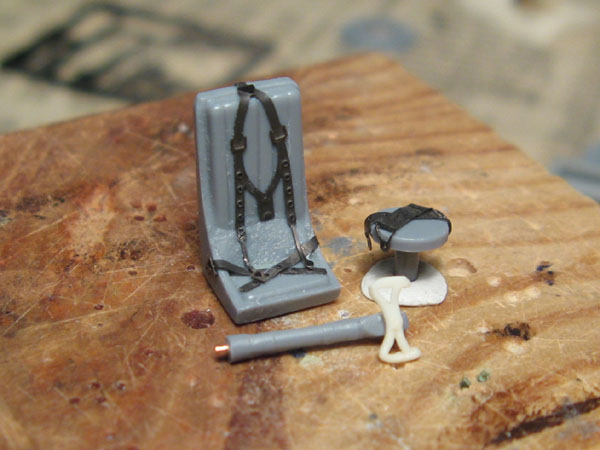
It seem like the resin series II bomb bay from Galdecal will require some quite drastic surgery to enable the cockpit to fit, but that's still looming ahead.

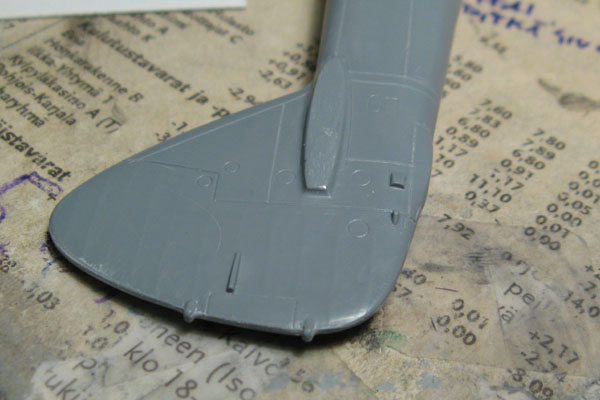
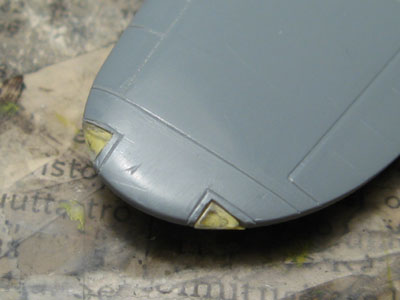
In addition to flash removal, there seems to be a bunch of parts to sand down in this kit.

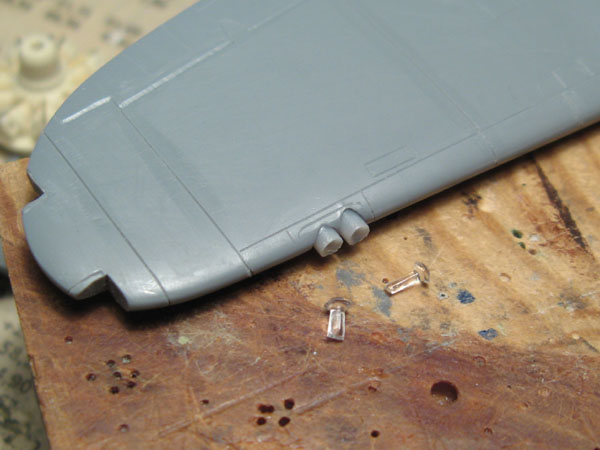
Quite a difference, the landing gear door on the right has been thinned already.


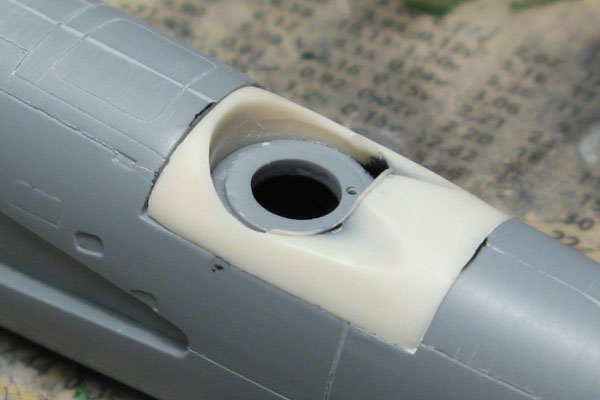
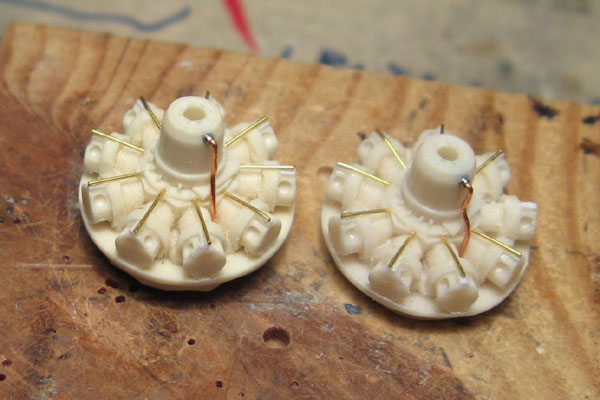
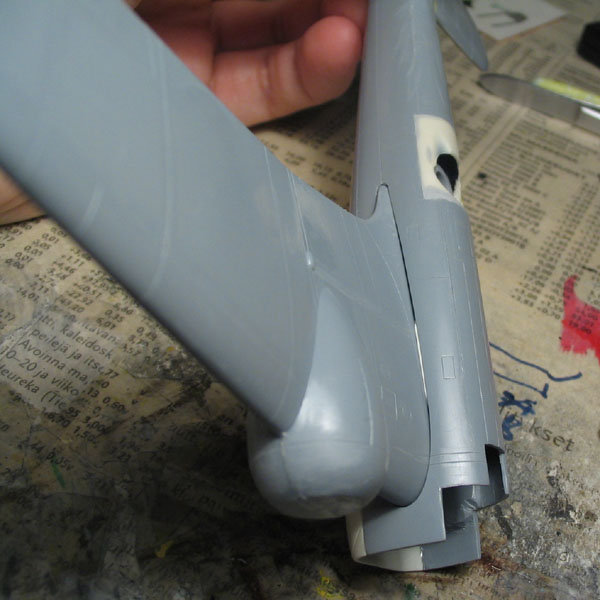
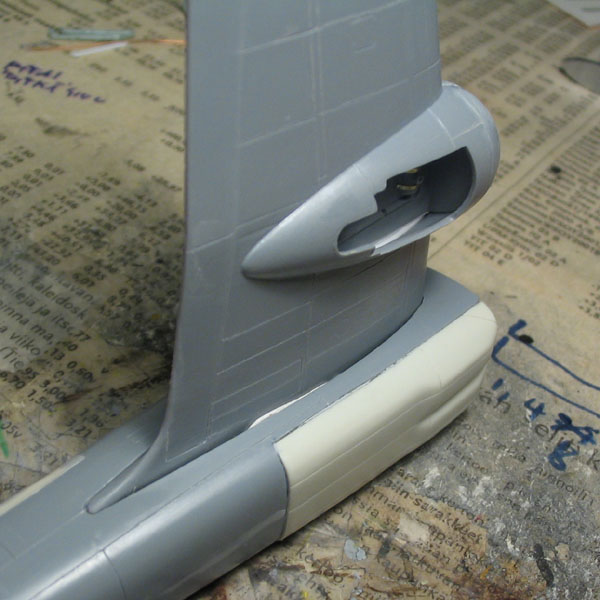
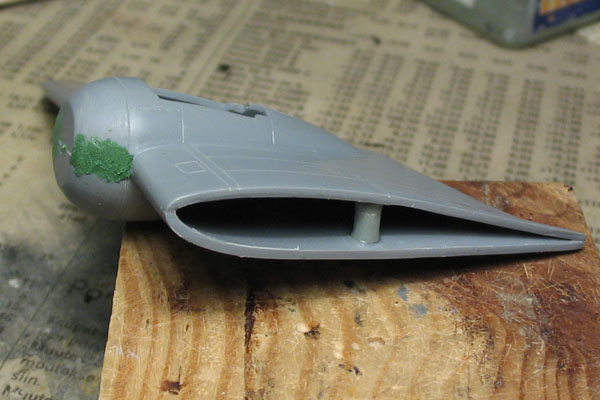
The engine cowling edges supposed to represent cooling flaps are as thick as the rest of the part. Quite a visible part, that has to be fixed. What's your opinion, should I try to sand the inside of the cowling (the outside details are quite nice), or just grind off the whole edges and make new flaps?
Doing that, I'll have to mount the cowlings some other way too, as out of the box, the cowling attaches to the engine mount on the wing by the flaps, it's all empty inside. Holes drilled to the wing and to backsides of the engines with wire in between should do the trick.
_H_Dori
_VISITCOMMUNITY
England - East Anglia, United Kingdom
Joined: November 09, 2006
KitMaker: 295 posts
AeroScale: 276 posts
Posted: Friday, March 07, 2008 - 03:46 AM UTC
I'm really looking forward to seeing this build take shape.

Great progress so far.

H
lampie
#029
_VISITCOMMUNITY
England - East Midlands, United Kingdom
Joined: December 23, 2005
KitMaker: 6,249 posts
AeroScale: 3,270 posts
Posted: Friday, March 07, 2008 - 03:48 AM UTC
Hi Eetu.
Youve certainly got your work cut out there, but Im sure your going to make a fabulous job of it
Good luck with that "step" at the back of the canopy
I'll be watching this with interest.
Nige
Emeritus
_VISITCOMMUNITY
Uusimaa, Finland
Joined: March 30, 2004
KitMaker: 2,845 posts
AeroScale: 1,564 posts
Posted: Friday, March 07, 2008 - 06:26 AM UTC
Thanks, glad you like.

I've been making some progress again.
This is actually the first time my bare metal co. scriber came in handy. Somehow, I've never got the hang of it for doing panel line. Sure, it takes away a sliver of plastic, but it's quite tricky to make straight lines without external templates or rulers and it tends to widen the lines, where usually they only need deepening.
But now, this was like it was designed for it.

The solid bomb bay part needed the front end hollowed to allow the cockpit to be attached where it belongs. It looked quite daunting before I realised the scriber could really hit the spot. And it did.

There's the unmodified fuselage taped together and cockpit backwall dryfitted. The resin part has been hollowed. That took some time even with the scriber, but with it, I could carve the outlines of the cutout, greatly reducing the risk of cutting too much with a modeling knife. On the middle, I carved cuts next to each other, like when cutting stone. I would estimate that about half of the removed resin was removed by the scriber.

Yesterday I glued the fuselage together.

This is probably the only aircraft kit that I've built some far where you could assemble the fuselage without having to finish and glue any parts inside.
Yes, you got it right, I'm not going to try and build any dorsal turret interior! I'll be just shooting black paint inside. Perhaps on the mk.IV I'll try something...


Fit of the fuselage was good, only the lower front edge didn't want to close, even after I gave the parts a few swipes against some sandpaper. Doesn't matter though, since that part will be cut off to make room for the resin part.


Marking up for the cuts and scribing guidelines.


And there it is, after the first cuts that removed most of the plastic. I deliberately cut away less than needed, to make sure I wouldn't cut too much. I've already measured and marked the plastic still to be removed. The resin bomb bay has a slight curve on the sides, which I won't be trying to replicate on the fuselage, I'd just go cutting again and again ("It'll fit after this cut..."), only to realize I need plastic sheet shims. I'll just give the resin part's side edges a few swipes from a file to take away the most of the curve, then just stick it in and fill any possible gaps with milliput scribe in the needed panel line.


The wheels where quite a positeve surprise, no sink marks or deformities. There's s coat of mr. surface on the seams still to be sanded.
The box goes on the shelf behind the cockpit. The kit part suffered badly from flash and mold misalignment, so I made a new one from a piece cut from a T-34 fender box, the open end plugged with styrene sheet. The straps are masking tape (this time, scrap PE didn't want to stick to the box for some reason that's beyond me, and after a few tries, I opted for thin strips of tape)


Here's the engines, out of the box. Looking very nice indeed, but still needing some extra detailing. For starters, I'll replace the pushrods with wire. Amazingly, the moulded-in rods where just fine, but I broke one when trying to remove the slight flash under one rod (not that it would have been visible in the finished model in the first place). So with one gone, I'll just replace them all, to keep the single different rod from standing out.
In addition to that, it'll need some plumbing and wires, the pipes going to the exhaust collector ring, and the collector ring's supports.

That's for this update. More to come soon.

Emeritus
_VISITCOMMUNITY
Uusimaa, Finland
Joined: March 30, 2004
KitMaker: 2,845 posts
AeroScale: 1,564 posts
Posted: Thursday, March 13, 2008 - 02:54 AM UTC
The fuselage is now together. The resin parts for the bomb bay and the turret insert took only a little filing and sanding to fit in. Some puttying has to be done, though nothing major. The panel lines have been scribed deeper, with the help of dymo tape where they were so faint a needle would have slipped easily. Once I'm done with blending in the resin parts, I'll give it a sanding, brush off dust and go over the recessed details with liquid cement to finish them up.

To keep it interesting, I decided to pose the turret turned to the right.
Also notice the need for some putty on the forward edge.

The step on the back edge was so small it could be sanded.
I hope the superglue holding turret ring doesn't come off, it would be impossible to re-attach in a finished model.


As many limited run kits, there's no slots & tabs or other locators for the stabilizers, so I'll have to pin the joints myself. But notice that, the rods moving the trim tabs and control surfaces have been omitted altogether. No need to cut away solid-moulded triangles. Just drill in the holes and insert some wire. Neat.


Here' s the exhaust pipes and air intakes, opened up. As you can see, there's still work to be done on the intakes. The one on the left has a nasty sink mark to be filled and I have to make the grating from some scrap PE.
SGTJKJ
#041
_VISITCOMMUNITY
Kobenhavn, Denmark
Joined: July 20, 2006
KitMaker: 10,069 posts
AeroScale: 3,788 posts
Posted: Thursday, March 13, 2008 - 07:48 PM UTC
Looks good, Eetu. You definentlyt have some work ahead of you on this one, but progress seems to be fast and at a high level as always. Can there be anymore Finnish aircraft left that you have not build?

Looking forward to see more
Emeritus
_VISITCOMMUNITY
Uusimaa, Finland
Joined: March 30, 2004
KitMaker: 2,845 posts
AeroScale: 1,564 posts
Posted: Friday, March 14, 2008 - 09:09 AM UTC

Quoted Text

Looks good, Eetu. You definentlyt have some work ahead of you on this one, but progress seems to be fast and at a high level as always. Can there be anymore Finnish aircraft left that you have not build?

Looking forward to see more


Thanks.
Anymore FAF aircraft I haven't built? Actually quite a bunch of them. Currently my collection's only kind of scratching the surface really.

Oh, yes there will be more.
Emeritus
_VISITCOMMUNITY
Uusimaa, Finland
Joined: March 30, 2004
KitMaker: 2,845 posts
AeroScale: 1,564 posts
Posted: Saturday, March 22, 2008 - 03:49 AM UTC
It's been over a week from my last update. I think it's about time for another.

On Tuesday this week, the postman brought me some goodies I ordered from Aeroclub, props for this one and the mk.IV Blenheim still in my stash and Vickers machine guns.

The greyish spots on the resin part are traces of mr. surfacer I used for blending in the part. I tried milliput, but it didn't stay put on the smooth surface and with such thin layer.

To my delight, the machine gun fitted to the turret ring with no trouble. Indeed, the lack of turret interior doesn't matter at all with the MG in place.


The white metal props came with spinners, but they were too short (and suffered from mould misalignment), so I'll be using the MPM resin spinners. To make room for them, I cut and filed off the offending hub details (Aeroclub's spinner caps were hollow).

The propeller blades turned out just as I calculated from the product description, too long. In fact, so long that if they were fitted as they came, they'de hit the sides of the fuselage. The pic shows the prop hubs modified and the excess lenght lenght of the blades marked out. (the correct shape of the blades is still to be marked on them)


When I got the fuselage finished, I dryfitted the front canopy, which revealed some some trouble with the fit. On the other side, the canopy's side is flush with the fuselage, the visible side showing the total difference in width. Looks like some more work...
magnusf
_VISITCOMMUNITY
Stockholm, Sweden
Joined: May 02, 2006
KitMaker: 1,953 posts
AeroScale: 1,902 posts
Posted: Saturday, March 22, 2008 - 04:20 AM UTC
I've put in a subscription to this blog Eetu! You do just "my" kind of kits and subjects.

It is also of interest to note that even if MPM have come a long way since their beginnings, short run is always short run with all kinds of interesting surprises along the road...


Magnus
Holdfast
Staff MemberPresident
IPMS-UK KITMAKER BRANCH
#056
_VISITCOMMUNITY
England - South West, United Kingdom
Joined: September 30, 2002
KitMaker: 8,581 posts
AeroScale: 4,913 posts
Posted: Saturday, March 22, 2008 - 09:31 AM UTC
Well Eetu you certainly have your work cut out but, as usual, you are making a very good job of it. I'll be watching this with interest

Mal
Emeritus
_VISITCOMMUNITY
Uusimaa, Finland
Joined: March 30, 2004
KitMaker: 2,845 posts
AeroScale: 1,564 posts
Posted: Monday, March 24, 2008 - 03:11 AM UTC

Quoted Text

I've put in a subscription to this blog Eetu! You do just "my" kind of kits and subjects.

It is also of interest to note that even if MPM have come a long way since their beginnings, short run is always short run with all kinds of interesting surprises along the road...


Magnus


Glad to hear you're liking what I'm building.
Indeed, short run is short run. Never take anything for granted, never assume anything.
Emeritus
_VISITCOMMUNITY
Uusimaa, Finland
Joined: March 30, 2004
KitMaker: 2,845 posts
AeroScale: 1,564 posts
Posted: Saturday, April 12, 2008 - 03:24 AM UTC
Too long a time, no see.
That's got to change. Time for some more WIP pics.

While I've been studying my references, I've made a start on the landing gear wells. I started by gluing a strip of styrene to each side to widen them slightly. Now they don't leave that big gaps when glued to the wing, although I think I'll have to box them in as well. I added straps to the engine oil tanks from scrap PE and drilled holes for the oil tubes.


As with many limited run kits, there's no locator pins, tabs, or slots, so pinned the joints between the stabilizers and fuselage. I've already drilled the holes for the control surface actuators, which I'll make from brass wire and add later.


Then to smaller things, the instrument panel, to be precise. Where to get suitable small, round plate-like parts for the instrument backs? The bigger ones came from the left-overs of a 1:72 M10 tank destroyer (in the middle). Other candidates on the right are from AFV-club's Achilles, but I didn't use them.

To make it more interesting, I managed to spill all the M-10 bolts on the floor a couple of days ago. I was almost certain that I wasn't going to be able to find them all, but luckily I was wrong. Turning off the lights and using a flashlight helped immensely.

The rest of the instruments were smaller so I reached for my parts box and settled on some bolts molded on an Academy tank sprue.
Now that I got the instruments, how to get them on the right places?
I took a photocopy of the backside of the intrument panel PE part and used it as a template.

The copy required some cutting because of the styrene part's shape, but it worked well. After trimming, I attached the paper panel to the bakc of the styrene part with masking fluid.

Then it was as simple as using a needle to mark the locations of the instruments. Finally the instruments were glued on and holes were drilled for the wiring.


I think I'll be going for the kit-parts on the propellers after all. After shorthening and trimming the aeroclub metal props, I realized there's a huge sanding chore ahead, as the cutting removed the sharper edges, revealing the true thickness of the parts. Now I'd have to both sand down the props and take care their shapes don't get distorted.
No thanks, I'll rather pin the joints between the plastic prop blades and resin hubs and construct a simple jig to align them than sand those metal parts any longer (did I mention that white metal was harder than I've worked with before?)

The engines are looking good so far with new push rods and scratch-built oil lines going to the crank case. Still missing are the exhaust collector ring supports, exhaust pipes and the air intake pipes for the oil coolers. I'll post pics of those when I get them done.

That's for this update.
magnusf
_VISITCOMMUNITY
Stockholm, Sweden
Joined: May 02, 2006
KitMaker: 1,953 posts
AeroScale: 1,902 posts
Posted: Saturday, April 12, 2008 - 07:16 AM UTC
That's ambitious Eetu! I was worried that you had given up...

Regards

Magnus
chukw1
_VISITCOMMUNITY
California, United States
Joined: November 28, 2007
KitMaker: 817 posts
AeroScale: 729 posts
Posted: Saturday, April 12, 2008 - 02:04 PM UTC
This is quite an entertaining thread- and a great build! I've learned a lot- and gained inspiration as well. great job on the IP- and the turret insert- and the stab pegs- and the gear doors... Cheers!
Emeritus
_VISITCOMMUNITY
Uusimaa, Finland
Joined: March 30, 2004
KitMaker: 2,845 posts
AeroScale: 1,564 posts
Posted: Monday, April 14, 2008 - 08:53 AM UTC

Quoted Text

That's ambitious Eetu! I was worried that you had given up...

Regards

Magnus


Me? Giving up on a kit?
:D

Well, that would be something. The only kit I can remember ever really giving up on was ICM's 1:72 I-5...
Nothing wrong with the kit itself, crisp molding, nice details all round. It was the material. I think I was unlucky and got I sample with defective plastic. That styrene was glass-brittle, perhaps even more. Many small detail parts were already broken when I got the kit, and I broke many more while handling them. Practically all of the detail parts would have to be scratch-built.
After realising the characteristics of the plastic, the kit went back to the box, and there it stayed until I got it sold for 2€. I was quite surprised the guy wanted to buy despite my accurate description of the product. I hope he's still sane...

It's getting late now. I was going to post some more WIP pics, but they'll have to wait until tomorrow.

jaypee
_VISITCOMMUNITY
Scotland, United Kingdom
Joined: February 07, 2008
KitMaker: 1,699 posts
AeroScale: 1,384 posts
Posted: Monday, April 14, 2008 - 10:51 AM UTC
Looks really promising. Build log is a great way for beginners like myself to learn. The twin spinners campaign is throwing up some really interesting builds. A nice change from mustangs spits and 109s.
Emeritus
_VISITCOMMUNITY
Uusimaa, Finland
Joined: March 30, 2004
KitMaker: 2,845 posts
AeroScale: 1,564 posts
Posted: Monday, April 14, 2008 - 09:20 PM UTC
Here come the pics.


I was having this idea of building a simple jig to help aligning the propeller blades, but after a while toying with a couple of pieces of styrene sheet, the resin hub and one prop blade, I realized it wasn't going to be worth it, and decided to rely on the good old mk.I eyeball instead.

The careful drilling paid off and supergluing the prop blades in place went really smoothly. In the end, it was a lot less work using the kit parts than it would have been if I had used the aeroclub props.


The pinned joints between the stablizers and fuselage came nice and robust, but the fuselage contact surface was tricky to sand to the correct angle, which resulted in a slight gap on the topside. Some filling to do, but a big chore when compared to the other challenges this kit provides. Time for some superglue + kicker and mr. surfacer (and sanding of course), I presume.


Despite me promising otherwise, here's the engines anyway, still in progress.
The oil line going to the crank case was missing from the kit's resin parts so I made them with copper wire. The plug in the crank case was made from a hypo needle.
Working on the needle was tricky. Cutting with side cutters squashes the tube, requiring fliling to make it round again. Usually these kind of tubes can be made longer than needed, but this time they needed to be just the right length, about three millimeters. (if longer, they'd prevent the propeller axels from fitting properly)
With perceverance, tweezers, a file and sanding sticks, I eventually got them done.
Emeritus
_VISITCOMMUNITY
Uusimaa, Finland
Joined: March 30, 2004
KitMaker: 2,845 posts
AeroScale: 1,564 posts
Posted: Tuesday, May 20, 2008 - 07:37 AM UTC
Has it really been over a month since my last update?
Well, school's out for summer and I'm having much more free time to build, so hopefully I'll be making progress a little faster than before, especially with the campaign deadline looming ahead at the end of June.

So, here's some more progress:


The stabilizer seams after a treatment of milliput and superglue. There's still sanding dust in the panel lines and some scratching to polish away on the tail, those will be taken care of soon.


After drilling the holes for the landing gear to the gear wells, I glued them to the bottom wing halves, taking care to ensure they were aligned properly. As this is a short run kit, there's not much in the way of luxuries like alignment aids. There was only a scribed line in the wing part for aligning the gear well, and even that wasn't very precise, mk.I eyeball was still the best tool in this step.
Since there weren't any sidewall in the gear well parts, you could see through to the sides. This I fixed by supergluing shaped styrene sheet to the sides. While I was at it, I mixed up some milliput slapped it to the front and rear seams. This didn't actually that much fill the barely visible seams inside the wells, but hopefully makes the assembly more robust. (I'd hate to have the wells pop loose while fitting the landing gear later on.

After gluing the wing halves together I did a quick test fit between the right wing and the fuselage using white-tac.
Yep, I'll be doing some more filling with milliput... I can probably squeeze the gaps a little smaller by gluing a piece of sprue inside the wing, but I'll be needing putty and sandpaper anyway.


Not only there's gaps, but I'll have to carefully sand the gluing surfaces of the wings in order to get them fitting at a right angle to fuselage; when assembled with the details and panel lines matching as well as possible (Meaning not that great. I'll probably need to fill and re-scribe some of the panel lines going across wing halves...), the wings sit at a notable downward angle, which is not right.

When I was looking at the least troublesome component of the langing gear, the tail wheel, I thought there had to be an easier way than cleaning up the flash-ridden kit-parts.


I looked around a little and bingo! One left-over Bf-109 tailwheel:

Even if a little too large in diameter, it's still way better than the kit-parts.
I'll have to conduct a more thorough rummaging through my spares box, as there still might be a an even more fitting part lurking somewhere.

That's all folks for this update. Until next time. (which will be way sooner than the last and this one, I promise)
magnusf
_VISITCOMMUNITY
Stockholm, Sweden
Joined: May 02, 2006
KitMaker: 1,953 posts
AeroScale: 1,902 posts
Posted: Tuesday, May 20, 2008 - 09:40 AM UTC
What a project! I am watching your progress closely.


Magnus
Emeritus
_VISITCOMMUNITY
Uusimaa, Finland
Joined: March 30, 2004
KitMaker: 2,845 posts
AeroScale: 1,564 posts
Posted: Friday, May 23, 2008 - 07:18 AM UTC
Just a little update today.
I got the wing and their joints thought out.
First, here's what I glued inside both of them to make the fuselage gaps narrower.

The seams on the engine mounts are also puttied and have since received a sanding treatment.

And this is how I took care of the probable wing-joint strength issue. Two bamboo-skewers superglued to holes drilled to the fuselage. Not pretty, but it doesn't have to be. I'm thinking of doing the actualy gluing with two-part epoxy just to be sure they don't start popping off.

The wings themselves needed some TLC too. The resulting gluing surfaces on the assembled wing components are not straight, resulting in a slight downward angle, unless sanded.
Now when the inner portion of the wings sit at a straight angle to the fuselage, another problem is revealed. The angle of the outer portions is somewhat too great when compared to scale drawings and photos of the real thing. However, at this point I'm not going to try anything to fix them. I'll leave that to the mk.IV I have in my stash; there's enough work with this one even without the campaign deadline looming ahead.

Until next time.
Emeritus
_VISITCOMMUNITY
Uusimaa, Finland
Joined: March 30, 2004
KitMaker: 2,845 posts
AeroScale: 1,564 posts
Posted: Thursday, May 29, 2008 - 08:00 AM UTC
Here's another small(ish) update.

Faced with the gaps between the wings and the fuselage, I chose milliput over regular putty for filling them. Normal putty just dries too fast so it has to be slapped on quickly; not a good thing when you're working close to panel line details. Mr. surfacer was completely excluded from the options, the initial gaps were just too large to start filling with that.

So with milliput I proceeded. And it worked great. I mixed up some putty, rolled it up to a thin sausage and stuffed them to the gaps. After that, I trimmed off the obvious excess putty with a knife and smoothed the milliput with a finger, tissue, and cotton swabs using water to keep thing going smoothly.


The results were nicely filled gaps, with no damage to surrounding details, thanks to milliput being easy to remove from panel lines when still workable.
Probably because of my use of swabs, the larger gaps had a depression in them, which will require some more work.

To see how much work there was, and how the filling had gone overall, I brushed a coat of primer on the seams, making it a flashback to my modeling past (and ensuring the coat stayed put) by using testors grey enamel primer I had in my paint stash.


Strange, I thought I remembered how bad enamels smelll...
Apparently I didn't.
The major advantage of acrylics is indeed the lack of odours.
Emeritus
_VISITCOMMUNITY
Uusimaa, Finland
Joined: March 30, 2004
KitMaker: 2,845 posts
AeroScale: 1,564 posts
Posted: Wednesday, June 04, 2008 - 04:01 AM UTC
Not much new under the sun with this build, but some anyway.
Now the rear part of the canopy fits like it's supposed to.

Originally the clear part sat a whopping few millimeters too high. I don't know if the error is in the clear part or the fuselage; I did cutting and sanding on both to get it sitting correctly.

Before moving on to the two-part front glazing, I added slide rails for upper canopy hatch made from left-over PE.

dcandal
_VISITCOMMUNITY
Buenos Aires, Argentina
Joined: September 07, 2006
KitMaker: 918 posts
AeroScale: 688 posts
Posted: Wednesday, June 04, 2008 - 01:00 PM UTC
Wow, you are making a wonderful job with that kit
Emeritus
_VISITCOMMUNITY
Uusimaa, Finland
Joined: March 30, 2004
KitMaker: 2,845 posts
AeroScale: 1,564 posts
Posted: Friday, June 13, 2008 - 10:40 PM UTC
A small update again.

I've made a start on getting the interior together.

Dryfitting before bringing out the glue is always good.
After a few quick swipes with a file, the main interior parts fit together well. The only issue needing further attention was a gap that formed between the back wall and the radio shelf behind the cockpit, but this was easily solved by gluing a piece of styrene sheet to the shelf part and sanding the front edge sharp again.

After handling the wings in the course of this build, the kit's navigation lights started to bother me and I decided to replace them with proper transparent parts.
After a while cutting, filing and constantly dryfitting, I got the lights to fit.

The yellow color is caused by masking tape used to hold the clear parts in place for the photo.

After some digging in the spares box, I found two left-over lights from some spitfire kit that were suitable. For the other two, I used resin lights from a CMK accessory set.
Emeritus
_VISITCOMMUNITY
Uusimaa, Finland
Joined: March 30, 2004
KitMaker: 2,845 posts
AeroScale: 1,564 posts
Posted: Saturday, June 21, 2008 - 01:07 AM UTC
Some progress again.


Now the main cockpit interior components are in place.
Notice the back wall of the radio shelf I added. That would have been easier to make and dryfit with the fuselage halves separate, but it wasn't very hard even at this point.
The extra piece of styrene at the front edge of the shelf wouldn't have been necessary, but I goofed and trimmed the back of the shelf part in vain, resulting in the part being too short. I added a shim of styrene between the back wall and the shelf, but I still had to fine tune it by adding this piece of thin sheet to the front as well.
Now that cockpit floor looks like something I don't want to glue with just a simple butt joint. Pinning the joints is an option, but I think I'll settle for a piece of milliput stuffed under the floor and the fuselage to make the seam more robust.


The landing lights in the kit were of the "embedded in leading egde" type so I had to make new ones. These were simply done by insterting pieces of the styrene rod to holes drilled to the wing leading edge and carefully drilling out the ends to accept lenses.
The lenses could be made with clear glue like kristal klear, but they were pretty big for that method and I wanted to try something new and decided to make them from stretched clear sprue. I first stretched the sprue, then held it again near the flame of a lighter to get the end to form a lens. I made around a dozen of these and picked the best two.
After removing them from the "sprue", they fit very well.
(they're still untrimmed in the pic)


And finally for this update, here's the new and improved wing machine gun.
Well, not that improved, as there were no such details in the kit to begin with.
So, I opened a shell ejector chute, drilled the opening for the MG barrel and scribed lines around the opening.
And because this is going to be a series II aircraft with a machine gun in each wing, I repeated the process for the other side as well.

Well, that's it for this update.
 _GOTOTOP