Stockholm, Sweden
Joined: May 02, 2006
KitMaker: 1,953 posts
AeroScale: 1,902 posts
Posted: Saturday, April 12, 2008 - 08:12 AM UTC
Time for a new project, this time for the
"Aces High" campaign.
I have picked a Fine Molds Bf-109F-2 from the stash, a model with an excellent reputation for fit and simplicity in order to keep the building tempo up. I am already lagging hopelessly behind in the "Twin Spinners" campaign...
I will probably do this one as the aircraft of Hans Philipp (final score 206 victories), this option is included in the kit decals and I have a photo of the aircraft. It also has an interesting paint scheme that might be a challenge to do!
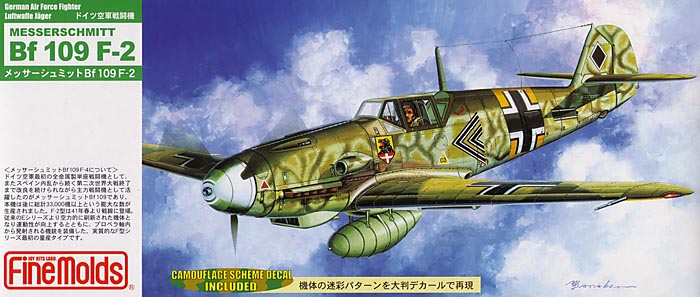
My usual blog start, the box art that is nothing short of excellent:
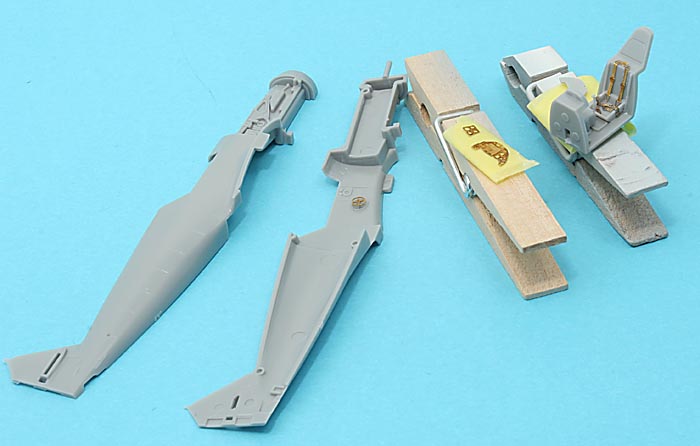
I couldn't resist adding seat belts and instrument panel from photo etch:
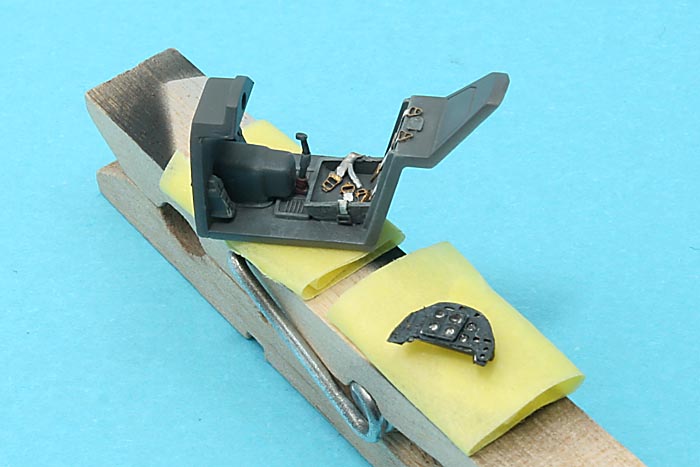
Painting completed:
After this, things went very fast. After one hours work one late night last week I suddenly had a complete Messerschmitt bar the stabilisers on the table!
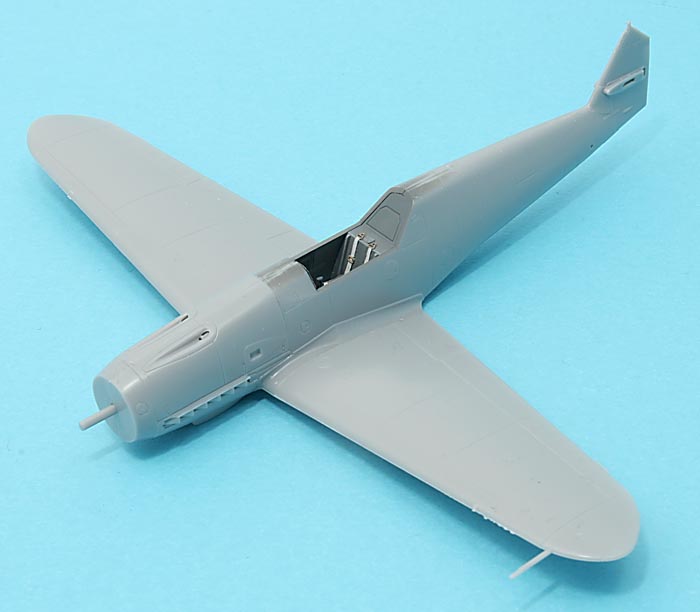
I am aiming for a quick build this time, with the majority of the time spent on painting.

Magnus
Press banner to the right to follow my trail to the new forums!
Michigan, United States
Joined: February 11, 2008
KitMaker: 311 posts
AeroScale: 278 posts
Posted: Saturday, April 12, 2008 - 09:10 AM UTC
Hi Magnus:
Cockpit looks great. Can't wait to see the rest.

Current Builds:
FW 190 D (Butcher Bird)
P61A (Night Stalkers)
P47D (CaveTonitrum)
Sea Fury ( Airedale Navy)
S-199 for finish the job again on Armorama
Uusimaa, Finland
Joined: March 30, 2004
KitMaker: 2,845 posts
AeroScale: 1,564 posts
Posted: Saturday, April 12, 2008 - 09:48 AM UTC
Looking good!

Have you already planned the painting stage yet? Painting that camo free-hand would be very tricky in 1:48 alone, and this is 1:72. Looks like some masking to do.

Florida, United States
Joined: January 26, 2002
KitMaker: 1,560 posts
AeroScale: 750 posts
Posted: Saturday, April 12, 2008 - 11:36 AM UTC
Stockholm, Sweden
Joined: May 02, 2006
KitMaker: 1,953 posts
AeroScale: 1,902 posts
Posted: Saturday, April 12, 2008 - 06:24 PM UTC
Quoted Text
Looking good! 
Have you already planned the painting stage yet? Painting that camo free-hand would be very tricky in 1:48 alone, and this is 1:72. Looks like some masking to do. 
I have a few ideas, among them is comitting modelling heresy by using the included camouflage decals for the fuselage sides or different combinations of masking and free-hand. I will blog it so you will be able to follow the progress, I have a poor old Heller Tempest that will be the first one under the airbrush just for figuring out the colours and the method!
Thanks for the comments, 109s seem to be popular around here!

Magnus
Press banner to the right to follow my trail to the new forums!
Stockholm, Sweden
Joined: May 02, 2006
KitMaker: 1,953 posts
AeroScale: 1,902 posts
Posted: Saturday, April 12, 2008 - 09:03 PM UTC
Quick update!
It usually takes me at least two months to get to this stage in a project:
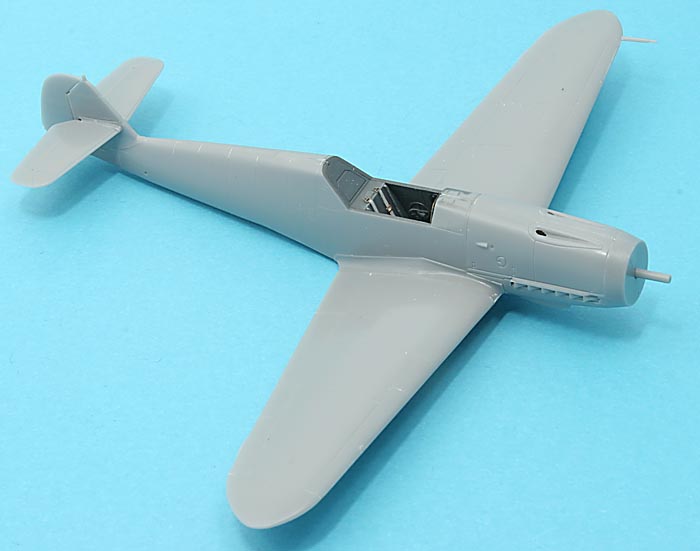
There will be some minor sanding to do but apart from that it is on to the painting stage soon!

Magnus
Press banner to the right to follow my trail to the new forums!

#041
Kobenhavn, Denmark
Joined: July 20, 2006
KitMaker: 10,069 posts
AeroScale: 3,788 posts
Posted: Monday, April 14, 2008 - 12:13 AM UTC
Looks good so far, Magnus
I also think it will be very interesting to follow the painting process. I remember Jean-Luc painted this scheme on a 1/48 Bf 109 and made a post on it in this forum.
Maybe that can inspire you...
Looking forward to see more

Campaign'oholic - 252+ campaigns completed
Stockholm, Sweden
Joined: May 02, 2006
KitMaker: 1,953 posts
AeroScale: 1,902 posts
Posted: Monday, April 14, 2008 - 12:38 AM UTC
Quoted Text
Looks good so far, Magnus
I also think it will be very interesting to follow the painting process. I remember Jean-Luc painted this scheme on a 1/48 Bf 109 and made a post on it in this forum.
Maybe that can inspire you...
Looking forward to see more 
Thanks for the hint! I'll have a lookaround and see if I can find J-Ls post. With a bit of luck I will be able to try it on my aforementioned Tempest!
Regards
Magnus
Press banner to the right to follow my trail to the new forums!
Uusimaa, Finland
Joined: March 30, 2004
KitMaker: 2,845 posts
AeroScale: 1,564 posts
Posted: Monday, April 14, 2008 - 07:49 AM UTC
Talking of the camouflage, how are the kit's camo decals? The usual thick Asian-type?
And is the whole paint-job printed on, or just the squigly bits leaving the base coat for the modeler? (which would make the almost inevitable touch-ups much easier)
Stockholm, Sweden
Joined: May 02, 2006
KitMaker: 1,953 posts
AeroScale: 1,902 posts
Posted: Monday, April 14, 2008 - 09:18 AM UTC
Here's a scan of the decal sheet:
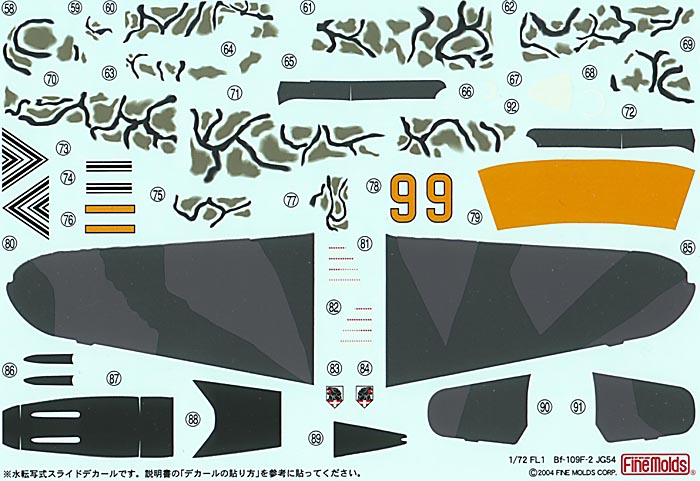
As you can see the there is a clear base film, with just the squiggles and the blobs (nice description huh?) printed. They look promising on the sheet, a bit on the thick side but not excessively so. I am pretty sure that I will be able to paint the pattern one way or another but I must admit that I am a bit tempted to use the decals, if for nothing else out of sheer curiosity!
Some sanding done tonight, first base coat of paint tomorrow night hopefully!

Magnus
Press banner to the right to follow my trail to the new forums!
Victoria, Australia
Joined: August 23, 2007
KitMaker: 629 posts
AeroScale: 539 posts
Posted: Tuesday, April 15, 2008 - 12:47 AM UTC
I think i'd give the decals a go as well...actually i'd probably do a compromise- i'd use the fuselage mottle but paint the wing/tailplane splinter camo. I'm willing to bet that the Gunze RLM colours i normally use would be a near perfect match for the decal colours for any touch ups.
Andrew
Current Projects:
Eduard 1/48 F6F-3 Hellcat
Hasegawa 1/350 Yukikaze
1/6 JJ Models Sarah "Gothic"
England - South East, United Kingdom
Joined: March 07, 2005
KitMaker: 868 posts
AeroScale: 690 posts
Posted: Tuesday, April 15, 2008 - 12:58 AM UTC
yes, agree - can't see why anyone would want to use the wing/tailplane decals but I think in the interests of research and for our general entertainment you should definitely use the mottle decals ! good work Magnus !
what an expensive kit though for 72nd scale !
Uusimaa, Finland
Joined: March 30, 2004
KitMaker: 2,845 posts
AeroScale: 1,564 posts
Posted: Tuesday, April 15, 2008 - 03:19 AM UTC
Quoted Text
what an expensive kit though for 72nd scale !
Indeed. They sell for around 14€ in HLJ, but when they get here, it's around 27€...
Btw, much they ask for those FM 109's in England?
England - South East, United Kingdom
Joined: March 07, 2005
KitMaker: 868 posts
AeroScale: 690 posts
Posted: Tuesday, April 15, 2008 - 05:06 AM UTC
..the UK distributor had a stand at the recent 'Trucks n Tracks' show in Folkestone...
because they only brought a small amount of stock they weren't selling until the Sunday afternoon..I expressed an interest but when I went back to pick one up the Euro price had appeared in pounds sterling ie around 24 GBP !!!
Needless to say I didn't bother..

#041
Kobenhavn, Denmark
Joined: July 20, 2006
KitMaker: 10,069 posts
AeroScale: 3,788 posts
Posted: Tuesday, April 15, 2008 - 07:17 PM UTC
Like Andrew, I would definently go for the decals for the fuselage camouflage, but paint the wings myself.
I assume there is another decal sheet as well as the crosses are missing on this one?
Looking forward to see what you decide to do....

Campaign'oholic - 252+ campaigns completed
Stockholm, Sweden
Joined: May 02, 2006
KitMaker: 1,953 posts
AeroScale: 1,902 posts
Posted: Tuesday, April 15, 2008 - 07:31 PM UTC
Fuselage camo pattern update:
I had a practice session yesterday on my Tempest, freehanding the scheme. Practice is the word, part of it went well and then i had a major spatter ruining the whole thing... I'll test some new ideas tonight, maybe brush painting a base and then softening those areas using the airbrush? I have a large clear photo of the scheme in a ModelArt publication showing that it was far from even in reality as well, on the other hand I am alwas wary of making things that might be realistic but makes me stand out as a bad craftsman anyway

!
For all of you standing on vultures row waiting for me to goof up the decals: I am sorry to say that I have almost definitely decided against them. But I might try them on something else just to see what it looks like!
Pricing of the kits: Yes, the price tag is scary but it is a good kit. If bought from Asia price go from painful to almost bearable though... Freightdog stock them in the UK for GBP 14 which is "a bit cheaper" than at Trucks n Tracks!
Stay tuned!

Magnus
Press banner to the right to follow my trail to the new forums!
Stockholm, Sweden
Joined: May 02, 2006
KitMaker: 1,953 posts
AeroScale: 1,902 posts
Posted: Sunday, April 20, 2008 - 09:12 AM UTC
I wonder if I should post this, as the winner of the March MoM I have a reputation to live up to. Anyway, the term "for general entertainment" have figured earlier in this thread so here we go!
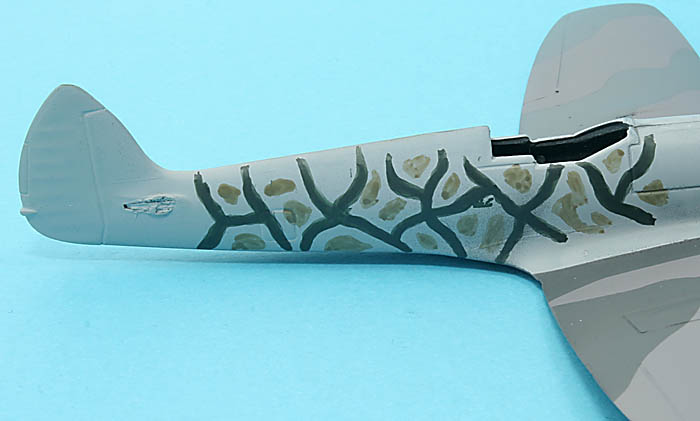
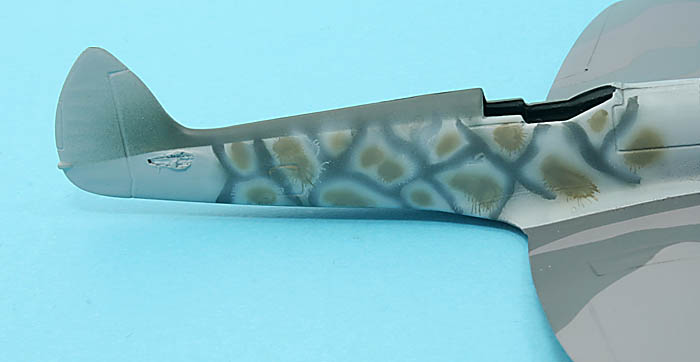
I have tried some more tricks for painting the fuselage squiggles. Below are a few photos showing one way of how not to do it...
Pencilling a few guiding lines:
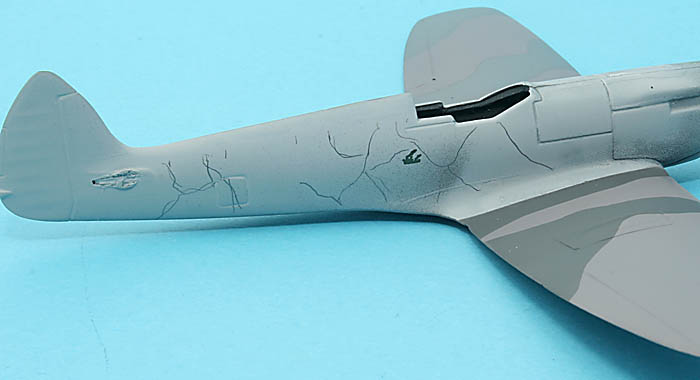
Brush painting the squiggles using Vallejo Air Black Green:
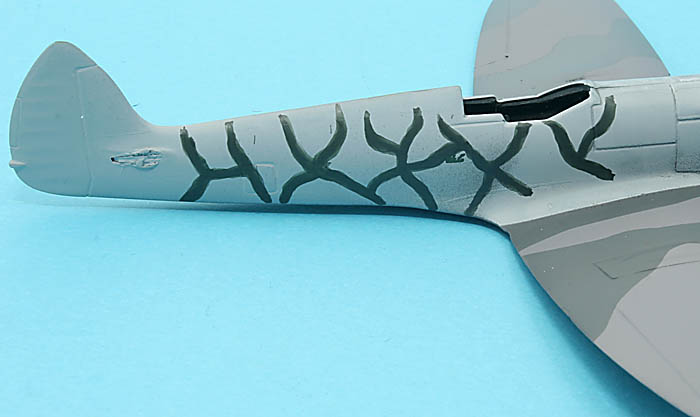
Brush painting the blobs using Vallejo Air RLM02:
Messing up the whole thing using the airbrush:
And after shifting paints back and forth, this is what I ended up with before going to bed trying to forget the b....y thing:
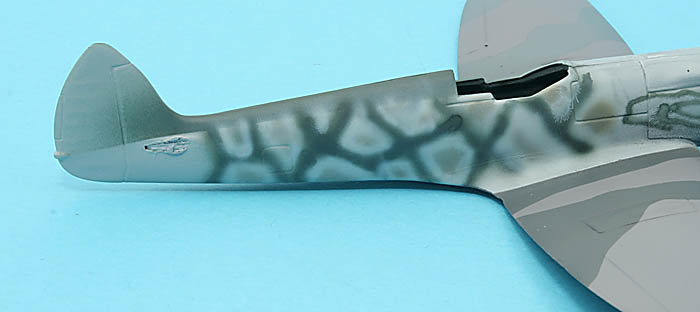
The pattern in the final photo looks reasonably clean but everything is much too coarse with all the colours feathered into eachother. After a second look at the photos: No it doesn't look reasonably clean, it looks messy...
I checked
Jean-Lucs Storch vermicell pattern trick and something along those lines might be the next method to try out. Or maybe those decals (still standing up there eagerly waiting I suppose?)...

Magnus
Press banner to the right to follow my trail to the new forums!
Manitoba, Canada
Joined: August 13, 2006
KitMaker: 1,021 posts
AeroScale: 184 posts
Posted: Sunday, April 20, 2008 - 09:10 PM UTC
The nice thing about using a masking technique like the one in Jean-Luc's Storch thread is that you can adjust it. If the mask is right against the model surface it will leave a sharp line. However by lifting it off the surface (with say, a sticky putty like "HoldIt") even just a little, the mask will leave a softer line. I have heard this referred to as a soft mask. Be sure to spray directly at the mask or paint will go where you don't want it. The putty usually leaves the paint intact but be careful it isn't too sticky as it could remove some paint. Though I've used it many times and it's never been a major problem.
-Matt

It seemed she viewed guys on the same level as potatoes.
-Kyon
Stockholm, Sweden
Joined: May 02, 2006
KitMaker: 1,953 posts
AeroScale: 1,902 posts
Posted: Monday, April 21, 2008 - 08:55 AM UTC
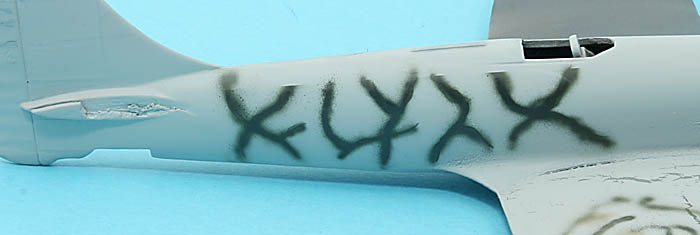
I just HAD to try freehanding the squiggles once more, this time using Gunze paints instead of Vallejo.
Brush painting some supporting lines (very thin lines this time):
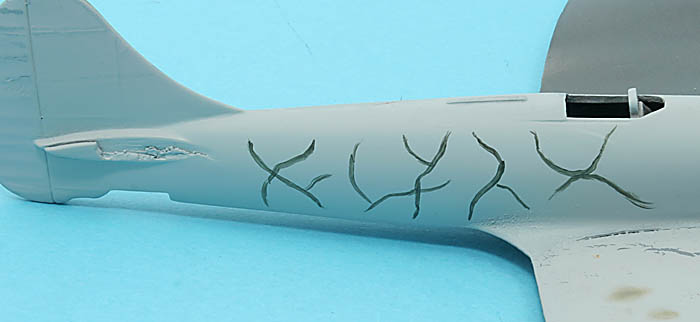
Out comes the airbrush. Too much overspray and very heavy lines:
My Gunze RLM02 was dry in the tin so back to Vallejo again for filling in the "blobs":
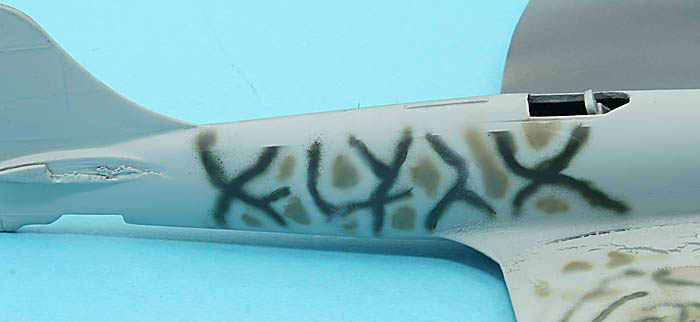
Horrible...
While in experimenting mode, I decided to give blue-tack masking a go as well.
Masking the squiggles:
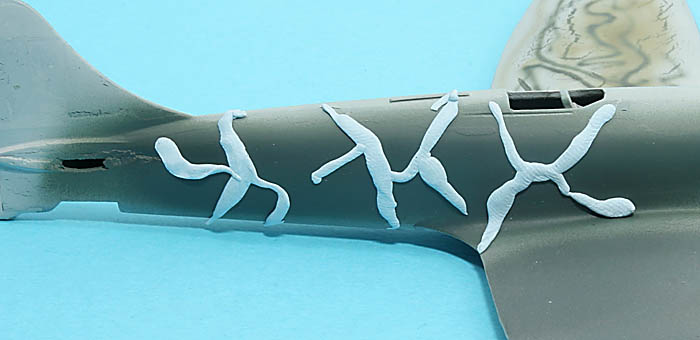
Overpainting using RLM02 and then masking the blobs:
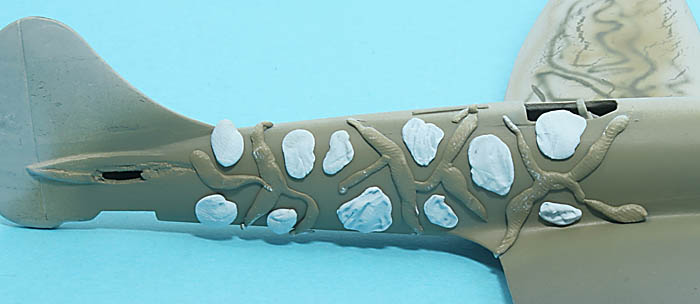
And the final result:
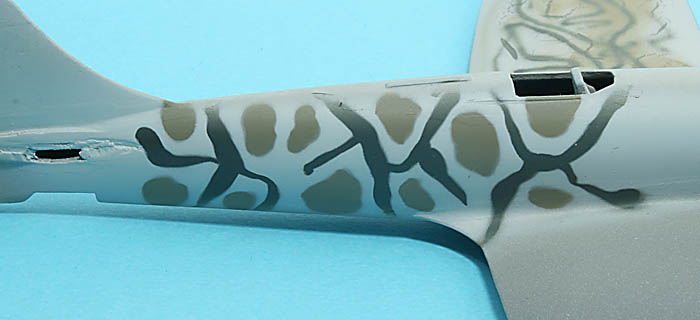
Not what I was looking for but this method might come in handy in some other situation!
The decals are drawing closer...

Magnus
Press banner to the right to follow my trail to the new forums!
Stockholm, Sweden
Joined: May 02, 2006
KitMaker: 1,953 posts
AeroScale: 1,902 posts
Posted: Wednesday, April 23, 2008 - 01:52 AM UTC
Just to show you that I am doing something more useful than just doodling away on my old paint wrecks...
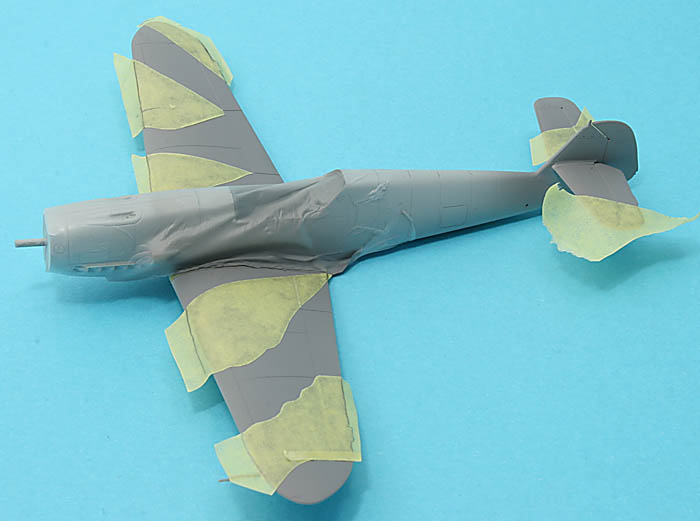
I've painted the wings and stabilisers now, RLM75 "Grauviolett" is from the old Aeromaster acrylic range with a drop of red added to get that purple ("violett" in german) shade. I love the decals for the camouflage, I've never had any better guide for cutting paint masks!
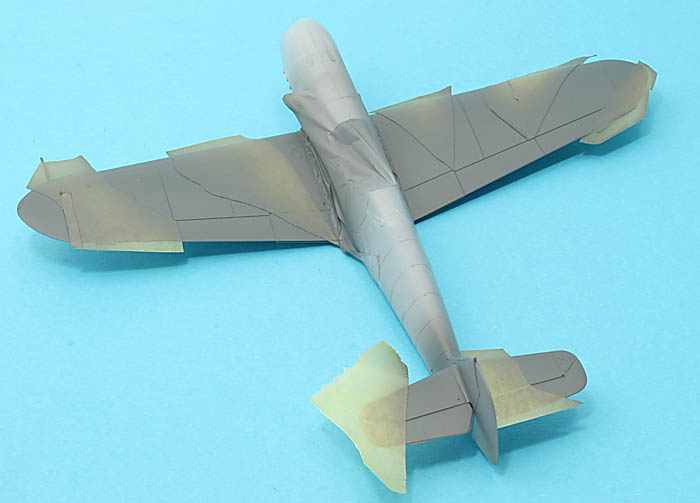
RLM74 "Graugrün" is from the Vallejo range with a bit of green and white added:
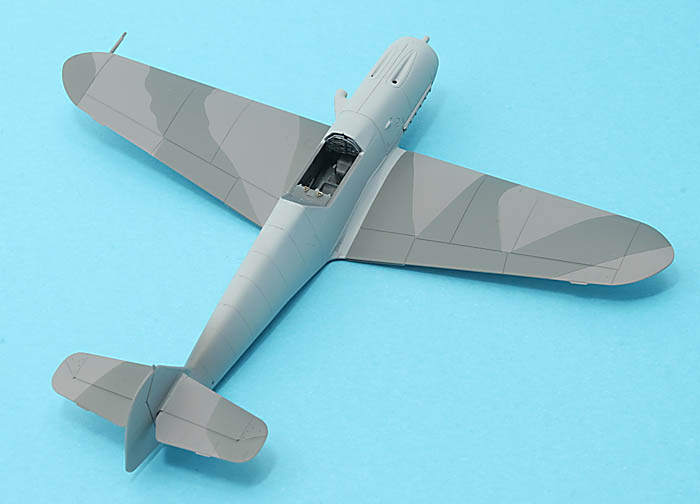
And the final result:

Magnus
Press banner to the right to follow my trail to the new forums!
Uusimaa, Finland
Joined: March 30, 2004
KitMaker: 2,845 posts
AeroScale: 1,564 posts
Posted: Wednesday, April 23, 2008 - 02:47 AM UTC
Looks superb so far!

Good look with the fuselage pattern. What method have you planned to use?
I'm starting to think I should do a Bf-109 as well for the Aces campaign...

The only problem would be to decide which scale, as I got a candidate in both 1:72 and 1:48...
Stockholm, Sweden
Joined: May 02, 2006
KitMaker: 1,953 posts
AeroScale: 1,902 posts
Posted: Wednesday, April 23, 2008 - 10:04 AM UTC
Quoted Text
Looks superb so far! 
Good look with the fuselage pattern. What method have you planned to use?
I'm starting to think I should do a Bf-109 as well for the Aces campaign... 
The only problem would be to decide which scale, as I got a candidate in both 1:72 and 1:48...
Eetu! I'll keep away from the fuselage pattern for as long as possible. I haven't figured it out yet but I will soon have to tackle the problem, one way or another... Of course you should do one in 1/72, a Finish one with InScale72 decals!
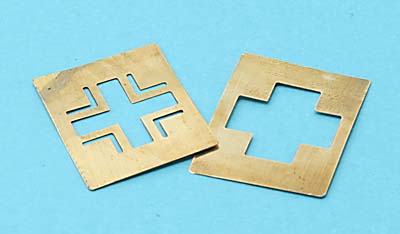
The painting stage is in progress. I have painted the yellow fuselage band and the lower wing tips today and decided to test a set of etched brass stencils I bought more than a decade ago for painting the wing crosses.
The stencils are a two part system with a large white cross being painted first with the second stencil design adding the black center and edges:
Left wing white base design finished with stencil in place on right wing:
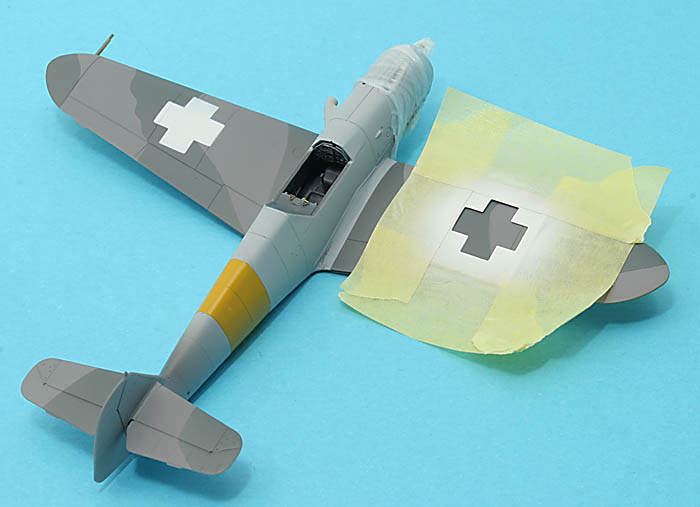
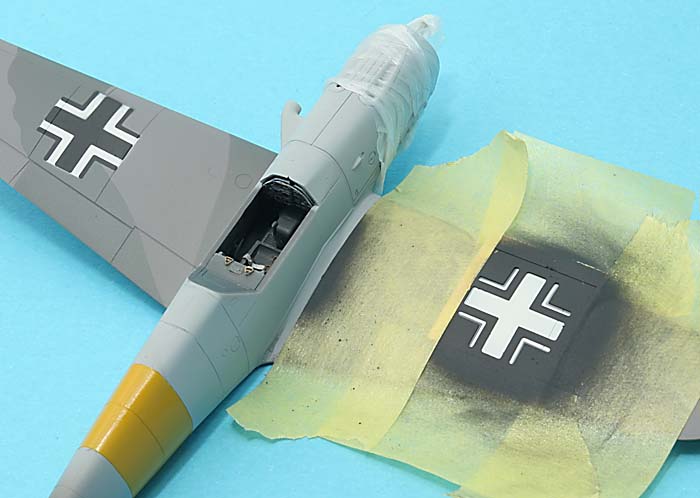
The centering between the stencils is critical and rather tricky:
And the final result. Not as perfect as a decal but not bad either! I might do some touch-up later:
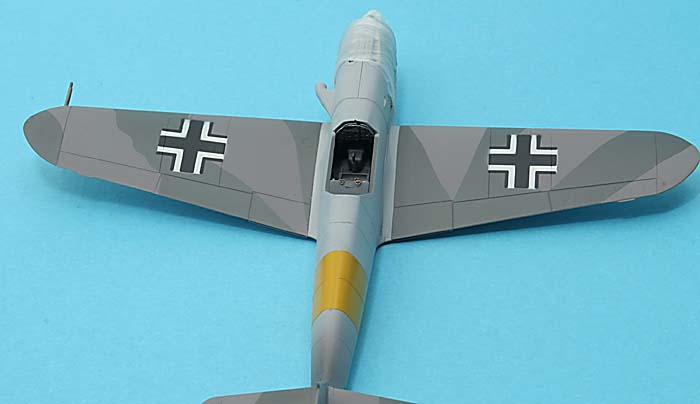
I used Vallejo Acrylics "Pergament White" and "German Grey" so the colours aren't plain white or black giving a more subtle impression.
Bedtime! (And see how carefully I have managed to avoid dealing with the fuselage camo problem...)

Magnus
Press banner to the right to follow my trail to the new forums!
Stockholm, Sweden
Joined: May 02, 2006
KitMaker: 1,953 posts
AeroScale: 1,902 posts
Posted: Thursday, April 24, 2008 - 08:46 AM UTC
OK! I've painted the fuselage bluegrey. That means that I will have to tackle the sides tomorrow, preferrably after a glass of wine or two...
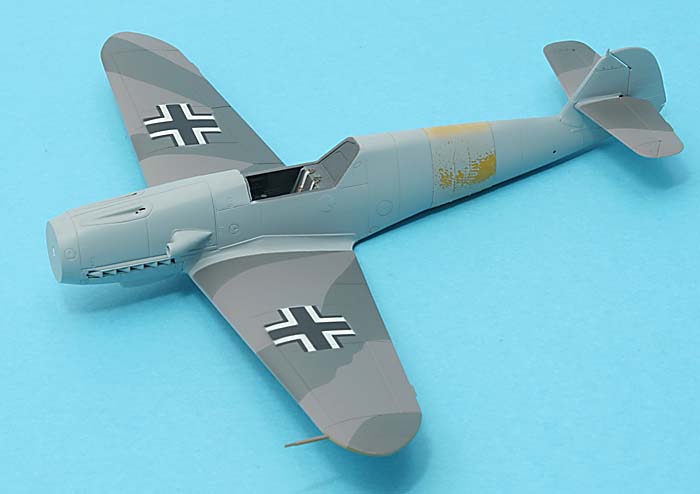

Magnus
Press banner to the right to follow my trail to the new forums!
Cork, Ireland
Joined: July 26, 2007
KitMaker: 292 posts
AeroScale: 265 posts
Posted: Thursday, April 24, 2008 - 09:21 AM UTC
Hi Magnus,
I've been following this build with interest

Great work with those Balkankrueze stencils.
Can't wait to see how you do with that funky fuselage scheme.....
Mike
Uusimaa, Finland
Joined: March 30, 2004
KitMaker: 2,845 posts
AeroScale: 1,564 posts
Posted: Thursday, April 24, 2008 - 11:33 PM UTC
Quoted Text
Quoted Text
Looks superb so far! 
Good look with the fuselage pattern. What method have you planned to use?
I'm starting to think I should do a Bf-109 as well for the Aces campaign... 
The only problem would be to decide which scale, as I got a candidate in both 1:72 and 1:48...
Eetu! I'll keep away from the fuselage pattern for as long as possible. I haven't figured it out yet but I will soon have to tackle the problem, one way or another... Of course you should do one in 1/72, a Finish one with InScale72 decals!
Then that's setteld, I'll be doing a Finnish 109.
I got Academy's G6 (with Galland canopy and short rudder), I guess I should start consulting my references for the right plane. Good thing there's quite many ace-flown planes to choose from.
Talking 109s, how's the langing gear bay detail in the Fine Molds kit?
Academy leaves room for improvement. The bays aren't boxed-in and the roofs of the bays are quite devoid of detail. Nothing that a little styrene strip couldn't fix, though.
I'll get crackin' on it when I get my workbench a bit cleaner. Now there's that Blenheim for 'twin spinners' and that "quick and easy" Spitfire I haven't got finished yet. I had the idea of building and finishing it before twin spinners began, but it's still on my workbench, only lacking final assembly, weathering and the final flat coat...

I'll just need to get started and finish that thing. I think it wouldn't take more than a few hours.


