

Matt:
Great Jug. I can't wait to see it look even dirtier. There is something about a grubby P47 that just looks right.
Taylor
World War II
Discuss WWII and the era directly before and after the war from 1935-1949.
Discuss WWII and the era directly before and after the war from 1935-1949.
Hosted by Rowan Baylis
P-47D "FAT CAT"
Yeti123

Joined: February 11, 2008
KitMaker: 311 posts
AeroScale: 278 posts
Posted: Thursday, October 30, 2008 - 12:46 PM UTC


lampie

#029

Joined: December 23, 2005
KitMaker: 6,249 posts
AeroScale: 3,270 posts

Posted: Thursday, October 30, 2008 - 01:04 PM UTC
Superb!
Nige
Nige


eagledoc2000
Joined: August 03, 2003
KitMaker: 34 posts
AeroScale: 22 posts
Posted: Tuesday, November 04, 2008 - 03:05 AM UTC
Any updates?
ricknroll
Joined: September 02, 2005
KitMaker: 39 posts
AeroScale: 4 posts
Posted: Thursday, November 06, 2008 - 12:27 PM UTC
Well, well, looking very nice Matt. I guess I missed all of those August updates somehow - you were a lot further along that I gave you credit for.
Whatcha thinking color-wise for the dots? In essence the dots are for paint fading, which makes it an interesting proposition over bare metal. I would suppose whites and yellows or even light blues on the upper surfaces then maybe you could get away with a little more color say round the engine and the higher wear areas...? Not sure, this is going to be interesting.
Rick

f1matt

Joined: August 13, 2006
KitMaker: 1,021 posts
AeroScale: 184 posts

Posted: Sunday, November 16, 2008 - 04:48 PM UTC
I'm back! Yes it's been a while. My computer decided it didn't want to play nice anymore.  And then it decided to reinforce that point.
Well it's all good now. For now anyway.
Hey Rick.
I've been wondering about the colours for the dots as well. I do like your suggestions. Maybe I'll spray a test panel to try out various colour combos.
"I guess I missed all of those August updates somehow"
All those? Yes, too much credit indeed.
Sorry but no pictures today. Why? Well although I have been going forwards (at my usual snails pace... of course) there isn't much obvious progress.
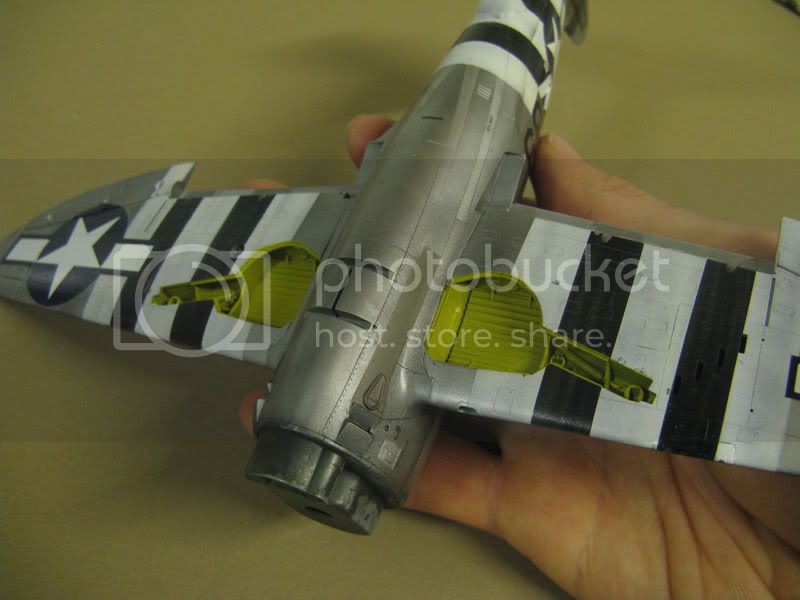
The landing gear wells have been sprayed a lovely shade of yellow-ee-green. The engine and propeller have been fully painted and glossed up for decals. A few other little odds and ends received attention. I was hoping to get some decals on Fat Cat this weekend but I was called into work and that reduced my productivity. 12 hour shifts can have that effect. All the main components are ready for a coat of gloss an once that's on the decals will finally appear.
Seems like every time I mention "more updates soon" something always prevents that from happening. So no more updates ever!
pssst. see you soon.
And then it decided to reinforce that point. Well it's all good now.
For now anyway. Hey Rick.
I've been wondering about the colours for the dots as well. I do like your suggestions. Maybe I'll spray a test panel to try out various colour combos.
"I guess I missed all of those August updates somehow"
All those? Yes, too much credit indeed.
Sorry but no pictures today. Why? Well although I have been going forwards (at my usual snails pace... of course) there isn't much obvious progress.
The landing gear wells have been sprayed a lovely shade of yellow-ee-green. The engine and propeller have been fully painted and glossed up for decals. A few other little odds and ends received attention. I was hoping to get some decals on Fat Cat this weekend but I was called into work and that reduced my productivity. 12 hour shifts can have that effect.
All the main components are ready for a coat of gloss an once that's on the decals will finally appear. Seems like every time I mention "more updates soon" something always prevents that from happening. So no more updates ever!
pssst. see you soon.
f1matt
Joined: August 13, 2006
KitMaker: 1,021 posts
AeroScale: 184 posts
Posted: Thursday, November 20, 2008 - 02:06 PM UTC
Okay still no pics. But they're comin'.
Right now the "gloss" coat is drying as I type. Why the quotation marks? Well because technically I used a satin finish to shine up my T-bolt in anticipation of one day applying decals.
Over the years I've never looked forward to the gloss coat. Something always went wrong. It might not go on as smooth as I'd like. Sometimes despite several layers it still wouldn't get nice and shiny. Or worse, the flat coat would react to the gloss coat and actually crack. Finally I've found what works for me. Polly S satin finish. It went on super smooth. Will no doubt be compatible with the flat coat (Polly S flat). And it turned out very glossy. More glossy then Polly S gloss for some reason!? Anyway I'm a happy camper once again cause I can look forward to slapping on some decals once this clear coat is dry. Maybe even tonight since this stuff dries quick. The sub-assemblies and bottom of the Cat were sprayed yesterday.
Oh and just about a half hour ago I became even more excited about this build. I've decided to add a ground crew figure. Came up with a funny idea. I think you guys are gonna like it. So anyone know who makes some decent American ground crew figs in 48th?
So what's the idea? Nothing mind blowing. It will be very simple in fact. But I like it.
SO WHAT'S THE IDEA!? 
You'll see.
Right now the "gloss" coat is drying as I type. Why the quotation marks? Well because technically I used a satin finish to shine up my T-bolt in anticipation of one day applying decals.
Over the years I've never looked forward to the gloss coat. Something always went wrong. It might not go on as smooth as I'd like. Sometimes despite several layers it still wouldn't get nice and shiny. Or worse, the flat coat would react to the gloss coat and actually crack. Finally I've found what works for me. Polly S satin finish. It went on super smooth. Will no doubt be compatible with the flat coat (Polly S flat). And it turned out very glossy. More glossy then Polly S gloss for some reason!? Anyway I'm a happy camper once again cause I can look forward to slapping on some decals once this clear coat is dry. Maybe even tonight since this stuff dries quick. The sub-assemblies and bottom of the Cat were sprayed yesterday.
Oh and just about a half hour ago I became even more excited about this build. I've decided to add a ground crew figure. Came up with a funny idea. I think you guys are gonna like it. So anyone know who makes some decent American ground crew figs in 48th?
So what's the idea? Nothing mind blowing. It will be very simple in fact. But I like it.
SO WHAT'S THE IDEA!?
You'll see.
f1matt
Joined: August 13, 2006
KitMaker: 1,021 posts
AeroScale: 184 posts
Posted: Thursday, November 20, 2008 - 08:08 PM UTC
I really should be sleeping right now. But thought I'd mention before I hit the sack tonight that I did get about a dozen or so decals on. Mostly stencils. When time permits I'll get some pics up. Still a fair number of decals to go. This ain't like decaling a tank.
Matt
Matt

hellvetier

Joined: April 17, 2008
KitMaker: 264 posts
AeroScale: 88 posts

Posted: Friday, November 21, 2008 - 12:05 AM UTC
Hei Matthew, your jug is just perfect! I'm looking forward to see her finished. I like very much the color scheme, but i don't like faces on the front, but that's just taste. Anyway keep it going!
Regards from Switzerland
Regards from Switzerland
f1matt
Joined: August 13, 2006
KitMaker: 1,021 posts
AeroScale: 184 posts
Posted: Saturday, November 22, 2008 - 08:03 PM UTC
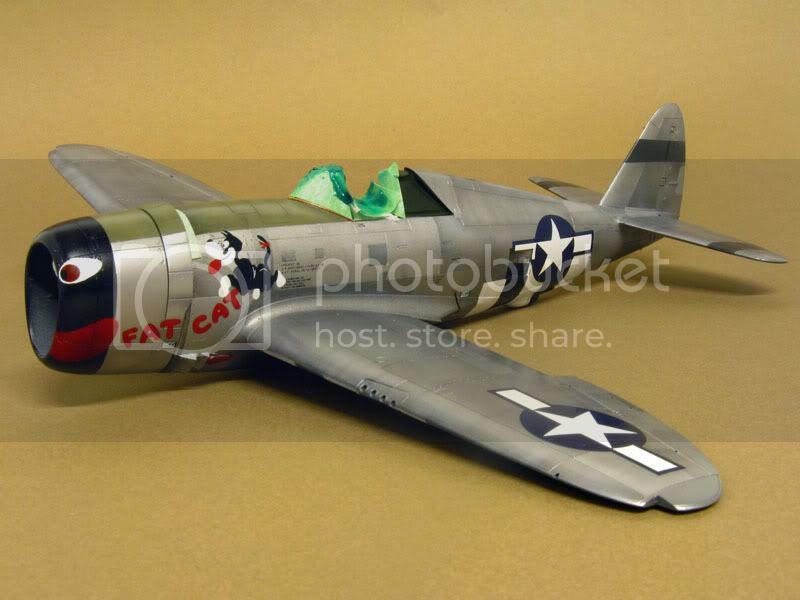
Finally! A real (albeit short) update!!
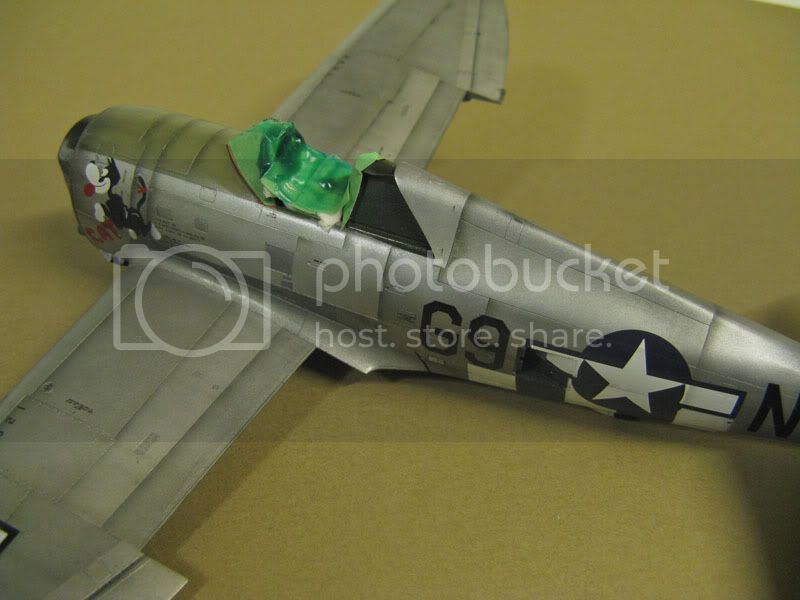
Been working all weekend so I haven't had time to add more decals. Only about a dozen have made it on so far. But more importantly, I did take some time tonight to take a couple pictures to prove this one ain't dead.
But first.
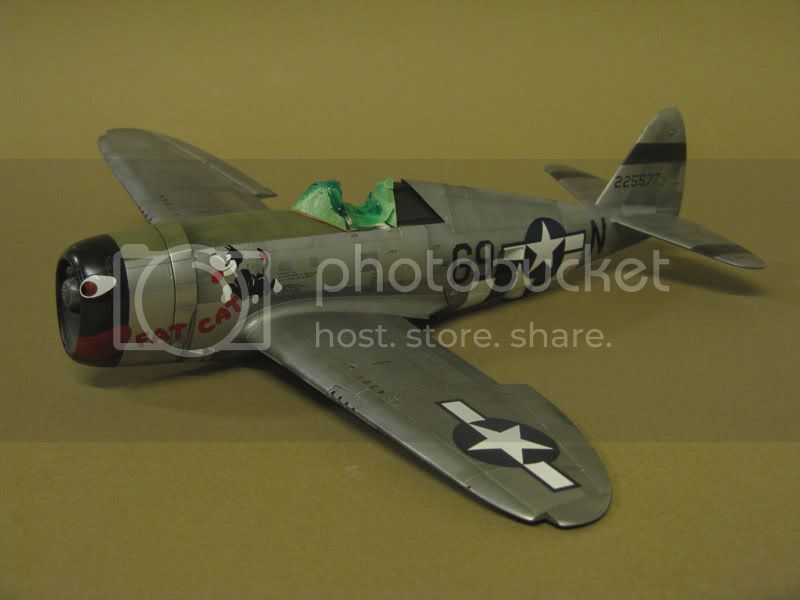
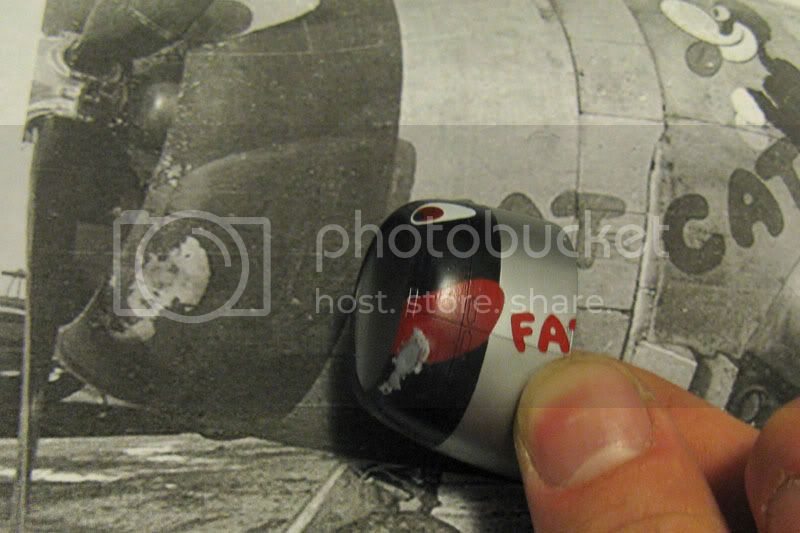
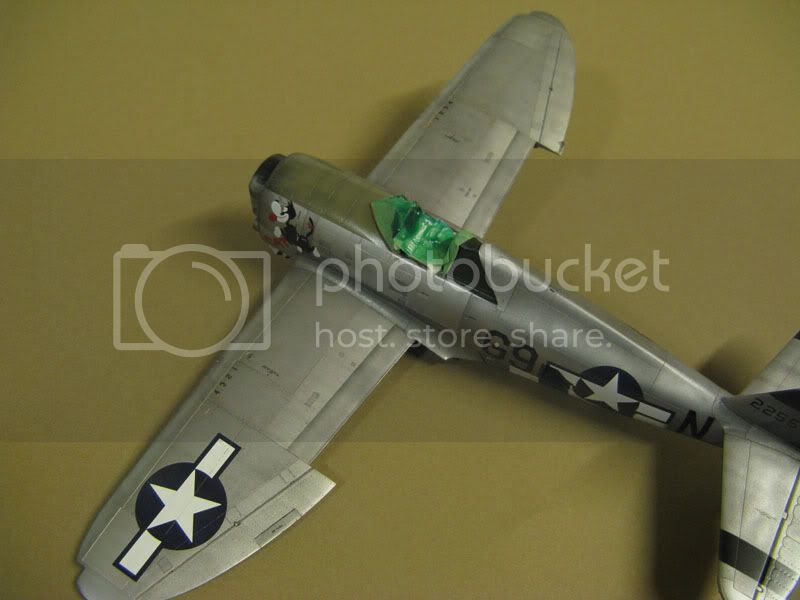
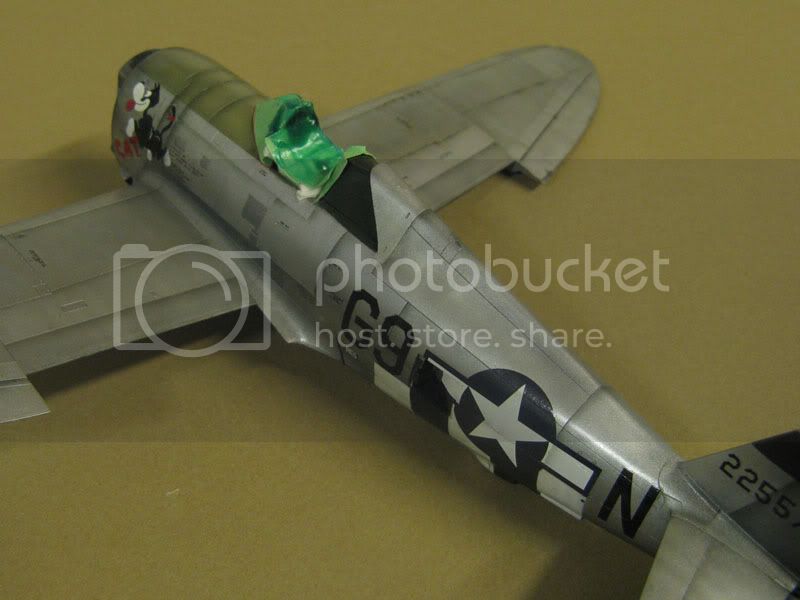
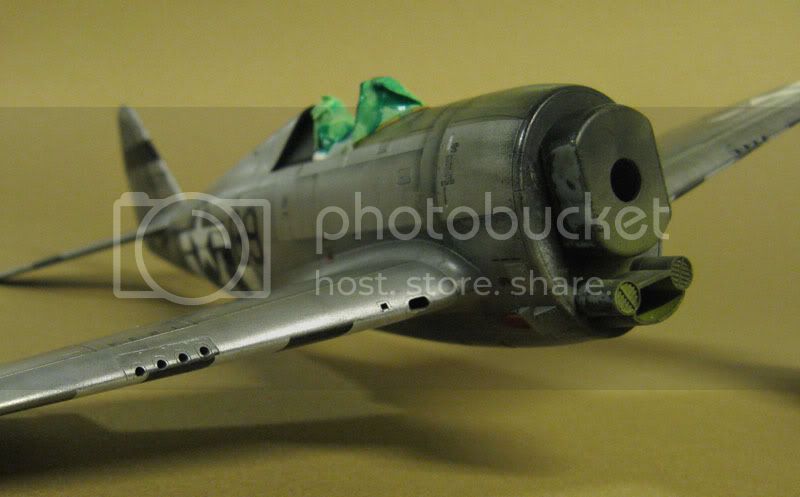
Hi A.W. Thanks for the comment. I must admit. Fat Cat has a mug only a mother could love.
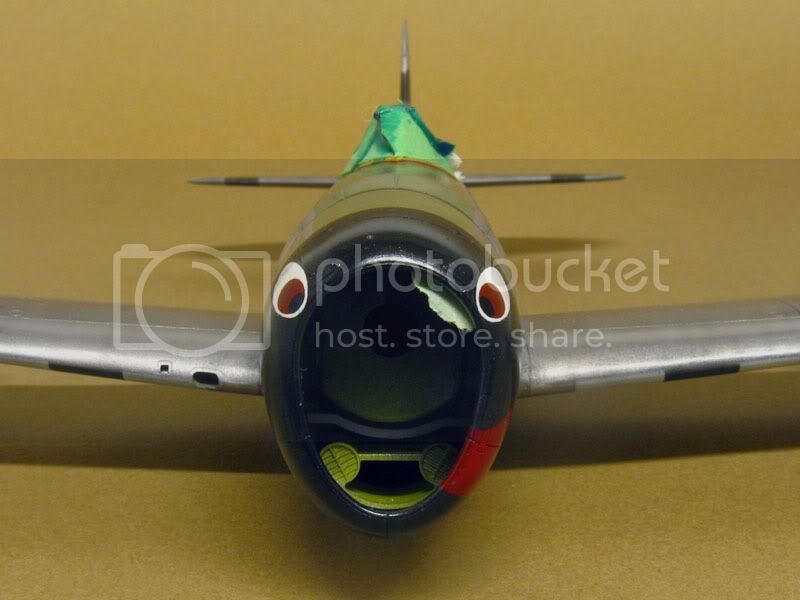
Sorry Cat.
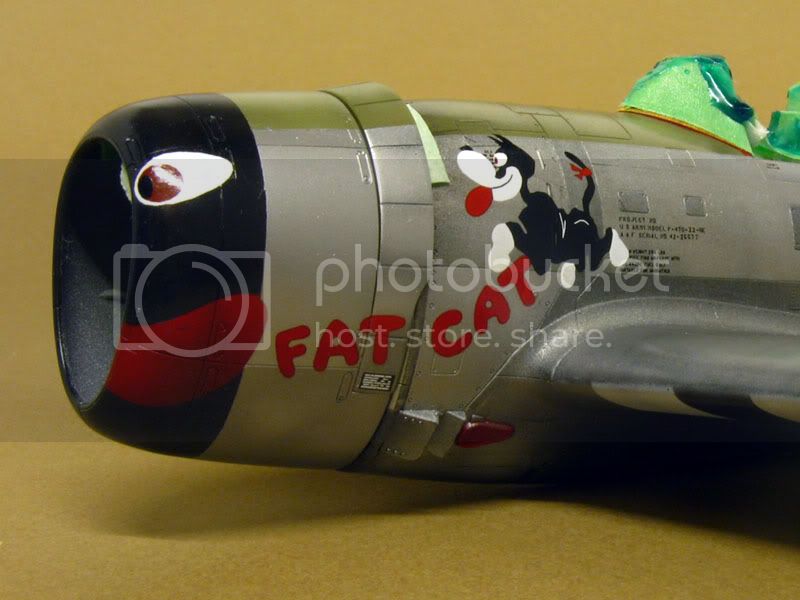
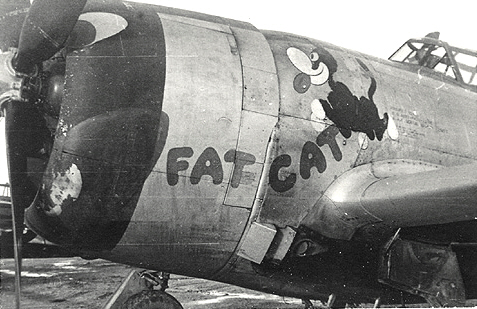
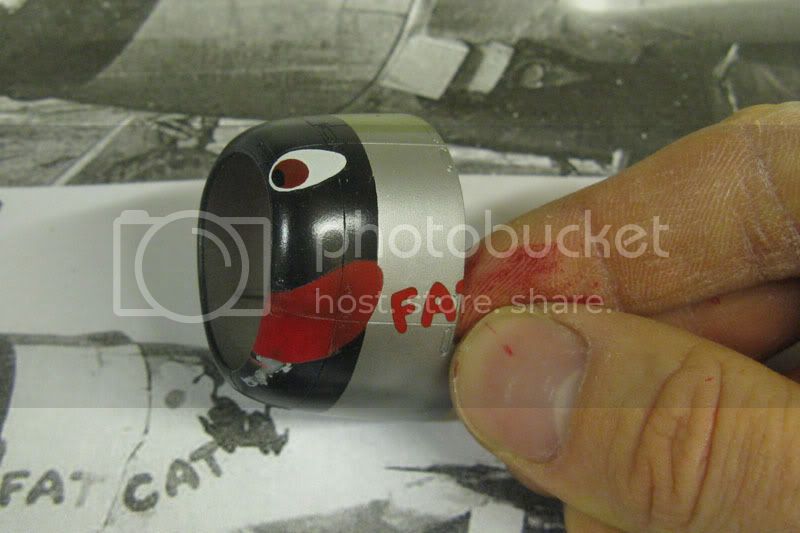
Here's a close up of the nose art. Looks like to decals should respond well to some Micro Sol. The red on the decals match pretty well with what has been painted. The red portion of the eyes however do look a little dark. I'm thinking of hand painting some fine streaks of lighter red. This would help match it to the the rest of the red. Plus this could help replicate actual brush strokes. I'll keep it subtle and see how it turns out.
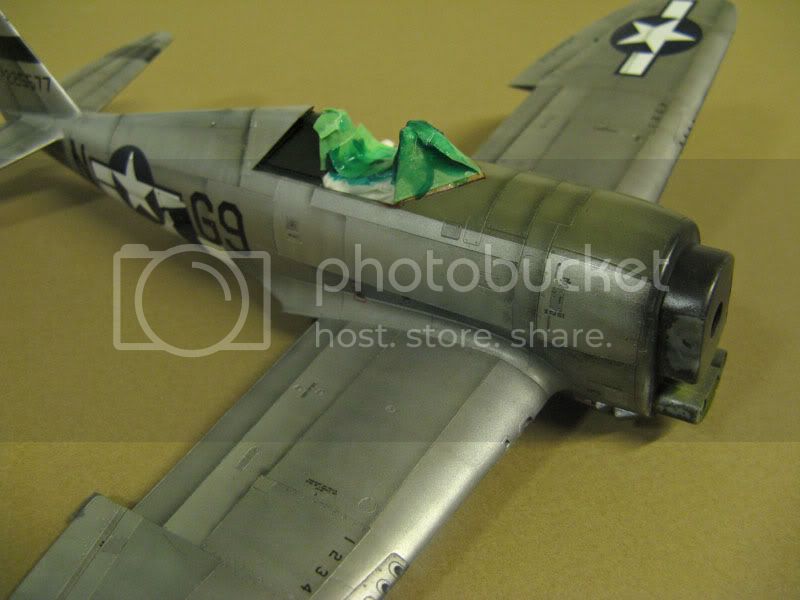
Here's the engine all painted up. The small Pratt&Whitney decal has been added as well. Looks good OOB. Course you really won't see much once the cowl is one and the propeller is added. That's why I don't feel too bad about my failed attempt to wire the engine.

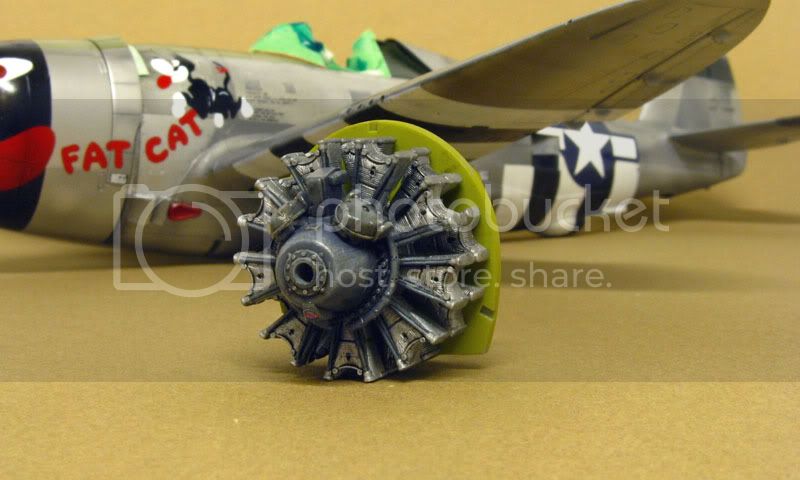
The propeller has been painted and decaled. Although the red now looks too dark with the gloss coat. I will probably mask off the propeller boss and shade on some lighter red so it better matches the canopy.

I don't think the propeller decals are in quite the right position. I have extra so if need be this can be fixed. How does it look to you guys? Also my instructions and references are a little unclear about the yellow prop stencils. I'm not sure where exactly or even in what position they are to be applied. Do they only go on the front?
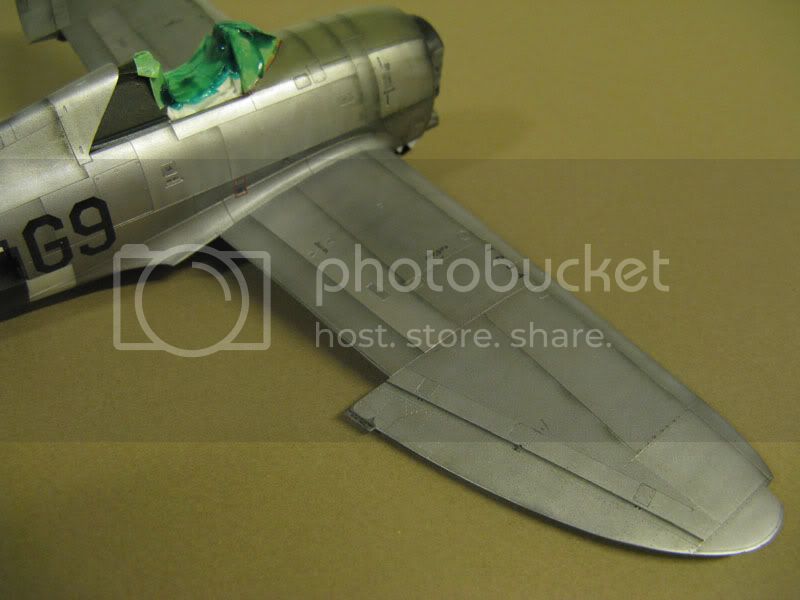
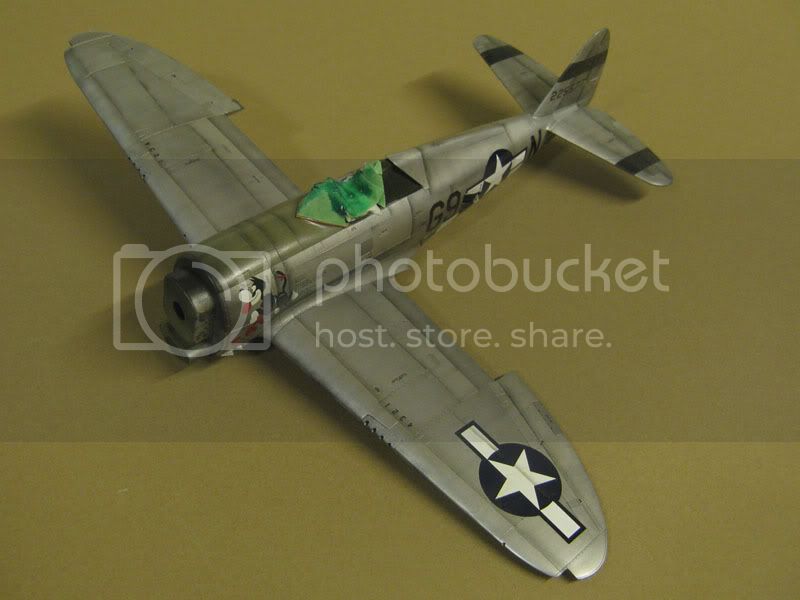
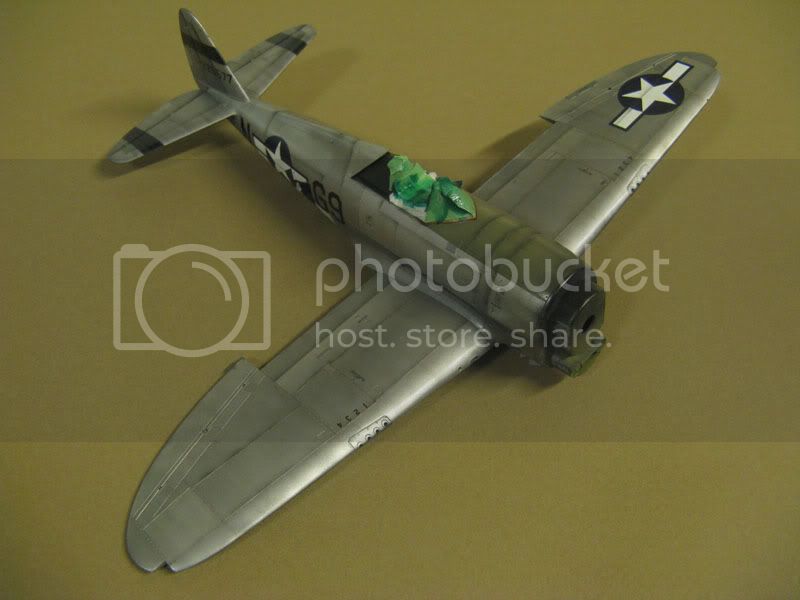
One final parting shot. I'm really looking forward to finishing the decals so I can start the real weathering.
So any thoughts on sources for American ground crew figures?
Matt
lampie
#029
Joined: December 23, 2005
KitMaker: 6,249 posts
AeroScale: 3,270 posts
Posted: Monday, November 24, 2008 - 08:52 AM UTC
Hi Matt.
This is really turning into something special!
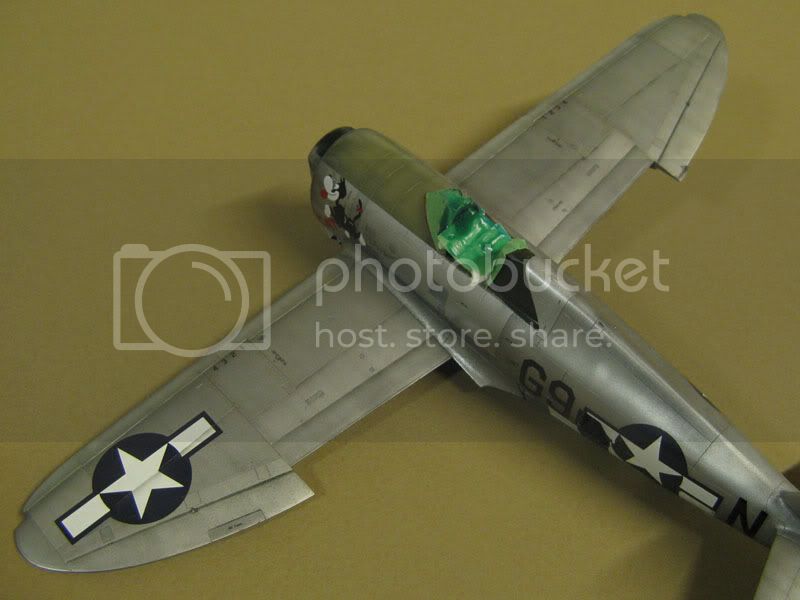
My initial thoughts were that the Hamilton decals looked a bit off, but looking at a photo of the actual plane they seem ok.
Heres a close up of the nose area as well.
I cant wait to see this one done!
Nige
This is really turning into something special!
My initial thoughts were that the Hamilton decals looked a bit off, but looking at a photo of the actual plane they seem ok.
Heres a close up of the nose area as well.
I cant wait to see this one done!
Nige
RickLawler
Joined: October 22, 2008
KitMaker: 48 posts
AeroScale: 7 posts
Posted: Monday, November 24, 2008 - 09:20 AM UTC
Now we're talking>>>>! I swear, Matt, you don't cease to amaze me with your skills and versitility.
Speaking of final weathering, are you going replicate the paint peel on the underside of the cowling?
Rick
Speaking of final weathering, are you going replicate the paint peel on the underside of the cowling?
Rick

f1matt
Joined: August 13, 2006
KitMaker: 1,021 posts
AeroScale: 184 posts
Posted: Monday, November 24, 2008 - 04:15 PM UTC
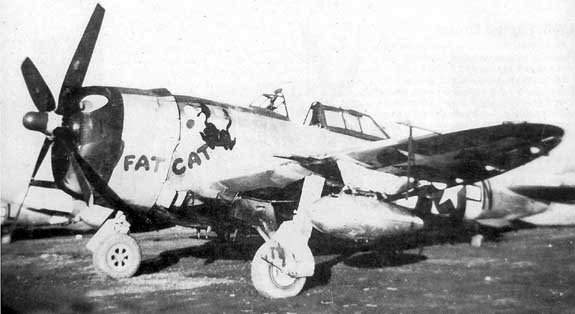
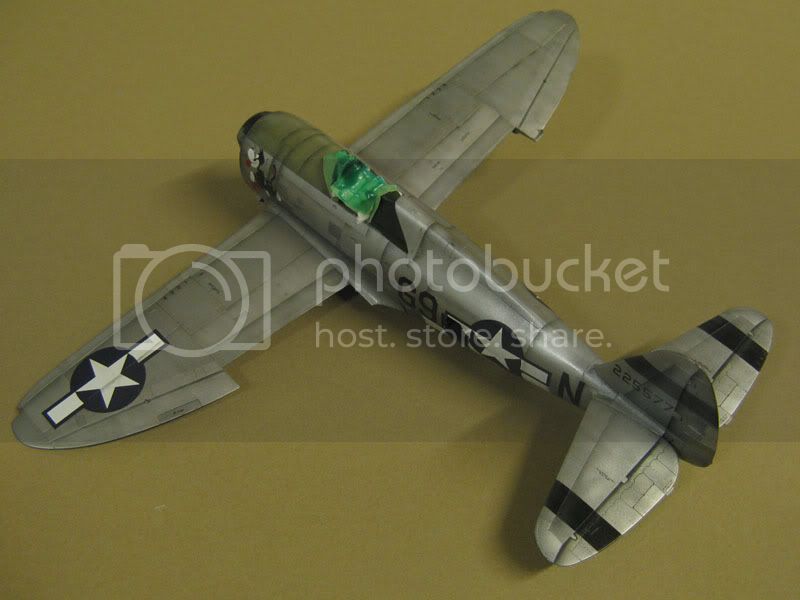
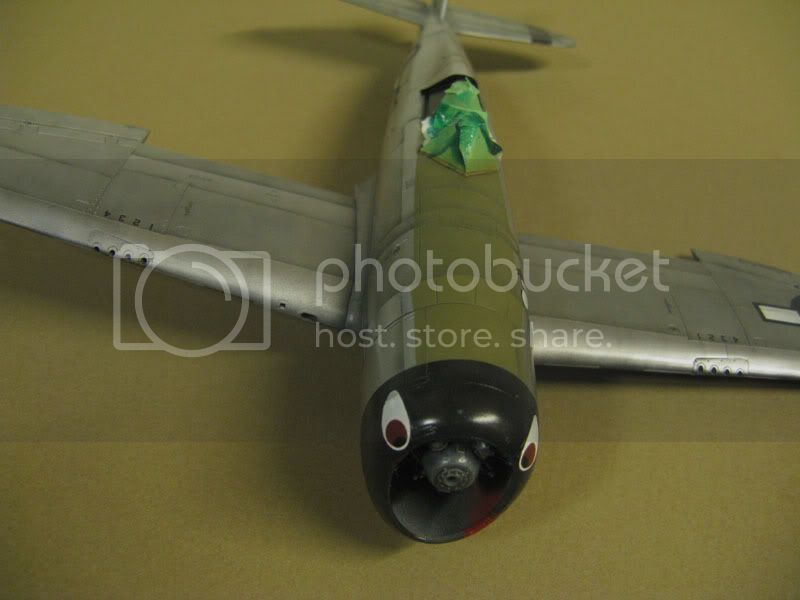
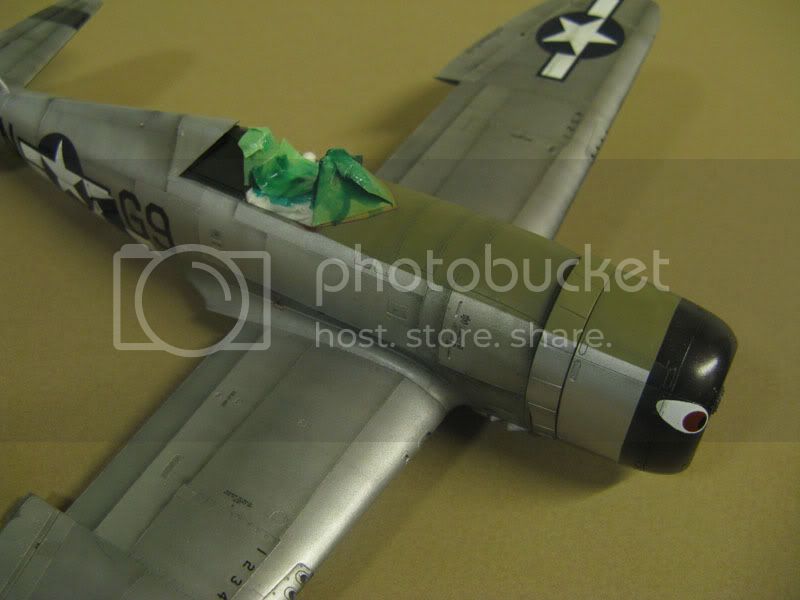
I've been thinking about the peeled paint on the cowling since the beginning of the build. Looking at the pictures of the real thing I get the sense it may be more than just peeled paint. To me at least it looks almost like there is a large dent in the cowling. Shallow, but still large in size. Perhaps Fat Cat hit some debris during a mission? This would be a fun detail to add.
The left (nose art) side of the plane has now been decaled. Just have to work on the right side now.
Matt
The left (nose art) side of the plane has now been decaled. Just have to work on the right side now.
Matt
f1matt
Joined: August 13, 2006
KitMaker: 1,021 posts
AeroScale: 184 posts
Posted: Tuesday, November 25, 2008 - 11:20 AM UTC
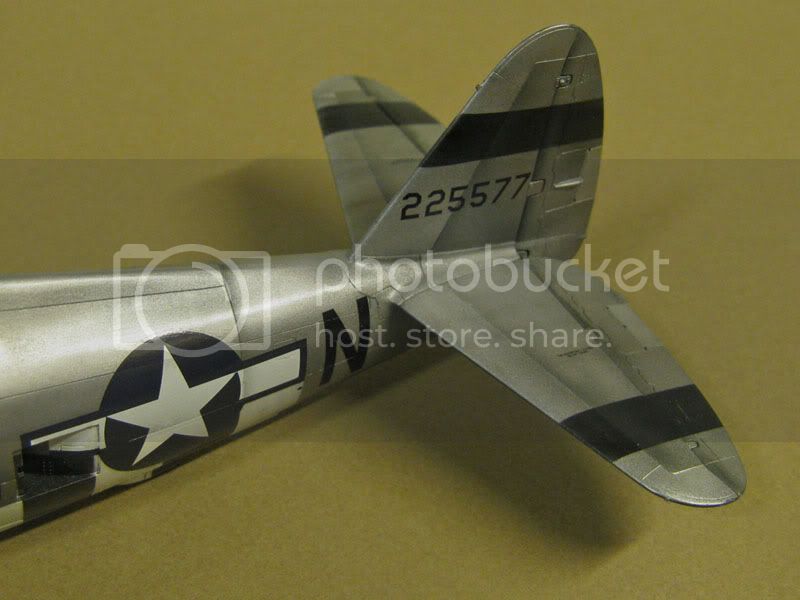
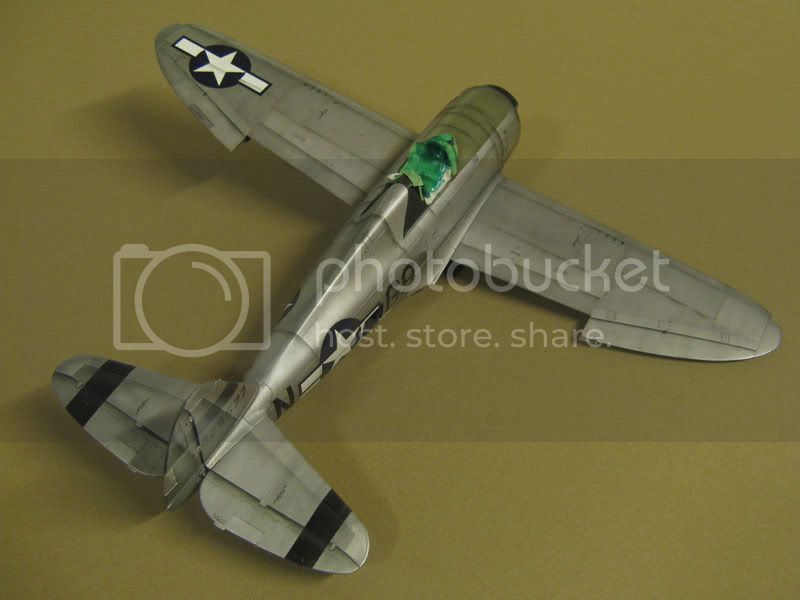
Got the decals on. Both sides, top and bottom.
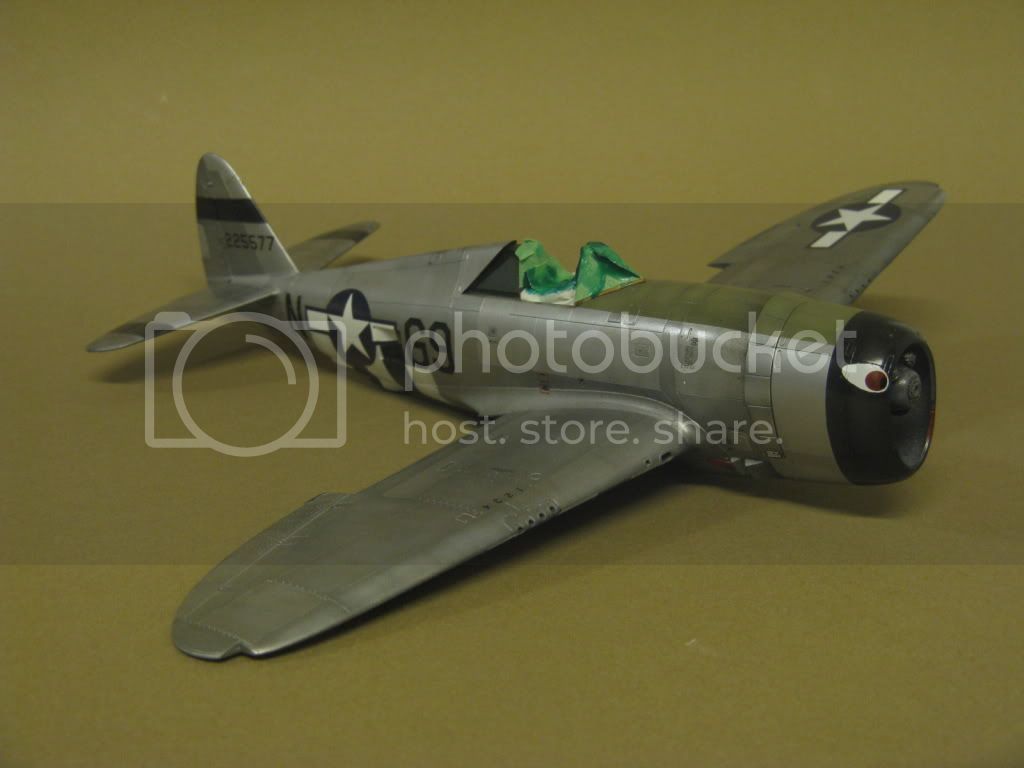
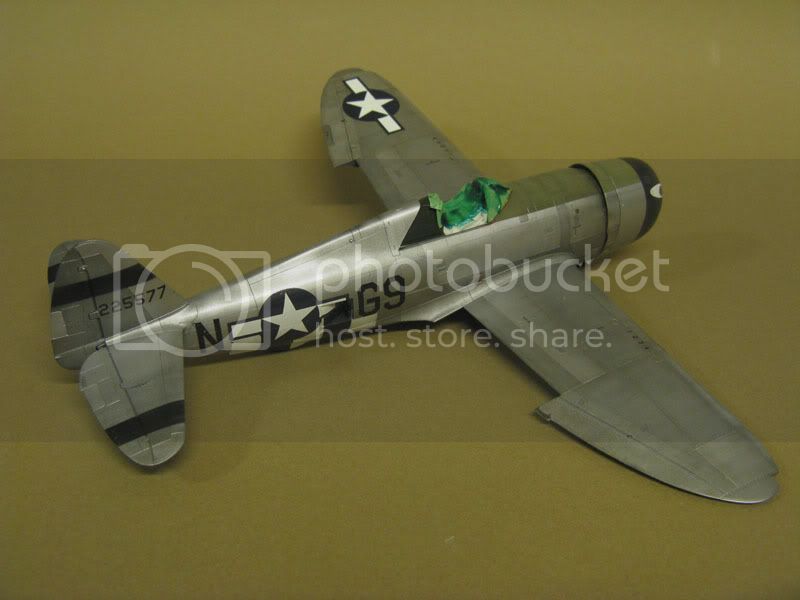
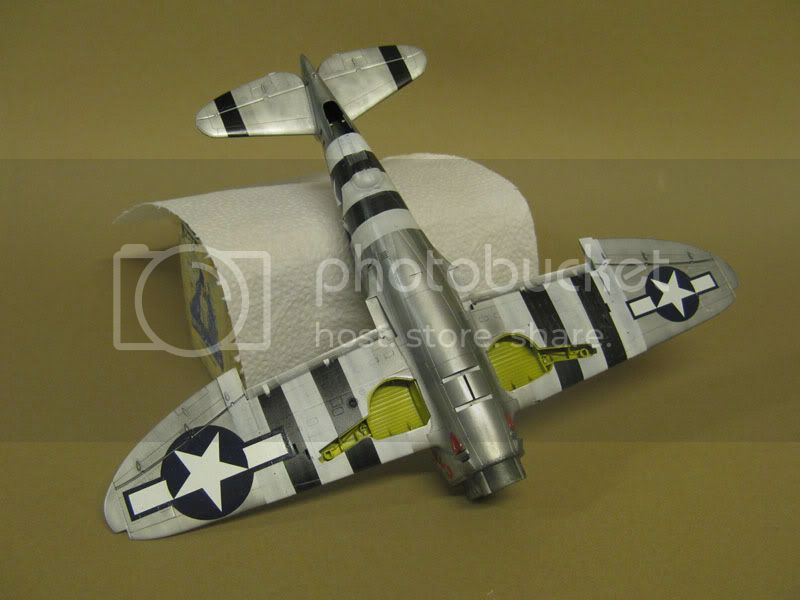
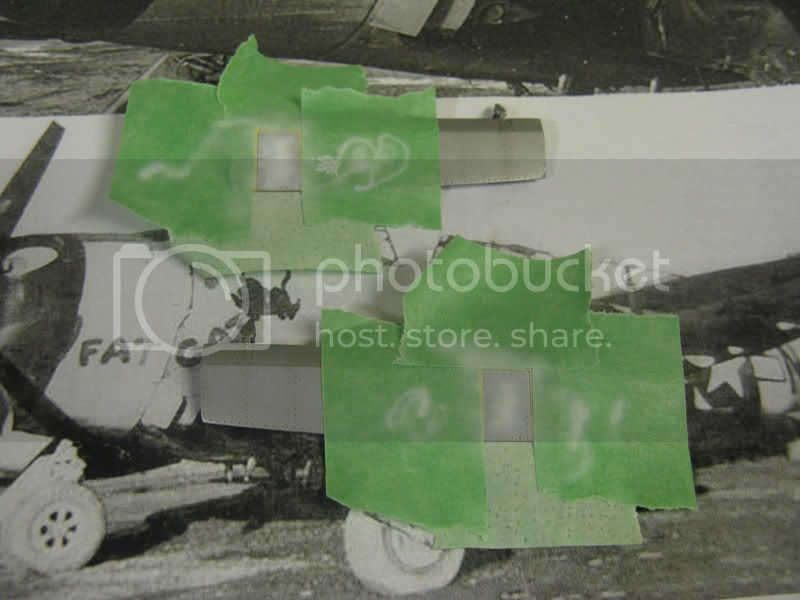
To help the decals snuggle down into the panel lines some Micro Sol was used. This was still taking effect while I took the pictures.
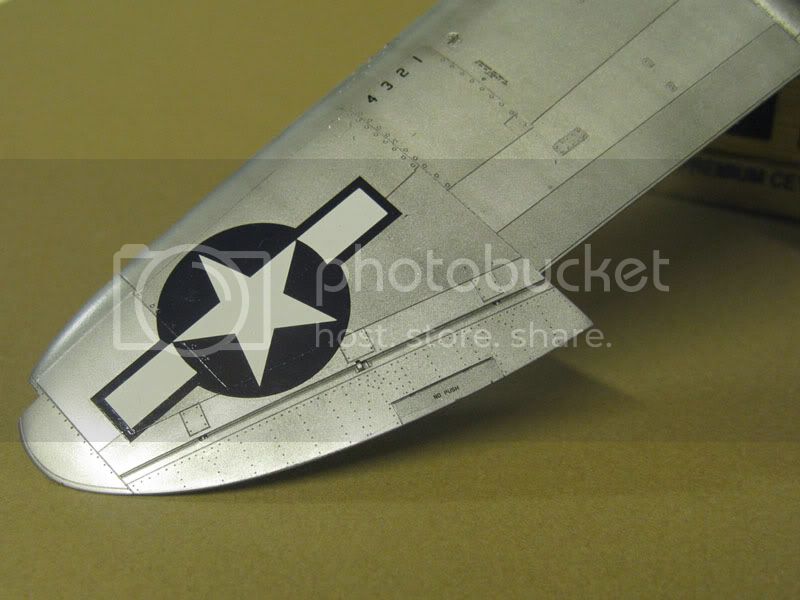
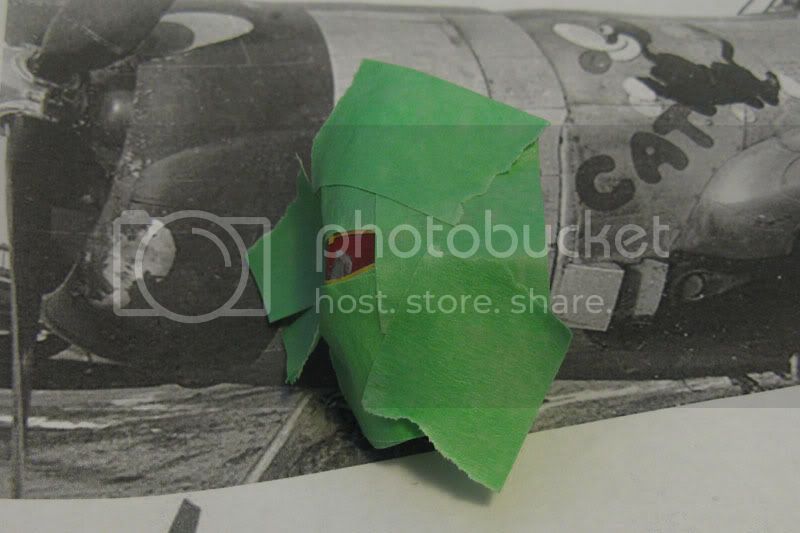
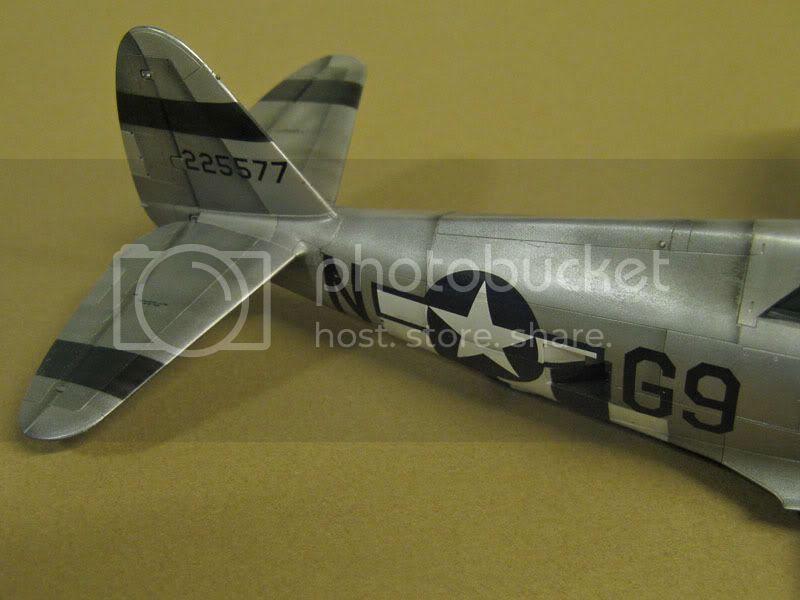
The large star and bar had to fit over an aileron fairing. It's quite the bump. A couple of cuts were made using a fresh blade and some more Micro Sol went on. The decal conformed to the bump but the cuts resulted in two small gaps in the decal. This was patched using another star and bar decal from the same sheet.
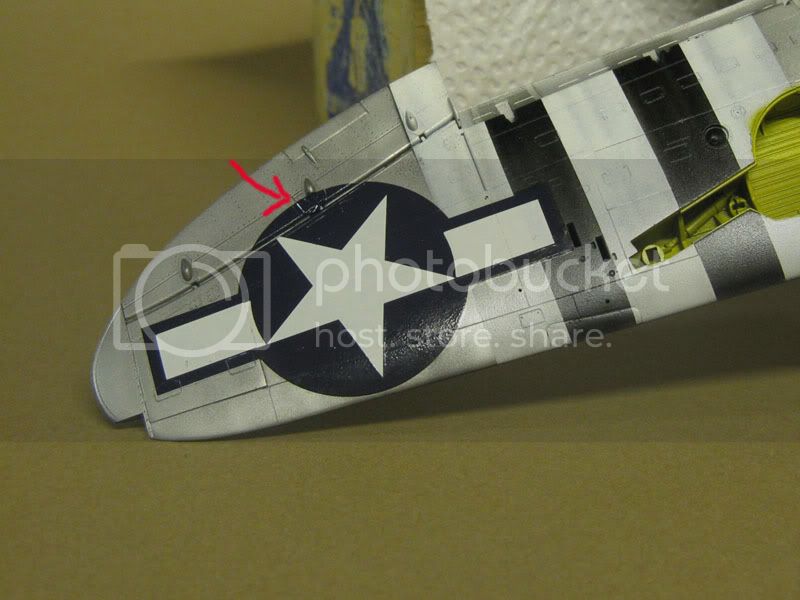
Oops. Too late now. Although it is tough to see the line. Don't tell anyone.

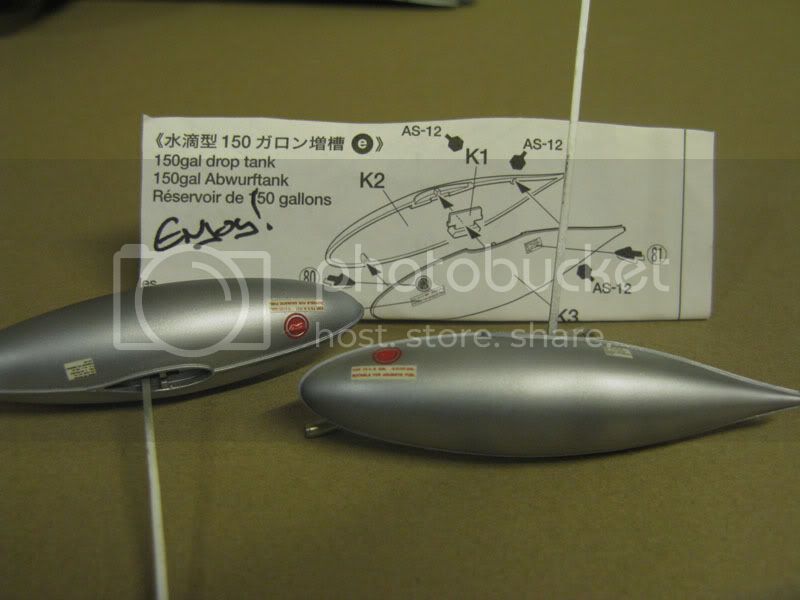
The drop tanks (that came all the way from Nige himself) got some decals too. Also provided by Nige. Thanks buddy. Enjoy them I did.
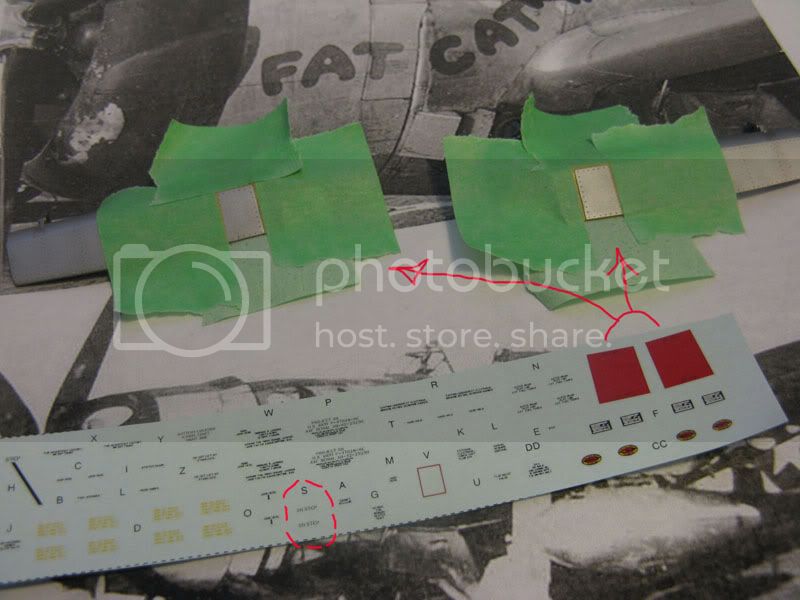
I'm unsure about this area. Should the "bar" extend further inside the duct or stop where it does now? I have more spare decals so adding an extension would be an easy fix.
Now that the Sol has taken effect I'll see if the decals need any more poking or prodding. Then it'll be back to the spray booth for another clear coat.
Right now I'm going to focus on the damaged cowl (can be seen in the picture of the real thing). Shouldn't be too hard to replicate.
--Famous--last--words--
Matt
To help the decals snuggle down into the panel lines some Micro Sol was used. This was still taking effect while I took the pictures.
The large star and bar had to fit over an aileron fairing. It's quite the bump. A couple of cuts were made using a fresh blade and some more Micro Sol went on. The decal conformed to the bump but the cuts resulted in two small gaps in the decal. This was patched using another star and bar decal from the same sheet.
Oops. Too late now. Although it is tough to see the line. Don't tell anyone.
The drop tanks (that came all the way from Nige himself) got some decals too. Also provided by Nige. Thanks buddy.
Enjoy them I did.I'm unsure about this area. Should the "bar" extend further inside the duct or stop where it does now? I have more spare decals so adding an extension would be an easy fix.
Now that the Sol has taken effect I'll see if the decals need any more poking or prodding. Then it'll be back to the spray booth for another clear coat.
Right now I'm going to focus on the damaged cowl (can be seen in the picture of the real thing). Shouldn't be too hard to replicate.
--Famous--last--words--
Matt
Cardshark_14
Joined: June 24, 2008
KitMaker: 69 posts
AeroScale: 12 posts

Posted: Tuesday, November 25, 2008 - 09:55 PM UTC
Fantastic work, Matt! I'm going to have to try your preshading technique. Does it work as well on camo as it does on NMF?
f1matt
Joined: August 13, 2006
KitMaker: 1,021 posts
AeroScale: 184 posts
Posted: Wednesday, November 26, 2008 - 07:33 PM UTC
As long as the following layers of paint are thin than yes it should work. It works very well with the Alclad because it is a naturally opaque paint. Thanks Alex
Yesterday I started work on trying to replicate the damaged cowl. Attempt number one....failed. (Excel Saga inside joke)
It didn't look awful. But certainly not good enough. I'll toss up some pics once the cowl damage is done. And while I was masking over the cowling I learned that the Polly S satin I used as a clear coat for the decals appears to be holding up well. It didn't come up at all when the masking was removed.
Matt
f1matt
Joined: August 13, 2006
KitMaker: 1,021 posts
AeroScale: 184 posts
Posted: Friday, November 28, 2008 - 01:11 PM UTC
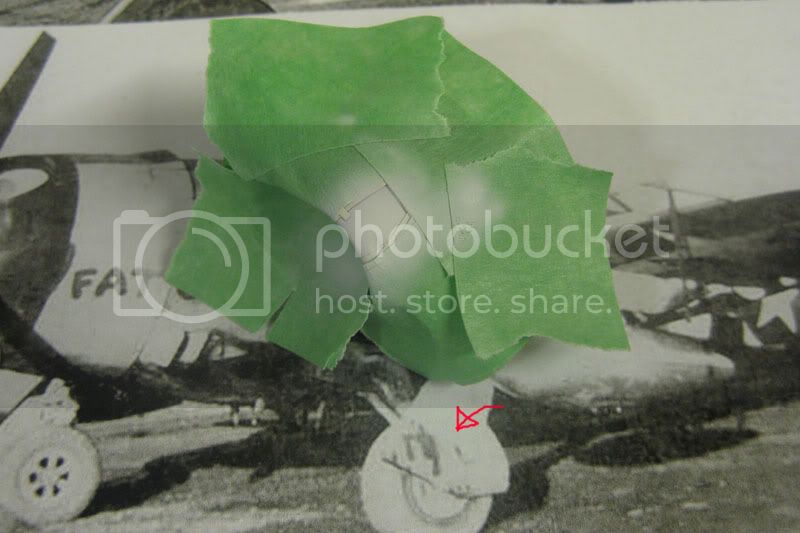
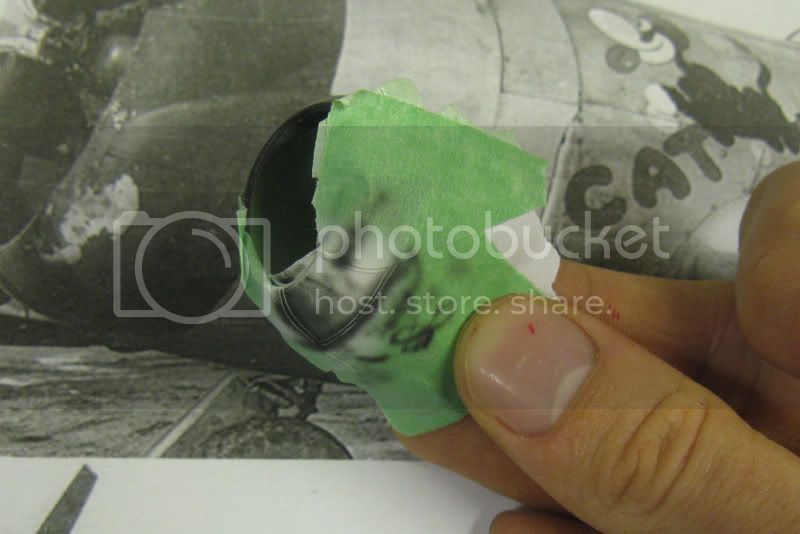
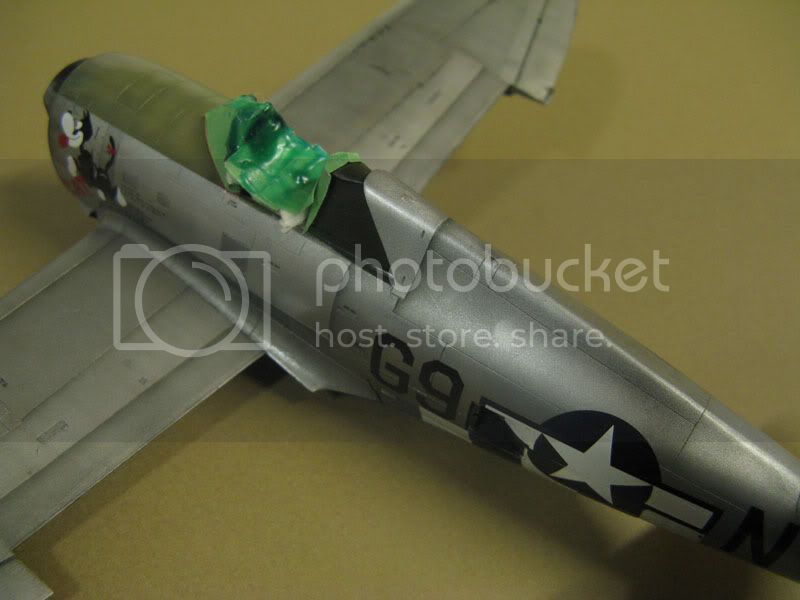
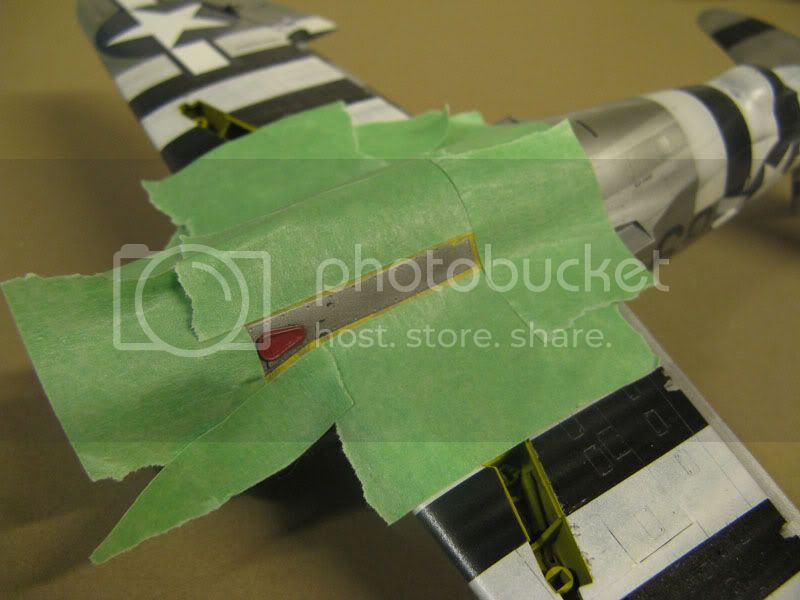
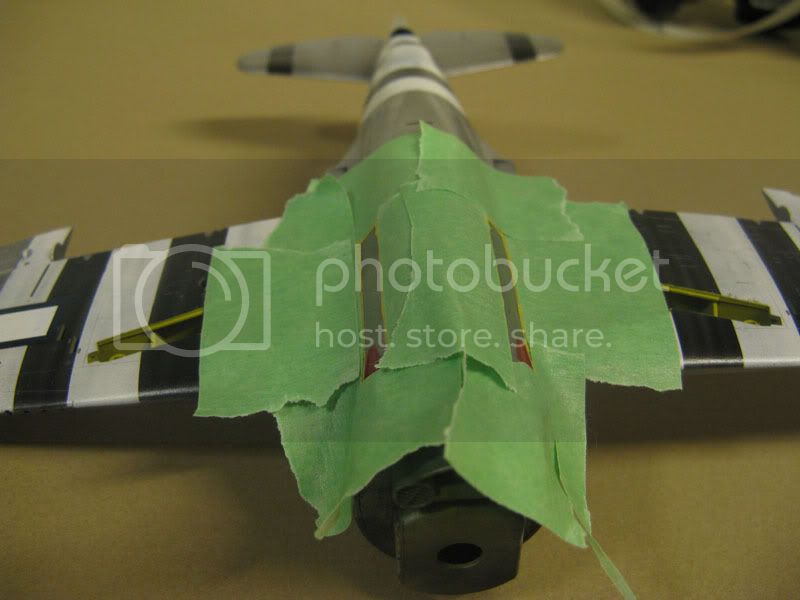
So as I mentioned in the previous post I've begun work on the cowl damage. This requires a small dent and some "damaged " or peeled paint.
So this is the cowling after it's been attacked by my Dremel with a fine round bit.
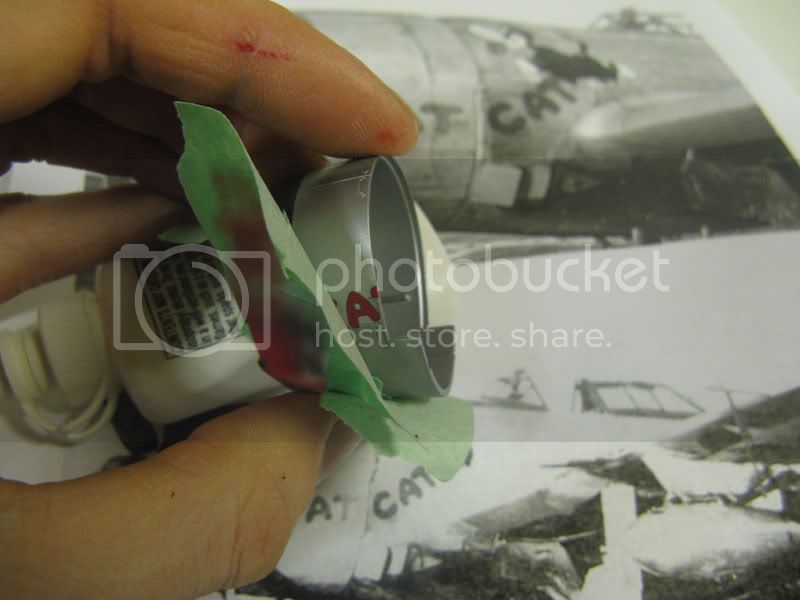
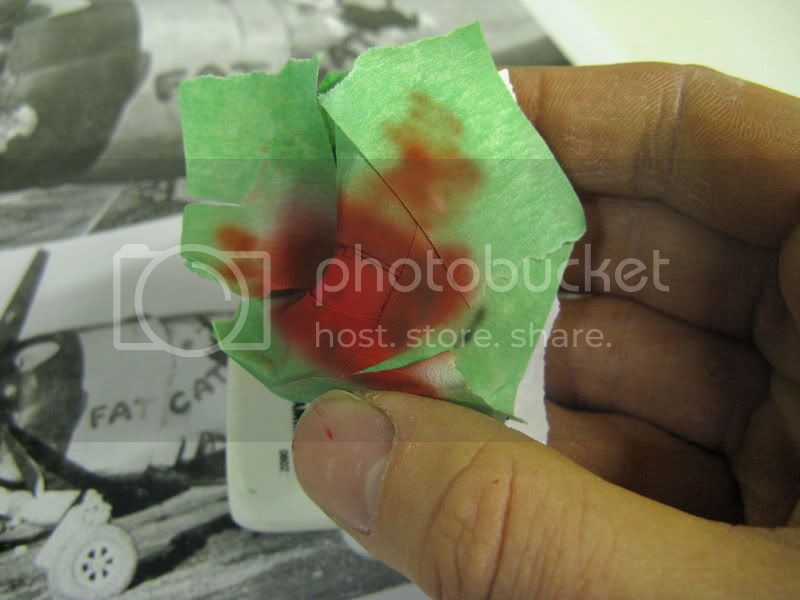
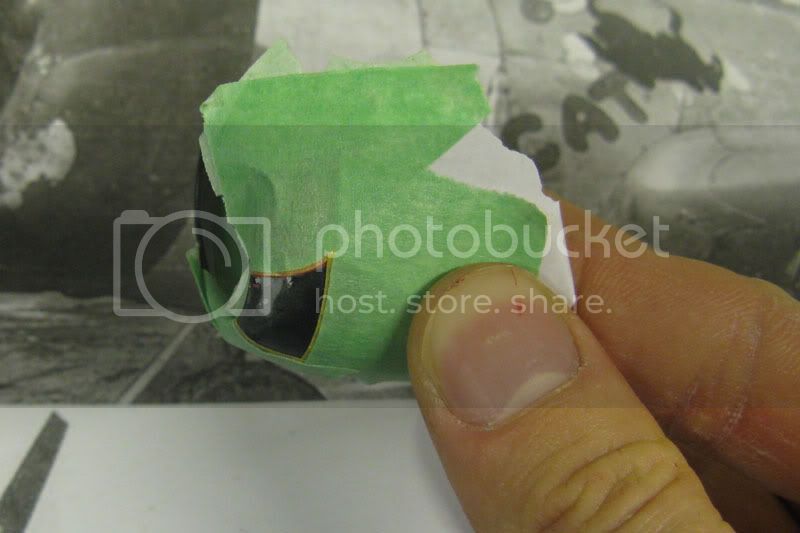
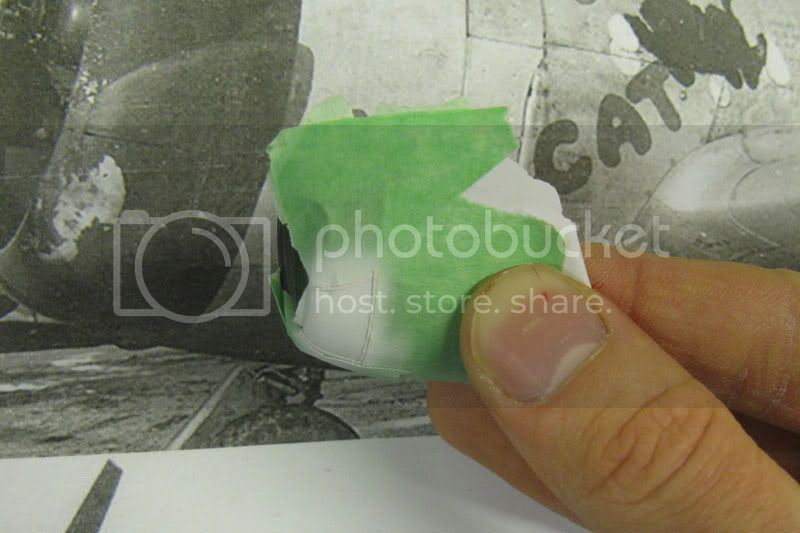
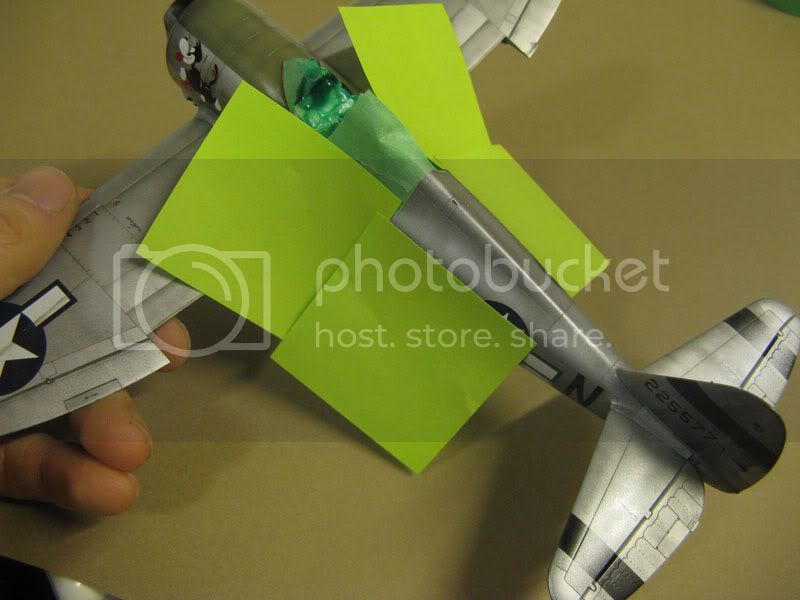
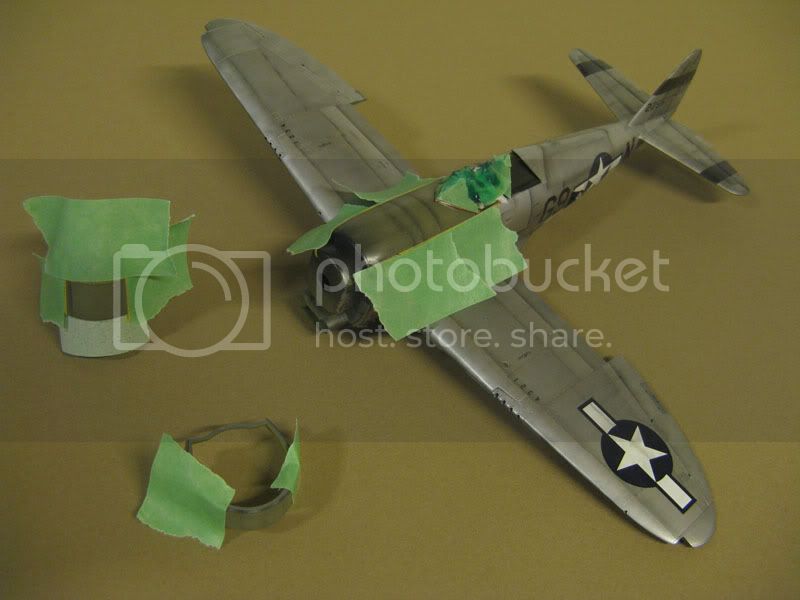
Next step was to mask the area I wanted to look as if it had paint damage as a result of whatever hit the cowling. Green painters masking tape (less sticky) and Mr. Masking Sol neo were used. The thick masking solution was dabbed on with a fine sponge.
Tamiya flat white was sprayed on to provide a uniform base for the Alclad that would cover it. Otherwise the previous colours would show through the white aluminum. The masking was removed and I was...less than impressed.
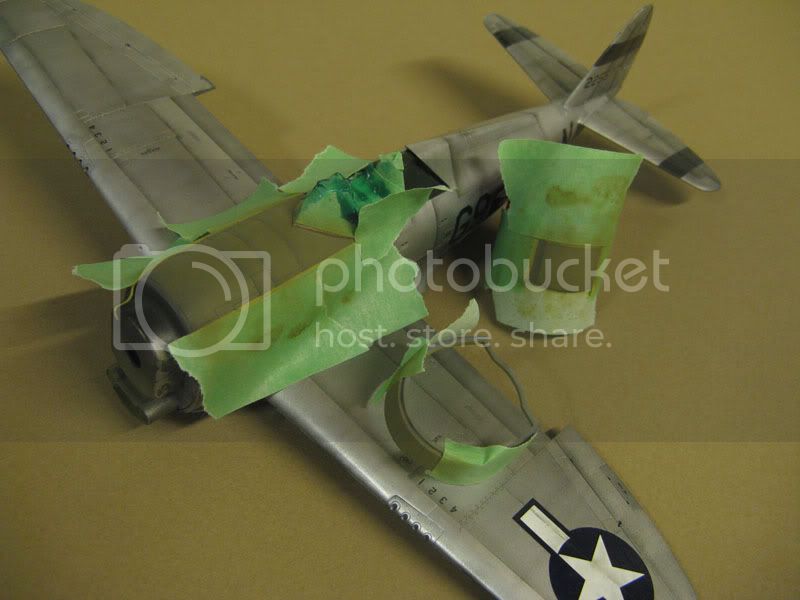
The shape of the damaged paint was all wrong and I tried to correct this with some Testors silver applied with a fine brush. Well it still looked like crap. Also the dent needed to be softened so I went to work with my fine grade sanding stick.
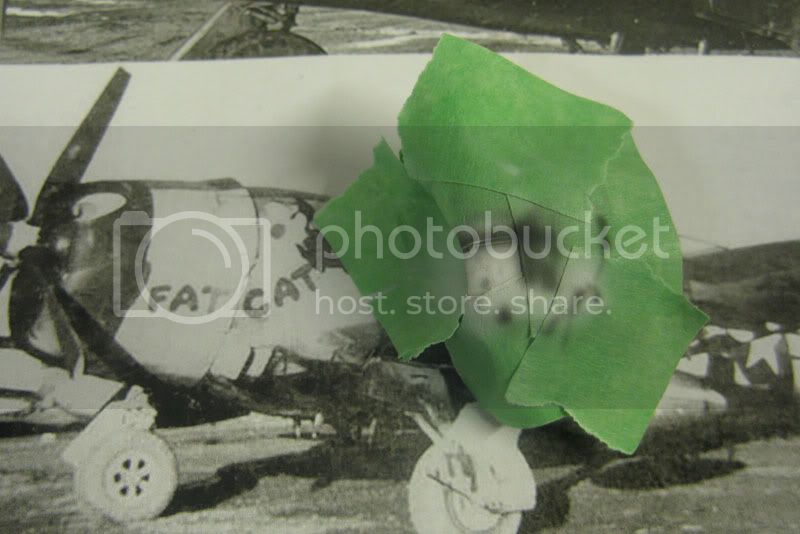
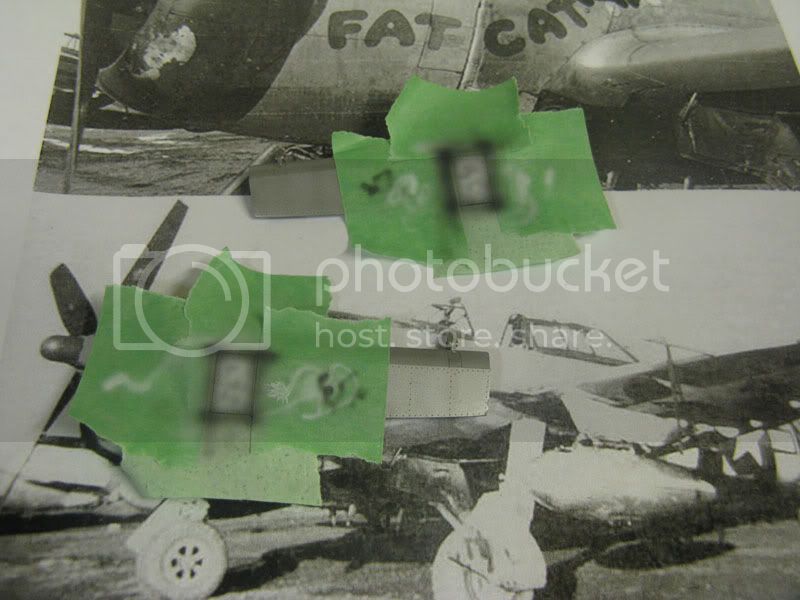
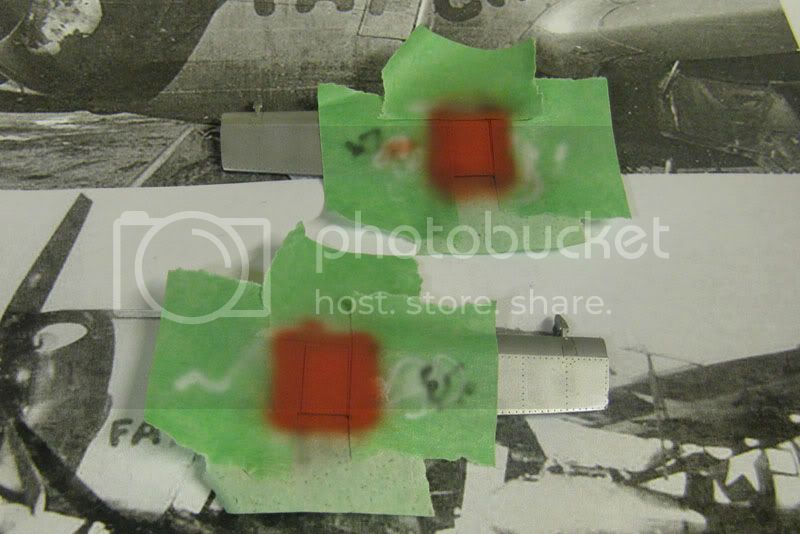
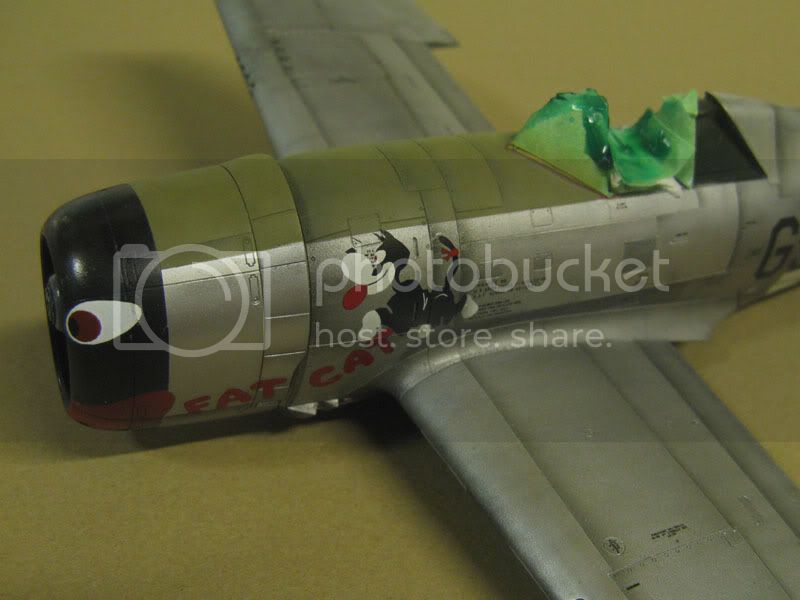
Now that the depression looked more like a dent I figured I would first have to repair the red and black paint before trying the bare aluminum again. And since I'd be painting red anyway why not paint the red "no step" areas on the flaps. This would look much better then the decals. And it just so happens that my decal sheet comes with extra "no step" markings. Perfect.
The cowl masked up and ready fro some paint. Some tongue restoration is the order of the day!
Before the red goes on I sprayed some Tamiya flat white in fine squiggly lines over the flap. Here's some more preshading for you Alex.
The cowl gets an even coat of Tamiya flat white. Red is very opaque just like the Alclad so again a base coat is required for an even appearance. I wonder what caused the large splash marks on the landing gear doors? Was someone sloppy while painting the d-day stripes? Who knocked over the bucket!
Some preshading with Tamiya NATO black. This is by far my single favorite paint of all time. It has so many uses that I use it on every model I build. The preshading is applied along panel lines. On the flaps, more fine squiggly lines. Only this time they are NATO black instead of white.
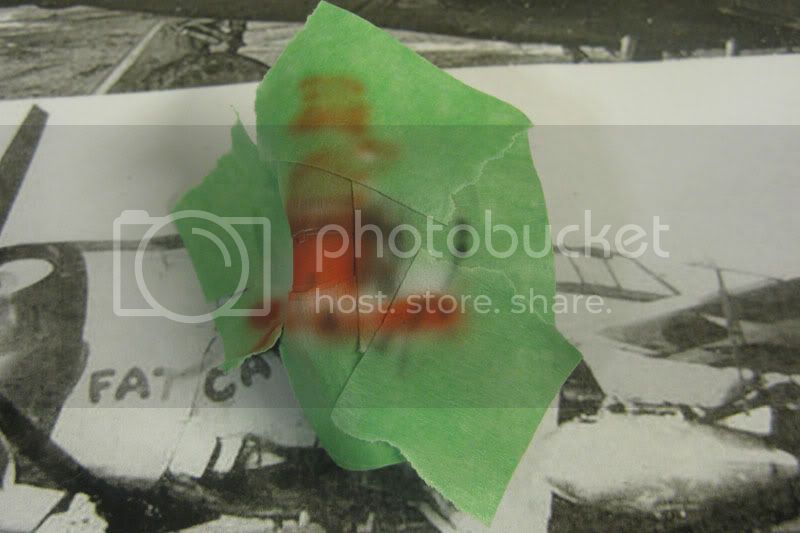
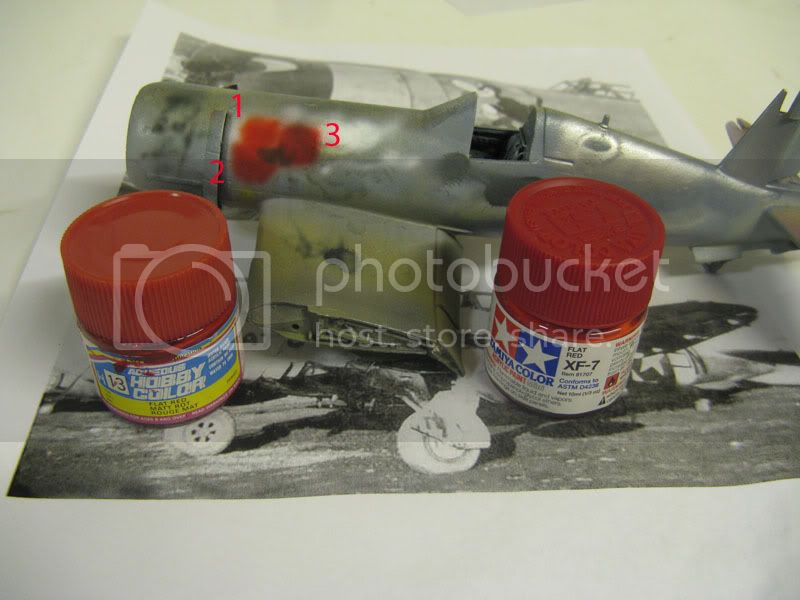
Now onto the red. Since I am re-painting only part of the tongue this will need to match the rest of the already red tongue. So I will re-paint the tongue in a similar fashion to before. By building up the colur with several coats of paint. The first coat is a thin layer of TamiyaXF-7 flat red. This actually is a very orangey-red colour.
This was also sprayed over the flaps.
Next. A mix of Tamiya XF-7 plus Gunze H-13 flat red. The Gunze Aqueous red is much darker with a hint of purple to it. These are mixed together in roughly equal amounts.

The flaps also received this mix and the masking was than removed. I didn't want the red on the flaps to match the red on the cowl. At least not an exact match. Just to provide some subtle variety.
I had to be careful not to pull up the decals already on the cowl. Some paper was stuck to the tape to help prevent this.
A final mix of red consisted of approximately two thirds Gunze H13 and one third Tamiya XF-7.
I think it came out pretty close.
Here is a comparison of the three red paints I used, sprayed on my trusty Tamiya Corsair. Always ready to take some colour for the team.
Well that's where I'm at. The black will be repaired next but that'll be a cake walk compared to the red. Then I make another attempt at replicating Fat Cat's damaged paint.
If any of you followed my tank build this past year you'll know it seems I rarely get something right the first time. Guess it's back to the paint booth for me.
Matt
So this is the cowling after it's been attacked by my Dremel with a fine round bit.
Next step was to mask the area I wanted to look as if it had paint damage as a result of whatever hit the cowling. Green painters masking tape (less sticky) and Mr. Masking Sol neo were used. The thick masking solution was dabbed on with a fine sponge.
Tamiya flat white was sprayed on to provide a uniform base for the Alclad that would cover it. Otherwise the previous colours would show through the white aluminum. The masking was removed and I was...less than impressed.
The shape of the damaged paint was all wrong and I tried to correct this with some Testors silver applied with a fine brush. Well it still looked like crap. Also the dent needed to be softened so I went to work with my fine grade sanding stick.
Now that the depression looked more like a dent I figured I would first have to repair the red and black paint before trying the bare aluminum again. And since I'd be painting red anyway why not paint the red "no step" areas on the flaps. This would look much better then the decals. And it just so happens that my decal sheet comes with extra "no step" markings. Perfect.
The cowl masked up and ready fro some paint. Some tongue restoration is the order of the day!
Before the red goes on I sprayed some Tamiya flat white in fine squiggly lines over the flap. Here's some more preshading for you Alex.
The cowl gets an even coat of Tamiya flat white. Red is very opaque just like the Alclad so again a base coat is required for an even appearance. I wonder what caused the large splash marks on the landing gear doors? Was someone sloppy while painting the d-day stripes? Who knocked over the bucket!
Some preshading with Tamiya NATO black. This is by far my single favorite paint of all time. It has so many uses that I use it on every model I build. The preshading is applied along panel lines. On the flaps, more fine squiggly lines. Only this time they are NATO black instead of white.
Now onto the red. Since I am re-painting only part of the tongue this will need to match the rest of the already red tongue. So I will re-paint the tongue in a similar fashion to before. By building up the colur with several coats of paint. The first coat is a thin layer of TamiyaXF-7 flat red. This actually is a very orangey-red colour.
This was also sprayed over the flaps.
Next. A mix of Tamiya XF-7 plus Gunze H-13 flat red. The Gunze Aqueous red is much darker with a hint of purple to it. These are mixed together in roughly equal amounts.
The flaps also received this mix and the masking was than removed. I didn't want the red on the flaps to match the red on the cowl. At least not an exact match. Just to provide some subtle variety.
I had to be careful not to pull up the decals already on the cowl. Some paper was stuck to the tape to help prevent this.
A final mix of red consisted of approximately two thirds Gunze H13 and one third Tamiya XF-7.
I think it came out pretty close.
Here is a comparison of the three red paints I used, sprayed on my trusty Tamiya Corsair. Always ready to take some colour for the team.
Well that's where I'm at. The black will be repaired next but that'll be a cake walk compared to the red. Then I make another attempt at replicating Fat Cat's damaged paint.
If any of you followed my tank build this past year you'll know it seems I rarely get something right the first time. Guess it's back to the paint booth for me.
Matt
f1matt
Joined: August 13, 2006
KitMaker: 1,021 posts
AeroScale: 184 posts
Posted: Friday, November 28, 2008 - 03:21 PM UTC
Fresh from the spray booth again. It's time to fix the black portion of the cowl. First mask off the tongue.
Spray on some flat white.
Pre shade with NATO black.
Spray Tamiya flat black. And cover all preshading.
Time to watch some Anime and let the paint dry. And decide how to replicate the bare aluminum. With better results this time.
Matt
Spray on some flat white.
Pre shade with NATO black.
Spray Tamiya flat black. And cover all preshading.
Time to watch some Anime and let the paint dry. And decide how to replicate the bare aluminum. With better results this time.
Matt
RickLawler
Joined: October 22, 2008
KitMaker: 48 posts
AeroScale: 7 posts
Posted: Saturday, November 29, 2008 - 10:58 AM UTC
Well, that looked like a load of S#!ts and Giggles!
I was thinking "Good Job" on the first dent/damage attempt. But Nooooooo, not you! Lets just repaint the whole darn thing and try again!
Hell Ya, Matt. You have the patience of a Zen Master, my friend.
Nothing short of awesome.
Rick
(who fixed his avatar - thanks)
I was thinking "Good Job" on the first dent/damage attempt. But Nooooooo, not you! Lets just repaint the whole darn thing and try again!
Hell Ya, Matt. You have the patience of a Zen Master, my friend.
Nothing short of awesome.
Rick
(who fixed his avatar - thanks)
f1matt
Joined: August 13, 2006
KitMaker: 1,021 posts
AeroScale: 184 posts
Posted: Saturday, November 29, 2008 - 04:12 PM UTC
Quoted Text
But Nooooooo, not you! Lets just repaint the whole darn thing and try again!

Well... otherwise it just wouldn't be me.
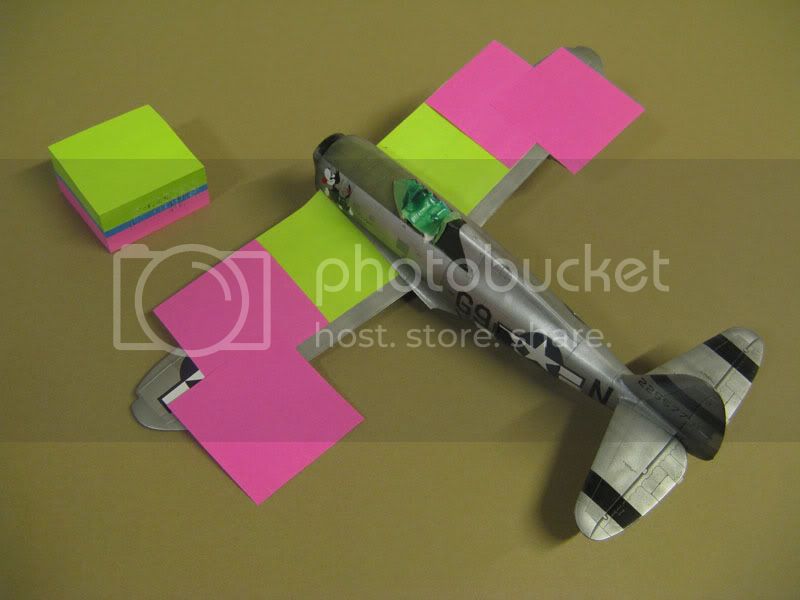
I promised you some weathering today so here it is. Now since I work around 737's all day and night I have plenty of opportunities to look at how working planes weather. They aren't warbirds but planes are planes. I often look at the panel lines. These are very inconsistent on the real thing and do not weather evenly. Some panel lines don't collect dirt and are almost invisible. Others are almost completely black. Even in a small area each panel line can look different. One interesting bit of weathering I noticed is how dirt often feathers back from a panel. Usually pulled in the direction of the airflow over the panel. And not always in areas that I would expect. I thought it would be fun to add some "feathered dirt" to several panels on my T-bolt.
I've masked the aircraft with post-it notes. These are easy to use and aren't very sticky. This is important as I haven't laid down a clear coat yet over the decals.
Next at a low pressure I spray a thin mix of Tamiya NATO black along the panel line. I love this paint.
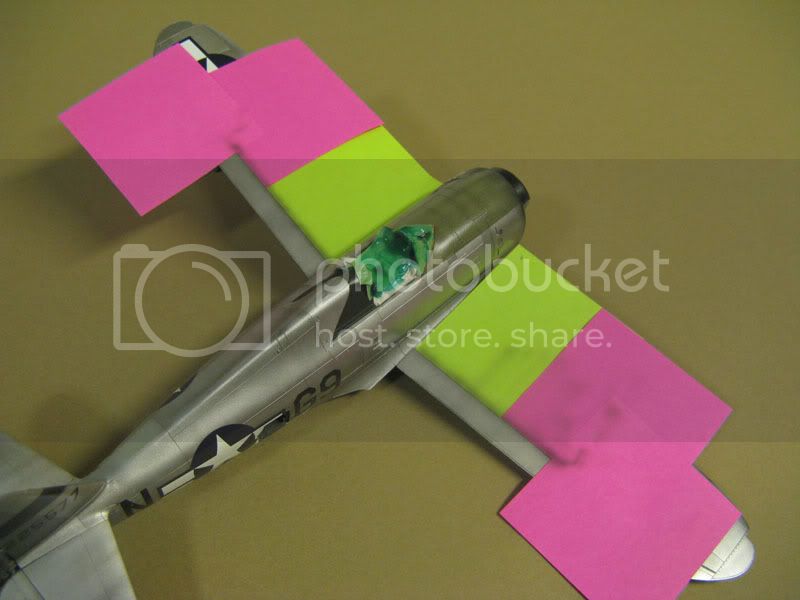
Pull up the masks and presto. Easy weathering.
Well don't stop there! Keep going!
Remove the masking again.

Tee-hee. This is fun. A few more panel lines were masked off on both wings and given some paint. To add some subtle streaks a large brush was first dipped into the Tamiya thinner. The excess thinner was removed and the brush pulled across the model in the direction of the airflow.
Whoops. Need to make sure the masks actually line up with the panel lines.
The weathering on the star and bar will need some touch up work later. If this picture were zoomed in you'd see the weathering doesn't quite line up properly. 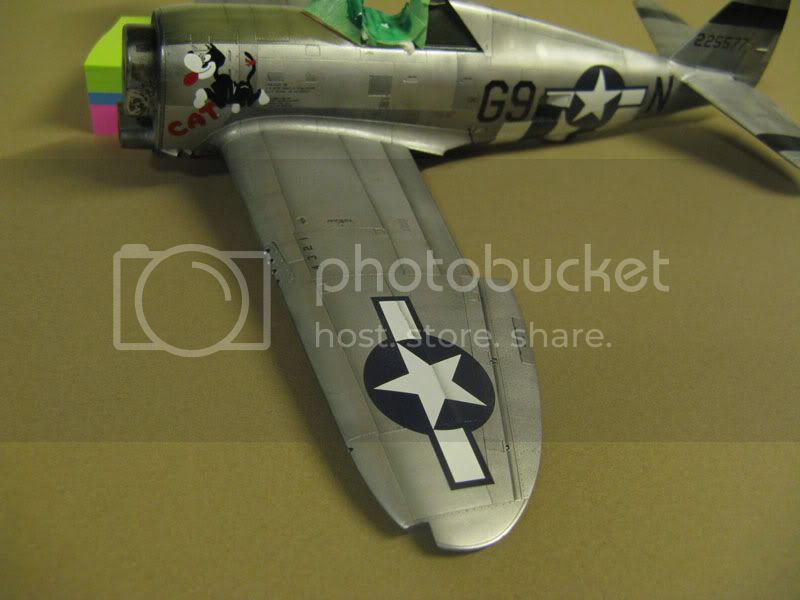
Now onto the fuselage. Painters masking tape was used on tight curves.
Uuuuuhh. That's just a little bit darker than I'd like actually. This is supposed to be relatively subtle. If it were closer to the engine I'd accept it. But that's a few feet west from this spot. It's easy to get excited and over do this treatment.
I'll fix that later.
Some panels ont he tail were sprayed next. All control surface hinges also received some attention from the airbrush.
More work on the fuselage.
Some overall shots.
Although not pictured, the cowl did get some panels sprayed too.
To fix that rather dark panel feathering just behind the cockpit, the area was re-masked and a light layer of Alclad dark aluminum toned down the weathering. That's lookin' better.
She's starting to look like she works for a living.
Matt
GVoakes
Joined: September 04, 2007
KitMaker: 193 posts
AeroScale: 32 posts
Posted: Saturday, November 29, 2008 - 04:21 PM UTC
Spray thinned Nato Black for weathering!?!
Where'd you pick that trick up? That looks amazing!
Where'd you pick that trick up? That looks amazing!
f1matt
Joined: August 13, 2006
KitMaker: 1,021 posts
AeroScale: 184 posts
Posted: Saturday, November 29, 2008 - 04:29 PM UTC
Thanks Grant. I think that one came from a Model Railroad magazine. Except they used Polly S "grimy black". NATO black is almost identical. A good grimy / dirty colour.
I forgot to mention. The weathering on the anti glare panels look slightly overdone to my eyes. I think I'll go over that area with a thin coat of OD to get it back under control.
Matt
I forgot to mention. The weathering on the anti glare panels look slightly overdone to my eyes. I think I'll go over that area with a thin coat of OD to get it back under control.
Matt

DAK66
Joined: April 28, 2006
KitMaker: 286 posts
AeroScale: 45 posts
Posted: Sunday, November 30, 2008 - 02:39 AM UTC
Nice work Matt it 's almost as if your using a color modulation technique i like it thanks for the SBS .
chukw1
Joined: November 28, 2007
KitMaker: 817 posts
AeroScale: 729 posts
Posted: Sunday, November 30, 2008 - 06:59 AM UTC
Excellent airbrushing skills, Matt!

f1matt
Joined: August 13, 2006
KitMaker: 1,021 posts
AeroScale: 184 posts
Posted: Sunday, November 30, 2008 - 10:08 AM UTC
Thanks Doug. I guess it is similar to modulation. The NATO black does give the panels a more 3-d look in places.
Thanks "BIG" Chuck. The airbrush was back to work today.
Looking back at the original photos of the Cat I noticed that around the exhaust waste gate is a long panel. This panel appears to be darker than the surrounding panels. A look at a good colour photo from the era also shows a P-47 with the same dark panel. In the colour photo the panel also has a slight brownish tinge to it. Probably from all that exhaust pouring out.
The panel was masked off on both sides.
A mix of (2/3) Model Master burnt metal and (1/3) Model Master earth gray was lightly sprayed over the panels. Yes this does cover the red exhaust. But I figure it would be easier to re-paint later than to mask now.
Now something I wanted to fix since yesterday was the weathering on the olive drab anti-glare. It just stood out far too much. The olive drab was masked off and sprayed a custom mix colour. This was made up from Tamiya khaki drab XF-51, Tamiya NATO green XF-67, Tamiya buff XF-51 and finally Aircraft Colors3041 US OD 41 faded.
Before
After
The new OD mix was lightly and unevenly sprayed over the upper surfaces of the cowl, cowl flaps and the upper fuselage. This slowly reduced the weathering. I didn't want to eliminate it completely. This also flattended out the OD. Took away all the sublte colour variations and shading. To restore some life into the drab panel a very thin, darker OD mix was randomly sprayed on. Next a lighter version of the base coat was applied in the same manner. And finally to bring it all together a light dusting of the base coat was sprayed over the whole anti-glare panel on all three parts.
Now to figure out that dent on the cowl than apply some panel shading to the bottom of this bird.
Matt
Thanks "BIG" Chuck. The airbrush was back to work today.
Looking back at the original photos of the Cat I noticed that around the exhaust waste gate is a long panel. This panel appears to be darker than the surrounding panels. A look at a good colour photo from the era also shows a P-47 with the same dark panel. In the colour photo the panel also has a slight brownish tinge to it. Probably from all that exhaust pouring out.
The panel was masked off on both sides.
A mix of (2/3) Model Master burnt metal and (1/3) Model Master earth gray was lightly sprayed over the panels. Yes this does cover the red exhaust. But I figure it would be easier to re-paint later than to mask now.
Now something I wanted to fix since yesterday was the weathering on the olive drab anti-glare. It just stood out far too much. The olive drab was masked off and sprayed a custom mix colour. This was made up from Tamiya khaki drab XF-51, Tamiya NATO green XF-67, Tamiya buff XF-51 and finally Aircraft Colors3041 US OD 41 faded.
Before
After
The new OD mix was lightly and unevenly sprayed over the upper surfaces of the cowl, cowl flaps and the upper fuselage. This slowly reduced the weathering. I didn't want to eliminate it completely. This also flattended out the OD. Took away all the sublte colour variations and shading. To restore some life into the drab panel
a very thin, darker OD mix was randomly sprayed on. Next a lighter version of the base coat was applied in the same manner. And finally to bring it all together a light dusting of the base coat was sprayed over the whole anti-glare panel on all three parts. Now to figure out that dent on the cowl
than apply some panel shading to the bottom of this bird.Matt
lampie
#029
Joined: December 23, 2005
KitMaker: 6,249 posts
AeroScale: 3,270 posts
Posted: Sunday, November 30, 2008 - 10:30 AM UTC
This just gets better and better!!
Nige
Nige
 |

WEB HOSTING BY


Copyright ©2021 AeroScale and Kitmaker Network, a subsidiary of Silver Star Enterprises
All Rights Reserved. Please read our Conditions of Use and Privacy Policy.
All Rights Reserved. Please read our Conditions of Use and Privacy Policy.