Air Campaigns
Want to start or join a group build? This is where to start.
Paparazzi Club
PolarBear
_VISITCOMMUNITY
Västra Götaland, Sweden
Joined: February 23, 2005
KitMaker: 820 posts
AeroScale: 629 posts
Posted: Tuesday, September 30, 2008 - 09:25 AM UTC
That is one awsome Phantom, Atoplu!!!! I love the paint job! It really brings the aircraft alive!

Good to see your progress, Magnus. Maybe I'll drop by at C-4 Open (when is it?).

Cheers! // PolarBear
SGTJKJ
#041
_VISITCOMMUNITY
Kobenhavn, Denmark
Joined: July 20, 2006
KitMaker: 10,069 posts
AeroScale: 3,788 posts
Posted: Tuesday, September 30, 2008 - 10:01 PM UTC

Quoted Text

That is one awsome Phantom, Atoplu!!!! I love the paint job! It really brings the aircraft alive!


I fullt agree. Another stunning aircraft for your collection, Ayhan!

Thanks for sharing
Phantom2
_VISITCOMMUNITY
Östergötland, Sweden
Joined: April 18, 2006
KitMaker: 708 posts
AeroScale: 678 posts
Posted: Wednesday, October 01, 2008 - 05:57 AM UTC
Ayhan!

That is one really nice Phantom!

I really like the "shading" you did to the paintwork, it´s hard to believe it´s only 1/72!

Good work, mate!

Cheers!

Stefan E
Phantom2
_VISITCOMMUNITY
Östergötland, Sweden
Joined: April 18, 2006
KitMaker: 708 posts
AeroScale: 678 posts
Posted: Wednesday, October 01, 2008 - 06:08 AM UTC
Hi all!

My Vigilante is idling for periods, but I have done some progress during the last few weeks.

I dressed up the landing gears with some wire as braking lines, and glued them to the fuselage.


Then I added the intakes, I had to sand them a bit but I got a nearly perfect fit.


Same goes for the wings, a little sanding and the join is almost invisible.


The nose required a heavier sanding and some filler, tough.


My baby´s growing!


Cheers!

Stefan E
Nito74
_VISITCOMMUNITY
Lisboa, Portugal
Joined: March 04, 2008
KitMaker: 5,386 posts
AeroScale: 635 posts
Posted: Wednesday, October 01, 2008 - 11:35 PM UTC
I didn't take any pics, but so far the cockpit is done.
Will post some stuff on the weekend, my PC will be ready by then.
Savage
_VISITCOMMUNITY
England - East Anglia, United Kingdom
Joined: June 04, 2003
KitMaker: 1,405 posts
AeroScale: 97 posts
Posted: Thursday, October 02, 2008 - 12:58 AM UTC
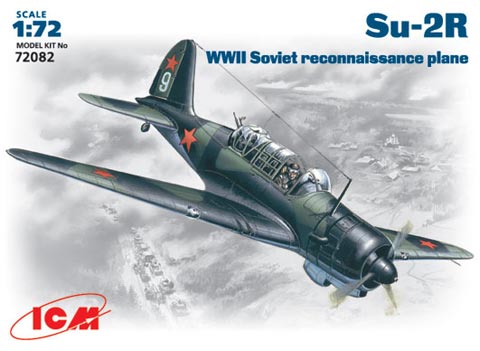
I was going to do an F-6K conversion from a 1/72 scale P-51K, but then I came across the ICM 1/72 Sukhoi Su-2R Soviet WW2 reconnaissance plane and all things changed.

The Sukhoi Su-2R is basically just the poor Su-2 fitted with a camera and as I usually end up supporting the underdog.....
SGTJKJ
#041
_VISITCOMMUNITY
Kobenhavn, Denmark
Joined: July 20, 2006
KitMaker: 10,069 posts
AeroScale: 3,788 posts
Posted: Thursday, October 02, 2008 - 08:51 PM UTC
Nice choice, Eric. This will be an interesting build to follow. Keppe us updated, please

I have made more progress on my Me 109. Painting and decalling is done. You can see more in my Me 109G-10/R2 tread HERE
Nito74
_VISITCOMMUNITY
Lisboa, Portugal
Joined: March 04, 2008
KitMaker: 5,386 posts
AeroScale: 635 posts
Posted: Wednesday, October 08, 2008 - 05:48 AM UTC
Here they are 2 pics.


Bigrip74
_VISITCOMMUNITY
Texas, United States
Joined: February 22, 2008
KitMaker: 5,026 posts
AeroScale: 2,811 posts
Posted: Wednesday, October 08, 2008 - 02:24 PM UTC
Jesper:
Nice paint job, really impressive, can you put it down in words and steps to help those of us (me) who need some help in the paint department?

Robert
SGTJKJ
#041
_VISITCOMMUNITY
Kobenhavn, Denmark
Joined: July 20, 2006
KitMaker: 10,069 posts
AeroScale: 3,788 posts
Posted: Wednesday, October 08, 2008 - 11:44 PM UTC
Thanks for the comments, Robert. Well, I simply spray painted the camouflage freehand, so there is no real trick to it. Just parctices and luck.

I have now finished my entry - the Revell Me 109G-10 modified to a R2 version with a camera. Great model except the fit of the canopy which is best left open.
The finished bird can be seen HERE
jaypee
_VISITCOMMUNITY
Scotland, United Kingdom
Joined: February 07, 2008
KitMaker: 1,699 posts
AeroScale: 1,384 posts
Posted: Sunday, October 19, 2008 - 11:16 PM UTC
Hi all going to the join the fun, (although this thread is pretty quiet) with the academy 1/72 P39.
It'll be the kit decal of Shomo's P39 with an oblique camera fitted in the radio comparment

Can't start until November, but will try and make a quick build while the wife and boys are
away and the builders are knocking half the house down. The things one must do to get
a bit of bench time.

jaypee
_VISITCOMMUNITY
Scotland, United Kingdom
Joined: February 07, 2008
KitMaker: 1,699 posts
AeroScale: 1,384 posts
Posted: Monday, November 03, 2008 - 11:49 AM UTC
Made a start on Snooks' cockpit and dry fitting tonight. Looks to be a nice kit so far. Will try and fashion a K-25 camera for the radio compartment. Anyone any references as to how these were fitted? I can only find a picture of one being removed. There is an underwing camera too but a clear part is provided for that.
PolarBear
_VISITCOMMUNITY
Västra Götaland, Sweden
Joined: February 23, 2005
KitMaker: 820 posts
AeroScale: 629 posts
Posted: Wednesday, November 05, 2008 - 05:40 AM UTC
Sorry if this thread is a tad quiet, JayPee! I've been busy building a cruiser over at modelshipwrights (my first ship - it's a whole different ball game!) and I haven't given this campaign the attention it deserves. My bad!

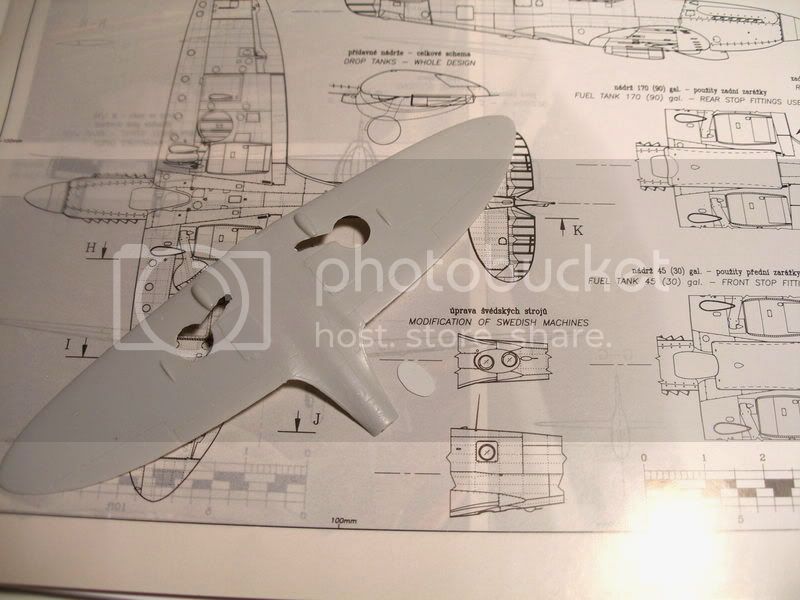
But that is going to change!!! I've actually started my own project (a Swedish Spitfire Pr Mk XIX*) today!!!
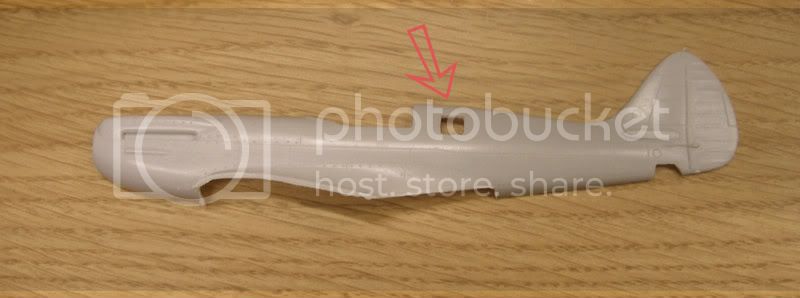


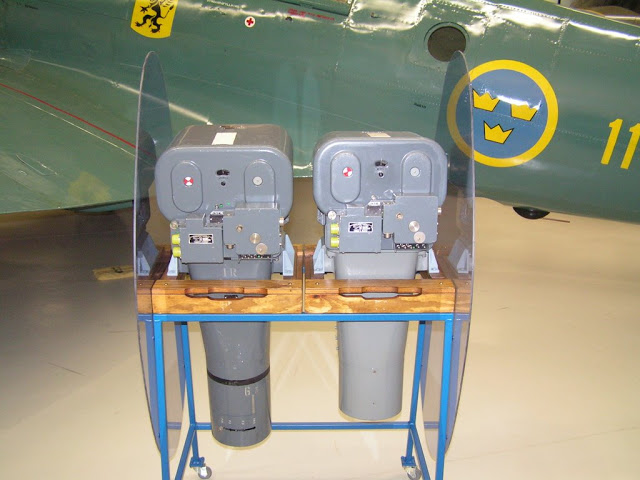
Not much work yet - I've only opened up the camera hatch! - but still one of the toughest "starts" that I've had! I simply couldn't choose which model to build!! The details of the Fujimi kit are so crisp and nice, yet so wrong (wrong panel lines, blisters, humpback etc). The Aviation Heritage kit is not crisp at all, the plastic is "a little strange", there is less detail etc... I've finally opted for the latter one. There is going to be some kit-bashing, and I'm going to try to adapt some PE from Part (should be used with Academy Spitfire Mk XIV), some resin parts from Quickboost (they have a prop that must be better than the one in the kit), etc. And then some scratch building (pressurisation chamber, SKa12 camera etc)!

Sorry, but I can't help you with the camera fitting in the P39.

Jesper - You've done one heck of a job on the Me 109! For those who have not yet looked at the separate thread, please do!

Looking forward to more updates from everyone!

Cheers! // PolarBear!

* For a while, I was seriously considering building the very long nosed Israeli Mirage IIICJ reconnaissance version - it even has a camera - but I was very discouraged having recenty built one AML Mirage kit!
Removed by original poster on 11/06/08 - 02:19:42 (GMT).
Greenhornet2
_VISITCOMMUNITY
California, United States
Joined: July 21, 2008
KitMaker: 51 posts
AeroScale: 37 posts
Posted: Wednesday, November 05, 2008 - 02:23 PM UTC
iv signed up for this one!!!!! im leaning toword a f-5b(reconicence p-38) maby somthing like this?
SGTJKJ
#041
_VISITCOMMUNITY
Kobenhavn, Denmark
Joined: July 20, 2006
KitMaker: 10,069 posts
AeroScale: 3,788 posts
Posted: Thursday, November 06, 2008 - 01:27 AM UTC
Thanks for the comment, Bjoern. I appreciate it. I am looking forward to see your Spit take shape.

Seth, very good choice for the campaign. The fork tailed devel is an interesting aircraft.
PolarBear
_VISITCOMMUNITY
Västra Götaland, Sweden
Joined: February 23, 2005
KitMaker: 820 posts
AeroScale: 629 posts
Posted: Thursday, November 06, 2008 - 03:26 AM UTC
Excellent choice, Seth! Welcome to the campaign!

I saw that decals for "Stinky 2" are available from Carpena in both 1/72 and 1/48. Personally, I've been looking at the new 1/72 F-5E Lightning Reconnaissance from Dragon! Looks like there is finally an ok kit of this classic aircraft!

Cheers! // PolarBear!
vanize
_VISITCOMMUNITY
Texas, United States
Joined: January 30, 2006
KitMaker: 1,954 posts
AeroScale: 1,163 posts
Posted: Thursday, November 06, 2008 - 11:47 AM UTC

Quoted Text

iv signed up for this one!!!!! im leaning toword a f-5b(reconicence p-38) maby somthing like this?


I've always wanted to do one of the early F-5s in the haze paint like that one.

let me know if you want any info on the haze paint scheme - it's more complicated than one originally thinks.

Greenhornet2
_VISITCOMMUNITY
California, United States
Joined: July 21, 2008
KitMaker: 51 posts
AeroScale: 37 posts
Posted: Thursday, November 06, 2008 - 06:04 PM UTC
yes some info on the paint would be nice. but i have to dissasemble the kits first. some would say they are built but i dont think they are. i got them at a yard sale for a buck and someone had the brite idea to build them with a hot glue gun so i will see what i can do. i will try to post pics of them so you guys can see what im up agenst.
jaypee
_VISITCOMMUNITY
Scotland, United Kingdom
Joined: February 07, 2008
KitMaker: 1,699 posts
AeroScale: 1,384 posts
Posted: Thursday, November 06, 2008 - 08:51 PM UTC
Jeez seth talk about making life difficult although I like your style getting the hobby done on the cheap.
Esp with the credit crunch Well I made a little progress last night while finishing off another build.
Just the interior and wing wells given a base coat of H31. The box shows this as zinc chromate but
Bell had their own colour so this is a close a match as I had in the paint box. H75 is probably the best match
but it's going to get a wash and highlights anyway 31 is close enough for me

The wheel wells are nice details but he front wheel well is really spartan any idea where to get walk
around shots of the inside of this? Be a shame to have the rear wheel nice and the front one rubbish.

and this was supposed to be a quick build
Greenhornet2
_VISITCOMMUNITY
California, United States
Joined: July 21, 2008
KitMaker: 51 posts
AeroScale: 37 posts
Posted: Friday, November 07, 2008 - 02:29 AM UTC
well acutully it is not that difficult to remove hot glue. all you need is a hobby knife,sandpaper,a saw blade and a pair of needel nose. i will write a whole build log here in the near futuer telling how to do this the right way
PolarBear
_VISITCOMMUNITY
Västra Götaland, Sweden
Joined: February 23, 2005
KitMaker: 820 posts
AeroScale: 629 posts
Posted: Friday, November 07, 2008 - 05:19 AM UTC
Looking forward to reading you log, Seth (although I'm not sure that I'll ever try to disassemble a kit before building it)!

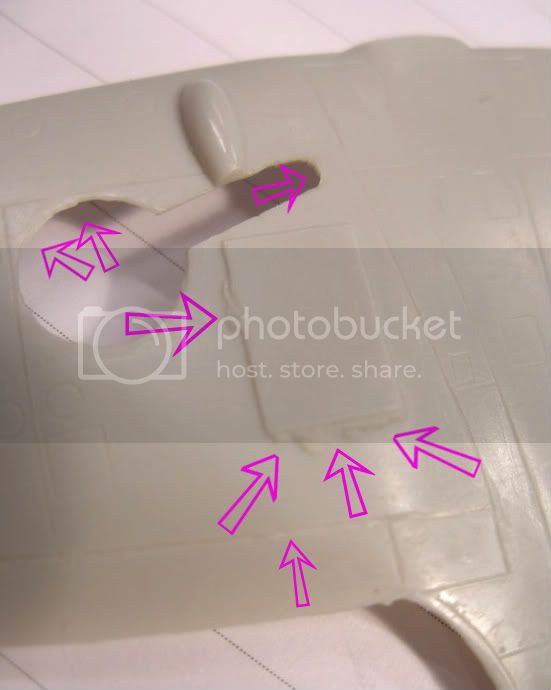
Lately, I've been building some rather bad (read difficult) kits. The AML Mirage proved to be a tough nut, and it looks like the Spitfire that I've just started is going to demand a lot of work! Having examined the parts for the interior, I finally decided yesterday to order the Aires Spitfire XIV resin cockpit. As I understand, there are very few changes to make for an Pr XIX. Waiting for it to arrive with the mailman, I have started to "clean up" the fuselage and wing parts.

The outline of the wings etc seems ok compared to the drawings. It's not until you get closer that the problems begin...

This is new to me! The plastic is rather hard, and there are blobs of flash (I'm not even sure this is called "flash") in the most unexpected places (inside the panellines!) I'm using x-acto blades and scribing tools to remove this, but it is very difficult to get nice.

I comfort myself with the thought that sooner or later, this is going to be a model of one of the most beautiful aircrafts ever!

Cheers! // PolarBear

Ps. Look what nice reference pictures that I found today!!!! Now I'm happy again!
SGTJKJ
#041
_VISITCOMMUNITY
Kobenhavn, Denmark
Joined: July 20, 2006
KitMaker: 10,069 posts
AeroScale: 3,788 posts
Posted: Sunday, November 09, 2008 - 09:29 PM UTC
Wow, you are in for a tough job on that one, Bjoern. Really strange place to have "flash" or "blobs of plastic". The mould must be really worn or damaged.

Looking forward to see it getting into the right shape.
jaypee
_VISITCOMMUNITY
Scotland, United Kingdom
Joined: February 07, 2008
KitMaker: 1,699 posts
AeroScale: 1,384 posts
Posted: Sunday, November 09, 2008 - 10:04 PM UTC
Yeah that is a nasty one. I had similar with the flaps my 109 aces build but there was a resin replacement in the kit which was nice. My temptation would be to sand the whole thing off and glue down a sheet of the right thickness in place. Good luck!

Made some progress with snooks 2 at the weekend. Painted and washed and detailed the cockpit with some leftover belts and pedals. Removed the throttle from the port side door. Boxed in the front wheel well with evergreen and closed her up. I'll take some snaps tonight of the interior, you can still see quite a lot through the open car door.
Really nice little kit this. I'm going to scratch a K-25 camera and leave it on the seat or the port wing root.
But first clean up the build seams and detail and paint the front wheel well. And no I didn't forget the fore ballast, but I almost did
jaypee
_VISITCOMMUNITY
Scotland, United Kingdom
Joined: February 07, 2008
KitMaker: 1,699 posts
AeroScale: 1,384 posts
Posted: Monday, November 10, 2008 - 08:52 PM UTC
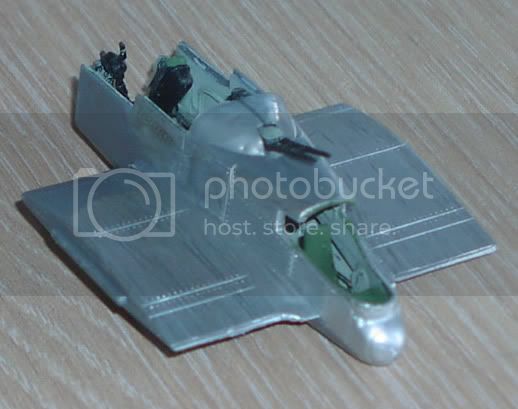
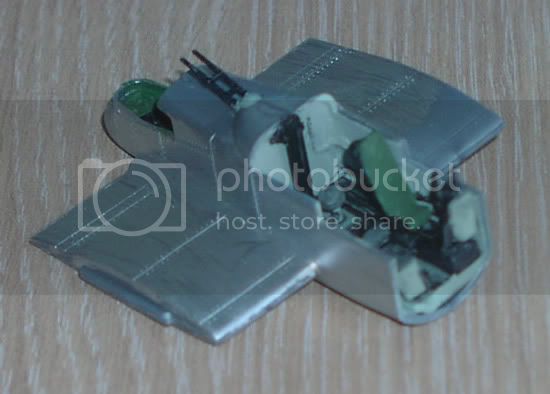
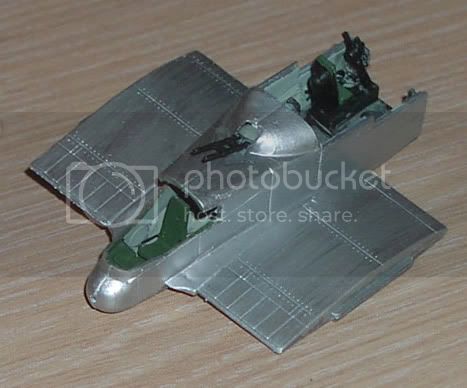
Here's the snaps. Did half an hour last night before bed and got the wings on. I'll attack the gaps tomorrow.
P-39QP-39QP-39Q

P-39QP-39Q