Moselle, France
Joined: May 15, 2005
KitMaker: 5,653 posts
AeroScale: 4,347 posts
Posted: Tuesday, July 22, 2008 - 08:11 PM UTC
Hi all!
Thanks for the encouragements...

Some more progress to report: the tailplane assembly is glued in place as well as the wings. Of course I used home made locators for more strength. I used CA Gel glue to fix the parts...
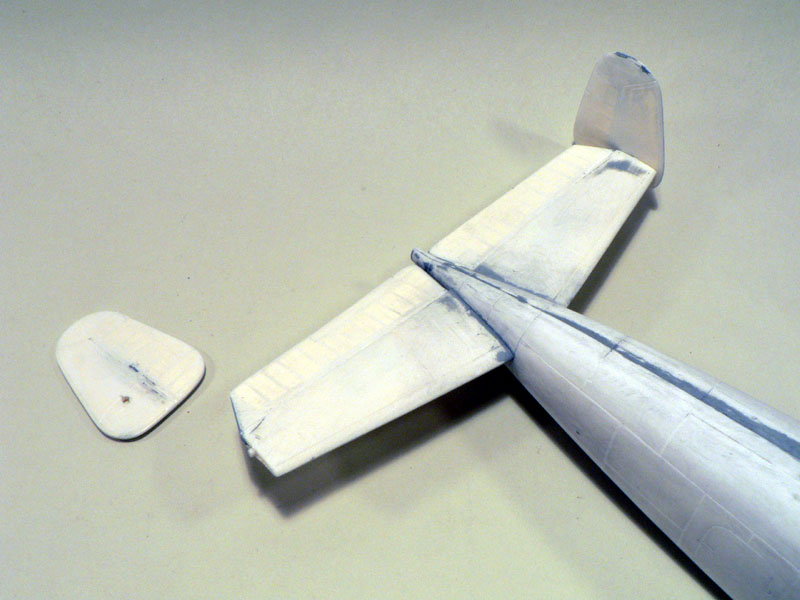
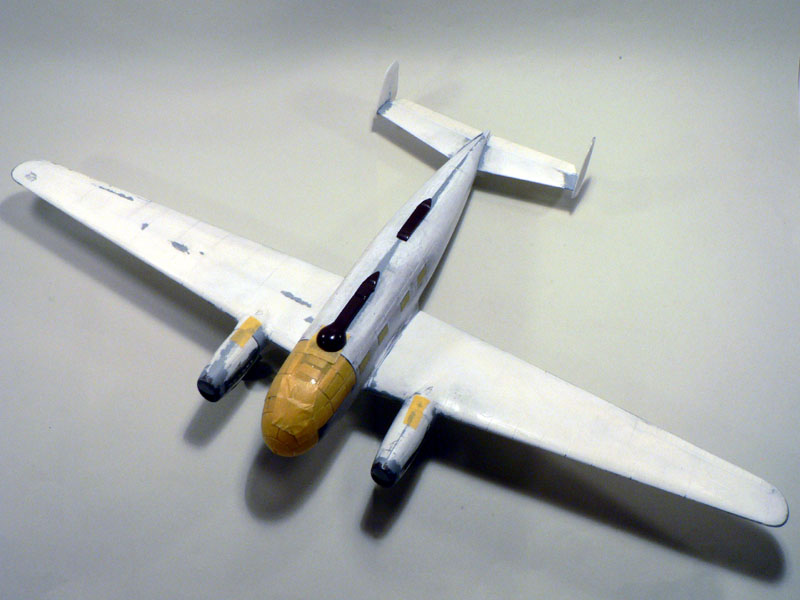
I couldn't resist and test fitted some pieces. It's the first time the kit looks like a plane!
Jean-Luc

Better think one hour and build five minutes...
Than think five minutes and build an hour!
Uusimaa, Finland
Joined: March 30, 2004
KitMaker: 2,845 posts
AeroScale: 1,564 posts
Posted: Wednesday, July 23, 2008 - 12:55 PM UTC
Welcome back. How was your vacation?
It's looking like an airplane now. Sweet!

So the kit didn't include any kind of engine-related parts, despite the openings in the cowlings? Those parts you made really hit the spot. Gizmology at it's finest; they're not so visible parts that people will start nitpicking if they're not 100% spot on, but they certainly will notice if the cowlings are void.
Moselle, France
Joined: May 15, 2005
KitMaker: 5,653 posts
AeroScale: 4,347 posts
Posted: Thursday, July 24, 2008 - 04:57 AM UTC
Hi all!
Eetu, "Gizmology" is indeed the appropriate word for the engines...

I used another method to do the landing bay covers. The kit only provides the vacu parts which are really basic. I thinned them down and added an internal structure with small evergreen stripes. But since the inner side of the covers was embossed on the real aircraft, I vacuformed the parts. Then I did a "sandwich": metal sheet, double sided tape and vacuform part. The result can be seen on the last picture...

Jean-Luc

Better think one hour and build five minutes...
Than think five minutes and build an hour!
West Virginia, United States
Joined: December 18, 2006
KitMaker: 1,121 posts
AeroScale: 1,063 posts
Posted: Thursday, July 24, 2008 - 05:47 AM UTC
Excellent workmanship. You're producing a very inspirational build. I can't wait to see the bird finished.
Mark
Joined: May 21, 2007
KitMaker: 77 posts
AeroScale: 76 posts
Posted: Thursday, July 24, 2008 - 07:55 AM UTC
Excellent work Jean-Luc, I always learn from your threads. I really like the idea for placing the windows with clear tape! Great stuff.
Thanks,
Allen
Moselle, France
Joined: May 15, 2005
KitMaker: 5,653 posts
AeroScale: 4,347 posts
Posted: Saturday, July 26, 2008 - 02:17 AM UTC
Hi all!
Thanks for the kind words...
I wasn't happy with the gear bay covers so I used another method and made new ones...

I think the result is better.
Jean-Luc

Better think one hour and build five minutes...
Than think five minutes and build an hour!
Merlin
 Senior Editor
#017
United Kingdom
Joined: June 11, 2003
KitMaker: 17,582 posts
AeroScale: 12,795 posts
Posted: Saturday, July 26, 2008 - 08:49 AM UTC
Hi Jean-Luc
It is better (not that the original was bad! ) Stunning work as usual throughout!

All the best
Rowan

BEWARE OF THE FEW...
As I grow older, I regret to say that a detestable habit of thinking seems to be getting a hold of me. - H. Rider Haggard
Grumpyoldman
 _ADVISOR
Florida, United States
Joined: October 17, 2003
KitMaker: 15,338 posts
AeroScale: 836 posts
Posted: Saturday, July 26, 2008 - 03:28 PM UTC
I'm surprised I missed this thread,
You certainly are doing a splendid job there Jean Luc.
Character is what you do when no one is looking.
Few things are harder to put up with than a good example.- Mark Twain
Make yourself an honest man, and then you may be sure that there is one less scoundrel in the world.--Thomas Carlyle
Moselle, France
Joined: May 15, 2005
KitMaker: 5,653 posts
AeroScale: 4,347 posts
Posted: Wednesday, July 30, 2008 - 07:19 AM UTC
Hi all!
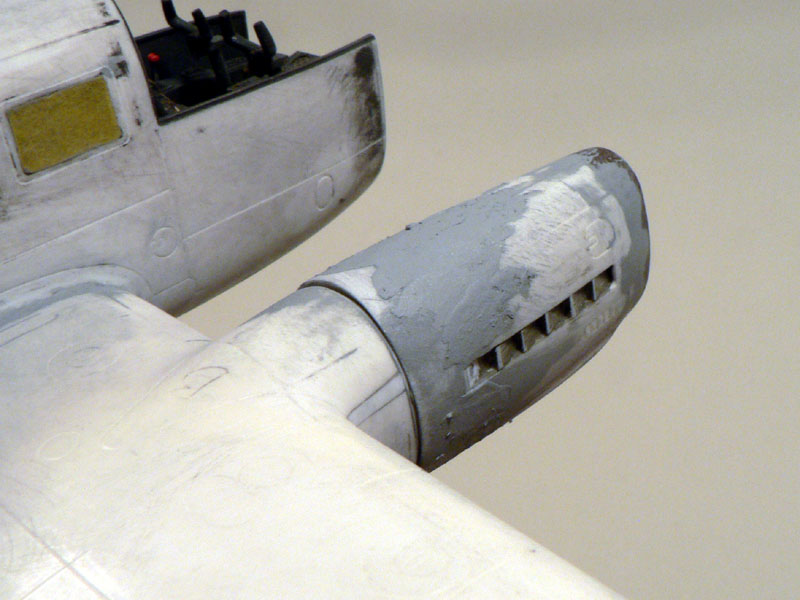
I'm still working on my Siebel. I'm currently finishing the engine pods. I used fine strips of plastic to create a small step which was present on the original plane. This will also allow me to glue the nacelles at the very end, once the paintjob is done...

Jean-Luc

Better think one hour and build five minutes...
Than think five minutes and build an hour!
Germany
Joined: September 07, 2005
KitMaker: 5,609 posts
AeroScale: 5,231 posts
Posted: Wednesday, July 30, 2008 - 07:24 AM UTC
Ohh boy, "Auftragen und Polieren" like karate kid. You should start training your little boy to get rid of the tedious tasks


cheers
Steffen
DULCE ET DECORUM EST PRO HOBBY MORI
Moselle, France
Joined: May 15, 2005
KitMaker: 5,653 posts
AeroScale: 4,347 posts
Posted: Wednesday, July 30, 2008 - 07:34 AM UTC
Hi Steffen!
"Karate Kid"? That's indeed something I should remember for my son later...

But I must confess that applying filler to a model and sanding pieces to shape is something I like to do. I must be a bit masochistic...

Jean-Luc

Better think one hour and build five minutes...
Than think five minutes and build an hour!
Germany
Joined: September 07, 2005
KitMaker: 5,609 posts
AeroScale: 5,231 posts
Posted: Wednesday, July 30, 2008 - 07:42 AM UTC
Quoted Text
But I must confess that applying filler to a model and sanding pieces to shape is something I like to do. I must be a bit masochistic... 
I knew it ... some of us are challenged putting an easy kit like eduards Bf 110 together and others - like you - do not even bother such baby toys and build their own ... like the Bugatti

hehehe BTW is that project cancelled?
I somehow like the Siebel 204 .. hope there will be an IM model one day
In case it did not become clear:
I really like your Siebelcheers
Steffen
DULCE ET DECORUM EST PRO HOBBY MORI

#041
Kobenhavn, Denmark
Joined: July 20, 2006
KitMaker: 10,069 posts
AeroScale: 3,788 posts
Posted: Wednesday, July 30, 2008 - 07:28 PM UTC
Looks great, Jean-Luc.
Very nice gear bay covers. As usual the finish is very smooth - or looks like it is going to be after you attacked the kit with sanding.

Looking forward to see more

Campaign'oholic - 252+ campaigns completed
Indiana, United States
Joined: May 14, 2007
KitMaker: 3,117 posts
AeroScale: 2,270 posts
Posted: Thursday, July 31, 2008 - 02:55 PM UTC
"Treat 'em Rough", Current Builds--Wingnut Rumpler
I am frequently seen with blood shot eyes from staying up past my nap time to get the right colour scheme on my latest WWI model?
Moselle, France
Joined: May 15, 2005
KitMaker: 5,653 posts
AeroScale: 4,347 posts
Posted: Friday, August 01, 2008 - 07:34 AM UTC
Hi all!
Thanks for the kind words... but we should wait until the kit is finished. To me the model doesn't looks very nice for the moment. I think there is almost as much filler on it as plastic. Here is how it looks like at the moment...
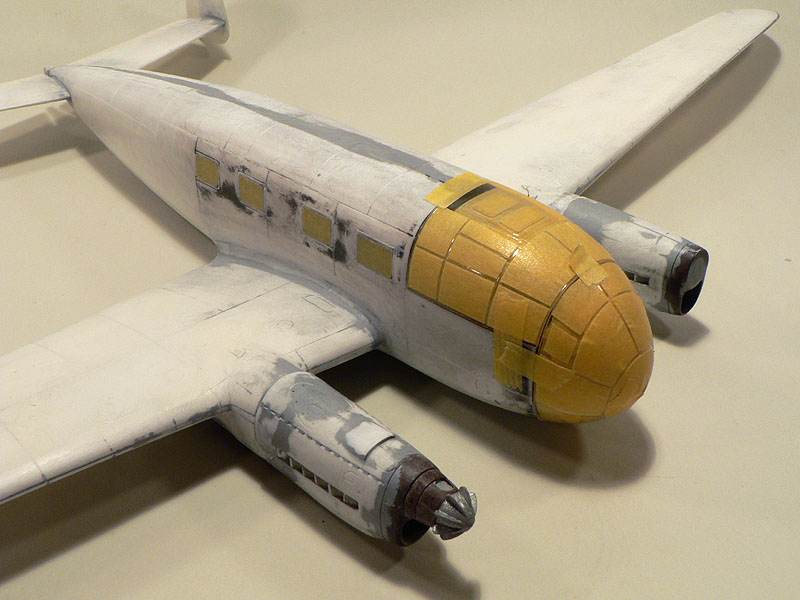
It's about time I reach the painting stage...

Jean-Luc

Better think one hour and build five minutes...
Than think five minutes and build an hour!
Ontario, Canada
Joined: September 15, 2005
KitMaker: 1,901 posts
AeroScale: 133 posts
Posted: Friday, August 01, 2008 - 07:42 AM UTC
Hi Jean-Luc,
A fantastic build you have going, possibly the most challenging modelling I've seen,... and yet you manage to make it look so effortless.
thanks for sharing it with us,
Frank

Currently working on:
350th Hasegawa Nagato
350th Hasegawa Isokaze
Moselle, France
Joined: May 15, 2005
KitMaker: 5,653 posts
AeroScale: 4,347 posts
Posted: Saturday, August 02, 2008 - 09:36 AM UTC
Quoted Text
A fantastic build you have going, possibly the most challenging modelling I've seen,...
Hi Frank!
You've never seen a Fonderie Miniature kit then...

Here is how I made the replacement parts for the propeller cone and the propeller blades. I used a resin I found in a DIY store. The resin is composed of a sirup like liquid and... powder!? Mixed together it hardens and is suppose to look like metal. For small parts it works quite well...
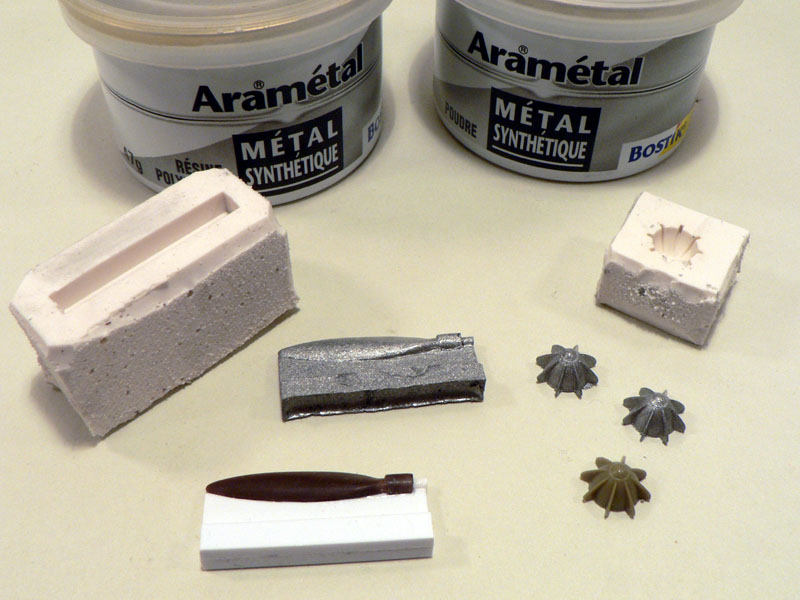
I reshaped one propeller blade of the kit and decided to do copies rather than do each one. This way the four blades will be exactly the same.
Jean-Luc

Better think one hour and build five minutes...
Than think five minutes and build an hour!
West Virginia, United States
Joined: December 18, 2006
KitMaker: 1,121 posts
AeroScale: 1,063 posts
Posted: Saturday, August 02, 2008 - 10:25 AM UTC
Jean Luc,
Excellent work!! I like how you overcame the prop spinner troubles you'd been having on this build. I watch it closely and enjoy it a lot. Thanks for sharing.
Mark
Moselle, France
Joined: May 15, 2005
KitMaker: 5,653 posts
AeroScale: 4,347 posts
Posted: Wednesday, August 13, 2008 - 05:52 AM UTC
Hi all!
Sorry for not showing some progress on the Siebel lately but I had to dig a 10 m long trench in front of my house because we've been connected to the gas network. It was more work than I thought...
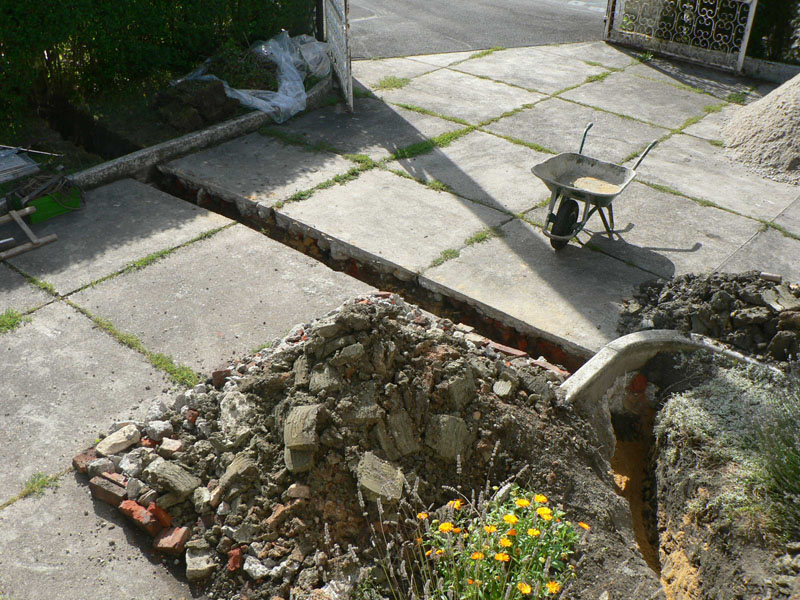
However, from time to time, I worked on my model and I'm happy to report that I almost reached the painting stage. It's only a question of hours now...

As you can see, I glued most of the glazing in place and scratchbuilt some doors for the astrodome. I don't know if this was a feature of the real plane but it was the only solution I found to hide the empty space inside the fuselage. Let's call this "artistic licence". Now a little sanding here and there and the model will be ready for some coats of paint... at last!

Jean-Luc

Better think one hour and build five minutes...
Than think five minutes and build an hour!
Germany
Joined: September 07, 2005
KitMaker: 5,609 posts
AeroScale: 5,231 posts
Posted: Wednesday, August 13, 2008 - 06:51 AM UTC
Hi J-L
a nice trench you have there


. I am glad you did not paint yet ... it is just wrong to paint roundels on this aircraft

cheers
Steffen
DULCE ET DECORUM EST PRO HOBBY MORI
Cork, Ireland
Joined: July 26, 2007
KitMaker: 292 posts
AeroScale: 265 posts
Posted: Wednesday, August 13, 2008 - 11:22 AM UTC
Nice work on the trench, the model's also really good

Moselle, France
Joined: May 15, 2005
KitMaker: 5,653 posts
AeroScale: 4,347 posts
Posted: Wednesday, August 13, 2008 - 09:59 PM UTC
Hi all!
Thanks for the kind words about the trench.

Here's one more picture, just to show you I wasn't joking yesterday when I said I was about to reach the painting stage...
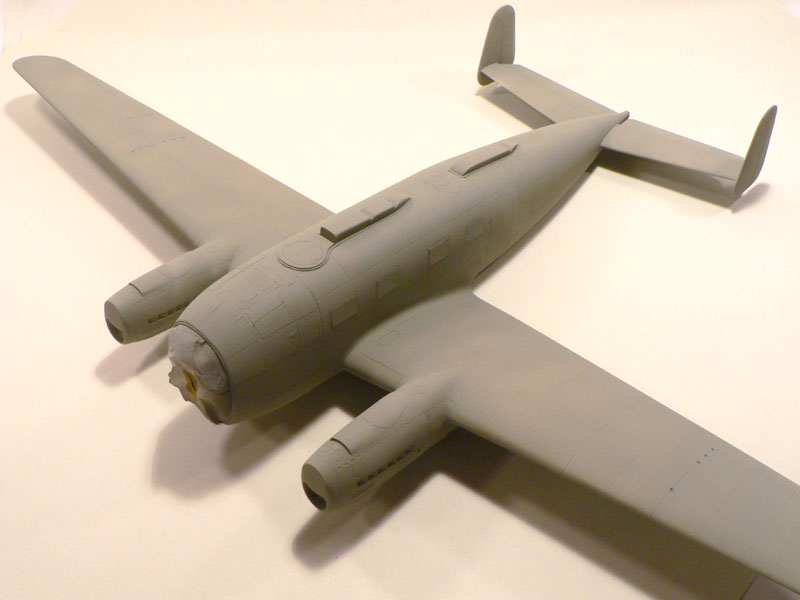
I sprayed the model in grey and after some minor sanding here and there It is now ready to receive it's camouflage scheme.

Jean-Luc

Better think one hour and build five minutes...
Than think five minutes and build an hour!
Germany
Joined: September 07, 2005
KitMaker: 5,609 posts
AeroScale: 5,231 posts
Posted: Wednesday, August 13, 2008 - 10:36 PM UTC
Hi Captain
it looks very, very nice!!!!!
Can I persuade you to do it in Blindflugschule markings instead of your sacrilegious plans ... pleeeeeeeeeeeez
greets
Steffen
DULCE ET DECORUM EST PRO HOBBY MORI
England - North West, United Kingdom
Joined: November 13, 2003
KitMaker: 2,240 posts
AeroScale: 743 posts
Posted: Thursday, August 14, 2008 - 01:12 AM UTC
Hi Jean-Luc
looking really nice.
Can't wait to see the camo on.
I've always liked the Siebel and this looks like its shaping up to be a cracker.
Cheers
Peter

PS Nice trench work.
Wolf Number 9.
A Wing Waggle to modellers everywhere.
Madness is the normal condition, interupted only by spells of sanity.
Moselle, France
Joined: May 15, 2005
KitMaker: 5,653 posts
AeroScale: 4,347 posts
Posted: Thursday, August 14, 2008 - 04:37 AM UTC
Hi Steffen and Peter!
No Steffen, I won't change my mind. If you look closely at the picture I've posted previously, I already drilled the holes for the wing antennas...

I've just finished the pre shading...

Jean-Luc

Better think one hour and build five minutes...
Than think five minutes and build an hour!


