Early Aviation
Discuss World War I and the early years of aviation thru 1934.
Eduard's Fokker Dr.I
Merlin
Staff MemberSenior Editor
AEROSCALE
#017
_VISITCOMMUNITY
United Kingdom
Joined: June 11, 2003
KitMaker: 17,582 posts
AeroScale: 12,795 posts
Posted: Monday, July 21, 2008 - 09:01 PM UTC
Hi again Stephen

Is there any evidence whether the underwing crosses on this Dr.1 were originally on a white field (which was then maybe overpainted, along with the others), or applied directly on the undersurface colour?

All the best

Rowan
JackFlash
_VISITCOMMUNITY
Colorado, United States
Joined: January 25, 2004
KitMaker: 11,669 posts
AeroScale: 11,011 posts
Posted: Monday, July 21, 2008 - 09:09 PM UTC

Quoted Text

Hi again Stephen Is there any evidence whether the underwing crosses on this Dr.1 were originally on a white field (which was then maybe overpainted, along with the others), or applied directly on the undersurface colour? All the best Rowan


All undersurface - lower wing cross fields came from the factory were clear doped linen. Most of these were overpainted light blue at the depot just like the olive on the upper surface cross fields.
jaypee
_VISITCOMMUNITY
Scotland, United Kingdom
Joined: February 07, 2008
KitMaker: 1,699 posts
AeroScale: 1,384 posts
Posted: Monday, July 21, 2008 - 09:12 PM UTC
That streaking is really impressive and looks spot on comparing it to the photos. What is the process you use to achieve this?
Merlin
Staff MemberSenior Editor
AEROSCALE
#017
_VISITCOMMUNITY
United Kingdom
Joined: June 11, 2003
KitMaker: 17,582 posts
AeroScale: 12,795 posts
Posted: Monday, July 21, 2008 - 11:17 PM UTC
Many thanks JP

I airbrushed a base-coat on linen-colour (I've used WEM's Elfenbein enamel) and, once it was dry, I applied a gloss-coat to seal it and make sure the next stage in painting didn't have an easy surface to stick to. Then I applied the streaking (WEM RLM 81) with a small flat brush - the gloss-coat underneath helped the paint to streak. My first effort looked too even, so I went back over it a few hours later building up the "banding effect" where the original painter would have refreshed his brush and applied streaks until the paint grew thin, and so on...


Quoted Text

All undersurface - lower wing cross fields came from the factory were clear doped linen. Most of these were overpainted light blue at the depot just like the olive on the upper surface cross fields.


Thanks Stephen - I'll apply a slightly different blue on the panels to represent overpainting in the field with different dope stock.

All the best

Rowan
jaypee
_VISITCOMMUNITY
Scotland, United Kingdom
Joined: February 07, 2008
KitMaker: 1,699 posts
AeroScale: 1,384 posts
Posted: Tuesday, July 22, 2008 - 03:20 AM UTC
Thanks Rowan, sounds deceptively straightforward
Merlin
Staff MemberSenior Editor
AEROSCALE
#017
_VISITCOMMUNITY
United Kingdom
Joined: June 11, 2003
KitMaker: 17,582 posts
AeroScale: 12,795 posts
Posted: Tuesday, July 22, 2008 - 08:29 AM UTC

Quoted Text

Thanks Rowan, sounds deceptively straightforward


As if he's waiting in the wings, let me introduce Cockupus Maximus! Remember those Roman history lessons we all fell asleep in, well he was the guy who got too smug too soon!

And he's alive and well at Castle Aeroscale! Spot the mistake:


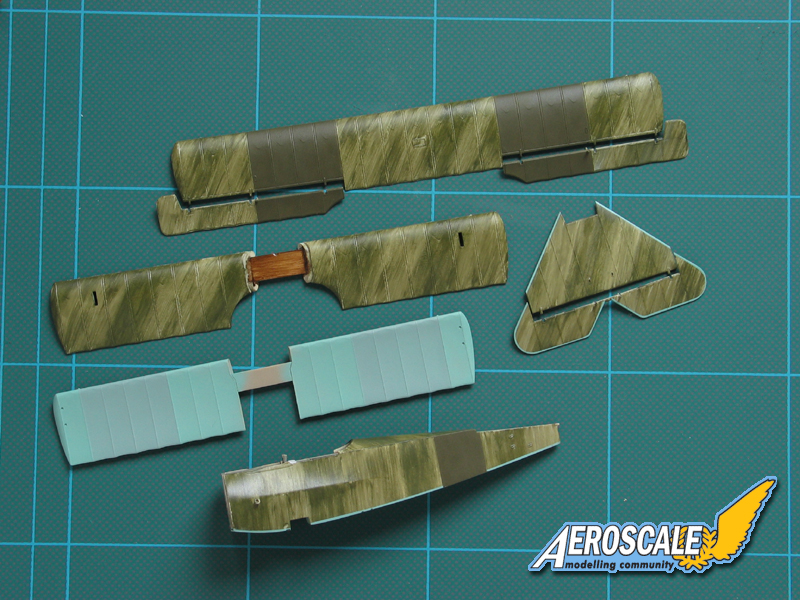
I'd applied a re-painted patch on the top wing, a re-painted patch under the bottom wing, got a nice little border of the undersurface colour around the fuselage and tail... and, just as I thought it was almost ready to put it all together - I realised I'd measured the fuselage patch from the wrong point!

It's way too far back! Andy said I'm speed building... I guess he's right - I'm making mistakes at double-time too!

Pride before the fall? More likely surprise before the fall! Still in shock at having progressed beyond the cockpit in a build! LOL!

So... hasty repaint and, hopefully, back on track soon. I should end up being pretty good at WW1 streaking - I'll have had plenty of practice lately!

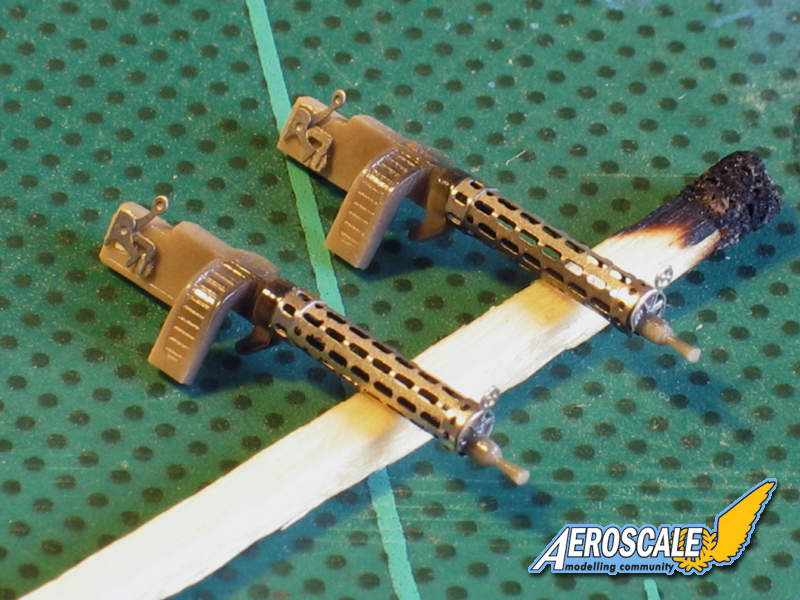
Trying to make a positive post out of a total b*lls -up - here's a look at the guns. waiting for a coat of paint:


I really like what Eduard have done this time - it's much more straightforward than their old way of asking you to simply cut off the barrels of the moulded guns. This way gives much more support - I won't go so far as saying it's foolproof, but if you have some experience of etched parts, you should have no trouble...

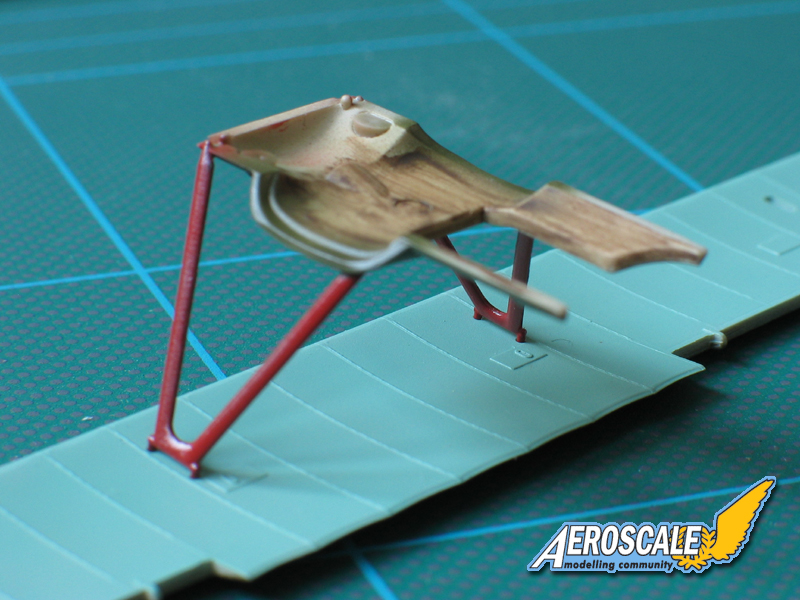
And struts: I've strayed away from the assembly sequence to use the fuselage decking and upper wing as mini-jig to get the angle sorted:


All the best

Rowan
JackFlash
_VISITCOMMUNITY
Colorado, United States
Joined: January 25, 2004
KitMaker: 11,669 posts
AeroScale: 11,011 posts
Posted: Tuesday, July 22, 2008 - 10:16 AM UTC
No worries Rowan an easy fix. Still very nicely done!
CaptainA
_VISITCOMMUNITY
Indiana, United States
Joined: May 14, 2007
KitMaker: 3,117 posts
AeroScale: 2,270 posts
Posted: Tuesday, July 22, 2008 - 11:59 AM UTC

Quoted Text

Hey Carl;

Think of it this way. White fields of the crosses were applied at the factory level. Then shortly after arrival at the depot the white fields were overpainted olive green just leaving a 10cm white border around the crosses. Then possibly the wing and fuselage was partially overpainted yellow at the unit level. Note, most of this would have been accomplished before the machine was finally assembled for duty at the unit level.


Thanks, but that is the part I did understand. It is those monochromatic photos that gets me. So, would the top wing have been covered in a semi-transparent yellow, as on the fuselage. And regarding the streaky paint that is applied, wasn't it applied with a 1" paint brush. If so, wouldn't the brush have run out of paint after just a few inches. Some of the old pictures look just like the finish Rowan has acheived. Others seem to be more random, appearing to look like random lines. Also, it seems the streaks are always perfectly parallel. Kinda makes me want to stick to the kits that have the tedious lozenge decals. Well I do have two more 1/32 Roden F.I's in the stash.

Rowan. The paint looks great. Your build is really coming along nicely. When you finish this build, you should go back and finish that D.VII. You know, the one with all the lozenge decals. Your talent does on these Early kits.
Merlin
Staff MemberSenior Editor
AEROSCALE
#017
_VISITCOMMUNITY
United Kingdom
Joined: June 11, 2003
KitMaker: 17,582 posts
AeroScale: 12,795 posts
Posted: Wednesday, July 23, 2008 - 09:48 AM UTC
Hi Carl

Sad to say (and I fear I broke Stephen's heart on this one ) - the D.VII is so spread around the un-natural distaster that I call a workroom that it's probably beyond salvage. It's not definitely a write-off, but don't hold your breath... It's so long ago, I can't even remember how/why the D.VII got shelved... a shame really.

Anyway - I'm going all out to get this one done! And I do agree on the Fokker streaking. Comparing photos, it doesn't seem to all be down to the brush running dry - some a/c show a relatively even finish with the streaks thinning after a few strokes (as you suggest) - others show the definite "banding", which I'm tempted to suggest was a deliberate effect to create a disruptive pattern.

I don't know if there were ever any official guideline or whether it was left to individual painters' "artistic choice". But there are certainly differences evident.

All the best

Rowan
Merlin
Staff MemberSenior Editor
AEROSCALE
#017
_VISITCOMMUNITY
United Kingdom
Joined: June 11, 2003
KitMaker: 17,582 posts
AeroScale: 12,795 posts
Posted: Wednesday, July 23, 2008 - 10:20 AM UTC
Hi again

Fast approaching the "point of no return" on the finish - and my doubts are growing about the infamous yellow upper wing. Wherever I find a quote from the crash report, it describes the colour scheme in some detail:

"red engine hood, red struts and wheels and the rear fuselage and the tails yellow."

but conspicuously fails to mention a yellow top wing! I just can't see how something so obvious wouldn't be listed and I can't reconcile it, unless there are other eye-witness accounts or photos of the aircraft intact.

So... it won't look as pretty, but I'm probably going to go for a standard streaked upper wing with overpainted cross fields. Plus, of course, I can always add yellow later if evidence comes to light!

All the best

Rowan
thegirl
_VISITCOMMUNITY
Alberta, Canada
Joined: January 19, 2008
KitMaker: 6,743 posts
AeroScale: 6,151 posts
Posted: Wednesday, July 23, 2008 - 02:34 PM UTC
Very nicely done Rowan , love the streaking that you have done . Can't wait to see this one finished !
SuccorPhysh
_VISITCOMMUNITY
Texas, United States
Joined: June 24, 2007
KitMaker: 82 posts
AeroScale: 81 posts
Posted: Thursday, July 24, 2008 - 02:51 AM UTC
Can I ask, what was the method you used for making the neat border line along the bottom edge of the fuselage and the outline of the elevator?
Merlin
Staff MemberSenior Editor
AEROSCALE
#017
_VISITCOMMUNITY
United Kingdom
Joined: June 11, 2003
KitMaker: 17,582 posts
AeroScale: 12,795 posts
Posted: Thursday, July 24, 2008 - 09:07 AM UTC

Quoted Text

Can I ask, what was the method you used for making the neat border line along the bottom edge of the fuselage and the outline of the elevator?


Hi Mike

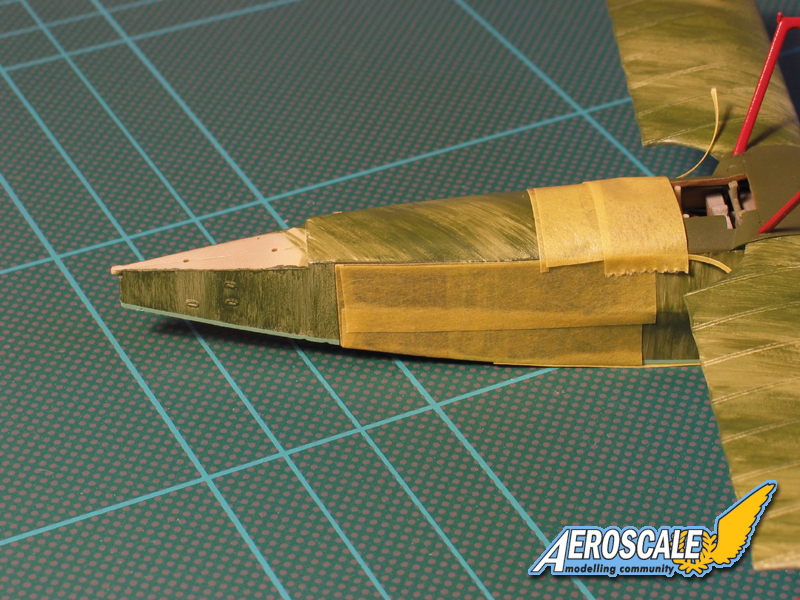
That was actually really easy, thanks to that modellers' favourite - Tamiya masking tape. I cut a thin strip and the stuff is so flexible, it was simple to make it follow tight curves such as around the elevator. Once it was in place, I filled in behind it with larger pieces of tape and latex masking.

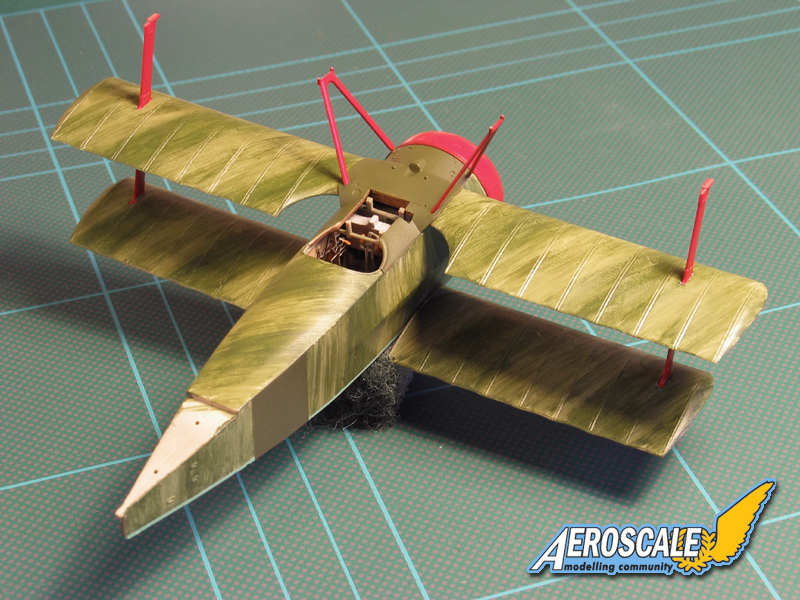
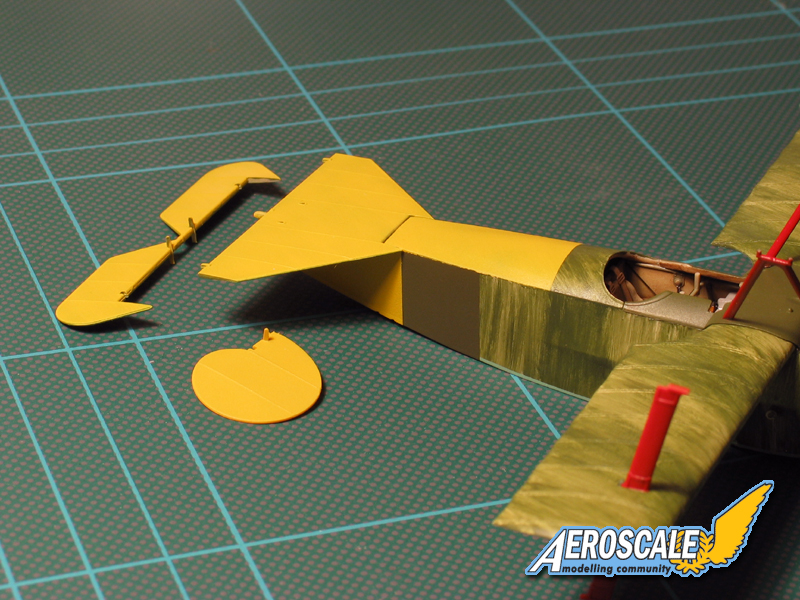
Talking of the outline etc. - I'm back on track after my c*ck-up and have repainted the rear fuselage with (hopefully! ) the cross-fields in a better position. A test fit shows this is beginning to look ominously aeroplane-shaped!
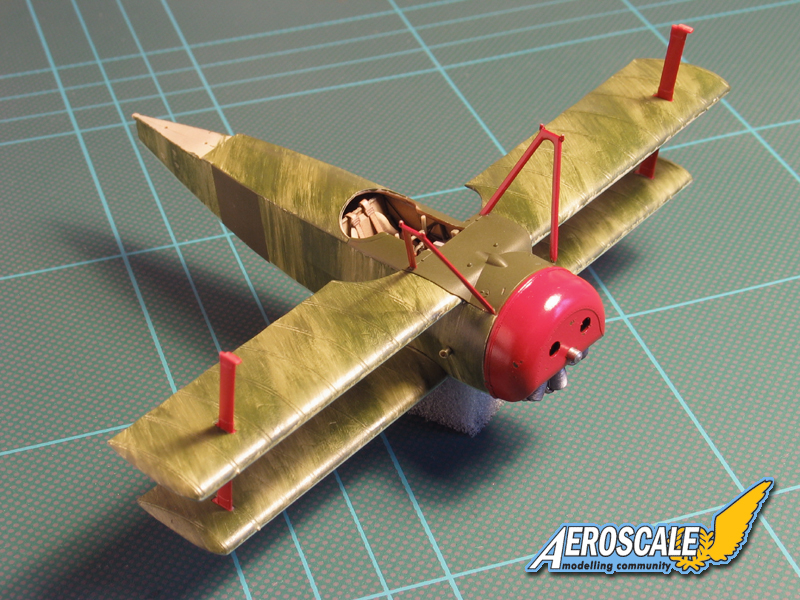


It's still at what I call the "Mr Blobby" stage! All my builds seem to go through it before shading etc. starts to pull everything together. Of course there's the yellow tail to add, which will largely obscure the streaking and outline.

The really odd thing is the colour of the streaking - I've never known a finish so susceptible to lighting conditions! In daylight it looks a brown Olive Drab, while under lamp-light it's a distinctly Grass-Green! I think my poor old digital camera is begging for me to finish this build and move on because it's totally incapable of coping with the colour, however I adjust the white-balance!

I'll be away from next week for a fortnight and I can't see me finishing this one before then, but I hope to have all the basics in place before I go...

All the best

Rowan
SuccorPhysh
_VISITCOMMUNITY
Texas, United States
Joined: June 24, 2007
KitMaker: 82 posts
AeroScale: 81 posts
Posted: Thursday, July 24, 2008 - 03:59 PM UTC
Thanksfor the explanation. I will have to give it a try.
Merlin
Staff MemberSenior Editor
AEROSCALE
#017
_VISITCOMMUNITY
United Kingdom
Joined: June 11, 2003
KitMaker: 17,582 posts
AeroScale: 12,795 posts
Posted: Friday, July 25, 2008 - 08:45 AM UTC
Hi again

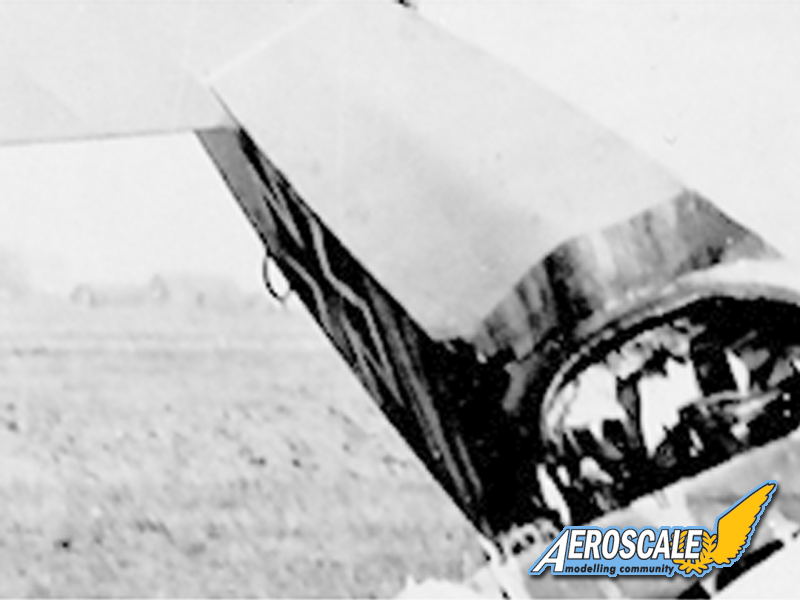
In the course of getting ready to paint the yellow rear fuselage, I downloaded Stephen's reference shot and cranked up the levels in Photoshop. My aim was to try to determine whether the fuselage cross-field was overpainted with yellow or not. Instead, I found a real surprise! The field seems to be solidly overpainted and the area ahead of it appears to have been left in its standard camouflage - not painted yellow at all:


So, my interpretation will fly in the face of all the profiles and other builds I've seen - the yellow on the top-decking will extend forward to just aft of the cockpit, but on the sides it will end at the cross-fields:


All the best

Rowan
DAK66
_VISITCOMMUNITY
Tennessee, United States
Joined: April 28, 2006
KitMaker: 286 posts
AeroScale: 45 posts
Posted: Friday, July 25, 2008 - 09:03 AM UTC
I think your right Rowan it appears to be that way in the photos your doing a great job so far keep up the good work .
JackFlash
_VISITCOMMUNITY
Colorado, United States
Joined: January 25, 2004
KitMaker: 11,669 posts
AeroScale: 11,011 posts
Posted: Friday, July 25, 2008 - 09:30 AM UTC
So it appears . . .LvR's Fokker Dr.I 454/17 was a work in progress when he crashed it?
Merlin
Staff MemberSenior Editor
AEROSCALE
#017
_VISITCOMMUNITY
United Kingdom
Joined: June 11, 2003
KitMaker: 17,582 posts
AeroScale: 12,795 posts
Posted: Friday, July 25, 2008 - 09:45 AM UTC
Cheers Mike and Stephen

Who can say? I've come at this as a WW1 "newbie" and totally open-minded - so some of the seemingly long-held preconceptions about this scheme were unknown to me. I'm going by those photos - are they really the only two references? I just don't see what others seem to have taken as fact...

I never intended my little build to be at all controversial - but it seems to be heading that way! Some people will totally hate the way I've interpreted the scheme! And I have to admit I'm disappointed - it won't be nearly as pretty as what I set on! Yellow is fast disappearing, wherever I look! And where I do see yellow, it's much denser than I'd supposed, so all that nice streaking on the tail will all but disappear..

All the best

Rowan
CaptainA
_VISITCOMMUNITY
Indiana, United States
Joined: May 14, 2007
KitMaker: 3,117 posts
AeroScale: 2,270 posts
Posted: Friday, July 25, 2008 - 10:30 AM UTC
You have raised a good point about photographic evidence and interpretations. I think it is a good choice to go with the pictures. And you are doing a great job. The streaking is fantastic.
Merlin
Staff MemberSenior Editor
AEROSCALE
#017
_VISITCOMMUNITY
United Kingdom
Joined: June 11, 2003
KitMaker: 17,582 posts
AeroScale: 12,795 posts
Posted: Friday, July 25, 2008 - 10:48 AM UTC
Hi Carl

Well, this is going to about it in terms of yellow:


I've left the faintest hint of the original finish showing through, but it's hardly evident in the photo - which matches the references.

But streaking looks fun - and there's certainly going to be a lot more of it evident compared with what I set out to paint!...

All the best

Rowan
Dwaynewilly
_VISITCOMMUNITY
New York, United States
Joined: December 15, 2006
KitMaker: 365 posts
AeroScale: 344 posts
Posted: Friday, July 25, 2008 - 12:36 PM UTC
Rowan,

Absolutely fabulous build and finishing techniques. I really like your research and your willingness to trust your own interpretation of the photographic evidence. Don't bother yourself with rocking the boat, consider it as pushing the envelope instead. If there are questions, let informed parties debate the merits and come up with a reasonable compromise. Your work helps stir the debate and can only further our understanding.

Model on, Dwayne
thegirl
_VISITCOMMUNITY
Alberta, Canada
Joined: January 19, 2008
KitMaker: 6,743 posts
AeroScale: 6,151 posts
Posted: Saturday, July 26, 2008 - 03:07 AM UTC
Rowan , Dwayne is right . You are building this airframe to your own interpretation of the aircraft as you see it . It's your model . For a newbie to WW1 you are doing on fantastic job and I'm looking forward on seeing more in the future .
Merlin
Staff MemberSenior Editor
AEROSCALE
#017
_VISITCOMMUNITY
United Kingdom
Joined: June 11, 2003
KitMaker: 17,582 posts
AeroScale: 12,795 posts
Posted: Saturday, July 26, 2008 - 08:47 AM UTC
Hi Dwayne and Terri

Thank you both for your kind remarks and encouragement. I was hoping to make a bit more progress before disappearing for a fortnight, but the usual last-minute panic before any trip is making that look unlikely!

I'll just need to make sure I can regain momentum on the build when I get back...

All the best

Rowan
JackFlash
_VISITCOMMUNITY
Colorado, United States
Joined: January 25, 2004
KitMaker: 11,669 posts
AeroScale: 11,011 posts
Posted: Saturday, July 26, 2008 - 10:21 AM UTC
Greetings all Here are several of images of the pilot we have been alluding to in this thread. Note the central image is after the crash. He wears a dental brace that helps hold his teeth forward after they collided with the Spandau gun butt / brace. Can anyone say "OUCH!"


I bet you might like to know what caused this whole issue of the crash?
thegirl
_VISITCOMMUNITY
Alberta, Canada
Joined: January 19, 2008
KitMaker: 6,743 posts
AeroScale: 6,151 posts
Posted: Saturday, July 26, 2008 - 12:33 PM UTC
Okay , that's not fair keeping a blond in spence (sp) !
What was the causing factor in the crash ?