_GOTOBOTTOM
Early Aviation
Discuss World War I and the early years of aviation thru 1934.
1/32 Roden GB 2008 SE5a - Hugh
MerlinV
_VISITCOMMUNITY
Victoria, Australia
Joined: November 26, 2006
KitMaker: 608 posts
AeroScale: 602 posts
Posted: Wednesday, November 19, 2008 - 11:22 PM UTC
Greetings,

Here is my build of the Roden 1/32 Hispano Suiza powered SE5a.


This will be built entirely according to IPMS OOB rules (Mainly because I need a quick build).

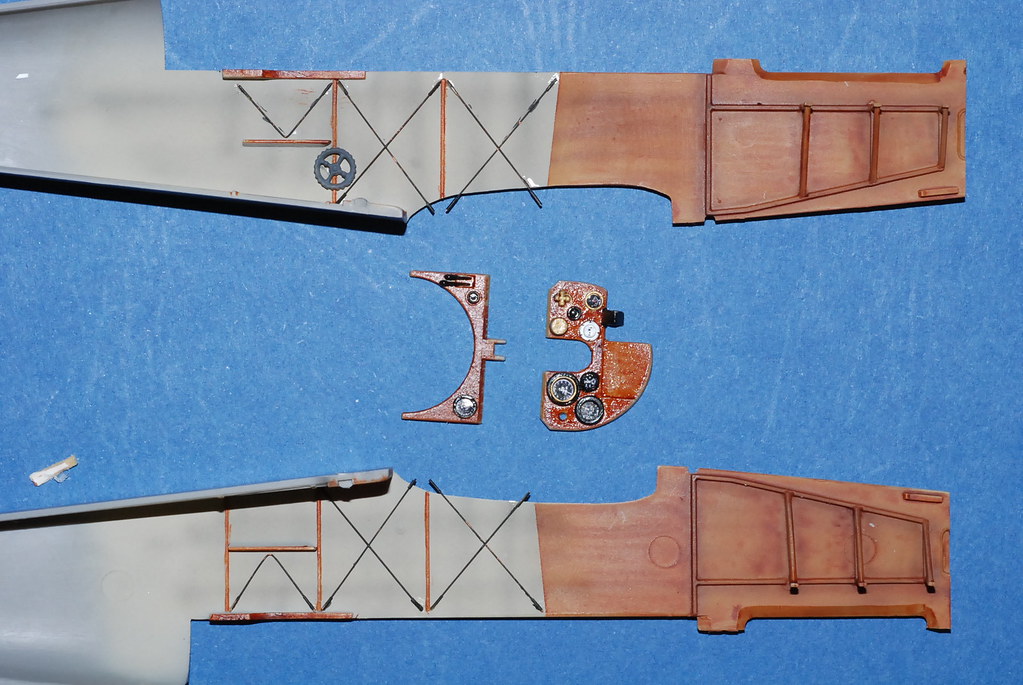
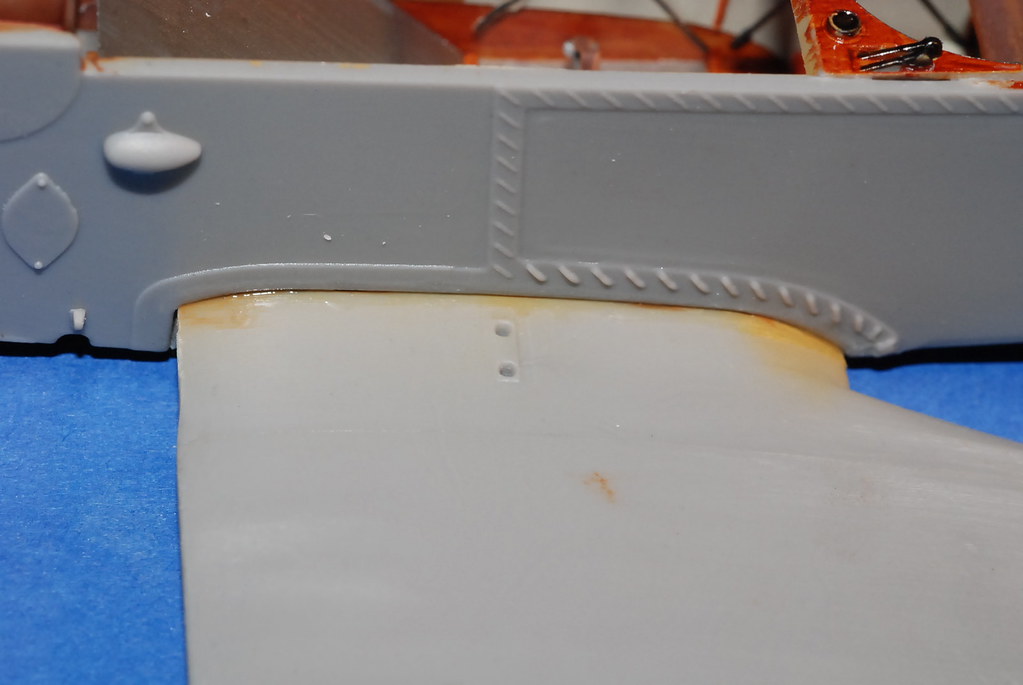
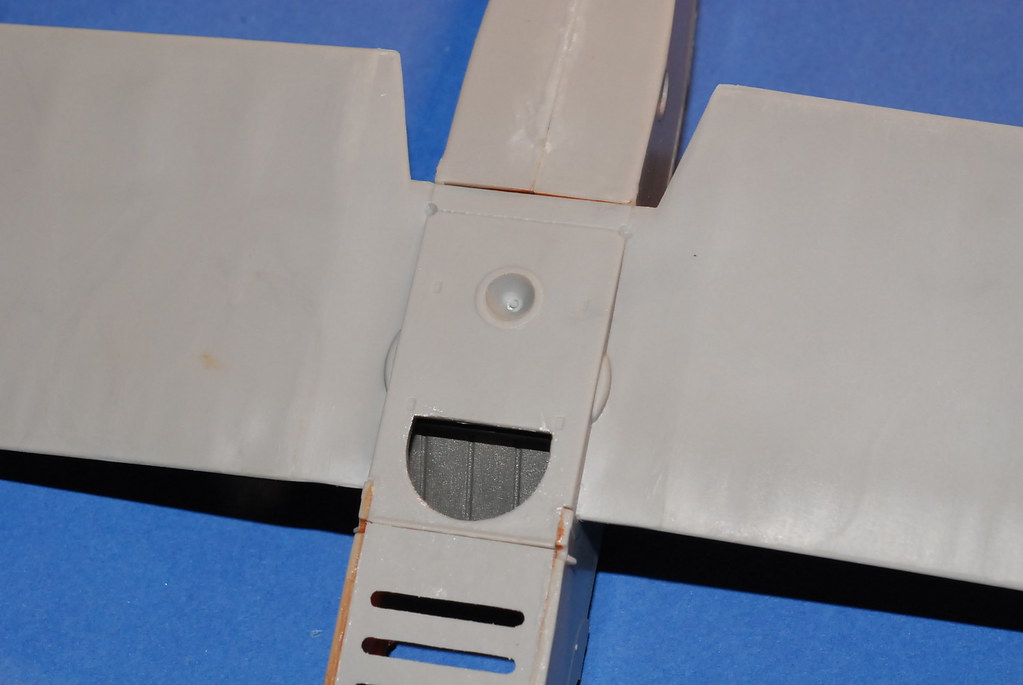
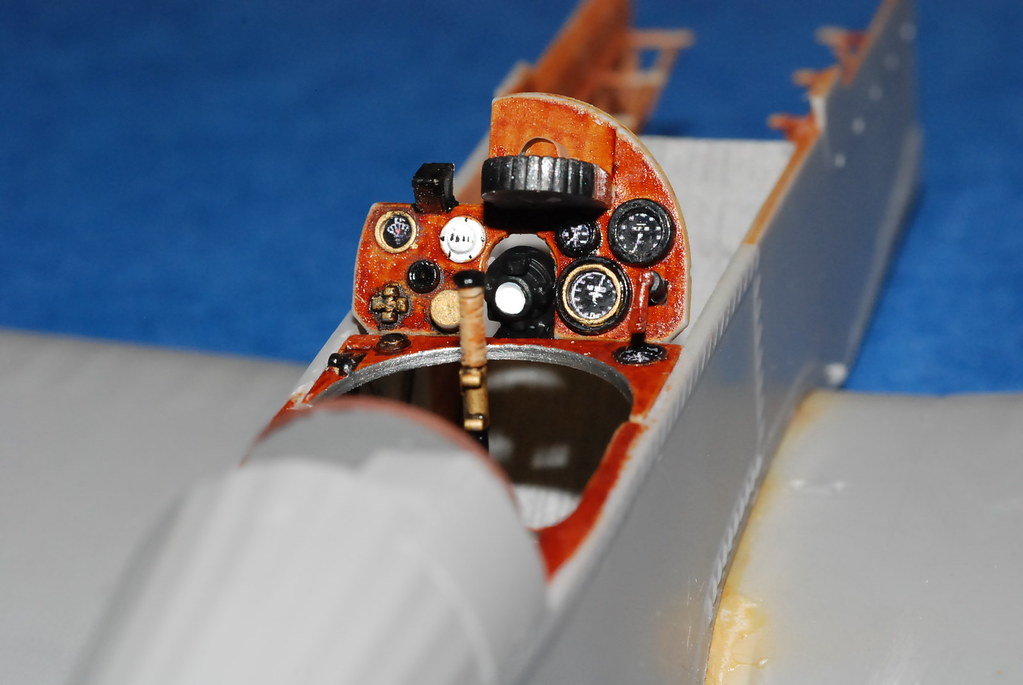
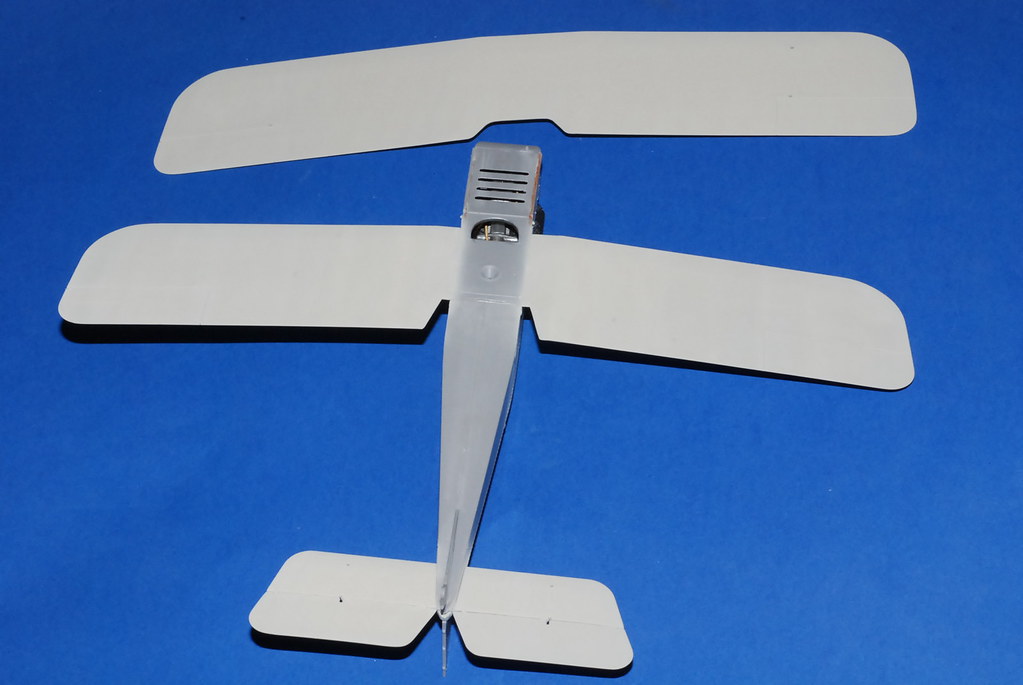
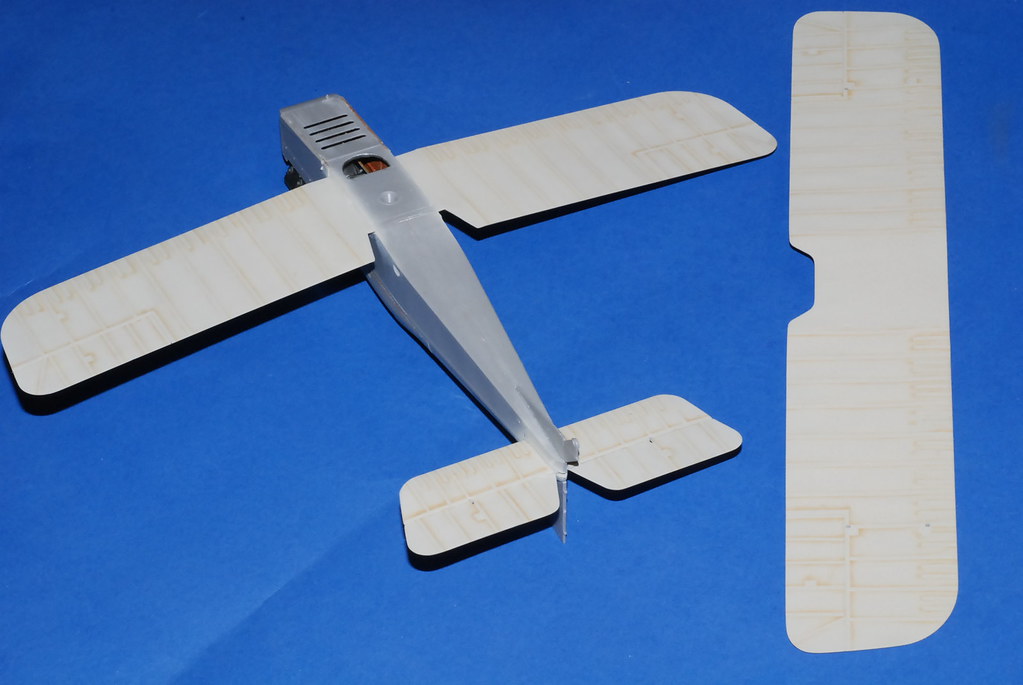
The quality of the moulding is 99.99% fantastic.
There is little flash evident and the only evidence of sink maks are those already known from the Wolesley Viper powered SE5a, that is the Propellers and the Vickers gun.


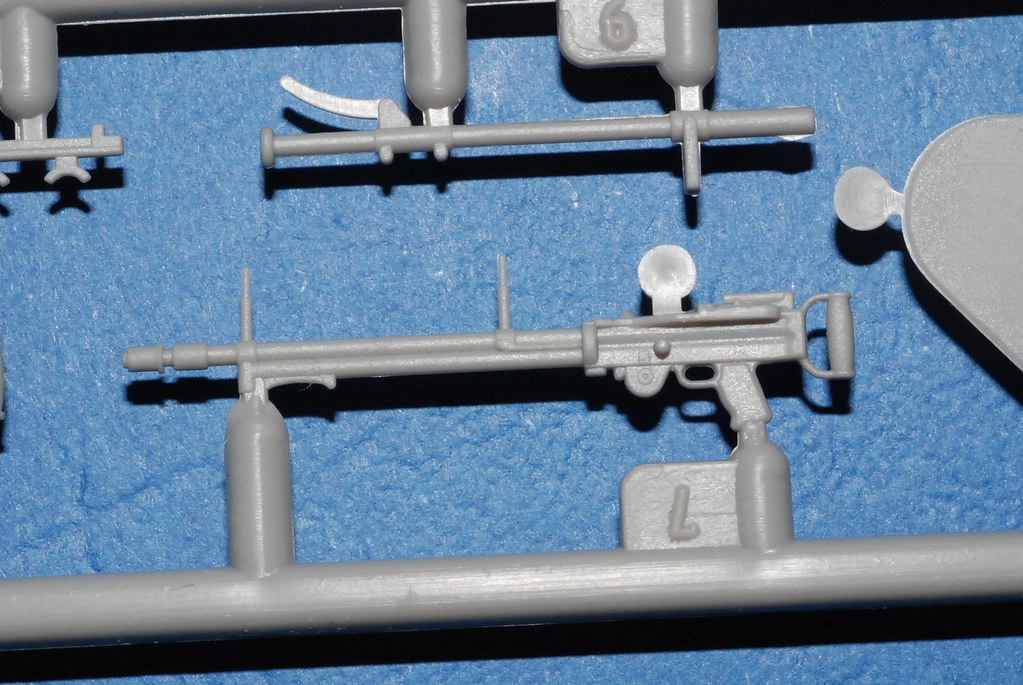
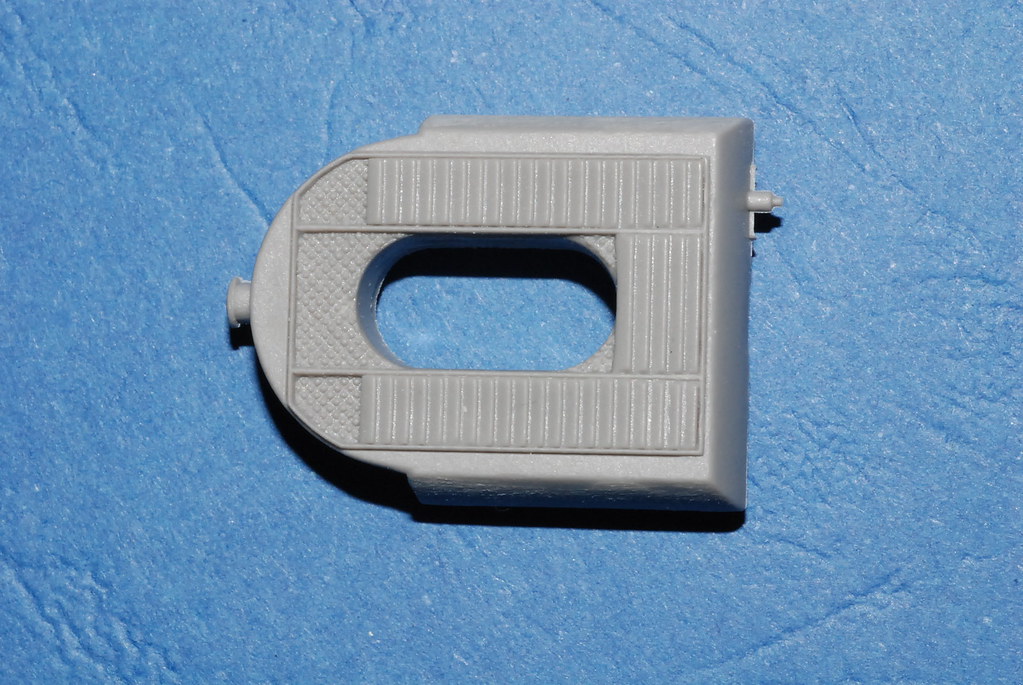
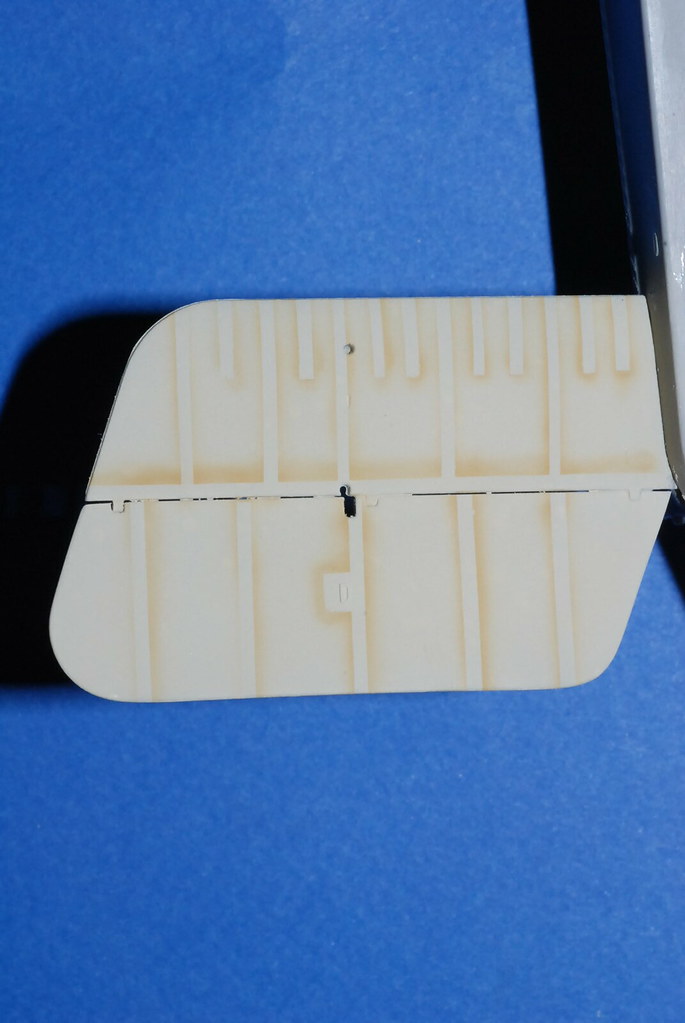
As you can see, the sharpness of the detail is generally exceptional.

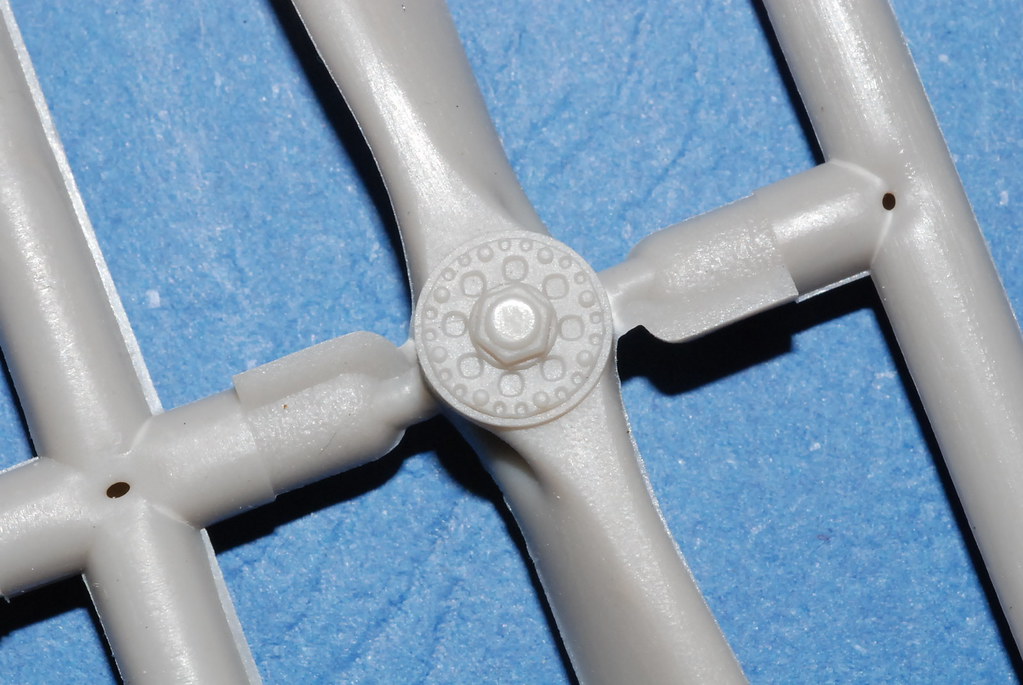
There is only one area that I feel Roden dropped the ball in this respect, and that is the Prop Bosses.


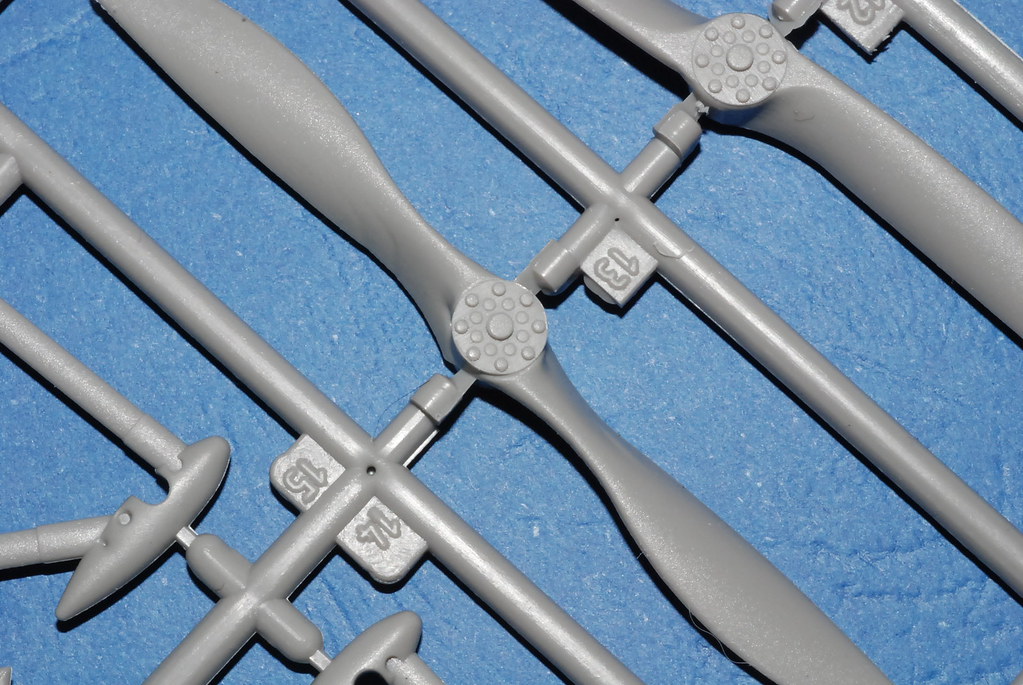
And the reason this frustrates me is that I know full well that they are capable of better.
See for example the Prop Boss on the Airscrew in the Fokker F1 box.


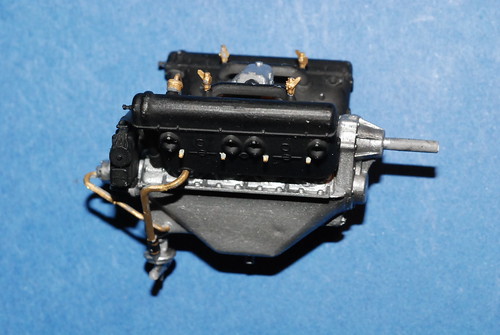
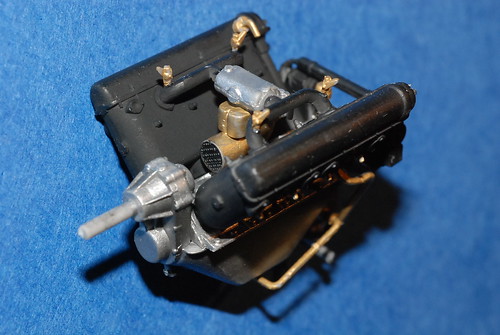
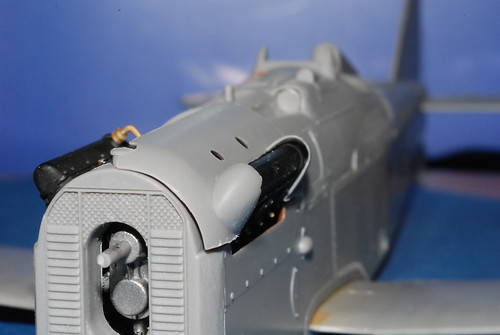
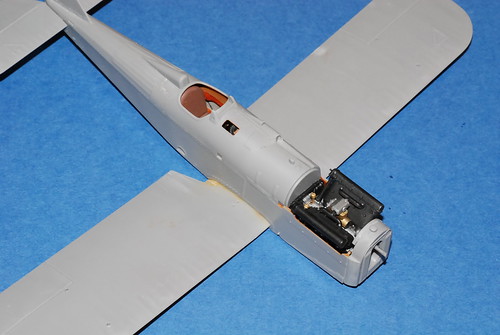
I have the engine pretty much finished. Just some detail painting to finish.
This is kept to the minimum required as not a lot of it will be visable when the cowelling is on.

More soon.

Cheers,

Hugh
CaptainA
_VISITCOMMUNITY
Indiana, United States
Joined: May 14, 2007
KitMaker: 3,117 posts
AeroScale: 2,270 posts
Posted: Thursday, November 20, 2008 - 08:13 AM UTC
The SE5a was the second airplane model I built, way back in about 1966-7. I am really looking forward to watching your build. I will be watching for this kit to appear at my LHS. Maybe I need to order some prop bosses.
thegirl
_VISITCOMMUNITY
Alberta, Canada
Joined: January 19, 2008
KitMaker: 6,743 posts
AeroScale: 6,151 posts
Posted: Thursday, November 20, 2008 - 04:47 PM UTC
I don't know if I will get this kit , but I'm looking forward to seeing your magic touch applied to this one . you are correct on the prop bosses , they could have done a better on them . Even in the Alb.DIII and Pfalz D.III the bosses are better .
Kalt
_VISITCOMMUNITY
Mendoza, Argentina
Joined: June 14, 2006
KitMaker: 222 posts
AeroScale: 219 posts
Posted: Thursday, November 20, 2008 - 05:22 PM UTC
I still have to order this kit it looks really nice. Good luck with your build!
MerlinV
_VISITCOMMUNITY
Victoria, Australia
Joined: November 26, 2006
KitMaker: 608 posts
AeroScale: 602 posts
Posted: Sunday, December 14, 2008 - 11:20 PM UTC
So, as stated, an Out of the Box build.
I will attempt to add nothing and change nothing... Unless there is a glaringly obvious error.

Here is the engine painted up. Notice that I have gone quite minimalist here as virtualy nothing will be seen once the cowels are on.


Now I have painted up the lower wing centre section in preperation for fitting the rudder bar ( I will add cables for this and the control column).


I have drilled out the larger dial faces on the instrument panel. My intention here is to print scale dials on photographic paper and add them from the rear of the dial.


More soon... I want this to be quick. I purchased the Spad VII last friday and want to try to kock that off too before the end of Jan.

Cheers,

Hugh
thegirl
_VISITCOMMUNITY
Alberta, Canada
Joined: January 19, 2008
KitMaker: 6,743 posts
AeroScale: 6,151 posts
Posted: Monday, December 15, 2008 - 01:46 AM UTC
Go Hugh Go ! I always look forward to your builds Hugh , this is going to be a treat
JackFlash
_VISITCOMMUNITY
Colorado, United States
Joined: January 25, 2004
KitMaker: 11,669 posts
AeroScale: 11,011 posts
Posted: Friday, December 19, 2008 - 06:05 AM UTC

Quoted Text

So, as stated, an Out of the Box build. I will attempt to add nothing and change nothing... Unless there is a glaringly obvious error... I want this to be quick. I purchased the Spad VII last friday and want to try to kock that off too before the end of Jan. Cheers,

Hugh


I was just noting to Mark and Steve that it is great to have each of us taking different approaches to the 1/32 Roden SE 5a kit. It gives other modelers a choice of methods for their builds.
MerlinV
_VISITCOMMUNITY
Victoria, Australia
Joined: November 26, 2006
KitMaker: 608 posts
AeroScale: 602 posts
Posted: Saturday, December 20, 2008 - 11:06 PM UTC

Quoted Text

it is great to have each of us taking different approaches to the 1/32 Roden SE 5a kit. It gives other modelers a choice of methods for their builds.


Well, as with all my builds, some new nechniques are being tried.

A small update.

I drilled out the instrument faces as previously noted. Then I hacked the bck of each face out with a larger drill, to thin the bezel itself.
Next, I printed up some instrument dials on photo paper (the actual dials that would have been used on each of the instruments.


These were then cut out with realy sharpe scissors and offered up to the isntruments from the back and CA'd in place.

You can see from left to right across the top, the Oil Pressure gauge, the Cooland Temp gauge, and the Tacho.
Below the Tacho is the Air Speed Indicator.

On the Horizontal panel on its own is the Altemeter.

The bezels were then detail painted.

Cheers,

Hugh
Hatter50
_VISITCOMMUNITY
North Carolina, United States
Joined: June 17, 2006
KitMaker: 478 posts
AeroScale: 391 posts
Posted: Sunday, December 21, 2008 - 01:56 AM UTC
Hmmmmm, what kind of printer for such fine detail there Hugh?

Regards
Steve
MerlinV
_VISITCOMMUNITY
Victoria, Australia
Joined: November 26, 2006
KitMaker: 608 posts
AeroScale: 602 posts
Posted: Sunday, December 21, 2008 - 09:15 AM UTC

Quoted Text

Hmmmmm, what kind of printer for such fine detail there Hugh?


A Kodak EasyShare 530. It's a combo printer, Scanner. I think the key to the detail in the finished article is the master image.

Cheers,

Hugh
Hatter50
_VISITCOMMUNITY
North Carolina, United States
Joined: June 17, 2006
KitMaker: 478 posts
AeroScale: 391 posts
Posted: Sunday, December 21, 2008 - 09:46 AM UTC
I think the key to the detail is a "Rastorized" image...........or was it "non-rastorized"? When the image is almost smaller than a single pixel.............there are issues with printing. So your's is a plain old "Inkjet"? If it is, i will have to play with small decals again.

Regards
Steve
MerlinV
_VISITCOMMUNITY
Victoria, Australia
Joined: November 26, 2006
KitMaker: 608 posts
AeroScale: 602 posts
Posted: Sunday, December 21, 2008 - 11:08 AM UTC
Steve,
It's an inkjet, but not just A plain old one. It's specifically designed for Photo printing.
You get better results on Photo paper than on plain paper, so that's what I used. In fact, on plain paper, it defaults to 300 DPI and there is no way of changing it. On photo paper, It lets you bump it up to 1200 DPI.

Having said that, the results were not much different between the 300 DPI drafts that I did and the 1200 DPI finals.

Cheers,

Hugh
Hatter50
_VISITCOMMUNITY
North Carolina, United States
Joined: June 17, 2006
KitMaker: 478 posts
AeroScale: 391 posts
Posted: Sunday, December 21, 2008 - 11:15 AM UTC
Well whatever it was Hugh, the gauges look just like the ones in the Part of Poland PE set. Good job.

Regards
Steve
MerlinV
_VISITCOMMUNITY
Victoria, Australia
Joined: November 26, 2006
KitMaker: 608 posts
AeroScale: 602 posts
Posted: Sunday, December 21, 2008 - 01:06 PM UTC
Thanks Steve.

All in the search of a "technique"...

Cheers,

Hugh
thegirl
_VISITCOMMUNITY
Alberta, Canada
Joined: January 19, 2008
KitMaker: 6,743 posts
AeroScale: 6,151 posts
Posted: Monday, December 22, 2008 - 03:00 AM UTC
Nice print job on the faces Hugh ! Can't wait to see more of your build .
MerlinV
_VISITCOMMUNITY
Victoria, Australia
Joined: November 26, 2006
KitMaker: 608 posts
AeroScale: 602 posts
Posted: Friday, December 26, 2008 - 11:43 AM UTC
Greetings,

I trust that everybody has been enjoying the festive season and that the Fat guy in the red coat brought all the Styrene/Accessores/Tools that we all asked for (I got a powered RC glider that I was intending to learn to fly on so that I could eventually build something scale, say a Bristol M1 Bullet, to while away those sunny windless afternoons... and which I smashed the wing of on the first flight... ... But never mind, I have a motor, servos and radio gear to fiddle with now... the world is the Molusc of my choice)).

I have made some (small) progress.


I used fine wire and stretched styrene tube to add bracing wires to the Fuselage sides.

And whacked it all together.


I reckon that the seat cushions in Rodens kit are pure fiction, but painted them up anyway and added lap belts from lead foil.


The wing/fuselage fit was not great, but some deft trimming and applcation of pressure while the CA was applied saw a reasonable join.


But the underside will need to be filled and cleaned up a bit.


Cheers,

Hugh
JackFlash
_VISITCOMMUNITY
Colorado, United States
Joined: January 25, 2004
KitMaker: 11,669 posts
AeroScale: 11,011 posts
Posted: Friday, December 26, 2008 - 09:17 PM UTC
Looking good Hugh! Have you had any fit problems with the kit set up for installing the motor?
MerlinV
_VISITCOMMUNITY
Victoria, Australia
Joined: November 26, 2006
KitMaker: 608 posts
AeroScale: 602 posts
Posted: Friday, December 26, 2008 - 11:48 PM UTC

Quoted Text

Looking good Hugh! Have you had any fit problems with the kit set up for installing the motor?


Not as yet Stephen, I have not yet gone beyond basic dry fitting of the engine. Having said that, I feel that the Cowling is going to require some surgery to fit adequately over the engine.

Cheers,

Hugh
thegirl
_VISITCOMMUNITY
Alberta, Canada
Joined: January 19, 2008
KitMaker: 6,743 posts
AeroScale: 6,151 posts
Posted: Saturday, December 27, 2008 - 01:37 AM UTC
You are making good progress with this one so far Hugh . Looking forward on seeing more of this build .

Cheers Mate !
MerlinV
_VISITCOMMUNITY
Victoria, Australia
Joined: November 26, 2006
KitMaker: 608 posts
AeroScale: 602 posts
Posted: Sunday, December 28, 2008 - 11:24 PM UTC

Quoted Text

Looking good Hugh! Have you had any fit problems with the kit set up for installing the motor?

--------------------------------------------------------------------------------


Not as yet Stephen, I have not yet gone beyond basic dry fitting of the engine. Having said that, I feel that the Cowling is going to require some surgery to fit adequately over the engine.

Cheers,

Hugh


I have a definitive answer for you Stephen.

The Engine itself fits fine.

The cowel however will not fit att all if the Pressure relief stops are fitted to the Induction pipes.

It fits a little better if these are removed... But still will need work to fit properly...


Back a step, with a little trimming of the Side engine cowel panels, the Cockpit combing fits beautifully!


And Back another step, this is what gets hidden with the combing on.


More real soon!

Cheers,

Hugh
Hatter50
_VISITCOMMUNITY
North Carolina, United States
Joined: June 17, 2006
KitMaker: 478 posts
AeroScale: 391 posts
Posted: Sunday, December 28, 2008 - 11:27 PM UTC
Very Nice there Hugh...............you have been busy i see. I'm just getting back to mine.

Regards
Steve
Kalt
_VISITCOMMUNITY
Mendoza, Argentina
Joined: June 14, 2006
KitMaker: 222 posts
AeroScale: 219 posts
Posted: Monday, December 29, 2008 - 02:20 AM UTC
Looking really good, !!!
Awesome work in the instrument panel, congratulations
JackFlash
_VISITCOMMUNITY
Colorado, United States
Joined: January 25, 2004
KitMaker: 11,669 posts
AeroScale: 11,011 posts
Posted: Tuesday, December 30, 2008 - 10:10 AM UTC
Very Cool Hugh. Thanks for the good report. Also for anyone building this kit. or the Viper motor version. The SE 5a had a steerable tail skid and the lowest access holes in the rear fuselage are for those cables.
thegirl
_VISITCOMMUNITY
Alberta, Canada
Joined: January 19, 2008
KitMaker: 6,743 posts
AeroScale: 6,151 posts
Posted: Wednesday, December 31, 2008 - 01:56 AM UTC
Hugh , love the instrument panel . The homemade dials really add life to the panel .
Looking forward on future progress .
MerlinV
_VISITCOMMUNITY
Victoria, Australia
Joined: November 26, 2006
KitMaker: 608 posts
AeroScale: 602 posts
Posted: Friday, January 02, 2009 - 06:56 PM UTC
Now for some painting.

The under Flying Surfaces were given a solid coat of Clear Doped Linnen (similar recipe to my Bleached Linnen (Tamiya Deck an and White (1:1)) but with a dash of Tamiya Desert Yellow)... What's that I hear you cry? No Preshading? Read on...


Next, came the masking of the rib tapes and a light spray across all the masking tapes of very highly thinned Desert Yellow...


In this process, I am not trying to show rib shadow of internal shaddow at all. I am mearly trying to show the yellowing that is caused by the extra coats of dope/varnish that went over the rib tapes.

Roden would have you place a rib tape (well, they imply that you should) for a full length rib immediately adjacent to the aileron.


This is incorrect. The later style wing had this rib, but it also had a different inboard rib configuration than that replicated on the wing that we are playing with here.
I don't know for certain whether the aircraft I am building had a late or early wing, but I'm going to go with the early (meaning that I am assuming that the rib at this point is not full length)... This will mean some surgery on the upper surfaces to remove the rib impression that Roden have put there.

And here is the Horisontal Stab and Elevator.


Now to tackle the upper surfaces. I am going to have to do some experiments with the old PC10 before I start Spraying that... Not quite 100% on the mix I have used in the past...

Cheers,

Hugh
 _GOTOTOP