_GOTOBOTTOM
Air Campaigns
Want to start or join a group build? This is where to start.
Ronnie RAAF Campaign
Phantom2
_VISITCOMMUNITY
Östergötland, Sweden
Joined: April 18, 2006
KitMaker: 708 posts
AeroScale: 678 posts
Posted: Friday, December 18, 2009 - 03:45 AM UTC

Hi all!!

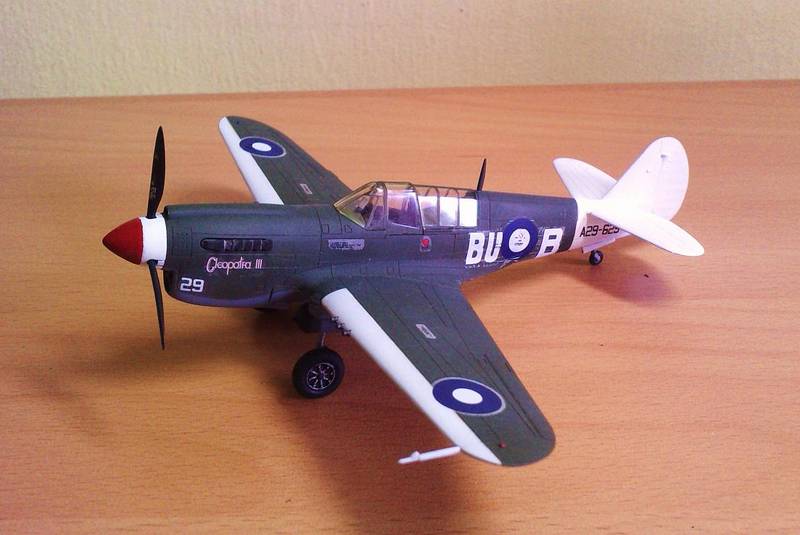
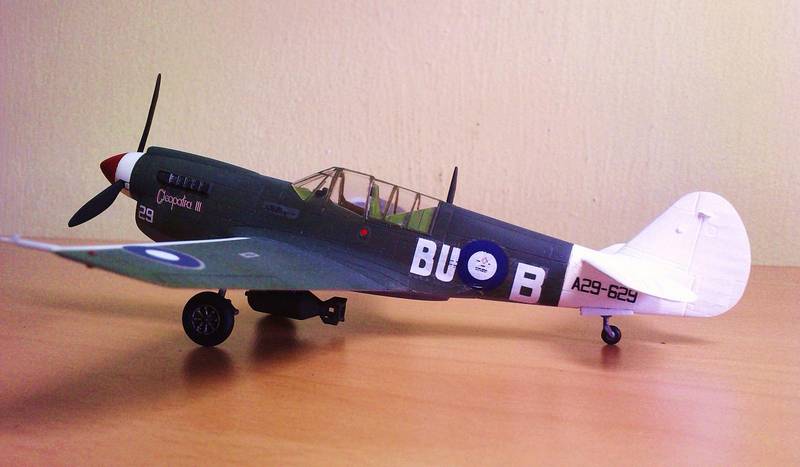
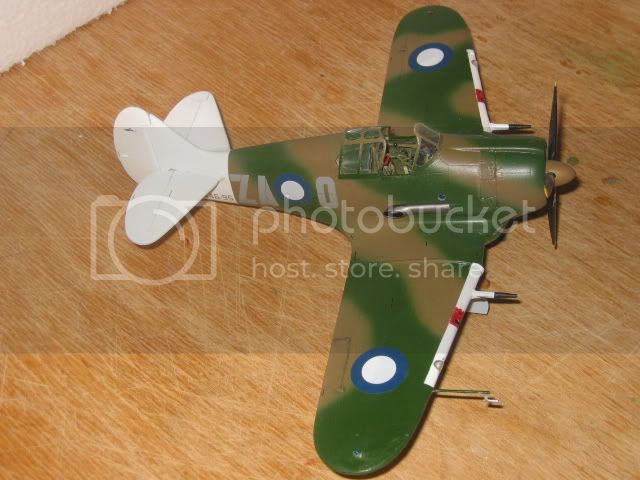
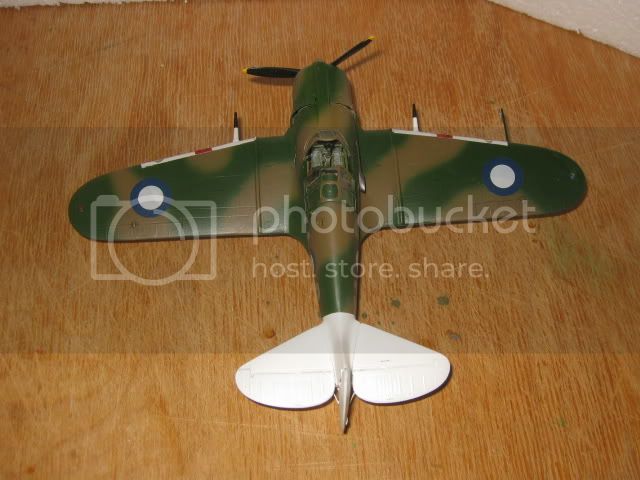
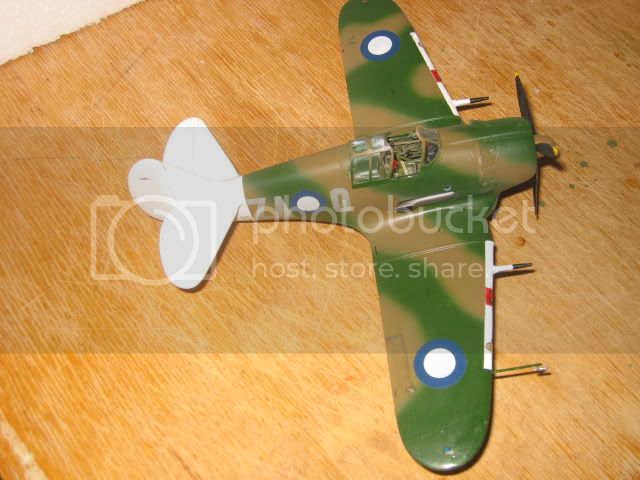
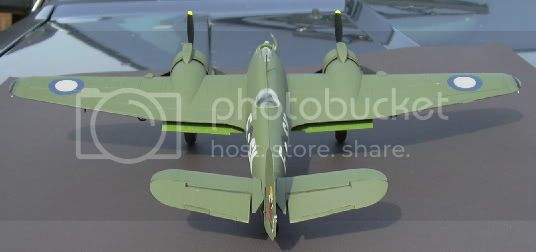
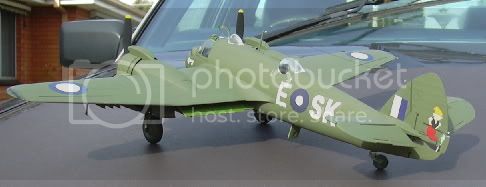
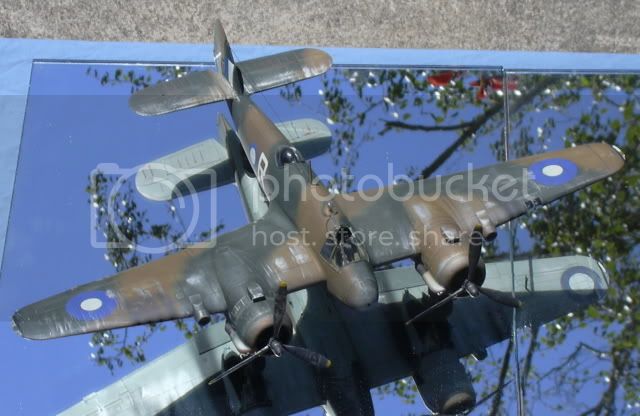
Nick, that´s a really nice P-40!
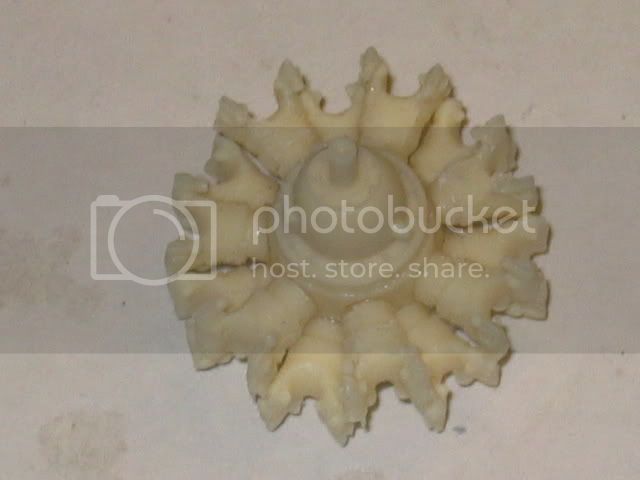
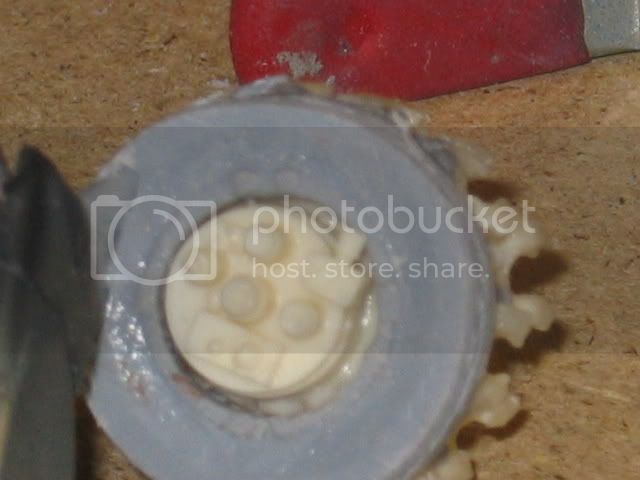
Now it’s time to get the little engine together!

This is a highly detailed little jewel, very much a kit in itself!

It comprises more then 75 parts, of which you have to make 28 (the rocker arms) yourself.
It took me several days to put the engine together, but its well worth the effort!
All parts fit together very well so no problems here!

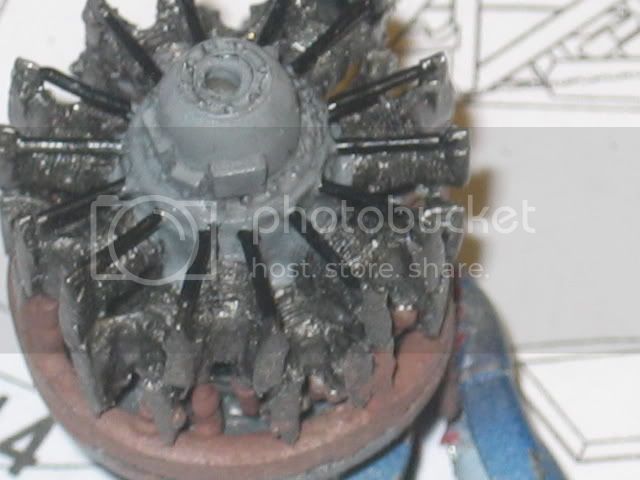
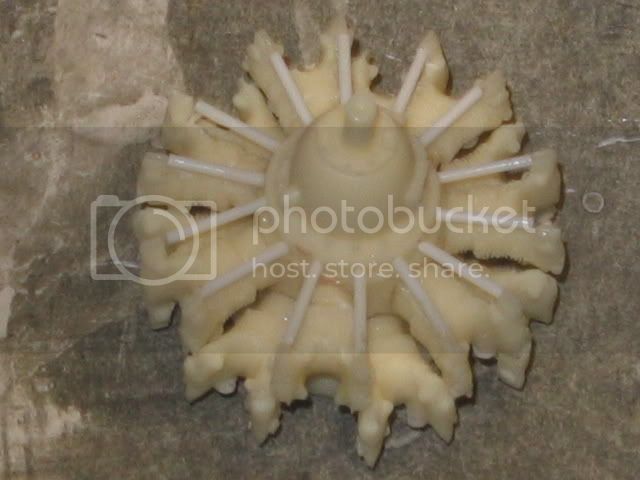
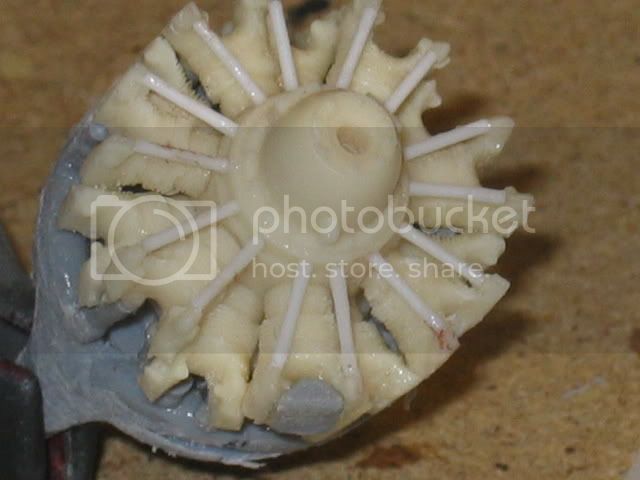
First a look at the crankcase and cylinders, you have to be very careful removing the cylinders from the casting blocks, so all cylinders get exactly(!) the same length!


As this is resin parts, I’ll use Locktite in the small bottles with a black cap.

Only drawback is that the glue sticks immediately, so you have to be sure the parts is correctly assembled the first time!

All cylinders fit in their mounting holes perfectly, and the engine gets a really tight look!
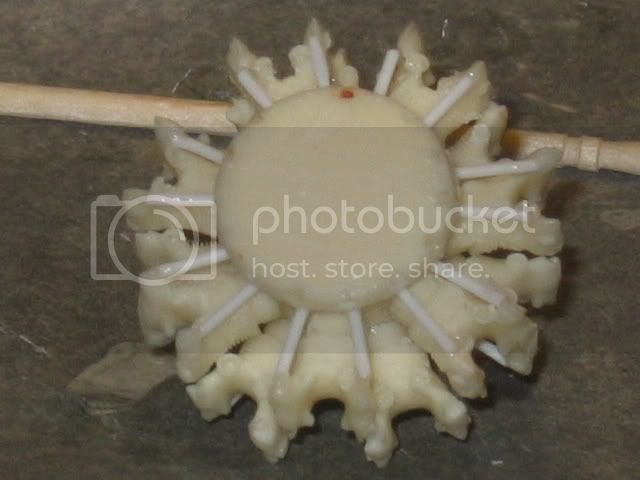
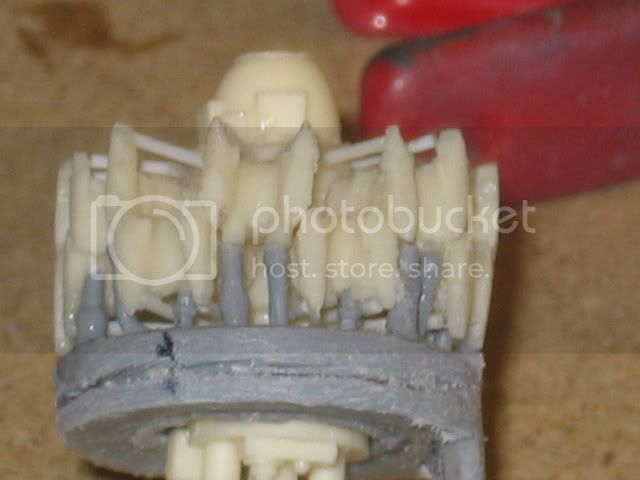
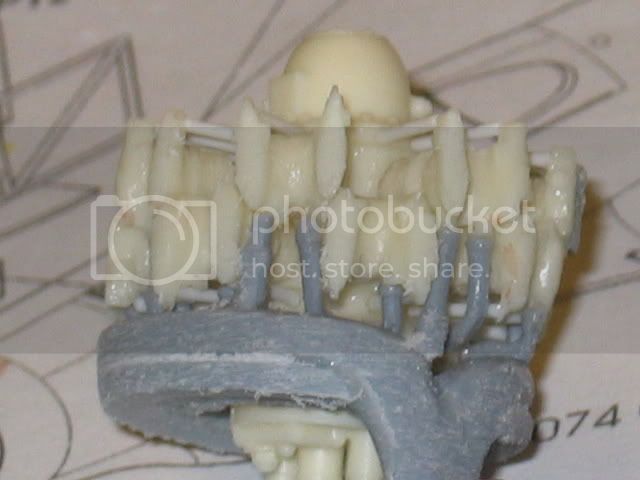


Then it’s time to get all the rocker-arms in place, there are 14 cylinders with 2 arms each, that’s 28 parts!
I used a small plastic sprue from Evergreeen with 0.25mm diameter.


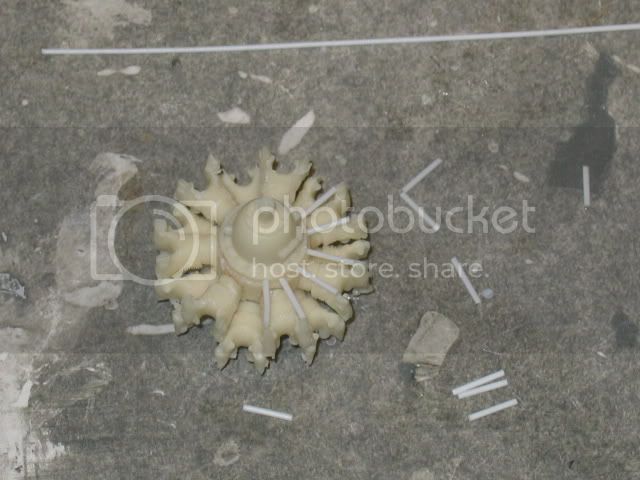
…and this is how the engine looks with all rocker arms assembled;


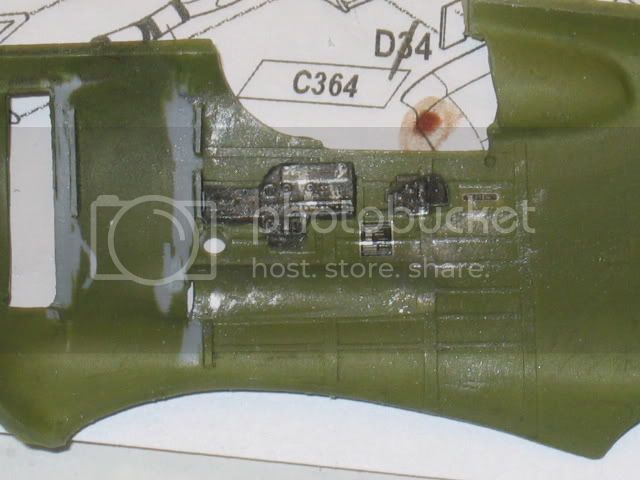
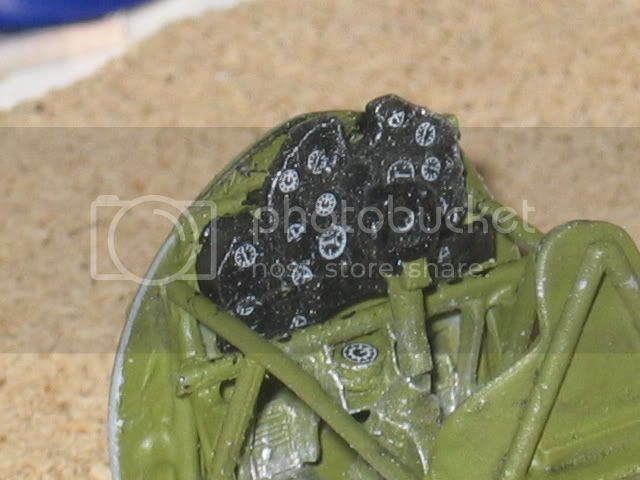
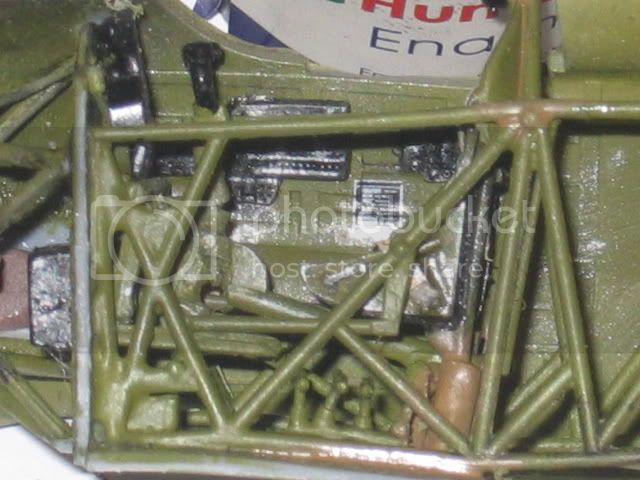
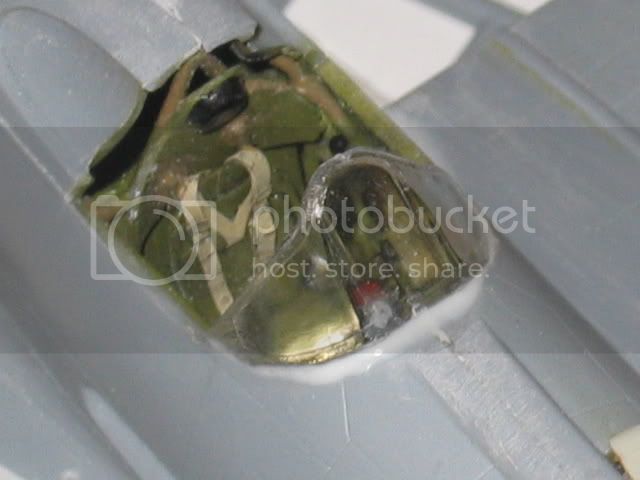
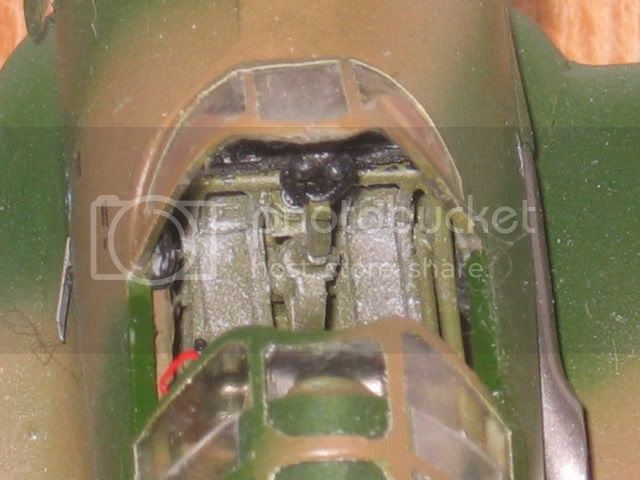
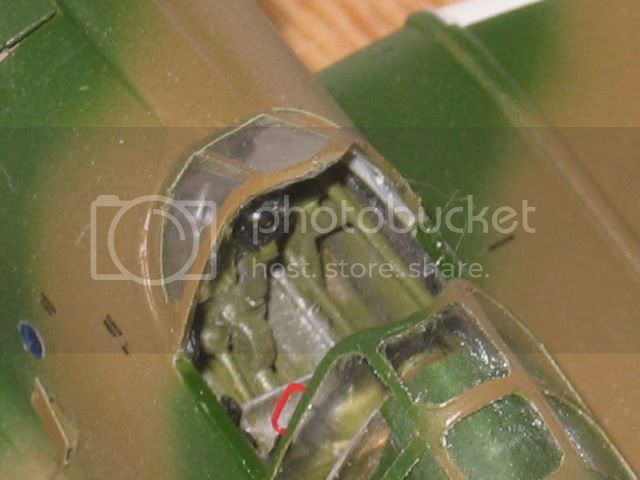
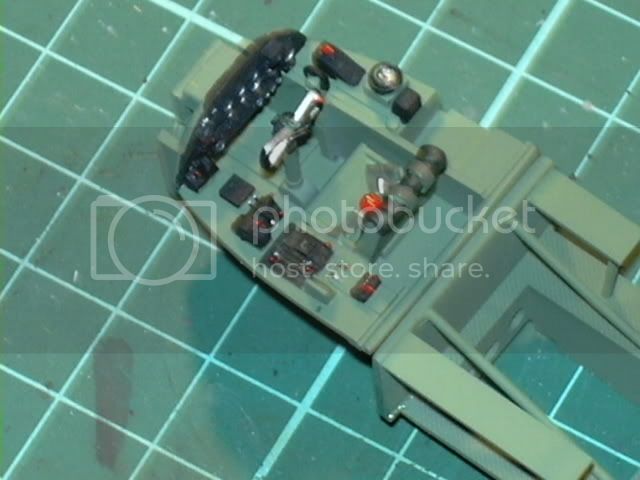
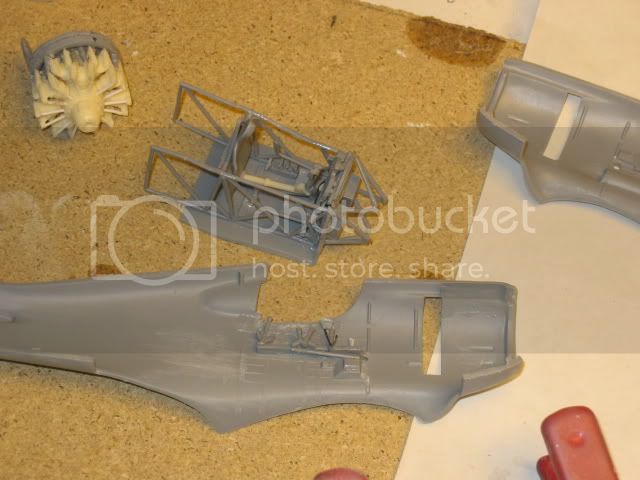
Assembling the instrument panel and the wheels was a breeze as they are made of ”ordinary plastic”!


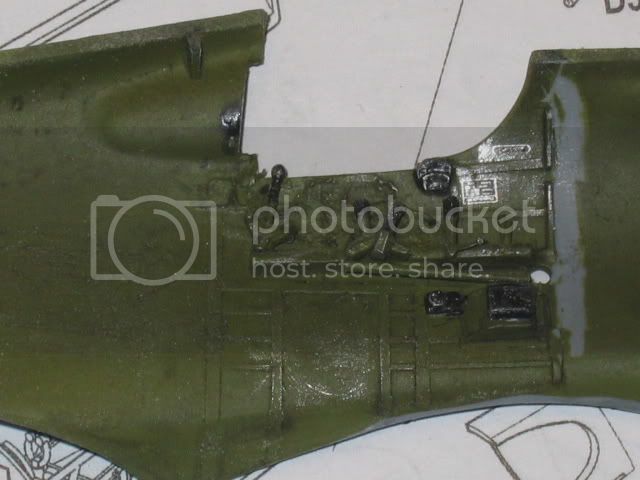
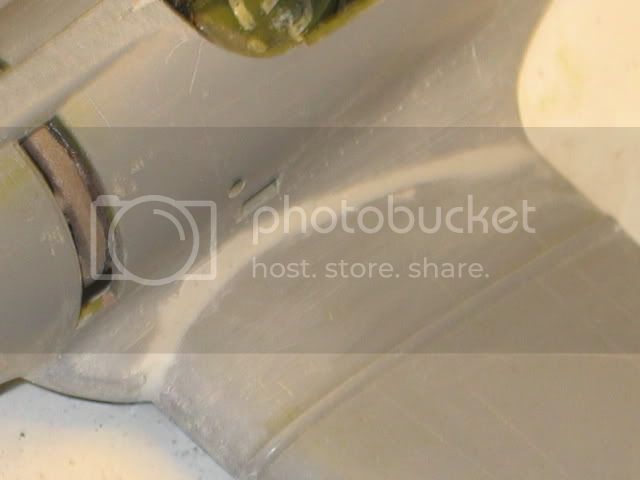
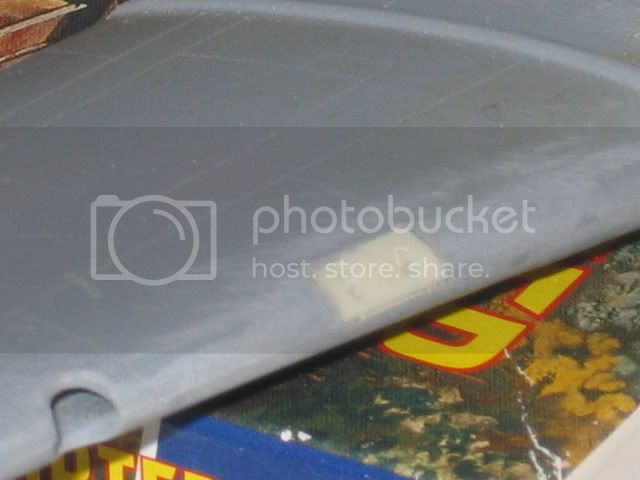
Due to errors in the instructions, I had to remove some wrongly placed parts, so I ended up with a marred inside!


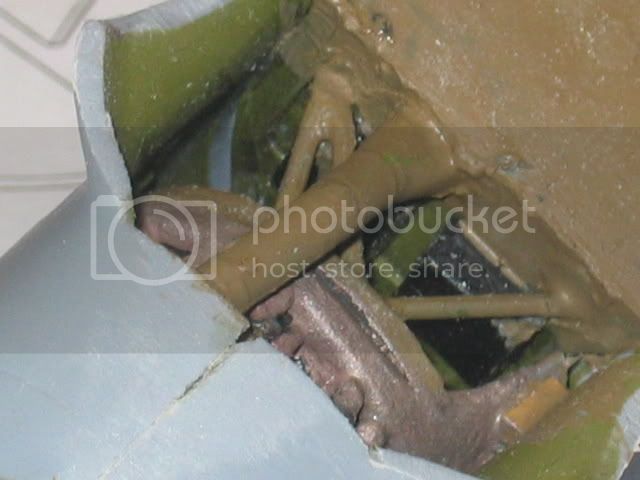
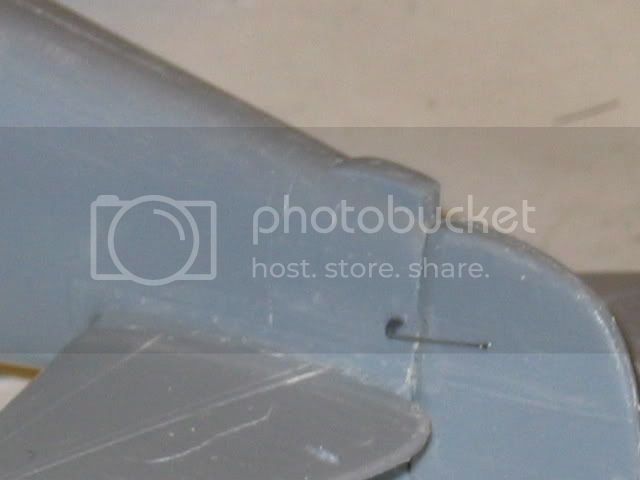
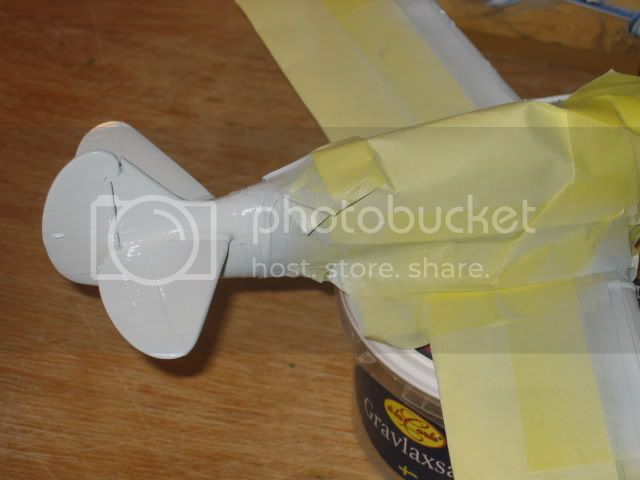
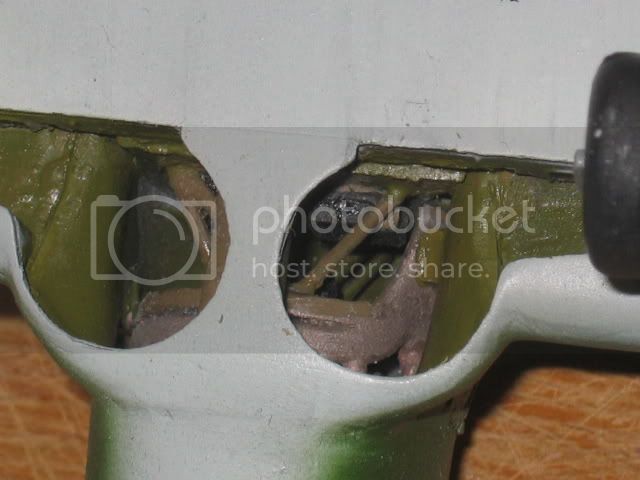
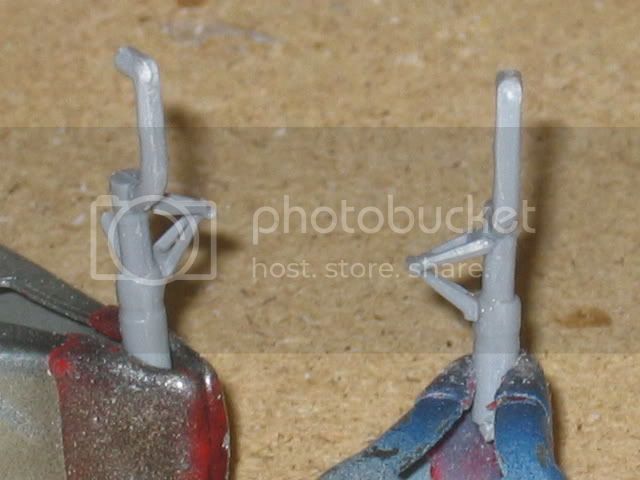
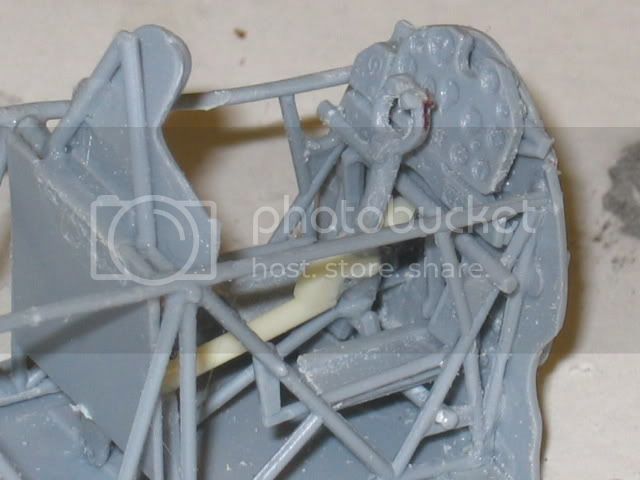
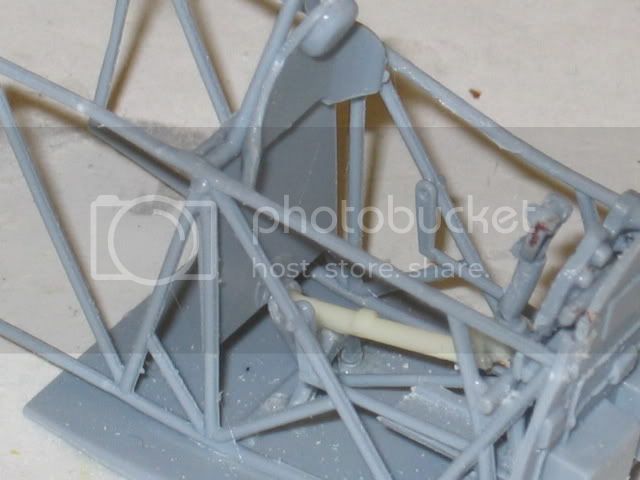
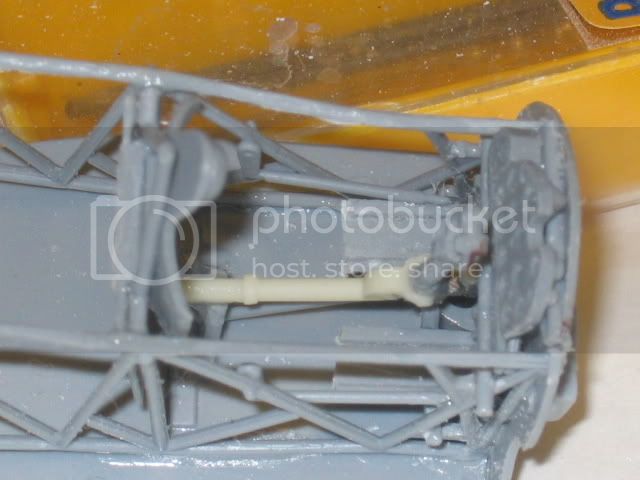
The landing gears and the scissor links;
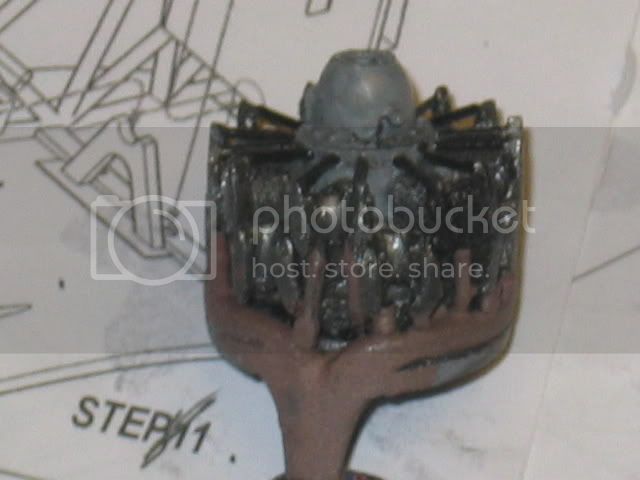
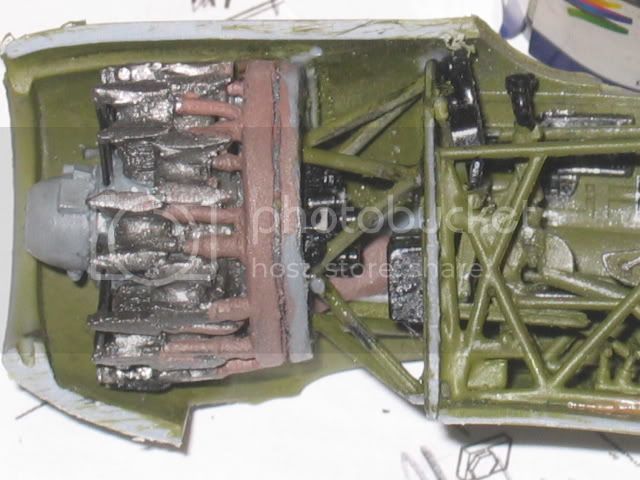
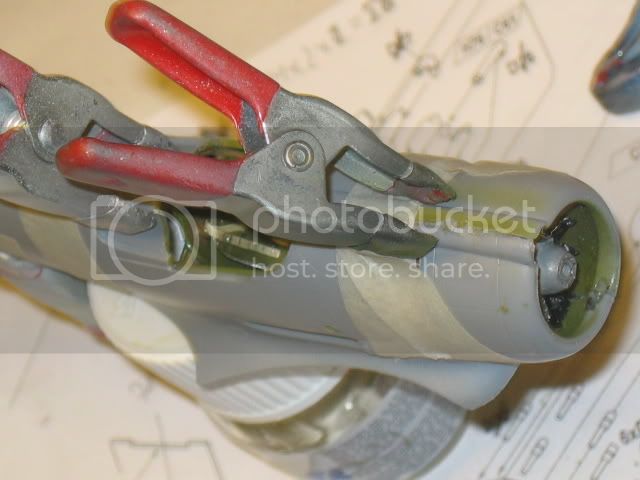
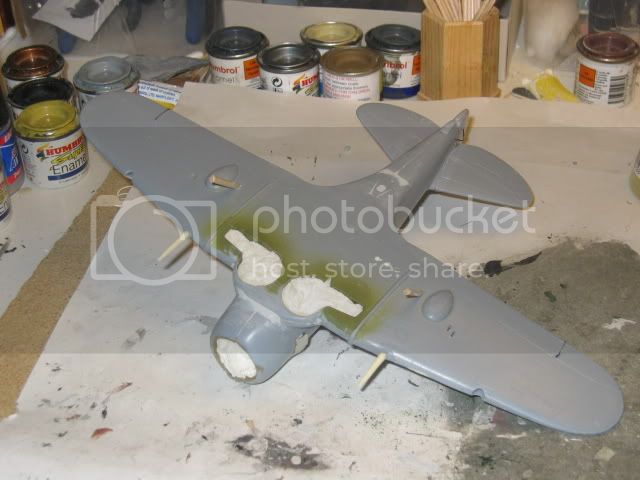
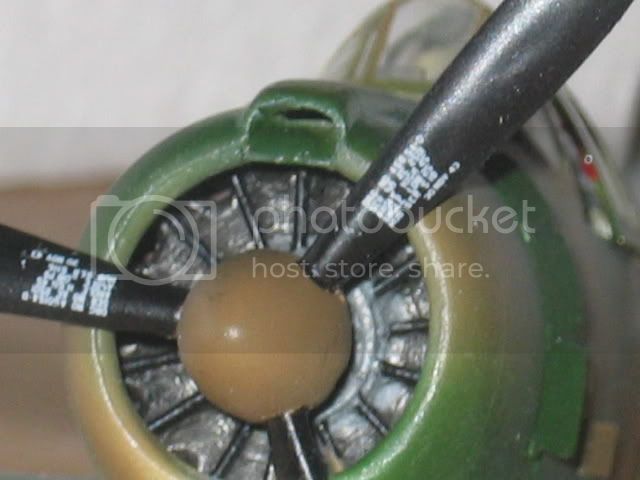


Back to the Engine!

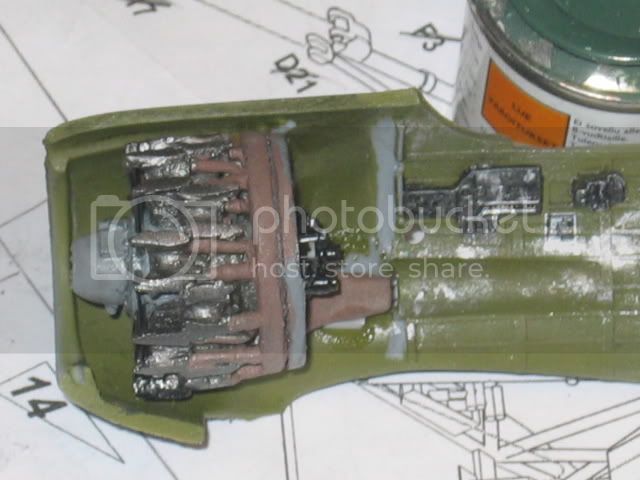
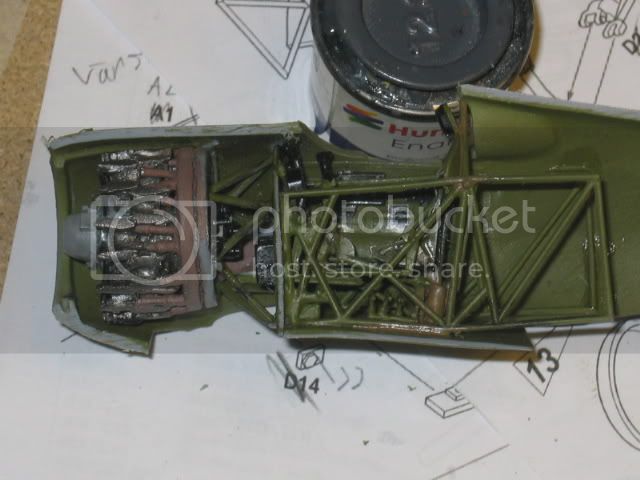
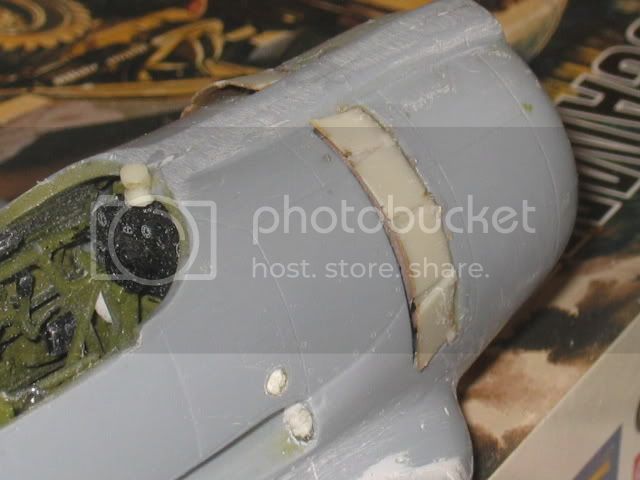
Now I could glue the engine to the forward bulkhead and assemble the exhausts and the mountings!


The rear part of the engine glued in place.;


Then I could glue all the exhaust stubs in place!


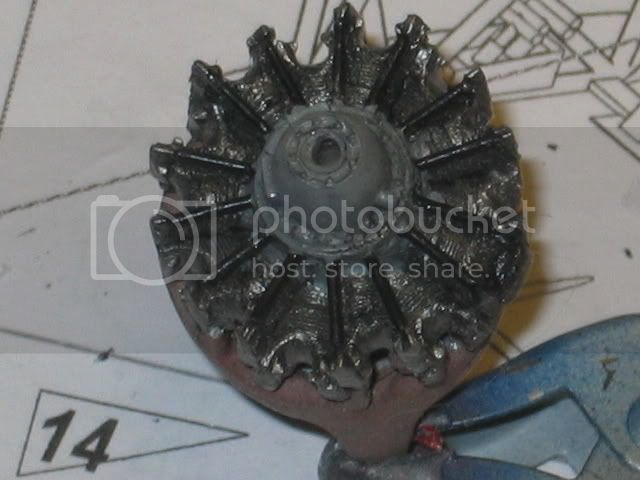
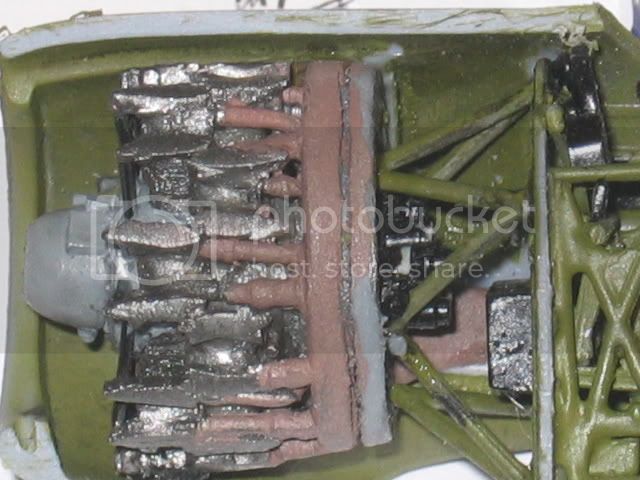
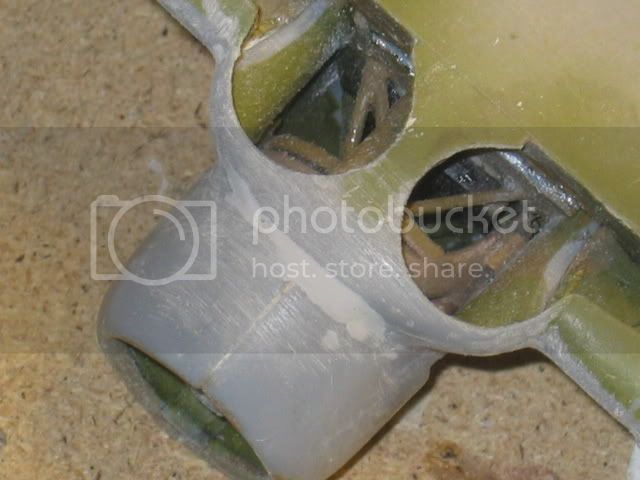
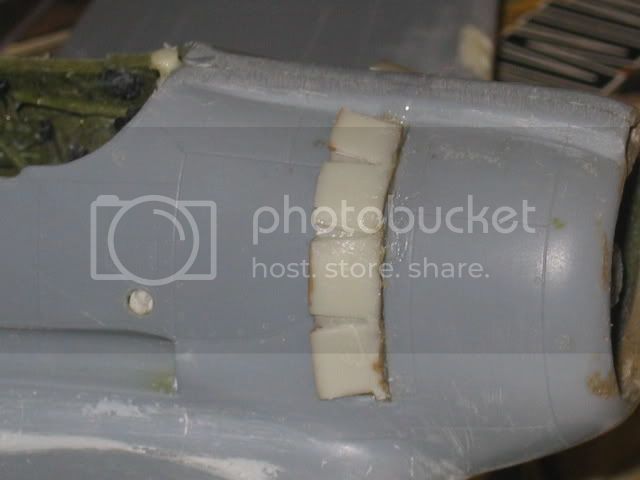
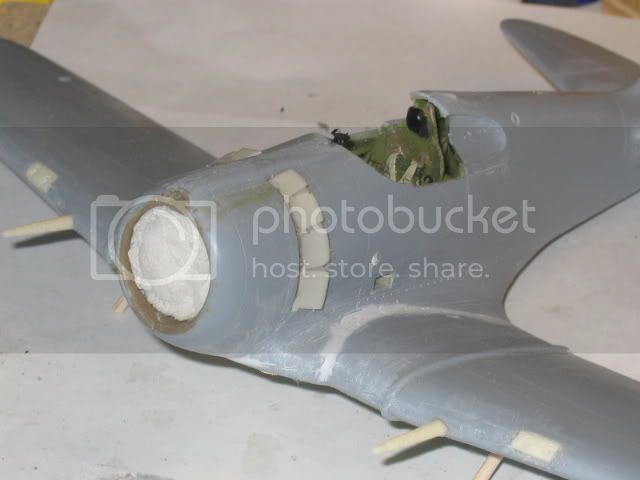
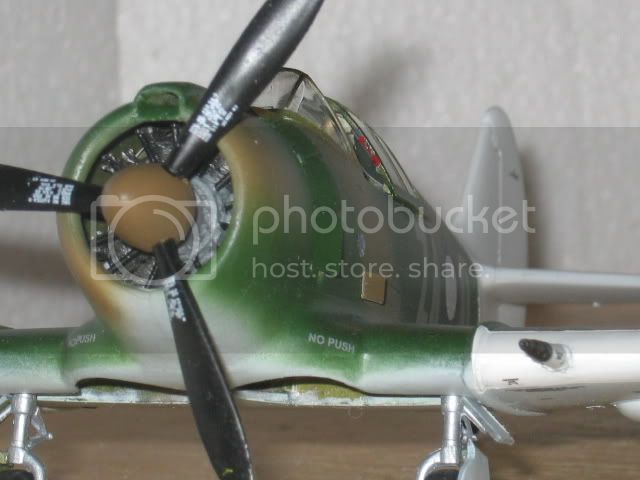
When I dry-fitted the engine I discovered that the engine fitted just fine, but the bulkhead it was mounted on was way too large!
I had to sand both the bulkhead and the exhaust ring to get a good fit.
I had to sand down the cylinder-heads too, as they were just a tad too long!
After a lot of fettling around, I got it all to fit just fine!

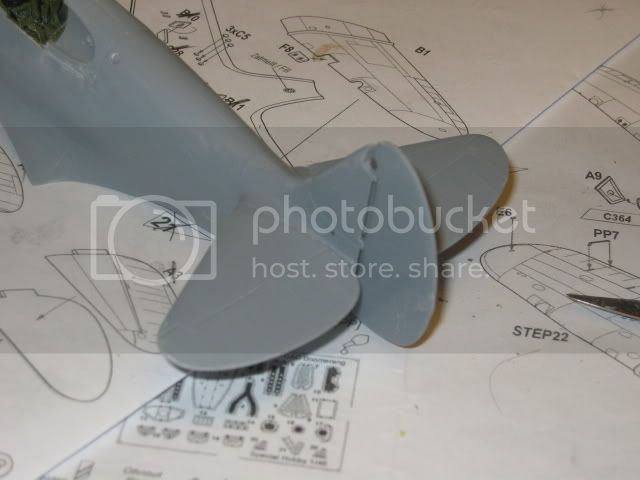
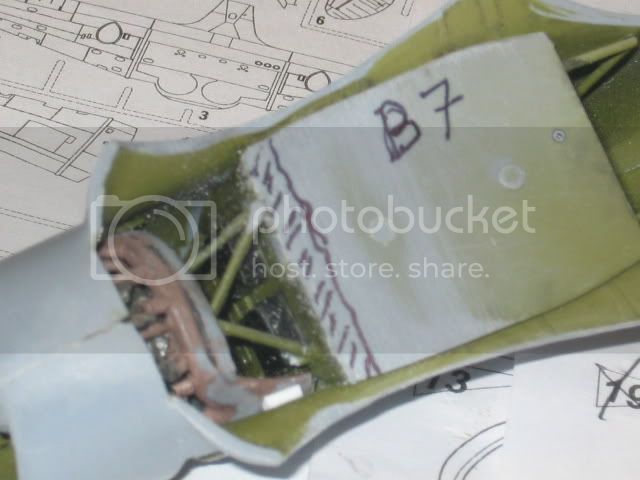
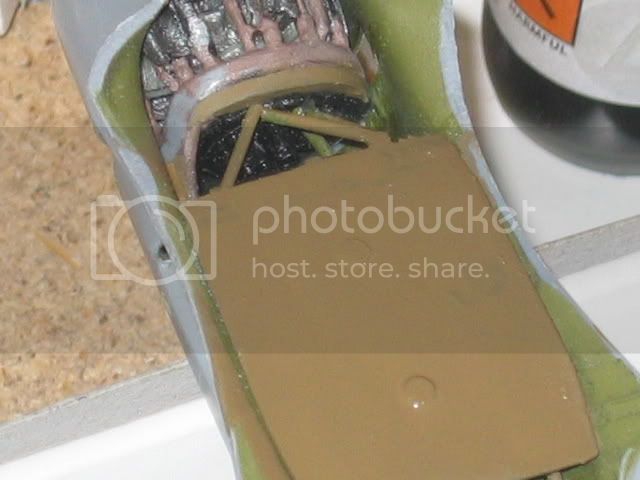
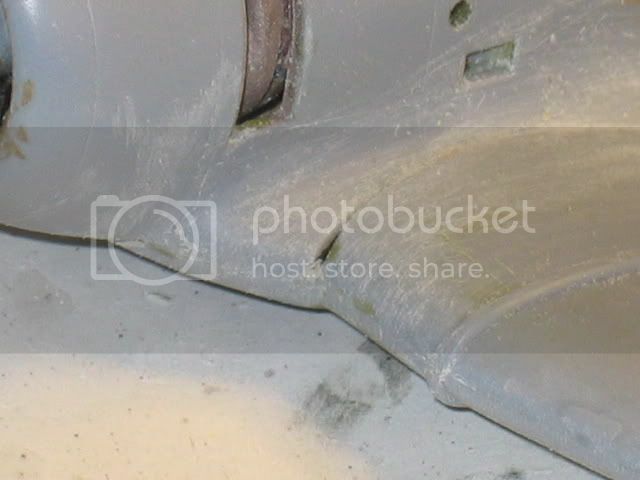
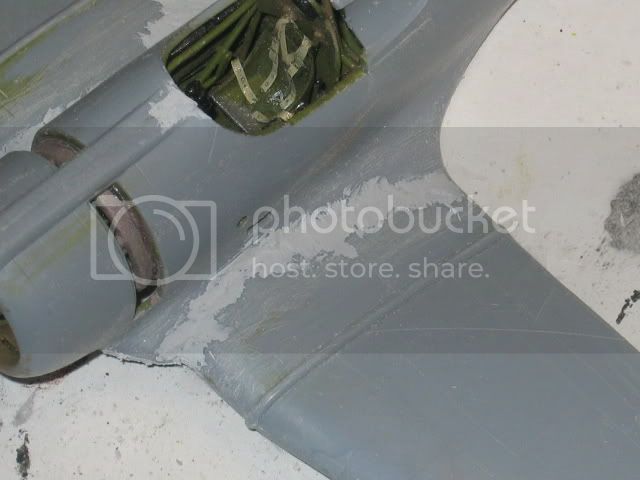
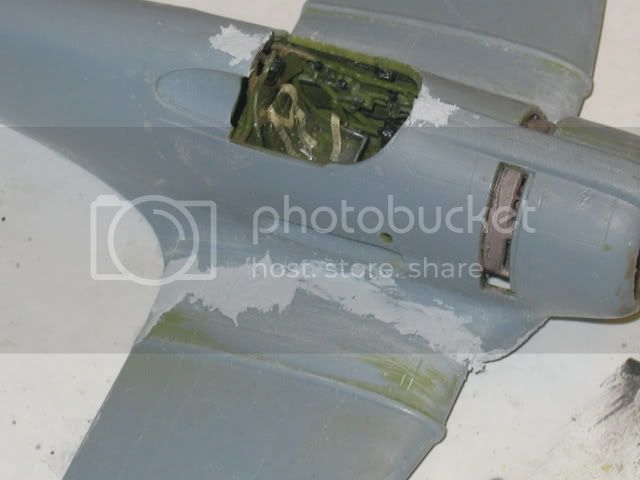
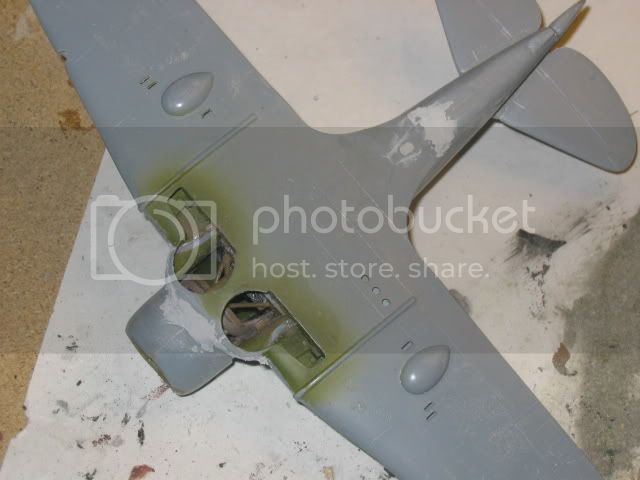
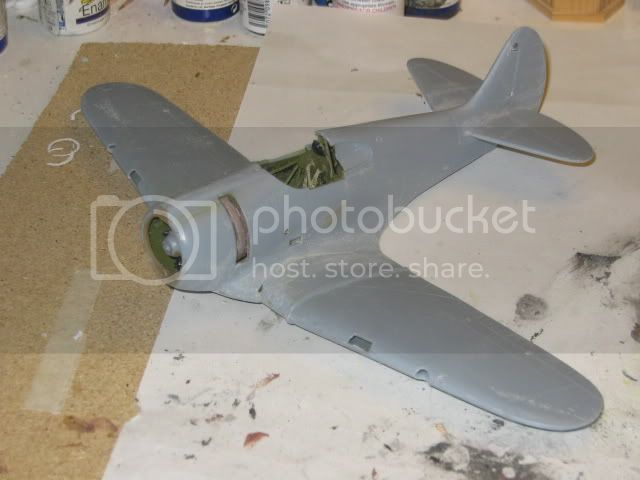
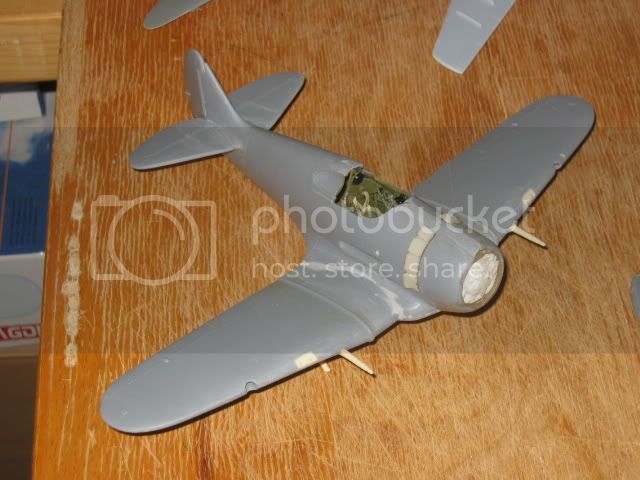
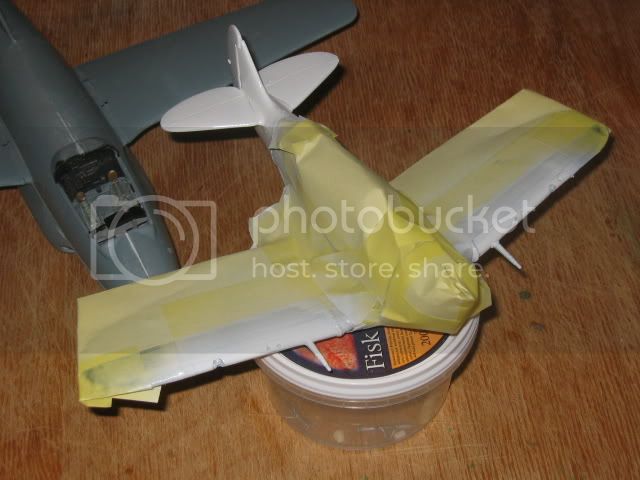
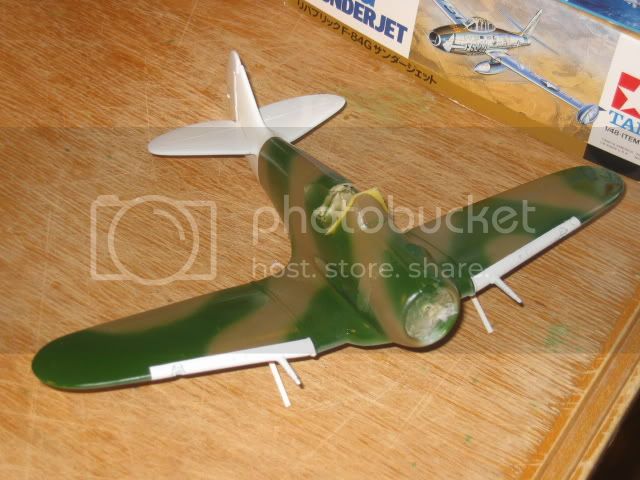
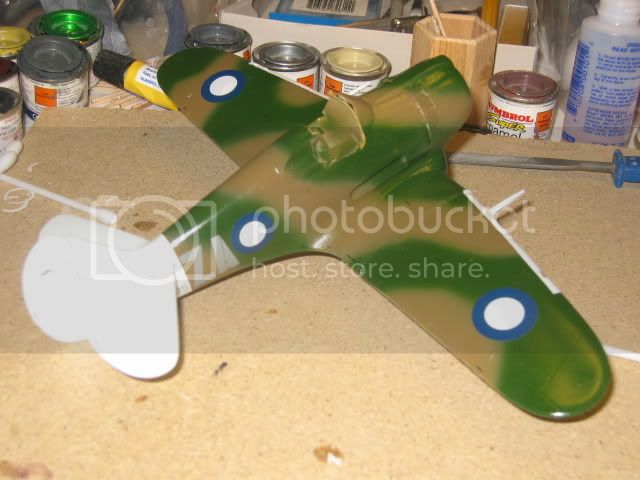
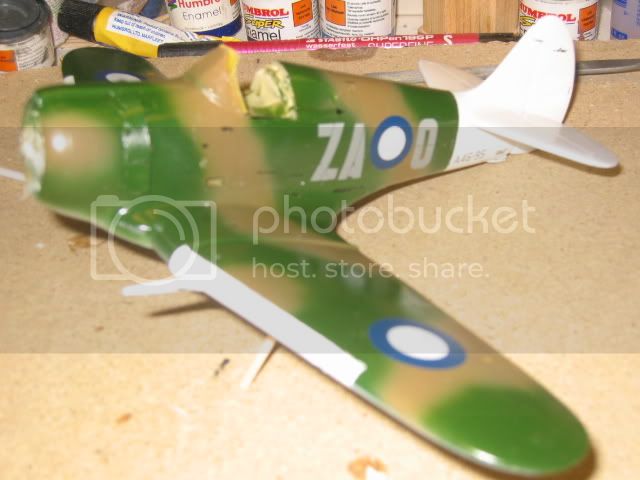
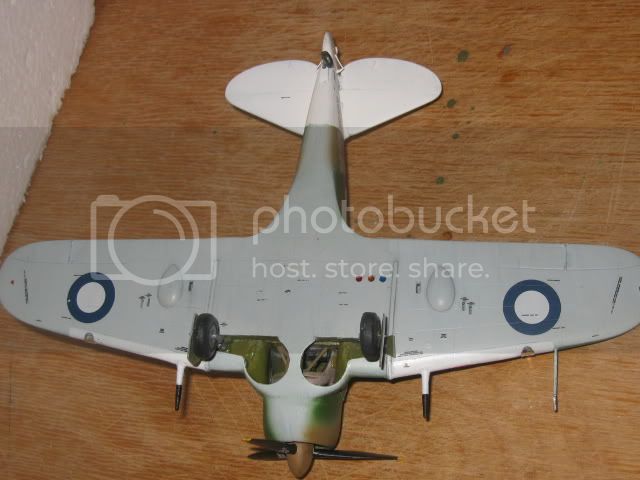
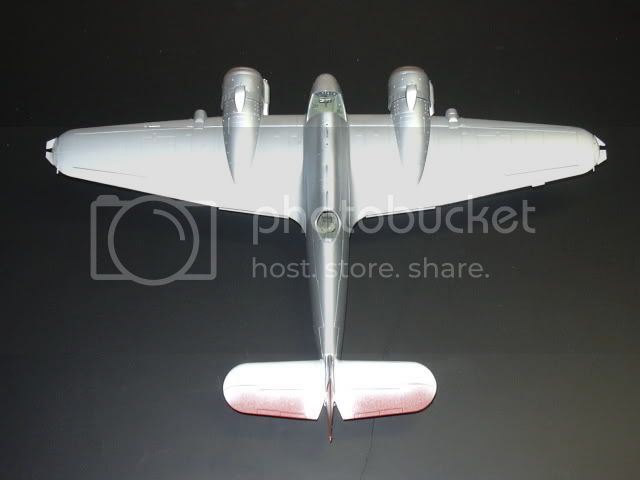
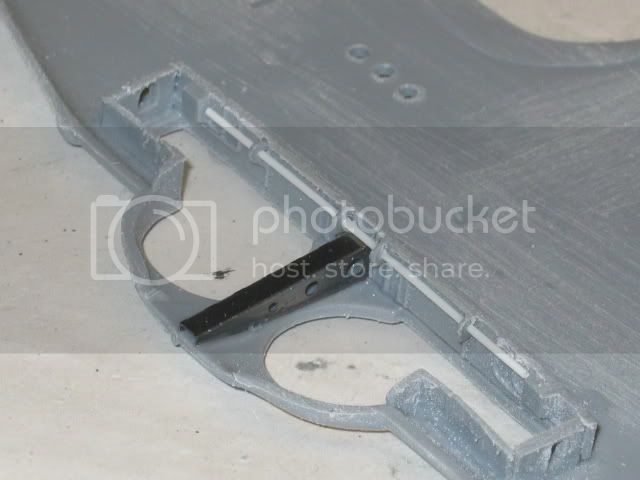
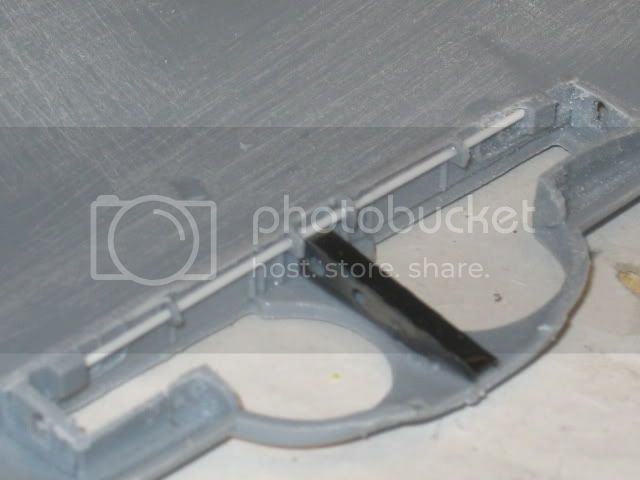
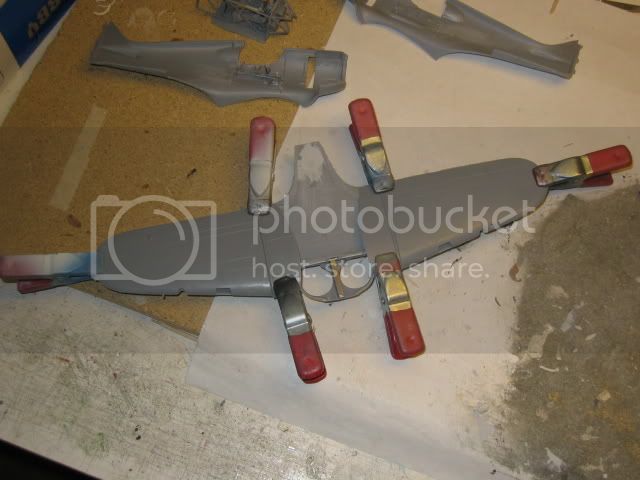
Over to the wings and the wheel wells!

Here everything was a very good fit.
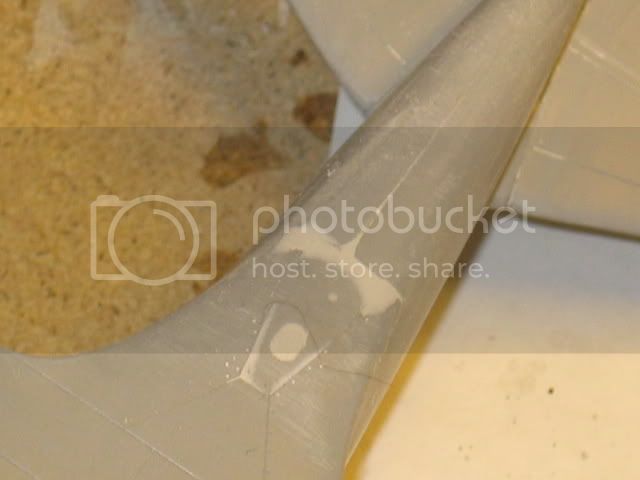
But the rear beam ( Part B9 ) is about 3mm too high and interferes with the front edge of the cockpit floor ( Part B7 ).
I would recommend cutting/sanding it down (wing to wing) BEFORE you assemble the details in the gear wells!


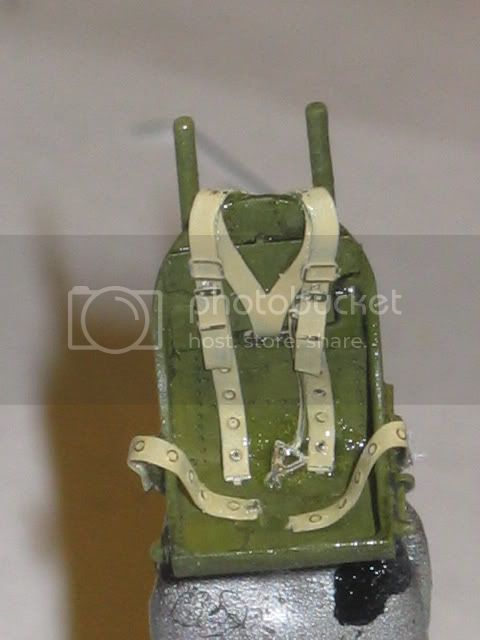
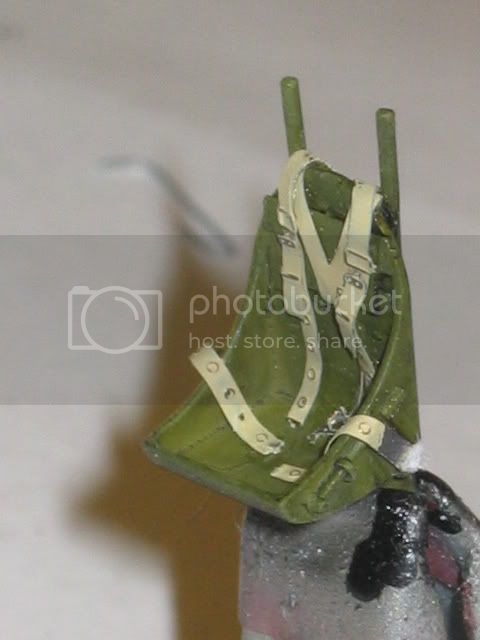
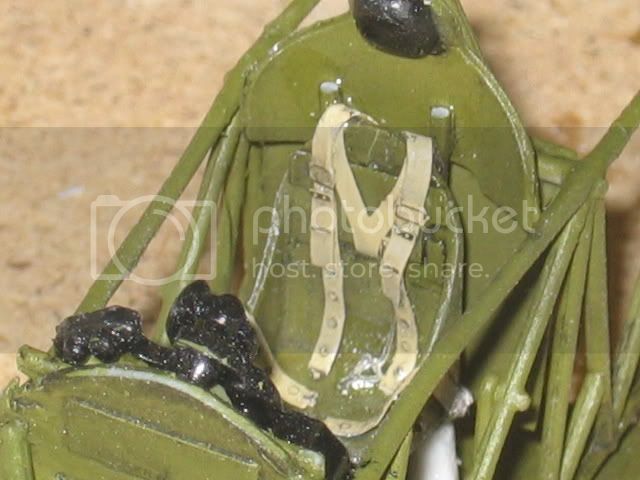
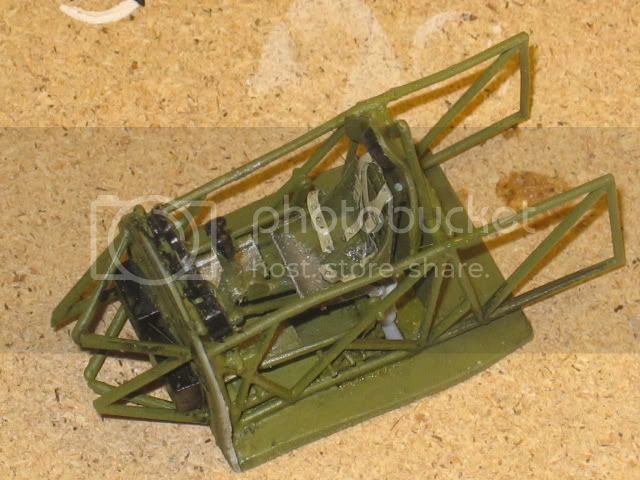
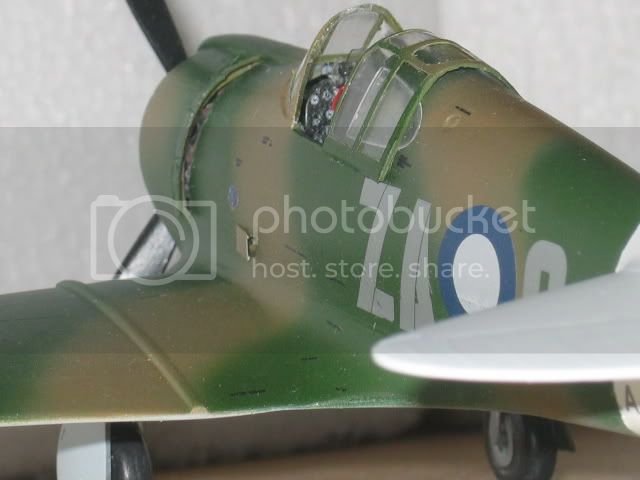
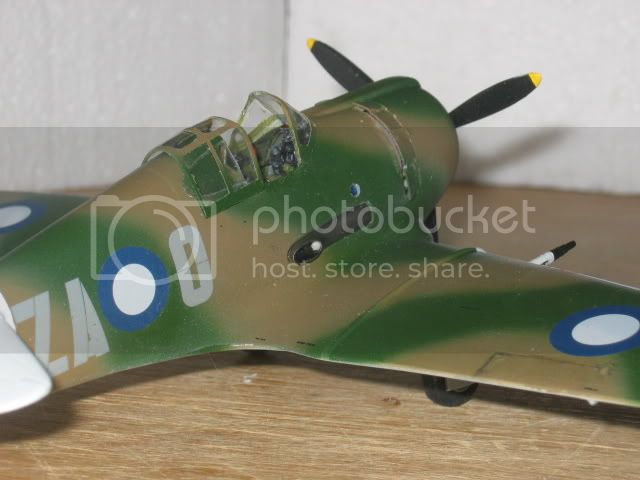
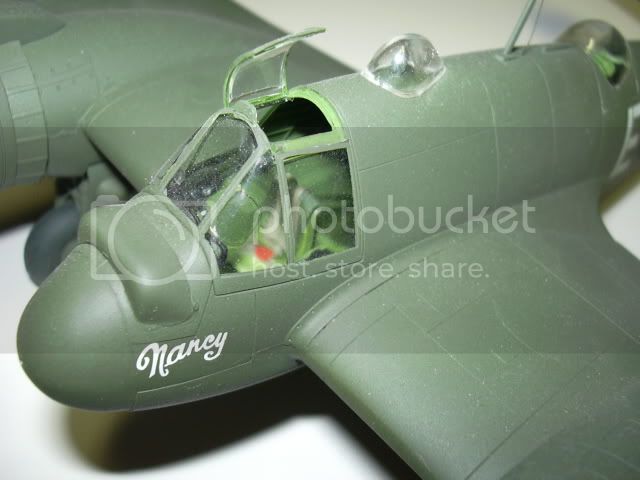
The cockpit looks really crowded and very much like the real deal when all parts are assembled!


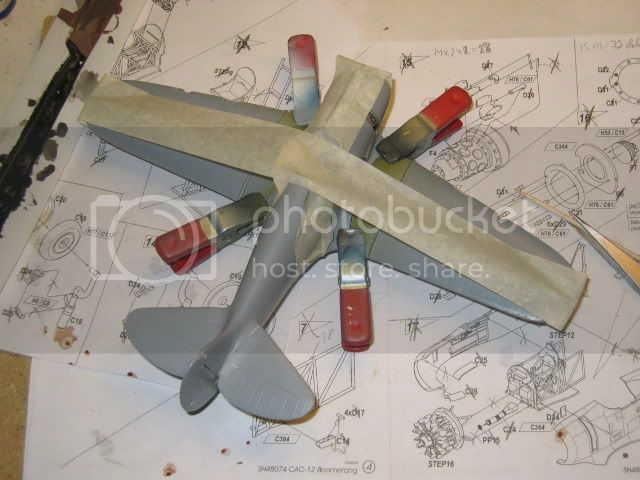
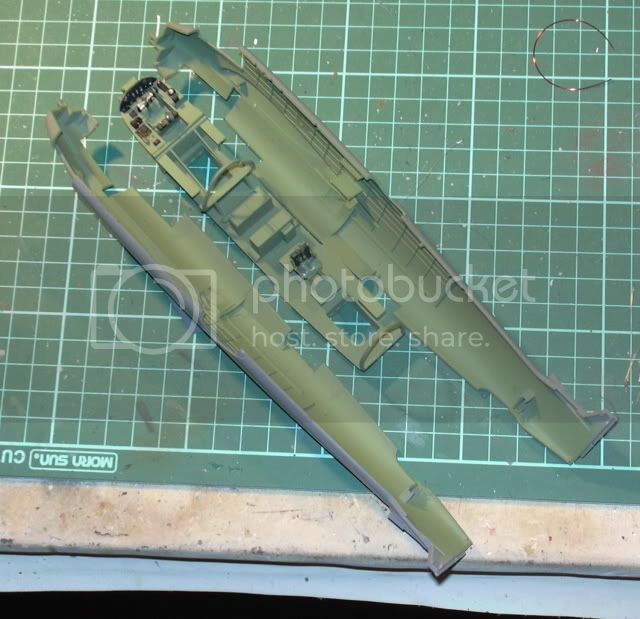
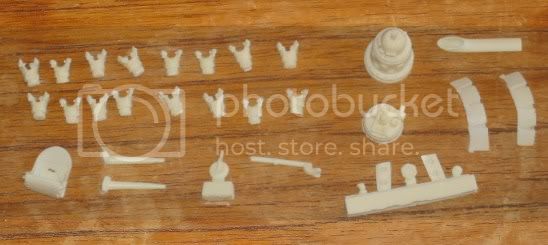
Here are all parts for the fuselage;


….and the wings…


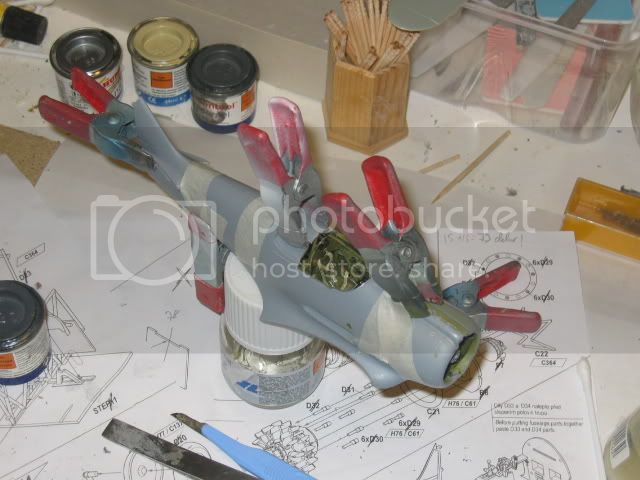
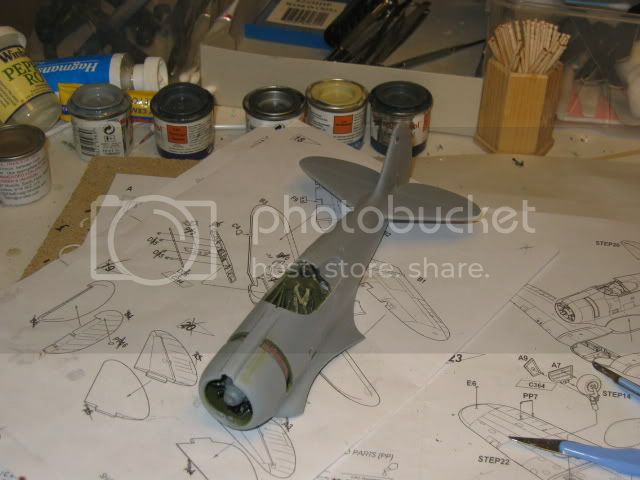
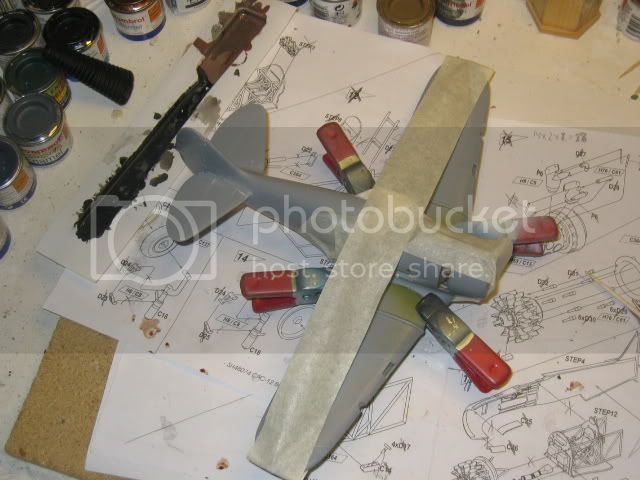
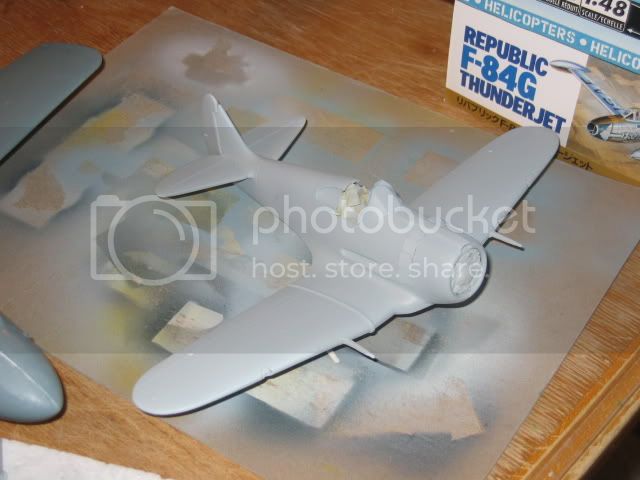
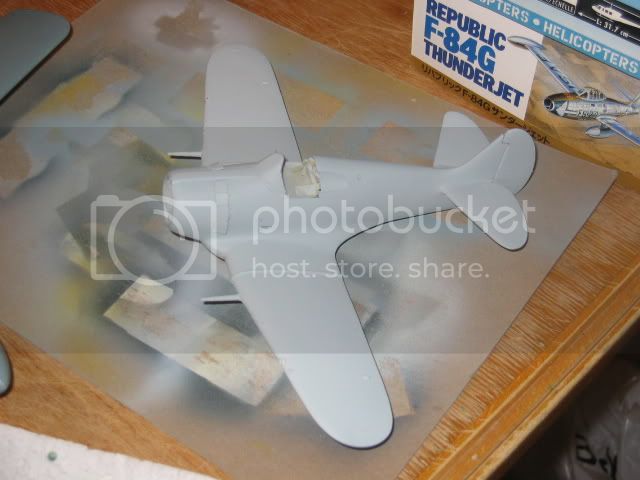
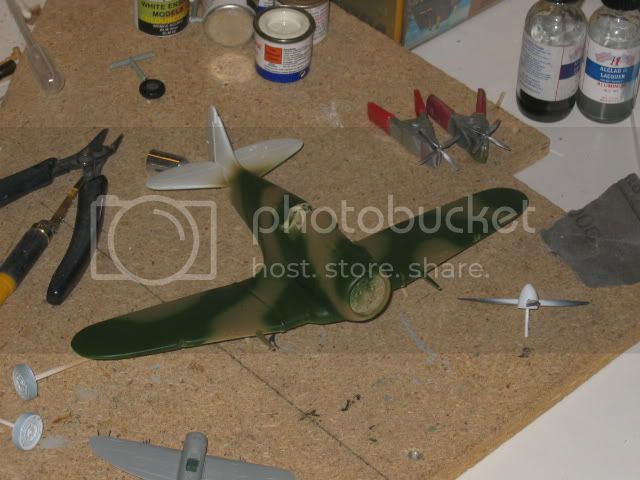
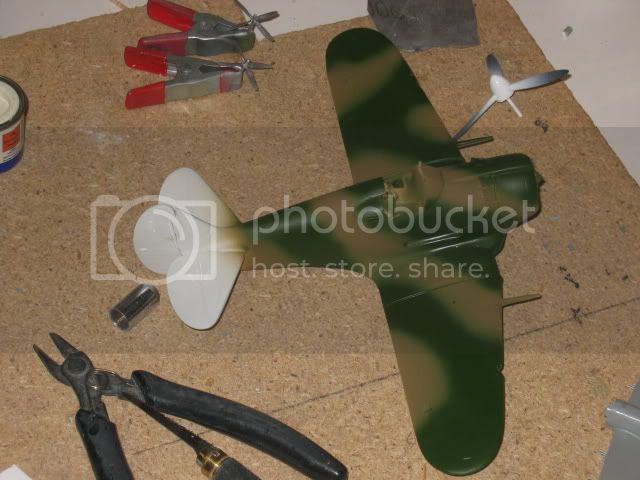
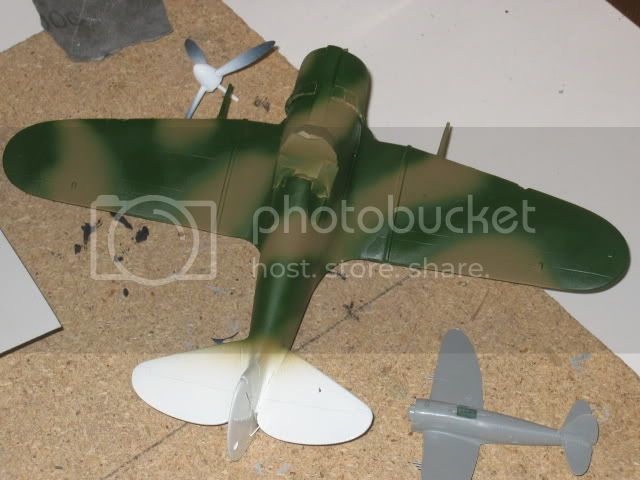
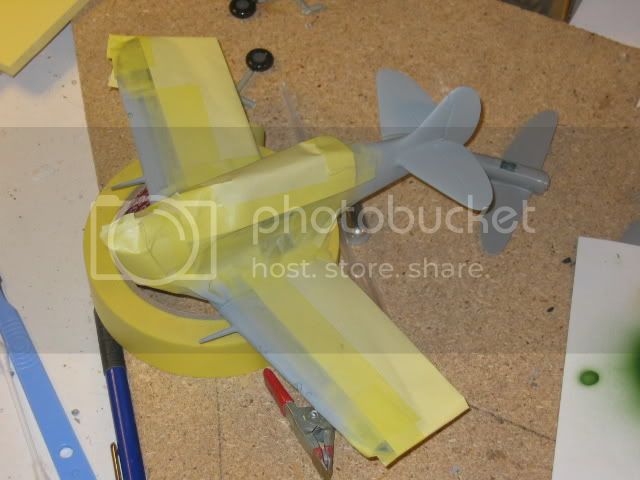
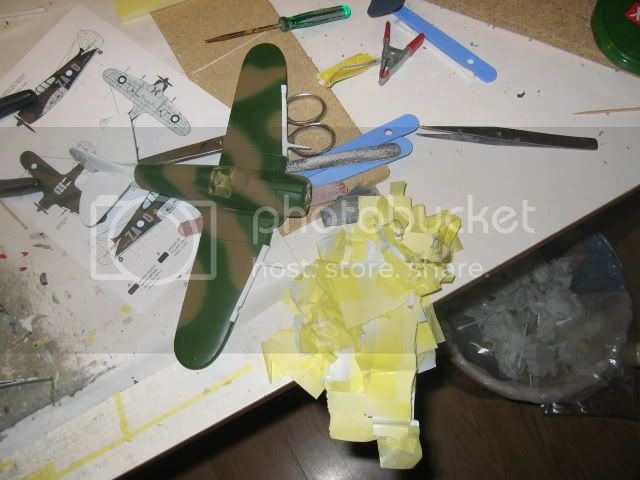
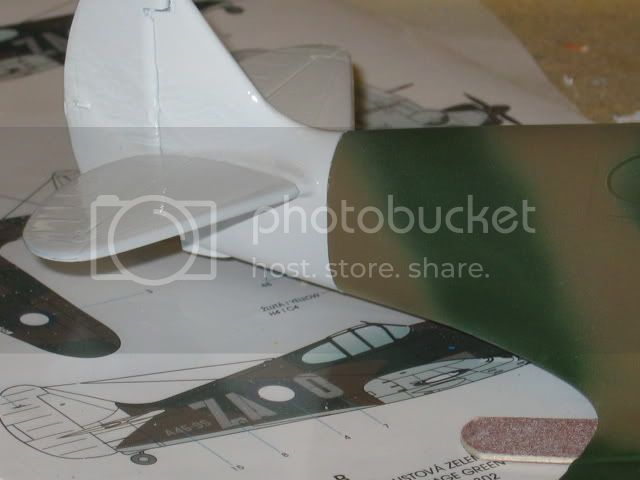
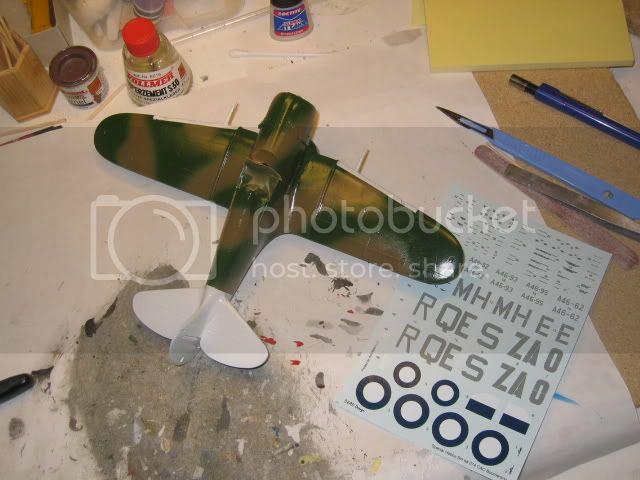
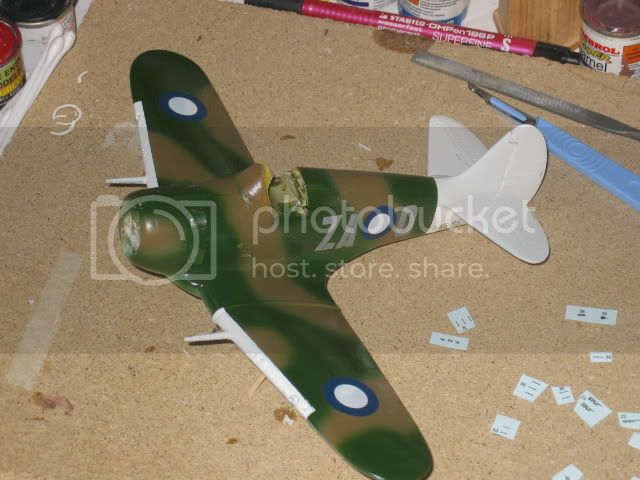
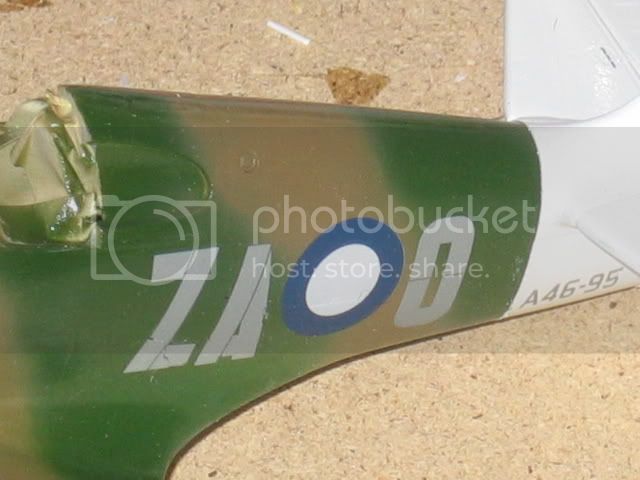
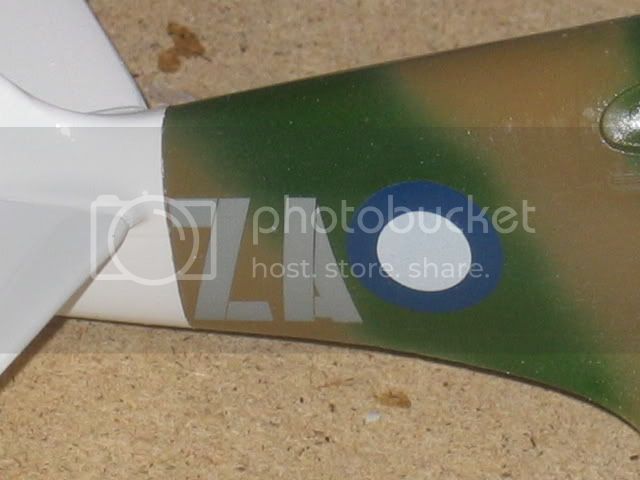
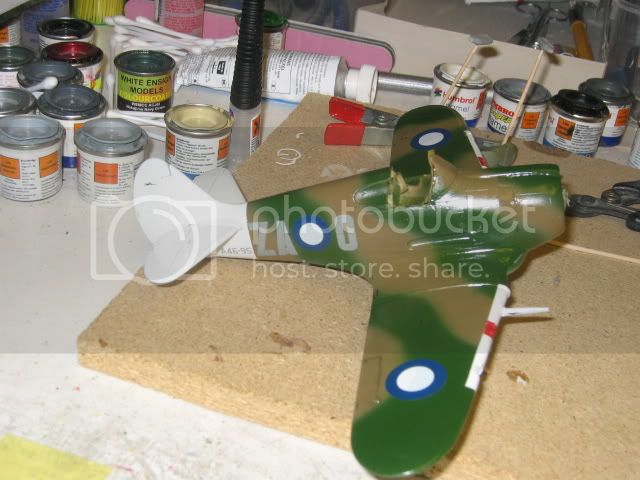
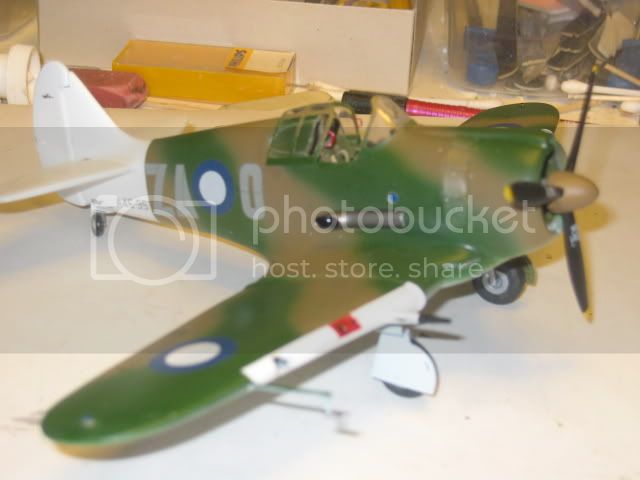
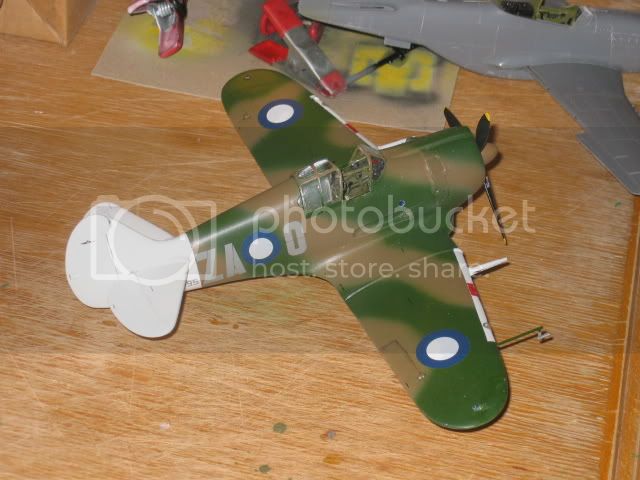
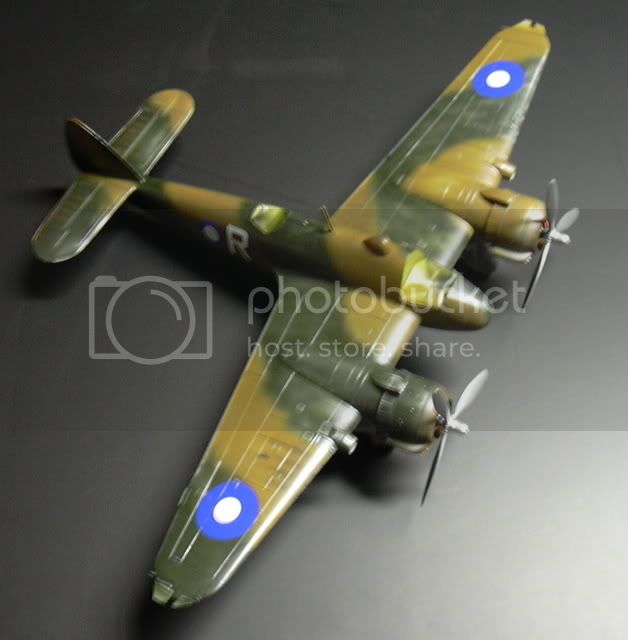
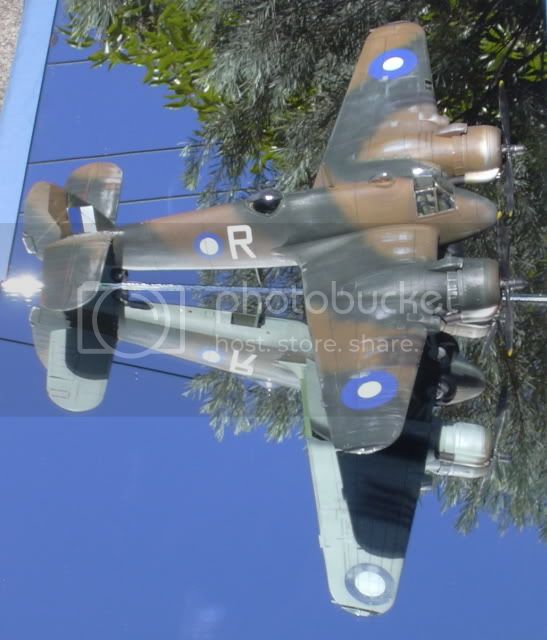
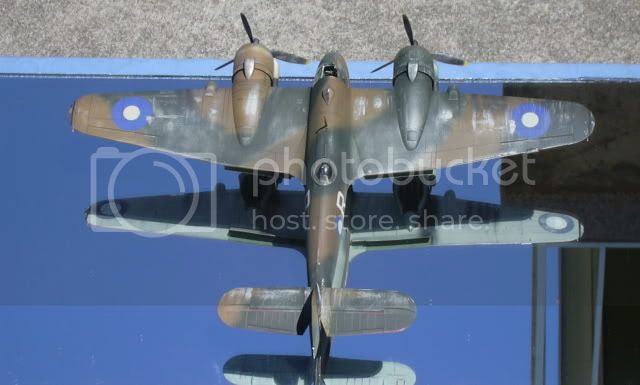
Over to the paint booth!!

More to come…

Cheers!

Stefan E


warreni
_VISITCOMMUNITY
South Australia, Australia
Joined: August 14, 2007
KitMaker: 5,926 posts
AeroScale: 2,201 posts
Posted: Friday, December 18, 2009 - 07:54 AM UTC
Lots of good work going on here. I have come to complete standstill for the past few months due to the hobby room being used as a temprary storage area until the new kitchen is finished. WIll endeavour to get mine finished but I think I may lose this one..

Regards

Warren
Phantom2
_VISITCOMMUNITY
Östergötland, Sweden
Joined: April 18, 2006
KitMaker: 708 posts
AeroScale: 678 posts
Posted: Sunday, December 20, 2009 - 07:43 AM UTC

Hi all!!

Now it’s finally time to get some paint on the plastic!

I started with Alclad steel on the cylinders, the rocker arms gloss black (Hu21), and the crankcase a light blue-grey (Hu127).

The exhaust ring and –stubs got a mix of Hu56 Aluminium, Hu70 Hull Red and Hu171 Antique Bronze.
Finally a black wash to bring out the details, and the engine was done.


I painted all of the Interior with White Ensign (WEM) RAAF (Royal Australian Air Force) Interior Green, all panels was painted satin black (Hu85), then a dry-brush with silver to bring out details and finally a black wash.


I used some of Mike Grant´s beautiful instrument decals!


I painted the seatbelts with Hu121 Pale Stone, I don’t know how “correct” this is, but it really looks good to my eye!


This is how the completed cockpit looks when done!


With all components done, I could start assembling the complete innards!
This will look as a stuffed turkey as it’s so much between the fuselage halves!

I started with the engine.
When I made a dry-fit I found out that the engine bulkhead was about 1mm too large in diameter!
I had to grind/sand away a great deal of plastic, but finally I could glue the engine in place.


I had to use some strong clamps and lots of tape to hold it all together.
Remember, there are no pins, holes to help you with the alignment!
This is a short-run kit; alignment is up to you as a builder!
But everything fitted surprisingly well; I only had to do some small adjustments!


Stabiliser and rudder was a near-perfect fit, only a swipe or two with a sanding paper and the parts ”fell” into place!
Some sanding of all joints and edges made the tail smooth and ready for paint.


More to come…

Cheers!

Stefan E


AussieReg
Staff MemberAssociate Editor
AUTOMODELER
#007
_VISITCOMMUNITY
Victoria, Australia
Joined: June 09, 2009
KitMaker: 8,156 posts
AeroScale: 3,756 posts
Posted: Sunday, December 20, 2009 - 08:41 AM UTC
Hi Stefan, Your build here is looking great !!

Cheers, D
lawlzw
_VISITCOMMUNITY
Singapore / 新加坡
Joined: April 05, 2009
KitMaker: 120 posts
AeroScale: 26 posts
Posted: Tuesday, December 22, 2009 - 03:37 PM UTC
Hi guys,

Here is my entry, Academy's P-40M Warhawk


Overall its not a bad kit, everything fits nicely. Only problem I have is with the decals... apparently they were quite thick, and my gloss coat wasn't "glossy" enough, resulting in all the silvering oh well... at least I learn something from this project!
Phantom2
_VISITCOMMUNITY
Östergötland, Sweden
Joined: April 18, 2006
KitMaker: 708 posts
AeroScale: 678 posts
Posted: Saturday, December 26, 2009 - 05:45 AM UTC


Hi all!

Now this build is on a roll!
You know, when the build seems to take off and almost gets a life on its own!

With the fuselage and wings done, it was time to marry them together!
Here I encountered real problems!
I couldn’t get them together properly!
No matter what I did, the wings sat 3-4mm too high and would simply not fit!

The problem was that the front edge of the floor, part D19 (which is the wings top-side) interfered with the wing spar, (which is the back wall of the wheel wells)!

I have marked where it interfered;


The wing spar (part B9) must be cut down by 3mm, all the way between the wings!
This means it MUST be done BEFORE the wheel wells are detailed or all details will be lost!
Don’t ask me how I know…

You can´t cut the floor short as there are details that mount on the topside and the engine bearers mount on the bulkhead!
You CAN NOT mount the cockpit higher as there are details that will sit too high!
ONLY way to solve this is to cut down the wing spar!

Here’s some pics with all parts assembled and painted;


Don’t forget to paint the underside of the cockpit floor, It can be seen trough the wheel wells!

With lots of clamps and tape, I could finally marry together the fuselage and wings!


I glued the front window to the cockpit-edge with some white glue.
It´s white in the bottle, but dries hard and clear.


Those etched rudder horns are small and fiddly!


The joints between the wings and fuselage turned out to be much better then expected!
But I had to fill them anyway!


Same procedure on the bottom too…


After sanding down;


Then I had to do some nice small-jobs as gluing the gun ports;


The resin cooling flaps, extremely thin and fragile, was glued in place.


Finally, the 20mm cannons, one in each wing.


I often use some tissue paper as a mask before painting.
If I have to, I’ll dip or moisten it with a little water, and the paper will conform to every nook and cranny.
This makes an excellent mask during painting!


You have to remember to stuff paper in every hole and crack, and then it’s off to the paint booth!

More to come…

Cheers!

Stefan E


Phantom2
_VISITCOMMUNITY
Östergötland, Sweden
Joined: April 18, 2006
KitMaker: 708 posts
AeroScale: 678 posts
Posted: Monday, December 28, 2009 - 03:18 AM UTC
Hi all!

Only me left here that still builds?

Anyway, here´s my Boomerang!
I might still use a few days more!

Finally, time for some paint!

I started with RAAF Sky Blue.


Next step was to paint the leading edges of the wings and the entire tail section Humbrol 22 Gloss White.

Next came the upper side camouflage pattern in RAAF Earth Brown, followed by RAAF Foliage Green.
I freehanded the entire pattern as I think it looks better then masking!


Then I had a LOT of masking to do!
Only part of the leading edges and the tail section was bare!

First, a coat of light grey (Hu127), acting as a primer for the white!


One More Coat of Humbrol Gloss White followed;


I ended up with a large heap of masking tape, but it was worth all the hard work!


More to come…

Cheers!

Stefan
Tango-India-Mike
_VISITCOMMUNITY
Western Australia, Australia
Joined: August 31, 2009
KitMaker: 88 posts
AeroScale: 79 posts
Posted: Monday, December 28, 2009 - 05:29 AM UTC
Greetings and congratulations to all for the fine work you're all doing.

It seems like ages since watching Magnus build his Winjeel! Truth is, I've had MAJOR problems with my computer...for a long while I couldn't log out, but couldn't post anything either, and then couldn't log IN! Not to worry though, as I have a friend sorting out all the problems. Not finished yet, but he'll be back here on Wednesday and assures me that it will all work perfectly once he's done some 'fine tuning'. For now, at least...Magnus, I can at last say what a great job you did with your Winjeel!

I've got my Meteor underway, but no progress photographs, I'm afraid...so I guess I'll have to bow out of this campaign. It's too damned hot for modelling anyway (42 degrees today and the same forecast for tomorrow). When does this campaign finish anyway? Perhaps I can start on something else!

Cheers all...and Happy New Year!
JollyRoger
_VISITCOMMUNITY
Istanbul, Turkey / Türkçe
Joined: December 22, 2004
KitMaker: 1,241 posts
AeroScale: 616 posts
Posted: Thursday, December 31, 2009 - 03:34 AM UTC
Oh Drab! I blew out again. This is the 4th campaigne this year I couldn't finish on time. I menaged to paint the camoflage but it stoped there. I probably won't have time for the next two weeks either, so please do excuse me. I too am going to bail out. And I was planing to Phinish my Phantom in twenty Phour hours!!!
Happy newyear everyone!
vanize
_VISITCOMMUNITY
Texas, United States
Joined: January 30, 2006
KitMaker: 1,954 posts
AeroScale: 1,163 posts
Posted: Thursday, December 31, 2009 - 03:38 AM UTC
There has been no reasonable painting weather here, so i am stuck with a prepped but unpainted beaufighter.

any chance of an extension?

warreni
_VISITCOMMUNITY
South Australia, Australia
Joined: August 14, 2007
KitMaker: 5,926 posts
AeroScale: 2,201 posts
Posted: Thursday, December 31, 2009 - 04:42 PM UTC

Quoted Text

There has been no reasonable painting weather here, so i am stuck with a prepped but unpainted beaufighter.

any chance of an extension?


How long you need Vance?
cobraleader
_VISITCOMMUNITY
Queensland, Australia
Joined: January 06, 2005
KitMaker: 3 posts
AeroScale: 2 posts
Posted: Thursday, December 31, 2009 - 08:13 PM UTC
G'Day All,

Finally finished my only one for the campain.

Aussie F-111, decked out in the 25th Anniversary markings.


The weather here is either hot and humid or raining. Definately slowed down the other 2 aircaft - oh well.

Thanks

cheers
Mark
AussieReg
Staff MemberAssociate Editor
AUTOMODELER
#007
_VISITCOMMUNITY
Victoria, Australia
Joined: June 09, 2009
KitMaker: 8,156 posts
AeroScale: 3,756 posts
Posted: Thursday, December 31, 2009 - 08:31 PM UTC
Nice F-111 Mark, great work. And a bit going on in the background, an Astro-Droid and a Bf110 ?

Thanks for posting your build. What kit did you build (scale and manufacturer), and did you have any problems with fit or finish?

Cheers, Damian
Phantom2
_VISITCOMMUNITY
Östergötland, Sweden
Joined: April 18, 2006
KitMaker: 708 posts
AeroScale: 678 posts
Posted: Friday, January 01, 2010 - 10:19 AM UTC

Hi all!!

Now my Boomerang is Clear coated, glossy and nice!


Finally, time for my favourite moment on every build, the decals!

I started with the small stencils.


These are tiny, but fully readable under a magnifying glass, and there’s lot of them!


The national insignias and the codes make a lot to enhance the visuals!
Even tough they are few and not very colourful.


Everything went well, the decals behaved perfectly well, although they are extremely thin and tears easily.
No silvering appeared.
These decals are super thin but easy to use and I did not need anything but water and some micro-set.
Then the disaster hit!

When I was going to apply the very last code letter, “O”, it folded up and before I could untangle it, it sheared and became a mess!


I can’t say now what I said then…., but I ALMOST gave the model a short flight in the nearest wall!

Here’s a pic on the missing decal!


OK,”Shit Happens”, I can still show the other side!


Later that night, when I had calmed down, I ordered a new Early CAC-12 Boomerang (along with one CAC-9 Wirraway 1/48, one Fokker D.XXI 1/48, one Canberra B.Mk20/Mk.62 1/144 and one An-2 Colt i 1/144) from my favourite short-run dealer in the Czech republic, Modelimex.

I’ll get a new kit and new decals, and this kit was such a nice build, that I want to build another one soon!

That my friends, is the best rating I can give to a kit!
Doesn’t happen very often, and especially not with short-run kits!


But it will take some weeks before the new kit arrives and then a few days before I can get it done!
So I have to plea for an extension, a few weeks will do, PLEASE!

Cheers and a Happy New Year to all of you!

Stefan E


warreni
_VISITCOMMUNITY
South Australia, Australia
Joined: August 14, 2007
KitMaker: 5,926 posts
AeroScale: 2,201 posts
Posted: Friday, January 01, 2010 - 10:53 AM UTC
Hi All

Sorry for the lack of attention but I have been a little busy in real life.

Sorry I do not know how to extend the campaign, but all who display their finished work here will get a ribbon. My 707 crashed before I could take photos thanks to my useless offspring and a cat.

But that being as it is I will post the ribbons soon.

Regards

Warren
vanize
_VISITCOMMUNITY
Texas, United States
Joined: January 30, 2006
KitMaker: 1,954 posts
AeroScale: 1,163 posts
Posted: Friday, January 01, 2010 - 04:33 PM UTC

Quoted Text


Quoted Text

There has been no reasonable painting weather here, so i am stuck with a prepped but unpainted beaufighter.

any chance of an extension?


How long you need Vance?


Couple weeks should be more than adequate...

cobraleader
_VISITCOMMUNITY
Queensland, Australia
Joined: January 06, 2005
KitMaker: 3 posts
AeroScale: 2 posts
Posted: Monday, January 18, 2010 - 04:00 PM UTC
G'Day All,

Sorry guys, had to buy a new computer - wow its amazing what you can do with the latest technology.

My F-111 was the Hasegawa 1/72 scale F-111C.

Main problems I had were;

Fit problems behind the cockpit - my own fault
Pitot tube too fragile, so i have replaced it with a peice of electrical wire with part of the plastic sheath cut away.
I've cut out the wingtip navigation lights and replaced them with acrylic rod that was superglued in place. These were sanded, polished and masked before painting.
Weapons were from the Hasegawa weapon kits
Paints were Humbrol and Model Master enamels.
Decals were from Aussie Decals, however they had yellowed while in storage - thats why the wing decals look weird.

Thanks

cheers
Mark
Phantom2
_VISITCOMMUNITY
Östergötland, Sweden
Joined: April 18, 2006
KitMaker: 708 posts
AeroScale: 678 posts
Posted: Wednesday, January 20, 2010 - 09:03 PM UTC

Hi all!!

Finally, after almost two weeks, I received my second Boomerang kit!

I eagerly opened the box, grabbed the decals, cut out the offending decal and applied it to the model, not a hitch this time!


Then I could give the model the final satin clear-coat and when dry, remove all masking.

Next step was to apply all those “dangly bits” like pitots, landing gear and covers, tail wheel and all those other small parts.


…and I can say “She’s done”, finally!

Thanks for a fun and well run Campaign!

Cheers!

Stefan E


warreni
_VISITCOMMUNITY
South Australia, Australia
Joined: August 14, 2007
KitMaker: 5,926 posts
AeroScale: 2,201 posts
Posted: Wednesday, January 20, 2010 - 09:05 PM UTC

Quoted Text


Quoted Text


Quoted Text

There has been no reasonable painting weather here, so i am stuck with a prepped but unpainted beaufighter.

any chance of an extension?


How long you need Vance?


Couple weeks should be more than adequate...

Take all the time you need..


Blueheeler
_VISITCOMMUNITY
New South Wales, Australia
Joined: March 18, 2008
KitMaker: 347 posts
AeroScale: 223 posts
Posted: Wednesday, February 17, 2010 - 08:38 PM UTC
Hey Warren, just wondering what was happening with this campaign? Just that I just remembered I haven't got a ribbon for it yet. No stress or anything, just wondering how everybody was going and if the campaign was still going.
warreni
_VISITCOMMUNITY
South Australia, Australia
Joined: August 14, 2007
KitMaker: 5,926 posts
AeroScale: 2,201 posts
Posted: Wednesday, February 17, 2010 - 09:26 PM UTC

Quoted Text

Hey Warren, just wondering what was happening with this campaign? Just that I just remembered I haven't got a ribbon for it yet. No stress or anything, just wondering how everybody was going and if the campaign was still going.


Hi everyone.

Sorry for my slackness but I have been away from modelling since about last August. I only just got access to my area again and started building a 1/35 BR86 for my Father-in-laws birthday.

I will try and issue the ribbons now.
warreni
_VISITCOMMUNITY
South Australia, Australia
Joined: August 14, 2007
KitMaker: 5,926 posts
AeroScale: 2,201 posts
Posted: Wednesday, February 17, 2010 - 09:42 PM UTC
Help!! I can't seem to add the ribbons to any participants as they have all disappeared!!
29Foxtrot
_VISITCOMMUNITY
Victoria, Australia
Joined: September 19, 2003
KitMaker: 708 posts
AeroScale: 674 posts
Posted: Thursday, February 18, 2010 - 12:18 AM UTC
Vance,

It's a pity the Tamiya Beaufighter had a few flaws in it and it does build up into a nice looking buird, having built several of them in the past, in variuos guises from the TRF Mk Ic to the XXI.
The Aussie XXI was the licience built TF X with 365 modifications and the Foliage Green overall looked very much like Black Green when first rolled out of the factory.

93 Sqn 'Green Ghosts' carried some interesting motifs on the tail, Eagle Strike did a sheet many years ago for 6 x Green Ghost subjects.

I've added 2 different builds of the Beaufighter here, the Mk XXI was built back in 2002, whereas the Mk IVc was built in 2004, as an original RAAF contract subject, but later changed for the Mk XXI.


The Mk XXI in 93 Sqn markings, using Aussie Decals:


The Mk IVc in 30 Sqm markings:


Note: The DAP Mk XXI's only used the forward wingtip nav light and a 4inch black tape on the wing tips covering the inner half of the nav light lense, which reduced the strobe beams when turned on.


Hope this helps a little with your build.
warreni
_VISITCOMMUNITY
South Australia, Australia
Joined: August 14, 2007
KitMaker: 5,926 posts
AeroScale: 2,201 posts
Posted: Sunday, January 09, 2011 - 09:11 AM UTC
I know I am very very late but I just foiund out how to give out the awards for this campaign. Can anyone who completed a model but did not get a ribbon post the photo of it here and I will award the ribbon to you. I am relying on your honesty here...
 _GOTOTOP