

Both great builds there, It's so interesting to see two different peoples approach's to the same kit at once.
Keith
Early Aviation
Discuss World War I and the early years of aviation thru 1934.
Discuss World War I and the early years of aviation thru 1934.
Hosted by Jim Starkweather
Dual Build
Eduard 1:48 Pfalz D.IIIa
Kornbeef

Joined: November 06, 2005
KitMaker: 1,667 posts
AeroScale: 1,551 posts

Posted: Saturday, July 04, 2009 - 09:14 PM UTC

RAGIII

Joined: June 19, 2007
KitMaker: 604 posts
AeroScale: 600 posts
Posted: Sunday, July 05, 2009 - 01:20 AM UTC
I am also enjoying watching the slight variations in technique as this build unfolds! Well done by both so far!!
RAGIII
RAGIII

Merlin

#017


Joined: June 11, 2003
KitMaker: 17,582 posts
AeroScale: 12,795 posts

Posted: Sunday, July 05, 2009 - 09:22 AM UTC
Hi Terri and Mark
Great stuff! You're both really doing us proud - and Stephen, the research back-up is fantastic. We're definitely going to have to work up a Feature from this!
All the best
Rowan
Great stuff! You're both really doing us proud - and Stephen, the research back-up is fantastic. We're definitely going to have to work up a Feature from this!
All the best
Rowan


hkopper
Joined: March 01, 2008
KitMaker: 529 posts
AeroScale: 340 posts
Posted: Sunday, July 05, 2009 - 11:57 AM UTC
Excellent work from both ..the builds are looking great!! I'm getting a bit inspired to attempt building a WWI plane.

guitarlute101
Joined: December 18, 2006
KitMaker: 1,121 posts
AeroScale: 1,063 posts
Posted: Sunday, July 05, 2009 - 02:02 PM UTC
Thanks guys.
Herman, we're always glad to welcome a new "stringbag" builder. This is a great place to ask questions.
Terri, your build is looking very fine. I'll be your wingman any day.
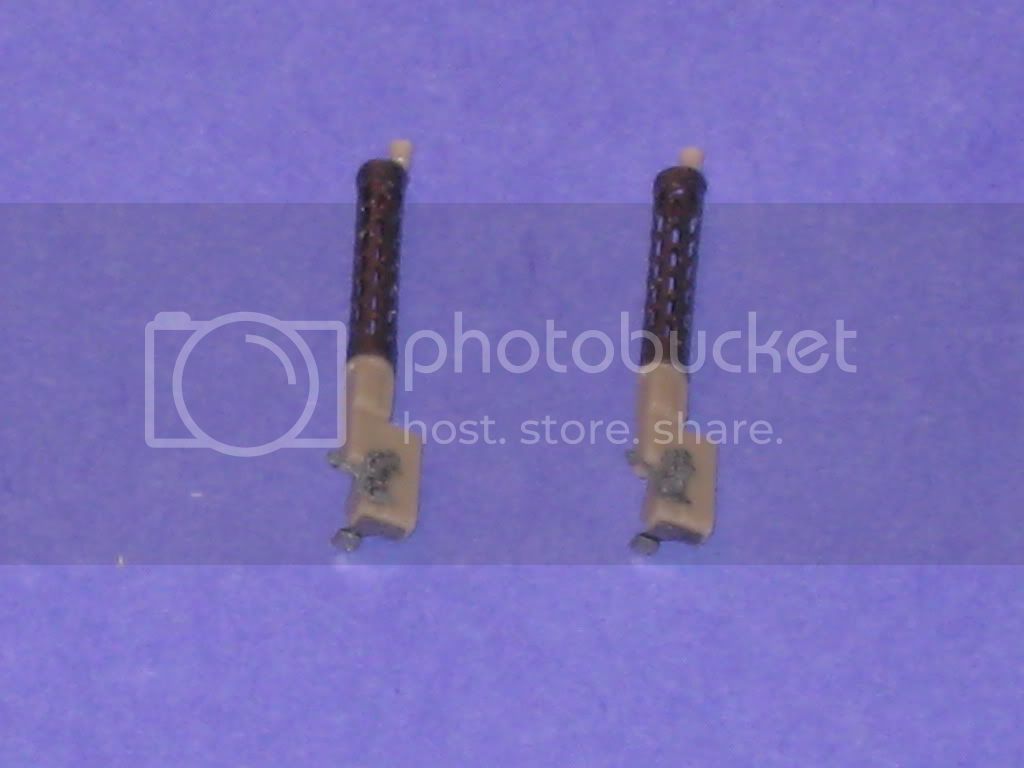
Here's some work on the guns with photo-etch.
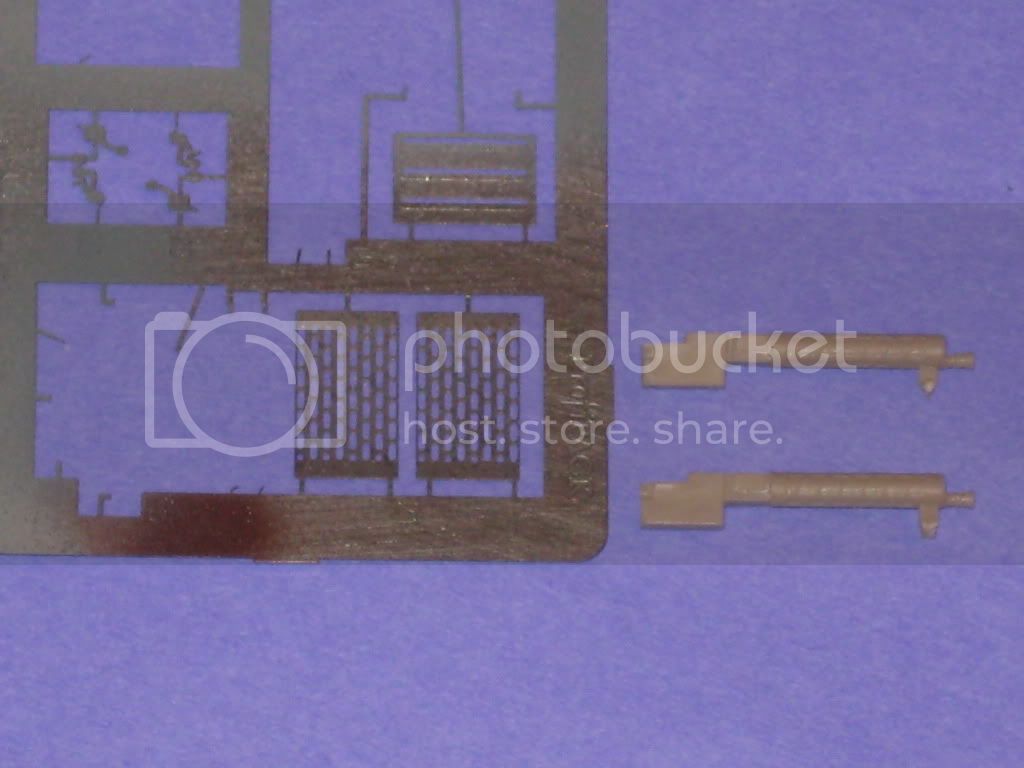
Here are the gun barrels replaced and details added........................

And here is the adjustable radiator cover with handle.....................
I'm thinking of using the "through the wing" rigging method and doing a short tutorial. What do you think?
Mark
thegirl

Joined: January 19, 2008
KitMaker: 6,743 posts
AeroScale: 6,151 posts
Posted: Sunday, July 05, 2009 - 05:01 PM UTC
Thanks guy's ! glad you are all enjoying the dual build so far 
Cool Mark , right on ....................and I the same ! Neat Idea Mark , I will do one on the wire twist / q-tip method then .
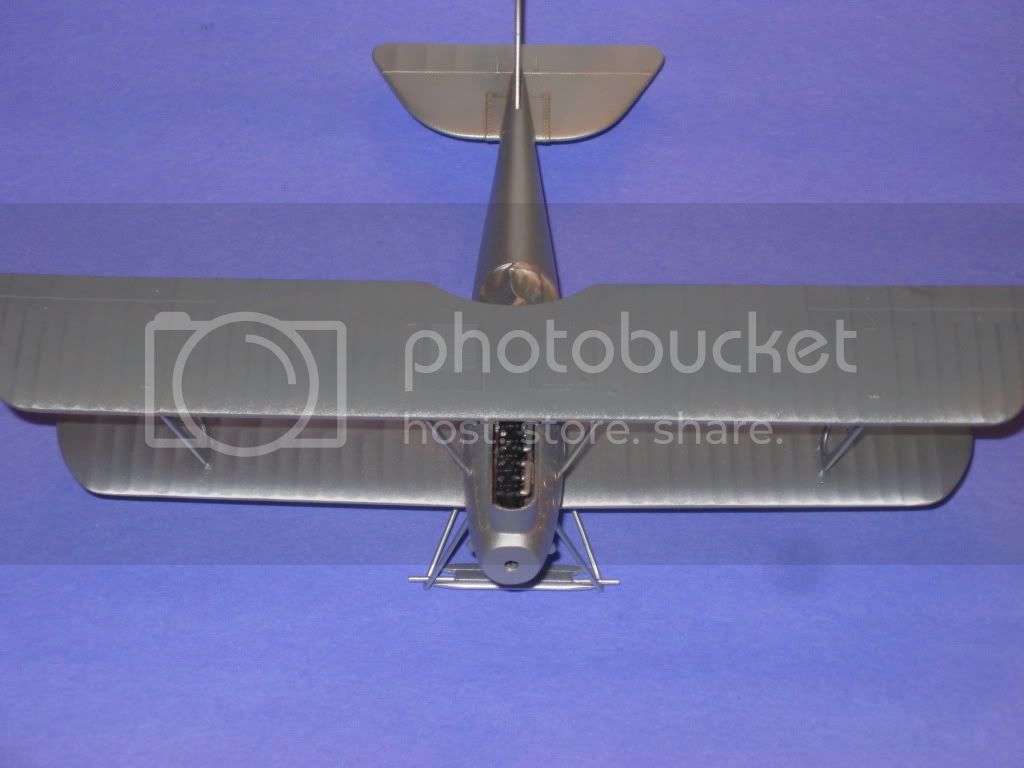
Not following to far behind , primer went on today . For the primer I mixed Tamiya neutral grey and flat white together . Few spots needed some touch up with white putty . Also had to fix a boo-boo on the rear stablizer . Didn't get a tight fit and had a cap with air bubbles ! I mask off the detail and gived it a quick sand . Next I mix squadron white putty and Testors liqiud cement and brushed this on . After 24 hours I will be able to resand and polish . This is not an issue with the kit , it's my own doing ( I was Tenax happy ) . Masking of the wing structure has started as well .


Cool Mark , right on ....................and I the same ! Neat Idea Mark , I will do one on the wire twist / q-tip method then .
Not following to far behind , primer went on today . For the primer I mixed Tamiya neutral grey and flat white together . Few spots needed some touch up with white putty . Also had to fix a boo-boo on the rear stablizer . Didn't get a tight fit and had a cap with air bubbles ! I mask off the detail and gived it a quick sand . Next I mix squadron white putty and Testors liqiud cement and brushed this on . After 24 hours I will be able to resand and polish . This is not an issue with the kit , it's my own doing ( I was Tenax happy ) . Masking of the wing structure has started as well .

Mobious
Joined: May 18, 2008
KitMaker: 210 posts
AeroScale: 80 posts
Posted: Monday, July 06, 2009 - 10:29 AM UTC
Mark, Terri, Both kits are looking great. Very cool having both kits built at the same time. I'll be following the progression on both with much interest.
Stephen, the photo of the Newly constructed Pfalz is awesome. Thanks for the history of this unique fighter too. Very interesting.
Stephen, the photo of the Newly constructed Pfalz is awesome. Thanks for the history of this unique fighter too. Very interesting.

CaptainA
Joined: May 14, 2007
KitMaker: 3,117 posts
AeroScale: 2,270 posts
Posted: Thursday, July 09, 2009 - 08:36 AM UTC
They are both looking great.
Never underestimate the value of good references.
Never underestimate the value of good references.


Dwaynewilly
Joined: December 15, 2006
KitMaker: 365 posts
AeroScale: 344 posts
Posted: Saturday, July 11, 2009 - 06:21 AM UTC
Teri and Mark,
Excellent progress, both kits are looking very good.
Dwayne
Excellent progress, both kits are looking very good.
Dwayne
thegirl
Joined: January 19, 2008
KitMaker: 6,743 posts
AeroScale: 6,151 posts
Posted: Saturday, July 11, 2009 - 06:27 PM UTC
This so far has been a real enjoyable build
Has been a very busy week for me but I do have more progress made ......................
After the resanding , primer was reapplied using white this time around . The green and red will show better ( not so many coats of paint ) . The wing structure has been masked on the lower wings . Still have to do the top wing thought . It is time consuming but the end results are worth it . The wings will get a light coat of black mix with brown sparayed along the edges of the tape .


That's all for now folks !
Has been a very busy week for me but I do have more progress made ......................
After the resanding , primer was reapplied using white this time around . The green and red will show better ( not so many coats of paint ) . The wing structure has been masked on the lower wings . Still have to do the top wing thought . It is time consuming but the end results are worth it . The wings will get a light coat of black mix with brown sparayed along the edges of the tape .
That's all for now folks !
Mobious
Joined: May 18, 2008
KitMaker: 210 posts
AeroScale: 80 posts
Posted: Sunday, July 12, 2009 - 12:03 PM UTC
Hey Terri, Is the masking tape you're using pre cut to correct widths or are you cutting the widths yourself. Hope this isn't a knucklehead question, but I would like to know if presized tape is available for masking task like this. BTW, the masking on the Pfalz looks great, looking forward to seeing paint.
thegirl
Joined: January 19, 2008
KitMaker: 6,743 posts
AeroScale: 6,151 posts
Posted: Tuesday, July 14, 2009 - 01:43 AM UTC
Hey Mob !
No there are no mask out there on the market to do this . All the strips of tape I cut myself using Tamiya tape with the aid of Windsock Datafile # 7 and 21 for the wing structure
No there are no mask out there on the market to do this . All the strips of tape I cut myself using Tamiya tape with the aid of Windsock Datafile # 7 and 21 for the wing structure
guitarlute101
Joined: December 18, 2006
KitMaker: 1,121 posts
AeroScale: 1,063 posts
Posted: Tuesday, July 14, 2009 - 02:15 AM UTC
Hi Mobius,
Here's a link to a masking tape I use.
http://www.jammydog.com/
I really like it and you can get it as small as 0.5 mm.

I also cut tape to differing widths like Terri does with this....................


You can adjust the blades with the screw to be closer or farther apart. I got this at Micro-Mark.
Mark
Here's a link to a masking tape I use.
http://www.jammydog.com/
I really like it and you can get it as small as 0.5 mm.
I also cut tape to differing widths like Terri does with this....................
You can adjust the blades with the screw to be closer or farther apart. I got this at Micro-Mark.
Mark
Mobious
Joined: May 18, 2008
KitMaker: 210 posts
AeroScale: 80 posts
Posted: Tuesday, July 14, 2009 - 09:37 AM UTC
Thanks for the tip on tape, Mark. I'll be looking into the Jammydog line of tape and the cutters too. I'm sure it would reduce the time spent cutting individual lengths.
Hey Terri, I can tell by the work you've done you're not winging it, pun intedended. I guessed correctly that you were using a reference to layout the mask. Very nice work too, I might add.
Looking forward to seeing updates on the Twin Pfalz.
Hey Terri, I can tell by the work you've done you're not winging it, pun intedended. I guessed correctly that you were using a reference to layout the mask. Very nice work too, I might add.
Looking forward to seeing updates on the Twin Pfalz.
guitarlute101
Joined: December 18, 2006
KitMaker: 1,121 posts
AeroScale: 1,063 posts
Posted: Wednesday, July 15, 2009 - 04:23 AM UTC
Here's some prep work for the rigging "through the wings" method. Firstly, check your kit instructions (and any references you have to confirm the kit instructions). Here is the kit rigging diagram. It has the rigging for the starboard side only. You will have to carry all points over to the port side.

Next, you can mark out the points to be drilled on the diagram so you can check them off as you go.

The Datafile shows one more rigging line from the outer bottom of the outer strut to the top wing. Check all of your references.

I drew the line on the rigging diagram in red........................

Here are the tail control line holes drilled.....................

Next......drilling the holes.......................
Mark
guitarlute101
Joined: December 18, 2006
KitMaker: 1,121 posts
AeroScale: 1,063 posts
Posted: Monday, July 20, 2009 - 11:32 AM UTC
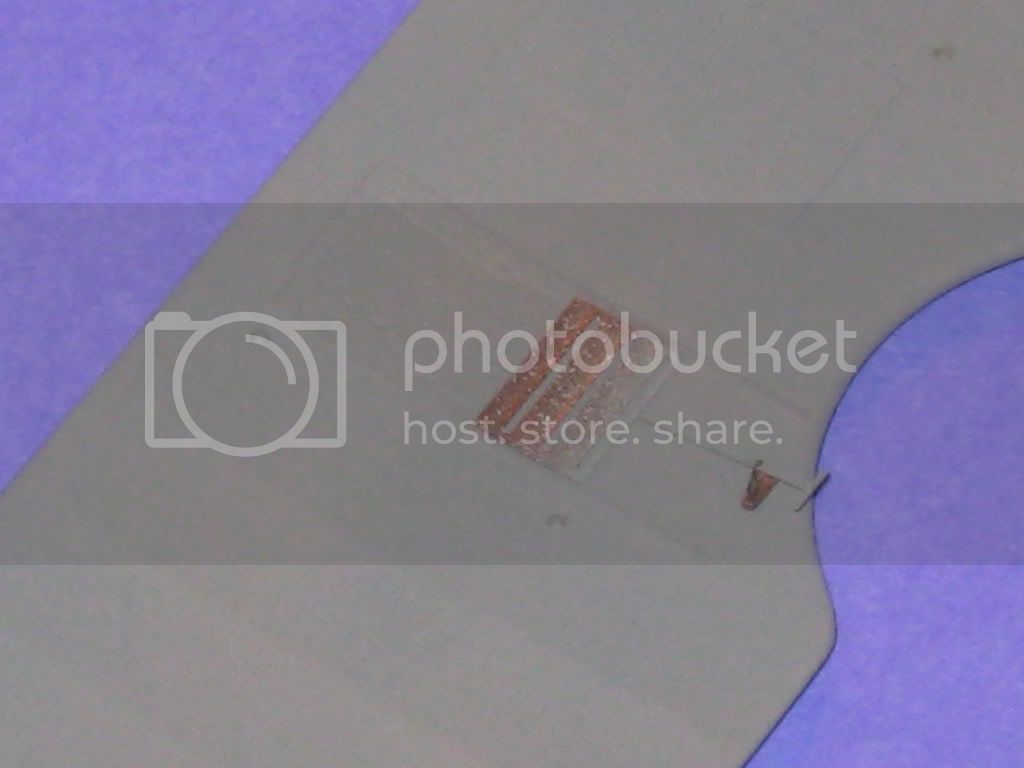
OK, here's some more progress. I use a pin vise with a #80 drill bit.

When I drill through the wing I try not to exit the other side on the top of a rib. It is harder to fill in and almost always makes a flat spot on top of the rib from sanding. You can angle your bit to the side a little to avoid this. Check your references and start driling.

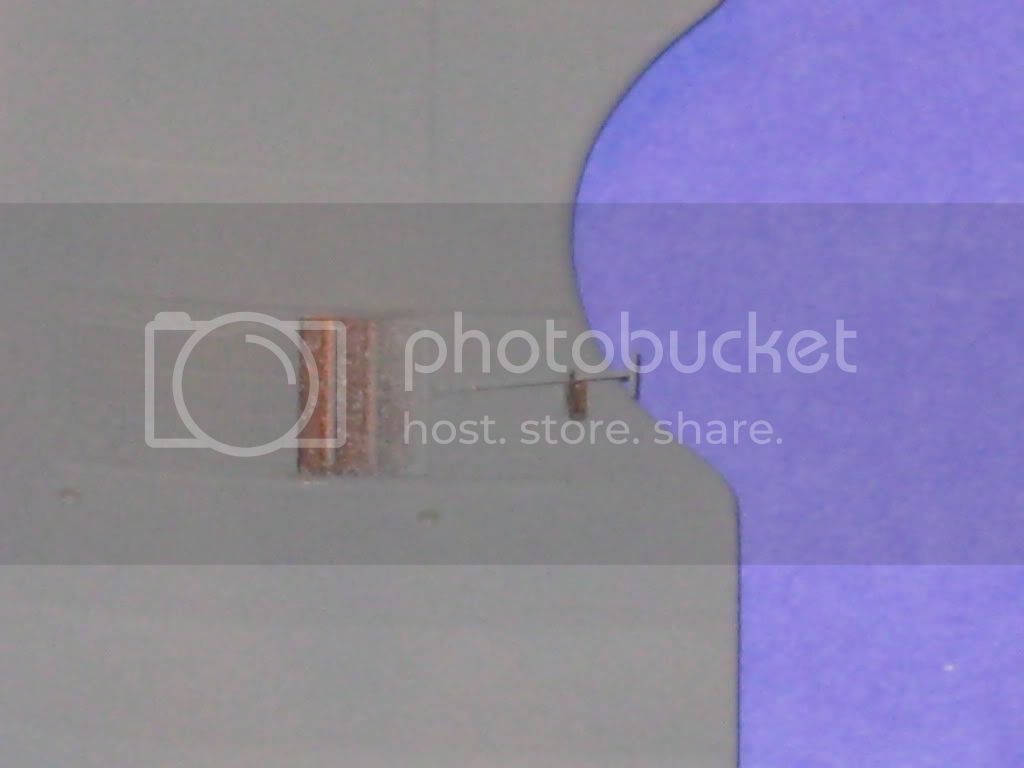
The entry has nice holes with no rough edges.......................

The exit will usually have some clean up to do.......................

I used the detail of the wing support brackets to drill through the wing from the top.

And here are the exit points under the top wing.....................

Next I measured the rigging point not indicated on the kit instructions. It's on the third rib out from the strut attachment point.

Seven holes here on this half of the top wing, six on the bottom wing.

I decided to run fuel lines to the gravity fuel tank on the post side and a hose from the wing radiator on the starboard side. Here are some pictures from the datafile and Flight magazine.
Port side gravity tank lines........................


Starboard side radiator hose......................


Here are the holes drilled in the gravity tank and radiator.................

..................and in the port and starbord sides.........................


Tailskid and undercarriage with PE installed..........................


Finally I primered it and then after it dried I painted it Model Master Aluminum Non-Buffing Metalizer.


More soon,
Mark
thegirl
Joined: January 19, 2008
KitMaker: 6,743 posts
AeroScale: 6,151 posts
Posted: Monday, July 20, 2009 - 02:17 PM UTC
Very nice Mark !
I been busy with the masking tape doing the wing structure on the main wings . That is done so is the per shading . Here is the results of that ..................


The tail has also been sprayed and masking for the red out line just needs to be filled in . The egdes will get a quick spray of white . Before the fuselage gets it's red paint . The wings will get sprayed silver/grey .


I been busy with the masking tape doing the wing structure on the main wings . That is done so is the per shading . Here is the results of that ..................
The tail has also been sprayed and masking for the red out line just needs to be filled in . The egdes will get a quick spray of white . Before the fuselage gets it's red paint . The wings will get sprayed silver/grey .
guitarlute101
Joined: December 18, 2006
KitMaker: 1,121 posts
AeroScale: 1,063 posts
Posted: Monday, July 20, 2009 - 03:16 PM UTC
Great work on the taping and pre-shading, Terri. I can't wait to see it done. I'm having a great time with the build.
I was able to get a little more done. Struts and guns mounted.


A little detailing around the radiators with a wash of van dyke oil paint.

And the top wing on.......................

I'll be installing the rigging on the next post.
more soon,
Mark
thegirl
Joined: January 19, 2008
KitMaker: 6,743 posts
AeroScale: 6,151 posts
Posted: Monday, July 20, 2009 - 05:17 PM UTC
Looking good Mark , I don't know if it's just me reading something wrong but the tank on the left side of the wing and the double line going into the fuselage in fuel tank and fuel lines ?
Mobious
Joined: May 18, 2008
KitMaker: 210 posts
AeroScale: 80 posts
Posted: Monday, July 20, 2009 - 06:41 PM UTC
Hey Team Pfalz. Good to see progress.
Terri, the preshading looks fantastic. Job well done!
Mark, thanks for the tip on the Jammydog tape, I'll be trying that one out. Nice tips on drilling for the rigging and the additional rigging line.
Great work people, looking forward to more updates.
Terri, the preshading looks fantastic. Job well done!
Mark, thanks for the tip on the Jammydog tape, I'll be trying that one out. Nice tips on drilling for the rigging and the additional rigging line.
Great work people, looking forward to more updates.
guitarlute101
Joined: December 18, 2006
KitMaker: 1,121 posts
AeroScale: 1,063 posts
Posted: Tuesday, July 21, 2009 - 01:10 AM UTC
Quoted Text
Looking good Mark , I don't know if it's just me reading something wrong but the tank on the left side of the wing and the double line going into the fuselage in fuel tank and fuel lines ?
Terri,
D'oh!! You are correct. Those are fuel lines for the gravity tank on the port side. I'll go back and fix the text of the post. Thanks for having my back.
Mark
New Mantra - Think twice, type once.

JackFlash
Joined: January 25, 2004
KitMaker: 11,669 posts
AeroScale: 11,011 posts
Posted: Tuesday, July 21, 2009 - 11:49 AM UTC
Quoted Text
Looking good Mark , I don't know if it's just me reading something wrong but the tank on the left side of the wing and the double line going into the fuselage in fuel tank and fuel lines ?
Excellent catch Terri!
guitarlute101
Joined: December 18, 2006
KitMaker: 1,121 posts
AeroScale: 1,063 posts
Posted: Wednesday, July 22, 2009 - 04:52 PM UTC
I decided to use the kit supplied masks for the tail.

I removed the parts around the masks to make them easier to remove.

They went down well with a few repositions to line them up accurately.


Then I masked around the other areas of the tail that need to remain silver in color.

Then I painted the tail Tamiya black and after it dried I started to remove the masking tape and Eduard Masks.

And it left a nice border around the edges. It took about 15 minutes to do it all.


Mark
Kornbeef
Joined: November 06, 2005
KitMaker: 1,667 posts
AeroScale: 1,551 posts
Posted: Thursday, July 23, 2009 - 12:30 AM UTC
Both looking extremely good Team P.
It's really interesting to see differing approaches to the same kit done at the same time like this. Both top quality too, not that I would expect anything less from you pair
Keith
It's really interesting to see differing approaches to the same kit done at the same time like this. Both top quality too, not that I would expect anything less from you pair
Keith
guitarlute101
Joined: December 18, 2006
KitMaker: 1,121 posts
AeroScale: 1,063 posts
Posted: Thursday, July 23, 2009 - 02:11 AM UTC
Keith,
Thanks for checking in. We appreciate your input.
Here are the decals on the struts. I wanted to put the decals on now so I wouldn't have to fish them through any rigging lines.


And here are the fuel and radiator lines....................


Next.............rigging lines.
Mark
Thanks for checking in. We appreciate your input.
Here are the decals on the struts. I wanted to put the decals on now so I wouldn't have to fish them through any rigging lines.
And here are the fuel and radiator lines....................
Next.............rigging lines.
Mark
 |

WEB HOSTING BY


Copyright ©2021 AeroScale and Kitmaker Network, a subsidiary of Silver Star Enterprises
All Rights Reserved. Please read our Conditions of Use and Privacy Policy.
All Rights Reserved. Please read our Conditions of Use and Privacy Policy.